Finding Campgrounds with Wi-Fi Connectivity
When planning a camping trip and looking for a campground, one important factor to consider is whether the campground offers Wi-Fi connectivity. Having access to Wi-Fi can greatly enhance your camping experience, allowing you to stay connected with loved ones, stream entertainment, and even work remotely if needed.
Here are a few tips to help you find campgrounds that offer reliable Wi-Fi connectivity:
- Research Campground Websites: Start by visiting the websites of campgrounds you are interested in. Look for information about Wi-Fi access and any associated fees or restrictions. Some campgrounds may have Wi-Fi available only in certain areas or at specific times.
- Read Reviews: Check online reviews and forums for feedback from previous campers regarding the quality and reliability of the campground’s Wi-Fi. Pay attention to recent reviews, as the quality of Wi-Fi services can change over time.
- Contact the Campground: If you have specific questions about Wi-Fi access, reach out to the campground directly. They can provide details about the coverage area, speed, and any limitations on usage.
- Use Camping Apps: There are several camping apps available that provide information on campgrounds, including whether they offer Wi-Fi. These apps often include user reviews and ratings, which can help you make an informed decision.
- Consider Natural Setting: Keep in mind that while some campgrounds may have excellent Wi-Fi connectivity, others may offer a more natural setting without reliable internet access. Consider your priorities and preferences when choosing a campground.
By following these tips, you can find campgrounds that offer Wi-Fi connectivity to ensure you stay connected during your camping adventure. Remember to pack your devices and charging cables, and be prepared to enjoy the beauty of nature while still having the convenience of Wi-Fi access.
Investing in a Mobile Wi-Fi Hotspot
For campers who desire reliable Wi-Fi connectivity regardless of the campground’s offerings, investing in a mobile Wi-Fi hotspot is a great solution. With a mobile hotspot, you can have your own personal Wi-Fi network wherever you go, ensuring a stable and secure internet connection throughout your camping trip.
Here’s what you need to know about investing in a mobile Wi-Fi hotspot:
- Choose a Reliable Provider: Research different providers to find one that offers good coverage in the areas you plan to camp. Look for providers with a strong network and positive customer reviews.
- Select an Appropriate Plan: Mobile hotspot plans vary in terms of data limits and pricing. Assess your usage needs and choose a plan that suits your requirements. Consider factors such as the number of devices you plan to connect, your typical internet activities, and the duration of your camping trips.
- Consider Device Compatibility: Make sure the mobile hotspot device you choose is compatible with your current devices, such as smartphones, tablets, and laptops. Check for compatibility with different operating systems and connection options.
- Set Up and Secure Your Network: Once you have your mobile hotspot device, follow the instructions to set it up and secure your network. Set a strong password and consider enabling additional security features such as a firewall or VPN.
- Manage Data Usage: Keep track of your data usage to avoid exceeding your plan’s limits. Adjust your internet activities accordingly, such as limiting video streaming or downloading large files while camping.
An investment in a mobile Wi-Fi hotspot allows you to enjoy reliable internet access on your camping trips. You can stay connected with family and friends, browse the web, stream entertainment, and even work remotely if needed. Just make sure to research providers, choose an appropriate plan, and manage your data usage effectively to get the most out of your mobile hotspot.
Using a Cellular Data Plan with a Mobile Router
If you’re a camper who prefers to rely on your existing cellular data plan for internet connectivity, pairing it with a mobile router can provide a convenient and reliable Wi-Fi connection throughout your camping trip. By using a mobile router, you can create a local Wi-Fi network that allows multiple devices to connect to the internet using your cellular data.
Here are the steps to set up and use a cellular data plan with a mobile router:
- Choose a Compatible Mobile Router: Select a mobile router that is compatible with your cellular service provider and offers the features you require, such as multiple device connections and fast speeds. Consult your provider or research online to find a suitable router.
- Activate Your Mobile Router: Follow the instructions provided by your mobile router’s manufacturer to activate the device. This typically involves inserting a SIM card from your cellular provider and configuring the settings.
- Connect Devices to the Mobile Router: Once you have activated the mobile router, connect your devices to the Wi-Fi network it creates. Ensure that the devices are within range of the router and enter the password, if prompted.
- Monitor and Manage Data Usage: Keep an eye on your data usage to avoid exceeding your cellular plan’s limits. Many routers have built-in tools to monitor data consumption, allowing you to adjust your internet activities as needed.
- Consider Data Saving Measures: To optimize your cellular data usage while camping, consider enabling data-saving features on your devices and applications. This could include disabling automatic app updates or streaming video in lower resolution.
By using a cellular data plan with a mobile router, you can enjoy the convenience and flexibility of a Wi-Fi network powered by your cellular connection. This allows you to stay connected, browse the web, and access online services while camping in areas with reliable cellular coverage. Just remember to choose a compatible router, activate it properly, and manage your data usage to make the most of your cellular data plan.
Boosting Wi-Fi Signal with a Range Extender
If you find yourself struggling with weak or unreliable Wi-Fi signals at the campground, a range extender can be an effective solution to amplify and extend your Wi-Fi coverage. A range extender, also known as a Wi-Fi repeater or booster, works by capturing the existing Wi-Fi signal and rebroadcasting it to reach areas with poor reception, thereby improving your overall connectivity.
Here’s how you can boost your Wi-Fi signal with a range extender:
- Choose a Compatible Range Extender: When shopping for a range extender, ensure that it is compatible with your existing Wi-Fi router. Consider factors such as the range, speed, and frequency compatibility (e.g., 2.4GHz or 5GHz).
- Placement Is Key: Find the optimal location for your range extender. It should be placed within the range of your existing Wi-Fi signal but close enough to the areas where you are experiencing weak connectivity. Avoid obstacles and interference from walls, appliances, or other electronic devices.
- Set Up the Range Extender: Follow the manufacturer’s instructions to set up the range extender. This typically involves connecting it to your Wi-Fi network and configuring its settings. Use the provided interface or mobile app to complete the setup process.
- Test and Adjust: Once set up, test the Wi-Fi signal strength in the previously weak areas. If necessary, try repositioning the range extender for optimal coverage. Some range extenders have signal strength indicators to help you find the best placement.
- Secure Your Network: Ensure that your range extender is properly secured with a strong password to prevent unauthorized access to your Wi-Fi network. Consult the manufacturer’s instructions for guidance on securing your specific range extender model.
By using a range extender, you can overcome Wi-Fi signal limitations and enjoy improved connectivity throughout your camping experience. Whether you’re streaming movies, working remotely, or simply browsing the web, a range extender can help ensure a strong and reliable Wi-Fi connection in your camper or nearby outdoor areas.
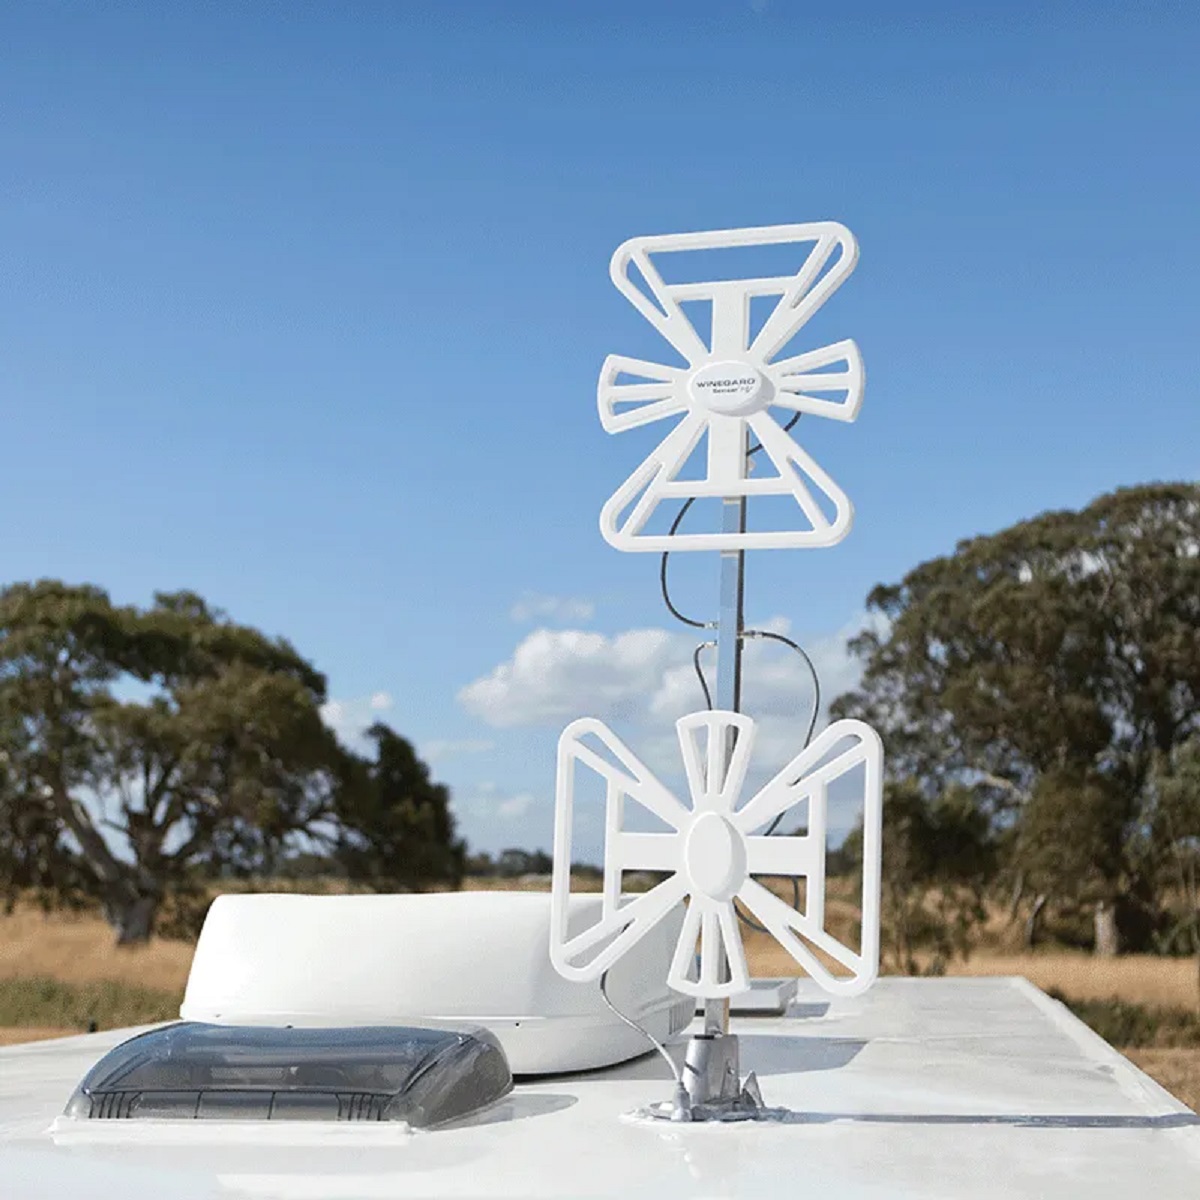
Setting Up a Wi-Fi Antenna for Long-Range Connectivity
If you often camp in remote areas or experience weak Wi-Fi signals, setting up a Wi-Fi antenna can significantly improve your range and connectivity. A Wi-Fi antenna enhances the signal reception and transmission, allowing you to access Wi-Fi networks even at longer distances from the source.
Here’s how you can set up a Wi-Fi antenna for long-range connectivity:
- Choose the Right Antenna: There are various types of Wi-Fi antennas available, such as omni-directional and directional antennas. Consider the range, gain, and directivity required for your specific needs. Directional antennas are ideal for targeting a distant Wi-Fi source, while omni-directional antennas provide more general coverage.
- Select the Frequency: Check the frequency used by your Wi-Fi router (e.g., 2.4GHz or 5GHz) and ensure that the chosen antenna supports that frequency. Some antennas are designed to work on multiple frequencies, providing more versatility and compatibility.
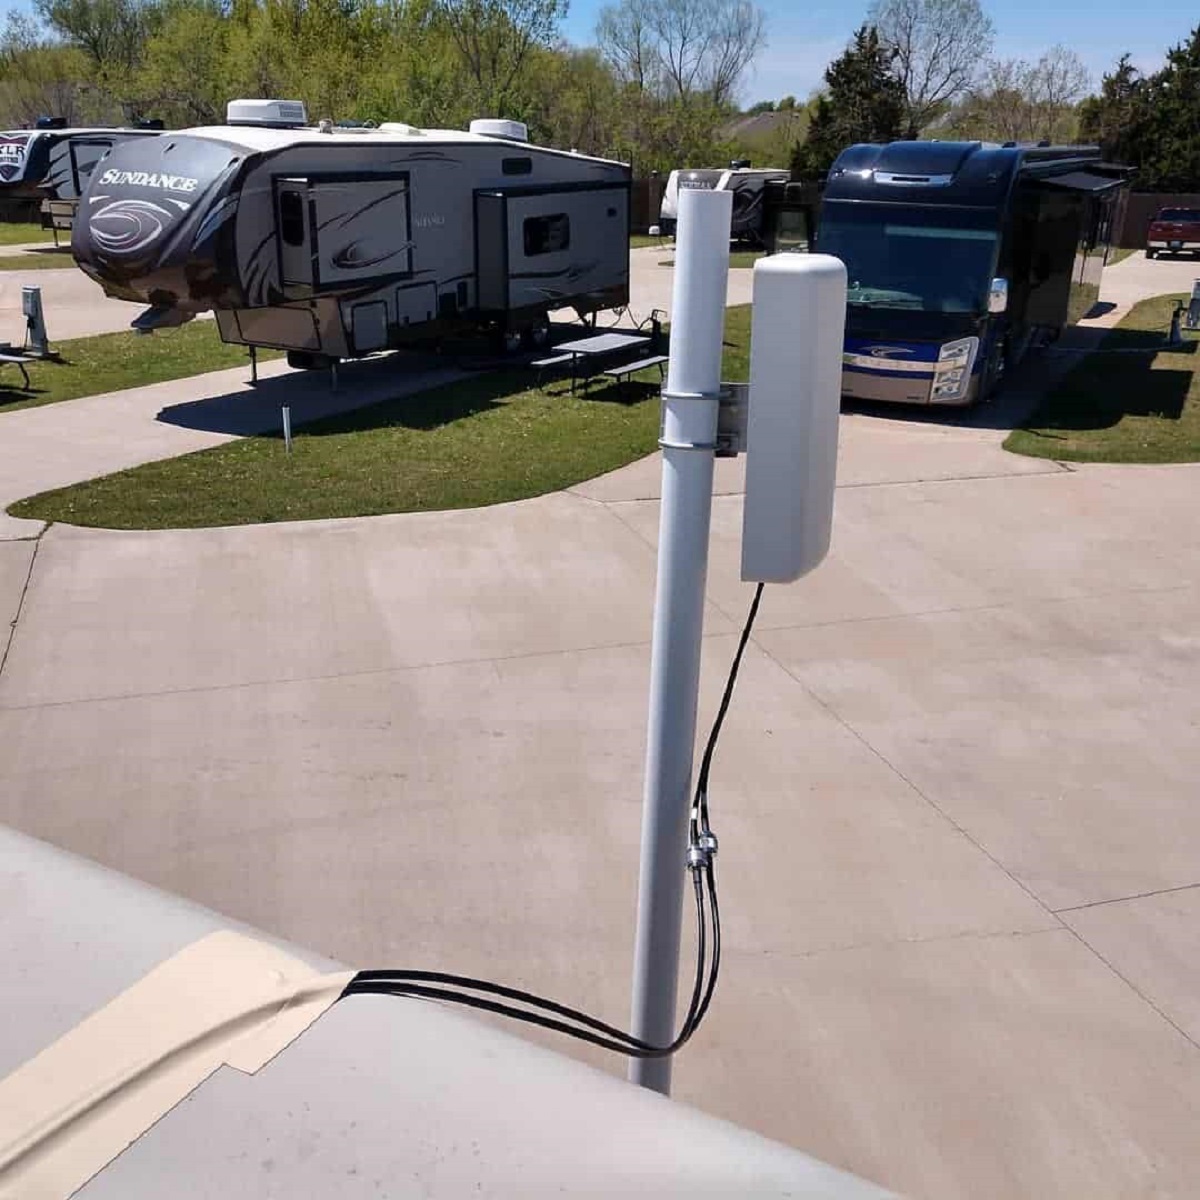
- Position the Antenna: Locate the Wi-Fi source or router and identify the direction from which the signal is coming. For directional antennas, point them towards the source for optimal reception. Ensure that there are minimal obstructions, such as trees or buildings, in the line of sight between the antenna and the source.
- Mount the Antenna: Mount the antenna in a stable position, such as on a rooftop, mast, or pole. Follow the manufacturer’s instructions for proper installation, including securely attaching the antenna and connecting the cables.
- Configure the Router: Adjust the settings on your Wi-Fi router to optimize performance with the newly installed antenna. Some routers have specific settings for external antennas, allowing you to fine-tune the signal for better long-range connectivity.
By setting up a Wi-Fi antenna, you can extend your Wi-Fi range and enjoy better connectivity even when camping in remote areas. Whether you rely on campground Wi-Fi or bring your own router, a Wi-Fi antenna can significantly improve your ability to access Wi-Fi networks from a distance. Stay connected, stream media, and browse the web with confidence, knowing you have enhanced long-range Wi-Fi capabilities.
Utilizing Campground Wi-Fi Networks
Many campgrounds now offer Wi-Fi networks for their visitors, providing a convenient option for staying connected during your camping trip. While campground Wi-Fi networks can vary in terms of speed and reliability, there are several ways to maximize your usage and make the most of these networks.
Here are some tips for utilizing campground Wi-Fi networks:
- Check the Availability and Coverage: Before relying on campground Wi-Fi, inquire about the availability and coverage within the campground. Some campgrounds may only offer Wi-Fi in certain locations, such as common areas or specific campsites.
- Position Your Campsite Strategically: If the campground has limited Wi-Fi coverage, try to choose a campsite closer to the access points or hotspots. Being in proximity to the Wi-Fi source can lead to a stronger and more reliable connection.
- Be Mindful of Peak Usage Times: Campground Wi-Fi networks can experience congestion during peak usage times, such as evenings when many campers are online. Consider adjusting your online activities to less congested times for better performance.
- Bring the Right Equipment: Ensure that your devices are equipped with modern Wi-Fi technology that supports the networks offered by the campground. For example, if the campground offers Wi-Fi on the 5GHz band, make sure your devices are compatible with this frequency.
- Manage Bandwidth Usage: To avoid overwhelming the campground Wi-Fi network, be mindful of your bandwidth usage. Avoid excessive streaming, downloading large files, or running multiple bandwidth-intensive activities simultaneously.
- Use VPN for Security: When connecting to campground Wi-Fi networks, consider using a Virtual Private Network (VPN) for enhanced security. A VPN encrypts your internet traffic, safeguarding your personal information from potential threats or eavesdropping.
- Have a Backup Plan: Despite your best efforts, campground Wi-Fi networks may still be unreliable or insufficient for your needs. In such cases, it is advisable to have a backup plan, such as using a mobile hotspot or cellular data plan.
By following these tips, you can optimize your experience with campground Wi-Fi networks and stay connected throughout your camping trip. While these networks may not always match the speed and reliability of home connections, they can still provide a valuable lifeline for staying in touch, accessing information, and enjoying online entertainment during your outdoor adventures.
Creating a Personal Wi-Fi Network with a Wireless Router
For campers who prioritize having their own private Wi-Fi network, creating a personal Wi-Fi network with a wireless router is an excellent option. By setting up your own network, you can enjoy the benefits of a stable and secure connection throughout your camping trip.
Here’s how you can create a personal Wi-Fi network with a wireless router:
- Choose a Suitable Router: Select a wireless router that fits your needs in terms of range, speed, and features. Look for models specifically designed for outdoor or rugged environments if you plan to use the router outside of your camper.
- Connect the Router: Connect your router to a power source and use an Ethernet cable to connect it to your modem or internet source. Follow the manufacturer’s instructions for the initial setup process.
- Access the Router Settings: Using your computer or mobile device connected to the router, open a web browser and enter the router’s IP address. This varies depending on the router model. Log in to the router’s configuration interface using the provided credentials.
- Configure the Network Settings: Within the router settings, configure your personal Wi-Fi network. Choose a network name (SSID) and password that is unique and secure. You may also customize other settings such as encryption type and wireless channel.
- Position the Router: Find an optimal location for your router that ensures optimal Wi-Fi coverage. Avoid obstructions such as walls or large objects that may interfere with signal strength. Consider using Wi-Fi signal booster tools or attachable antennas if necessary for better range.
- Connect Devices to Your Wi-Fi Network: Once your personal Wi-Fi network is set up, connect your devices to the network using the designated SSID and password. Ensure that the devices are within range of the router for a stable connection.
- Ensure Network Security: Enable the router’s built-in security features, such as WPA2 encryption, to protect your Wi-Fi network from unauthorized access. Regularly update the router’s firmware to ensure the latest security patches are applied.
By creating a personal Wi-Fi network with a wireless router, you have full control over your connectivity during your camping trip. You can connect multiple devices, maintain a secure network, and customize the settings to fit your specific needs. Enjoy the convenience and reliability of your own personal Wi-Fi network while exploring the great outdoors.
Using Wi-Fi Signal Boosters for Better Connectivity
When camping in areas with weak Wi-Fi signals, using a Wi-Fi signal booster can significantly improve your connectivity and enhance your overall camping experience. A Wi-Fi signal booster, also known as a range extender or repeater, amplifies and expands the existing Wi-Fi signal, allowing you to enjoy a stronger and more reliable connection.
Here’s how you can use a Wi-Fi signal booster to achieve better connectivity while camping:
- Identify the Problem Areas: Determine the areas in your camper or outdoor space where you experience weak or unreliable Wi-Fi signals. This will help you determine where to position the signal booster for optimal coverage.
- Choose a Compatible Signal Booster: Research the various options available and choose a Wi-Fi signal booster that is compatible with your existing Wi-Fi network. Consider factors such as range, compatibility with your router, and any specific features you may require.
- Set Up the Signal Booster: Follow the manufacturer’s instructions to set up the Wi-Fi signal booster. Typically, this involves connecting it to your Wi-Fi network and configuring the settings. Some signal boosters may have a mobile app that simplifies the setup process.
- Position the Signal Booster: Find an optimal location for the signal booster. Ideally, it should be placed between the area with weak Wi-Fi and your router, ensuring an effective signal amplification. Experiment with different placements to find the best position for maximum coverage.
- Test and Fine-tune: Once the signal booster is set up, test the Wi-Fi strength in the previously problematic areas. If necessary, adjust the position of the signal booster or try different antenna orientations to achieve the best signal reception.
- Secure Your Network: Ensure that your Wi-Fi network is properly secured, even with the signal booster in place. Set a strong password and enable encryption to protect against unauthorized access.
- Monitor Performance: Keep an eye on the performance of your Wi-Fi connection with the signal booster. If you continue to experience issues, consider additional troubleshooting steps, such as adjusting channel settings or upgrading your internet package if bandwidth is a concern.
By using a Wi-Fi signal booster, you can extend the range and improve the overall reliability of your Wi-Fi connection while camping. Stay connected, stream media, browse the web, and work remotely with confidence, knowing that you have enhanced connectivity with the help of a signal booster.
Managing Data Usage and Optimizing Wi-Fi Speeds
Managing data usage and optimizing Wi-Fi speeds are crucial aspects of ensuring a smooth and efficient internet experience while camping. By following some best practices, you can maximize your data allowance, improve Wi-Fi speeds, and enjoy a seamless online experience during your camping trip.
Here are some tips for managing data usage and optimizing Wi-Fi speeds:
- Monitor Data Usage: Keep track of your data usage to avoid exceeding your plan’s limits. Many internet service providers offer online tools or mobile apps that allow you to monitor your data consumption. Check these regularly and adjust your internet activities accordingly.
- Stream at Lower Resolutions: Streaming high-definition videos or movies consumes a significant amount of data. Reduce data usage by streaming at lower resolutions, especially when camping where Wi-Fi speeds may be limited. Many streaming platforms offer options to adjust the video quality manually.
- Limit Background Data Usage: Some devices and applications continue to consume data even when you’re not actively using them. Configure your devices to limit background data usage or disable automatic updating for apps that are not essential during your camping trip.
- Disconnect Unused Devices: Unused devices that remain connected to the Wi-Fi network can consume valuable bandwidth. Disconnect devices that are not actively being used to free up bandwidth and improve Wi-Fi speeds for devices that need it.
- Position Devices for Better Signal Strength: Position your devices, such as smartphones or laptops, closer to the Wi-Fi router or signal booster for optimal Wi-Fi speeds. Align the devices in the line of sight of the router and reduce obstructions that could weaken the signal reception.
- Adjust Router Settings: Access your router’s settings and ensure that it is optimized for performance. Adjust the channel settings, enable Quality of Service (QoS) to prioritize certain applications or devices, and update the router’s firmware regularly to take advantage of performance improvements and security updates.
- Clear Cache and Delete Temporary Files: Over time, devices can accumulate temporary files and cache data that may impact their performance. Regularly clear the cache and delete unused files to optimize their performance and enhance Wi-Fi speeds.
- Consider an Internet Speed Test: Perform an internet speed test to assess the actual Wi-Fi speeds you are receiving. This will help you determine if there are any issues with your Wi-Fi connection and allow you to address them accordingly.
By managing data usage and optimizing Wi-Fi speeds, you can make the most out of your internet connection while camping. These practices will help you stay within your data limits, improve Wi-Fi speeds, and ensure a seamless online experience for all your camping needs.
Ensuring Security and Privacy on Public Wi-Fi Networks
When connecting to public Wi-Fi networks, such as those found in campgrounds or cafes, it’s important to prioritize security and privacy to protect your personal information. Public Wi-Fi networks can be susceptible to various security risks, but by taking certain precautions, you can minimize the chances of falling victim to cyber threats.
Here are some tips for ensuring security and privacy on public Wi-Fi networks:
- Use Trusted Networks: Whenever possible, connect to Wi-Fi networks that you trust, such as those provided by reputable establishments or known network providers. Be cautious when connecting to unsecured or unfamiliar networks.
- Enable Firewall and Antivirus Protection: Ensure that your device’s firewall and antivirus software are enabled and up-to-date. This provides an additional layer of protection against potential threats while connected to public Wi-Fi networks.
- Disable File Sharing and Network Discovery: To prevent unauthorized access to your device or files, disable file sharing and network discovery features while connected to public Wi-Fi. This will help safeguard your data from potential intruders on the network.
- Use HTTPS and VPN: Whenever possible, visit websites that use HTTPS encryption. This ensures that data transmitted between your device and the website is secure. Additionally, consider using a Virtual Private Network (VPN) to encrypt your internet traffic and protect your online activities from prying eyes.
- Avoid Accessing Sensitive Information: Refrain from accessing or transmitting sensitive information, such as banking details or personal credentials, while connected to public Wi-Fi. Save these activities for when you are connected to a secured network or use your cellular data connection instead.
- Be Wary of Phishing Attempts: Public Wi-Fi networks can be a breeding ground for phishing attacks. Be cautious of any suspicious email, pop-up ads, or requests for personal information while connected to a public network. Avoid clicking on unverified links or downloading content from unknown sources.
- Regularly Update Devices and Apps: Keep your devices and apps updated with the latest security patches. Regular updates often include bug fixes and security enhancements that help protect against known vulnerabilities.
- Utilize Two-Factor Authentication: Enable two-factor authentication (2FA) for your online accounts whenever possible. This adds an extra layer of security by requiring a second verification step, such as a code sent to your phone, in addition to your password.
By following these security practices, you can significantly reduce the risk of falling victim to cyber threats while connected to public Wi-Fi networks. By prioritizing security and privacy, you can confidently use public Wi-Fi networks during your camping trips while protecting your personal information and maintaining your online privacy.