Introduction
3D printing has revolutionized the way we create and manufacture objects, opening up a world of possibilities. However, one common challenge that can arise when using 3D printers is the appearance of layer lines on printed objects. Layer lines are visible ridges or grooves that can give a printed object a less than desirable finish. To achieve smoother and more professional-looking prints, it’s important to understand the causes of layer lines and how to mitigate them.
Layer lines occur during the 3D printing process when each layer of the object is built upon the previous layer. This process creates visible lines or inconsistencies that can affect the overall quality of the print. Understanding the factors contributing to layer lines is crucial in order to adjust your 3D printer settings and improve print quality.
In this article, we will explore the causes of layer lines and provide tips and strategies to help you get rid of them. By optimizing your 3D printer settings and implementing the right techniques, you can achieve smoother prints with minimal layer lines. Whether you are a beginner or an experienced 3D printing enthusiast, the information provided here will help you enhance the quality of your prints.
It’s important to note that achieving completely flawless prints without any layer lines may not always be possible, especially with certain complex geometries or materials. However, by following these guidelines, you can greatly minimize the appearance of layer lines and achieve professional-looking prints that are closer to your desired outcome.
Now, let’s dive deeper into the causes of layer lines and explore various strategies to overcome them for optimal 3D print quality.
Understanding Layer Lines
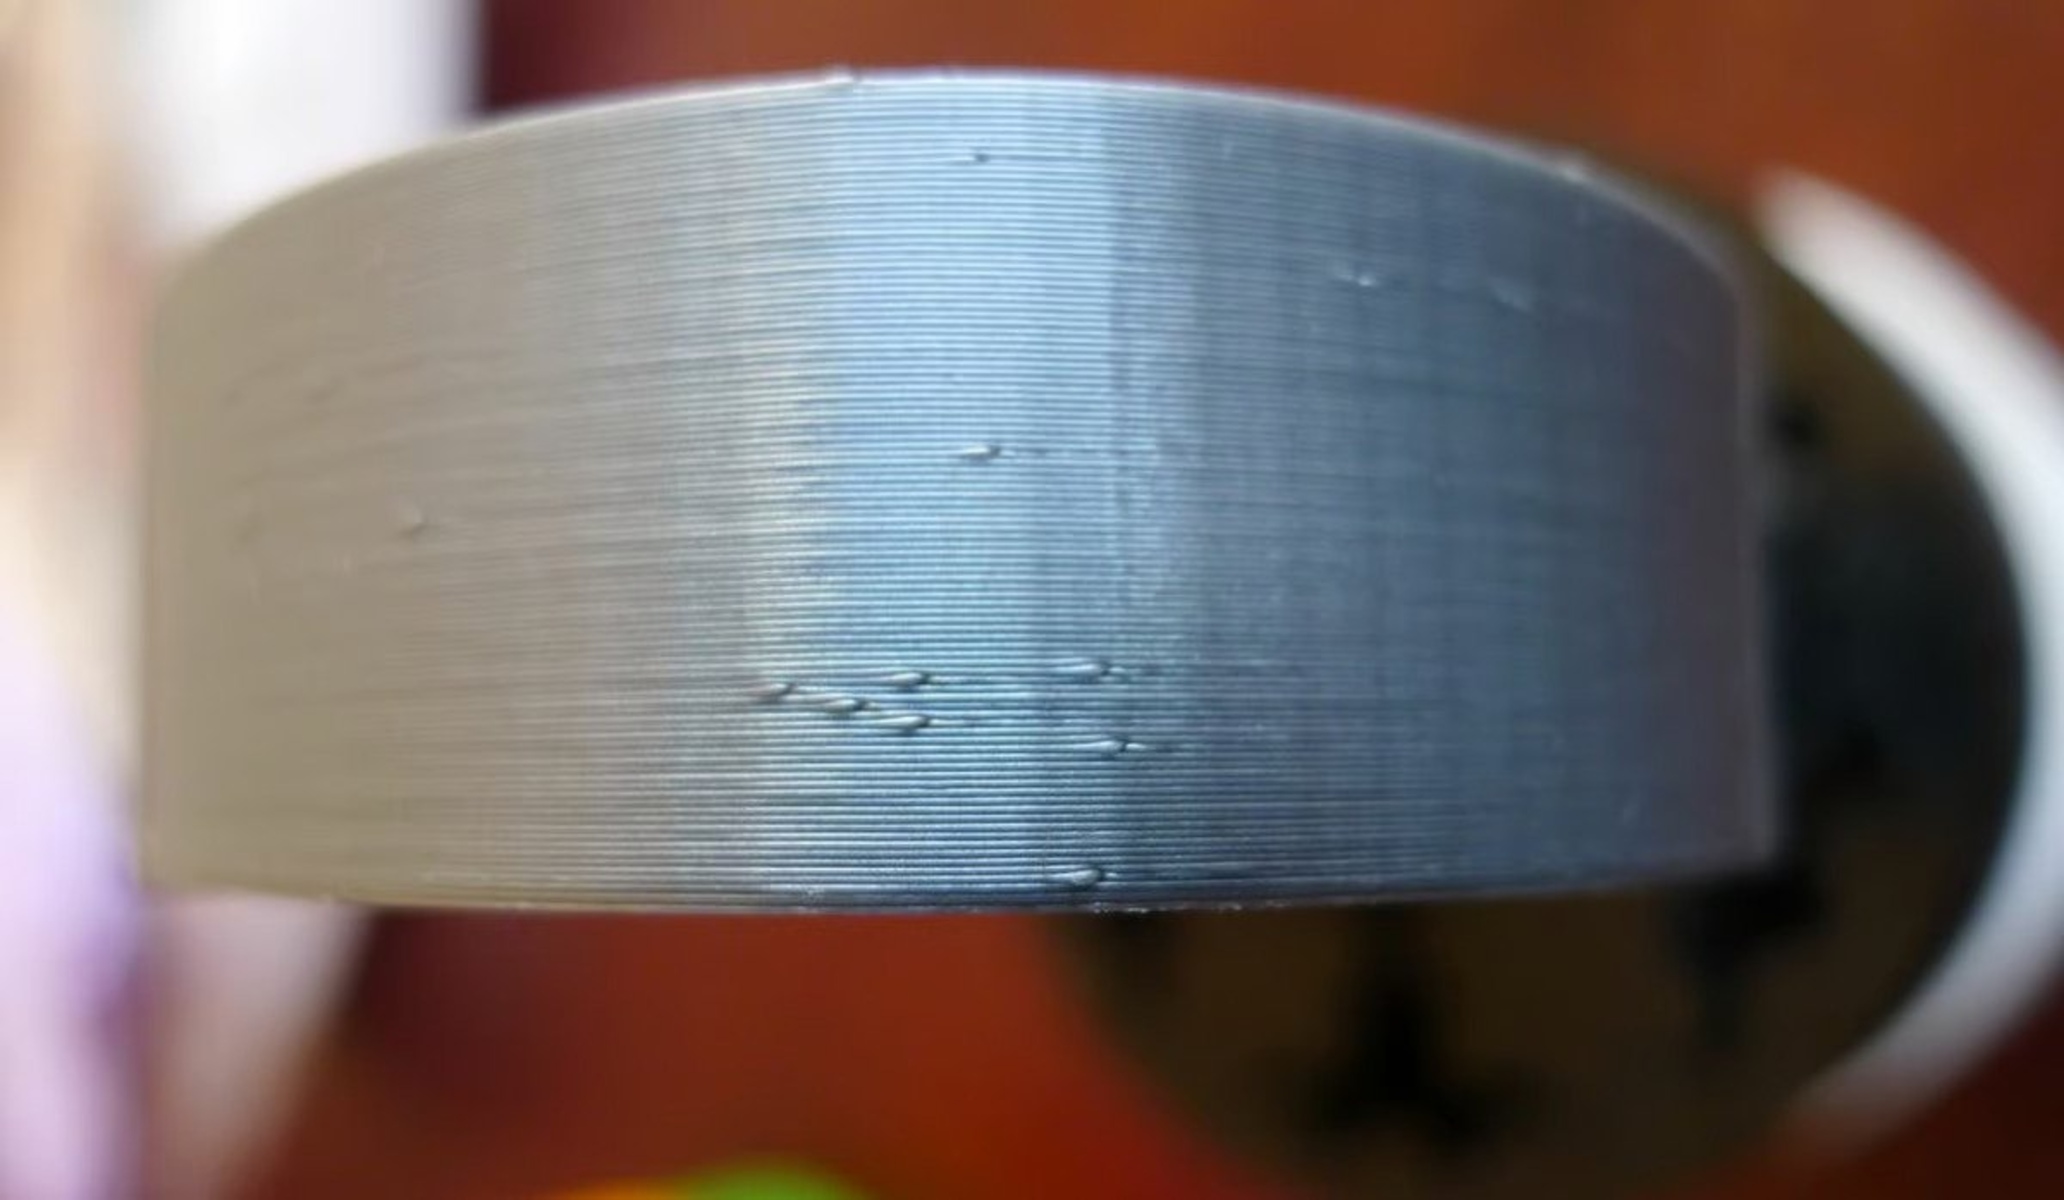
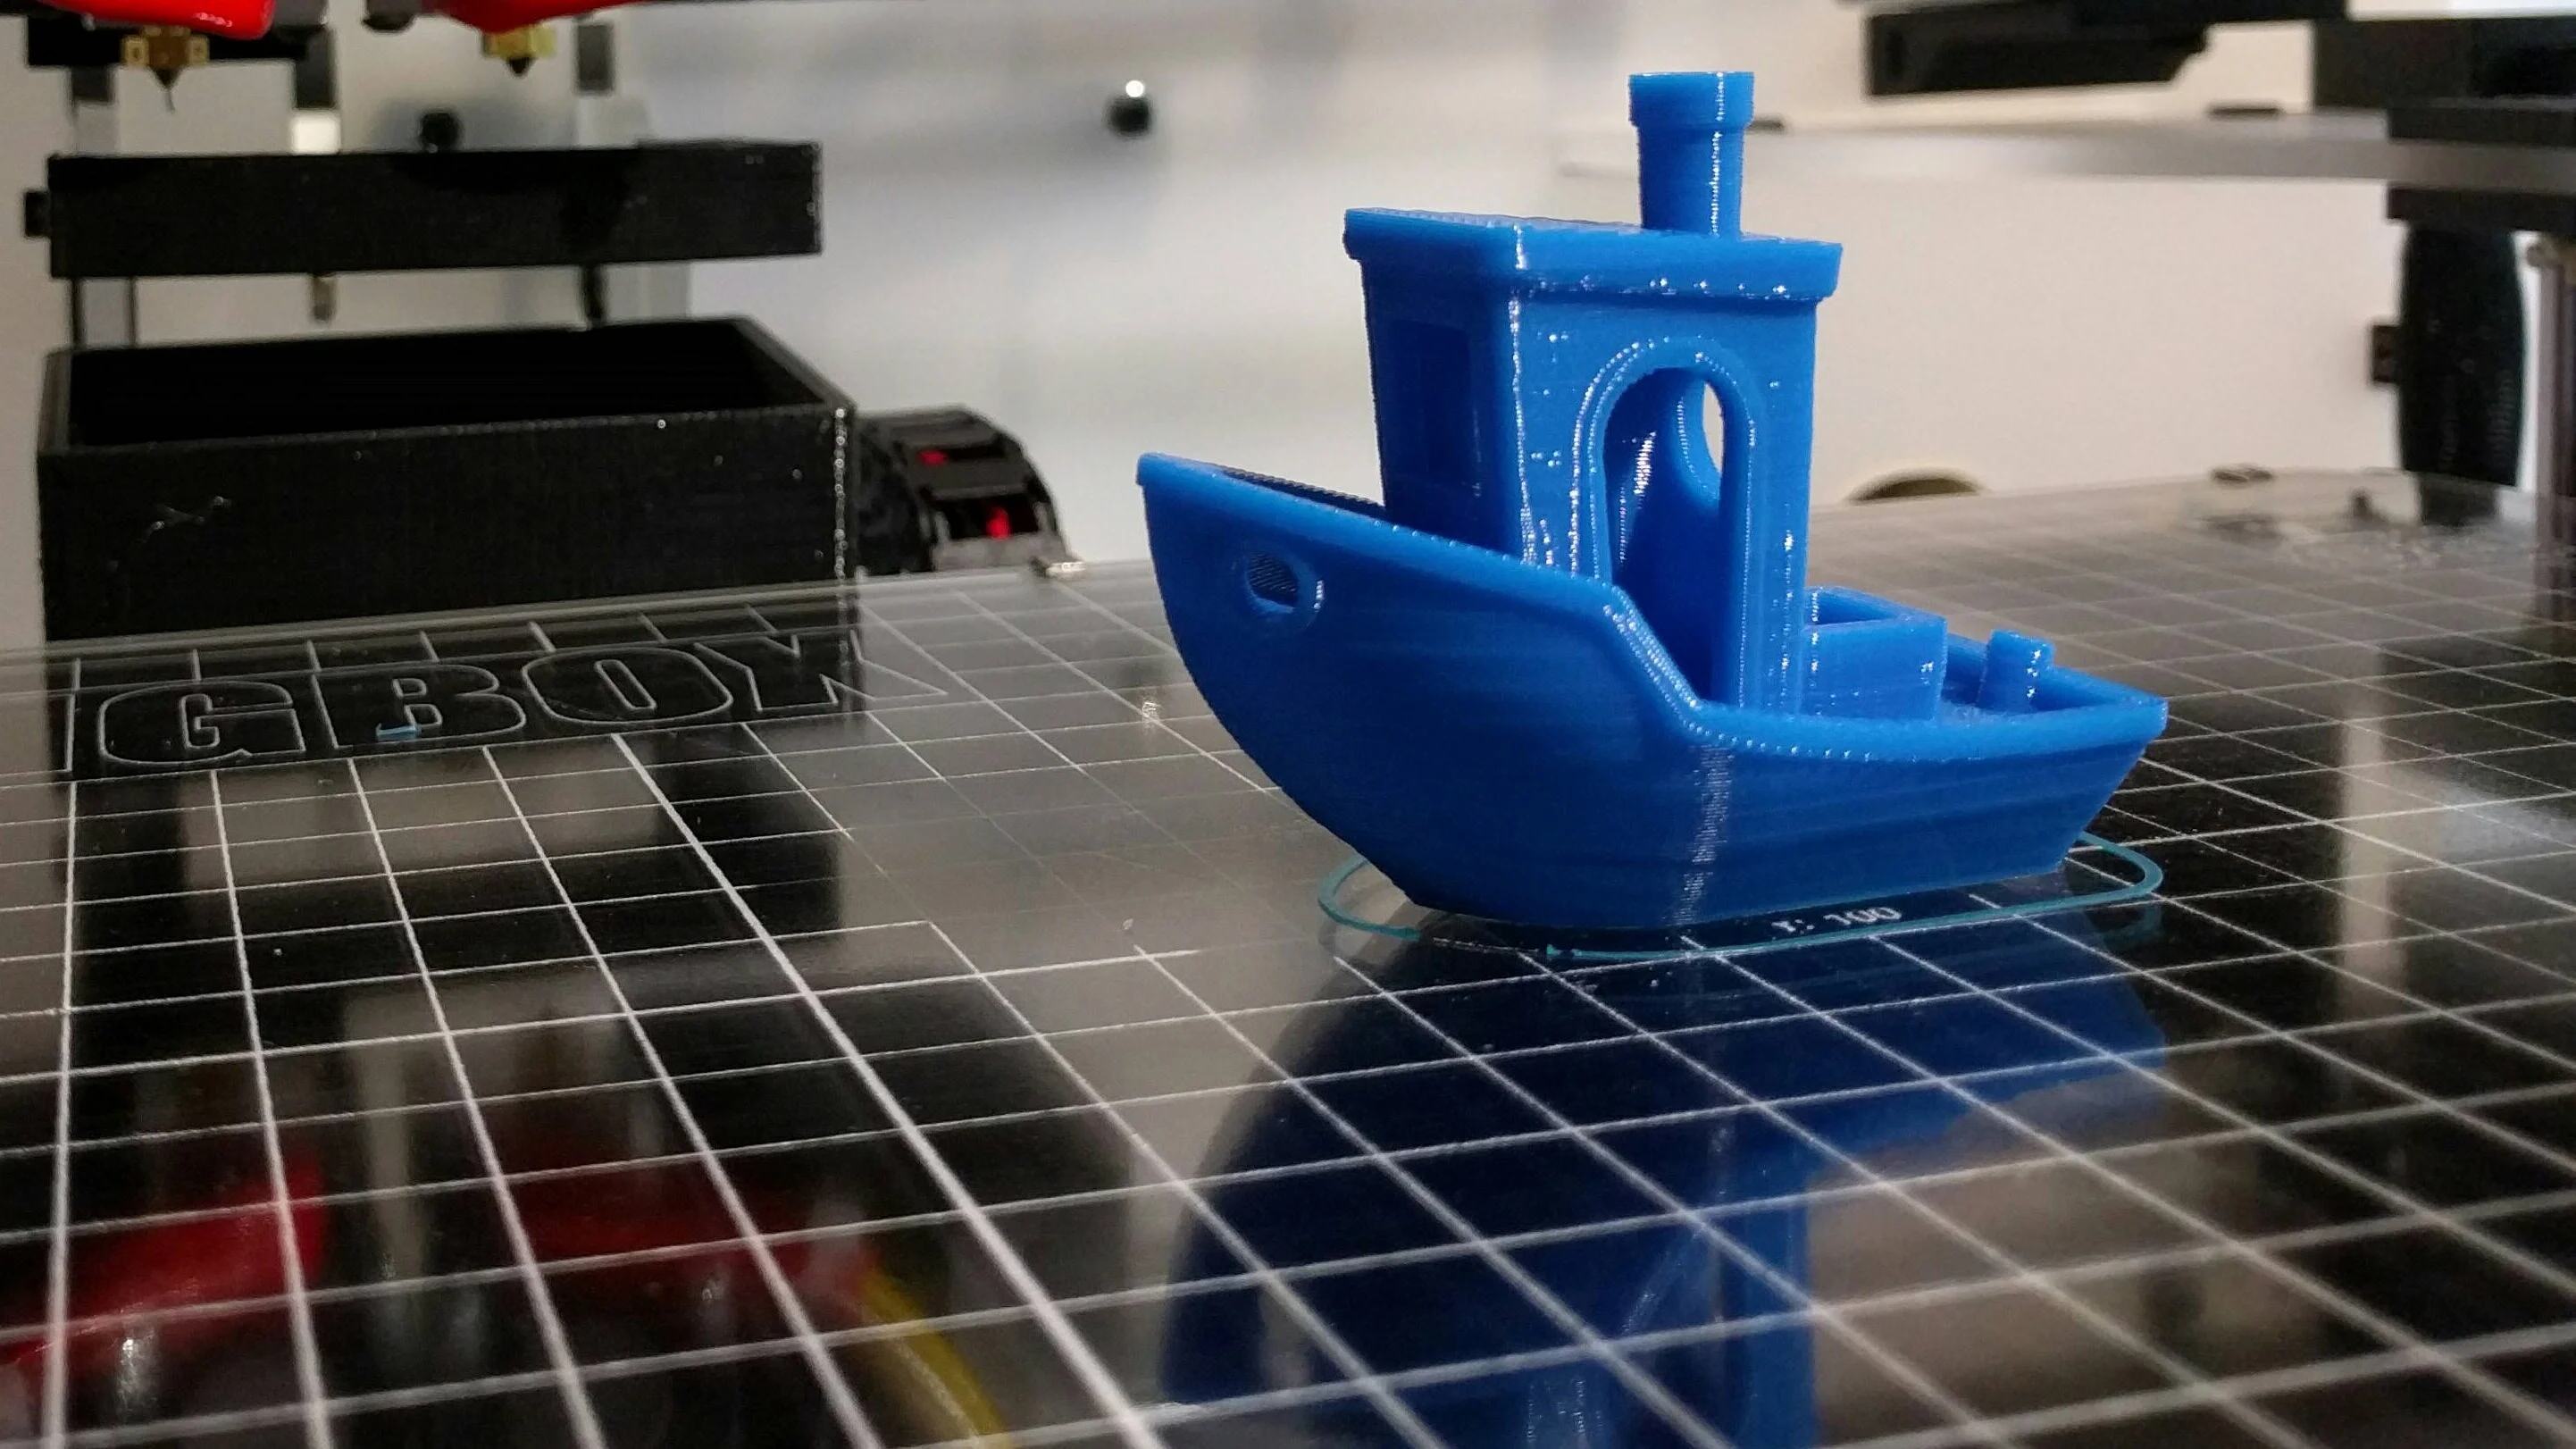
Layer lines, also known as striations, are the result of the additive manufacturing process in 3D printing. As each layer of a printed object is built upon the previous one, these lines can become visible on the final print surface. They can manifest as ridges, grooves, or uneven textures, detracting from the overall quality and smoothness of the object.
The visibility and severity of layer lines can vary depending on several factors such as printer settings, print speed, temperature, and filament quality. Understanding the causes of layer lines is crucial to effectively address and minimize their appearance in your 3D prints.
Layer lines commonly occur due to inconsistencies during the printing process. These inconsistencies can arise from factors such as imprecise stepper motor movements, temperature fluctuations, improper filament flow, or inadequate bed adhesion. Additionally, factors like print overhangs, excessive vibration, or insufficient cooling can also contribute to the formation of layer lines.
Layer lines can be more noticeable on larger and flatter surfaces of a print, but they can still be present on smaller details. They can affect the appearance, texture, and overall quality of the object, making it essential to address and minimize their visibility.
By understanding the causes of layer lines, you can take proactive steps to reduce their impact on your prints. The following sections will delve into specific strategies and techniques that can help you overcome and minimize the presence of layer lines in your 3D prints. Remember, achieving perfect prints without any layer lines may not always be feasible, but with the right adjustments and techniques, you can significantly improve the overall print quality.
Causes of Layer Lines
Layer lines in 3D prints can be caused by various factors that affect the printing process. Identifying and understanding these causes is essential in order to address and mitigate the appearance of layer lines. Let’s explore the most common causes of layer lines and how they impact the print quality.
1. Inconsistent Print Settings: Incorrect settings such as layer height, print speed, and temperature can contribute to the formation of layer lines. If the layer height is too high or the print speed is too fast, it can result in inconsistent layer deposition and visible lines. Similarly, improper temperature settings can cause filament flow issues and lead to uneven layers.
2. Mechanical Issues: Problems with the printer’s mechanical components can also result in layer lines. Loose belts, misaligned rods, or worn-out bearings can cause inconsistencies in the movement of the printhead, leading to visible lines on the print surface. Regular maintenance and calibration can help prevent these mechanical issues.
3. Filament Quality: The quality of the filament used in 3D printing plays a crucial role in the appearance of layer lines. Poor-quality or inconsistent filament can result in uneven extrusion, leading to visible lines on the print. Using high-quality filament from reputable manufacturers can help minimize this issue.
4. Insufficient Cooling: Inadequate cooling during the printing process can cause layer lines, especially for prints with overhangs or complex geometries. Insufficient cooling can result in filament warping or sagging, leading to the formation of ridges and grooves on the print surface. Proper cooling strategies, such as using a dedicated cooling fan or adjusting fan speed, can help improve print quality.
5. Poor Bed Adhesion: If the print is not properly adhered to the build platform, it can lead to layer shifting or uneven layers, causing visible lines. Ensuring proper bed leveling and using adhesion methods like using a heated bed or applying adhesive aids in achieving better bed adhesion, minimizing the risk of layer lines.
By understanding the causes of layer lines, you can take targeted steps to address them and improve your 3D print quality. In the next sections, we will explore strategies and techniques to reduce the appearance of layer lines by optimizing your 3D printer settings and implementing best practices throughout the printing process.
Choosing the Right 3D Printer Settings
Selecting the appropriate 3D printer settings is crucial in achieving high-quality prints with minimal layer lines. Each setting affects the deposition of layers and the overall print quality. Here are some key settings to consider and optimize for better print results.
1. Layer Height: The layer height determines the thickness of each layer deposited during the printing process. Smaller layer heights result in finer details but take longer to print. Increasing the layer height can lead to faster prints but may sacrifice some detail. Experiment with different layer heights to strike the right balance between speed and quality.
2. Printing Speed: The printing speed affects how quickly the printer moves during the printing process. Higher speeds can reduce print time but may introduce inaccuracies and visible layer lines. Slowing down the printing speed can improve print quality and minimize layer lines, especially when printing intricate or complex designs.
3. Temperature Settings: Proper temperature settings for the filament being used are crucial for achieving optimal print quality. Each filament type has specific temperature requirements for extrusion. Incorrect temperatures can result in filament flow issues and irregular layer deposition, leading to visible lines. Refer to the manufacturer’s recommendations for temperature settings and experiment to find the best balance.
4. Cooling Strategies: Implementing effective cooling strategies is essential, especially when printing models with overhangs or intricate details. Proper cooling helps solidify the layers quickly, reducing the chance of filament sagging or warping. Consider using a dedicated cooling fan and adjusting the fan speed to optimize the cooling effect during the printing process.
5. Filament Quality: Using high-quality filament from reputable manufacturers can significantly improve print quality and reduce the appearance of layer lines. Inconsistent filament diameter or poor material formulation can lead to uneven extrusion and visible lines. Invest in reliable filament brands to achieve better print results.
6. Bed Leveling and Adhesion: Ensuring proper bed leveling and adhesion is crucial for minimizing layer lines. A level bed ensures consistent layer thickness and deposition. Use manual or automatic bed leveling techniques to achieve optimal print surface alignment. Additionally, consider using adhesive aids or a heated bed to improve bed adhesion and reduce the risk of layer shifting.
7. Calibration: Regular calibration of your 3D printer is necessary to maintain accurate movements and precise layer deposition. Verify the calibration of your printer’s axes, check the levelness of the build plate, and calibrate the extruder for accurate filament flow. Proper calibration helps minimize inconsistencies and visible layer lines.
8. Slicer Software: The settings and options in your slicer software have a significant impact on print quality. Take the time to understand the various settings and experiment with different configurations to optimize your prints. Adjust parameters such as infill density, wall thickness, and print speeds to achieve the best results for your specific print.
By carefully selecting and optimizing these 3D printer settings, you can significantly reduce the appearance of layer lines and improve the overall quality of your prints. Experimentation and small adjustments are key to finding the optimal combination of settings that work best for your specific printer and filament.
Layer Height
The layer height is a critical setting that determines the thickness of each layer deposited during the 3D printing process. It plays a significant role in the final print quality, including the visibility of layer lines. Choosing the right layer height can greatly influence the level of detail and smoothness of your prints.
When selecting the layer height, it’s essential to strike a balance between print speed and quality. Smaller layer heights result in finer details and smoother surfaces but increase printing time. On the other hand, larger layer heights decrease print time but can lead to more visible layer lines and reduced accuracy.
To minimize the visibility of layer lines, try using smaller layer heights, such as 0.1mm or lower. This will allow for more precise layer deposition and smoother transitions between layers, resulting in a higher-quality print with fewer visible lines. However, keep in mind that printing with smaller layer heights will increase the overall print time, so it’s important to consider the trade-off between quality and speed.
It’s worth noting that the layer height should be consistent with the capabilities of your 3D printer. Some printers may struggle to maintain accuracy with extremely small layer heights, leading to other print issues. If you encounter problems such as inconsistent extrusion or failed prints, consider increasing the layer height slightly to find the optimal balance for your specific printer.
Additionally, the layer height should be compatible with the resolution of your 3D model. High-resolution models with intricate details will benefit from smaller layer heights, while larger, less detailed objects may not require such fine layer heights. Consider the complexity of your design and the desired level of detail when choosing the appropriate layer height.
Experimenting with different layer heights is key to finding the optimal setting for your prints. Start with a smaller layer height and gradually increase it while observing the quality and visibility of layer lines. Keep in mind that the ideal layer height may vary depending on the specific filament, printer, and model being printed.
By adjusting the layer height, you can achieve smoother and more precise prints that minimize the appearance of layer lines. Take the time to find the optimal balance between speed and quality for your specific printing needs, and enjoy high-quality prints with improved aesthetics.
Printing Speed
The printing speed is a crucial parameter that can greatly affect print quality, including the visibility of layer lines. The speed at which the printhead moves during the printing process can impact the accuracy, consistency, and overall smoothness of the printed object. Finding the optimal printing speed is essential to minimize the appearance of layer lines.
When it comes to printing speed, it’s important to strike a balance between faster print times and print quality. Higher printing speeds can shorten the time it takes to complete a print, but they can also introduce inaccuracies and visible layer lines, especially on intricate or delicate features.
In general, reducing the printing speed can lead to improved print quality and fewer visible layer lines. Slower speeds allow the filament to properly melt and solidify, resulting in cleaner transitions between layers. This is particularly important for small details, overhangs, and complex geometries where precise layer deposition is crucial.
To find the optimal printing speed, start with the manufacturer’s recommended speed for your specific 3D printer and filament. From there, you can gradually decrease the speed and observe the impact on print quality. Keep in mind that excessively slow speeds can elongate print times significantly, so it’s important to find a balance that satisfies both quality and efficiency requirements.
It’s also crucial to consider the capabilities of your 3D printer when adjusting the printing speed. Some printers may have limitations that affect their ability to maintain accuracy at high speeds. In these cases, it may be necessary to find the upper limit of the printer’s speed capabilities and adjust accordingly.
In complex prints that have a combination of high-detail areas and large, less detailed sections, consider using variable printing speeds. Most slicing software allows you to set different speeds for different parts of the print. This allows for faster printing on less detailed areas while maintaining slower speeds for intricate features, resulting in a balance of speed and quality.
Experimentation is key when it comes to determining the optimal printing speed for your specific printer and prints. Gradually adjust the speed and evaluate the print quality, making note of any visible layer lines or other artifacts. By finding the right balance, you can achieve smooth and accurate prints with minimal layer lines.
Remember, finding the optimal printing speed may require some trial and error. Take the time to experiment and fine-tune this setting to achieve the best results for your specific printing needs. With the right printing speed, you can produce high-quality prints that showcase the fine details of your designs while minimizing the appearance of layer lines.
Temperature Settings
Proper temperature settings are crucial for achieving optimal print quality and minimizing the appearance of layer lines. Different filaments have specific temperature requirements for successful extrusion and adhesion. Understanding and fine-tuning the temperature settings can significantly impact the overall print quality.
When determining the appropriate temperature settings, it’s important to refer to the manufacturer’s guidelines for the specific filament you are using. Each filament type, such as PLA, ABS, PETG, or TPU, has its own recommended temperature range for successful printing.
Using temperatures that are too high can lead to excessive filament flow, causing blobbing and stringing. On the other hand, using temperatures that are too low can result in insufficient melting and extrusion, leading to poor layer adhesion and weak prints. It’s important to find the optimal temperature within the recommended range to achieve the best print quality.
Adjusting the nozzle temperature can help minimize the appearance of layer lines. Decreasing the temperature can decrease the likelihood of stringing, nozzle dragging, and overextrusion, leading to smoother print surfaces. However, it’s important to note that lowering the temperature too much can also cause underextrusion and poor layer adhesion. A balance must be struck between temperature and filament flow.
It’s also worth considering adjusting the bed temperature, especially for materials that require a heated bed, such as ABS. A properly heated bed helps with adhesion, reducing the risk of warping and layer shifting during the print. Ensure that the bed temperature is set according to the filament manufacturer’s recommendations to achieve optimal print results.
Experimentation is key when it comes to dialing in the temperature settings. Gradually adjust the nozzle and bed temperatures, observing the impact on print quality, and making note of any visible layer lines. Keep in mind that outside factors like ambient temperature and airflow can also affect temperature readings and print quality.
It’s worth noting that temperature can be a critical factor when printing more complex designs with overhangs or bridging. Lowering the temperature slightly can improve the overhang performance and minimize sagging, resulting in smoother and more precise layer deposition.
By fine-tuning the temperature settings for both the nozzle and bed, you can optimize the print quality and minimize layer lines. Consistent and accurate temperature control throughout the printing process will help ensure reliable and high-quality prints. Take the time to experiment and find the optimal temperature settings for your specific filament and printer to achieve the best results.
Cooling Strategies
Implementing effective cooling strategies during the 3D printing process is essential for minimizing the appearance of layer lines and ensuring optimal print quality. Proper cooling helps solidify the layers quickly, reducing the chance of filament sagging or warping and improving overall print aesthetics.
The cooling requirements can vary depending on the type of filament you are using and the complexity of your print. Here are some cooling strategies to consider:
Dedicated cooling fan: Most 3D printers are equipped with a cooling fan that directs airflow towards the printed object. This fan helps in the rapid cooling of the layers, reducing the chances of filament sagging and improving surface quality. Ensure that the cooling fan is functioning correctly and set to an appropriate speed for the filament being used. Adjusting the fan speed can have a significant impact on print quality, especially in bridging or overhang areas.
Layer-specific cooling: Some slicing software allows for custom cooling settings for different layers of a print. This feature is useful when printing objects that have varying geometries or require different cooling rates at different stages. Adjusting the cooling settings for specific layers can help achieve better control over the printing process, reducing the visibility of layer lines.
Printing in an enclosed environment: For filaments that are prone to warping or temperature sensitivity, such as ABS, printing within an enclosed and controlled environment can minimize layer lines. An enclosed or partially enclosed printer prevents temperature fluctuations and drafts, leading to more stable print conditions and better overall print quality.
External cooling mechanisms: In some cases, additional cooling mechanisms can be used to improve the cooling process further. This can include using a small external fan to direct airflow towards the print bed or employing passive cooling techniques like placing the print near an open window to take advantage of natural airflow.
It’s important to note that while cooling is crucial, excessive cooling can result in other issues, such as print warping or poor layer adhesion. Finding the right balance between cooling effectiveness and print stability is crucial. Experiment with different cooling settings and observe the impact on print quality, adjusting as necessary to achieve the desired results.
By implementing proper cooling strategies, you can enhance the print quality and minimize the visibility of layer lines. Pay attention to the cooling requirements of the filament you are using and experiment with fan speed, layer-specific cooling, and even the printer’s physical environment to find the optimal cooling strategy for your specific prints. This will help you achieve smoother and more professional-looking printed objects.
Filament Quality
The quality of the filament used in 3D printing plays a significant role in the appearance of layer lines and overall print quality. Choosing high-quality filaments from reputable manufacturers can greatly reduce the visibility of layer lines and ensure consistent extrusion, resulting in smoother and more precise prints.
Inconsistent filament quality can lead to uneven extrusion, filament blockages, or other printing issues that contribute to the appearance of layer lines. Poor-quality filaments may have variations in diameter throughout the spool, which can result in inconsistent flow and visible lines on the printed object. Choosing a reliable filament brand known for its quality and consistency can greatly improve print results.
When selecting filament, consider factors such as filament diameter tolerance, material formulation, and reviews from other users. Look for filaments that have a narrow diameter tolerance, such as ±0.05mm, to ensure consistent extrusion. High-quality filaments also tend to have well-controlled material formulations, resulting in better printability and more reliable layer adhesion.
It’s important to store your filament properly to maintain its quality. Exposure to moisture can negatively affect filament performance and lead to issues like poor layer adhesion, inconsistent extrusion, or brittleness. Keep your filament stored in airtight containers or use moisture-absorbing desiccant packets to ensure its longevity and prevent degradation.
Experimenting with different filaments can also give you insights into their performance and how they affect the appearance of layer lines in your prints. Each filament type, such as PLA, ABS, PETG, or TPU, may have different characteristics and behaviors that can impact the visibility of layer lines. Finding a filament that suits your specific printing requirements and yields minimal layer lines can significantly improve the overall print quality.
Consider conducting research and seeking advice from the 3D printing community to find filaments that are known for their excellent performance and minimal layer lines. Pay attention to user reviews, recommendations, and technical specifications to ensure you’re selecting the right filament for your specific print projects.
Investing in high-quality filaments may come with a slightly higher cost, but the improved print quality, reduced layer lines, and overall reliability are well worth it. By using filaments that are known for their quality and consistency, you can achieve smoother and more professional-looking prints with minimal visible layer lines.
Bed Leveling and Adhesion
Proper bed leveling and adhesion are vital factors in minimizing the appearance of layer lines and ensuring successful 3D prints. Having a leveled bed and proper adhesion between the print and the build surface helps in achieving consistent layer height and deposition, reducing the risk of layer shifting and visible lines.
To achieve optimal bed leveling, it’s important to follow the manufacturer’s instructions for your specific 3D printer. Most printers have features or mechanisms that allow you to manually or automatically level the bed. Regularly checking and adjusting the bed level ensures that the first layer adheres uniformly across the build platform, minimizing inconsistencies and improving print quality.
In addition to proper bed leveling, ensuring adequate adhesion between the print and the build surface is equally crucial. Insufficient adhesion can lead to the print detaching from the bed during the printing process, resulting in layer shifting and visible layer lines.
Consider implementing the following tips for better bed adhesion:
- Use a heated bed: For certain filament types, such as ABS, utilizing a heated bed can improve bed adhesion. Heating the bed to the appropriate temperature for the filament helps prevent warping and increases the bond between the print and the build surface.
- Apply adhesive aids: Applying adhesive aids, such as glue stick, hairspray, or a specialized bed adhesive, can enhance bed adhesion. These substances create a temporary bond between the print and the build surface, preventing shifting and improving overall print stability.
- Consider using a textured or specialized build surface: Some 3D printers offer specialized build surfaces, such as PEI sheets or textured surfaces, which can improve bed adhesion. These surfaces provide better grip for the printed object, reducing the risk of layer shifting and improving print quality.
Regularly cleaning the build surface is also essential for maintaining proper bed adhesion. Dust, debris, and residue can compromise adhesion and cause print imperfections. Clean the build surface with isopropyl alcohol or a recommended cleaning agent before each print to ensure a clean and suitable printing surface.
By leveling the bed accurately and enhancing bed adhesion, you can minimize the visibility of layer lines and improve the overall print quality. Take the time to properly level the bed and experiment with different adhesion methods to find the best combination for your specific printer and filament. These efforts will contribute to smoother and more precise prints with fewer visible layer lines.
Calibration
Calibrating your 3D printer is a crucial step in achieving accurate and high-quality prints with minimal layer lines. Calibration involves fine-tuning various aspects of the printer to ensure precise movements, filament flow, and layer deposition. By properly calibrating your printer, you can minimize inconsistencies and improve the overall print quality.
Here are some key areas to focus on during calibration:
- Axis Calibration: Ensuring that the printer’s moving axes are calibrated correctly is essential for accurate print positioning and layer deposition. Verify that the X, Y, and Z axes move smoothly and align with the desired distances. This can be done by adjusting the belt tension, checking for loose screws, and lubricating the necessary components.
- Filament Extrusion Calibration: Calibrating the extruder’s steps per millimeter (E-steps) is crucial for accurate filament extrusion. This calibration ensures the correct amount of filament is pushed through the extruder. By adjusting the E-steps, you can minimize over- or under-extrusion issues, which can contribute to visible layer lines.
- First Layer Calibration: The first layer of a print is essential for proper bed adhesion and layer height consistency. Calibrate the first layer by adjusting the bed height or nozzle distance. Aim for a smooth and uniformly deposited first layer, which can help reduce the appearance of layer lines and improve overall print quality.
- Flow Rate Calibration: Fine-tuning the flow rate of your filament is another important calibration step. Adjusting the extrusion multiplier or flow rate setting ensures that the correct amount of filament is being extruded. This helps achieve precise layer deposition and minimize the risk of under- or over-extrusion, reducing the visibility of layer lines.
Calibration is an iterative process, and it may require some trial and error to achieve the desired results. Take the time to properly calibrate your 3D printer, making small adjustments and observing the impact on print quality. Document any changes made during the calibration process so that you can replicate successful settings in future prints.
Additionally, it’s important to periodically recalibrate your printer, especially after making any modifications or when encountering print quality issues. Regular calibration helps maintain the performance of your printer and ensures consistent, high-quality prints with minimal layer lines.
By diligently calibrating your 3D printer, you can improve the accuracy, reliability, and overall print quality. Taking the time to fine-tune the various calibration settings helps minimize the visibility of layer lines, resulting in smoother, more precise prints. Embrace the calibration process as an ongoing learning experience to continually optimize your printer’s performance.
Slicer Software
The slicer software you use has a significant impact on the quality of your prints, including the visibility of layer lines. Slicer software is responsible for converting your 3D model into instructions that the printer understands. By understanding and utilizing the features and settings of your slicer software effectively, you can minimize layer lines and achieve higher-quality prints.
Here are some key aspects to consider when working with slicer software:
- Layer height and print settings: Slicer software allows you to specify the layer height, print speed, and other settings that directly impact print quality. Understanding how these settings affect the appearance of layer lines is crucial. Experiment with different settings to find the optimal values that balance speed and quality for your specific prints.
- Infill density and pattern: The infill density and pattern determine the internal structure of your print. Higher infill densities and stronger infill patterns can help reduce the visibility of layer lines. Adjusting these settings in your slicer software can strengthen the structure and minimize the appearance of layer lines on the outer surfaces of the print.
- Support structures: When printing objects with overhangs or complex geometries, proper support structures are essential. Slicer software allows you to generate and customize support structures. Well-placed and well-designed supports can help maintain print stability and reduce the risk of layer shifting, resulting in smoother prints with fewer visible layer lines.
- Retraction settings: Retraction settings control the retraction and unretraction of the filament during travel moves. Adjusting these settings in your slicer software can help minimize stringing and blobbing, which can contribute to the appearance of layer lines. Finding the optimal retraction distance and speed for your specific printer and filament can significantly improve print quality.
- Orientation and slicing: The orientation of your model and the way it’s sliced can affect the visibility of layer lines. Experiment with orienting your model to minimize long, continuous horizontal or vertical surfaces, as these can accentuate layer lines. Consider rotating the model or using different slicing strategies to distribute layer lines more evenly across the print.
Take the time to explore the features and settings of your slicer software. Familiarize yourself with its capabilities and experiment with different configurations to optimize your prints. Understanding how each setting affects the appearance of layer lines and print quality will help you achieve smoother and more professional-looking prints.
Stay updated with the latest version of your slicer software and explore any new features or improvements it offers. Slicer software developers often release updates that can improve print quality and provide more control over the printing process. By staying informed and utilizing these advancements, you can further enhance your print results.
Remember, mastering your slicer software takes time and experimentation. Keep a record of the settings that work well for your specific printer and filament combinations to achieve consistent and high-quality prints with minimal layer lines.
Maintaining Your 3D Printer
Regular maintenance of your 3D printer is essential for ensuring optimal performance and minimizing the appearance of layer lines. Over time, wear and tear, dust accumulation, and other factors can affect the accuracy and reliability of your printer. By implementing a maintenance routine, you can keep your printer in top shape and achieve high-quality prints.
Here are some key maintenance tasks to consider:
- Cleaning: Regularly clean your 3D printer to remove dust, debris, and filament residue that can affect print quality. Use a soft brush or compressed air to clean the printer’s exterior, nozzle, printhead, and any other accessible areas. Clean the build platform to ensure proper bed adhesion and minimize inconsistencies.
- Lubrication: Lubricate the moving parts of your printer, such as rods, bearings, and lead screws, following the manufacturer’s recommendations. Proper lubrication reduces friction and ensures smooth and accurate movement, helping to minimize the risk of layer shifting and visible layer lines.
- Belt Tension: Check and adjust the tension of the belts that control the movement of the printer’s axes. Loose belts can result in imprecise movements and contribute to print inaccuracies and layer lines. Ensure the belts are properly tensioned to maintain optimal printer performance.
- Nozzle Maintenance: Monitor and clean the nozzle regularly, as it can get clogged with filament residue or debris. Perform atomic pulls, also known as cold pulls or filament pulls, to clear any obstructions. A clean and properly functioning nozzle ensures accurate filament extrusion, minimizing the risk of layer lines.
- Check Hardware: Regularly inspect and tighten any loose screws, nuts, or other hardware on your printer. Vibrations during printing can cause components to become loose, leading to print inconsistencies and visible layer lines. A thorough hardware check and tightening can improve overall print stability.
- Software Updates: Keep your printer’s firmware and slicing software up to date. Manufacturers often release updates that address bugs, improve performance, and introduce new features. Updating your printer’s software helps ensure compatibility with new filaments and improves overall print quality.
Implementing a maintenance schedule is beneficial to prevent issues before they arise. Create a routine that includes regular cleaning, lubrication, and inspection of critical components. Refer to your printer’s manual or manufacturer’s guidelines for specific maintenance recommendations and intervals.
It’s also important to keep a record of any modifications made to your printer or changes in settings that improve print quality. This will help you troubleshoot issues and reproduce successful print configurations in the future.
Maintaining your 3D printer is an ongoing process that requires regular attention and care. By keeping your printer well-maintained, you can minimize print inconsistencies and visible layer lines, ensuring reliable and high-quality prints. A well-maintained printer will provide you with consistent results and an overall better printing experience.
Tips and Tricks for Smoother Prints
In addition to the specific strategies and techniques discussed earlier, here are some additional tips and tricks to help you achieve smoother prints with minimal layer lines:
- Print Orientation: Experiment with different orientations for your models to minimize the visibility of layer lines. Adjust the orientation to reduce the number of long, continuous surfaces parallel to the build plate, as these are more likely to show layer lines. Different orientations can distribute layer lines more evenly, resulting in a smoother overall appearance.
- Optimize Support Placement: When using support structures, carefully place and generate them to minimize their impact on the visible surfaces of your print. Adjusting the support settings in your slicer software can help reduce the need for excessive support material, which can contribute to the appearance of layer lines.
- Reduce Print Speed for Small Details: When printing small intricate details or fine features, consider reducing the print speed further. Slowing down the print speed allows for smoother and more precise layer deposition, resulting in finer details with reduced layer lines.
- Check for Extruder Calibration: Periodically check and recalibrate your printer’s extruder to ensure accurate filament extrusion. Incorrect extrusion steps can lead to under- or over-extrusion, causing inconsistencies and visible layer lines. Refer to the manufacturer’s guidelines or follow online tutorials for extruder calibration procedures.
- Use High-Resolution Models: Using high-resolution 3D models can help minimize the appearance of layer lines. Higher resolution models have more detail, which can mask the visibility of layer lines. Consider using higher-quality or high-poly models when fine details are crucial for your prints.
- Print Smaller Objects: Printing smaller objects can lead to smoother prints with less visible layer lines. Smaller prints require fewer layers, reducing the chance of inconsistencies. Keep in mind that this might not be feasible for larger projects, but it’s worth considering for objects that can be scaled down.
- Check for Filament Diameter Consistency: Ensure that your filament has a consistent diameter throughout the spool. Uneven filament diameter can cause variations in extrusion, leading to visible layer lines. Use calipers or a filament diameter measurement tool to verify the diameter and choose filaments with good dimensional consistency.
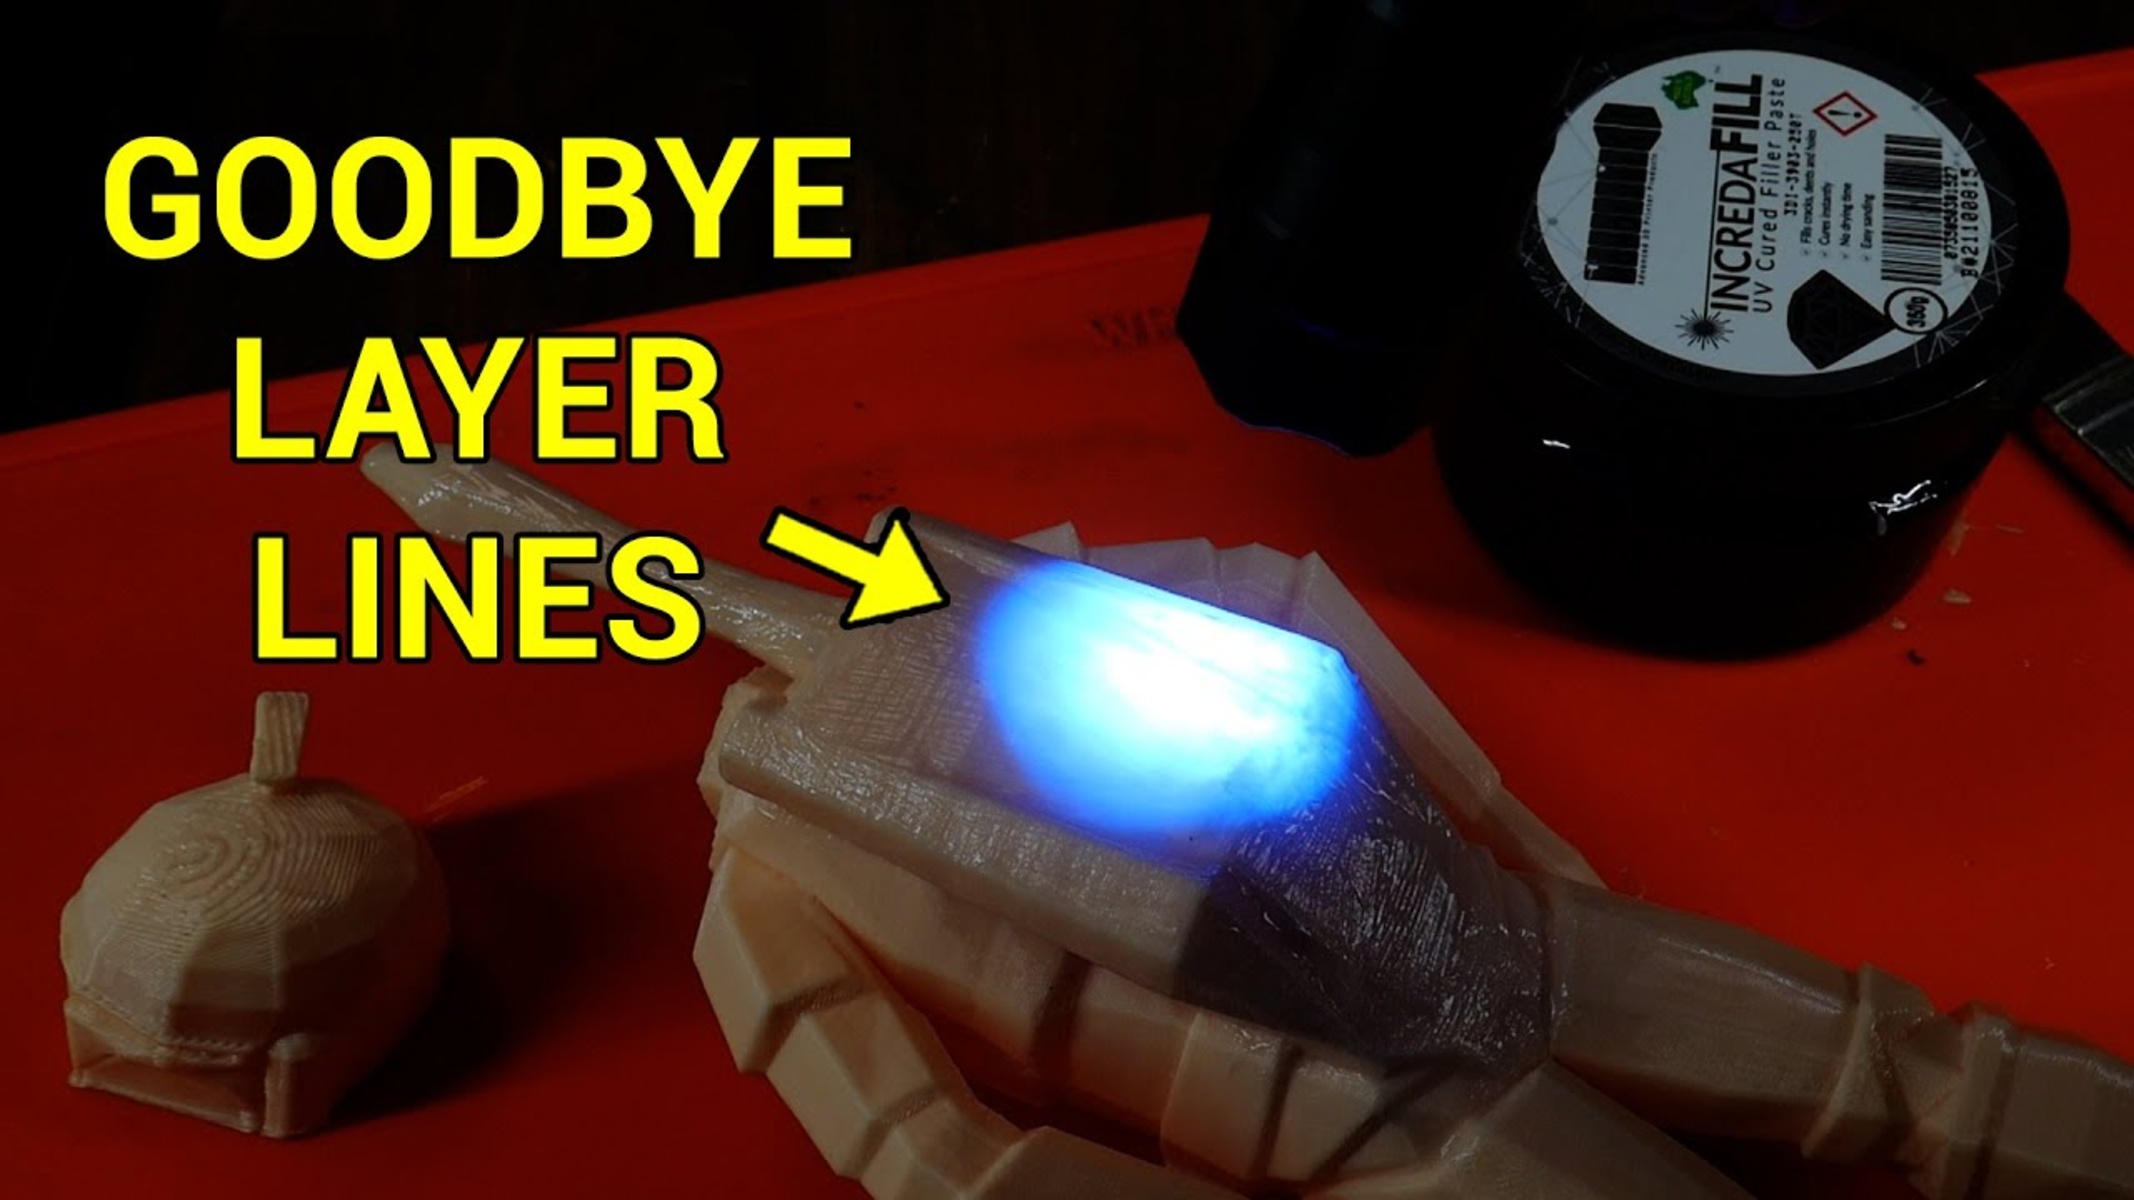
- Consider Post-Processing: Post-processing techniques such as sanding, priming, and painting can help minimize the appearance of layer lines. Finishing your prints with smoothing techniques can enhance the surface quality and provide a more professional finish.
Remember, achieving flawless prints without any layer lines may not always be possible, and each printing project presents unique challenges. However, by implementing these tips and tricks and combining them with the strategies discussed earlier, you can significantly improve the overall print quality and reduce the visibility of layer lines.
Keep in mind that it may take some experimentation to find the best combination of settings, techniques, and tips for your specific printer and filament. Take notes, document your successful configurations, and learn from your printing experiences to continuously refine your process.
With practice and attention to detail, you will be able to produce smoother and more professional-looking prints, showcasing the fine details of your designs while minimizing the presence of layer lines.
Conclusion
Achieving smooth 3D prints with minimal layer lines requires a combination of proper techniques, optimized settings, and regular maintenance. By understanding the causes of layer lines and implementing the strategies discussed in this article, you can greatly improve the overall print quality and enhance the appearance of your 3D prints.
Start by choosing the right 3D printer settings, including layer height, printing speed, temperature, cooling strategies, and filament quality. These settings directly influence the appearance of layer lines and can be fine-tuned to achieve the desired results. Experimentation is key, as each printer and filament combination may require different adjustments to achieve optimal print quality.
Maintaining your 3D printer through regular cleaning, lubrication, and calibration is crucial. This helps to ensure accurate movements, precise filament extrusion, and overall print stability. By keeping your printer in top condition, you can minimize print inconsistencies and visible layer lines.
Additionally, implementing tips and tricks such as optimizing print orientation, reducing print speed for intricate details, and carefully placing support structures can further enhance the appearance of your prints.
Remember that achieving completely flawless prints without any layer lines may not always be feasible, especially for complex models or certain filament types. However, by following the strategies and techniques outlined in this article, you can significantly reduce the appearance of layer lines and achieve smoother, more professional-looking prints.
Continue to learn and adapt as you gain experience with 3D printing. Each print provides an opportunity for improvement and fine-tuning. With patience, practice, and attention to detail, you will be able to produce high-quality prints that showcase the intricate details of your designs with minimal visible layer lines.
So, keep exploring, experimenting, and refining your approach, and enjoy the rewarding journey of 3D printing with smoother and more impressive results. Happy printing!


