Introduction
Welcome to the world of 3D printing, where imagination becomes tangible. If you’re a proud owner of a 3D printer, you’re already aware of the incredible potential it holds. However, achieving the best possible print quality requires precise calibration of your printer settings.
Calibrating a 3D printer may sound daunting, but fear not! In this article, we’ll guide you through the process step by step, ensuring that you have the knowledge and skills to optimize your printer’s performance.
By calibrating your 3D printer, you’ll be able to achieve accurate dimensions, smooth surfaces, and overall high-quality prints. Calibrating includes elements such as leveling the print bed, adjusting the extruder steps/mm, fine-tuning the temperature, and more. Each of these factors plays a crucial role in the output of your 3D printer and requires precise adjustments to achieve optimal performance.
Whether you’re a beginner or an experienced maker, understanding how to calibrate your 3D printer is essential to ensure consistent and reliable results. So, grab your tools and let’s dive into the fascinating world of 3D printer calibration!
Understanding the Basics of 3D Printer Calibration
Before diving into the calibration process, let’s take a moment to understand the key concepts involved. Calibration is the act of adjusting your 3D printer’s settings to achieve precise and accurate prints. It involves fine-tuning various parameters to ensure that your printer is operating at its optimal performance levels.
One critical aspect of calibration is leveling the print bed. A level bed ensures that the first layer of your print is deposited uniformly across the entire build surface. An uneven bed can lead to adhesion issues, warping, and ultimately compromise the overall print quality.
Another crucial aspect is calibrating the extruder steps/mm. The extruder motor is responsible for pushing filament through the nozzle. Adjusting the steps/mm ensures that the expected amount of filament is extruded, allowing for precise control over the dimensions of your print. This step is fundamental in achieving accurate and consistent print results.
Flow rate adjustment is another key consideration in calibration. By adjusting the flow rate, you can control the amount of filament being extruded during each layer. This can help fine-tune the strength, aesthetics, and overall quality of your prints.
Temperature plays a crucial role in achieving optimal print quality. Different filament materials require specific temperature settings to melt and flow properly. By finding the ideal temperature for your filament, you can avoid issues like under-extrusion or stringing, resulting in clean and smooth prints.
Print speed is another factor worth paying attention to during calibration. Adjusting the print speed allows you to balance between faster prints and maintaining adequate print quality. Finding the right balance is crucial to avoid issues such as ringing, layer shifting, or poor surface finish.
Understanding these basic concepts sets a foundation for successful calibration. With a clear understanding of the key elements involved, you’ll be well-prepared to dive into the various calibration processes and achieve outstanding print results. So, let’s roll up our sleeves and delve into the nitty-gritty of 3D printer calibration!
Leveling the Print Bed
One of the crucial steps in calibrating a 3D printer is leveling the print bed. A level bed ensures that the first layer adheres properly and that subsequent layers are deposited accurately. Improper bed leveling can lead to issues such as uneven prints, poor adhesion, and even print failures.
To start, make sure your printer is powered on and preheated to the desired printing temperature. Most printers have a menu option or control knob to navigate to the bed leveling settings. Once you’re in the leveling menu, follow these steps:
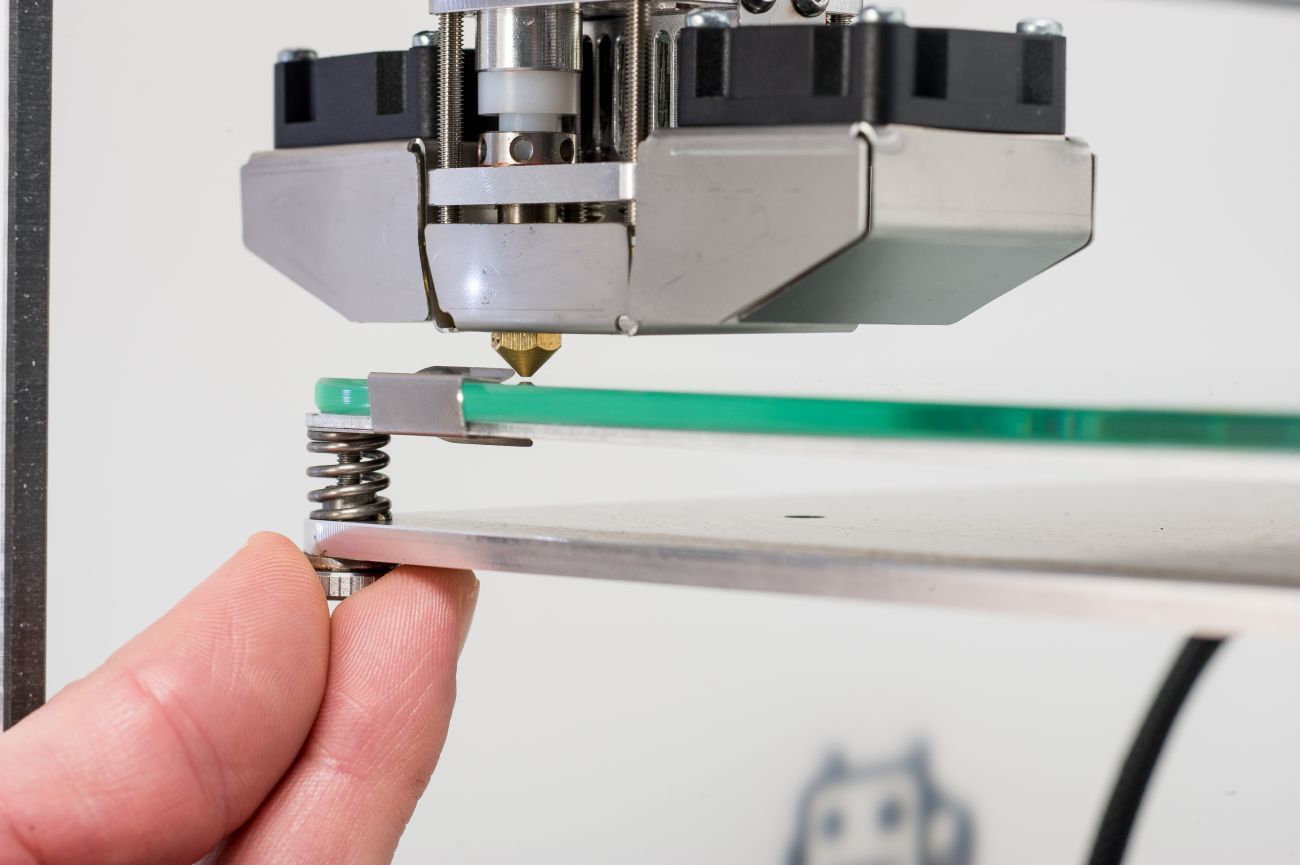
- Bring the nozzle close to the bed: Use the manual controls or adjustment screws to lower the nozzle until it is just above the print bed. Aim for a gap of about 0.1-0.2mm.
- Level the corners: Begin by adjusting the screws or knobs at each corner of the bed. Use a piece of paper or a feeler gauge to check the gap between the nozzle and the bed. Adjust the screws until there is a slight resistance when sliding the paper under the nozzle. Repeat this process for all four corners.
- Check the center: Move the nozzle to the center of the bed and repeat the paper test. Adjust the bed leveling screws if necessary until the paper can just slide under the nozzle without too much resistance.
- Verify the levelness: Once you have leveled the corners and the center, it’s important to double-check the corners again. This ensures that the bed is perfectly leveled. Repeat the paper test at each corner and make any necessary adjustments to achieve an even gap.
After completing the leveling process, it’s recommended to recheck the leveling periodically, as the bed can shift over time. Remember, a properly leveled print bed sets the foundation for successful 3D prints. Take your time during this step, as it significantly impacts the overall print quality.
Now that we have a leveled print bed, it’s time to move on to the next step in our calibration journey: adjusting the extruder steps/mm.
Calibrating the Extruder Steps/mm
Once you have leveled the print bed, the next vital step in calibrating your 3D printer is adjusting the extruder steps/mm. The extruder steps/mm setting determines how much filament is pushed through the nozzle for a given movement of the extruder motor.
Inaccurate extruder steps/mm can result in under-extrusion or over-extrusion, leading to inconsistent print dimensions and poor overall print quality. To ensure precise filament extrusion, follow these steps to calibrate your extruder:
- Mark the filament: Begin by marking a spot on your filament about 120mm above the extruder.
- Preheat your printer: Set your printer to the appropriate filament temperature and allow it to reach that temperature.
- Extrude filament: Using the printer’s control interface, extrude 100mm of filament.
- Measure the actual extrusion: Once the extrusion is complete, measure the distance from the mark on the filament to the extruder. Make note of the measured length.
- Calculate the new steps/mm value: Using the formula (current steps/mm) × (expected extrusion length ÷ measured extrusion length), calculate the new steps/mm value.
- Update steps/mm settings: Access the firmware configuration or printer settings and update the steps/mm value for the extruder motor.
After adjusting the extruder steps/mm, it’s recommended to perform another test to ensure the accuracy of the calibration. Repeat the process of extruding 100mm of filament and measure the extrusion length. If the measurement aligns with the expected value, congratulations! You have successfully calibrated the extruder steps/mm.
Accurate extrusion is crucial for achieving precise prints. By calibrating the extruder steps/mm, you’ll have better control over the amount of filament being extruded, ensuring consistent and reliable prints.
Now that we have set the foundation by leveling the print bed and calibrating the extruder steps/mm, let’s move on to the next step: adjusting the flow rate.
Adjusting the Flow Rate
After calibrating the extruder steps/mm, the next crucial step in optimizing your 3D printer’s performance is adjusting the flow rate. The flow rate determines how much filament is extruded during each layer of your print.
By adjusting the flow rate, you can achieve better control over the strength, aesthetics, and overall quality of your prints. Here’s how you can effectively adjust the flow rate:
- Start with a benchmark: Print a calibration cube or a similar test model using your default flow rate settings. This will serve as a benchmark for comparison.
- Measure the dimensions: Using a caliper or ruler, measure the dimensions of the printed cube, including the height, width, and length. Make a note of these measurements.
- Calculate the adjustment factor: By comparing the measured dimensions with the expected dimensions, calculate the adjustment factor. If the dimensions are smaller than expected, increase the flow rate, and if larger, decrease the flow rate.
- Adjust the flow rate: Access the flow rate settings in your slicing software or printer configuration. Increase or decrease the flow rate by the calculated adjustment factor.
After adjusting the flow rate, print another test model, preferably the calibration cube again, to assess the changes. Measure the dimensions of the new print and compare them to the expected dimensions.
Repeat this process of adjusting the flow rate and printing test models until you achieve the desired print quality. Fine-tuning the flow rate is a crucial step in achieving accurate and visually appealing prints, so take your time and make incremental adjustments as needed.
By adjusting the flow rate, you can optimize the deposition of filament during printing, resulting in improved print quality, enhanced structural stability, and better overall aesthetics.
Now that we have calibrated the flow rate, let’s move on to the next step: fine-tuning the temperature settings.
Fine-tuning the Temperature
Temperature plays a crucial role in achieving optimal print quality. Different filament materials require specific temperature settings to melt and flow properly. By fine-tuning the temperature, you can find the ideal balance between extrusion consistency and avoiding issues such as under-extrusion or stringing.
Here’s a step-by-step guide to help you fine-tune the temperature settings for your 3D printer:
- Start with manufacturer’s recommendations: Consult the manufacturer’s guidelines or the filament packaging for the recommended temperature range. This will give you a baseline to work with.
- Print a temperature tower: Find a pre-designed temperature tower model suitable for your filament type. This model has multiple sections, each printed at a different temperature.
- Observe print quality: Examine the various sections of the temperature tower print to assess the quality at different temperatures. Look for signs of over or under-extrusion, stringing, or poor layer adhesion.
- Identify optimal temperature: Based on the visual inspection of the temperature tower, identify the section that demonstrates the best print quality. This section represents the optimal temperature for your specific filament.
- Adjust temperature settings: Adjust the temperature settings in your slicer software or printer firmware to match the optimal temperature determined from the temperature tower print. Make small adjustments and test them to find the perfect temperature setting.
Fine-tuning the temperature requires patience and iterative testing. It’s important to make incremental adjustments and retest to achieve the desired print quality. Keep in mind that adjusting the temperature may also affect other aspects of the print, such as layer adhesion, bridging, and overall print speed.
By finding the ideal temperature for your filament, you can ensure proper flow, reduce the risk of clogs or jams, and achieve clean and well-defined prints. Keep experimenting with different temperatures to optimize your print quality further.
Now that we have fine-tuned the temperature settings, let’s move on to the next step: calibrating the print speed.
Calibrating the Print Speed
Print speed plays a critical role in balancing the time it takes to complete a print and maintaining print quality. Calibrating the print speed allows you to find the optimal balance between faster print times and ensuring that the print quality remains uncompromised.
To calibrate the print speed for your 3D printer, follow these steps:
- Start with default settings: Begin by printing a standard test model using the default print speed settings provided by your slicer software or printer firmware.
- Assess print quality: Examine the printed model for any signs of issues such as ringing, layer shifting, or poor surface finish. Take note of any areas where the print quality is compromised.
- Adjust print speed: Using your slicer software or printer firmware, make incremental adjustments to the print speed and re-print the test model. Gradually increase or decrease the speed and observe how it affects the overall print quality.
- Find the optimal print speed: Through a process of trial and error, identify the print speed that achieves the best balance between speed and quality. This speed should minimize any print issues while allowing for faster print times.
During the calibration process, it’s important to consider the specific characteristics of your printer and the filament being used. Different printers and filaments have varying speed limits and may require different settings to achieve the optimal print quality.
By calibrating the print speed, you can tailor the settings to your specific printer and filament combination, resulting in smoother prints, reduced print time, and overall improved print quality.
Now that we have calibrated the print speed, it’s time to move on to the next step: testing and assessing print quality.
Testing and Assessing Print Quality
After calibrating various aspects of your 3D printer, it’s essential to test and assess the print quality to ensure that your calibration efforts have been successful. Testing and evaluating print quality allows you to identify any remaining issues and make further adjustments if necessary.
Here are some steps to help you test and assess the print quality of your 3D printer:
- Print test models: Use a variety of test models that are specifically designed to evaluate different aspects of print quality, such as dimensional accuracy, overhangs, bridging, and fine details. Choose models that align with your typical printing needs.
- Evaluate layer adhesion: Inspect the printed models for signs of weak layer adhesion. Gently try to separate the individual layers to check how well they adhere to each other.
- Check dimensional accuracy: Use precision calipers or rulers to measure the dimensions of the printed models. Compare these measurements with the expected dimensions to assess the accuracy of your printer’s output.
- Examine surface finish: Analyze the surface quality of the printed models. Look for signs of roughness, layer lines, or other imperfections that may affect the overall aesthetics.
- Assess overhangs and bridging: Evaluate how well your printer handles overhangs and bridging sections in the test models. Check for drooping, sagging, or other issues that may indicate poor performance in these areas.
- Inspect fine details: Pay close attention to intricate and fine details in the printed models. Check for any missing or poorly defined elements that may indicate issues with the printer’s resolution or extrusion settings.
Based on your observations from the print quality tests, make any necessary adjustments to your printer settings. Fine-tuning specific parameters such as temperature, flow rate, or print speed may be required to address any remaining issues.
By regularly testing and assessing the print quality, you can continually improve your calibration efforts and achieve consistent and high-quality prints. It’s an iterative process, and even small adjustments can make a significant difference in the final output.
Now that we have covered the process of testing and evaluating print quality, let’s move on to the next section, where we discuss some common calibration issues and how to troubleshoot them.
Troubleshooting Common Calibration Issues
Even with proper calibration, it’s not uncommon to encounter some issues during the 3D printing process. However, understanding common calibration issues and knowing how to troubleshoot them can help you overcome these challenges and improve your overall print quality.
Here are some common calibration issues and their potential solutions:
- Under-Extrusion: If you notice that the layers of your print have gaps or are not fully connected, it may indicate under-extrusion. To address this, check your filament diameter setting and ensure it matches your actual filament diameter. Additionally, check for clogs or partial blockages in the nozzle and clean it if necessary. Finally, consider increasing the flow rate slightly to ensure proper filament flow.
- Over-Extrusion: Over-extrusion occurs when there is an excess amount of filament being deposited, resulting in blobs, rough surfaces, and poor detail definition. To tackle this issue, try reducing the flow rate to decrease the amount of filament being extruded. You can also adjust the nozzle temperature to achieve better flow control.
- Bed Adhesion Problems: If your prints struggle to adhere to the bed or have warping issues, it may indicate improper bed leveling or inadequate bed surface preparation. Re-level your bed carefully, ensuring that the nozzle is at the correct height from the bed. Additionally, consider using adhesive aids like hairspray or a printing surface with better adhesion properties, such as a heated bed or a specialized print surface like PEI or BuildTak.
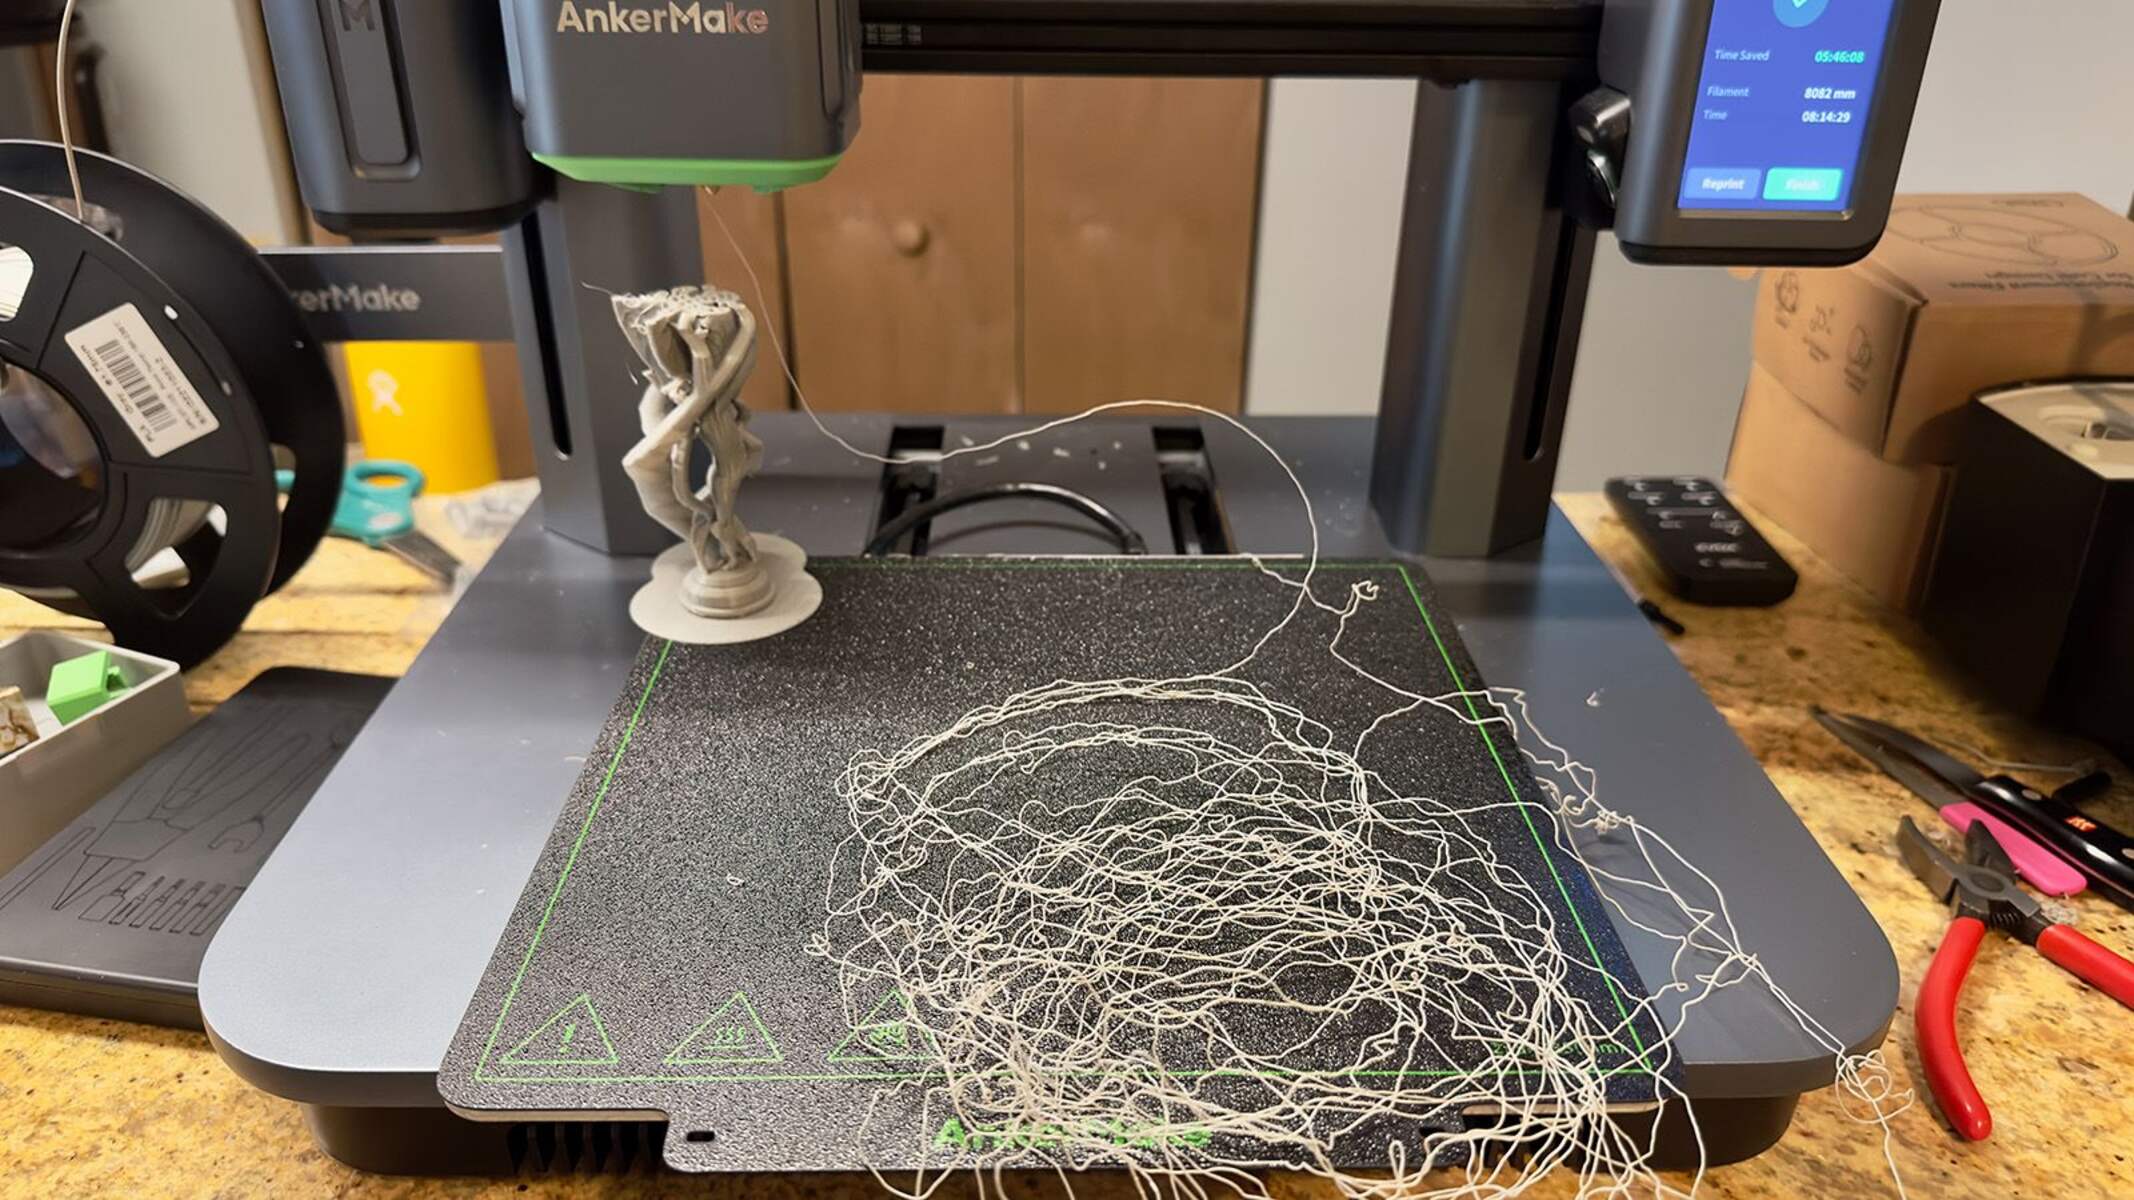
- Stringing: Stringing occurs when thin strands or hairs of filament are left behind between different parts of your print. To minimize stringing, try lowering the print temperature to reduce the amount of oozing filament. Adjusting the retraction settings in your slicing software can also help by pulling back the filament when moving between different parts of the print.
- Poor Surface Finish: If your prints have a rough or uneven surface finish, it may be due to issues such as improper filament flow or excessive layer height. Check that your extruder steps/mm and flow rate are properly calibrated. Additionally, lowering the layer height and adjusting the print speed can help achieve a smoother surface finish.
It’s important to note that troubleshooting calibration issues may require a combination of adjustments to various settings. Keep in mind that every printer is unique, and finding the right balance may require some experimentation and iteration.
By understanding and addressing these common calibration issues, you can enhance your 3D printing experience and achieve better and more consistent print results.
Now that we have covered troubleshooting common calibration issues, let’s summarize the key points and conclude our exploration of 3D printer calibration.
Conclusion
Calibrating a 3D printer is a crucial step towards achieving accurate and high-quality prints. By leveling the print bed, calibrating the extruder steps/mm, adjusting the flow rate, fine-tuning the temperature, calibrating the print speed, and testing and assessing print quality, you can optimize your printer’s performance and produce outstanding prints.
Through the calibration process, you gain a deeper understanding of your printer’s capabilities and how various settings impact print quality. It allows you to fine-tune parameters to match your specific filament and printing needs, resulting in consistent and reliable prints.
Remember, calibration is an iterative process. It requires patience, experimentation, and a willingness to make adjustments based on test prints and observations. No two printers are exactly alike, and finding the optimal settings for your specific setup might take time and practice.
By mastering the art of calibration, you can overcome common issues such as under-extrusion, over-extrusion, bed adhesion problems, stringing, and poor surface finish. Troubleshooting these issues and making the necessary adjustments will enable you to achieve remarkable print quality and push the boundaries of your 3D printing capabilities.
So, embrace the process of calibration and continue to refine your printer’s settings. With each calibration iteration, you’ll gain confidence, experience, and a deeper understanding of the intricacies of 3D printing. Let your creativity flow and enjoy the journey of bringing your ideas to life! Happy printing!