Introduction
Welcome to the exciting world of 3D printing, where technology has revolutionized the way we create objects and bring our ideas to life. In recent years, 3D printers have become increasingly sophisticated, allowing us to manufacture complex and intricate designs with ease. One fascinating application of 3D printing is the creation of cars. Imagine being able to design and construct your own vehicle from scratch, tailored to your specific needs and preferences. With a 3D printer, this dream can become a reality.
Creating a car with a 3D printer is a challenging yet rewarding process that requires careful planning and execution. It involves selecting the right printer, sourcing car models and blueprints, preparing the printer, choosing suitable materials, printing the car parts, and finally assembling the vehicle. In this article, we will guide you through each step of the process, providing you with valuable insights and tips to help you successfully make a car with a 3D printer.
Before we dive into the specifics, it’s important to note that 3D printing a car is a complex and time-consuming endeavor. It requires a certain level of technical proficiency and access to specialized equipment. However, with the right knowledge and determination, you can overcome the challenges and embark on a truly unique and fulfilling project.
In the following sections, we will discuss the key factors to consider when choosing a 3D printer for car making, how to find car models and blueprints for printing, the necessary preparations for the printing process, the materials and filaments suitable for car printing, the steps involved in printing the car parts, post-printing techniques for sanding, painting, and finishing, the crucial process of assembling the printed parts, and troubleshooting common challenges that may arise during the project.
So, whether you are an experienced 3D printing enthusiast or a beginner taking on a new challenge, get ready to embark on an exciting journey of car making with a 3D printer. Let’s dive in and explore the world of 3D printing and automotive innovation!
Choosing the Right 3D Printer for Car Making
When it comes to making a car with a 3D printer, choosing the right printer is crucial. There are several factors to consider that will impact the quality, precision, and speed of your printing process. Here are some key considerations to keep in mind:
- Printing Technology: The first step in selecting a 3D printer is understanding the different printing technologies available. The most common options are FDM (Fused Deposition Modeling) and SLA (Stereolithography). FDM printers use a filament material and are more affordable, while SLA printers use a liquid resin and offer higher resolution. Consider the specific needs of your car project to determine which technology is best suited for your requirements.
- Build Size: Car parts can be large, so it’s essential to choose a printer with a sufficient build volume to accommodate your design. Consider the dimensions of the car parts you intend to print and ensure that the printer can accommodate them without any issues.
- Print Speed: Time is a valuable resource, so it’s important to consider the printing speed of the printer. Keep in mind that larger and more intricate car parts may take longer to print. Evaluate the speed of the printer and find a balance between efficiency and quality.
- Resolution: The level of detail and precision required for car parts may vary based on your specific design. Consider the resolution capabilities of the printer to ensure that it can achieve the level of quality you desire. Higher resolution printers will be able to produce more intricate details.
- Reliability and Durability: Look for a printer known for its reliability and durability. Car projects require long printing hours and consistent performance. Research reviews and user feedback to gauge the printer’s reliability and longevity.
- Cost: Set a budget for your 3D printer and consider the overall cost of ownership, including filament or resin costs, maintenance, and any additional accessories required. It’s important to strike a balance between your budget and the features you require for your car printing project.
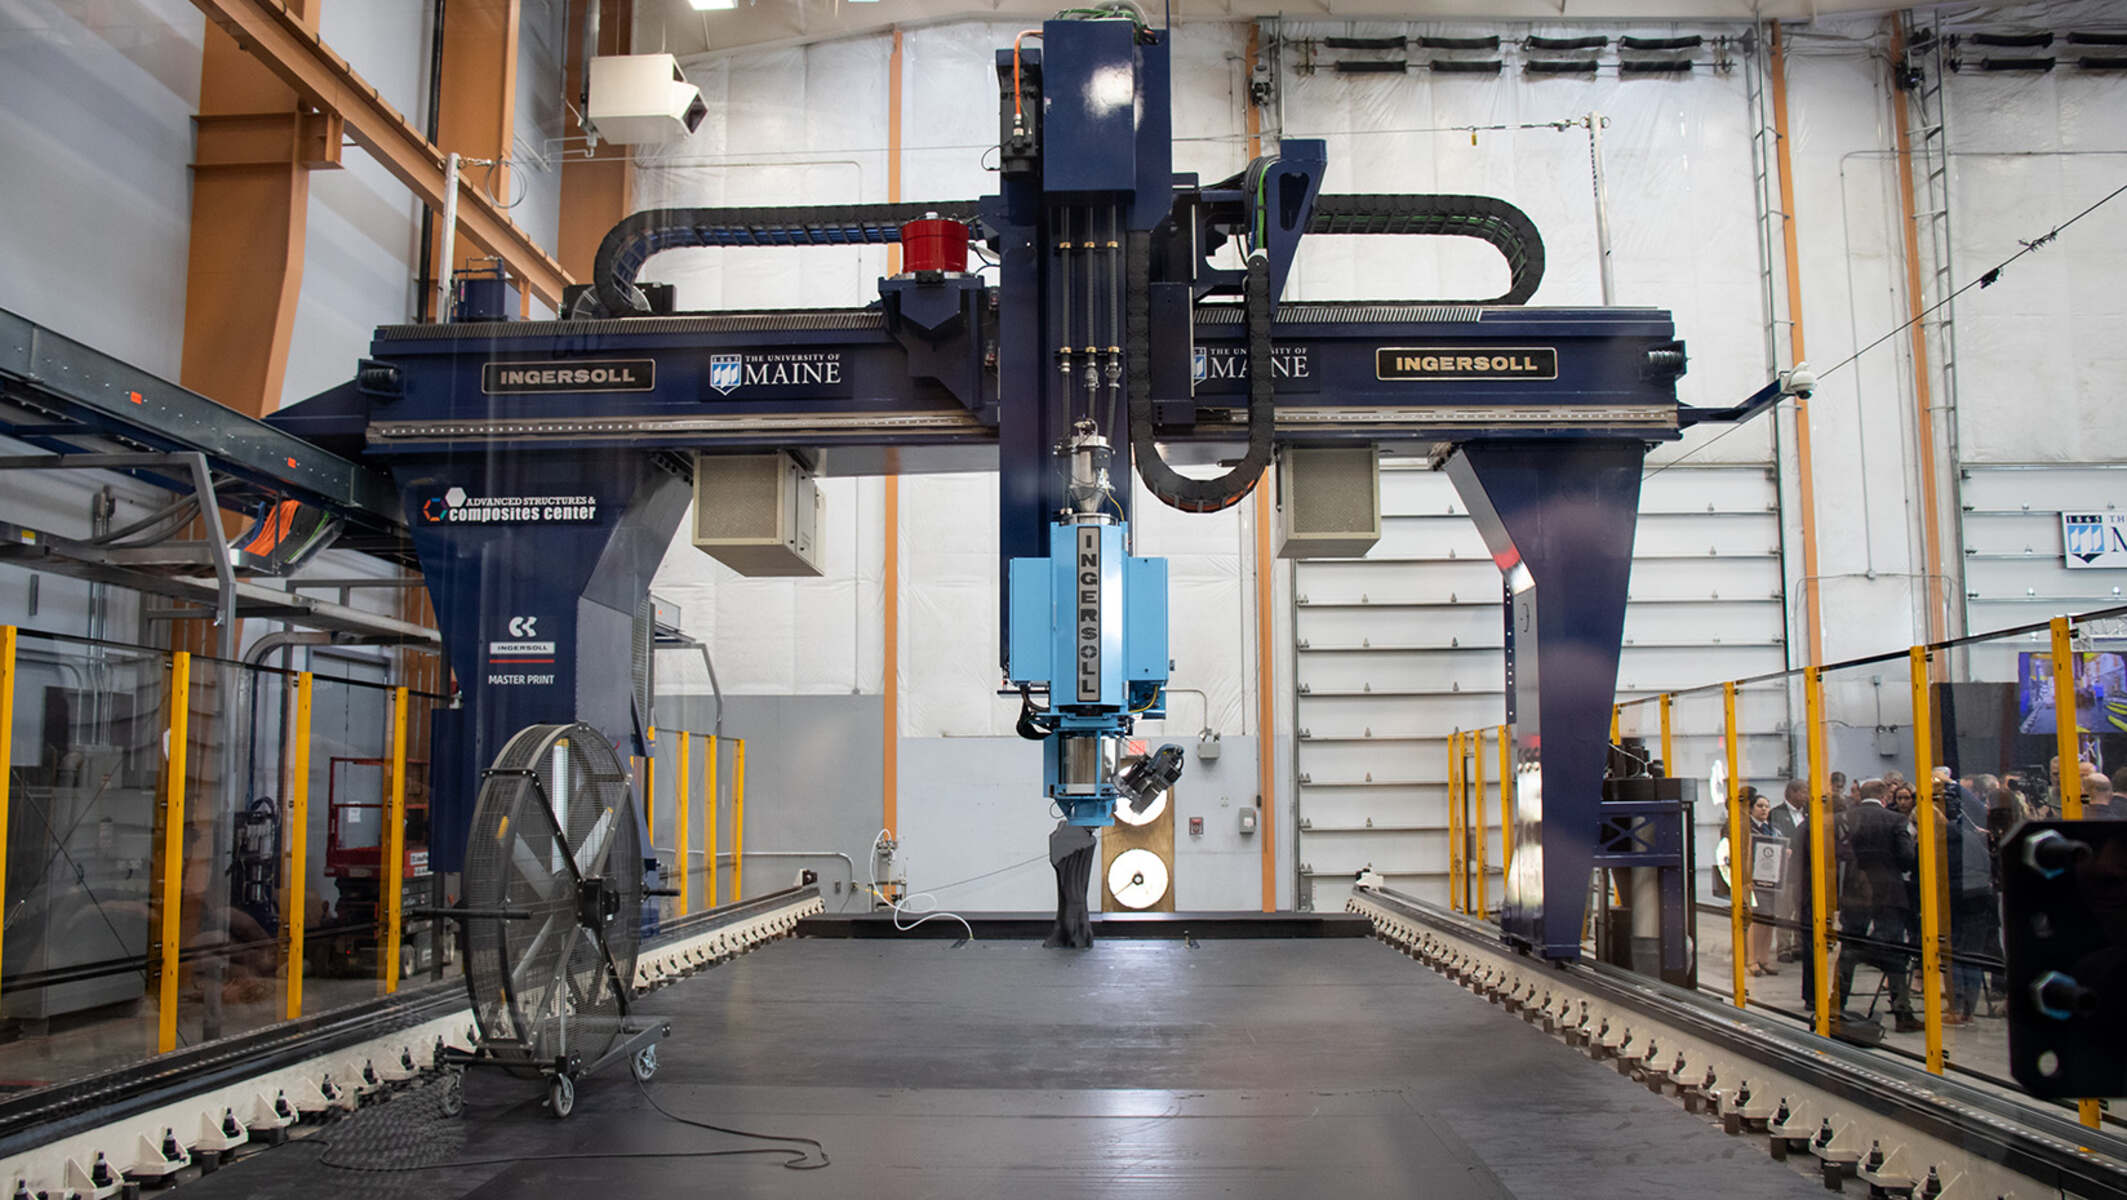
By carefully evaluating these factors, you can select a 3D printer that is optimal for car making. Keep in mind that there are various options available in the market, ranging from affordable consumer-grade printers to professional-grade industrial machines. Assess your needs, research different models, and choose a printer that aligns with your project requirements and budget.
Finding Car Models and Blueprints for Printing
Once you have chosen the right 3D printer, the next step in making a car is finding suitable car models and blueprints to print. There are several resources available that provide access to a wide range of car designs. Here are some methods to help you find the perfect car models for your project:
- Online 3D Model Repositories: There are numerous online platforms dedicated to hosting 3D models for 3D printing. Websites like Thingiverse, MyMiniFactory, and GrabCAD have vast collections of car models that you can freely download and print. These platforms often allow users to upload their designs, so you can find a variety of car models with different levels of intricacy and styles.
- Car Manufacturer Websites: Many car manufacturers release official 3D models or blueprints of their vehicles for promotional purposes or as part of open-source initiatives. Check the websites of car manufacturers you are interested in or reach out to them directly to inquire about the availability of 3D models for printing.
- Online Communities and Forums: Engaging with online 3D printing communities and forums can be a valuable way to find car models for printing. These communities often have dedicated sections or threads where users share and discuss 3D models, including car designs. Participating in these communities can provide you with unique insights, tips, and access to exclusive designs.
- 3D Scanning: If you have access to a 3D scanner, you can create your own models by scanning existing cars or car parts. This method allows you to replicate real-world vehicles and customize them according to your preferences. Just ensure that you have the necessary permissions and legal rights to scan and replicate the cars you choose.
- Custom Design: If you have expertise in 3D modeling, you can create your own car designs from scratch using software like Blender, Fusion 360, or SolidWorks. This approach offers complete creative freedom and allows you to create unique and personalized car models.
It’s important to note that when downloading or using 3D models from online sources, you should always check the licensing agreements and ensure that you have permission to use the designs for your intended purpose, including commercial use if applicable.
By exploring these methods and resources, you can find a vast array of car models and blueprints for your 3D printing project. Whether you choose to download existing designs or create your own, the availability of these resources opens up endless possibilities for your car making journey.
Preparing the 3D Printer for Car Printing
Before you start printing the car parts, it is crucial to properly prepare your 3D printer. Taking the time to ensure that your printer is calibrated, clean, and in optimal condition will greatly contribute to the success of your car printing project. Here are the key steps to prepare your 3D printer for car printing:
- Calibration: Calibration is essential to ensure that your printer is correctly aligned and ready to produce accurate and precise prints. Follow the manufacturer’s instructions and perform the necessary calibration procedures for your specific printer model. This includes calibrating the bed level, nozzle height, and ensuring the proper alignment of all moving parts.
- Printer Maintenance: Regular maintenance will help keep your 3D printer functioning smoothly. Clean the nozzle regularly to remove any debris or residue that could affect print quality. Lubricate moving parts as per the manufacturer’s recommendations to reduce friction and ensure proper operation.
- Bed Adhesion: Achieving good bed adhesion is crucial for successful prints. Ensure that the print bed is clean and free from any dust or residue. Depending on your printer and materials used, you may need to apply adhesive solutions like glue stick, hairspray, or special adhesives to improve adhesion.
- Filament or Resin Preparations: If you are using a filament-based 3D printer, properly load and prepare the filament as per the manufacturer’s instructions. Ensure that the filament is securely inserted into the extruder and that it is feeding smoothly. For resin-based printers, ensure that you have enough resin and that it is properly mixed and degassed if required.
- Slicing Software: Use slicing software to prepare your 3D model for printing. Import your car model into the software and adjust the necessary settings, such as layer height, print speed, infill density, and support structures. Generate the sliced file that can be read by your printer.
- Test Prints: Before diving into printing the car parts, it’s advisable to start with some test prints to fine-tune the settings and ensure that everything is working as expected. This will help identify any potential issues and make necessary adjustments before moving on to the more critical car parts.
Remember to consult the user manual or seek assistance from the manufacturer or online communities if you encounter any specific issues or have questions about preparing your 3D printer. Taking the time to properly prepare your printer will significantly contribute to the quality and success of your car printing venture.
Materials and Filaments for Car Printing
Choosing the right materials and filaments is a crucial aspect of car printing. The materials you select will determine the durability, strength, and overall appearance of your printed car parts. Here are some common materials and filaments used in car printing:
- ABS (Acrylonitrile Butadiene Styrene): ABS is a widely used thermoplastic known for its toughness and impact resistance. It offers good heat resistance and is suitable for functional car parts that require strength and durability. However, it can be prone to warping during printing, so proper bed adhesion and temperature control are important.
- PLA (Polylactic Acid): PLA is another popular material that is easy to print with and environmentally friendly. It offers good strength and a wide range of colors, making it suitable for car parts that don’t require heavy stress or extreme temperatures. PLA is biodegradable and has a low printing odor.
- PETG (Polyethylene Terephthalate Glycol): PETG combines the durability of ABS with the ease of printing of PLA. It has high impact resistance, is less prone to warping, and has good layer adhesion. PETG is suitable for functional car parts that require strength and flexibility.
- Nylon: Nylon is a strong and flexible material ideal for car parts that require high impact resistance and durability. It has good layer adhesion and can withstand harsh conditions. Nylon can be more challenging to print with due to its high printing temperatures and moisture sensitivity.
- Carbon Fiber Reinforced Filaments: Filaments infused with carbon fiber offer higher stiffness, strength, and heat resistance. These filaments are ideal for producing lightweight car parts with high mechanical properties, such as structural components.
It’s important to note that different printers may have specific filament requirements, so ensure that the filament you choose is compatible with your printer. Additionally, consider the specific needs of your car parts – if they require high strength, impact resistance, or specific properties, select an appropriate material accordingly.
When choosing filaments, consider the diameter (typically 1.75mm or 2.85mm) and the color options available. Some manufacturers offer specialty filaments with unique properties, such as metallic finishes or glow-in-the-dark effects, which can add a personalized touch to your car prints.
Remember to always follow the manufacturer’s recommendations for printing settings and temperatures specific to the chosen materials. Conducting test prints with different filaments and adjusting the settings as needed will help you achieve the desired results for your car printing project.
Printing the Car Parts
Once you have prepared your 3D printer and chosen the appropriate materials, it’s time to start printing the car parts. This is the phase where your designs come to life, layer by layer. Here are the essential steps for printing the car parts:
- Slicing and Printing Setup: Import your 3D model into the slicing software and adjust the necessary settings, such as layer height, print speed, infill density, and support structures. Generate the sliced file that is compatible with your printer. Prepare the printer by ensuring proper filament insertion, bed adhesion, and other printer-specific settings.
- Monitor the Print: Once the printing process starts, closely monitor the initial layers to ensure proper adhesion and avoid any early issues. Pay attention to the first few layers, as they provide the foundation for the rest of the print. Make sure the printer is running smoothly and address any problems or errors that arise promptly.
- Support Structures: Depending on the design and complexity of the car parts, you may need to use support structures. These temporary structures are printed alongside the car parts to provide stability and prevent sagging or collapsing. However, they need to be properly removed after printing, which may require additional post-processing steps.
- Optimize Printing Speed: Adjust the print speed based on the complexity of the car parts. Generally, slower print speeds result in better accuracy and surface finish. However, keep in mind that slower speeds can significantly increase the printing time. Find a balance that meets your quality requirements while considering the project timeline.
- Print Quality Checks: Conduct regular quality checks during the printing process to ensure that the parts are being printed correctly. Inspect for any layer shifting, warping, or other defects. Address any issues immediately to avoid wasting time and materials on faulty prints.
- Batch Printing: Depending on the size and quantity of car parts, consider batch printing multiple parts together to optimize productivity. This can help to reduce the overall printing time and increase efficiency. However, ensure that there is enough spacing between parts to prevent interference or collisions during printing.
- Patience and Timeliness: Larger and more complex car parts may require longer print times. Be patient and allow the printer to complete the job without interruption. Ensure that you have dedicated time set aside for the printing process to avoid interrupting prints midway. Promptly remove completed parts from the print bed to make space for subsequent prints.
Remember, the printing process can take a significant amount of time, especially for larger car parts or intricate designs. Be prepared to dedicate sufficient time and monitor the progress regularly to ensure a successful print. Patience, attention to detail, and a well-adjusted printer will yield high-quality car parts ready for post-printing finishing and assembly.
Post-Printing Steps: Sanding, Painting, and Finishing Techniques
Once the car parts are printed, the post-printing steps are crucial to achieving a professional and polished look for your project. These steps involve sanding, painting, and applying finishing techniques to enhance the appearance and performance of the printed car parts. Here is a breakdown of the post-printing process:
- Sanding: Start by inspecting the printed parts for any imperfections such as layer lines, rough edges, or excess material. Use sandpaper or sanding blocks with progressively finer grits to smooth out the surfaces. Start with a coarse grit to remove larger imperfections and gradually move to finer grits for a smoother finish.
- Filling and Priming: If there are any gaps or small defects, use a filler material such as epoxy putty or filler primer to fill them in. Then, apply a primer layer to create a smooth and even surface for painting. Primer helps paint adhere better and provides a consistent base color.
- Painting: Choose a suitable paint for your car parts, considering factors such as durability, finish, and compatibility with the material. Spray paints or airbrushing are often used for a smooth and professional look. Apply thin coats of paint, allowing each coat to dry before adding another. Prioritize even coverage and take your time to achieve a high-quality finish.
- Finishing Techniques: Depending on your desired outcome, additional finishing techniques can be applied. This may include clear coating for added protection and gloss, weathering techniques to create a worn or aged appearance, or applying decals and stickers for a customized look. Experiment with different techniques to achieve the desired aesthetic for your car parts.
- Assembly and Integration: Once the post-printing steps are complete and the parts have fully dried, it’s time to assemble them. Follow the design and blueprint guidelines to ensure proper fit and alignment. If necessary, use screws, adhesives, or other joining methods to securely connect the printed parts. Take your time during assembly to ensure a precise and sturdy construction.
While post-printing steps can be time-consuming, they significantly enhance the final appearance and functionality of your printed car parts. Don’t rush through these steps and allocate sufficient time for each process. Practice different techniques on test prints to gain confidence and refine your skills before applying them to the final parts.
Remember, post-printing steps require patience, attention to detail, and a focus on craftsmanship. Aim to achieve a professional finish that showcases the quality and effort put into your 3D-printed car project. With proper post-printing techniques, your printed car parts will be ready for the next stage of the assembly process.
Assembling the Printed Car Parts
Once the individual car parts have been printed, post-processed, and prepared, the next crucial step is assembling them together to create the final 3D-printed car. Proper assembly ensures that all the components fit together seamlessly and function as intended. Here are the key steps to follow when assembling the printed car parts:
- Review the Design and Blueprint: Before starting the assembly process, thoroughly review the design and blueprint of the car. Familiarize yourself with the intended arrangement and connections between the various parts. This will help ensure that you assemble the components correctly.
- Clean and Prepare the Parts: Before assembly, make sure to remove any remaining support structures, clean off any residue, and sand down any rough edges or imperfections. This will help the parts fit together smoothly without any obstructions.
- Organize and Arrange the Parts: Lay out all the printed parts in an organized manner to help visualize the assembly process. Group similar components together and line them up in the order specified by the design or blueprint.
- Test Fit the Parts: Before permanently joining the parts, perform test fittings to ensure proper alignment and fit. Make any necessary adjustments or modifications if certain parts require slight trimming or reshaping to ensure a precise fit.
- Use Appropriate Joining Methods: Depending on the design and intended function of the car parts, use suitable joining methods such as screws, bolts, adhesive, or snap-fit connections to secure the components together. Follow any guidelines or recommendations provided by the design or blueprint.
- Apply Reinforcements, if Needed: In areas where additional strength or stability is required, consider reinforcing the connections with additional hardware or structural components. This may involve inserting metal rods or brackets to enhance the overall strength and durability of the assembly.
- Test and Verify Functionality: Once the parts are securely joined, perform functional tests to ensure that the assembled car can operate as intended. Check the moving parts, mechanisms, and other functional aspects to ensure smooth operation and proper alignment.
- Make Adjustments and Fine-Tune: If any issues or misalignments are identified during the test, make necessary adjustments and fine-tune the assembly. This could involve adjusting screws or connections, sanding or filing down certain areas, or adding additional support structures.
Proper organization, attention to detail, and patience are key during the assembly process. Take your time to ensure each part fits together accurately and that the final assembly is robust and functional. Following the design or blueprint, along with any additional guidelines, will help you achieve a successful outcome.
Once the printed car parts are effectively assembled, the project will start to take shape and resemble the envisioned 3D-printed car. Completing the assembly stage sets the foundation for the final steps, such as troubleshooting and fine-tuning, before you can finally showcase your remarkable 3D-printed car achievement.
Troubleshooting Common Challenges in Car Printing
Car printing with a 3D printer can sometimes present challenges that may affect the quality of the printed parts. However, with some troubleshooting techniques and problem-solving skills, you can overcome these hurdles. Here are some common challenges you may encounter during car printing and how to address them:
- Warpage: Warping occurs when the printed parts deform or curl up, usually due to uneven cooling. To minimize warping, ensure proper bed adhesion and consider using a heated bed or enclosure to maintain a stable temperature throughout the printing process. You can also try printing with a brim or raft to increase adhesion and reduce warping at the corners.
- Layer Lines: Layer lines are visible horizontal lines on the printed parts, resulting from the layer-by-layer printing process. To reduce layer lines, try adjusting the layer height to a smaller value for finer resolution. Increasing the number of top and bottom solid layers can also help to fill gaps and make the lines less visible. Consider sanding and post-processing techniques to further smooth the surface.
- Stringing: Stringing occurs when thin strands of filament are left behind between separate printed features. To minimize stringing, adjust the retraction settings in your slicing software to pull the filament back when moving between non-contiguous parts. Increasing travel speed or enabling the “coast” feature can also help reduce stringing by forcing the extrusion to stop slightly before reaching the end point.
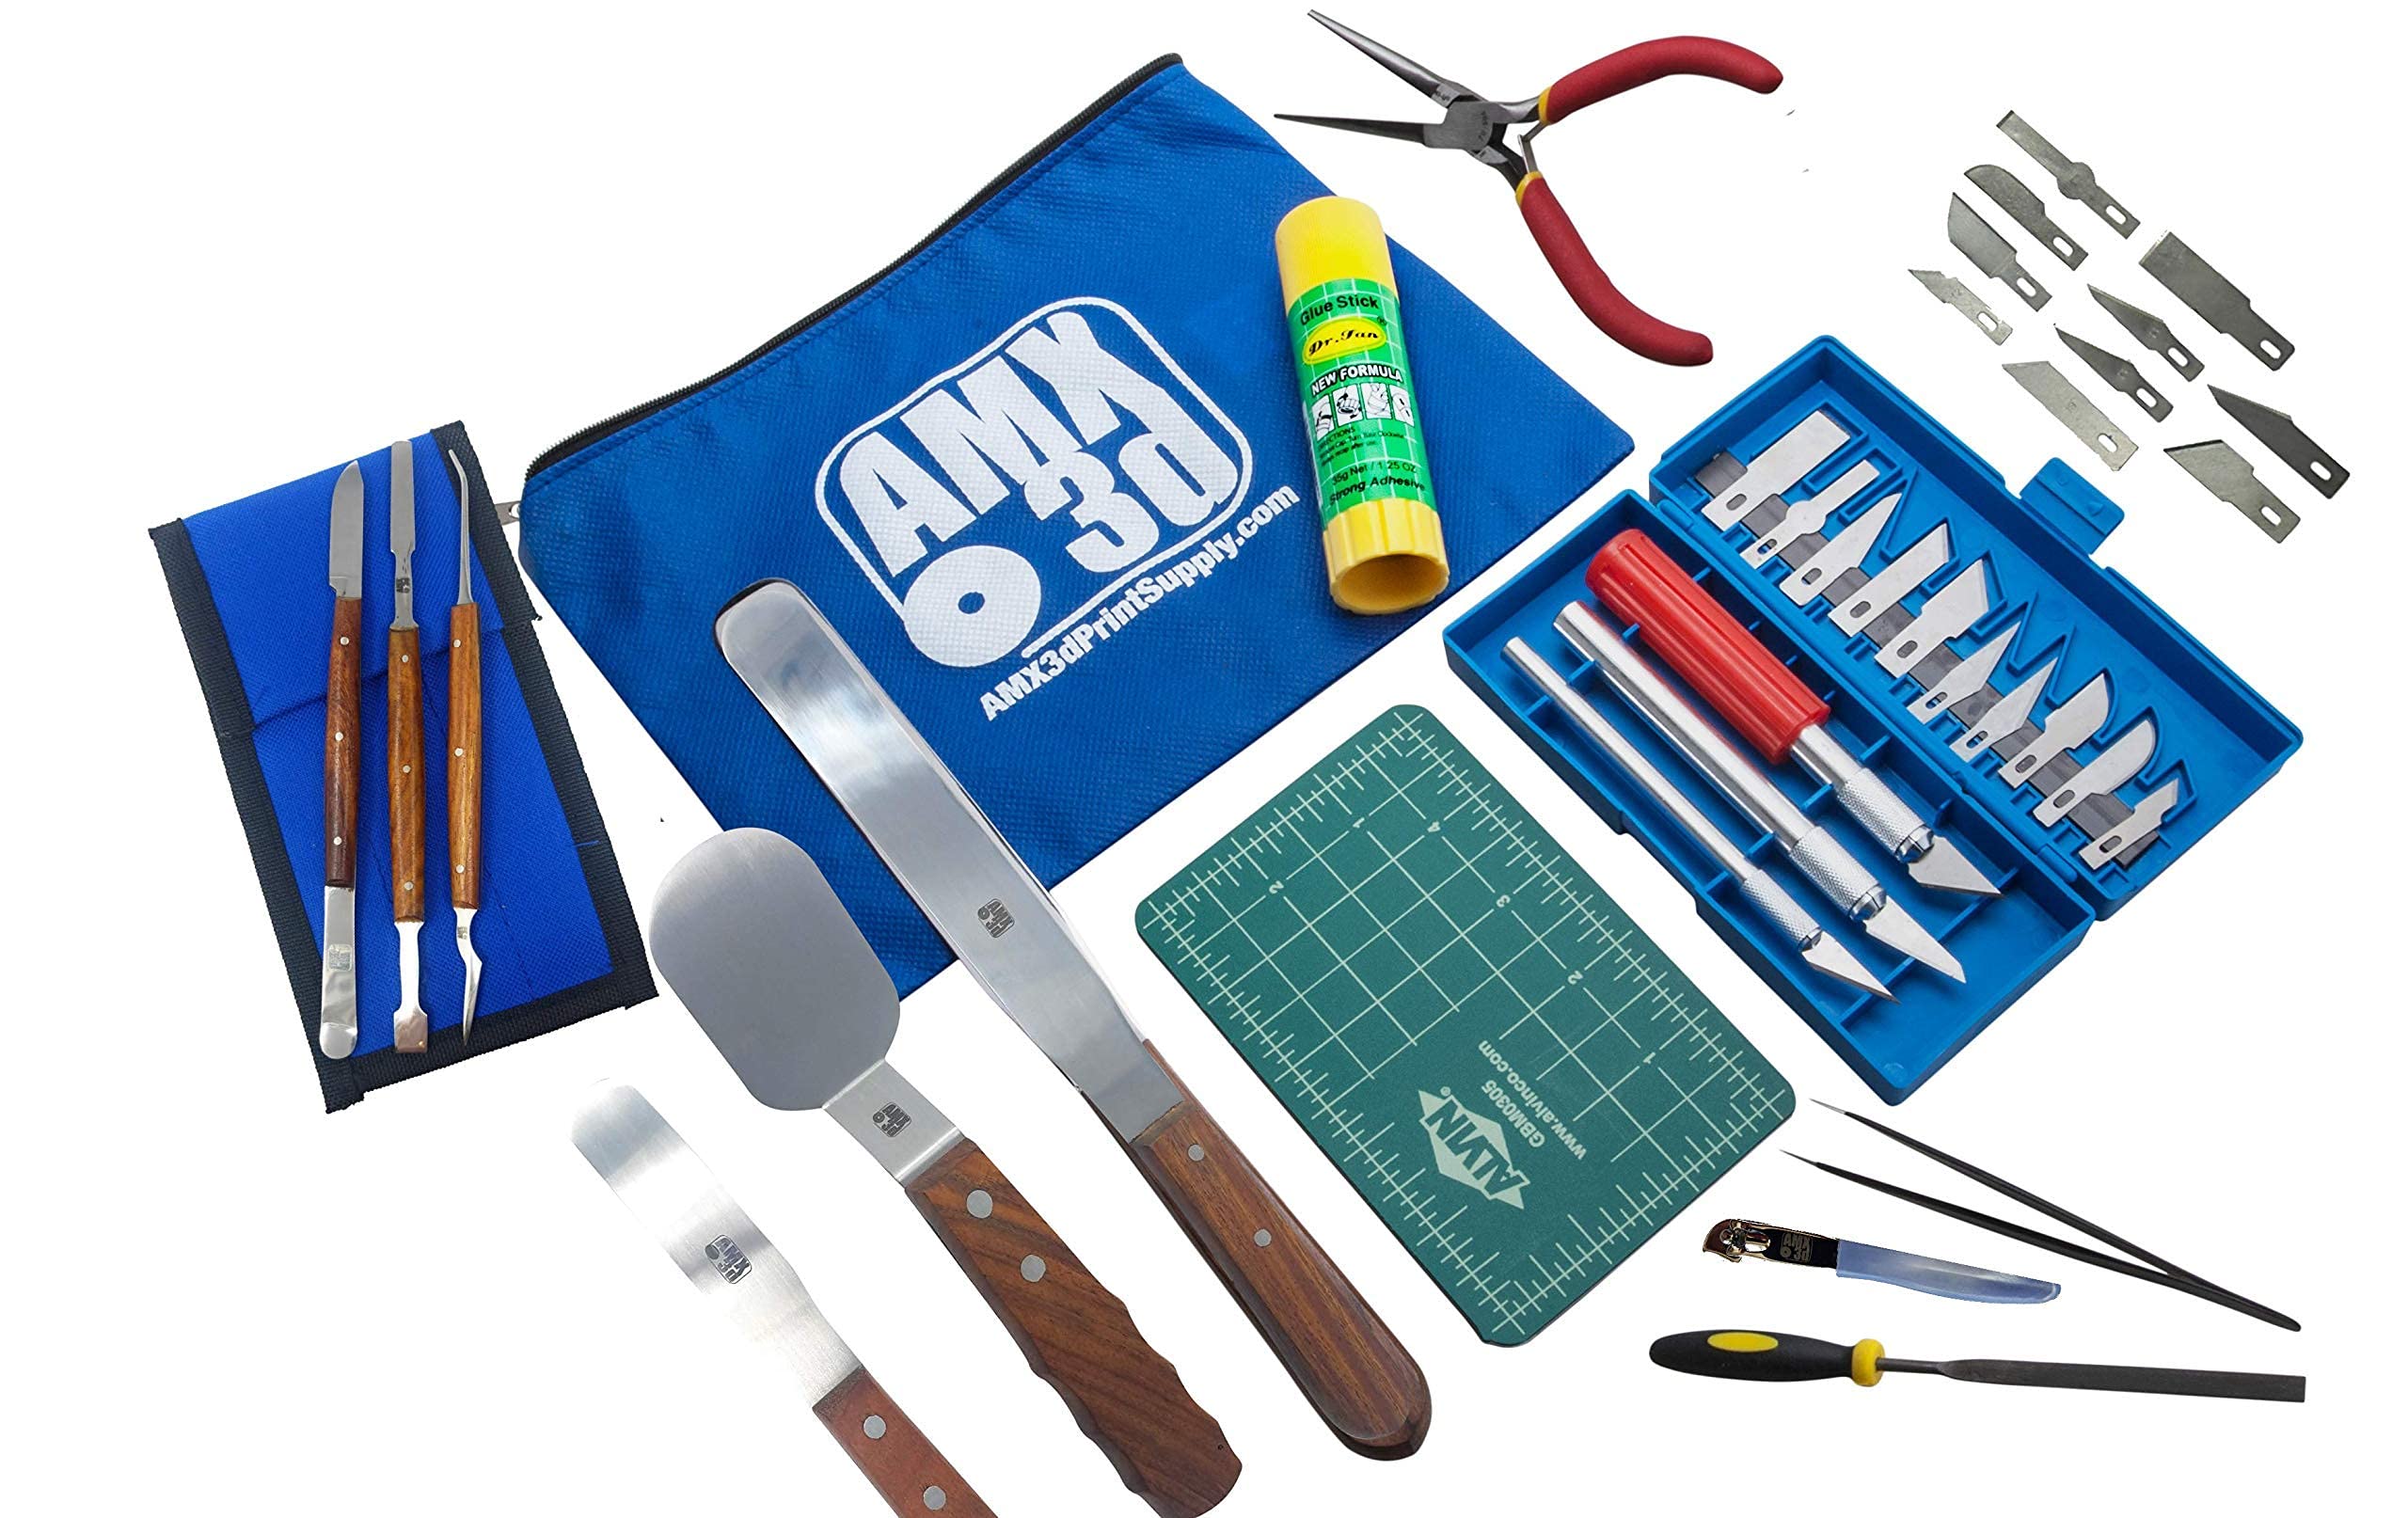
- Support Removal: Removing support structures can be challenging, especially in intricate or hard-to-reach areas. Use appropriate tools such as flush cutters, pliers, or needle-nose tweezers to carefully remove support material. Consider incorporating easily removable support materials or designing the parts with self-supporting structures where possible.
- Printing Errors: Printing errors can occur due to various factors, such as power interruptions, filament jams, or incorrect printer settings. Ensure a stable power supply and troubleshoot any connectivity issues. Check for any obstructions in the extruder or feeder mechanism and ensure proper tension on the filament. Double-check the printer settings and verify that they are correctly configured in your slicing software.
- Model Integrity: If the printed parts are not fitting together properly or are showing structural weaknesses, review the design and ensure that it is suitable for 3D printing. Check for any errors or inconsistencies in the model, such as non-manifold geometry, intersecting or overlapping surfaces, or thin walls. Make necessary adjustments to the design or consider modifying the printing parameters to strengthen the weak areas.
- Print Bed Adhesion: Poor adhesion to the print bed can result in parts detaching or warping during printing. Ensure a clean and level print bed surface. Consider using adhesive solutions like glue stick, hairspray, or specialized adhesives to improve bed adhesion. Adjust the print bed temperature and the printing speed if necessary, and ensure that the filament is properly extruded from the beginning.
It’s important to remain persistent and patient when troubleshooting these challenges. Each issue provides an opportunity to learn and improve your printing process. As you gain experience, you’ll develop a better understanding of your printer’s capabilities and limitations and be able to anticipate and address potential issues more effectively.
Remember to document any troubleshooting steps taken for future reference and seek guidance from online forums, user communities, or the printer manufacturer’s support if you come across persistent or unique challenges. Troubleshooting is an essential part of the 3D printing journey, and overcoming these obstacles will ultimately lead to more successful car prints.
Conclusion
Creating a car with a 3D printer is an exciting and rewarding endeavor. With the advancements in 3D printing technology, it is now possible to bring your own custom-designed car to life. Throughout this article, we have explored the various steps involved in making a car with a 3D printer.
We began by discussing the importance of choosing the right 3D printer for car making and the key factors to consider when selecting one. We then explored different methods to find car models and blueprints for printing, including online repositories and car manufacturer websites. Additionally, we emphasized the significance of properly preparing the 3D printer for the printing process and the materials and filaments suitable for car printing.
Next, we delved into the essential steps of printing the car parts, including slicing, monitoring the print, and troubleshooting common challenges that may arise. We then examined the post-printing steps of sanding, painting, and finishing techniques to achieve a professional and refined look for the printed car parts. Finally, we discussed the crucial stage of assembling the printed car parts and provided insights on troubleshooting techniques for potential issues.
By following the steps outlined in this article and utilizing your creativity, patience, and problem-solving skills, you can successfully create your own 3D-printed car. Remember to continuously learn and seek guidance from online communities and resources to further enhance your skills and overcome any obstacles along the way.
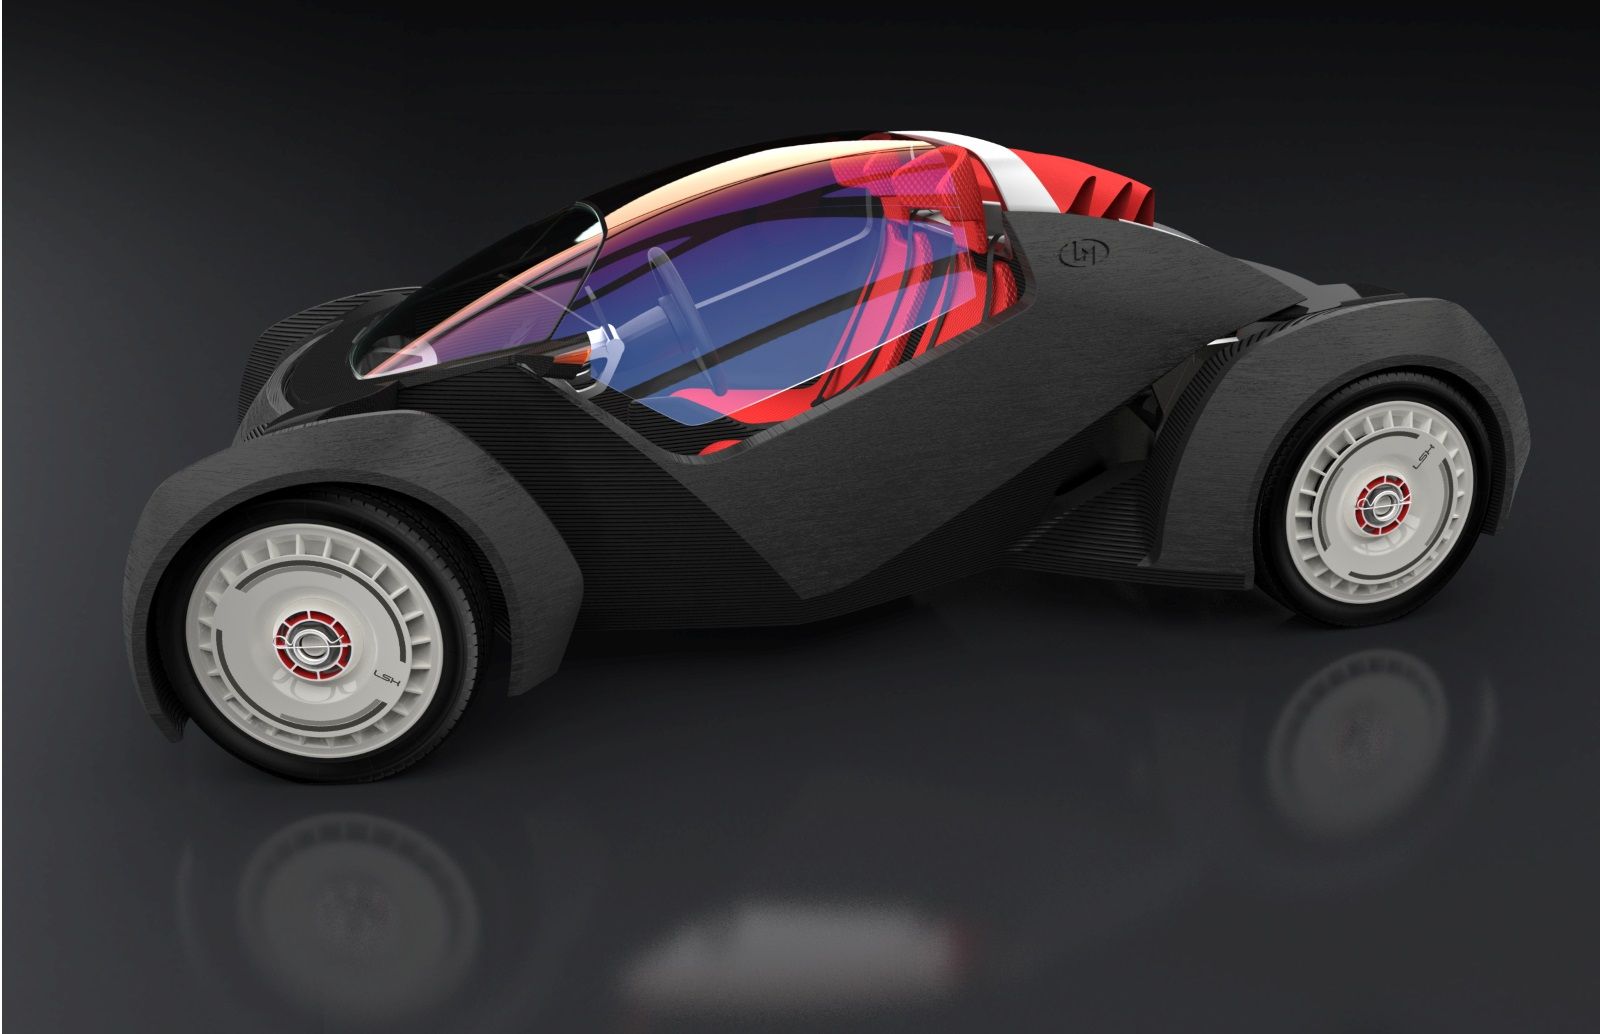
Embarking on a 3D-printed car project offers a unique opportunity for exploration, customization, and innovation. From designing and printing the car parts to assembling and testing the final product, the journey of creating a 3D-printed car is a testament to the endless possibilities and incredible capabilities of 3D printing technology.
So, take the first step, dive into this fascinating world of 3D printing, and let your imagination run wild as you make your very own 3D-printed car a reality!