Introduction
A 3D printer is a fascinating device that has revolutionized the world of manufacturing and prototyping. It allows you to transform digital designs into physical objects by building them layer by layer, using various materials such as plastic, metal, or even food. Understanding the different parts of a 3D printer is essential for achieving high-quality prints and maximizing the machine’s potential.
At its core, a 3D printer consists of several components working together in harmony to create intricate and precise objects. In this article, we will explore the various parts that make up a 3D printer, providing you with a comprehensive understanding of their functions and significance.
From the frame and structure to the software and firmware, every component plays a crucial role in the 3D printing process. Whether you are a novice or an experienced user, knowing the purpose and interplay of these parts will empower you to make informed decisions, troubleshoot issues effectively, and unlock the full capabilities of your 3D printer.
Throughout this article, we will delve into each part of a 3D printer, detailing its function, construction, and importance. So, let’s start exploring the fascinating world of 3D printers by examining the frame and structure, the foundation upon which the printer is built.
Frame and Structure
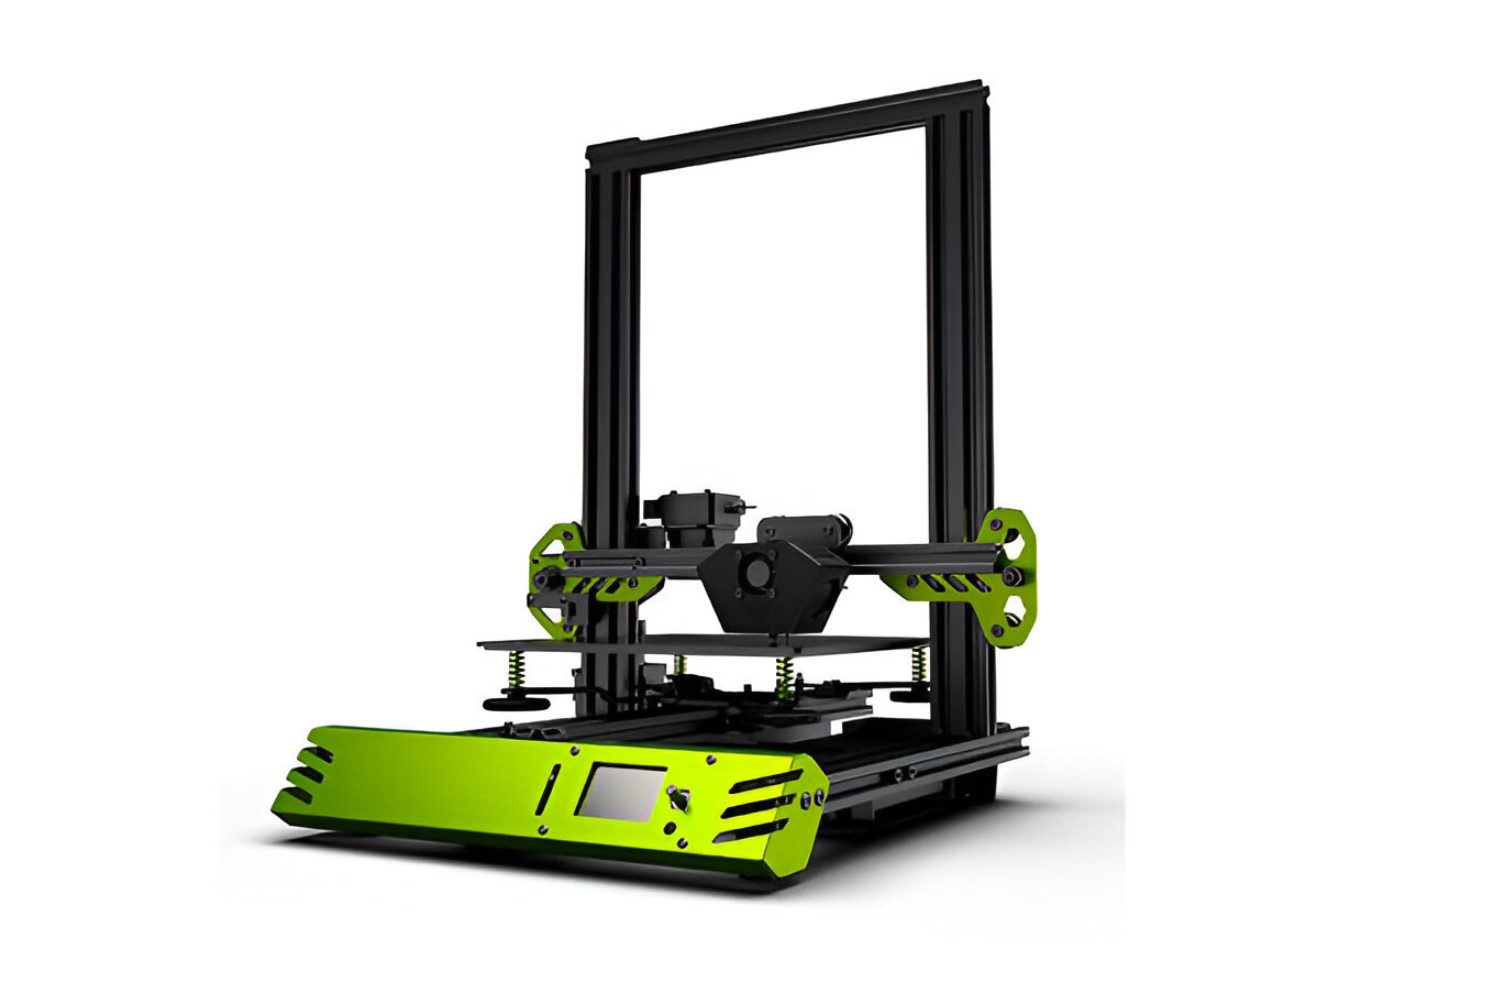
The frame and structure of a 3D printer provide stability and support to the entire machine. It acts as the backbone, ensuring accuracy and smooth operation during the printing process.
The frame is typically made of metal or sturdy plastic, designed to withstand the vibrations and movements generated by the printer’s components. It is essential to have a rigid frame to maintain the printer’s geometry and prevent any distortion that could affect the final print quality.
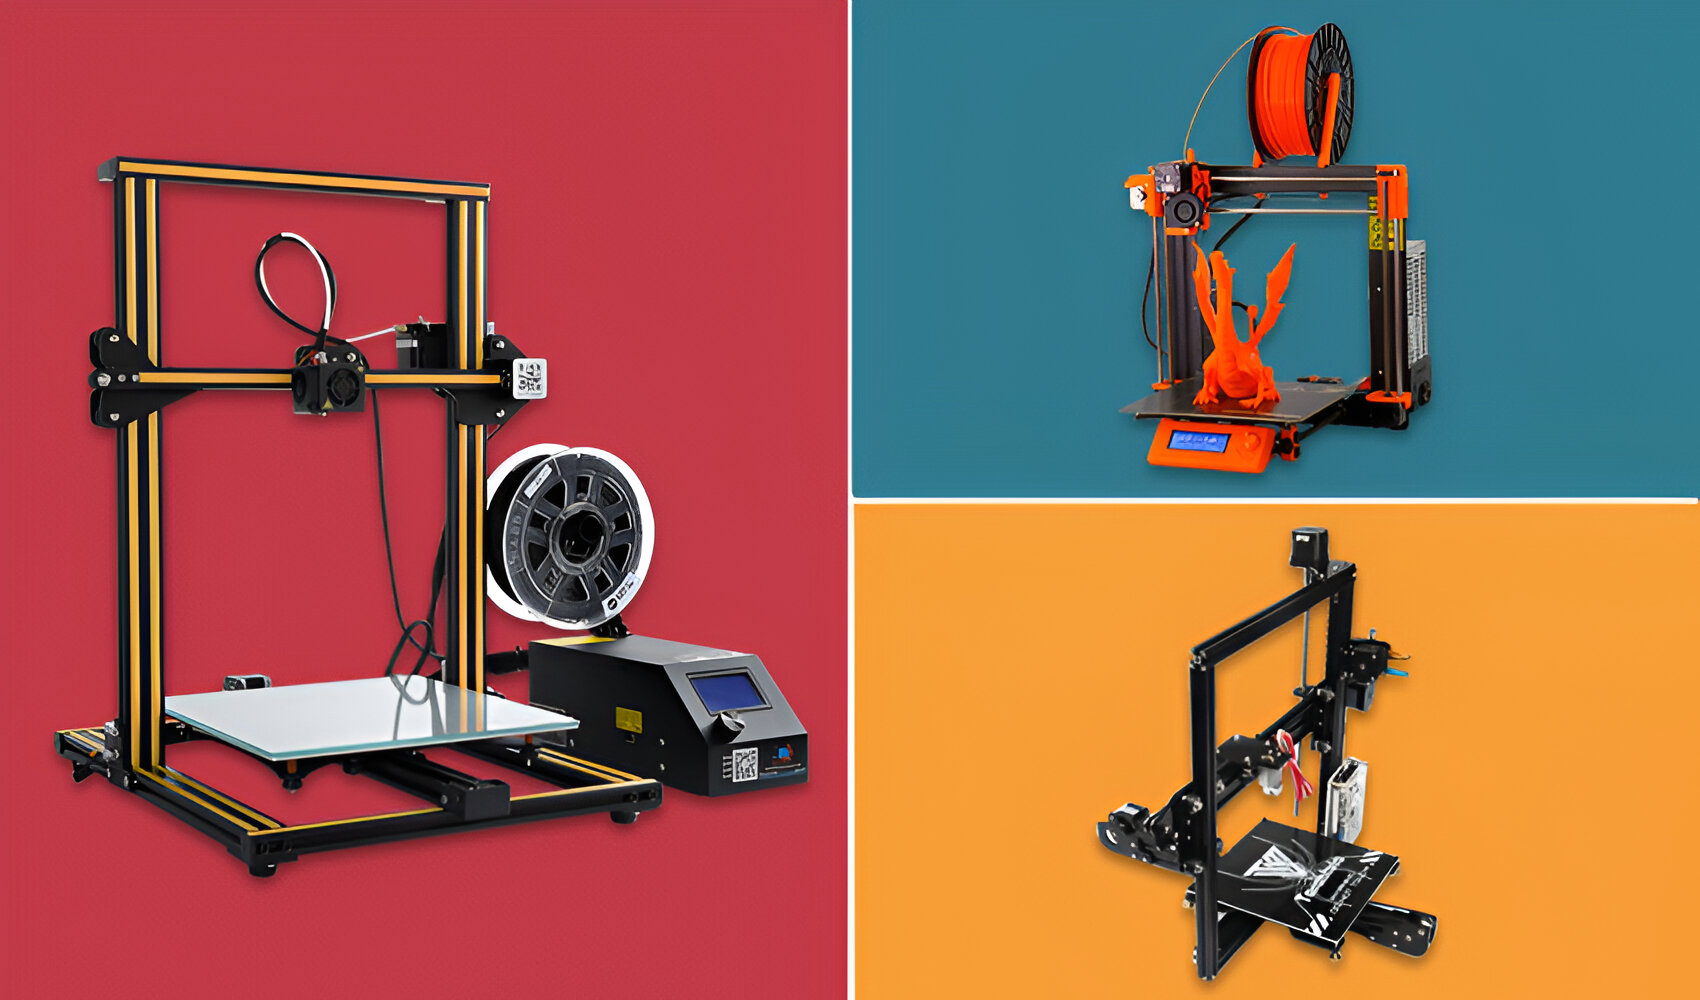
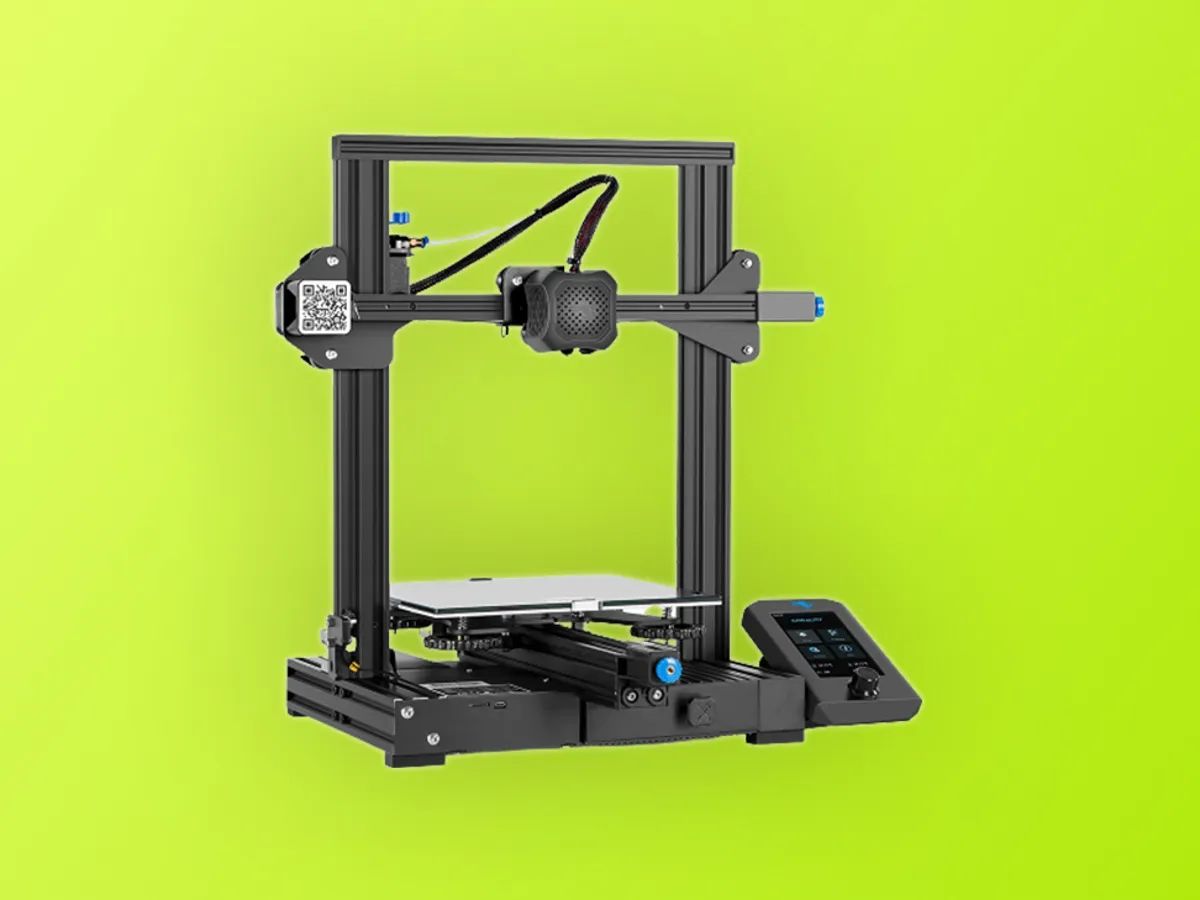
Many 3D printers have an open-frame design, consisting of a base, vertical support columns, and a top crossbar. This structure allows for easy access to the printing area, making it convenient to monitor the progress and make adjustments as needed.
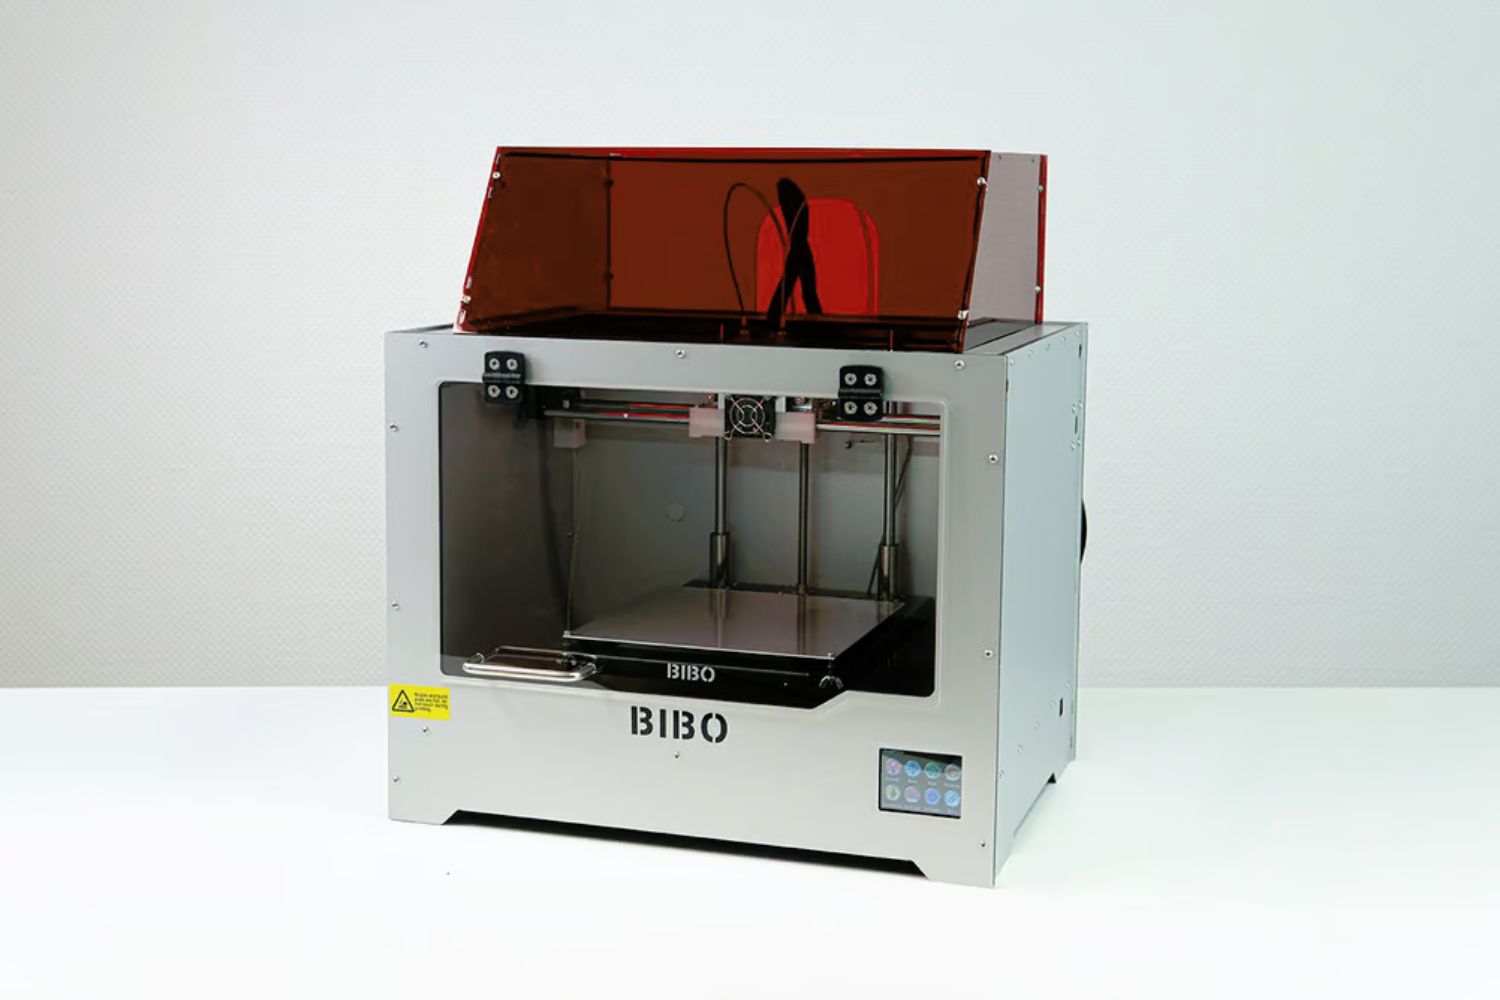
On the other hand, enclosed-frame printers have a complete enclosure around the printing area. This design helps maintain a consistent temperature inside the printer, especially during the printing of materials that are sensitive to temperature fluctuations.
Additionally, some 3D printers may employ a combination of metal and acrylic for their frames, providing a balance between structural integrity and transparency. This allows users to observe the printing process from all angles while still ensuring rigidity.
Overall, a sturdy frame and structure are vital for maintaining the printer’s accuracy and stability. It provides a solid foundation for the other components to perform their functions effectively.
In the next section, we will delve into another essential part of a 3D printer, the print bed or build plate. Its role is crucial in ensuring proper adhesion of the printed object to the surface, providing a solid starting point for a successful print.
Print Bed or Build Plate
The print bed, also known as the build plate, is a fundamental component of a 3D printer. It serves as the foundation upon which the object is printed. The print bed plays a vital role in ensuring proper adhesion of the printed object to the surface, preventing warping, and facilitating successful printing.
The material and surface texture of the print bed greatly influence the adhesion between the bed and the printed object. Commonly used materials for the print bed include borosilicate glass, aluminum, or specialized build surfaces like PEI (Polyetherimide) or Kapton tape. These materials provide a flat and level surface for the printed object to adhere to during the printing process.
Some 3D printers incorporate a heated print bed, which aids in minimizing warping of printed objects. The heat helps to keep the bottom layers of the print at an elevated temperature, preventing uneven cooling and contraction that can lead to warping or detachment during the printing process. Different printing materials may require different bed temperatures for optimal adhesion and print quality.
Another important consideration is the surface texture of the print bed. A smooth surface provides a sleek finish to the bottom layers of the printed object but may not offer the best adhesion for certain materials. In contrast, a textured surface, such as a rough texture or a patterned sheet, can improve adhesion for materials like ABS or TPU, reducing the risk of parts detaching during printing.
Furthermore, some printers employ a leveling mechanism to ensure that the print bed is perfectly level, especially in printers with large print areas. This is crucial for consistent layer adhesion and print quality across the entire build area.
Overall, the print bed or build plate is a critical component that directly affects the success and quality of 3D prints. It provides a stable and adhesive surface for the printed object, promoting accuracy and preventing issues such as warping or detachment.
Next, we will explore the extruder, a key component responsible for feeding and melting the filament used in the 3D printing process.
Extruder
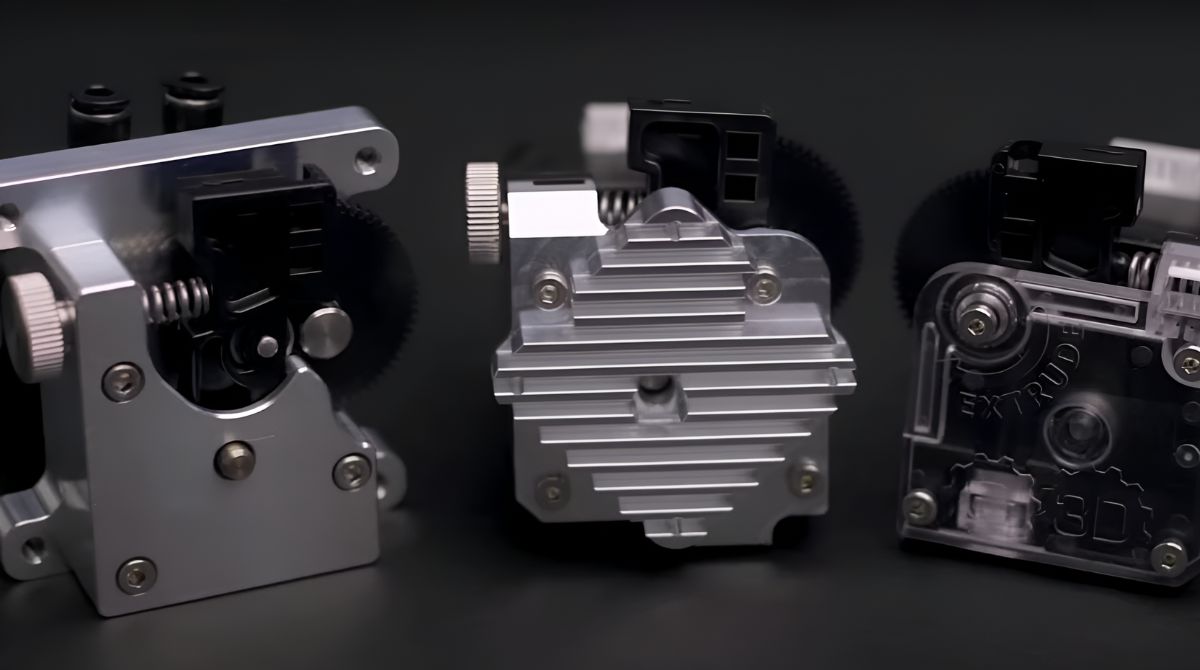
The extruder is a crucial component of a 3D printer that is responsible for feeding and melting the filament during the printing process. It plays a pivotal role in ensuring a steady and controlled flow of material, determining the accuracy and quality of the printed object.
The extruder consists of several key parts, including a motor, a drive gear or hobbed bolt, a filament guide tube, and a hot end. The motor drives the rotation of the drive gear, which grips the filament and pushes it through the filament guide tube towards the hot end.
The hot end is the part of the extruder where the filament is melted and extruded onto the print bed or the previous layers of the print. It typically consists of a heating element, a temperature sensor (thermistor), and a nozzle. The heating element heats the filament to its melting point, while the thermistor measures and controls the temperature. The nozzle is a small opening through which the melted filament is extruded, determining the thickness and accuracy of the printed layers.
There are different types of extruders used in 3D printers, including direct drive and Bowden extruders. In a direct drive extruder, the filament is fed directly into the hot end, providing better control and responsiveness. On the other hand, a Bowden extruder has the filament feed system located further away from the hot end, which reduces the weight on the print head and allows for faster movements, but may sacrifice some precision.
It’s important to note that the extruder needs to be properly calibrated to ensure accurate filament feeding and extrusion. Proper tension on the filament, correct filament path alignment, and the right temperature settings are critical factors in achieving consistent and high-quality prints.
Advanced extruders may also include additional features such as filament sensors that detect filament runout and pause printing to prevent errors. They may also have dual extrusion capabilities, allowing for the simultaneous printing of different materials or colors.
In summary, the extruder is a key component in a 3D printer that feeds and melts the filament, enabling precise control and flow of the printing material. Its performance and calibration directly impact the accuracy and quality of the printed objects.
Next, let’s dive into the hot end, the part of the extruder responsible for melting the filament and forming the layers of the printed object.
Hot End
The hot end is a critical component of the extruder in a 3D printer. It is responsible for melting the filament and precisely extruding it onto the print bed or the previous layers of the print, forming the desired shape of the object being printed.
The hot end consists of several key parts, including a heating element, a temperature sensor (usually a thermistor or a thermocouple), and a nozzle. The heating element, often a ceramic cartridge or a high-resistance wire, generates heat to melt the filament. The temperature sensor measures the temperature of the hot end and provides feedback to the printer’s control board for accurate temperature regulation.
The nozzle is the small opening at the end of the hot end where the melted filament is extruded. It determines the diameter of the extruded filament and plays a crucial role in achieving precise layer thickness and print resolution. Nozzles come in various sizes, commonly ranging from 0.2mm to 0.6mm, although other sizes may be available. Smaller nozzles result in finer details but may require longer print times, while larger nozzles can enable faster prints but sacrifice some fine detail.
In addition to the heating element, temperature sensor, and nozzle, many hot ends also include a heat sink. The heat sink helps dissipate heat from the hot end to prevent heat creep, where heat travels too far up the filament, causing clogging or inconsistent extrusion. Cooling fans may also be attached to the heat sink to further aid in heat dissipation and prevent overheating.
It’s important to note that the hot end needs to be heated to the appropriate temperature for the specific filament being used. Different filaments have different melting points, and printing at the correct temperature is crucial for achieving successful prints. Most 3D printers allow for temperature adjustment based on the filament being used, ensuring optimal printing conditions.
Advanced hot ends may feature additional capabilities such as removable nozzles for easy maintenance and different nozzle sizes, allowing for versatility in print quality and speed. Some hot ends may also support dual extrusion, enabling the printing of multiple colors or materials in a single print job.
In summary, the hot end is a vital component of the 3D printer’s extruder, responsible for melting the filament and accurately extruding it to form the printed object’s layers. Its elements, including the heating element, temperature sensor, nozzle, heat sink, and cooling fan, work together to ensure precise and controlled extrusion.
Next, let’s explore the filament, the material that is fed into the extruder to create the physical object.
Filament
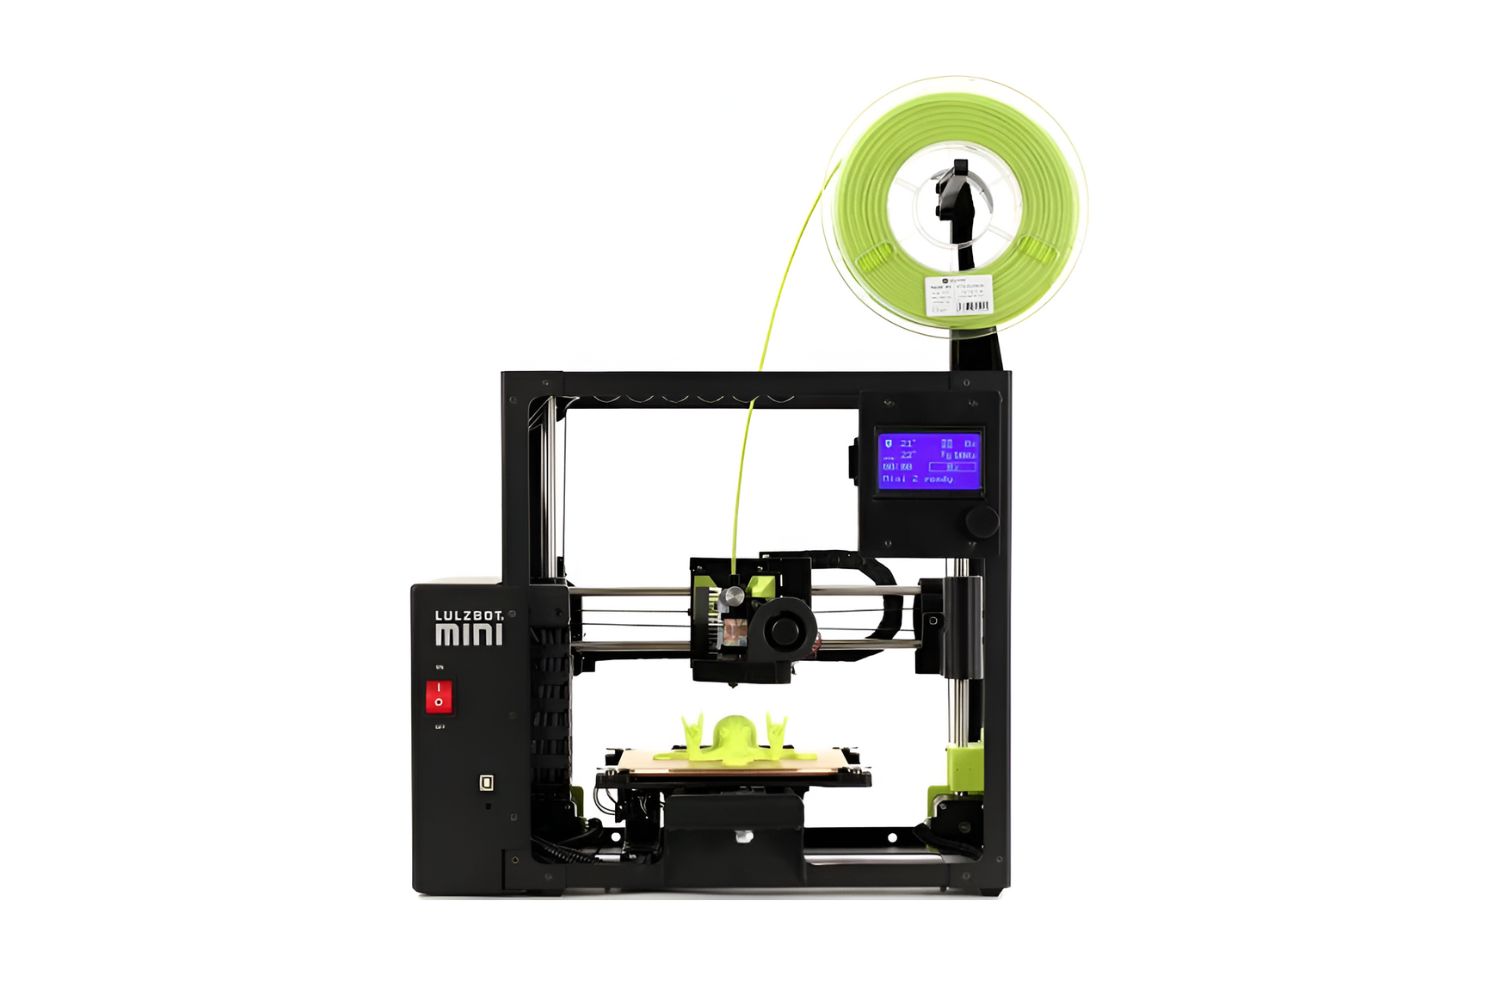
Filament is the material that is fed into the 3D printer’s extruder to create the physical object. It plays a crucial role in the 3D printing process, determining the properties, appearance, and durability of the final printed object.
Most 3D printers use filament in the form of a thin, flexible thread. The two most common types of filament used in 3D printing are PLA (Polylactic Acid) and ABS (Acrylonitrile Butadiene Styrene). PLA is derived from renewable resources such as cornstarch or sugarcane, making it biodegradable and eco-friendly. ABS, on the other hand, is a petroleum-based plastic known for its strength and impact resistance.
Other types of filaments include PETG (Polyethylene Terephthalate Glycol), which offers a balance between PLA and ABS with improved durability and flexibility, and TPU (Thermoplastic Polyurethane), which is a flexible filament suitable for printing objects requiring a rubber-like texture.
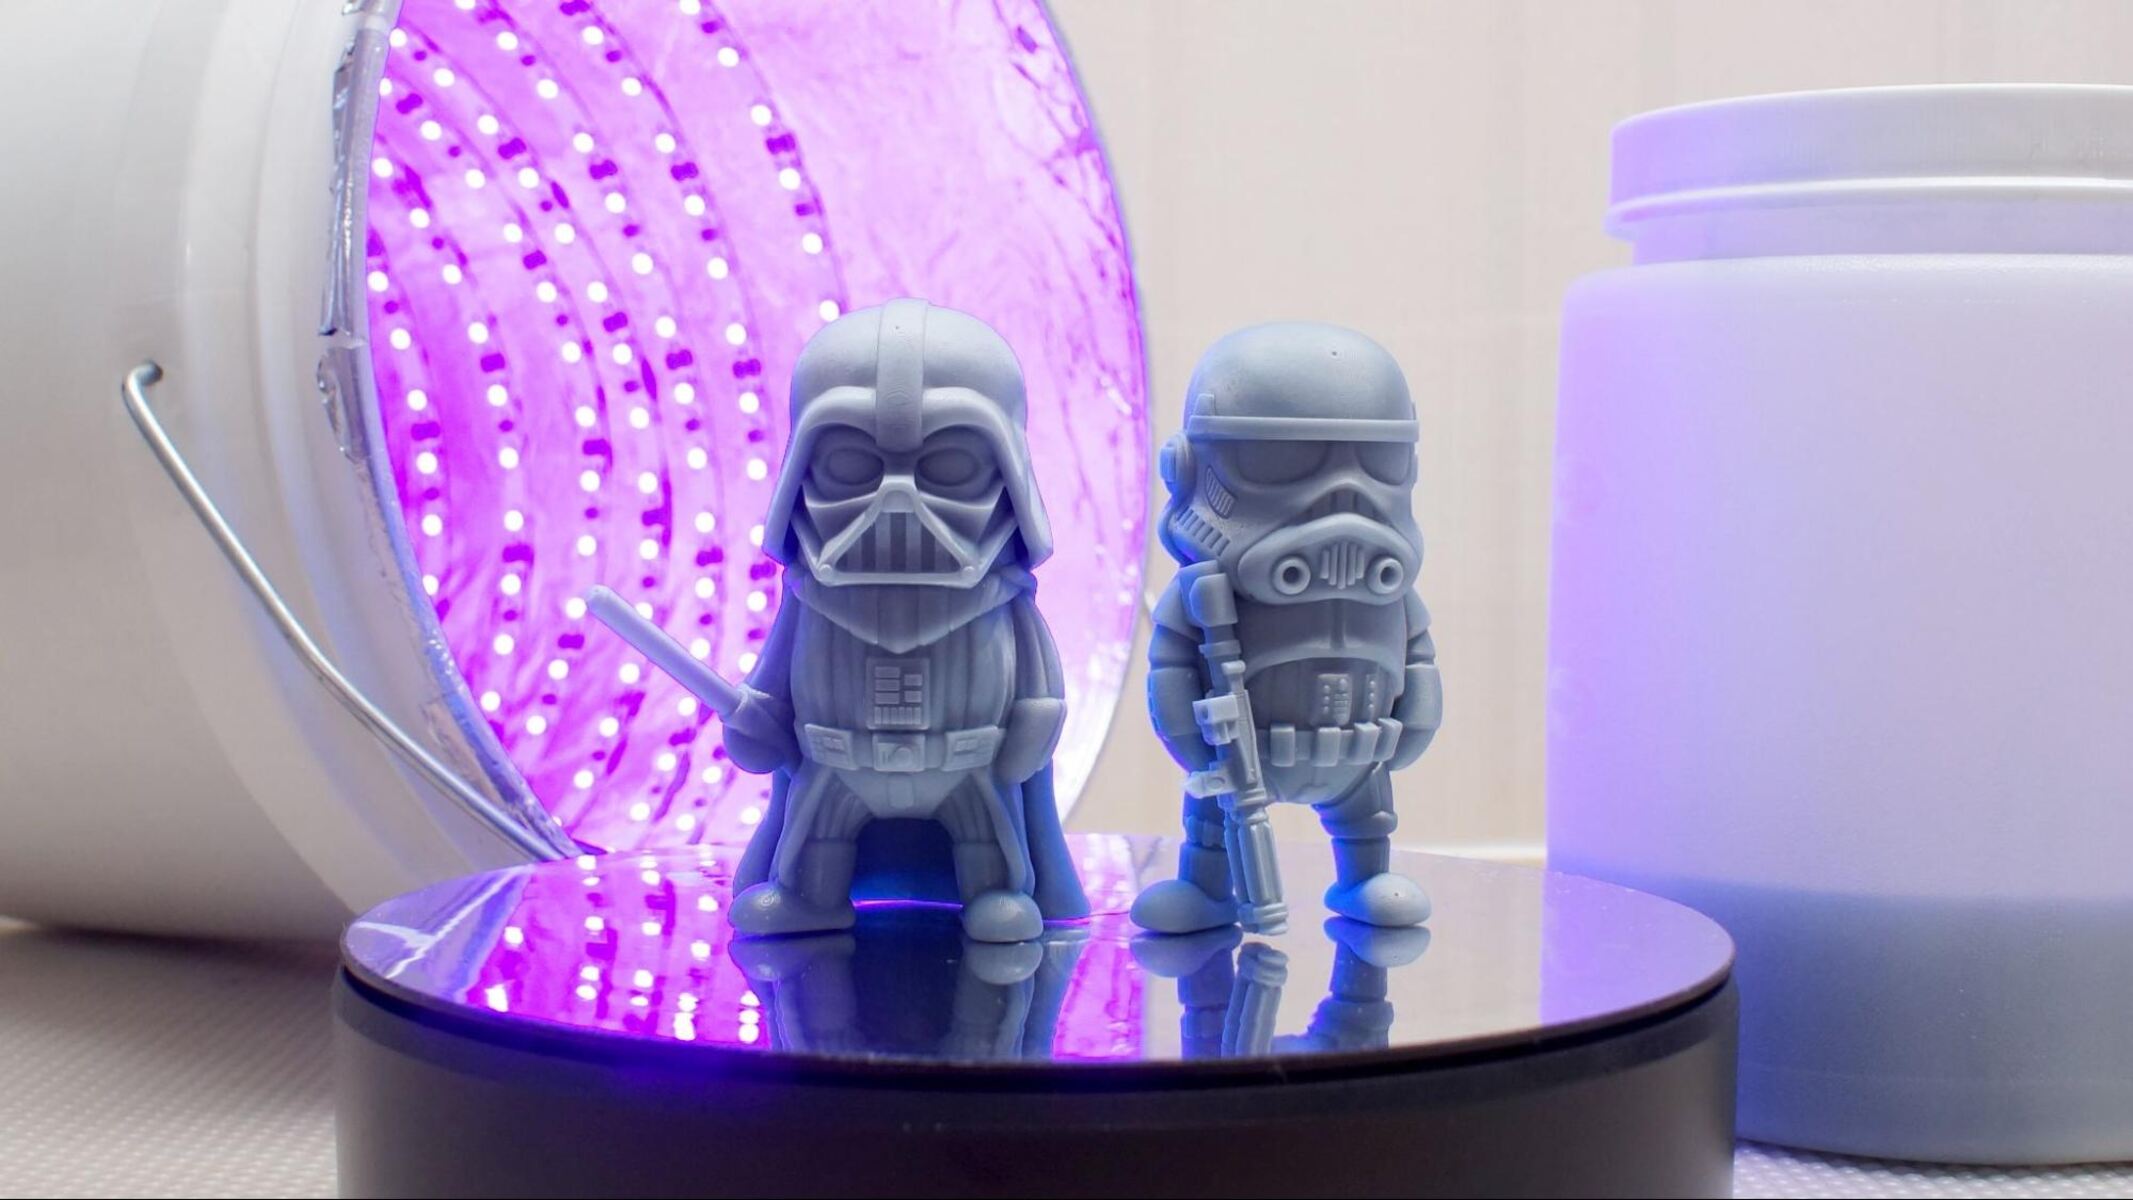
Filament is available in a variety of colors, allowing for creative and colorful prints. Some filaments even offer special properties, such as glow-in-the-dark filaments or those infused with metallic particles for a unique finish. Additionally, there are filaments with unique characteristics like wood or stone filaments, which provide a textured appearance to printed objects.
Filament diameter is an important consideration when selecting and using filament. The most common filament diameter is 1.75mm, although some printers use 2.85mm or 3mm filament. It is crucial to accurately identify and configure the filament diameter in the printer’s settings to ensure proper feeding and extrusion during the printing process.
Successfully printing with filament requires attention to storage and handling. Filament should be stored in a cool and dry environment, as exposure to moisture can lead to clogging or poor print quality. It is also important to handle the filament carefully to avoid tangling or damage. Some printers may include filament sensors to detect the presence and movement of filament, providing a warning or pausing the print if no filament is detected.
Overall, filament is a vital component in 3D printing that determines the characteristics and appearance of the final printed object. With a wide range of materials, colors, and properties available, filament offers endless possibilities for creating unique and functional printed objects.
Next, let’s explore the nozzle, a small but critical component of the extruder that controls the flow and precision of extruded filament.
Nozzle
The nozzle is a small but crucial component of the 3D printer’s extruder that controls the flow and precision of the extruded filament. It plays a vital role in determining the layer thickness, print quality, and overall accuracy of the printed object.
The nozzle is a cylindrical piece located at the end of the hot end. It has a tiny opening through which the melted filament is extruded onto the print bed or the previous layers of the print. Nozzles come in different sizes, typically ranging from 0.2mm to 0.6mm in diameter.
The size of the nozzle directly impacts the layer thickness and print speed. A smaller nozzle diameter results in finer details and higher resolution prints, as it can extrude thinner lines of filament. However, printing with a smaller nozzle may require slower print speeds to ensure adequate filament flow and prevent clogging.
Conversely, a larger nozzle diameter allows for faster printing, as it can extrude a larger volume of filament. However, the trade-off is a reduction in fine details and resolution. The choice of nozzle size depends on the specific requirements of the print, balancing the desired print quality with the desired printing speed.
Nozzles are typically made of brass or hardened steel, known for their heat resistance and durability. Brass nozzles are suitable for most common filaments like PLA and ABS, while hardened steel nozzles are recommended for more abrasive filaments like carbon fiber or metal-filled materials.
It’s important to note that the nozzle needs to be properly maintained and periodically cleaned to ensure a smooth and consistent flow of filament. Filament residue or debris can accumulate in the nozzle, leading to clogs or inconsistent extrusion. Regular cleaning using a nozzle cleaning needle or other tools can help prevent these issues.
Some advanced printers offer interchangeable nozzles, allowing users to easily switch between different sizes to achieve the desired print quality and speed. This flexibility provides versatility in printing a wide range of objects with varying details and requirements.
In summary, the nozzle is a small but critical component of the 3D printer’s extruder. Its size and design determine the layer thickness, print quality, and speed of the printed object. Proper maintenance and cleaning are essential to ensure optimal extrusion and prevent clogs or inconsistent printing.
Next, let’s explore the X, Y, and Z-axis, the guiding system that enables precise movement and positioning during the 3D printing process.
X, Y, and Z-axis
The X, Y, and Z-axis are an integral part of a 3D printer’s movement system, providing precise positioning and control during the printing process. Each axis corresponds to a specific direction of movement, enabling the printer to move and layer the filament accurately.
The X-axis represents horizontal movement from left to right. It is responsible for the side-to-side movement of the print head or extruder. The X-axis motor and belt system work together to control the movement of the extruder along the X-axis, ensuring precise positioning of the nozzle.
The Y-axis represents movement from front to back. It is responsible for moving the print bed or build plate in this direction. The Y-axis motor and belt system work together to control the movement of the build plate along the Y-axis, allowing for proper layering of the object being printed.
The Z-axis represents vertical movement, allowing the extruder and print bed to move up and down. The Z-axis motor and lead screw or linear rail system control the movement of the extruder or build plate along the Z-axis, determining the height and layer thickness of the printed object.
By coordinating the movements of the X, Y, and Z-axis, 3D printers are able to create complex and precise shapes layer by layer. The printer’s firmware interprets the instructions from the 3D model and translates them into movements along these three axes, resulting in the desired printed object.
Accurate and synchronized movement along the X, Y, and Z-axis is crucial for achieving high-quality prints. Misalignment or incorrect calibration of any of these axes can lead to skewed prints, warped layers, or even failed prints.
Many 3D printers employ stepper motors to control the movement along each axis. Stepper motors provide precise and incremental movements, ensuring accurate positioning of the print head or build plate. The motors are driven by the printer’s control board, which interprets the commands from the slicing software or the 3D model file.
Some advanced printers may include additional features to enhance movement and precision. These features include dual or independent Z-axis motors, which ensure even leveling and layering across the build plate, or a core XY mechanism, which combines the X and Y-axis movements for improved speed and precision.
In summary, the X, Y, and Z-axis are essential components of a 3D printer’s movement system. They enable precise positioning and control, allowing the printer to build objects layer by layer. Proper calibration and alignment of these axes are crucial for achieving accurate and high-quality prints.
Next, let’s explore the motors and belts that drive the movements of the printer’s extruder and build plate.
Motors and Belts
The motors and belts are essential components in a 3D printer that drive the precise movements of the extruder and build plate along the X, Y, and Z-axis. These components work together to ensure accurate positioning and smooth motion during the printing process.
Stepper motors are commonly used in 3D printers for their ability to provide precise control and incremental movements. Each axis, X, Y, and Z, is typically equipped with a dedicated stepper motor. The motors receive instructions from the printer’s control board and convert them into rotational motion, moving the extruder or build plate along the desired axis.
The motors are connected to the moving components, such as the extruder carriage or the build plate, through belts. Belts are commonly made of reinforced rubber or other durable materials. They are looped around toothed pulleys attached to the motor shaft and the moving component. As the motor rotates, the belt moves, causing the connected component to move accordingly along the specified axis.
The teeth on the pulleys and the corresponding notches on the belt create a direct coupling, ensuring that the motion of the motor is accurately transferred to the moving component. The use of belts allows for precise and synchronized motion, resulting in accurate layering and positioning of the printed object.
It is crucial to properly tension the belts to ensure optimal performance. Proper tensioning prevents slippage and ensures that the motor’s rotational motion is efficiently transferred to the moving component. Loose belts can result in imprecise movements and diminished print quality, while overly tight belts can strain the motors and lead to premature wear or damage.
Some printers may employ additional mechanisms, such as linear guides or rods, in combination with belts to enhance stability and reduce vibrations during movement. These mechanisms help to minimize unwanted movement or oscillations, resulting in smoother and more accurate prints.
Overall, the motors and belts are critical components in a 3D printer’s movement system. They work together to drive the precise motion along the X, Y, and Z-axis, allowing for accurate positioning and smooth layering of the printed object.
Next, let’s explore the print head assembly, which includes the extruder and the hot end, and its role in the 3D printing process.
Print Head Assembly
The print head assembly is a vital component in a 3D printer that houses both the extruder and the hot end. It plays a crucial role in the 3D printing process by feeding and melting the filament, controlling its extrusion, and depositing it layer by layer to create the final printed object.
The print head assembly typically consists of the extruder, which feeds the filament, and the hot end, which heats and melts the filament. The extruder pulls the filament from a spool and guides it into the hot end, where it is melted and then extruded through the nozzle onto the print bed or the previous layers.
The extruder component of the print head assembly is responsible for gripping and feeding the filament. It utilizes a motor and a drive gear to push the filament into the hot end. The extruder must exert enough pressure on the filament to provide a consistent flow, but not so much that it causes unnecessary strain or deformation.
The hot end component of the print head assembly consists of a heating element, a temperature sensor (thermistor), and a nozzle. The heating element provides the necessary heat to melt the filament, with the temperature controlled by the sensor. The nozzle, with its small opening, determines the diameter of the extruded filament, influencing the precision and detail of the printed object.
The print head assembly is often mounted on a carriage system that allows it to move in the X and Y directions. The movement is controlled by the printer’s motors and belts, ensuring precise positioning and layering of the printed object. The ability to move the print head assembly is crucial for covering the entire print bed and creating complex shapes and patterns.
Print head assemblies can be single or dual extrusion. Single extrusion printers have only one extruder and are capable of printing with a single filament at a time. Dual extrusion printers, on the other hand, have two extruders, allowing for the simultaneous printing of multiple colors or materials, opening up possibilities for more intricate designs and multi-material objects.
Proper calibration and alignment of the print head assembly are essential for achieving high-quality prints. This includes ensuring that the extruder is properly tensioned, the hot end is correctly heated, and the nozzle is at the correct height from the print bed. Calibration ensures consistent filament flow and accurate layering, resulting in precise and detailed prints.
In summary, the print head assembly is a key component of a 3D printer, housing both the extruder and the hot end. It functions to feed and melt the filament and control its extrusion. Proper calibration and alignment are crucial for achieving high-quality prints.
Next, let’s explore the build tray or print bed, which provides a stable surface for the printed object.
Build Tray
The build tray, also known as the print bed, is an essential component of a 3D printer that provides a stable surface for the printed object to be created upon. It plays a crucial role in ensuring the proper adhesion of the object to the bed, maintaining accuracy throughout the printing process.
The build tray can be made of various materials, such as glass, aluminum, or specialized build surfaces. Borosilicate glass is a popular choice due to its flatness and durability. Aluminum beds offer good heat distribution and even heating. Specialized build surfaces like PEI (Polyetherimide) or Kapton tape can provide enhanced adhesion for filaments like ABS.
Proper leveling of the build tray is crucial to ensure accurate and consistent layering of the printed object. Uneven or misaligned build trays can result in warped prints, layer shifting, or other adhesion problems. Most 3D printers include manual or automatic leveling systems to help users achieve an optimal print bed surface.
Some printers also incorporate a heated build tray, allowing for better adhesion of certain materials. The heat helps to reduce the chances of warping and aids in layer adhesion. Different printing materials may require different temperatures for optimal results, so the ability to adjust the bed temperature is essential.
Print bed surfaces should be cleaned and maintained regularly to ensure optimal printing conditions. Depending on the materials used and the printing environment, residues, dust, or other contaminants can accumulate on the build tray, affecting adhesion and print quality. Cleaning with isopropyl alcohol or other recommended cleaners helps in maintaining a clean and dust-free surface.
In addition to adhesion, the build tray size determines the maximum size of objects that can be printed. The build volume is the maximum size of an object that a 3D printer can create in all three dimensions (X, Y, and Z). It is typically specified in millimeters or inches and may vary depending on the printer model.
Build trays may also include features to facilitate print removal, such as removable or magnetic beds. These types of build trays allow for easier and safer removal of printed objects without damaging them or the build surface.
In summary, the build tray or print bed is a crucial component of a 3D printer. It provides a stable and level surface for the printed object, ensuring proper adhesion and maintaining accuracy throughout the printing process. Proper leveling, cleaning, and material considerations are important for achieving successful prints.
Next, let’s explore the heater and thermistor, elements that allow precise temperature control in the 3D printing process.
Heater and Thermistor
The heater and thermistor are integral components of a 3D printer that work together to provide precise temperature control during the printing process. These elements play a crucial role in ensuring the proper melting and extrusion of filament, leading to successful and high-quality prints.
The heater is responsible for generating the heat required to melt the filament in the hot end of the 3D printer. It is usually a ceramic cartridge or a high-resistance wire that heats up when an electric current passes through it. The heat produced by the heater raises the temperature of the hot end to the specific melting point of the filament being used.
Temperature control is essential in 3D printing to ensure the filament reaches and maintains the desired temperature for successful extrusion. This is where the thermistor comes into play. The thermistor is a temperature sensor that measures the temperature of the hot end. It provides feedback to the printer’s control board, allowing for precise regulation of the heater’s power to maintain a consistent temperature.
The thermistor is typically located near the hot end, in close proximity to where the filament is melted. It measures the temperature of the hot end by detecting changes in electrical resistance that correspond to changes in temperature. This information is then used by the printer’s control board to adjust the power supplied to the heater, ensuring it maintains the desired temperature for optimal filament flow and extrusion.
The ability to control temperature accurately is crucial, as different filaments require specific temperature ranges for optimal printing results. For example, PLA filament typically requires a lower temperature range (around 180-220°C), while ABS filament necessitates a higher temperature range (around 220-260°C). Other specialty filaments may have different temperature requirements, and precise temperature control is crucial for achieving the desired print quality.
It’s important to note that calibration and proper maintenance of the heater and thermistor are essential for reliable and consistent printing. Inaccurate temperature readings or fluctuations can lead to issues such as under extrusion, poor layer adhesion, or even clogs in the hot end. Regular checks and calibration can help ensure the heater and thermistor are functioning correctly, providing accurate temperature control throughout the printing process.
In summary, the heater and thermistor are vital components in a 3D printer that enable precise temperature control. The heater generates the required heat to melt the filament, while the thermistor measures and provides feedback on the temperature of the hot end. Accurate temperature control is crucial for successful filament flow, extrusion, and high-quality prints.
Next, let’s explore the cooling fan, a component that helps dissipate heat and enhance the 3D printing process.
Cooling Fan
The cooling fan is an important component of a 3D printer that aids in dissipating heat and improving the overall printing process. It helps maintain the stability of printed objects, enhances print quality, and prevents issues such as warping or filament deformation.
The primary role of the cooling fan is to provide airflow to the printed object immediately after extrusion. When the hot filament is deposited onto the print bed or previous layers, it undergoes a rapid cooling process. The cooling fan assists in this process by blowing cool air onto the printed layers, which accelerates solidification and minimizes heat transfer to the surrounding layers.
This rapid cooling helps ensure that each layer solidifies quickly and efficiently. It reduces the chances of layer deformation, warping, or even collapsing due to heat buildup. Cooling fans are especially important when printing with materials that have a tendency to shrink or warp, such as ABS or certain specialty filaments.
The cooling fan is usually positioned near the hot end of the printer, close to where the filament is extruded. It is typically mounted on the print head assembly or directed towards the printed object. Most printers have a controllable cooling fan that can be adjusted to different speeds or turned on and off depending on the filament being used and the specific requirements of the print job.
In addition to preventing warping and improving print quality, the cooling fan can also assist in bridging and overhangs. These are areas of the printed object where the filament is unsupported in mid-air. By cooling the filament quickly, the fan helps solidify these sections, allowing for better stability and accuracy in complex prints.
It’s important to note that the cooling fan should be properly calibrated and adjusted for optimal performance. Depending on the filament being used and the desired print quality, different cooling fan speeds or even controlled fan ducts may be required. Some 3D printers offer advanced features, such as part cooling fan ducts that can be adjusted or customized to direct the airflow precisely where it is needed.
In summary, the cooling fan is a crucial component in a 3D printer that helps dissipate heat and improve print quality. By rapidly cooling the printed layers, it prevents warping, enhances stability, and enables successful printing of complex geometries. Proper calibration and settings adjustments are important to optimize the performance and achieve the desired print results.
Next, let’s explore the temperature controller, a component that regulates the heating and cooling processes of the 3D printer.
Temperature Controller
The temperature controller is a critical component of a 3D printer that regulates the heating and cooling processes during the printing operation. It ensures precise control over the temperature of various components, such as the hot end, print bed, and cooling fan, contributing to successful and high-quality prints.
The primary function of the temperature controller is to maintain the desired temperature within specific tolerances. It monitors the temperature using input from sensors, such as the thermistors, and adjusts the power supplied to the heating elements or the cooling fan accordingly.
For the hot end, the temperature controller powers the heating element to achieve and maintain the desired temperature for melting the filament. It continuously monitors the thermistor’s temperature readings to ensure precise control within the optimal range for the filament being used.
Similarly, the temperature controller manages the temperature of the print bed. In printers with a heated bed, it regulates the power supplied to the heating element to reach and maintain the desired bed temperature. This is important for filament adhesion and minimizing warping or deformation during the printing process.
Additionally, the temperature controller may control the cooling fan. It can adjust the speed or turn the fan on or off based on the specific requirements of the print job. By regulating the airflow, the temperature controller helps optimize cooling during the printing process, preventing issues like overheating or insufficient cooling of the printed layers.
Most modern 3D printers have a digital temperature controller, which allows for precise temperature adjustments and monitoring. These controllers may include an interface that displays real-time temperature information and allows users to modify temperature settings easily.
Temperature controllers also play a vital role in maintaining safety during the printing process. They often include safety features such as thermal runaway protection, which monitors for abnormal temperature changes to prevent excessive heating and potential hazards.
Additionally, temperature controllers may have input and output ports for connecting and controlling various components of the printer, such as the extruder, cooling fan, and heated bed. These ports enable seamless integration and coordination of temperature control throughout the printing process.
In summary, the temperature controller is an essential component of a 3D printer that regulates the heating and cooling processes. It ensures precise control over the temperature of the hot end, print bed, and cooling fan, contributing to successful and high-quality prints. With advanced features and safety measures, the temperature controller plays a crucial role in creating reliable and efficient 3D printing experiences.
Next, let’s explore the power supply, a necessary component that provides the electrical energy required for the printer’s operation.
Power Supply
The power supply is a crucial component of a 3D printer that provides the electrical energy necessary for the printer’s operation. It converts the input power source, typically AC power from an outlet, into the appropriate voltage and current required by the printer’s components.
Most 3D printers use a switched-mode power supply (SMPS) due to its efficiency, compact size, and ability to handle a wide range of input voltages. The SMPS takes the AC power input and transforms it into a regulated DC voltage that powers the various components of the printer.
The power supply ensures a stable and continuous power flow to the printer, preventing voltage fluctuations that could adversely affect the components and the printing process. It provides power to components such as the motors, heaters, fans, and control board, enabling them to operate smoothly and accurately.
The power supply unit (PSU) is typically housed separately, either internally within the printer’s frame or externally, connected via a cable. The PSU is rated based on the required voltage and current capacity of the printer’s components. Common ratings for 3D printer power supplies are 12V, 24V, or higher, depending on the requirements of the specific printer model.
Safety features are an important consideration in power supplies for 3D printers. They may include protection against short circuits, overvoltage, and overcurrent situations. These safety features help safeguard the printer and its components, preventing damage or potential hazards during operation.
Depending on the printer model, the power supply may have additional features such as a power switch or an integrated cooling fan to prevent overheating. Some power supplies may also have international voltage compatibility, allowing them to be used in different regions without the need for additional voltage converters.
It is crucial to operate the 3D printer with the manufacturer-recommended power supply to ensure compatibility and safe operation. Using an incorrect or incompatible power supply can damage the printer’s components or lead to unreliable performance.
In summary, the power supply is a vital component of a 3D printer, providing the necessary electrical energy for the printer’s operation. It regulates the power flow, ensures stable voltage and current, and incorporates safety features to protect the printer and its components. The power supply plays a critical role in maintaining the reliability and efficiency of the 3D printing process.
Next, let’s explore the display and controls, which allow users to interact with and control the printer’s functions.
Display and Controls
The display and controls of a 3D printer provide an interface for users to interact with and control the printer’s functions. These components allow for easy navigation, adjustment of settings, and monitoring of the printing process.
The display is often an LCD or OLED screen that provides visual feedback and information about the printer’s status. It can display relevant details such as print progress, temperature readings, settings, and error messages. The display may also include a backlight for improved visibility in different lighting conditions.
The controls of a 3D printer are typically buttons or knobs located near the display. These controls allow users to navigate through menus, select options, and make adjustments to various settings. Buttons may include functions like moving the print head or build plate, starting and pausing prints, and accessing configuration menus.
Many printers now include more advanced user interfaces, such as touchscreens or graphical displays. These interfaces provide a more intuitive and user-friendly experience, allowing users to easily access and modify settings with a few simple taps or swipes. Some touchscreen displays even provide visual previews of the printed object or offer on-screen guides and tutorials.
The display and controls also provide valuable feedback during the printing process. They can indicate the current print status, temperature readings, estimated print completion time, and other relevant information. This feedback allows users to monitor the progress, make adjustments if needed, and quickly respond to any issues that may arise during the print job.
Additionally, some printers offer connectivity options that enable remote access and control via a computer or mobile device. Through Wi-Fi, Ethernet, or USB connections, users can monitor and control the printer using dedicated software or apps, even when not in close proximity to the machine.
The display and controls are designed to be user-friendly and intuitive, allowing users of all experience levels to easily navigate and operate the printer. Clear and straightforward menus, along with descriptive icons or labels, enhance the user experience and eliminate confusion.
Overall, the display and controls of a 3D printer provide an essential interface for users to interact with the printer and control its functions. They offer a visual representation of the printer’s status, enable adjustment of settings, and allow for seamless monitoring and control of the printing process.
Next, let’s explore the control board, which acts as the brain of the 3D printer, coordinating the functions of the various components.
Control Board
The control board is the brain of a 3D printer, responsible for coordinating and controlling the various components of the machine. It acts as a central hub, receiving input, executing commands, and ensuring smooth operation throughout the printing process.
The control board uses firmware, which is a specialized software program, to interpret instructions from the user interface, such as the display and controls. It then translates these instructions into specific actions for the printer’s components, such as the motors, extruder, and bed heater.
One of the primary functions of the control board is to regulate and coordinate the movement of the printer’s components along the X, Y, and Z-axis. It processes commands from the firmware and sends signals to the respective stepper motors, synchronizing their actions and ensuring precise positioning and smooth travel along the designated paths.
In addition to movement control, the control board also manages the extrusion process. It controls the extruder motor’s speed and direction, ensuring a steady and controlled flow of filament. The control board also monitors and adjusts the temperature of the hot end and print bed, working in conjunction with the temperature sensors to provide precise temperature control during the printing process.
The control board also oversees other crucial functions, such as monitoring filament presence or runout sensors, detecting potential issues like filament jams or empty spools. It can automatically pause the print job or alert the user when such situations occur, preventing print failures and allowing for timely intervention.
Furthermore, the control board handles communication with external devices, such as computers or other peripherals. It may have USB or network connectivity options, allowing users to transfer print files, monitor progress remotely, or even control the printer through dedicated software or apps.
As technology advances, some control boards support advanced features like auto-bed leveling. This feature uses sensors to measure and compensate for any variations in the levelness of the print bed, ensuring consistent layer adhesion and print quality across the entire bed surface.
Manufacturers often provide open-source firmware for their control boards, allowing users to customize and modify the printer’s functionality to suit their specific needs. This open-source nature fosters collaboration, and the 3D printing community often develops firmware modifications and enhancements, expanding the capabilities of the printer.
In summary, the control board is a critical component of a 3D printer, serving as the brain that coordinates and controls the functions of the machine. It ensures accurate movement, precise temperature control, and manages various other crucial aspects to achieve successful and high-quality prints.
Next, let’s explore the connecting cables that play a vital role in transmitting data and power between the printer’s components.
Connecting Cables
Connecting cables are an essential component of a 3D printer, playing a vital role in transmitting power and data between the various components of the machine. They ensure the seamless operation and coordination of the printer’s functions during the printing process.
Power cables are responsible for supplying electrical power from the power supply unit (PSU) to the different components of the printer. These cables deliver the necessary voltage and current to power the motors, heaters, cooling fans, and other electrical components in the printer.
Data cables are used to transmit data and signals between the control board and other components of the printer. For example, stepper motor cables connect the control board to the stepper motors, enabling precise control and coordinated movement along the X, Y, and Z-axis. These cables carry step and direction signals from the control board to the motors, ensuring accurate positioning and smooth motion.
Additional data cables may be used for communication between the control board and peripherals such as display screens, touchscreens, or external devices like computers. These cables enable the exchange of commands, status updates, and other data, allowing users to interact with and control the printer’s functions.
The quality and durability of the connecting cables are crucial for maintaining reliable and uninterrupted printer operation. Well-insulated cables with proper shielding help prevent electrical interference, noise, and signal degradation. High-quality connectors ensure secure and consistent connections between the components, reducing the risk of loose wiring or intermittent connections.
Proper cable management is important in order to maintain an organized and tidy workspace, as well as to prevent accidental damage to the cables during printing. Cable ties, wire looms, or cable management clips can be used to bundle and secure the cables, keeping them organized and protected from snagging or getting entangled during operation.
In cases where components are housed separately, such as the power supply unit or control box, longer cables may be required to provide the necessary reach and flexibility. Care should be taken to ensure that the length and type of cables used are suitable for their intended purposes without excessive strain or tension.
Regular inspection and maintenance of connecting cables are essential to prevent issues such as cable damage or pinched wires. Loose connections should be tightened, damaged cables should be replaced, and any signs of wear, fraying, or degradation should be addressed promptly to maintain the reliability and safety of the printer.
In summary, connecting cables are critical for transmitting power and data within a 3D printer. They ensure reliable operation and coordination between components and play a crucial role in maintaining accurate movement, temperature control, and communication between the printer’s various parts.
Next, let’s explore the software and firmware that drive the 3D printer’s functionalities and translate design files into printed objects.
Software and Firmware
Software and firmware are essential components of a 3D printer that enable the translation of design files into printed objects. Together, they provide the necessary instructions, controls, and settings for the printer’s operation.
Software refers to the computer programs or applications used to generate, prepare, and slice 3D models for printing. These programs allow users to design or import 3D models, make adjustments such as scaling or positioning, and generate the necessary instructions for the printer to create the physical object.
Slicing software is particularly important in the 3D printing process. It takes the 3D model and divides it into individual layers, or slices, which the printer can understand and execute. The slicing software allows users to adjust printing parameters such as layer thickness, printing speed, and infill density, customizing the printing process to achieve the desired print quality and functionality.
Firmware, on the other hand, is the specialized software installed on the control board of the 3D printer. It acts as the operating system of the printer, providing the low-level instructions and controls that govern the printer’s movements, temperature regulation, and overall functionality.
The firmware interprets the commands generated by the slicing software and translates them into specific actions for the printer’s components. It communicates with the motors, heaters, thermistors, and other peripherals to ensure precise movement, temperature control, and coordination of all aspects of the printing process.
Many 3D printer manufacturers develop their own firmware, while others leverage open-source firmware such as Marlin or Repetier. Open-source firmware allows for community collaboration, frequent updates, and customization to suit specific printer models and user preferences.
Additionally, some printers support wireless connectivity and may come with manufacturer-provided or third-party software applications that allow for remote monitoring and control. These software applications enable users to start, pause, or monitor print jobs, adjust settings, and receive notifications from their computer or mobile devices.
Regular firmware updates, provided by the manufacturer or the open-source community, offer improvements, bug fixes, and additional features, enhancing the printer’s performance, reliability, and user experience.
Furthermore, software and firmware are continually evolving, with new features and functionalities being introduced to enhance the 3D printing experience. These advancements aim to simplify the process, improve print quality, and expand the scope of what can be achieved with a 3D printer.
In summary, software and firmware are essential components of a 3D printer that enable the translation of design files into physical objects. Software applications facilitate design, preparation, and slicing, while firmware provides low-level instructions and controls for the printer’s operation. Regular updates and advancements in software and firmware drive the ongoing improvement and innovation in the world of 3D printing.
With the exploration of software and firmware complete, we have covered all the major parts of a 3D printer.
Summary
In this article, we have explored the various components that make up a 3D printer and their roles in the printing process. From the frame and structure that provide stability and support, to the extruder and hot end that melt and extrude the filament, each component plays a critical role in creating high-quality prints.
The print bed or build plate provides a stable surface for the printed object, while the nozzle controls the flow and precision of the extruded filament. The X, Y, and Z-axis enable precise movement and positioning, driven by motors and belts. The print head assembly houses the extruder and hot end, working together to feed and melt the filament for extrusion.
The heater and thermistor ensure precise temperature control, while the cooling fan helps dissipate heat and improve print quality. The temperature controller regulates the heating and cooling processes for the printer. The power supply provides the necessary electrical energy for operation, while the display and controls allow users to interact with and control the printer’s functions.
The control board acts as the brain of the 3D printer, coordinating the functions of the various components. Connecting cables transmit power and data between the printer’s components, and software and firmware provide the necessary instructions, controls, and settings for the printer’s operation.
Understanding the different parts of a 3D printer is essential for achieving accurate prints, troubleshooting issues, and maximizing the printer’s potential. Each component works together to create intricate and precise objects, making 3D printing a versatile and innovative manufacturing and prototyping solution.
As technology continues to advance, we can expect further improvements and new features in 3D printer components, further expanding the possibilities in the world of 3D printing.