Reasons to Upgrade RAM on Chromebook
Are you experiencing slow performance, lagging apps, and frequent crashes on your Chromebook? It might be time to consider upgrading the RAM. RAM, or Random Access Memory, plays a crucial role in the overall performance of your device. It’s responsible for temporarily storing data that your device needs to access quickly, such as running applications, loading web pages, and multitasking.
Here are a few reasons why upgrading the RAM on your Chromebook could significantly improve its performance:
- Smooth Multitasking: With a higher RAM capacity, your Chromebook can handle multiple applications simultaneously without slowing down. Whether you’re streaming music, editing documents, or browsing the web with multiple tabs open, more RAM allows for smoother multitasking.
- Faster Application Response Times: Upgrading your RAM can reduce the overall loading time of applications. It ensures that your favorite apps open quickly and respond promptly, saving you valuable time and frustration.
- Better Web Browsing Experience: Chromebooks are well-known for their web-centric nature. Increasing the RAM can enhance your web browsing experience by improving the speed at which web pages load and reducing any lag or stuttering while scrolling.
- Efficient Resource Management: Insufficient RAM can cause your Chromebook to rely heavily on virtual memory (page file), which is significantly slower. By upgrading the RAM, you allow your device to utilize the physical memory more efficiently, resulting in improved performance.
- Future-Proofing: Technology constantly evolves, and software applications become more resource-intensive over time. By upgrading your Chromebook’s RAM now, you can future-proof your device and ensure it can handle the demands of upcoming updates and applications.
Keep in mind that not all Chromebooks come with upgradable RAM. Before considering an upgrade, check your specific Chromebook model’s specifications and determine if it has a RAM slot that can be upgraded.
In the following sections, we will explore how to check the RAM usage on your Chromebook, determine any limitations, optimize performance, and, if applicable, how to choose and install the right RAM upgrade. So, let’s dive into the world of Chromebook RAM and unleash its full potential!
Checking RAM Usage on Chromebook
Before deciding to upgrade the RAM on your Chromebook, it’s essential to assess your current memory usage to determine if an upgrade is necessary. Chrome OS provides a straightforward way to check the RAM usage using the built-in Task Manager. Here’s how you can do it:
- Open Task Manager: Press the Shift + Esc keys simultaneously. Alternatively, you can right-click on the taskbar and select “Task manager” from the context menu.
- Check Memory Usage: In the Task Manager window, you’ll see a list of running processes and their respective memory usage. Look for the “Memory” column, which displays the amount of RAM used by each process.
- Observe Overall RAM Usage: At the bottom of the Task Manager window, you’ll find a summary of the overall memory usage. It shows the total amount of RAM installed on your Chromebook and the percentage currently in use.
By monitoring the memory usage in the Task Manager, you can determine if your Chromebook is consistently running out of available RAM. If you frequently see high memory usage or notice significant slowdowns when running multiple applications, it may be a sign that you need to upgrade your RAM.
It’s also worth noting that some Chromebooks have system optimizations that manage memory usage efficiently. For instance, Chrome OS may automatically free up memory by suspending inactive tabs or processes to prioritize active tasks. Therefore, occasional spikes in memory usage are normal, especially if you have many tabs open or memory-intensive applications running.
In the next section, we will explore the limitations of RAM upgrades on Chromebooks to ensure that you make an informed decision about upgrading your device’s memory.
Determine RAM Limitations on Chromebook
While upgrading the RAM on your Chromebook can greatly improve its performance, it’s important to understand that not all Chromebooks support RAM upgrades. Chromebook manufacturers often solder the memory chips directly to the motherboard to reduce costs and increase portability. Therefore, it’s crucial to determine the RAM limitations of your specific Chromebook model before considering an upgrade.
Here are a few ways to find out if your Chromebook is upgradable:
- Check the Manufacturer’s Specifications: Start by visiting the manufacturer’s website or referring to the Chromebook’s user manual. Look for information about memory upgrades or expandability. The specifications should clearly state if the RAM is soldered or if there are available slots for expansion.
- Research Online: If you can’t find direct information from the manufacturer, you can search online forums, Chromebook communities, or review sites. Many tech enthusiasts share their experiences and insights on whether a particular Chromebook model is upgradable or not. However, keep in mind that the information may not always be accurate, so cross-check from multiple sources.
- Contact Customer Support: If you’re still unsure about the upgradeability of your Chromebook, reach out to the manufacturer’s customer support. They can provide you with definitive information specific to your device model.
It’s also essential to consider any potential warranty implications. Modifying or upgrading your Chromebook’s hardware can void the warranty provided by the manufacturer. Make sure to review the warranty terms and make an informed decision accordingly.
If your Chromebook is not upgradable or you’re apprehensive about voiding the warranty, there are still ways to optimize your device’s performance by managing the existing resources effectively. In the next sections, we will explore techniques such as clearing cache, closing unused apps, and managing extensions to help improve your Chromebook’s performance.
Clearing Cache and Closing Unused Apps
If you’re experiencing sluggish performance on your Chromebook, one of the first steps to optimize its performance is by clearing the cache and closing unused applications. Over time, temporary files and cached data can accumulate, consuming valuable memory and slowing down your device. Here’s what you can do:
- Clear Browser Cache: Open the Chrome browser on your Chromebook and press Ctrl + Shift + Delete simultaneously. This will open the “Clear browsing data” window. Select the desired time range and check the “Cached images and files” option. Click on “Clear data” to remove the cached data and free up memory.
- Close Unused Tabs: Having multiple tabs open can strain the available RAM on your Chromebook. Take a moment to close any tabs that you’re not actively using. This will free up memory and improve overall performance.
- Review and Remove Unnecessary Apps: Go to the “Launcher” (the button with a circle at the bottom left corner of the screen) and right-click on any app you no longer need. Select “Uninstall” to remove the app from your Chromebook. Removing unnecessary apps helps free up storage space and reduces the demand on system resources.
- Use Task Manager to Quit Applications: Press Shift + Esc to open the Task Manager. In the “Processes” tab, you’ll see a list of running applications. Select any applications that are not essential and click on the “End process” button to close them. This will reclaim memory and improve performance.
- Restart Your Chromebook: Restarting your Chromebook periodically can help clear the RAM and optimize the system. It closes all running apps and processes, giving your device a fresh start and potentially improving its performance.
By regularly clearing the cache, closing unused apps, and managing your Chromebook’s resources, you can maximize the available RAM and ensure optimal performance. However, if you find that these steps are not sufficient and your Chromebook continues to struggle with performance issues, it may be time to consider a RAM upgrade, which we will discuss in the upcoming sections.
Managing Extensions and Plugins
Extensions and plugins can enhance the functionality of your Chromebook, but they can also consume valuable resources and impact performance. It’s important to manage them effectively to ensure optimal performance. Here are some tips for managing extensions and plugins on your Chromebook:
- Review Installed Extensions: Open the Chrome browser on your Chromebook and type “chrome://extensions” in the address bar. This will display all the installed extensions. Review each extension and consider removing any that you no longer use or need. Click on the “Remove” button next to the extensions you want to uninstall.
- Disable Unnecessary Plugins: In the Chrome browser, type “chrome://plugins” in the address bar. This will show a list of all the plugins installed on your Chromebook. Disable any plugins that are unnecessary or causing performance issues by clicking on the “Disable” button.
- Use Extension Alternatives: Some extensions may have alternative options that are more lightweight and consume fewer resources. Research and try out alternative extensions that serve the same purpose but have a smaller impact on your Chromebook’s performance.
- Disable Extensions Temporarily: If you suspect that a specific extension is causing performance issues, you can temporarily disable it to see if it improves your Chromebook’s performance. You can do this by going to “chrome://extensions”, finding the extension, and toggling the switch next to it to disable it temporarily.
- Keep Extensions Updated: Regularly check for updates to your installed extensions. Developers frequently release updates with bug fixes and performance improvements. Keeping your extensions updated can help ensure compatibility with the latest version of Chrome and may improve overall performance.
By reviewing and managing your installed extensions and plugins, you can reduce the strain on your Chromebook’s resources and optimize its performance. Remember to periodically reassess and remove any extensions or plugins that are no longer necessary to maintain a smooth and efficient browsing experience.
In the next section, we will explore additional techniques for optimizing the performance of your Chromebook’s operating system.
Optimizing Chrome OS Performance
If you want to maximize the performance of your Chromebook’s operating system, there are several optimizations you can implement. By following these techniques, you can improve the overall speed and responsiveness of your device. Here are some ways to optimize Chrome OS performance:
- Keep Chrome OS Updated: Regularly check for updates and install them to ensure you have the latest features, bug fixes, and security patches. Chrome OS updates often include performance improvements, so staying up to date is crucial for optimal performance.
- Enable Automatic Updates: To ensure you don’t miss any critical updates, enable automatic updates for Chrome OS. This way, your device will automatically download and install updates in the background, keeping your Chromebook running smoothly.
- Disable Unnecessary Startup Apps: Open the “Launcher” and go to “Settings.” Under “Apps,” select “Startup.” Review the list of apps that are set to run at startup and disable any that are not necessary. This will help reduce the amount of resources consumed during bootup.
- Manage System Resources: Open the “Settings” and navigate to the “System” section. Review the options under “System” and adjust them according to your needs. For example, you can limit the number of background processes or adjust the animation settings to optimize performance.
- Reset Chrome OS Settings: If you’ve made numerous customizations or tweaks to your Chromebook’s settings and are experiencing performance issues, consider resetting Chrome OS settings to their default values. Open the “Settings,” scroll down to “Advanced,” and select “Reset settings.”
- Close Unnecessary Background Tabs: Keep an eye on the number of open tabs in your Chrome browser. Having excessive tabs open can consume significant system resources. Close any tabs that are not in use to free up memory and enhance overall performance.
Implementing these optimizations can help ensure a smooth and efficient experience while using your Chromebook. It’s worth noting that the specific options and settings available may vary depending on your Chromebook model and the version of Chrome OS.
By following these guidelines, you can optimize the performance of your Chromebook’s operating system and enjoy a faster, more responsive device.
In the next sections, we will delve into the considerations for upgrading the RAM on your Chromebook and guide you through the process.
Considering a RAM Upgrade
If you have exhausted all other optimization options and are still experiencing sluggish performance on your Chromebook, it may be time to consider a RAM upgrade. Increasing the amount of RAM can have a significant impact on your device’s speed and responsiveness. Here are a few factors to consider when deciding on a RAM upgrade:
- Current RAM Capacity: Check your Chromebook’s specifications or use the Task Manager to determine the current amount of RAM installed on your device. This information will help you understand how much additional RAM you can add.
- Specific Use Cases: Consider the tasks you typically perform on your Chromebook. If you frequently use memory-intensive applications, run multiple tabs simultaneously, or work with large files, upgrading the RAM can greatly enhance your productivity and overall user experience.
- Budget: Determine how much you are willing to invest in a RAM upgrade. The cost of RAM modules varies depending on the capacity and type. Research pricing options and find the right balance between your budget and the performance improvement you anticipate.
- Compatibility: Ensure the RAM module you choose is compatible with your Chromebook model. Refer to the manufacturer’s specifications or consult online resources to find the appropriate RAM type, speed, and capacity for your device.
- Future-Proofing: Consider your long-term needs. Upgrading the RAM now can future-proof your Chromebook, allowing it to handle more demanding applications and operating systems that may be released in the future.
It’s essential to note that not all Chromebooks have upgradable RAM. Some models have the RAM soldered directly on the motherboard, making it impossible to upgrade. Therefore, it’s crucial to ensure your specific Chromebook model supports RAM upgrades before proceeding.
If you are unsure about performing the upgrade yourself, it is recommended to seek professional assistance to ensure the proper installation and compatibility of the RAM module.
In the next sections, we will guide you through the process of choosing the right RAM for your Chromebook and provide step-by-step instructions for installing the RAM module.
Choosing the Right RAM for Chromebook
When considering a RAM upgrade for your Chromebook, selecting the right RAM module is crucial for optimal compatibility and performance. Here are some key factors to keep in mind while choosing the right RAM for your Chromebook:
- Compatibility: Ensure that the RAM module you select is compatible with your specific Chromebook model. Check the manufacturer’s specifications or consult online resources to find the recommended RAM type, speed, and capacity for your device. Additionally, consider the maximum RAM capacity supported by your Chromebook.
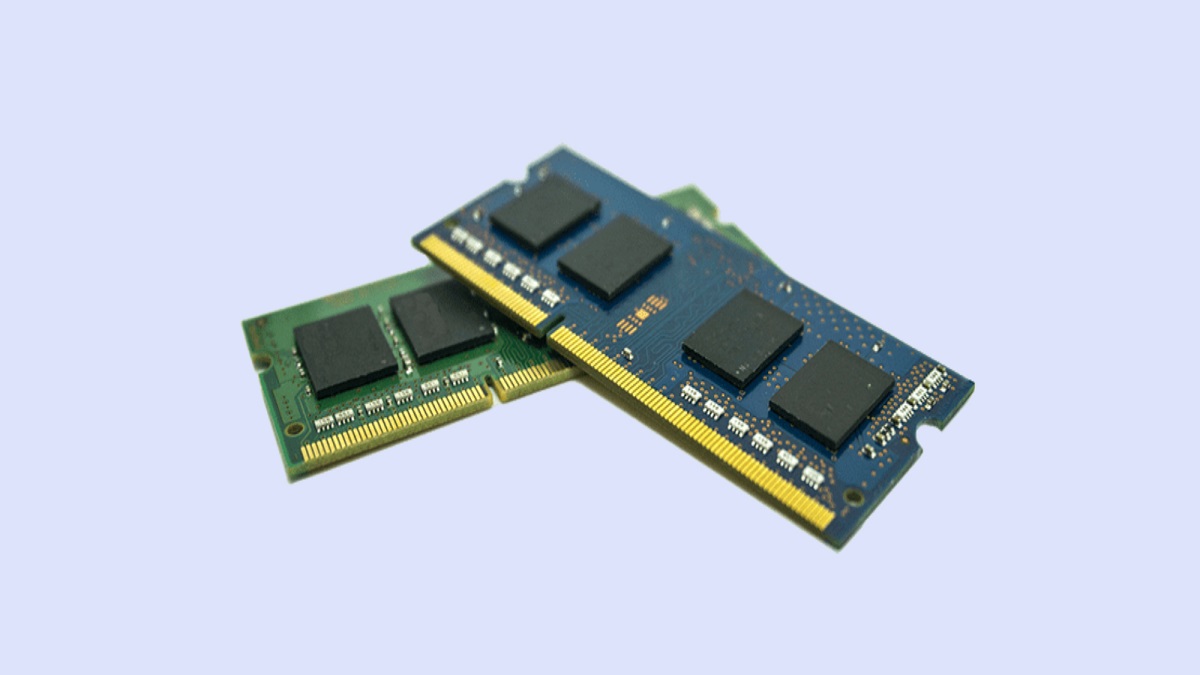
- Type of RAM: Chromebooks generally use DDR3 or DDR4 RAM. Check the type of RAM your Chromebook requires to ensure compatibility. DDR4 RAM offers faster speeds and better energy efficiency compared to DDR3, but it may be more expensive.
- RAM Capacity: Determine how much additional RAM you want to add to your Chromebook. Consider your usage requirements and budget. Upgrading from 4GB to 8GB of RAM is a common choice that provides a noticeable performance boost.
- RAM Speed: RAM modules come in different speeds, such as 2133MHz, 2400MHz, or 3200MHz. Higher speeds offer better performance, but make sure your Chromebook’s motherboard supports the desired speed. In case of mismatch, the RAM will operate at the highest speed supported by both the RAM module and the motherboard.
- Brand and Reliability: Opt for reputable brands when choosing a RAM module for your Chromebook. Well-known brands often provide better quality and reliability, ensuring the longevity and stability of your Chromebook’s performance.
It’s worth mentioning that some Chromebooks have limitations when it comes to RAM upgrades. Some older models may have a fixed RAM capacity or limited upgrade options. Make sure to thoroughly research your specific Chromebook model to understand its upgrade capabilities.
Once you have determined the appropriate RAM specifications for your Chromebook, you can proceed with purchasing the RAM module from a reliable retailer or online vendor.
In the next section, we will guide you through the step-by-step process of installing the RAM module in your Chromebook.
Installing RAM on Chromebook
Installing additional RAM on your Chromebook can significantly boost its performance. Here is a step-by-step guide to help you install the RAM module:
- Power off your Chromebook: Save any open files and shut down your Chromebook completely by selecting the “Power” icon in the bottom right corner of the screen and choosing “Power off.
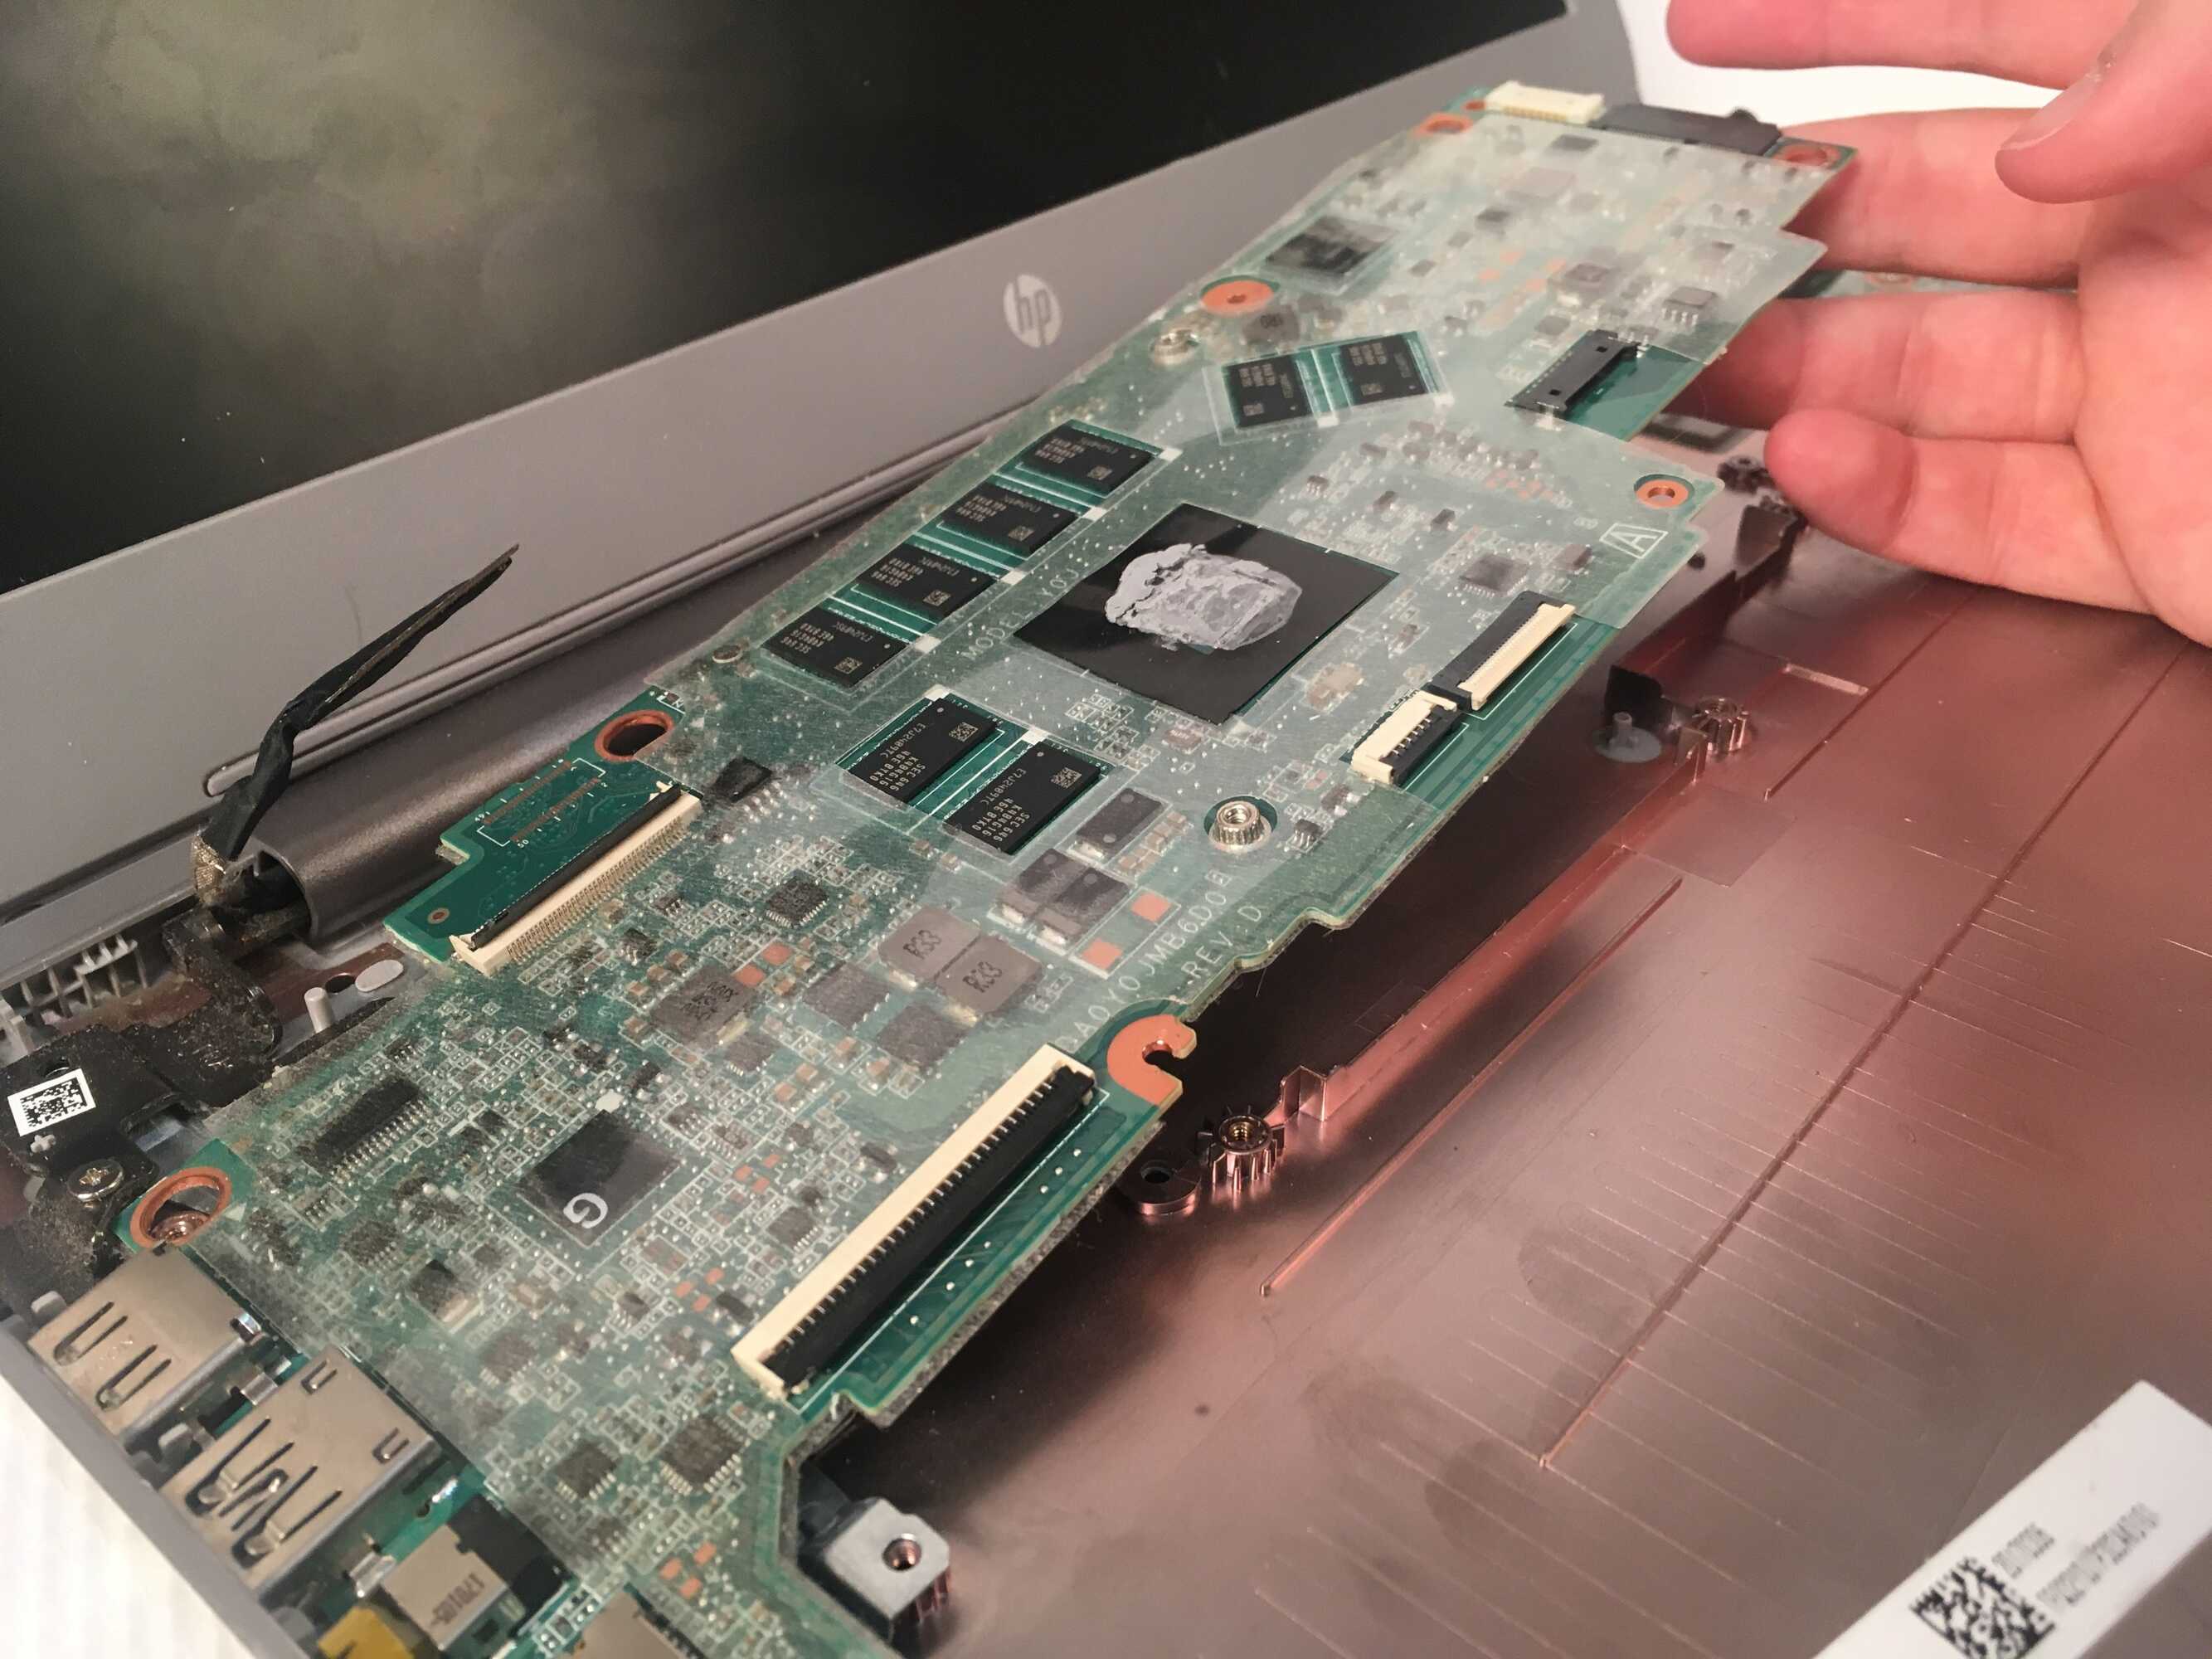
- Locate the RAM slot: Depending on your Chromebook model, the RAM slot may be located either on the bottom of the device or beneath the keyboard. Refer to the manufacturer’s manual or search online for specific instructions on locating the RAM slot for your Chromebook model.
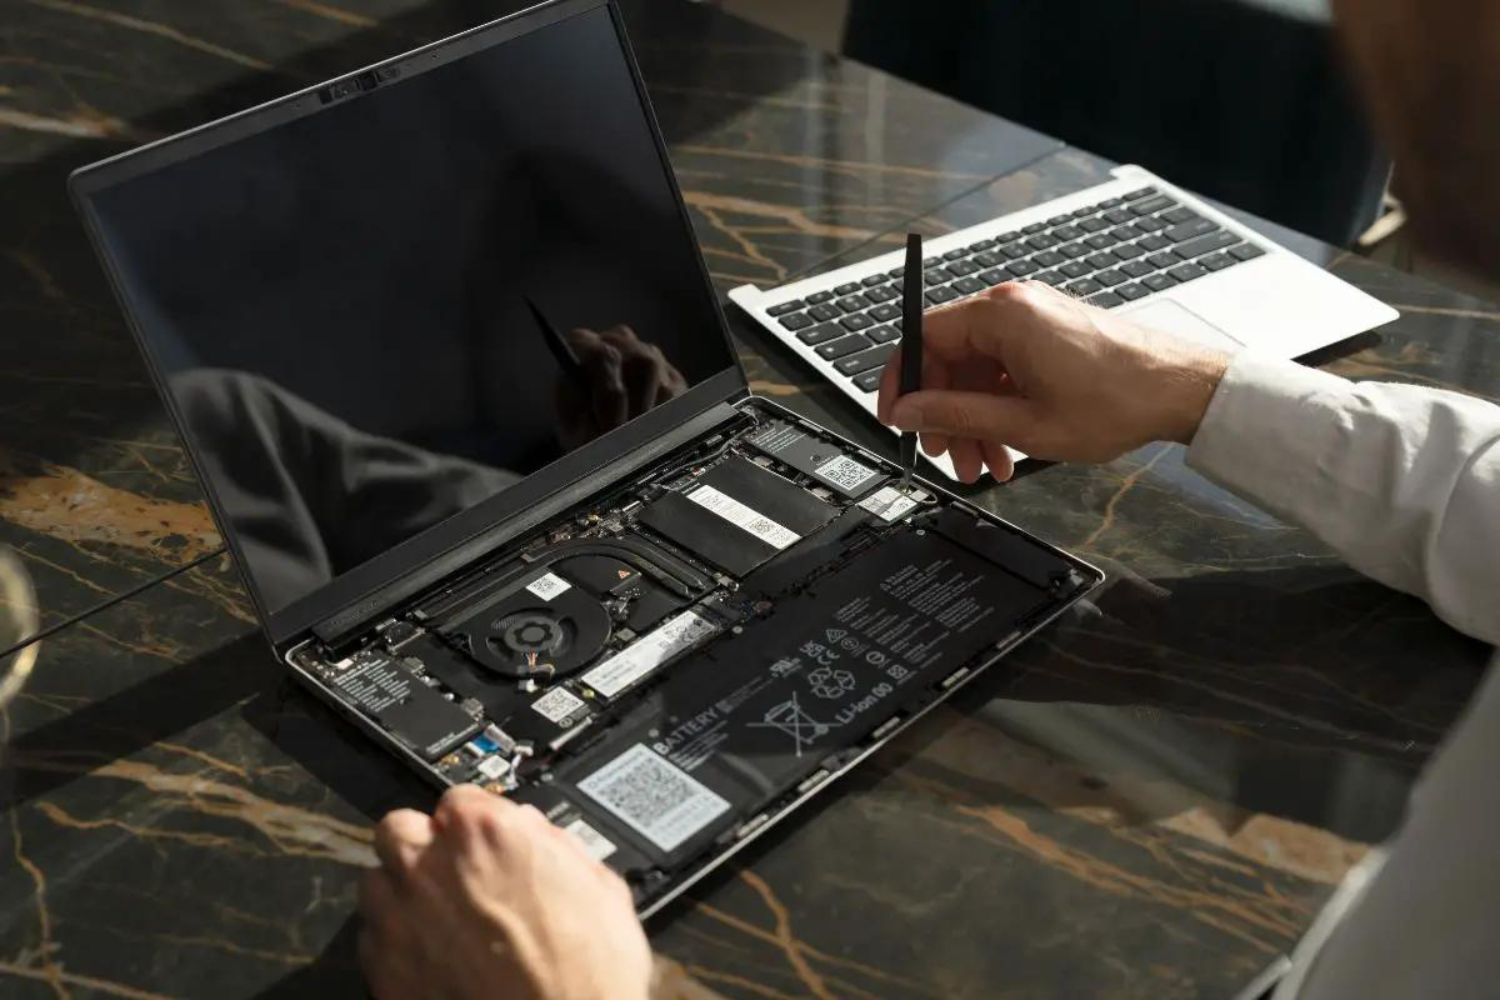
- Remove the back panel or keyboard: If the RAM slot is located on the bottom of the Chromebook, you may need to remove the back panel using a screwdriver. If the RAM slot is located beneath the keyboard, gently pry off the keyboard using a plastic spudger or a small flathead screwdriver.
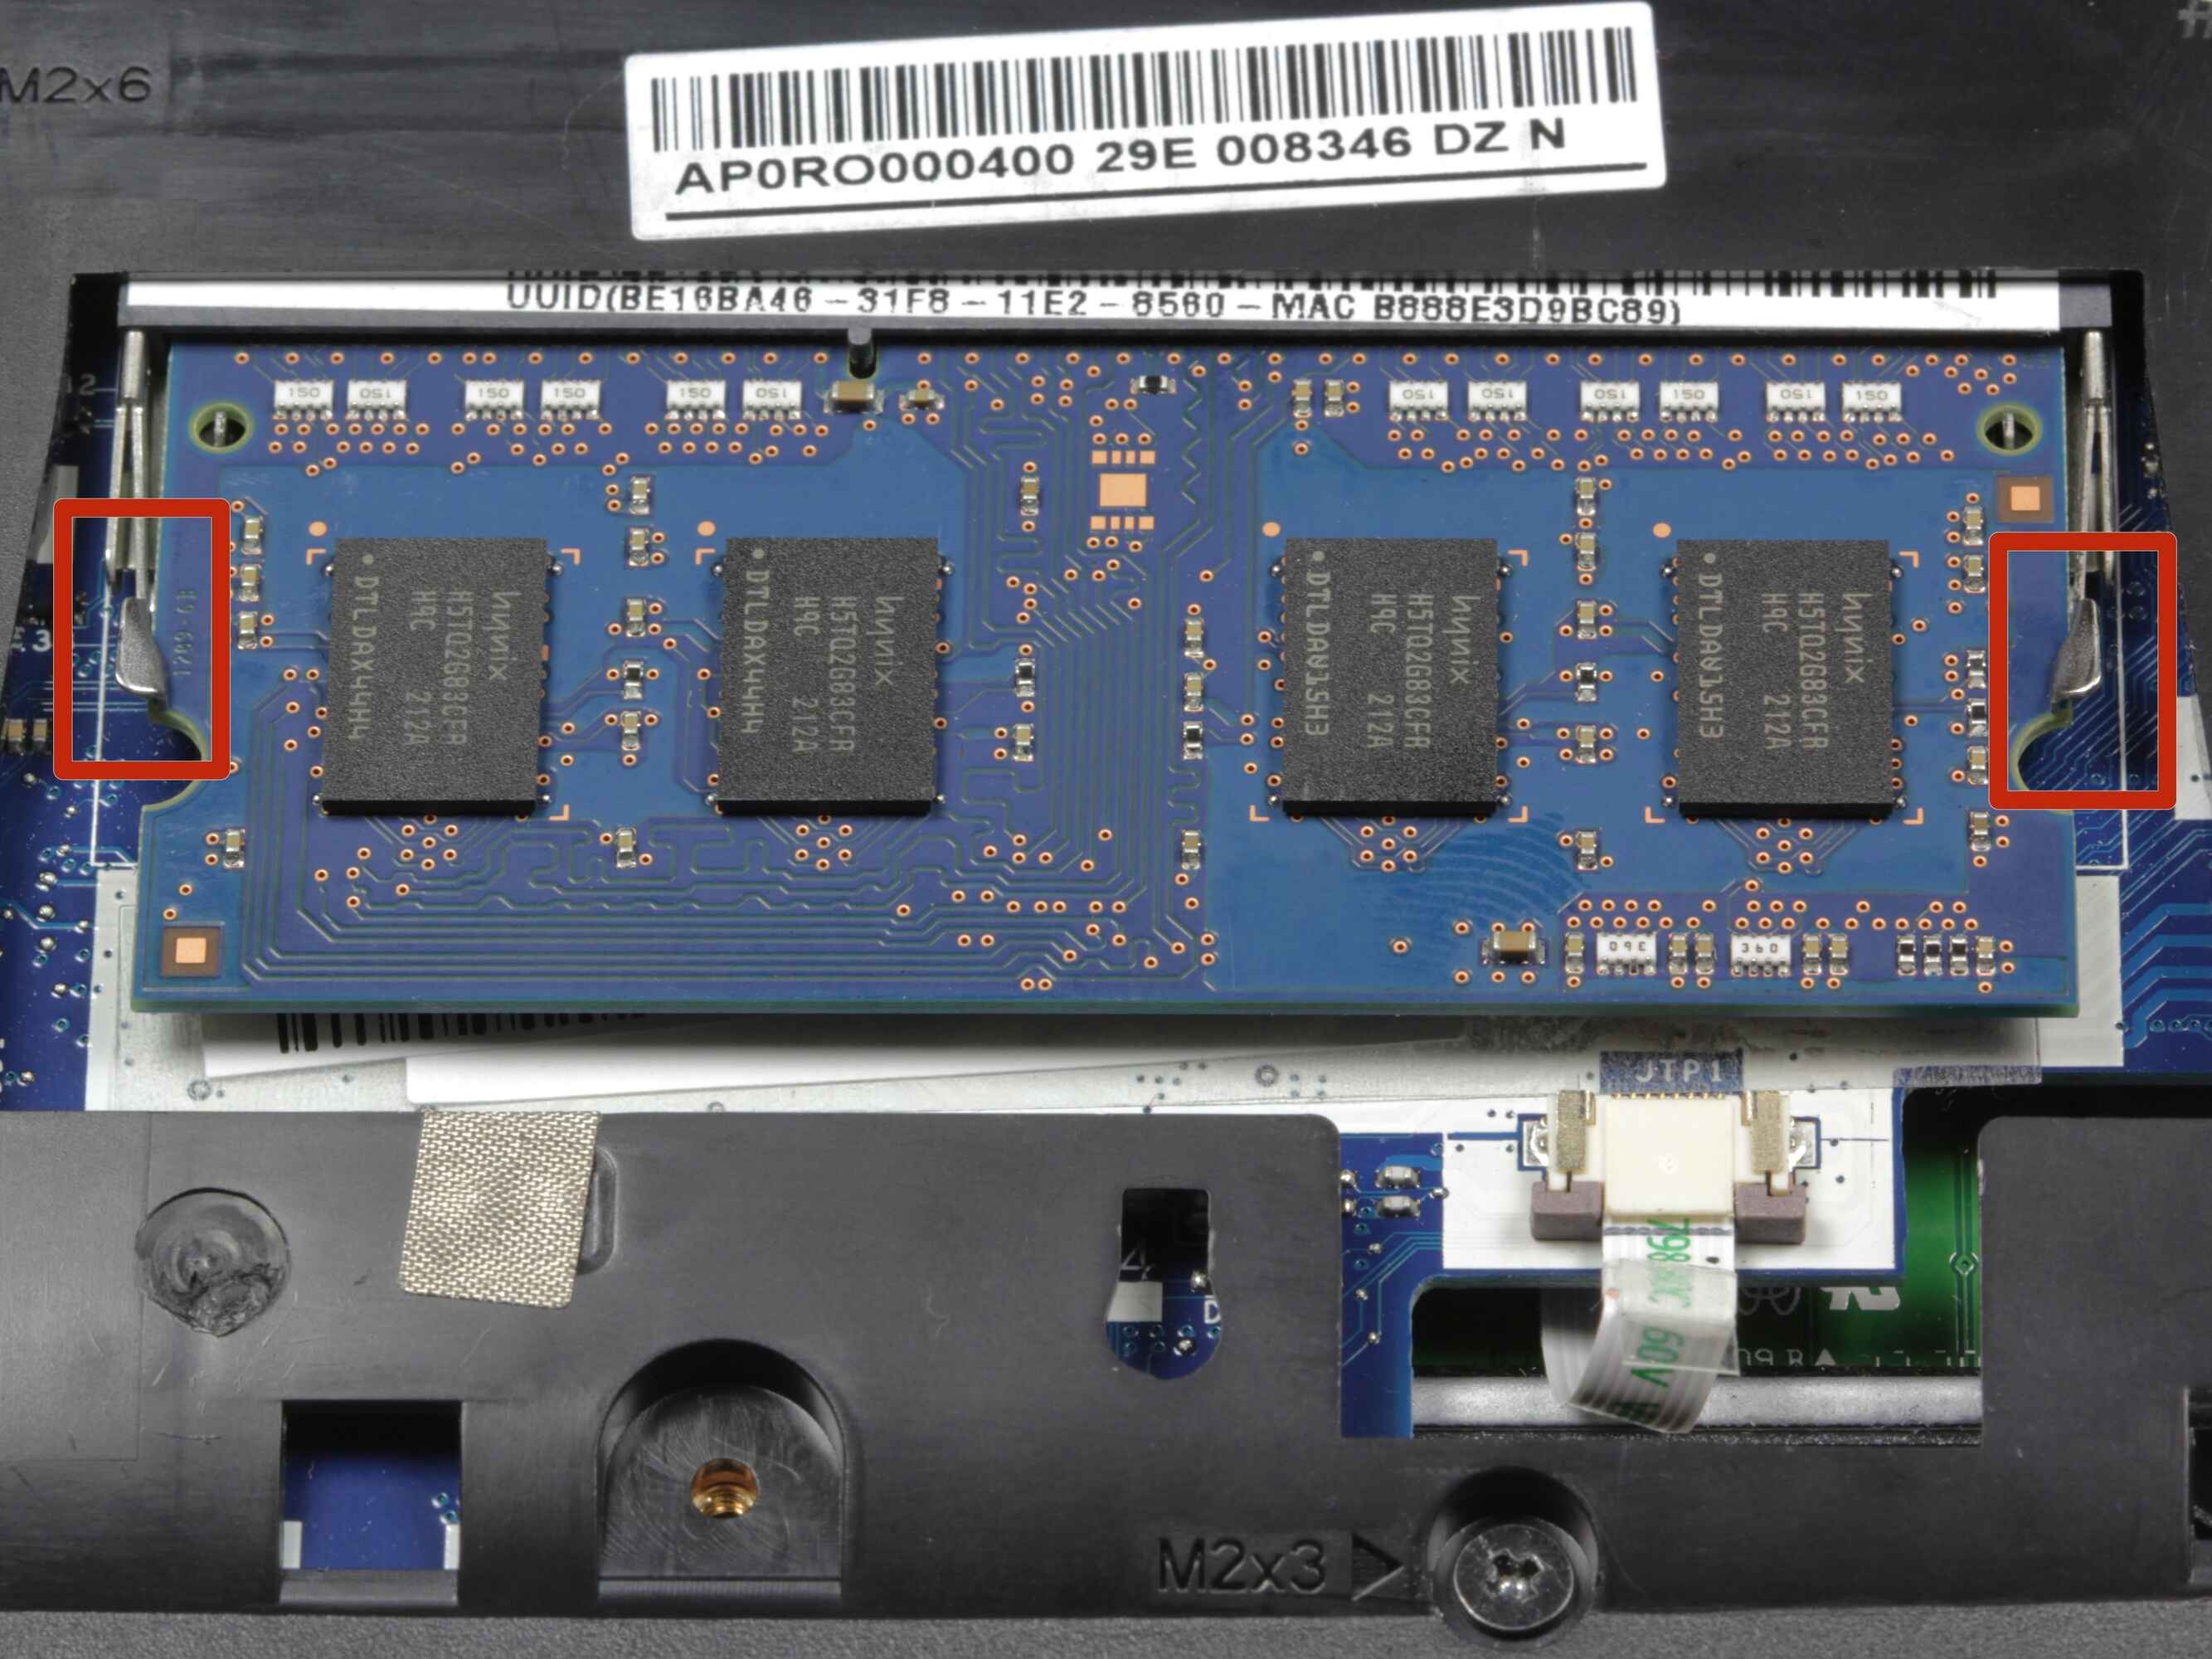
- Insert the RAM module: Carefully align the notch on the RAM module with the notch in the RAM slot. Insert the module at an angle and gently press it down until it clicks into place. Ensure that the module is securely seated in the slot.
- Reassemble the Chromebook: If you removed the back panel, screw it back into place. If you removed the keyboard, carefully place it back into position and press down to snap it back into place.
- Power on your Chromebook: Once the RAM module is installed and the Chromebook is reassembled, power it back on. Allow the Chromebook to boot up and detect the new RAM module. Check the Task Manager or your Chromebook’s settings to verify that the additional RAM is recognized and functioning.
It’s important to note that the installation process may vary depending on the specific Chromebook model. Always consult the manufacturer’s manual or search for online resources for detailed instructions tailored to your device.
If you are unsure or uncomfortable with installing the RAM module on your own, it’s recommended to seek assistance from a professional or authorized service center to ensure proper installation and avoid any potential damage.
Once the RAM module is successfully installed, you can enjoy improved performance and multitask with ease on your Chromebook!
Verifying RAM Upgrade on Chromebook
After installing new RAM on your Chromebook, it’s essential to verify that the upgrade was successful and the additional memory is recognized by the system. Here’s how you can verify the RAM upgrade:
- Open Task Manager: Press the Shift + Esc keys simultaneously to launch the Task Manager on your Chromebook.
- Check the Memory Utilization: In the Task Manager window, look for the “Memory” tab or section. It will display the amount of RAM installed on your Chromebook and how much is currently being used.
- Observe the New RAM Capacity: Verify that the Task Manager is now detecting the increased RAM capacity. It should display the total amount of RAM you installed, reflecting the upgrade.
- Monitor Performance: With the upgraded RAM, you should notice improved performance when running memory-intensive applications or multitasking with multiple tabs open. Pay attention to the speed and responsiveness of your Chromebook to gauge the impact of the RAM upgrade.
If the Task Manager displays the correct amount of RAM and your Chromebook is running smoothly, it signifies a successful RAM upgrade. You can now take full advantage of the increased memory capacity and enjoy a more efficient computing experience.
However, if the Task Manager does not reflect the change, or if you encounter any issues or error messages related to the RAM upgrade, double-check the installation to ensure that the RAM module is properly seated in the slot. If the problem persists, consider seeking professional assistance or contacting the manufacturer’s support for further guidance.
Remember that while upgrading the RAM can significantly enhance your Chromebook’s performance, it is not a guarantee to resolve all performance issues. If you continue to experience slowdowns or other performance-related problems, it may be necessary to explore additional optimization techniques or consult with a professional.
With the new RAM in place and verified, enjoy the improved performance and smooth usage of your Chromebook!