Introduction
As an Apple user, you may be familiar with the convenience and functionality of iMessage on your iPhone. However, did you know that you can also sync your iMessages with your Mac computer? This seamless integration allows you to send and receive messages on your Mac, making it easier to stay connected with friends and family.
In this article, we will guide you through the process of setting up iMessage on your Mac and ensuring that it syncs properly with your iPhone. Whether you’re a seasoned Mac user or a newcomer to the Apple ecosystem, we’ve got you covered.
With iMessage on your Mac, you’ll be able to enjoy the same features and benefits of the iPhone version. Send and receive text messages, photos, videos, and even documents on your Mac, all within the familiar iMessage interface.
Before we dive into the setup process, there are a few prerequisites to keep in mind. Firstly, make sure that your Mac meets the minimum system requirements to run macOS High Sierra or a later version. Additionally, ensure that your iPhone is running iOS 11.4 or later, as this is necessary for the iMessage syncing feature.
Now that we’ve covered the basics, let’s get started with setting up iMessage on your Mac.
Prerequisites
Before you begin setting up iMessage on your Mac, there are a few requirements that need to be met. These prerequisites ensure a smooth and successful integration between your iPhone and Mac:
- Compatible Devices: Ensure that your Mac is running macOS High Sierra or a later version. For optimal experience, it is recommended to use the latest version of macOS.
- Updated iOS: Make sure your iPhone is running iOS 11.4 or a later version. This is necessary to enable the iMessage syncing feature.
- iCloud Account: You must have an active iCloud account linked to both your iPhone and Mac. If you don’t have an iCloud account, you can create one for free.
- Stable Internet Connection: Ensure that your Mac is connected to a reliable internet source. This is essential for syncing your messages between devices.
- Apple ID: You need to have an Apple ID, as it is used to sign in to your iCloud account and authenticate your devices.
Meeting these prerequisites will ensure that your devices are compatible and ready for iMessage syncing. Now that you have checked off these requirements, let’s move on to the step-by-step process of setting up iMessage on your Mac.
Setting up iCloud on your iPhone
Before you can sync iMessage on your Mac, you need to set up iCloud on your iPhone. Follow these steps to ensure that iCloud is properly configured:
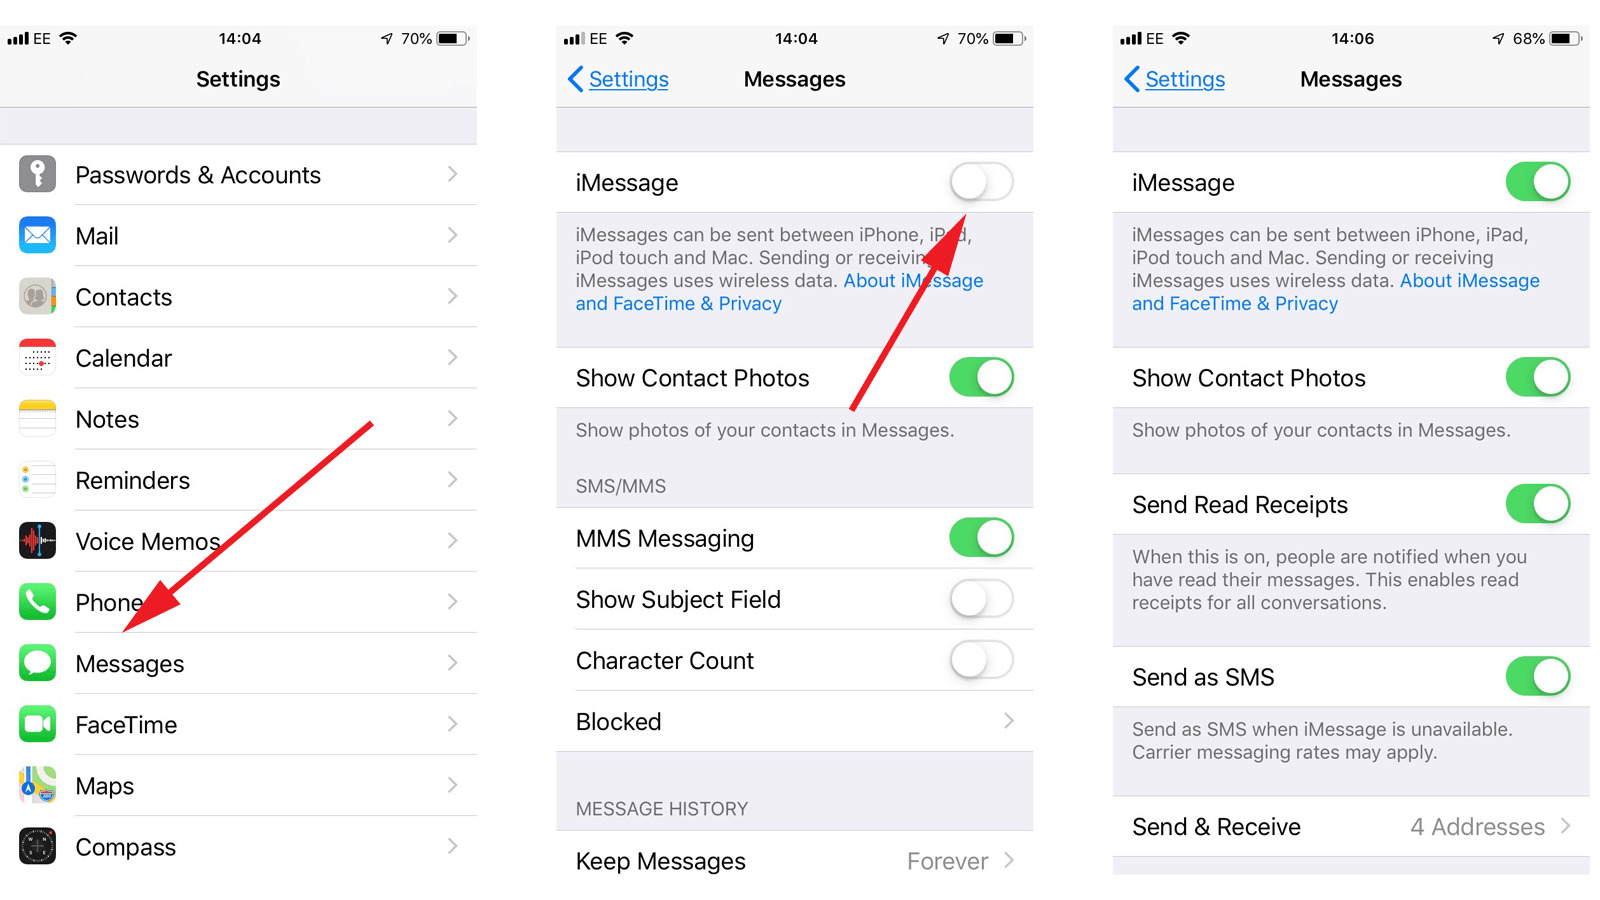
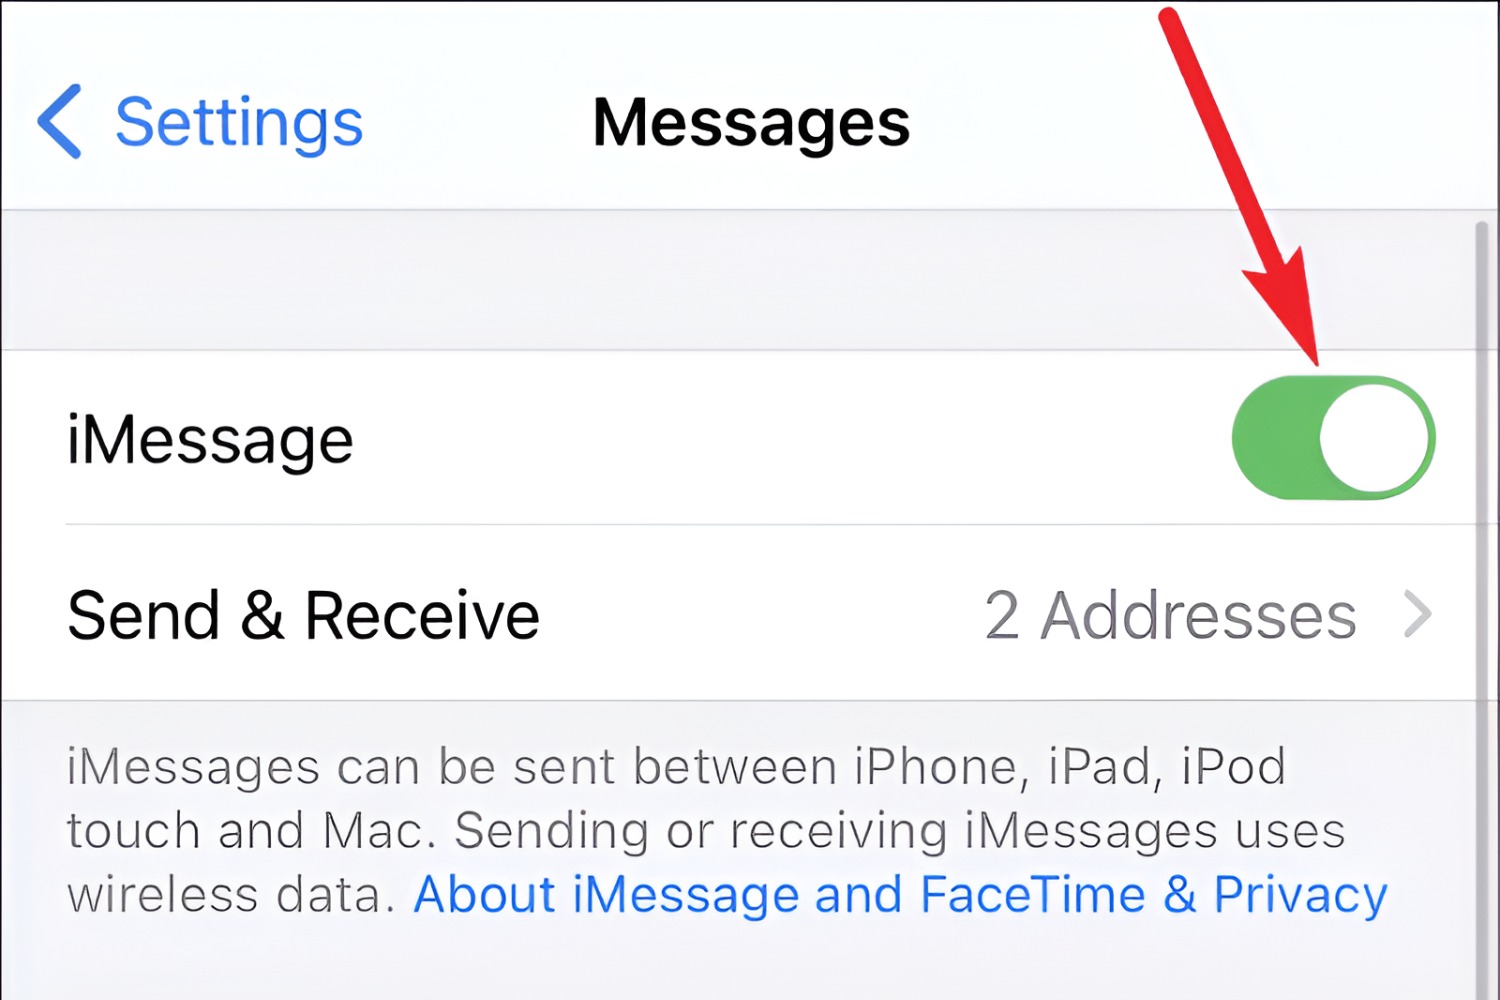
- Launch the “Settings” app on your iPhone and tap on your name at the top of the screen to access your Apple ID settings.
- Tap on “iCloud” and make sure that the toggle for “iCloud Drive” is turned on. This will enable the syncing of your messages across devices.
- If prompted, enter your Apple ID password to sign in to iCloud. Make sure to use the same Apple ID on both your iPhone and Mac to ensure synchronization.
- Scroll down to the “Apps Using iCloud” section and make sure that the toggle for “Messages” is turned on. This will sync your message history and allow you to send and receive iMessages on your Mac.
- Wait for a few moments as iCloud syncs your messages. This may take some time depending on the size of your message history.
Once you have successfully set up iCloud on your iPhone, you can proceed to the next step of signing in to iMessage on your Mac.
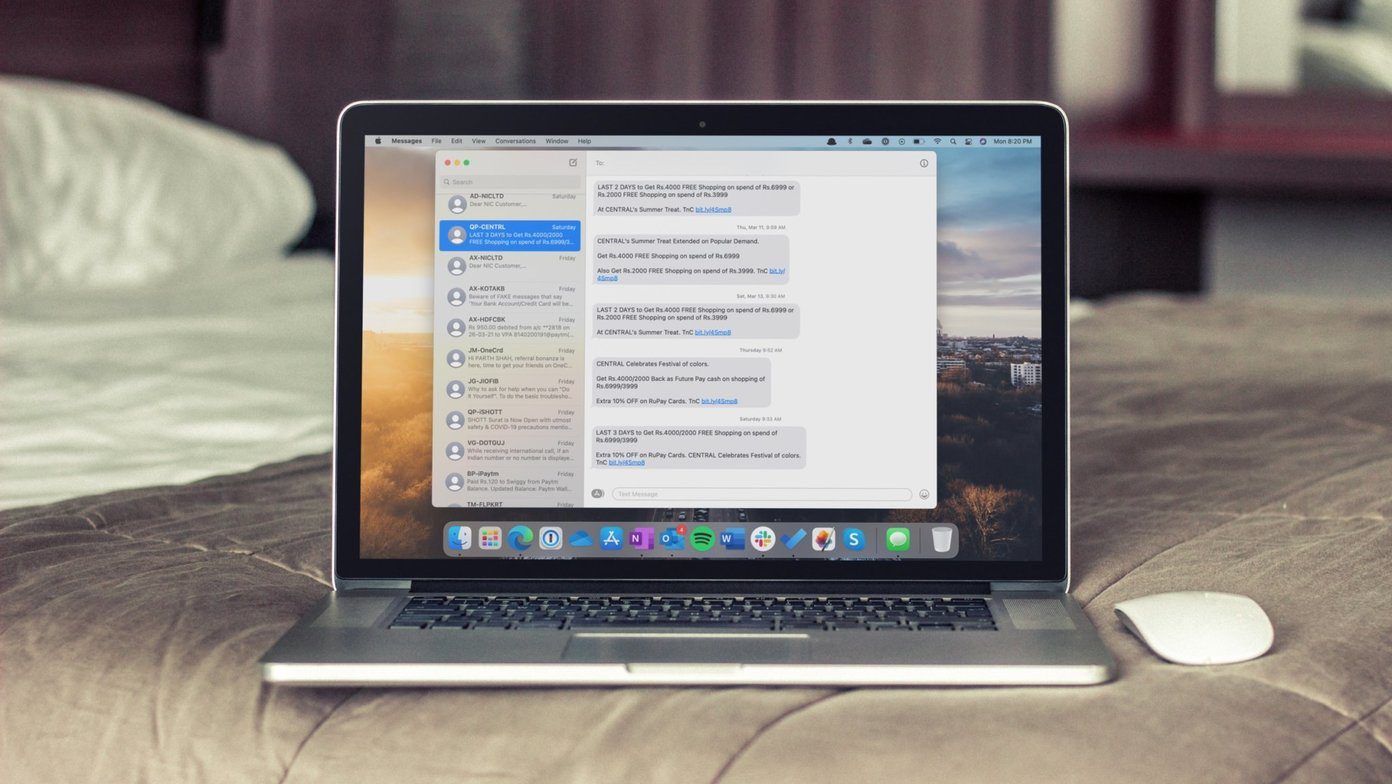
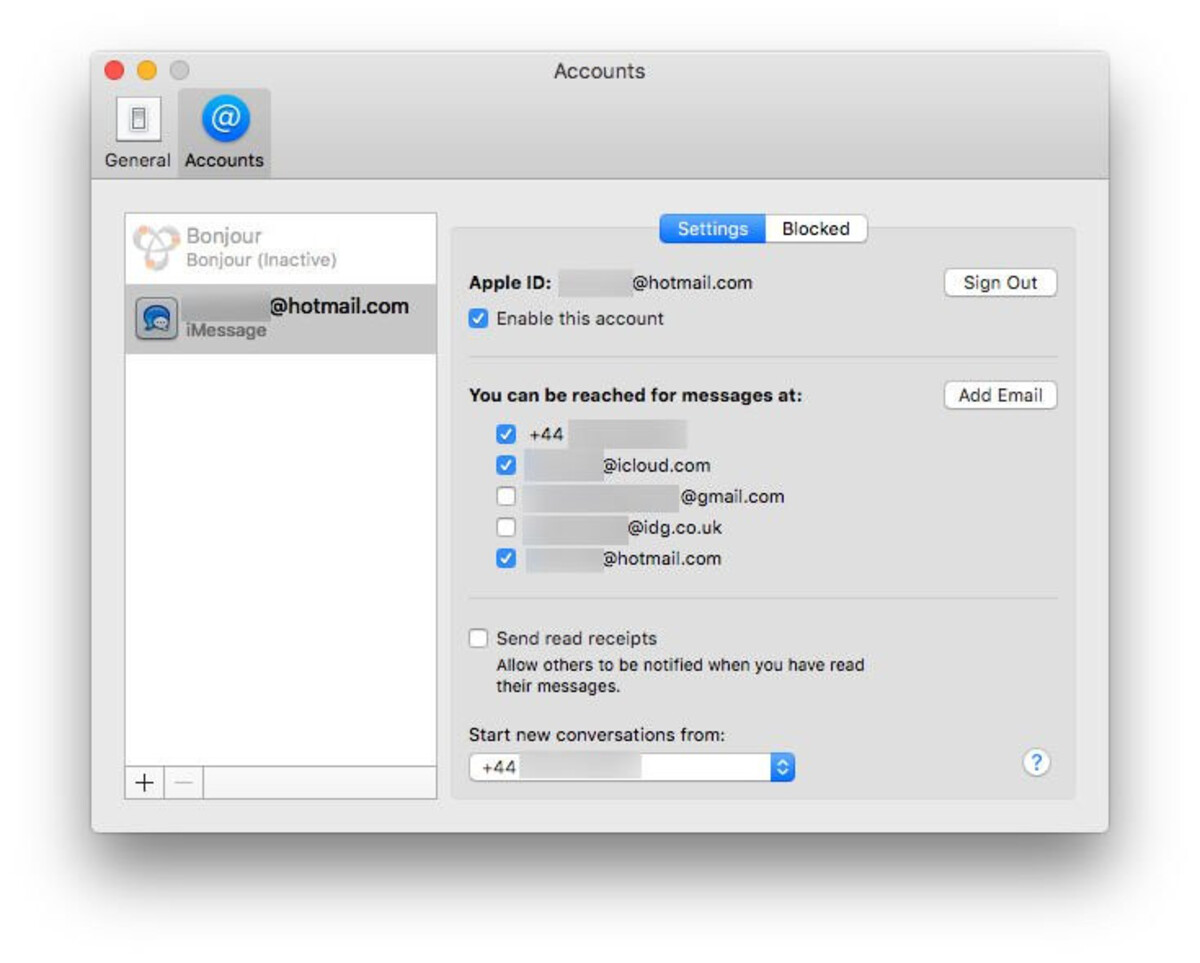
Signing in to iMessage on your Mac
Now that you have set up iCloud on your iPhone, it’s time to sign in to iMessage on your Mac. Follow these steps to get started:
- Open the “Messages” app on your Mac. You can find it in the Applications folder or by using Spotlight search.
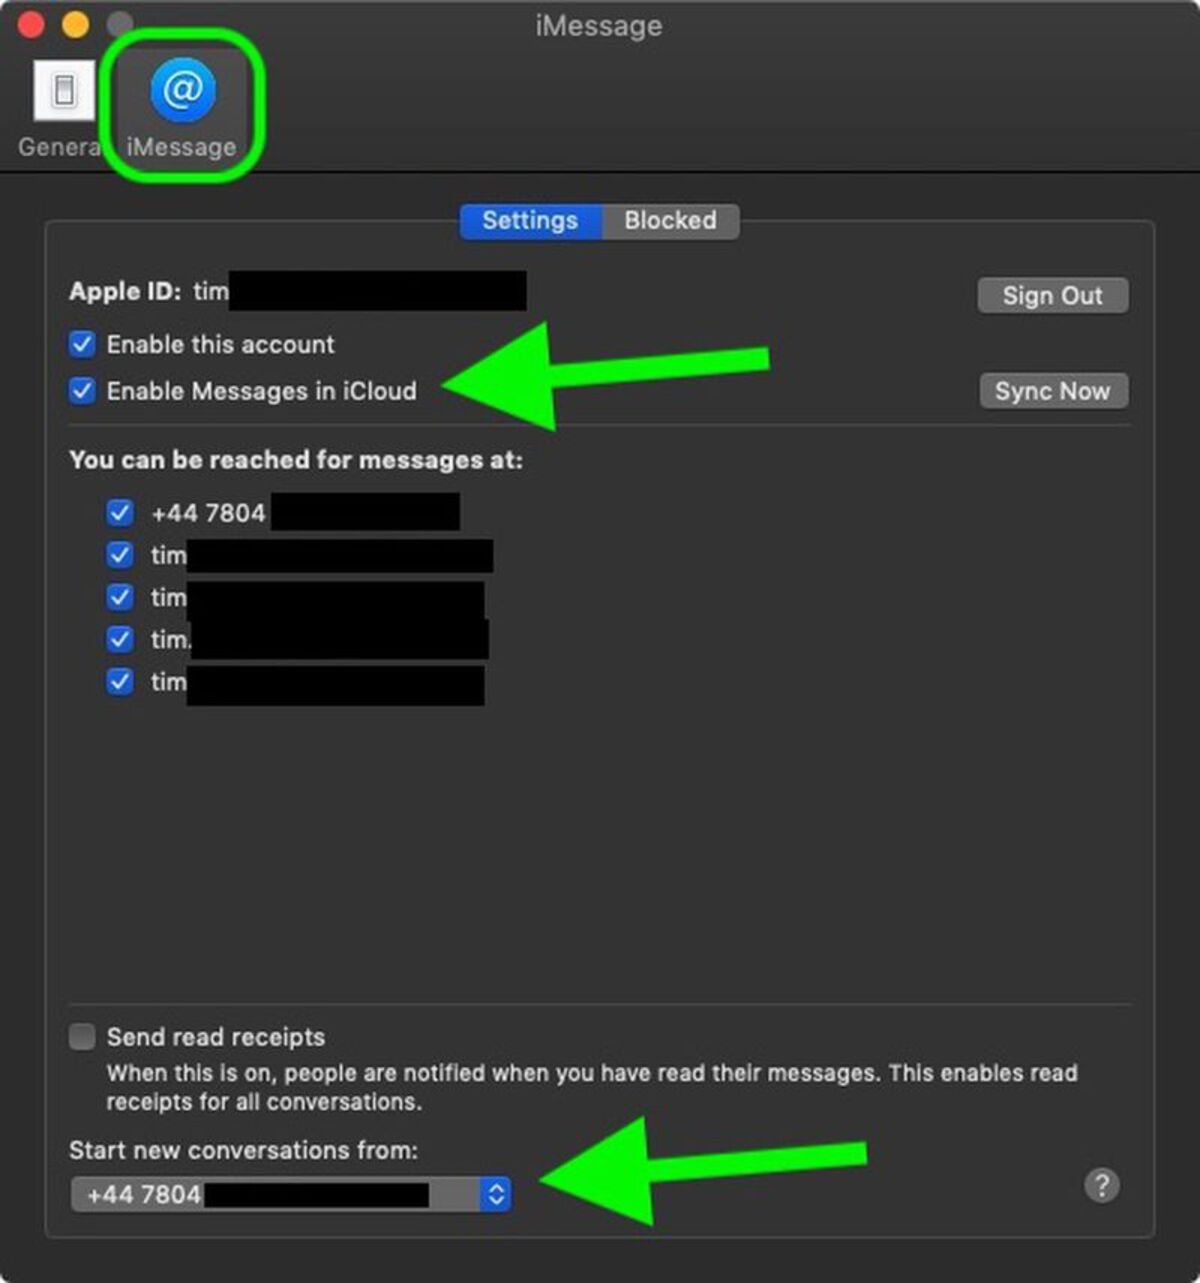
- If you see a prompt to sign in with your Apple ID, enter your credentials and click “Sign In”. If you don’t see the prompt, click on “Messages” in the menu bar and select “Preferences”. Then, click on the “Accounts” tab and click the “+” button to add your Apple ID.
- Once signed in, ensure that the “Enable this Account” option is checked next to your Apple ID.
- Check the box next to “Enable Messages in iCloud”. This will ensure that your messages are synced across your Apple devices.
- Click on “Sync Now” to initiate the sync process. This will sync your existing messages from iCloud to your Mac, allowing you to access your entire message history.
After completing these steps, you should see your iMessage conversations appear on your Mac. You can now send and receive messages seamlessly between your iPhone and Mac.
If you encounter any issues during the signing-in process, double-check that your Apple ID credentials are correct and that your internet connection is stable. If problems persist, refer to the troubleshooting section in this article for potential solutions.
Enabling Messages in iCloud on your Mac
Enabling Messages in iCloud on your Mac allows you to keep your iMessage conversations seamlessly synced with your other Apple devices. Follow these steps to enable this feature:
- Open the “Messages” app on your Mac.
- Click on “Messages” in the menu bar and select “Preferences”.
- In the “Accounts” tab, make sure your Apple ID is selected on the left-hand side.
- Check the box next to “Enable Messages in iCloud”.
- Click on “Sync Now” to start syncing your messages with iCloud. This might take some time depending on the size of your message history and your internet connection speed.
Enabling Messages in iCloud ensures that your messages, including all past conversations, attachments, and even deletions, are kept in sync across all your Apple devices. This means that any changes you make to your messages on one device will reflect on all your other devices as well.
With Messages in iCloud enabled, you can seamlessly switch between your iPhone and Mac without losing any message history. Additionally, if you get a new Apple device in the future, all your messages will automatically sync to that device as well.
Please note that enabling Messages in iCloud will use your iCloud storage space. If you are running low on iCloud storage, you may need to consider upgrading your storage plan to accommodate the space needed for your messages.
Now that you have successfully enabled Messages in iCloud on your Mac, you can enjoy the convenience of having all your iMessage conversations available across all your Apple devices.
Troubleshooting: Common issues and solutions
While setting up iMessage on your Mac, you may encounter some common issues. Here are a few troubleshooting tips and solutions to help you resolve them:
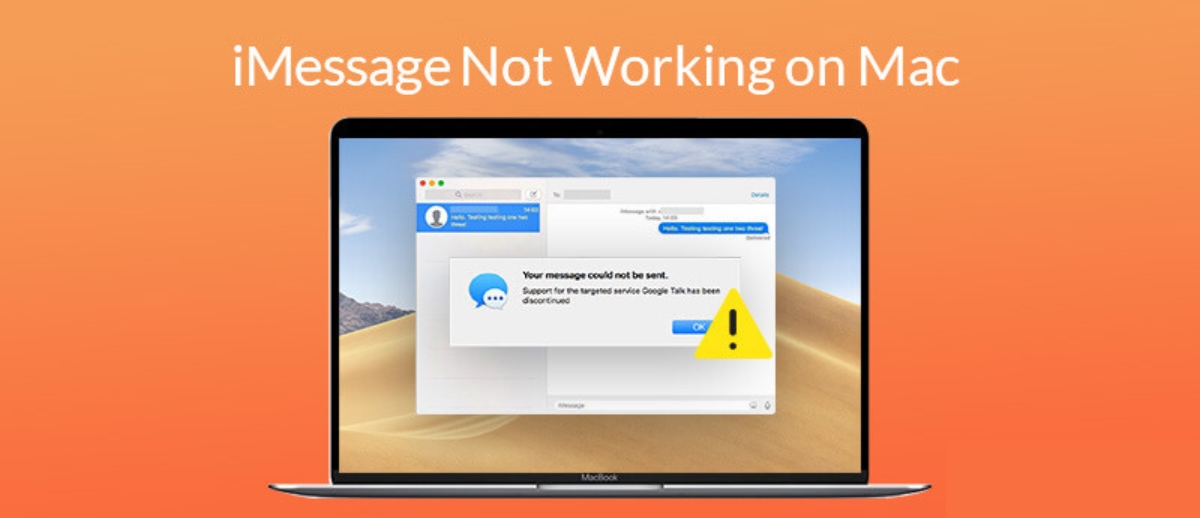
- Unable to sign in with Apple ID: If you are unable to sign in with your Apple ID, double-check that you have entered the correct credentials. Additionally, ensure that your internet connection is stable. If the problem persists, try resetting your Apple ID password or contact Apple Support for further assistance.
- Messages not syncing across devices: If your messages are not syncing properly, firstly make sure that you are signed in to iCloud with the same Apple ID on all your devices. Additionally, verify that you have enabled iMessage and Messages in iCloud on both your iPhone and Mac. Restarting your devices and signing in and out of iCloud on all devices may also help resolve syncing issues.
- Insufficient iCloud storage: If you receive a notification about insufficient iCloud storage, consider upgrading your storage plan to accommodate the size of your message history. To do this, go to “Settings” on your iPhone or “System Preferences” on your Mac, select “iCloud,” and then click on “Manage Storage” to purchase more storage.
- Unable to send or receive messages: If you are having trouble sending or receiving messages on your Mac, ensure that your internet connection is working properly. Also, make sure that your iPhone has a cellular or Wi-Fi connection. Restarting your devices or signing out and back in to iMessage on your Mac may also help resolve this issue.
- Messages appearing out of order: If your messages are not displayed in chronological order, try quitting and reopening the Messages app on your Mac. If the issue persists, restart your devices and ensure that you are running the latest software updates on both your iPhone and Mac.
If you are still experiencing issues with iMessage on your Mac, it is recommended to visit the Apple Support website or contact Apple Support directly for further assistance.
By troubleshooting these common issues, you can ensure a smooth and seamless iMessage experience on your Mac.
Conclusion
Setting up iMessage on your Mac and getting it to sync with your iPhone is a great way to stay connected and easily communicate with others. Whether you’re working on your Mac or simply prefer using a larger screen, having access to iMessage on your computer brings convenience and efficiency to your messaging experience.
In this article, we discussed the prerequisites for setting up iMessage on your Mac, including ensuring compatible devices, updated iOS, having an iCloud account, a stable internet connection, and an Apple ID. We then walked you through the step-by-step process of setting up iCloud on your iPhone, signing in to iMessage on your Mac, and enabling Messages in iCloud.
We also provided troubleshooting tips for common issues you may encounter during the setup process. By following these solutions, you can overcome obstacles and maximize the functionality of iMessage on your Mac.
Now that you have successfully set up iMessage on your Mac and learned how to troubleshoot potential issues, you can enjoy seamless syncing of your messages across all your Apple devices. Stay connected, send messages, share photos and videos, and enjoy the convenience of having iMessage at your fingertips, no matter which device you are using.
Remember to keep your devices updated with the latest software versions to ensure compatibility and access to new features that Apple releases over time.
We hope this guide has been helpful in assisting you with syncing iMessage on your Mac. If you have any further questions or need additional support, don’t hesitate to reach out to Apple Support for assistance.