Introduction
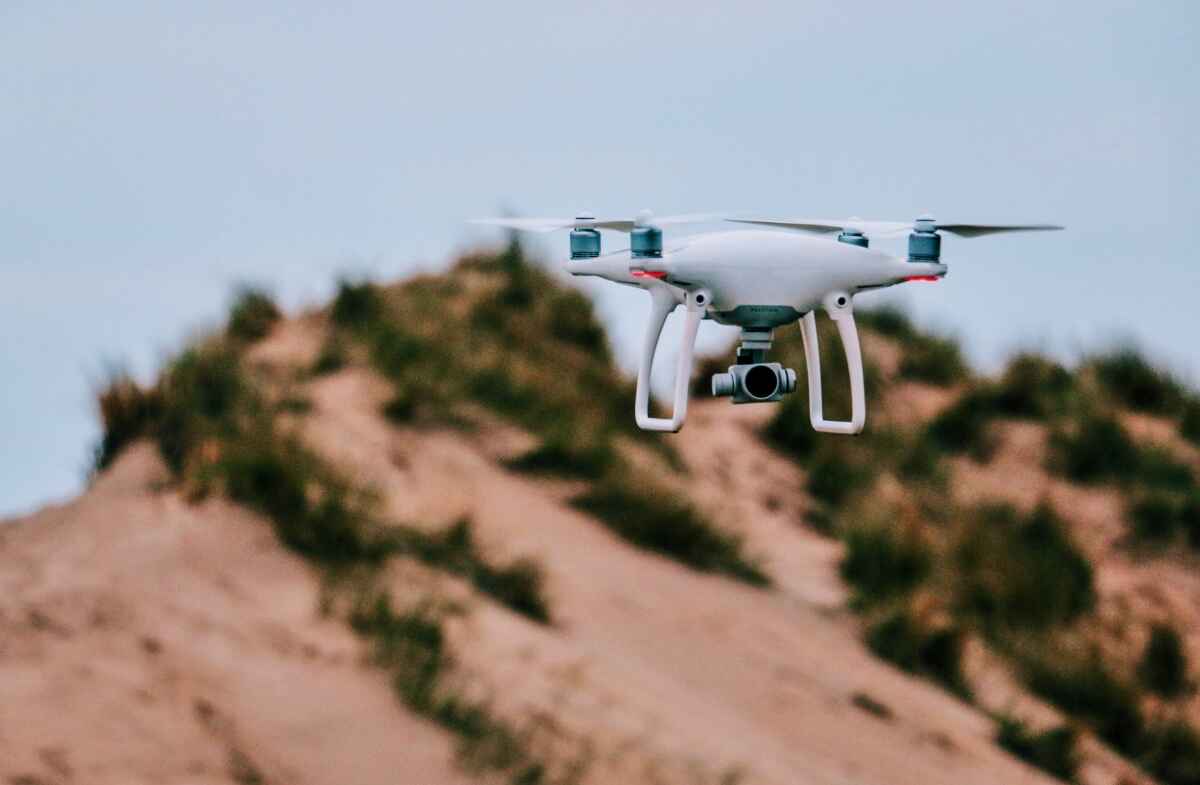
Welcome to the world of flying drones! The Phantom 4 drone is an incredible piece of technology that allows you to capture breathtaking aerial footage and explore the sky like never before. Whether you are a hobbyist looking to capture stunning photos or an aspiring filmmaker wanting to add cinematic aerial shots to your projects, the Phantom 4 drone is your perfect companion.
In this guide, we will take you through the essential steps to get you up and flying with your Phantom 4 drone. We will cover everything from unboxing the drone to mastering its flight controls, as well as capturing high-quality photos and videos. By the end of this guide, you will have the confidence and knowledge to operate your Phantom 4 drone like a pro.
Before we dive into the specifics, it is important to note that flying a drone comes with responsibility. It is crucial to follow all local regulations and guidelines regarding drone usage to ensure both your safety and the safety of others around you. Familiarize yourself with the laws in your area and always fly in designated areas where permitted.
The Phantom 4 drone is equipped with advanced features such as obstacle avoidance, intelligent flight modes, and GPS navigation. However, it is still essential to understand the basics of drone flight and control. This guide will provide you with a solid foundation to confidently operate your drone, but always remember to start with caution and practice in open areas away from obstacles.
Now, get ready to embark on an exciting journey into the world of drone flight. Let’s begin with unboxing your Phantom 4 drone and setting it up for your first flight adventure!
Getting Started
Before you take to the skies with your Phantom 4 drone, there are a few important steps to follow to ensure a smooth and successful flight. Let’s walk through the initial setup process to get you ready for an amazing flying experience.
The first step is to familiarize yourself with the components of the Phantom 4 drone. Take a moment to carefully unbox the drone and lay out all the items included in the package. You should find the drone itself, the remote controller, propellers, batteries, charger, and various cables and accessories. Make sure everything is accounted for and in good condition.
Next, it’s time to charge the batteries. The Phantom 4 drone comes with a rechargeable intelligent flight battery. Locate the battery and the charger, then connect the charger to a power source. Insert the battery into the charger and ensure it is securely connected. The LED indicators on the charger will show the charging progress, and once fully charged, the lights will turn green. Charging times may vary, so be patient and allow sufficient time for the batteries to charge fully.
While the batteries are charging, you can start preparing the propellers. Locate the propellers included in the package and identify the correct orientation for each propeller. It is essential to install the propellers correctly to ensure safe and stable flight. Follow the diagram provided in the user manual to attach the propellers securely to the designated motors. Each propeller should have a black dot or a letter corresponding to a specific motor. Match the propellers accordingly to the motor labels on the drone.
After the batteries are fully charged and the propellers are installed, it’s time to update the firmware of the Phantom 4 drone. Firmware updates often include important bug fixes and performance improvements. To update the firmware, connect the drone to your computer using the USB cable provided. Download the latest firmware from the official DJI website and follow the instructions to install it. This process may take a few minutes, so be patient and ensure a stable and reliable internet connection during the update.
With the firmware updated, it’s time to connect the remote controller to your drone. Ensure both the drone and the remote controller are powered on and within close proximity to establish a stable connection. Follow the instructions in the user manual to pair the drone with the remote controller. Once the connection is established, you are ready to move on to the next steps.
In the next section, we will go through a pre-flight checklist to ensure your drone is in optimal condition and ready for takeoff. Stay tuned!
Unboxing the Phantom 4 Drone
Unboxing your new Phantom 4 drone is an exciting moment that marks the beginning of your aerial adventure. Let’s take a closer look at what you can expect when you crack open the box and reveal the contents of the package.
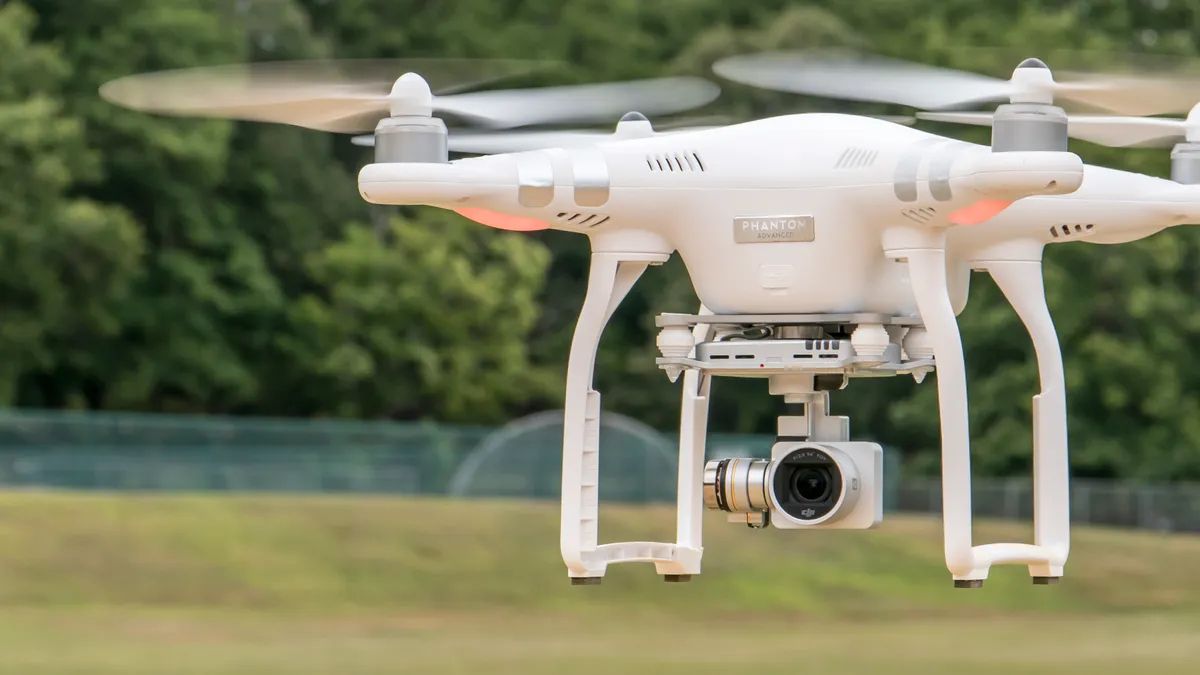
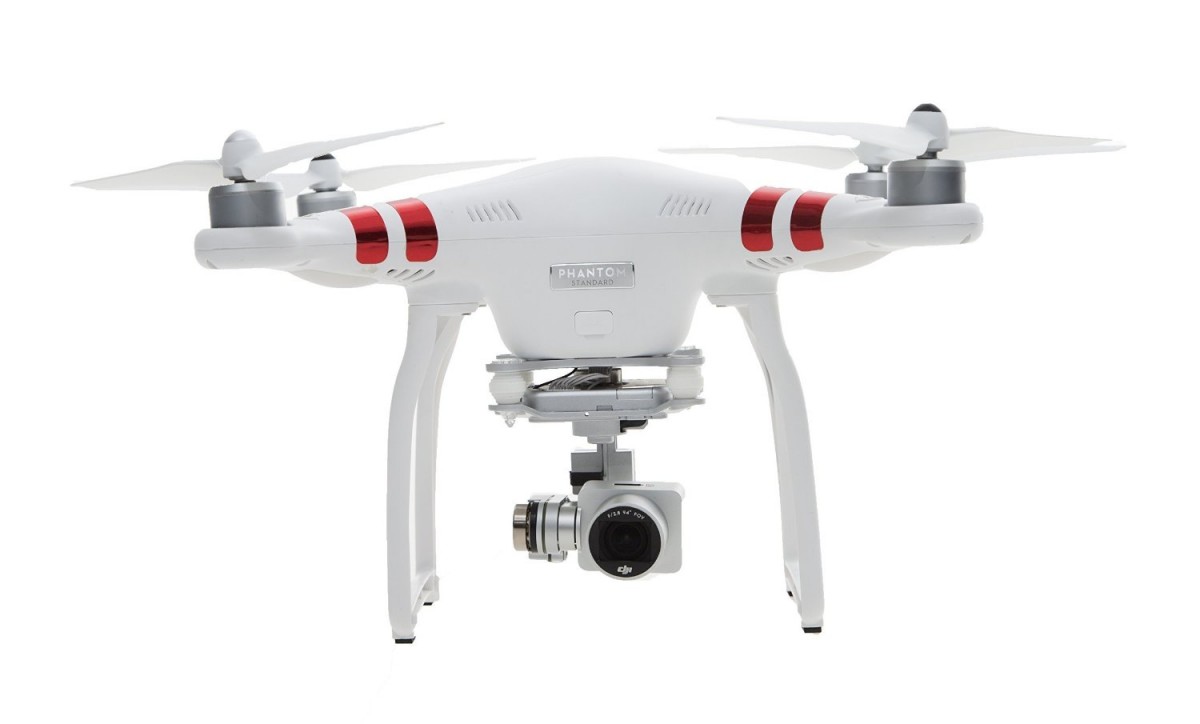
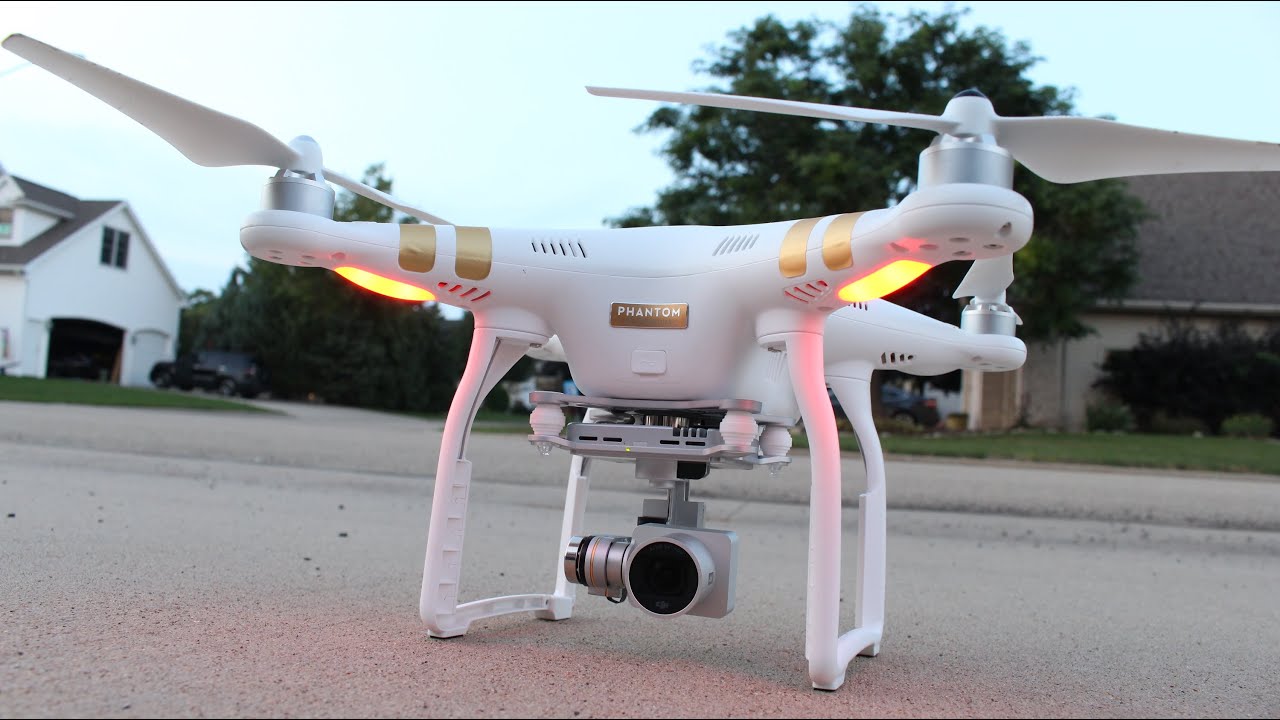
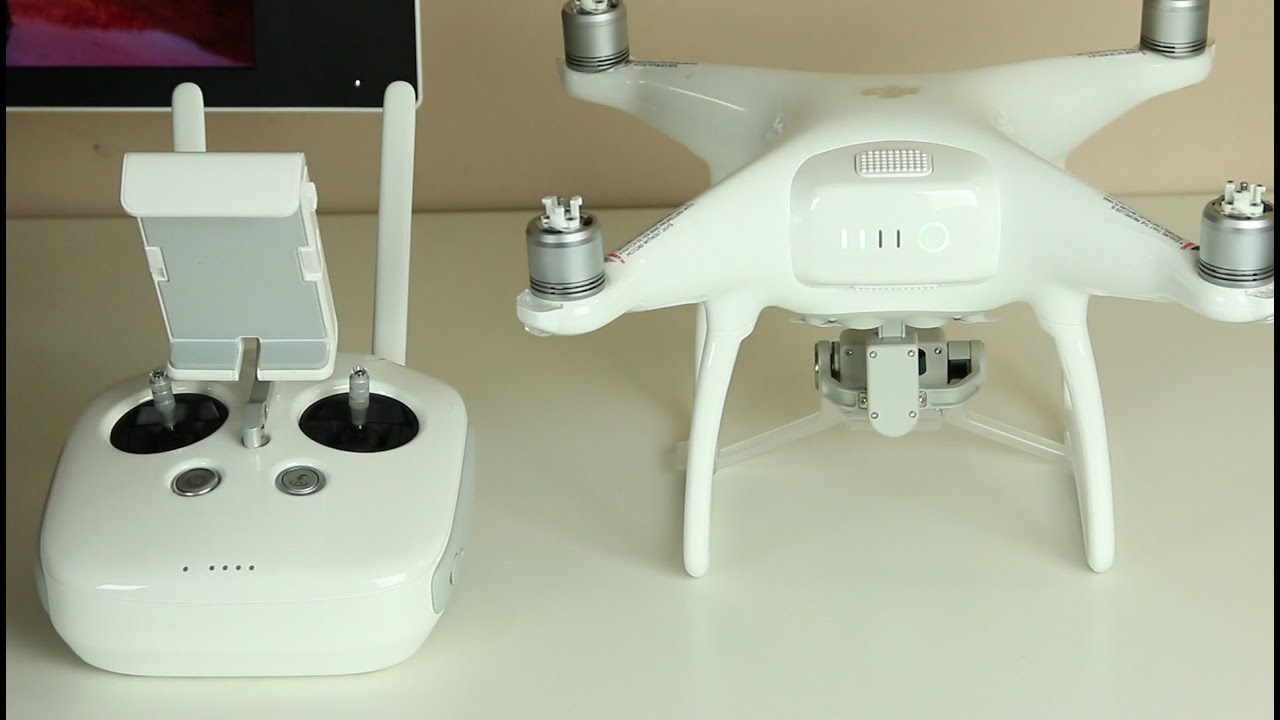
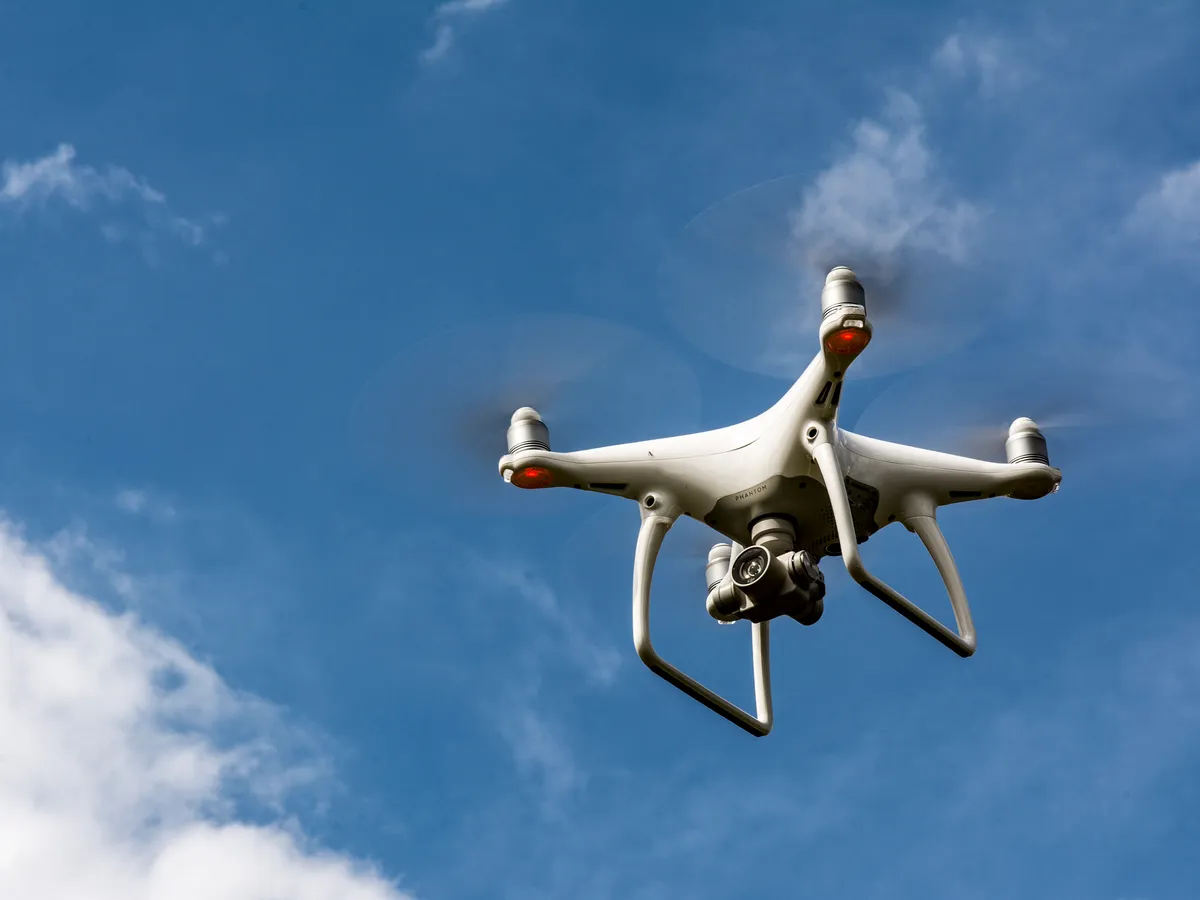
As you lift the lid, you will find the sleek and sophisticated Phantom 4 drone resting snugly inside. Carefully remove it from the packaging, taking note of its sturdy construction and elegant design. The drone’s white body and sleek lines contribute to its aerodynamic appearance, hinting at the incredible performance it offers.
Beneath the drone, you will discover the remote controller, neatly positioned and waiting to be grasped. The controller accommodates your hands comfortably, with intuitive buttons and a responsive control stick that allows you to navigate the drone with precision.
Continuing the unboxing process, you will uncover the propellers neatly organized and secured within the packaging. The Phantom 4 drone usually comes with a set of spare propellers, ensuring you have replacements on hand in case of any accidents or wear over time.
As you delve deeper into the box, you will find the intelligent flight battery, the powerhouse that fuels the drone’s airborne adventures. These high-capacity batteries offer extended flight times, allowing you more freedom to explore the sky and capture stunning footage from above.
In addition to the drone and accessories, the package usually includes various cables, such as a USB cable for firmware updates and a charging cable for the batteries. You may also find a user manual and quick start guide, which provide detailed instructions on setting up and operating your Phantom 4 drone.
Remember to inspect all the components upon unboxing to ensure everything is accounted for and in good condition. If you notice any damaged or missing parts, contact the manufacturer or retailer immediately for assistance.
Now that you have unboxed your Phantom 4 drone and familiarized yourself with its components, you are one step closer to taking flight. In the next sections, we will guide you through the setup process, from charging the batteries to updating the firmware. Stay tuned as we prepare to unleash the full potential of your Phantom 4 drone!
Charging the Batteries
One of the essential tasks in preparing your Phantom 4 drone for flight is ensuring that the batteries are fully charged. The intelligent flight battery is the heart of the drone, providing the necessary power for its aerial adventures. Let’s guide you through the process of charging the batteries to ensure you have enough juice for an exciting flight.
The Phantom 4 drone typically comes with one or more rechargeable intelligent flight batteries. These batteries are designed to provide optimal performance and extended flight times. When you unbox your drone, you will find the batteries neatly packed and ready for charging.
To start charging the batteries, locate the charger that came with your Phantom 4 drone. Connect the charger to a power source, such as a wall outlet or a USB power bank. Ensure that the charger is compatible with the voltage and power requirements in your region.
Next, carefully insert the intelligent flight battery into the charger. The charger’s LED indicators will provide information about the charging status. On some models, there may be multiple LED lights that indicate the battery’s charging progress, while others may feature a single LED light that changes color to signify the charging stage.
During the charging process, it is important to allow sufficient time for the batteries to charge fully. The charging time may vary depending on the battery’s level of depletion and the charger’s output power. It is recommended to consult the user manual or the manufacturer’s guidelines for specific charging times.
While waiting for the batteries to charge, it is crucial to ensure a stable and safe charging environment. Avoid placing the batteries near flammable materials or in direct sunlight. Additionally, always monitor the charging process and never leave the batteries unattended while charging.
Once the batteries have reached a full charge, the LED indicators on the charger will typically turn green. This indicates that the batteries are ready for use. Carefully remove the batteries from the charger and confirm that they are securely inserted into the drone. Remember to store any spare batteries in a cool and dry place when not in use.
With fully charged batteries, you are now one step closer to taking flight with your Phantom 4 drone. In the upcoming sections, we will guide you through installing the propellers and updating the firmware, ensuring your drone is ready for an exhilarating flight experience. Stay tuned!
Installing the Propellers
The propellers of your Phantom 4 drone play a crucial role in ensuring stable flight and maneuverability. Properly installing the propellers is essential for safe and efficient drone operation. Let’s go through the steps to install the propellers correctly, ensuring a smooth takeoff and a successful flight.
When you unbox your Phantom 4 drone, you will find a set of propellers included in the package. Each propeller consists of two parts: the propeller itself and a mount with a tightening mechanism. Take a moment to inspect the propellers to ensure they are undamaged and free from any signs of wear or deformation.
Start by identifying the correct orientation and placement of the propellers. In most cases, the drone’s user manual will provide a detailed diagram or instructions to help you determine which propeller goes on which motor. It is important to install the propellers in the correct positions to ensure proper flight control and stability.
Locate the motor on the drone and match it with the corresponding propeller. Pay attention to any markings or indicators on both the propellers and the drone’s motor mount. Some propellers may have a black dot or a letter that corresponds to a specific motor. Ensure that the propeller with the marking matches the motor with the corresponding label.
Once you have identified the correct positioning, align the propeller with the motor shaft. Gently push the propeller onto the motor shaft, making sure it fits snugly and securely. You should feel a slight resistance as you push the propeller onto the shaft. Do this for all four propellers, ensuring that each propeller is correctly aligned with its respective motor.
After attaching the propellers to the motors, it is important to tighten them to ensure a secure fit. On the mounting mechanism of each propeller, you will find a tightening mechanism, usually in the form of a screw or a self-locking mechanism. Use your fingers to tighten the mechanism, making sure that the propellers are firmly attached to the motors. It is essential to avoid overtightening, as this can cause damage to both the propellers and the motor mounts.
With all four propellers installed and tightly secured, take a moment to inspect them and confirm that they are all facing in the correct direction. The propellers should spin freely without any obstructions or resistance. Give each propeller a gentle spin to ensure there are no abnormalities or misalignments.
Properly installing the propellers is an important step in preparing your Phantom 4 drone for flight. Remember to double-check the orientation and tightness of each propeller before each flight to maintain the highest level of safety and performance. In the next section, we will guide you through the process of updating the firmware, ensuring your drone is equipped with the latest software enhancements. Get ready to elevate your flying experience!
Updating the Firmware
Keeping your Phantom 4 drone’s firmware up to date is crucial for optimizing performance, adding new features, and addressing any software bugs. Firmware updates improve the overall stability and functionality of your drone, ensuring a safe and enjoyable flying experience. Let’s guide you through the process of updating the firmware on your Phantom 4 drone.
The firmware update process typically requires a computer with internet access. Start by connecting the drone to your computer using the USB cable provided. Ensure that the drone is powered on and in a stable state throughout the update process.
Before proceeding with the firmware update, it is essential to download the latest firmware files from the official DJI website or the manufacturer’s designated firmware portal. Check the compatibility of the firmware files with your specific drone model and download the appropriate files.
Once you have downloaded the firmware files, locate and launch the DJI Assistant software or any firmware update software provided by the manufacturer. Follow the prompts and instructions provided by the software to initiate the firmware update process. The software will guide you through the necessary steps to ensure a successful update.
Please note that the firmware update process may take some time, depending on the size of the update and the speed of your internet connection. Avoid interrupting the update process once it has started and ensure a stable internet connection throughout the update to minimize the risk of errors or incomplete installations.
During the firmware update, the software will communicate with your Phantom 4 drone and proceed with the necessary updates. The progress of the update will be displayed on your computer screen or within the firmware update software. Be patient and allow the update to complete, as it may involve multiple stages or steps.
Once the firmware update is finished, the software will notify you of its successful completion. Disconnect the USB cable from your drone and power it off and on again to ensure that the firmware changes take effect. You can verify the successful firmware update by checking the version information displayed on the drone’s controller or companion app.
Remember to periodically check for new firmware updates and keep your Phantom 4 drone’s firmware up to date. This ensures that your drone benefits from the latest improvements and features, enhancing your flying experience.
With the firmware updated, you are now equipped with the latest software enhancements for your Phantom 4 drone. In the next section, we will guide you through connecting the remote controller, bringing you one step closer to taking flight. Stay tuned!
Connecting the Remote Controller
The remote controller is your command center for operating your Phantom 4 drone. Establishing a stable and reliable connection between the remote controller and the drone is crucial for seamless flight control. Let’s walk you through the process of connecting the remote controller to your Phantom 4 drone.
Begin by ensuring that both the drone and the remote controller are powered off. Make sure the controller’s battery is sufficiently charged for the upcoming flight session. It is recommended to fully charge the controller’s battery before use.
To turn on the remote controller, press and hold the power button until it powers on. Once the controller is powered on, you should see the LED light indicators illuminate, indicating that it is ready for connection.
Next, power on your Phantom 4 drone by pressing the power button located on the side of the aircraft. The drone will initialize and go through its startup sequence. During this time, the drone’s status lights will blink rapidly, indicating that it is searching for a remote control signal.
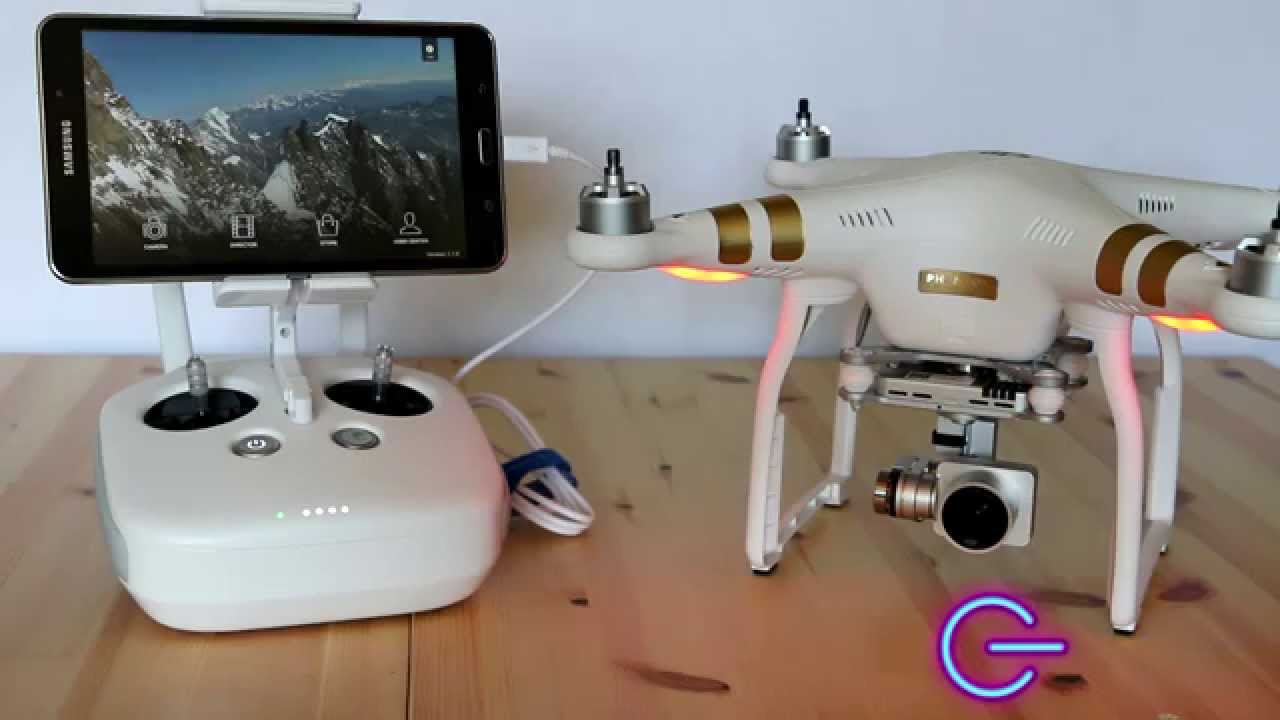
While the drone is in the process of starting up, it’s essential to prepare the remote controller for connection. Locate the device holder on the remote controller and unfold it. Place your mobile device in the device holder, ensuring that it is securely in place. The mobile device will serve as the display for live video feed and flight telemetry.
Once your mobile device is securely positioned, connect it to the remote controller using a compatible USB cable. Ensure that the cable is firmly inserted into both the mobile device and the remote controller’s USB port.
With both the drone and the remote controller powered on and the mobile device connected, you are now ready to establish a connection between the two devices. To do this, move the remote controller’s control sticks inward and then outward. This action will activate the automatic pairing mode, allowing the remote controller and the drone to establish a connection.
As the connection process takes place, you will see the LED lights on both the drone and the remote controller flashing rapidly. Once a stable connection is established, the LED lights will remain solid. Additionally, the live video feed from the drone’s camera should appear on your mobile device’s screen.
At this point, you have successfully connected the remote controller to your Phantom 4 drone. Take a moment to ensure that the connection is stable and that all control inputs are functioning properly. You are now ready to move on to the next steps of the pre-flight checklist and prepare for an exhilarating flight experience!
Pre-flight Checklist
Before taking to the skies with your Phantom 4 drone, it is crucial to perform a pre-flight checklist to ensure the safety and optimal performance of your aircraft. Following these steps will help you minimize the risk of accidents and improve your overall flying experience. Let’s go through the essential checks to complete before each flight.
1. Verify your surroundings: Before launching your drone, survey the area for any obstacles or potential hazards that may interfere with your flight. Ensure that you have sufficient space and clearance to maneuver safely.
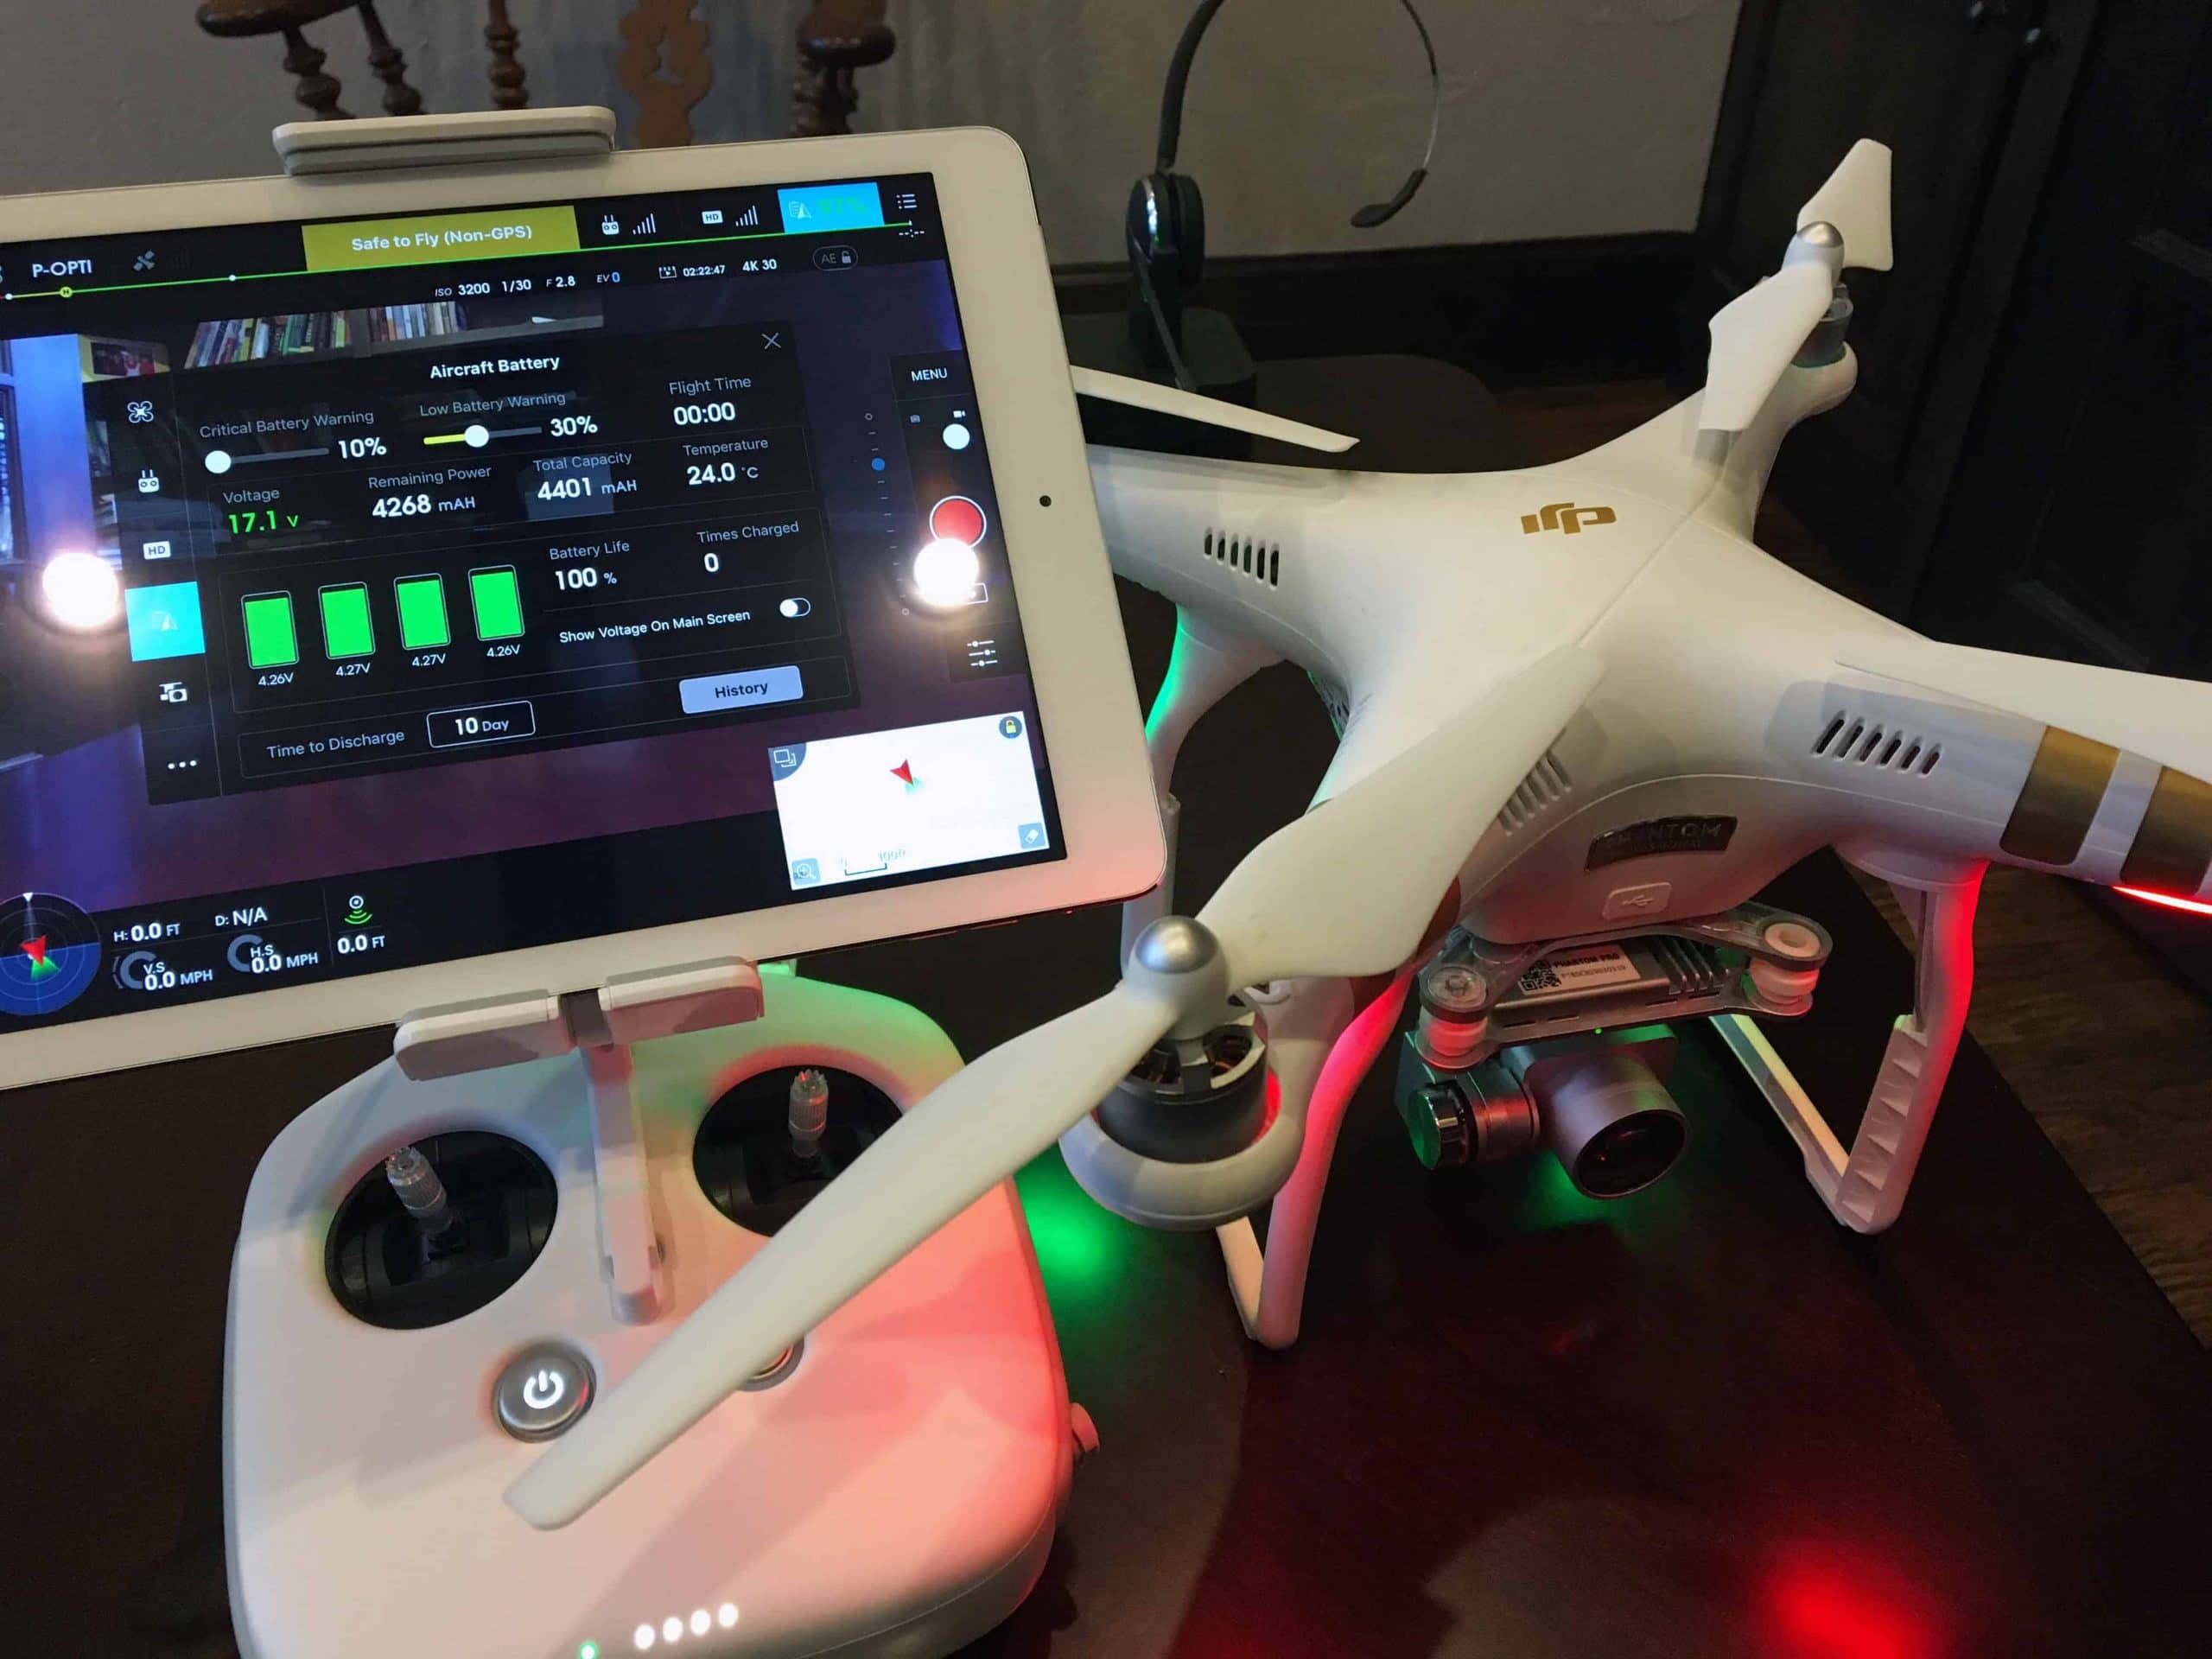
2. Check the battery level: Verify that the drone’s battery is adequately charged for the intended flight duration. A low battery level may result in an early and unexpected termination of the flight. Always use fully charged batteries for optimal performance.
3. Inspect the propellers: Examine the propellers for any signs of damage, wear, or debris. Ensure that they are securely attached and rotate freely without any obstructions. Damaged or incorrectly installed propellers can lead to flight instability or unexpected behavior.
4. Check the firmware and software: Make sure that both the drone and the remote controller have the latest firmware updates installed. The latest firmware versions often include bug fixes, improved performance, and new features.
5. Calibrate the compass: Before taking off, it is advisable to calibrate the drone’s compass. This step ensures accurate positioning and direction tracking during flight. Follow the manufacturer’s instructions to perform the compass calibration process.
6. Verify GPS signal: Check that the GPS signal indicator on your remote controller or mobile device shows strong and stable reception. A good GPS signal provides accurate positioning information and enables intelligent flight modes.
7. Clear camera lens: Ensure that the camera lens is clean and free from dirt, fingerprints, or smudges. A clear lens will result in better image and video quality during your flight.
8. Check the flight restrictions: Familiarize yourself with any flight restrictions, rules, or regulations in your area. Adhere to local laws, designated flying zones, and any airspace restrictions to ensure safe and legal operation of your drone.
9. Plan your flight path: Identify and plan your intended flight path, taking into consideration any potential obstacles or restricted areas. Planning your flight path in advance ensures a smooth and controlled flight.
10. Verify emergency procedures: Familiarize yourself with the emergency procedures outlined in the user manual. Understand how to initiate an emergency landing, return to home, or handle other critical situations that may arise during flight.
By diligently completing this pre-flight checklist, you are taking proactive steps to ensure a safe and successful flight with your Phantom 4 drone. Following these guidelines will help you maintain control over your aircraft and minimize the risk of accidents or incidents while maximizing your flying enjoyment.
In the next sections, we will delve into the details of understanding the controller, mastering the basic controls, and executing essential flight maneuvers. Get ready to elevate your piloting skills and unleash the full potential of your Phantom 4 drone!
Understanding the Controller
The remote controller is the primary interface between you and your Phantom 4 drone. Understanding the various components and functions of the controller is essential for smooth and precise control of your aircraft. Let’s explore the key elements of the controller and how they contribute to your flying experience.
The remote controller of the Phantom 4 drone is ergonomically designed to provide a comfortable grip and easy access to all the necessary controls. It usually features two control sticks, multiple buttons, and various switches and dials.
At the center of the controller, you will find the control sticks. The left stick, also known as the throttle stick, controls the vertical movement of the drone, allowing you to ascend and descend. The right stick, often referred to as the pitch stick, controls the forward, backward, left, and right movements of the drone.
Located at the back of the controller, you will find buttons and switches that handle essential functions such as power, flight modes, and camera controls. The power button is used to turn the controller on and off, while the flight mode switch allows you to adjust the flight mode of the drone.
On the front of the controller, there are generally buttons for takeoff, landing, and return-to-home functions. These buttons simplify the execution of these commands and ensure safe and controlled flight operations.
Another crucial component of the controller is the mobile device holder. It is designed to securely hold your smartphone or tablet, which serves as the display for the live video feed and flight telemetry data. Position your mobile device in the holder and connect it to the controller using a compatible USB cable.
Additionally, most controllers feature an integrated LCD screen that provides important flight information, including battery level, GPS signal strength, altitude, and more. This screen allows you to monitor important flight parameters without needing to rely solely on the information displayed on your mobile device.
Understanding the controller’s layout and functionality is essential for effective drone operation. Take the time to familiarize yourself with the various buttons, sticks, switches, and screens before your first flight. This will enable you to navigate the controls confidently during flight, ensuring a smooth and controlled flying experience.
In the following sections, we will delve into mastering the basic controls of your Phantom 4 drone, equipping you with the skills necessary to execute precise movements and maneuvers. Get ready to soar through the skies with confidence and precision!
Basic Controls
Mastering the basic controls of your Phantom 4 drone is crucial for navigating the skies with confidence and precision. Understanding how to maneuver your drone in different directions and adjust its altitude will allow you to capture stunning aerial footage and execute impressive flight maneuvers. Let’s explore the key controls that will enable you to become a skilled pilot.
1. Throttle Control: The left control stick, also known as the throttle stick, is used to control the altitude of your drone. Pushing the stick upward will make the drone ascend, while pulling it downward will make it descend. Gradually and smoothly adjust the throttle to achieve steady altitude changes.
2. Pitch and Roll Control: The right control stick, also referred to as the pitch stick, allows you to control the forward, backward, left, and right movements of your drone. Pushing the stick forward will make the drone move forward, pulling it backward will make it move backward, pushing it to the left will make it move left, and pushing it to the right will make it move right. Use small and precise movements to control the pitch and roll of your drone.
3. Yaw Control: Yaw control refers to the rotation of the drone around its vertical axis. It allows you to change the direction the drone is facing or execute rotating movements. To control the yaw, use the left control stick and move it horizontally to the left or right. Smooth and gradual movements will result in controlled and stable rotations.
4. Trim Adjustments: The trim buttons or sliders, typically located on the remote controller, allow you to make small adjustments to the drone’s flight attitude. These adjustments help counteract any small deviations in flight caused by factors such as wind or imbalance. Use the trim buttons sparingly and make small adjustments as needed to maintain stable flight.
5. Flight Mode Switch: The flight mode switch, usually located on the back of the remote controller, allows you to switch between different flight modes. These modes may include GPS mode for stable and precise positioning, Sport mode for increased speed and agility, and Intelligent Flight modes that automate certain flight patterns. Familiarize yourself with the different flight modes and understand their specific characteristics and limitations.
Practicing the basic controls of your Phantom 4 drone is essential to develop your piloting skills. Start with small and simple movements, gradually progressing to more complex maneuvers as you gain confidence. Remember to always fly in open spaces away from obstacles and to adhere to local regulations and guidelines.
In the next section, we will explore the steps for taking off and landing your Phantom 4 drone, allowing you to confidently start and end each flight. Get ready to elevate your flying skills and capture stunning aerial imagery!
Taking Off and Landing
Taking off and landing your Phantom 4 drone smoothly and safely is a fundamental skill for every drone pilot. Understanding the correct procedures will ensure that your flights begin and end with precision and confidence. Let’s explore the steps for a successful takeoff and landing.
Takeoff:
1. Find an open area: Choose a suitable location free from obstacles, ensuring you have ample space for takeoff and flight.
2. Pre-flight checks: Complete the pre-flight checklist, including verifying battery levels, propeller installation, and aircraft readiness.
3. Power up: Turn on the remote controller and the drone by pressing the respective power buttons, making sure they establish a stable connection.
4. Arm the motors: Push both control sticks downwards and towards each other to arm the motors. The propellers will start spinning slowly.
5. Ascending: Gently push the throttle control stick upwards to increase the drone’s altitude. Gradually increase the throttle to ensure smooth ascending.
6. Hovering: Once the drone is at a suitable height, release the throttle control stick to maintain a stable hover. Make slight adjustments if necessary using the other control sticks.
Landing:
1. Find a suitable landing spot: Look for a clear and level area without obstructions to safely land your drone.
2. Prepare for descent: Reduce the throttle to gradually descend the drone, carefully considering wind conditions and obstacles.
3. Position the drone: Position the drone over the desired landing spot, adjusting its location as needed by using the pitch, roll, and yaw controls.
4. Controlled descent: Slowly lower the drone by smoothly reducing the throttle control. Maintain a steady descent rate, maintaining control and stabilizing the aircraft.
5. Touchdown: Once the drone is close to the ground, continue reducing the throttle to bring it gently to the ground. Ensure a soft and controlled landing.
6. Disarm the motors: After landing, push both control sticks downwards and towards each other to disarm the motors. The propellers will stop spinning.
By following these steps, you can perform smooth takeoffs and landings with your Phantom 4 drone. It is important to practice these maneuvers in an open area to build your piloting skills and maintain safety.
In the next section, we will explore hovering and maneuvering techniques, allowing you to achieve precise movements in the air. Get ready to enhance your control over your Phantom 4 drone and capture incredible footage!
Hovering and Maneuvering
Being able to hover your Phantom 4 drone with stability and execute precise maneuvers is a key skill for capturing stunning aerial footage and navigating through tight spaces. Mastering hovering and maneuvering techniques will give you full control over your drone’s movements in the sky. Let’s explore how to achieve a stable hover and execute smooth maneuvers.
Hovering:
The ability to maintain a stable hover is essential for various flight tasks, such as capturing photos or videos. Follow these steps to achieve a stable hover:
1. Achieve an appropriate altitude: Set the desired altitude by adjusting the throttle control stick. The drone should hover at a sufficient height to avoid obstacles.
2. Use the control sticks for stability: Make minor adjustments to the control sticks, particularly the pitch, roll, and yaw controls, to maintain the drone’s position and counteract any external factors like wind.
3. Anticipate and react to changes: Continuously monitor the drone’s position and make small, precise adjustments to keep it in a stable hover. Anticipate movements caused by wind or other factors and react accordingly.
4. Utilize altitude hold modes: The Phantom 4 drone offers altitude hold features that help maintain a steady hover. Utilize these modes to automate altitude control and focus on other aspects of your flight.
Maneuvering:
Executing smooth and controlled maneuvers allows you to capture dynamic shots and navigate through challenging environments. Follow these steps for precise maneuvering:
1. Make smooth control inputs: Use small and gradual movements of the control sticks to initiate maneuvers. Avoid abrupt or jerky motions that can destabilize the drone.
2. Adjust pitch and roll: Use the control sticks to adjust the pitch and roll of the drone. These movements allow you to tilt the drone forward, backward, left, or right, enabling you to navigate around objects or capture dynamic footage.
3. Control yaw: Yaw control allows you to rotate the drone around its vertical axis. Use the control sticks to smoothly adjust the yaw, enabling you to change the direction the drone is facing or execute stable turns during flight.
4. Combine movements: Combine pitch, roll, and yaw movements to achieve more complex maneuvers. For example, you can execute a curved orbit around a point of interest by combining yaw and forward movement while adjusting the altitude.
Remember to practice these hovering and maneuvering techniques in an open area with sufficient clearance. Gradually increase the complexity of your maneuvers as you become more comfortable and confident in your piloting skills.
In the next section, we will explore how to adjust flight modes to suit different scenarios, enhancing your control and expanding your creative possibilities with your Phantom 4 drone. Get ready to elevate your flight experience!
Adjusting Flight Modes
The Phantom 4 drone offers various flight modes that cater to different flying scenarios and creative needs. Understanding and adjusting these flight modes will enhance your control and unlock new creative possibilities with your drone. Let’s explore some of the flight modes available and how to utilize them.
GPS Mode:
The GPS mode provides the most stable and precise positioning for your Phantom 4 drone. In this mode, the drone utilizes satellite positioning to maintain its position and stability, even in windy conditions. This mode is ideal for capturing steady aerial footage and executing stable flight maneuvers.
Sport Mode:
Sport mode unlocks the full speed and agility potential of your Phantom 4 drone. In this mode, the drone’s speed increases, allowing for more dynamic flights and exciting maneuvers. However, it is important to note that the stability and obstacle sensing capabilities may be reduced in Sport mode. Use this mode when you require fast-paced movements and want to capture dynamic action shots.
Intelligent Flight Modes:
The Phantom 4 drone offers a range of intelligent flight modes that automate certain flight patterns, enabling you to capture professional-grade shots effortlessly. Some of these modes include:
- ActiveTrack: Allows the drone to track and follow a moving subject while maintaining a safe distance.
- TapFly: Allows you to tap on the screen of your mobile device, and the drone will automatically fly in the designated direction.
- Waypoints: Enables you to set multiple waypoints for the drone to follow, allowing for precise and repeatable flight paths.
- Cinematic Mode: Slows down the drone’s movements for smooth and cinematic shots, perfect for capturing breathtaking footage.
To adjust flight modes on your Phantom 4 drone, follow these steps:
1. Ensure a stable connection between the remote controller and the drone.
2. Access the flight mode settings through the DJI Go mobile app or the menu on the remote controller’s screen.
3. Select the desired flight mode from the available options, considering the specific scenario or shot you want to achieve.
4. Familiarize yourself with the specific functions and limitations of the selected flight mode to maximize its benefits.
Experimenting with different flight modes will allow you to explore new creative possibilities and capture unique shots with your Phantom 4 drone. Remember to always fly safely and adhere to local regulations and guidelines when using these flight modes.
In the next section, we will delve into utilizing GPS navigation to enhance your flight control and enable precise positioning with your Phantom 4 drone. Get ready to explore the skies with confidence!
Using GPS Navigation
The GPS navigation feature of your Phantom 4 drone provides precise positioning, stability, and advanced flight capabilities. Leveraging GPS navigation enhances your control over the drone and opens up a world of opportunities for creative aerial shots. Let’s explore how to utilize GPS navigation effectively.
Precise Positioning:
GPS technology allows your Phantom 4 drone to accurately determine its position and maintain stability in flight. By utilizing satellites to track its location, the drone can hold its position even in challenging conditions, such as wind or air currents. This precise positioning is essential for capturing steady shots and executing precise flight maneuvers.
Return-to-Home (RTH) Function:
The RTH function uses GPS navigation to guide your drone back to its takeoff point automatically. This is useful if you have flown the drone far away or in situations where the battery is running low. Activating the RTH function ensures the safe and autonomous return of your drone, providing peace of mind during your flights.
GPS Assisted Hovering:
GPS navigation enables your Phantom 4 drone to hover in one place with exceptional stability. By utilizing GPS data, the drone can resist external factors like wind and make precise adjustments to maintain its position. This feature is particularly useful for capturing steady aerial shots or conducting detailed inspections and surveys.
Waypoints and Automated Flight:
With GPS navigation, you can plan and execute automated flight paths using waypoints. Set multiple waypoints on the map in the DJI Go mobile app or the remote controller, and the drone will follow the designated path automatically. This allows you to capture complex shots and execute repeatable flights with ease.
Safe Flight Limits:
GPS navigation also includes safety features that establish virtual boundaries for your drone’s flight. You can set altitude and distance limits, ensuring that your drone stays within your desired boundaries and helps avoid any potential risks or accidents.
To utilize GPS navigation effectively, follow these steps:
1. Ensure that the GPS signal on your drone is stable before takeoff. It is usually indicated on the remote controller or the DJI Go app.
2. Calibrate the compass and IMU (Inertial Measurement Unit) to ensure accurate navigation and positioning.
3. Familiarize yourself with the GPS-assisted flight modes available for your drone, such as Follow Me mode or Course Lock mode, and use them to enhance your flights.
4. Use the DJI Go app or the remote controller’s screen to monitor your drone’s GPS signal, altitude, and positioning during flight.
By utilizing GPS navigation effectively, you can confidently navigate the skies with your Phantom 4 drone, execute precise maneuvers, and capture breathtaking footage. Always fly responsibly and consider local regulations and guidelines when utilizing GPS navigation.
In the next section, we will explore techniques for capturing great photos and videos with your Phantom 4 drone, maximizing its capabilities as a powerful aerial imaging tool. Get ready to unleash your creativity and capture stunning aerial imagery!
Shooting Great Photos and Videos
Your Phantom 4 drone is not only a powerful flying machine but also an excellent tool for capturing stunning aerial photos and videos. With the right techniques and settings, you can unlock its full potential as a creative imaging device. Let’s explore how to shoot great photos and videos with your drone.
Composition and Framing:
Just like with any other type of photography or videography, composition plays a crucial role in capturing visually appealing shots. Consider the rule of thirds, leading lines, and interesting perspectives to create compelling compositions. Experiment with different angles, heights, and framing techniques to capture unique and captivating imagery.
Lighting Conditions:
Pay attention to lighting conditions when capturing photos or videos with your drone. Early morning or late afternoon often provide soft, warm light that can add depth and drama to your shots. Avoid harsh midday sunlight, as it can create strong shadows and wash out colors. Experiment with different times of the day to capture the desired mood and ambiance.
Camera Settings:
Take advantage of the Phantom 4 drone’s camera settings to capture your desired shots effectively. Adjusting settings such as ISO, shutter speed, and exposure compensation can help you achieve optimal exposure and image quality. Experiment with different settings to get the desired effect and adapt to various lighting conditions.
Manual Mode:
Switching to Manual mode gives you full control over camera settings, allowing you to fine-tune your shots. It gives you the flexibility to adjust the aperture, ISO, and shutter speed according to the specific shooting conditions and your creative vision. Manual mode is particularly useful for capturing long exposures, night shots, or when you want precise control over the depth of field.
Utilize Intelligent Flight Modes:
Take advantage of the intelligent flight modes available on your Phantom 4 drone to capture unique perspectives and dynamic shots. Experiment with ActiveTrack for tracking and following subjects, Point of Interest for circular orbits around points of interest, or Hyperlapse for creating time-lapse videos with stunning aerial footage.
Post-Processing:
To enhance the quality of your photos and videos, consider post-processing techniques. Use photo editing software such as Adobe Lightroom or video editing software like Adobe Premiere Pro to refine colors, enhance contrast, and add creative effects. However, be mindful not to over-process your footage, as it can lead to unnatural-looking results.
Remember to familiarize yourself with local laws and regulations regarding aerial photography and videography. Respect privacy and airspace restrictions when capturing imagery with your Phantom 4 drone. Practice responsible and ethical flying while prioritizing safety during your flights.
Incorporate these techniques into your aerial photography and videography sessions to capture breathtaking shots with your Phantom 4 drone. Experiment, practice, and let your creativity soar as you explore the endless possibilities of aerial imaging!
In the next section, we will provide an overview of the intelligent flight modes available on the Phantom 4 drone, enabling you to automate flight patterns and capture professional-grade shots easily. Get ready to take your aerial photography and videography to new heights!
Utilizing Intelligent Flight Modes
Your Phantom 4 drone is equipped with a variety of intelligent flight modes that allow you to automate flight patterns and capture professional-grade shots effortlessly. These intelligent flight modes provide you with incredible creative possibilities and make it easier to execute complex maneuvers. Let’s explore some of the intelligent flight modes available and how to utilize them effectively.
ActiveTrack:
ActiveTrack mode enables your drone to track and follow a moving subject while maintaining a safe and adjustable distance. This mode is perfect for capturing dynamic shots of people engaged in activities such as running, biking, or any other action-packed scenario. Simply draw a bounding box around your subject on the DJI Go app and let the drone take care of tracking the subject while you have full control over capturing the shots.
TapFly:
TapFly mode provides a convenient way to control your drone’s flight path with a simple tap on the DJI Go app. You can tap on the live video feed displayed on your mobile device, and the drone will automatically fly in the designated direction. This mode allows you to focus on framing your shots, while the drone takes care of navigating along the desired path.
Waypoints:
Waypoints mode allows you to pre-plan a flight path by selecting multiple waypoints on the map in the DJI Go app. The drone will then autonomously follow the designated path, enabling you to capture repeatable and precise shots. Take advantage of this mode for capturing aerial footage of scenic landscapes or for creating smooth and calculated camera movements.
Cinematic Mode:
Cinematic Mode slows down the drone’s movements, resulting in smoother and more cinematic shots. In this mode, the drone responds more gradually to control inputs, allowing you to capture graceful and controlled movements. Use this mode to create stunning aerial footage that closely resembles the smooth camera movements found in films.
These are just a few examples of the intelligent flight modes available on your Phantom 4 drone. To utilize these modes effectively, be sure to familiarize yourself with the specific features and controls for each mode. Read the user manual and practice with each mode to understand their limitations and capture the desired shots.
Remember to always fly responsibly and adhere to local regulations and guidelines when utilizing these intelligent flight modes. Respect privacy, avoid restricted airspace, and prioritize safety during your flights.
In the next section, we will explore emergency procedures to help you handle unexpected situations and ensure the safety of your drone. Prepare yourself with the knowledge to respond effectively in critical moments, allowing you to fly with confidence and peace of mind.
Emergency Procedures
Being prepared for emergency situations is crucial to ensure the safety of your Phantom 4 drone and those around you. While flying responsibly and following safety guidelines can minimize the risk of emergencies, it’s essential to know how to respond effectively in critical moments. Let’s explore some common emergency scenarios and the recommended procedures to handle them.
Loss of Signal:
If you experience a loss of signal between the drone and the remote controller, remain calm and follow these steps:
1. Do not panic and avoid making sudden control inputs.
2. Wait for the connection to be re-established. In most cases, the drone will return to the home point or regain connection automatically. Monitor the signal on the remote controller or DJI Go app.
3. If the connection is not re-established, activate the Return-to-Home (RTH) function manually to ensure a safe return of your drone.
Battery Low:
When the battery level of your drone becomes critically low, it’s important to take immediate action:
1. Remain calm and maintain control of the drone.
2. Ascend the drone to a safe height to avoid obstacles and potential hazards.
3. Activate the Return-to-Home (RTH) function to ensure a safe and autonomous return of your drone. The drone will navigate back to the home point and land automatically.
Losing Visual Line of Sight:
If you lose sight of your drone during flight, follow these steps:
1. Stay calm and refrain from making erratic control inputs.
2. Use the DJI Go app or the remote controller’s screen to track the drone’s position and flight parameters.
3. Activate the Return-to-Home (RTH) function if necessary to ensure a safe return of the drone to the home point.
Obstacle Avoidance System Failure:
If the obstacle avoidance system of your Phantom 4 drone malfunctions, take the following precautions:
1. Reduce the speed and fly with caution, keeping a safe distance from obstacles.
2. Use visual observation and maintain full control over the drone to avoid collisions.
3. Land the drone immediately if needed and address the issue before attempting to fly again.
In all emergency situations, it’s important to prioritize the safety of people and property. Remain aware of your surroundings, follow local regulations, and ensure responsible and ethical flying practices. Regularly familiarize yourself with the user manual and practice emergency procedures to be prepared for unexpected situations.
In the next section, we will provide some practical tips for a safe and successful flight with your Phantom 4 drone. These tips will help you enjoy your flying experience while minimizing risks and maximizing the potential of your drone.
Tips for a Safe and Successful Flight
Flying your Phantom 4 drone is an exciting and rewarding experience. To ensure a safe and successful flight, it’s important to follow some practical tips that will help you minimize risks, avoid accidents, and make the most out of your flying adventures. Let’s explore these tips:
1. Learn and Adhere to Local Regulations:
Familiarize yourself with the local laws and regulations regarding drone usage in your area. Understand the restrictions, permits, and designated flying zones to ensure that you fly in compliance with the rules and promote safe drone operation.
2. Perform Pre-flight Checks:
Before each flight, conduct a thorough pre-flight checklist. Verify battery levels, propeller installation, GPS signal strength, and overall drone readiness. Ensure that your drone is in optimal condition for a safe and successful flight.
3. Fly in Open Areas:
Choose open spaces away from people, buildings, and other obstacles to minimize the risk of accidents. Flying in open areas provides more room for maneuvering and reduces the chances of collisions with objects or bystanders.
4. Be Mindful of Weather Conditions:
Check weather conditions before flying your drone. Avoid flying in strong winds, rain, or adverse weather conditions that may affect your drone’s stability and control. Pay attention to temperature extremes that can impact battery performance.
5. Maintain Visual Line of Sight:
Always keep your drone within your line of sight during flight. Maintaining visual contact allows you to monitor the drone’s position, spot obstacles, and ensure safe navigation. Flying beyond visual line of sight can increase the risk of accidents and violate local regulations.
6. Respect Privacy:
Be mindful of people’s privacy and respect their personal space. Avoid flying over private property or capturing footage without permission. Fly with consideration for others and prioritize their privacy rights.
7. Keep Spare Batteries and Propellers:
Carry spare batteries and propellers with you during your flying sessions. This allows you to extend your flight time and replace damaged or worn-out propellers immediately if needed. Always fly with fully charged batteries to avoid unexpected power loss.
8. Practice & Build Skills Gradually:
Start with simple maneuvers and gradually build your piloting skills. Be patient and give yourself time to familiarize yourself with the controls and become comfortable with different flight maneuvers. Practice in open areas and gradually increase the complexity of your flights.
9. Learn from Others:
Join online communities and forums to learn from experienced drone pilots. Engage in discussions, share your experiences, and seek advice or tips. Learning from others can enhance your knowledge and help you improve your flying skills.
10. Enjoy the Journey:
Above all, enjoy the experience of flying your Phantom 4 drone. Embrace the freedom, creativity, and unique perspectives that aerial photography and videography offer. Capture breathtaking shots, explore new locations, and share your passion with others.
By following these tips, you can ensure a safe and successful flight with your Phantom 4 drone. Prioritize safety, be responsible, and respect the environment and others while enjoying the incredible possibilities that your drone offers.
In the next section, we will conclude our guide, summarizing the key points and emphasizing the importance of safe and responsible drone operation. Fly safely and have a fantastic flying adventure with your Phantom 4 drone!
Conclusion
Congratulations on completing our comprehensive guide to flying your Phantom 4 drone! We have covered a wide range of topics, from unboxing the drone to mastering flight controls, capturing great photos and videos, and ensuring a safe and successful flight. By following the tips and techniques outlined in this guide, you are well-equipped to embark on an exciting and fulfilling drone flying journey.
Throughout the guide, we emphasized the importance of responsible and safe drone operation. Always prioritize safety by familiarizing yourself with local regulations, conducting pre-flight checks, and practicing good flying habits. Take the time to understand the features and functionalities of your drone, such as GPS navigation and intelligent flight modes, to unleash its full potential and capture incredible shots.
Remember to respect privacy, maintain visual line of sight, and fly in open areas away from obstacles and people. Regularly update your firmware, fly with fully charged batteries, and keep spare batteries and propellers on hand to ensure uninterrupted flight time. By practicing and gradually building your skills, you will become a confident and skilled drone pilot.
Furthermore, be mindful of the impact of your drone on the environment and others. Respect the privacy of individuals and adhere to ethical guidelines. By flying responsibly, you can help foster a positive image of drone enthusiasts and promote the continued growth and acceptance of this incredible technology.
Finally, enjoy the journey of flying your Phantom 4 drone. Embrace the creative possibilities and unique perspectives that aerial photography and videography offer. Capture breathtaking shots, share your passion with others, and continue to expand your skills and knowledge through ongoing learning and exploration.
Safe flying and have an amazing time with your Phantom 4 drone!