Introduction
Welcome to our comprehensive guide on how to fix dead pixels on your monitor. Dead pixels can be a frustrating and annoying issue that affects the overall viewing experience. These tiny, unresponsive dots on your screen can distract from your work, gaming, or simply enjoying your favorite movies or videos. But fret not, as there are several methods you can try to revive those dead pixels and restore your monitor to its full glory.
Before we dive into the various solutions, let’s briefly discuss what dead pixels are and how to identify them. Dead pixels, also known as stuck pixels, are defective pixels that fail to display the correct color on your monitor. They can appear as white, black, or in rare cases, different colored dots on your screen. These pixels are essentially unable to respond to electrical signals, leaving them “stuck” in a fixed state.
Identifying dead pixels is crucial to determine the severity of the issue. One common method is to display different colors on your screen and inspect for any abnormal dots. Dead pixels are easiest to spot against a plain background such as a solid black or white screen. Alternatively, there are online tools available that can help you locate and identify dead pixels on your monitor.
Now that we understand what dead pixels are and how to identify them, let’s explore the common causes behind their occurrence. Dead pixels can result from manufacturing defects, physical damage, or even prolonged use of your monitor. Additionally, temperature fluctuations, pressure, or electrical surges can contribute to the development of dead pixels.
What are dead pixels?
Dead pixels, also known as stuck pixels, are small defects found on computer monitors, LCD screens, or other display devices. These are unresponsive or non-functioning pixels that appear as bright or dark spots on the screen. Dead pixels can cause visual distractions and compromise the overall image quality, which can be particularly frustrating for users who rely heavily on their screens for work, gaming, or entertainment purposes.
There are three main types of dead pixels: hot pixels, stuck pixels, and dead pixels. Hot pixels are pixels that always remain lit, causing a bright spot on the screen. Stuck pixels, on the other hand, are pixels that are stuck in either the “on” or “off” state, resulting in either a bright or dark spot. Dead pixels, as the name suggests, are pixels that no longer respond to electrical signals and appear as black dots on the screen.
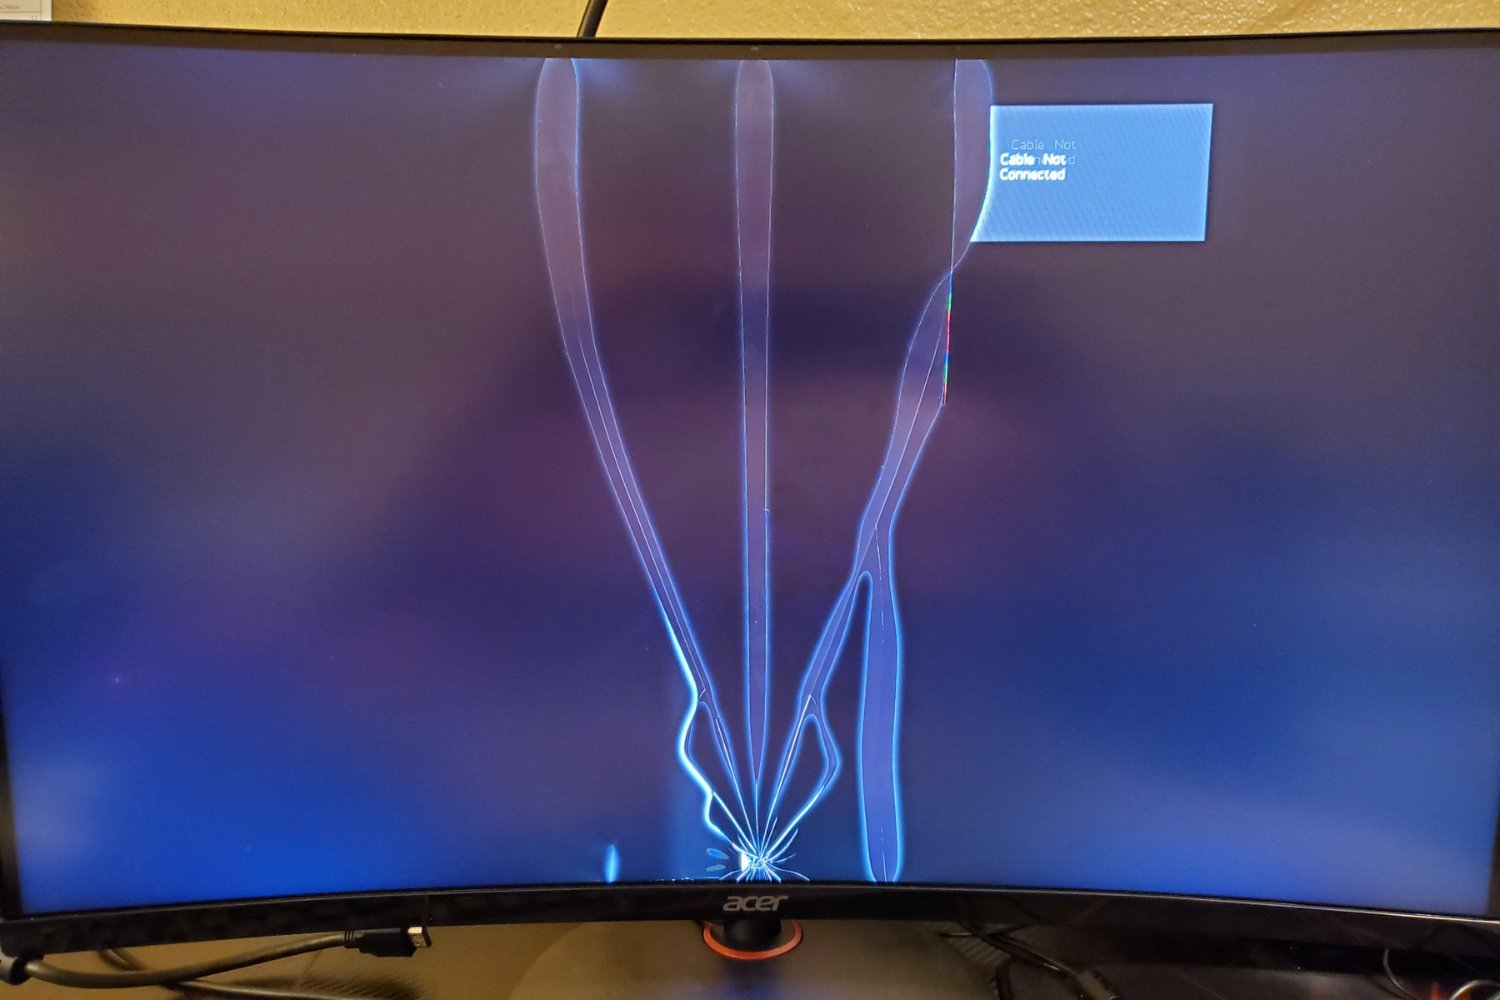
Dead pixels can occur during the manufacturing process or develop over time due to various factors. Manufacturing defects, such as impurities or contamination during the production of the display panel, can lead to dead pixels. Physical damage to the screen, such as dropping or bumping the monitor, can also cause pixels to become stuck or unresponsive. Additionally, prolonged use, exposure to extreme temperatures, or electrical surges can contribute to the appearance of dead pixels.
It’s important to note that dead pixels can vary in size and intensity. Some may be barely noticeable, while others can be larger and more visible. The severity of the dead pixel issue can differ from one screen to another, and it ultimately depends on the number and location of dead pixels on the display.
While dead pixels are an unfortunate occurrence, there are methods available to potentially fix or minimize their impact. In the following sections, we will explore various techniques you can try to revive dead pixels on your monitor and restore optimal screen performance.
How to identify dead pixels on your monitor
Identifying dead pixels on your monitor is essential to determine the extent of the issue and troubleshoot potential solutions. Fortunately, there are simple methods you can use to detect dead pixels and differentiate them from other display abnormalities.
One common approach is to employ a pixel test or dead pixel checker tool available online. These websites or software applications display solid colors on your screen, allowing you to thoroughly examine each pixel and identify any abnormalities. By cycling through different colors, you can easily spot pixels that appear as white, black, or off-color dots.
Another method is to visually inspect your screen against a background with contrasting colors. For example, using a solid black or white image as the background can make dead pixels more noticeable. By examining the screen closely, you can identify any anomalies, such as bright or dark spots that deviate from the uniformity of the background color. It’s worth noting that dead pixels are easier to spot on LCD or LED screens compared to CRT monitors.
To perform a quick check without using any tools, you can navigate to a website or image with a solid background and zoom in to examine different areas of the screen. Pay attention to any pixels that stand out and do not match the surrounding pixels. It’s advisable to perform this inspection in different lighting conditions to get a comprehensive assessment.
If you notice small, insignificant dots on your screen that are difficult to distinguish, it is recommended to focus on the areas where you frequently view content, such as the center of the screen. Dead pixels that are located in peripheral areas may have less impact on your overall viewing experience, especially if they are out of your primary line of sight.
Keep in mind that dead pixels may not be visible in all circumstances. Certain colors or backgrounds may hide the dead pixels or make them less apparent. Therefore, it’s important to thoroughly examine your monitor under different conditions to ensure you don’t miss any dead pixel defects that may be affecting your screen.
Common causes of dead pixels
Dead pixels can occur for various reasons, ranging from manufacturing defects to external factors that impact the functionality of individual pixels on your monitor. Understanding the common causes behind dead pixels can help you prevent their occurrence and address the issue effectively. Let’s explore some of the most prevalent causes:
1. Manufacturing defects: Dead pixels can be a result of manufacturing imperfections during the production of the display panel. Dust, impurities, or misalignment during the assembly process can lead to malfunctioning pixels.
2. Physical damage: Dropping or impacting the monitor can cause damage to the screen and result in dead pixels. The shock can disrupt the pixel structure or cause the pixels to become stuck in an unresponsive state.
3. Overuse: Prolonged usage of the monitor can contribute to the appearance of dead pixels. Continuous exposure to electrical signals and heat generated by the screen may degrade the pixel’s responsiveness over time.
4. Temperature fluctuations: Extreme temperature changes or excessive heat can affect the functionality of the pixels, leading to dead pixel issues. High temperatures can cause the liquid crystal within the pixels to expand or contract, resulting in irreparable damage.
5. Pressure: Applying excessive pressure to the screen, either accidentally or intentionally, can cause pixels to become stuck or unresponsive. It’s important to handle and clean your monitor with care to avoid potential pixel damage.
6. Electrical surges: Power fluctuations or electrical surges can impact the electrical circuitry of the monitor, potentially causing dead pixels. It is advisable to use a surge protector to minimize the risk of damage from power irregularities.
It’s worth noting that dead pixels can occur independently or in clusters. A single dead pixel may not be as noticeable, but clusters of dead pixels in close proximity can significantly impact the display quality.
While understanding the causes of dead pixels can help you prevent their occurrence, it’s important to keep in mind that not all dead pixels can be permanently fixed. However, there are techniques and methods available that can potentially revive stuck pixels and minimize their impact on your screen’s performance.
Method 1: Massaging the pixel
One of the simplest methods to potentially revive a stuck pixel is by massaging it gently. This technique involves applying light pressure to the affected area in an attempt to dislodge or reactivate the stuck pixel. Here’s a step-by-step guide on how to massage the pixel:
- Turn off your monitor or display to prevent any further image distortion or damage.
- Locate the stuck pixel on the screen. You can use a pixel test or dead pixel checker tool to pinpoint the location accurately.
- With the display still turned off, take a soft, lint-free cloth or your fingertip and apply gentle pressure directly onto the stuck pixel.
- While exerting light pressure, use circular motions or gently rub the affected area. Be careful not to press too hard or use excessive force.
- If the pixel does not respond initially, continue massaging it for a few minutes. Sometimes, persistent and patient massaging can help revive the pixel.
After massaging the pixel, turn your monitor back on and check if the stuck pixel has been resolved. In some cases, the pixel may reactivate and display the correct color. However, please note that this method may not work for all cases of stuck pixels, especially if the underlying issue is more complex or severe.
It’s important to be cautious while applying pressure to your monitor. Avoid using sharp objects or excessive force as these can cause further damage to the screen. If the massaging method does not yield any results, proceed to explore other potential solutions discussed later in this guide.
Method 2: Using pixel fixing software
If massaging the stuck pixel doesn’t produce the desired results, another effective method to consider is using pixel fixing software. These software programs utilize rapid and colorful pixel cycling techniques to stimulate the pixel and potentially revive it. Here’s how you can use pixel fixing software to address the issue:
- Research and select a reliable pixel fixing software that is compatible with your operating system.
- Download and install the software on your computer following the provided instructions.
- Launch the pixel fixing software and locate the option to fix or repair stuck pixels.
- Choose the area of the screen where the stuck pixel is located and select the appropriate settings for running the pixel fixing process.
- Initiate the pixel cycling process and allow the software to run for the recommended duration. This usually involves displaying rapid color changes and patterns on the screen.
During the pixel cycling process, the software aims to stimulate the stuck pixel by rapidly transitioning between various colors. The quick changes in color and intensity can potentially jolt the pixel into functioning properly again.
Once the pixel fixing process is complete, carefully observe the affected area of the screen to check if the stuck pixel has been resolved. Restart your computer and assess if the pixel remains responsive.
Keep in mind that while pixel fixing software can be effective for certain cases of stuck pixels, it may not work for all situations. Additionally, it’s important to follow the instructions provided by the software developer and exercise caution to prevent any unintended consequences or damage to your monitor.
If the pixel remains stuck after using pixel fixing software or if you prefer to try alternative methods, continue reading the following sections for additional techniques to address dead pixels on your monitor.
Method 3: Applying pressure to the affected area
Another technique that can potentially fix stuck pixels is applying pressure to the affected area. By exerting controlled force on the pixel, you may be able to free it from its unresponsive state. Here’s how you can apply pressure to the affected area:
- Turn off your monitor and make sure it is disconnected from any power source.
- Identify the stuck pixel on the screen using a pixel test or dead pixel checker tool.
- Take a blunt object that has a soft, non-abrasive surface, such as a stylus or the eraser end of a pencil.
- Gently apply pressure to the center of the stuck pixel with the soft surface of the object. Make sure to exert even pressure and avoid using excessive force.
- Hold the pressure for a few seconds and then release it.
Sometimes, applying slight pressure to the pixel can realign the liquid crystals or reestablish the electrical connection, resolving the stuck pixel issue.
After applying pressure, turn your monitor back on and check if the stuck pixel has been fixed. Monitor the affected area closely to see if the pixel remains responsive. If the pixel remains stuck, you can try repeating the process a few times or proceed to explore other methods.
It’s crucial to exercise caution while applying pressure to your screen. Using too much force or applying pressure to the wrong area can cause damage. If you’re uncertain or uncomfortable with this method, it’s advisable to try alternative techniques discussed in this guide or seek professional assistance.
If the pressure method doesn’t yield the desired results, don’t worry. There are still other potential solutions to consider. Let’s move on to the next method to address dead pixels on your monitor.
Method 4: Applying heat to the dead pixel
Applying heat to the dead pixel is another method that can potentially revive the unresponsive pixel. The idea behind this technique is to warm up the pixel, which may help reactivate it. Here’s how you can try applying heat to the dead pixel:
- Turn off your monitor and unplug it from any power source.
- Locate the dead pixel on the screen using a pixel test or dead pixel checker tool.
- Take a clean, soft cloth and fold it to create a small pad.
- Heat the pad using a hairdryer or by placing it close but not touching a low-heat source, such as a heating pad.
- Gently press the heated cloth pad against the dead pixel for a few seconds.
The heat generated by the cloth pad aims to warm up the stuck pixel, potentially restoring its functionality. It’s important not to apply excessive heat or press too hard, as this can cause damage to the screen. Exercise caution and be gentle during the process.
After applying heat, turn on your monitor and observe if the dead pixel has been resolved. If the pixel remains unresponsive, try repeating the process a few more times. It’s essential to note that applying heat may not work in all cases and can have varying levels of success depending on the underlying issue causing the dead pixel.
If applying heat does not fix the dead pixel, don’t be discouraged. There are still additional methods to explore. Let’s move on to the next technique to address dead pixels on your monitor.
Method 5: Tapping the dead pixel gently
Tapping the dead pixel gently is another method that can potentially revive a non-responsive pixel on your monitor. This technique involves tapping the affected area to try and dislodge or reactivate the stuck pixel. Here’s how you can try tapping the dead pixel:
- Turn on your monitor and display a plain background, such as a solid color or a black screen, to make the dead pixel more visible.
- Locate the dead pixel on the screen.
- Take a stylus, pen cap, or other small, soft object. Make sure the object has a smooth surface and will not cause any damage to the screen.
- Gently tap the dead pixel with the soft object. Apply light pressure and use small, controlled taps.
- Continue tapping the dead pixel for a few seconds, but avoid using excessive force.
The goal of tapping is to potentially reposition the pixel or jolt it out of its unresponsive state. The gentle taps may dislodge any debris or help realign the pixel’s liquid crystals, resolving the issue.
After tapping, monitor the screen closely to check if the dead pixel has been fixed. It’s important to note that this method may not work for all cases of dead pixels, especially if the underlying issue is more complex or severe. If tapping does not yield the desired results, try exploring other methods discussed in this guide.
Remember to exercise caution while tapping the screen. Applying too much force or using sharp objects can cause damage. If you’re uncertain or uncomfortable with this method, it’s advisable to try alternative techniques or seek professional assistance.
If the tapping method didn’t revive the dead pixel, don’t worry. There are still other potential solutions to consider. Let’s move on to the next method to address dead pixels on your monitor.
Method 6: Performing manual pixel repair
Performing manual pixel repair is a method that involves using special pixel repair tools or software to fix dead pixels. This technique attempts to revive the non-responsive pixel by stimulating it with specific patterns and colors. Here’s how you can perform manual pixel repair:
- Research and acquire a specialized pixel repair tool or software that is designed to fix dead pixels. These tools typically display flashing colors or patterns to stimulate the pixel.
- Follow the instructions provided by the pixel repair tool manufacturer or software developer to install and use the tool on your computer.
- Launch the pixel repair tool and locate the option to repair dead pixels.
- Select the area of the screen with the dead pixel and choose the appropriate repair settings.
- Initiate the pixel repair process and allow the tool to run for the recommended duration.
During the manual pixel repair process, the tool will display rapid and alternating colors or patterns on the screen. These colors and patterns aim to stimulate the stuck or dead pixel, potentially coaxing it back to life.
After the repair process is complete, carefully observe the affected area on the screen to check if the dead pixel has been resolved. Restart your computer and verify if the pixel remains responsive.
It’s crucial to use reputable and trustworthy pixel repair tools or software to avoid any potential harm to your screen. Follow the instructions closely and exercise caution throughout the process.
If the manual pixel repair method does not fix the dead pixel, don’t be disheartened. There are still other methods to explore. Let’s move on to the next technique to address dead pixels on your monitor.
Method 7: Seeking professional help
If none of the previous methods have been successful in fixing the dead pixel on your monitor, or if you are uncomfortable attempting the fixes yourself, it may be time to seek professional help. Professional technicians who specialize in monitor repairs have the expertise and tools necessary to diagnose and fix dead pixel issues. Here’s how you can seek professional help:
- Research and find reputable monitor repair centers or technicians in your area.
- Contact them to inquire about their experience in dealing with dead pixels and ask about their repair services.
- Explain the issue and provide any necessary information about your monitor, including its make and model.
- Ask about their pricing, warranty, and estimated turnaround time for the repair.
- If you’re comfortable with the information provided, schedule an appointment and bring your monitor to the repair center or arrange for a technician to visit your location if available.
Professional technicians may have access to specialized equipment and techniques that can effectively address dead pixel issues. They can potentially disassemble the monitor and perform intricate repairs or replace specific components if necessary.
While seeking professional help ensures a higher chance of success, it’s important to note that repair costs and turnaround times can vary. Be sure to weigh the cost of repair against the overall value of your monitor before making a decision.
If your monitor is still under warranty, check the warranty terms and conditions. Some manufacturers may cover dead pixel repairs or provide a replacement unit if the issue falls within the warranty guidelines.
Remember to consult with the professionals for their expert advice and guidance. They will be able to assess the dead pixel issue and recommend the best course of action for your specific situation.
By seeking professional help, you can ensure that your dead pixel issue is handled by experienced individuals who have the necessary knowledge and resources to resolve it effectively.
Conclusion
Dealing with dead pixels on your monitor can be frustrating, but there are various methods and techniques you can try to revive or minimize their impact. Whether it’s massaging the pixel, using pixel fixing software, applying pressure, applying heat, tapping the dead pixel, performing manual pixel repair, or seeking professional help, there are options available based on your comfort level and the severity of the dead pixel issue.
It’s important to remember that not all dead pixels can be permanently fixed, and the success of these methods may vary depending on the underlying cause of the dead pixel. Additionally, exercise caution while attempting any DIY methods and always consider seeking professional assistance if you’re unsure or uncomfortable with the process.
Prevention is key in avoiding dead pixel issues in the future. Handle your monitor with care, avoid exposing it to extreme temperatures, and use surge protectors to safeguard against electrical irregularities. Regularly clean your screen using recommended methods to prevent debris accumulation, which can contribute to dead pixel occurrences.
Overall, it’s essential to assess the severity of the dead pixel issue and choose the method that best suits your situation. Each method has its own merits and may yield different results. By being patient and persistent, you may be able to breathe life back into your monitor and enjoy a smooth, visually pleasing display once again.


