Introduction
Knowing how much RAM (Random Access Memory) you have on your computer is important for various reasons. RAM is a crucial component that affects the performance and speed of your system. Whether you’re a gamer looking to optimize your gaming experience, a professional handling resource-intensive tasks, or simply someone interested in understanding your computer’s capabilities, finding the amount of RAM in your device is a fundamental step.
Checking your RAM is a straightforward process, and one of the easiest ways to do so is through the Device Manager on Windows computers. Device Manager provides a comprehensive overview of the hardware components installed on your system, including the RAM modules. By following a few simple steps, you can quickly locate and view the details of your computer’s RAM.
In this guide, we will walk you through the step-by-step process of finding your RAM in Device Manager. Whether you’re using Windows 10, Windows 8, or Windows 7, the steps remain relatively similar, and you’ll have no trouble finding the information you need.
So, without further ado, let’s dive into the process of discovering your RAM size and specifications using the Device Manager.
Step 1: Open Device Manager
To begin the process of finding your RAM in Device Manager, you need to first open the Device Manager utility on your Windows computer. Device Manager provides a centralized location to view and manage all the hardware devices connected to your system.
Here’s how you can open the Device Manager:
- Press the Windows key and R key simultaneously to open the Run dialog box.
- Type “devmgmt.msc” (without quotation marks) in the Run dialog box.
- Click OK or press Enter.
Alternatively, you can also open the Device Manager through the Control Panel:
- Press the Windows key and type “Control Panel“.
- Click on the Control Panel search result to open it.
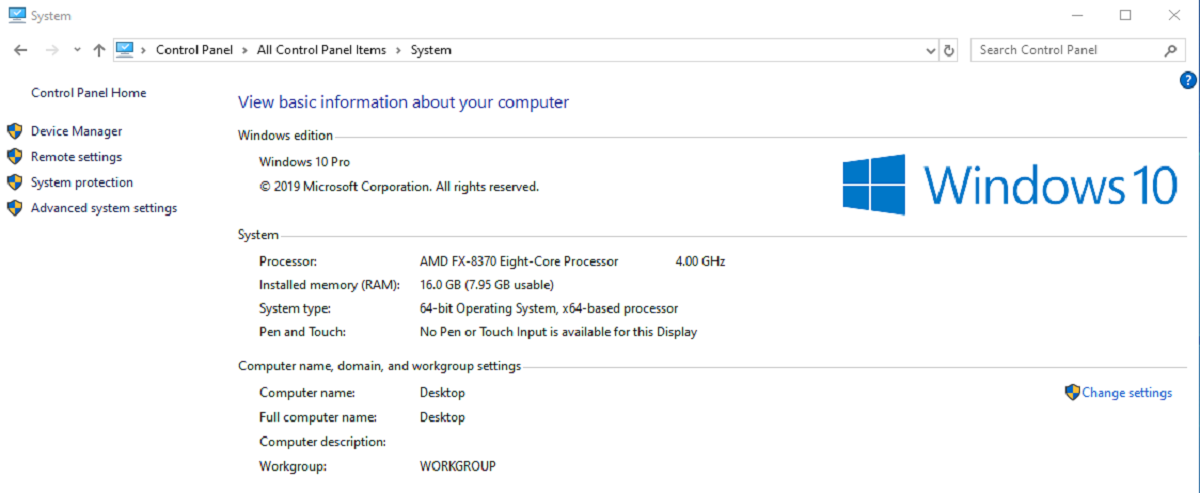
- In the Control Panel window, locate and click on the System and Security category.
- Under the System and Security category, click on System.
- In the System window, click on the Device Manager link located on the left side.
Regardless of the method you choose, both will open the Device Manager window, allowing you to proceed to the next step.
Step 2: Expand the “Memory technology devices” category
Once you have successfully opened the Device Manager window, the next step is to locate and expand the “Memory technology devices” category. This category contains the information about your computer’s RAM.
Follow these steps to expand the “Memory technology devices” category:
- In the Device Manager window, you’ll see a list of different hardware categories and devices.
- Locate and double-click on the Memory technology devices category.
By double-clicking on the “Memory technology devices” category, you will expand it and reveal the RAM modules installed on your system.
If you do not see the “Memory technology devices” category, it could mean that your system does not have this category visible in Device Manager. In such cases, do not worry. The absence of this category does not necessarily mean that your computer lacks RAM. There are alternative methods to find your RAM details, which we will explore.
Once you have expanded the “Memory technology devices” category, you are ready to proceed to the next step and locate the specific entry for your computer’s RAM.
Step 3: Locate the RAM entry
Now that you have expanded the “Memory technology devices” category in Device Manager, it’s time to locate the entry that corresponds to your computer’s RAM module. This entry will provide you with the detailed information about your RAM.
Follow these steps to locate the RAM entry:
- In the expanded “Memory technology devices” category, you will see one or more entries listed.
- Look for an entry that includes terms like “RAM“, “Memory“, or the specific brand name of your RAM module (e.g., “Kingston“, “Corsair“, etc.).
- If you see multiple entries, it means that there are multiple RAM modules installed on your system. Each entry represents a separate RAM module.
- Click on the entry for your desired RAM module to select it.
By locating and selecting the relevant RAM entry, you are now ready to view the details and capacity of your computer’s RAM.
If you are unable to find any specific RAM entry in the “Memory technology devices” category, it could mean that your system does not have this category listed in Device Manager. But don’t worry, there are alternative methods available to find your RAM information, which we will explore.
With the RAM entry in sight, let’s move on to the next step and view the details and capacity of your RAM module.
Step 4: View RAM details and capacity
After locating the entry for your computer’s RAM module in Device Manager, the final step is to view the details and capacity of the RAM. This information will provide you with valuable insights into the specific specifications of your RAM.
Follow these steps to view the RAM details and capacity:
- Once you have selected the RAM entry in Device Manager, right-click on it.
- A context menu will appear. From the menu, choose the option “Properties“.
- A new window will open, displaying the properties of your RAM module.
- Within the properties window, navigate to the “General” tab.
- Under the General tab, you will find information such as the manufacturer, model, and capacity of your RAM.
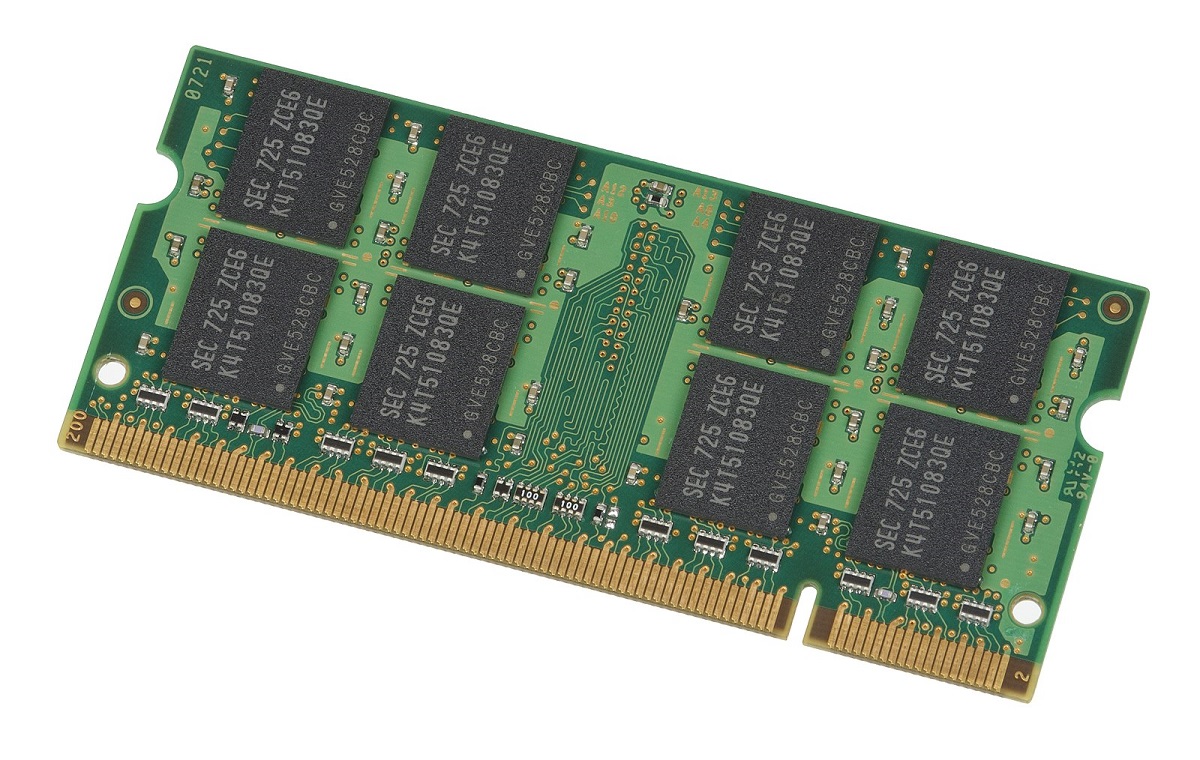
The capacity of your RAM module will be listed in megabytes (MB) or gigabytes (GB). This indicates the amount of memory the module can store and is an essential factor in determining the performance of your computer.
Take note of the RAM details and capacity for future reference or analysis. Knowing this information will come in handy when upgrading or troubleshooting your computer’s memory.
Congratulations! You have successfully found and viewed your RAM details and capacity using the Device Manager in Windows.
If you have multiple RAM modules, repeat the above steps for each module to gather information about each individual module.
Now that you have obtained the necessary information about your computer’s RAM, you can make informed decisions about optimizing your system’s performance or upgrading your RAM, if needed.
Conclusion
Finding the amount of RAM in your computer is a straightforward process using the Device Manager in Windows. By following the steps outlined in this guide, you can easily locate and view the details of your computer’s RAM module.
RAM plays a crucial role in determining the performance and speed of your system. Whether you’re a gamer, a professional handling resource-intensive tasks, or simply someone curious about your computer’s capabilities, knowing your RAM size and specifications is essential.
With the Device Manager, you can not only find the amount of RAM but also access additional information such as the manufacturer, model, and capacity. This information can be useful for troubleshooting issues, upgrading your RAM, or optimizing your system’s performance.
Remember that if you do not find the “Memory technology devices” category in Device Manager or if you encounter any issues, there are alternative methods available to find your RAM information. Consulting your computer’s documentation or using specialized system information software can provide you with the necessary details about your RAM.
Armed with the knowledge of your computer’s RAM, you can make informed decisions about software compatibility, system upgrades, and overall performance improvements.
So go ahead and explore the various ways you can utilize your RAM and make the most out of your computer’s capabilities!