Introduction
Virtualization has revolutionized the world of computing, providing organizations with the opportunity to maximize their resources and achieve greater efficiency. Whether you are a seasoned IT professional or a curious enthusiast, understanding how to enable virtualization in VMware virtual machines can significantly enhance your virtualization journey.
In this article, we will explore the fundamentals of virtualization, the various types of virtualization, and the numerous benefits it offers. We will then delve into the step-by-step process of enabling virtualization in VMware virtual machines, ensuring that you can take full advantage of this powerful technology.
Virtualization is the process of creating a virtual version of a computer system, enabling multiple virtual machines to run on a single physical machine. Each virtual machine operates independently, with its own operating system, applications, and resources, effectively simulating a real computer system. This eliminates the need for multiple physical machines, reducing costs, and simplifying management.
There are several types of virtualization, including server virtualization, desktop virtualization, application virtualization, and network virtualization. Server virtualization is the most common, allowing multiple virtual machines to run on a single physical server. Desktop virtualization emulates a complete desktop environment, enabling users to access their virtual desktops from any device. Application virtualization encapsulates applications so that they can run on any machine without interfering with the underlying operating system. Network virtualization abstracts networking components to create virtual networks that can be managed independently.
The benefits of virtualization are numerous, making it a highly sought-after technology in the IT industry. Virtualization optimizes resource utilization, allowing organizations to fully utilize their hardware infrastructure. By running multiple virtual machines on a single physical machine, businesses can reduce costs associated with purchasing and maintaining separate hardware. Additionally, virtualization enhances scalability and flexibility, allowing for easy allocation of resources as needs change. It improves disaster recovery capabilities, as virtual machines can be quickly replicated and restored. Moreover, virtualization enables efficient testing and development, simplifying the setup of isolated environments.
Now that we have established the importance and benefits of virtualization, let’s dive into the process of enabling virtualization in VMware virtual machines. This involves a series of steps, including ensuring hardware support, enabling virtualization in the BIOS/UEFI, verifying support in the guest operating system, and enabling virtualization in the VMware virtual machine itself.
Understanding Virtualization
In order to comprehend how to enable virtualization in VMware virtual machines, it is crucial to first have a solid understanding of virtualization itself. Virtualization is a technology that allows for the creation of virtual versions of computer systems, enabling multiple virtual machines to operate independently on a single physical machine.
Virtualization works by abstracting the hardware resources of a computer, such as the CPU, memory, and storage, and creating virtual representations of them. Each virtual machine (VM) has its own isolated and independent set of resources, including its own operating system, applications, and configurations.
These virtual machines can run concurrently on a host machine, sharing the physical resources while maintaining their individuality. This allows businesses to consolidate their hardware infrastructure and optimize resource utilization, reducing costs and improving efficiency.
There are multiple types of virtualization, each catering to different needs and purposes. Let’s explore a few of the most common types:
- Server Virtualization: This is the most widely used form of virtualization. It involves running multiple virtual servers on a single physical server. Each virtual server operates independently, with its own operating system and applications. Server virtualization allows for better utilization of server resources and enhances scalability and flexibility.
- Desktop Virtualization: Desktop virtualization enables the creation of virtual desktop environments that can be accessed from any device. This allows users to work remotely and access their personal desktop settings and applications from anywhere. It simplifies desktop management, enhances security, and improves mobility.
- Application Virtualization: With application virtualization, applications are encapsulated and run in a virtual environment without being installed on the local operating system. This allows for seamless application delivery and compatibility across various operating systems and eliminates conflicts between different applications.
- Network Virtualization: Network virtualization involves abstracting the network infrastructure, separating the physical network into multiple virtual networks. Each virtual network operates independently, allowing for better management and allocation of network resources. It provides flexibility, scalability, and improved network security.
The benefits of virtualization are significant and impact various aspects of IT infrastructure. Virtualization enables businesses to consolidate their hardware, reducing the number of physical machines required and minimizing costs associated with power consumption, cooling, and maintenance. It improves resource utilization by allowing for efficient sharing of resources among multiple virtual machines.
Virtualization also enhances scalability, as additional virtual machines can be easily deployed and scaled up or down according to the organization’s needs. It improves disaster recovery capabilities, as virtual machines can be quickly backed up, replicated, and restored in the event of a system failure. Additionally, virtualization simplifies testing and development by enabling the creation of isolated environments for software development and testing purposes.
As we grasp the concept of virtualization and understand its diverse applications and benefits, we can now proceed to learn how to enable virtualization in VMware virtual machines.
Types of Virtualization
Virtualization comes in various forms, each designed to meet specific needs and provide unique benefits. Understanding the different types of virtualization can help you determine which approach is best suited for your requirements. Let’s explore some of the most common types of virtualization:
- Server Virtualization: Server virtualization involves running multiple virtual servers on a single physical server. Each virtual server operates independently with its own operating system, applications, and resources. Server virtualization allows for efficient utilization of hardware resources, reducing the number of physical servers required and providing scalability and flexibility. It enables organizations to consolidate their server infrastructure, streamline management, and improve resource allocation.
- Desktop Virtualization: Desktop virtualization or Virtual Desktop Infrastructure (VDI) allows users to access their desktop environment from any device. A virtual desktop is created on a server, and users can securely access their desktops remotely. This eliminates the need for physical desktops, making it easier to manage and update software and configurations centrally. Desktop virtualization provides flexibility for remote work, enhances security, and simplifies desktop deployment and support.
- Application Virtualization: Application virtualization enables applications to run in isolated virtual environments, separate from the underlying operating system. This allows for the use of multiple applications on a single machine without conflicts. Applications are encapsulated into packages that can be easily deployed and managed. With application virtualization, compatibility issues between different applications and operating systems are minimized, making software deployment and updates more streamlined.
- Network Virtualization: Network virtualization partitions physical network resources into logical segments, creating virtual networks that can be managed independently. This allows for more efficient and dynamic allocation of network resources, improved network performance, and enhanced security. Network virtualization enables the creation of logical networks that can be customized according to specific needs, helping organizations achieve greater flexibility and scalability in their network infrastructure.
- Storage Virtualization: Storage virtualization consolidates physical storage resources from multiple storage devices into a single, virtualized storage pool. This simplifies storage management, improves data availability, and enhances performance. In storage virtualization, virtual disks are created, and storage can be allocated based on the requirements of virtual machines. Storage virtualization helps optimize storage space utilization, improves data protection, and allows for easier data migration and disaster recovery.
These are just a few examples of the various types of virtualization available. Advances in virtualization technology continue to expand the possibilities and improve efficiency in IT environments.
Understanding the types of virtualization empowers organizations to choose the most suitable approach or combination of approaches to meet their specific needs. By leveraging virtualization, businesses can achieve higher levels of resource utilization, scalability, flexibility, and cost savings.
Benefits of Virtualization
Virtualization offers a wide range of benefits that make it a highly valuable technology for businesses of all sizes. By harnessing the power of virtualization, organizations can optimize their IT infrastructure, streamline operations, and achieve significant cost savings. Let’s explore some of the key benefits of virtualization:
- Resource Utilization: Virtualization allows for efficient utilization of hardware resources. By running multiple virtual machines on a single physical server, organizations can maximize the use of CPU, memory, and storage, reducing the need for additional physical hardware. This results in cost savings, reduced power consumption, and a smaller data center footprint.
- Cost Savings: Virtualization enables businesses to save money on hardware, maintenance, and energy costs. With fewer physical servers required, hardware purchases and associated maintenance expenses are reduced. Additionally, virtualization allows for higher consolidation ratios, leading to lower energy consumption and cooling requirements. This translates into significant cost savings in the long run.
- Scalability and Flexibility: Virtualization provides scalability and flexibility by allowing for easy provisioning and allocation of resources. Virtual machines can be quickly created, replicated, and scaled up or down to meet changing demands. This scalability ensures that businesses can adapt to growth and handle peak workloads effectively without the need for extensive hardware upgrades.
- Improved Disaster Recovery: Virtualization simplifies disaster recovery efforts by enabling the quick backup and replication of virtual machines. In the event of a system failure or data loss, virtual machines can be restored to a previous state or transferred to another host machine with minimal downtime. This enhances business continuity and reduces the risk of data loss.
- Easier Testing and Development: Virtualization simplifies the testing and development process by providing a flexible and isolated environment for software development and testing. Virtual machines can be set up quickly and easily, allowing developers to experiment with different configurations and software versions without impacting the production environment. This accelerates application development and deployment cycles.
- Enhanced Security: Virtualization improves security by isolating virtual machines from each other and from the host machine. Each virtual machine operates independently, and any issues or security breaches within one virtual machine have limited impact on others. Additionally, virtual machines can be easily backed up and encrypted, providing an extra layer of protection for critical data.
- Centralized Management: With virtualization, administrators can manage multiple virtual machines and their resources from a central console. This simplifies tasks such as deploying new virtual machines, managing storage allocations, and monitoring performance. Centralized management improves efficiency and reduces the time and effort required for administrative tasks.
These benefits highlight the transformative power of virtualization in optimizing IT infrastructure and operations. By embracing virtualization technology, businesses can achieve cost savings, scalability, flexibility, improved security, and simplified management, allowing them to stay competitive and agile in today’s rapidly evolving digital landscape.
Enabling Virtualization in VMware
Enabling virtualization is an essential step to unlock the full potential of VMware virtual machines. By enabling virtualization, you allow virtual machines to efficiently utilize hardware resources and maximize performance. Here are the steps to enable virtualization in VMware:
Step 1: Checking Hardware Support for Virtualization
Before enabling virtualization, it is crucial to ensure that your hardware supports virtualization technology. Most modern CPUs have built-in virtualization capabilities, such as Intel’s Virtualization Technology (VT-x) or AMD’s Virtualization (AMD-V). Check your CPU manufacturer’s specifications or consult the documentation to verify virtualization support.
Step 2: Enabling Virtualization in BIOS/UEFI
Virtualization must be enabled in the computer’s BIOS (Basic Input/Output System) or UEFI (Unified Extensible Firmware Interface) settings. To access the BIOS/UEFI settings, restart your computer and look for a key prompt (such as F2, F10, or Del) to enter the BIOS/UEFI setup. Navigate to the virtualization settings (usually located under “Advanced” or “Processor” options) and enable the virtualization feature. Save your changes and exit the BIOS/UEFI settings.
Step 3: Verifying Virtualization Support in the Guest Operating System
Once virtualization is enabled in the BIOS/UEFI, you need to verify virtualization support in the guest operating system running within the VMware virtual machine. Install a reliable system information tool, such as CPU-Z or Speccy, to check if virtualization extensions are enabled in the guest operating system. If the virtualization support is enabled, you are ready to proceed to the next step.
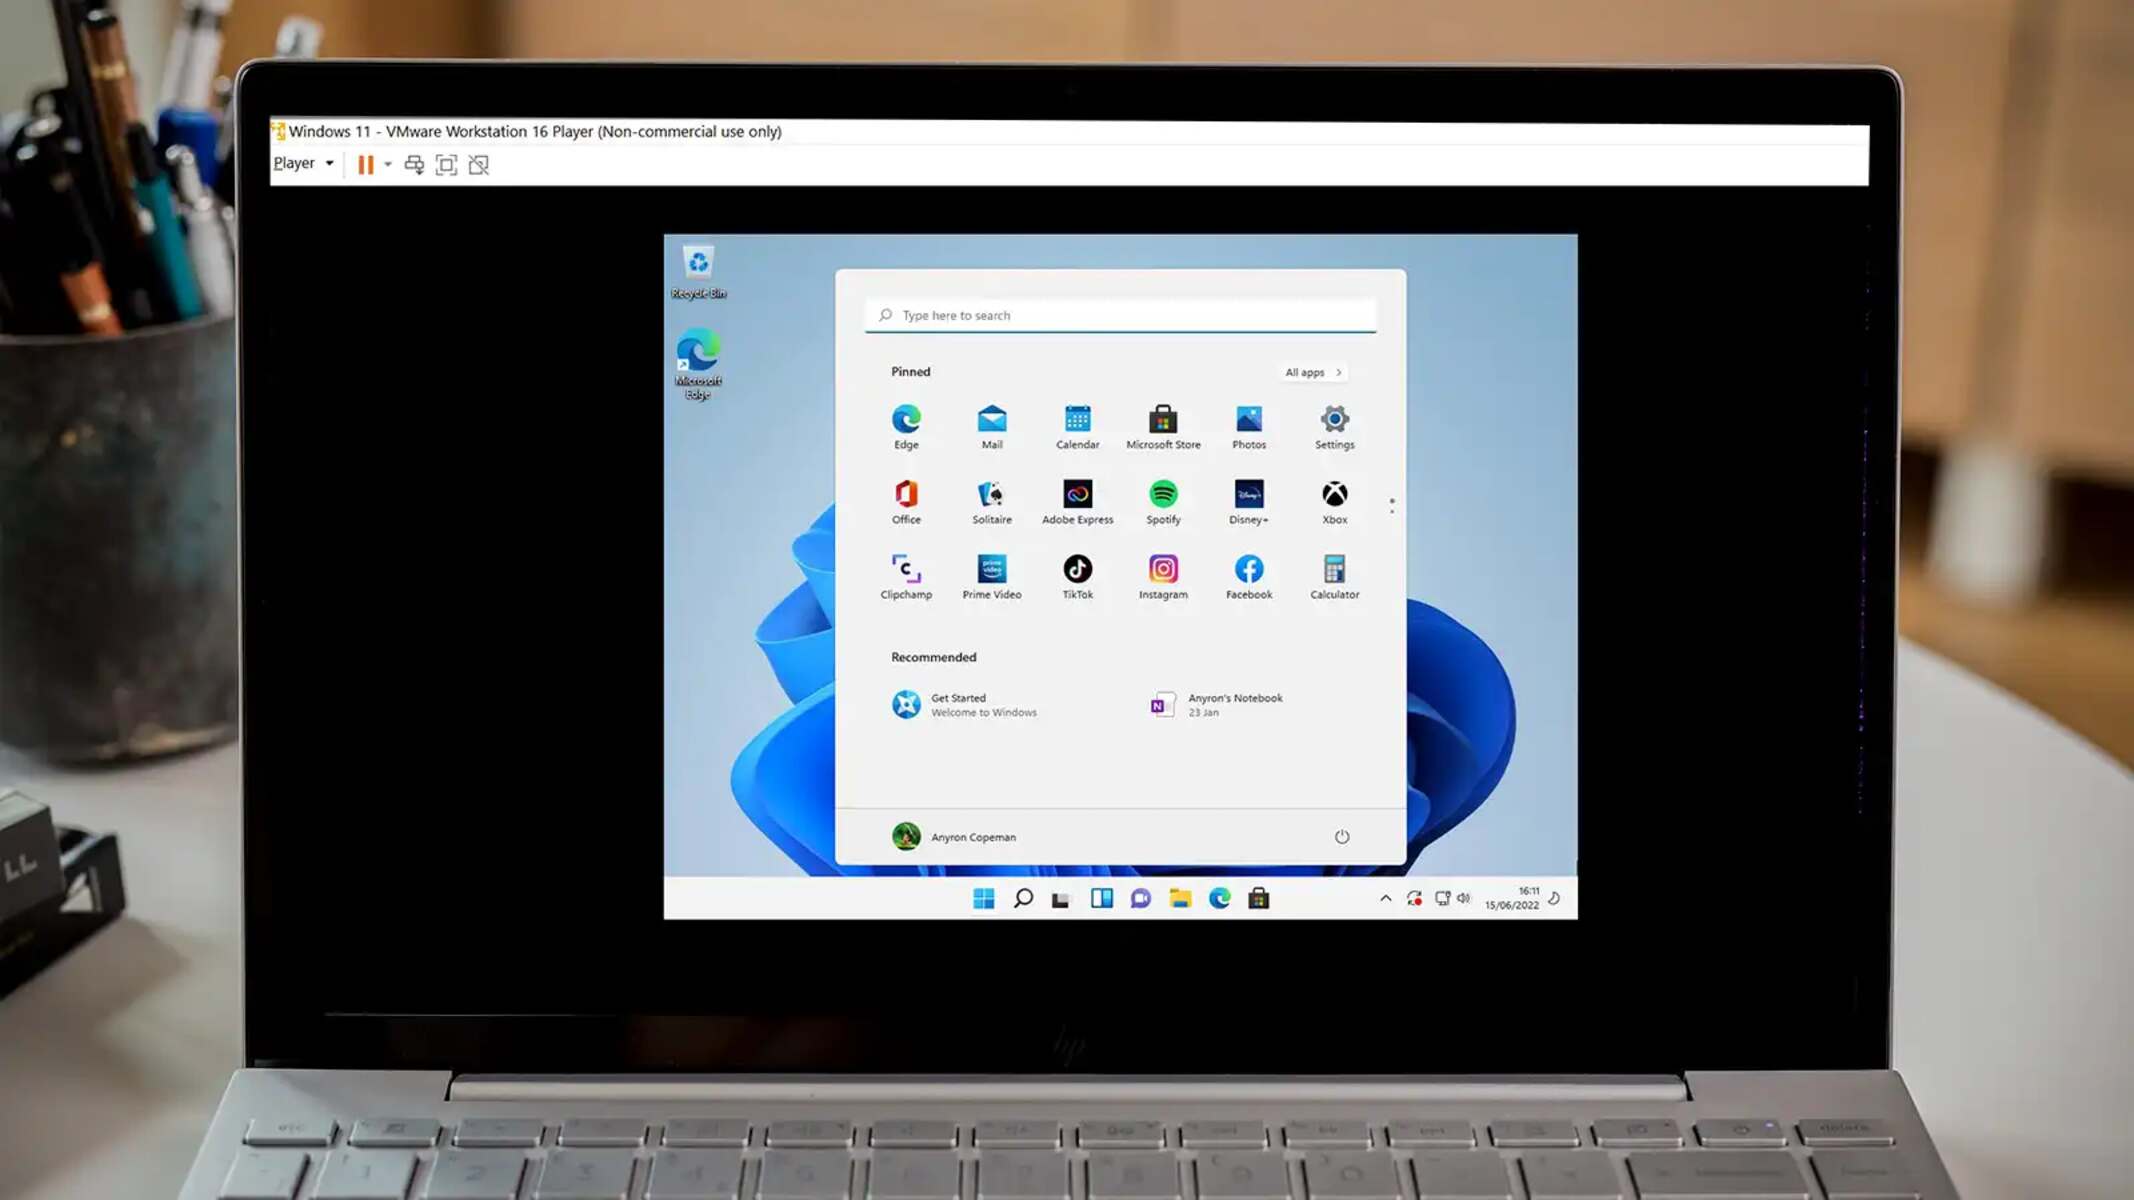
Step 4: Enabling Virtualization in the VMware Virtual Machine
Launch the VMware virtualization software and open the virtual machine for which you want to enable virtualization. Go to the virtual machine settings and navigate to the “Processors” or “CPU” section. Look for the virtualization options and ensure that the “Virtualize Intel VT-x/EPT or AMD-V/RVI” checkbox is selected. This option may vary depending on the version of VMware software you are using. Save the settings and start the virtual machine.
Once the virtual machine is up and running, it should be able to utilize virtualization features, enhancing its performance and resource utilization.
Troubleshooting Virtualization Issues
If you encounter any issues or receive error messages while enabling virtualization, ensure that you have followed the correct steps and that your hardware supports virtualization. Refer to the documentation or online resources specific to your hardware and VMware software for troubleshooting guidance. Additionally, keep your software and drivers up to date to ensure compatibility and optimal virtualization performance.
By enabling virtualization in VMware virtual machines, you unlock the full potential of your virtual infrastructure, enhancing performance, resource efficiency, and overall productivity.
Step 1: Checking Hardware Support for Virtualization
Before enabling virtualization in VMware, it is essential to verify that your hardware supports virtualization technology. Most modern processors come equipped with built-in virtualization extensions, such as Intel’s Virtualization Technology (VT-x) or AMD’s Virtualization (AMD-V). These extensions provide the necessary hardware support for running virtual machines efficiently. Follow the steps below to ensure your hardware is capable of virtualization:
Step 1: Determine the CPU model: Identify the model of your CPU to check if it supports virtualization. You can usually find this information in your computer’s documentation or by accessing the system information tool provided by your operating system.
Step 2: Verify virtualization support: Once you have identified your CPU model, visit the manufacturer’s website (Intel or AMD) and search for the specifications or documentation related to your specific processor model. Look for details regarding virtualization support, including the supported virtualization extensions (VT-x for Intel or AMD-V for AMD).
Step 3: Check BIOS/UEFI settings: Restart your computer and access the BIOS (Basic Input/Output System) or UEFI (Unified Extensible Firmware Interface) settings. The key to enter the BIOS/UEFI setup may vary depending on your computer manufacturer (common keys include F2, F10, or Del). Once in the settings, navigate to the “Advanced” or “Processor” options.
Step 4: Enable virtualization in BIOS/UEFI: Look for an option related to virtualization, such as “Intel Virtualization Technology,” “VT-x,” or “AMD Virtualization.” Depending on your BIOS/UEFI interface, the terminology may vary. Enable the virtualization feature by selecting the appropriate option and saving the changes to the BIOS/UEFI settings.
Step 5: Reboot your computer: After enabling virtualization in the BIOS/UEFI settings, save the changes and exit the settings interface. Allow your computer to restart, ensuring that the changes are applied successfully.
Step 6: Verify virtualization support: Once your computer has rebooted, verify the status of virtualization support. You can use system information tools such as CPU-Z or Speccy to check if virtualization extensions are now enabled. These tools provide detailed information about your CPU, including virtualization support status.
If you find that your CPU does not support virtualization, you may need to consider upgrading to a processor that offers virtualization extensions or exploring alternative virtualization options that do not rely heavily on hardware virtualization.
Verifying hardware support for virtualization is the first crucial step in enabling virtualization in VMware. Ensuring that your hardware is capable of virtualization is essential to achieve optimal performance and functionality within your virtual machines.
Step 2: Enabling Virtualization in BIOS/UEFI
To enable virtualization in VMware, it is necessary to access the BIOS (Basic Input/Output System) or UEFI (Unified Extensible Firmware Interface) settings of your computer. Configuring these settings will allow your hardware to fully support virtualization. Follow the step-by-step guide below to enable virtualization in the BIOS/UEFI:
Step 1: Start your computer: Power on your computer and wait for the initial boot screen to appear. As the computer starts up, you will typically see a message indicating which key to press to enter the BIOS/UEFI settings. The specific key may vary depending on your computer’s manufacturer, commonly it is F2, F10, or Del.
Step 2: Access the BIOS/UEFI settings: Press the designated key repeatedly until the BIOS/UEFI setup menu is displayed. This timing may require some trial and error, so keep pressing the key until you successfully enter the settings interface.
Step 3: Navigate to virtualization settings: Once inside the BIOS/UEFI setup menu, use the arrow keys on your keyboard to navigate through the options. Look for a section that is related to virtualization or processor settings. These options may be located under the “Advanced” or “CPU” tab, but the exact location can vary depending on the BIOS/UEFI version and manufacturer.
Step 4: Enable virtualization support: Within the virtualization or processor settings, there should be an option related to virtualization technology. The naming convention can differ, such as “Intel Virtualization Technology” or “AMD Virtualization.” Select the option and change the setting from “Disabled” to “Enabled” using the appropriate key (usually Enter or Spacebar).
Step 5: Save and exit the BIOS/UEFI settings: Once you have enabled virtualization support, navigate to the exit menu or a similar option within the BIOS/UEFI settings. Select the option to save the changes you made and exit the settings interface. Confirm your selection if prompted.
Step 6: Restart your computer: Allow your computer to restart in order for the changes made in the BIOS/UEFI settings to take effect. Depending on your BIOS/UEFI version, you might receive a notification stating that changes have been made. This is a normal part of the process.
After completing these steps, your computer’s BIOS/UEFI settings will have virtualization enabled. Now, you can proceed with the remaining steps to configure virtualization settings within the VMware software and within the guest operating system running on the virtual machine.
Enabling virtualization in the BIOS/UEFI settings is a crucial step in ensuring optimal performance and functionality within VMware virtual machines. This allows the hardware to fully support virtualization extensions and leverage the benefits of this powerful technology.
Step 3: Verifying Virtualization Support in the Guest Operating System
After enabling virtualization in the BIOS/UEFI settings, the next step is to verify virtualization support within the guest operating system running in your VMware virtual machine. Verifying virtualization support ensures that the guest operating system can leverage the virtualization extensions provided by the underlying hardware. Follow the steps below to confirm virtualization support in the guest operating system:
Step 1: Power on the VMware virtual machine: Launch the VMware virtualization software and start the virtual machine for which you want to verify virtualization support.
Step 2: Access the virtual machine settings: With the virtual machine running, navigate to the menu options or toolbar within the VMware software and locate the virtual machine settings. This option is typically named “Settings” or “Preferences.”
Step 3: Navigate to the virtualization options: Within the virtual machine settings, look for a section related to virtualization or CPU. The wording and location of these options can vary depending on the version of VMware software you are using.
Step 4: Check virtualization support: In the virtualization options, ensure that the checkbox or option related to virtualization support is selected. It is usually labeled as “Virtualize Intel VT-x/EPT” or “Virtualize AMD-V/RVI” depending on your CPU architecture. Selecting this option allows the guest operating system to access the hardware virtualization extensions.
Step 5: Save the settings and start the virtual machine: After enabling the virtualization support option, save the settings and start the virtual machine. The guest operating system will now have access to the hardware virtualization features, optimizing its performance and compatibility with virtualization.
Step 6: Verify virtualization support in the guest operating system: Once the virtual machine has booted up, login to the guest operating system and install a system information tool such as CPU-Z or Speccy. These tools provide detailed information about your CPU and can verify whether virtualization extensions are enabled in the guest operating system.
If the virtualization support is correctly enabled in the guest operating system, you can proceed with utilizing the benefits of virtualization within your VMware virtual machine.
Note that the process of verifying virtualization support in the guest operating system may vary slightly depending on the specific operating system you are using. Consult the documentation or online resources for the guest operating system to find the appropriate method.
Confirming virtualization support in the guest operating system is a crucial step in ensuring that the virtual machine can fully utilize virtualization extensions provided by the underlying hardware. This enhances the performance, scalability, and compatibility of the virtualized environment.
Step 4: Enabling Virtualization in the VMware Virtual Machine
Once you have confirmed virtualization support in both the hardware and the guest operating system, the next step is to enable virtualization within the VMware virtual machine itself. Enabling virtualization in the VMware settings ensures that the virtual machine can leverage the hardware virtualization extensions. Follow the steps below to enable virtualization in the VMware virtual machine:
Step 1: Launch the VMware software: Start the VMware virtualization software on your computer. The software should open to the main interface or display a list of your virtual machines.
Step 2: Open the virtual machine settings: Locate the virtual machine for which you want to enable virtualization and right-click on it. From the context menu, select “Settings” or “Virtual Machine Properties.” This action will open the settings panel for your virtual machine.
Step 3: Navigate to the virtualization options: Within the virtual machine settings, look for a section or tab related to the CPU or processor settings. The exact location and naming can vary depending on the version of VMware software you are using.
Step 4: Enable virtualization support: In the virtualization options, locate the checkbox or option that enables virtualization support. The option should be called “Virtualize Intel VT-x/EPT” for Intel processors or “Virtualize AMD-V/RVI” for AMD processors. Check or select this option to enable virtualization in the virtual machine.
Step 5: Save the settings and start the virtual machine: After enabling the virtualization support option, save the settings and exit the virtual machine settings panel. Start the virtual machine for the changes to take effect.
Step 6: Verify virtualization in the virtual machine: Once the virtual machine has booted up, you can verify whether virtualization is enabled by checking the system information within the guest operating system. Tools like CPU-Z or Speccy can provide detailed CPU information, including virtualization support.
Enabling virtualization in the VMware virtual machine allows it to fully leverage the hardware virtualization extensions, improving performance and compatibility with virtualization technology. It enables the virtual machine to allocate resources more efficiently and optimize the utilization of the underlying hardware.
Note that the availability and location of virtualization options may vary depending on the version of VMware software you are using. Refer to the documentation or online resources specific to your software version for more detailed instructions.
By enabling virtualization within the VMware virtual machine, you ensure that your virtual environment is configured to take full advantage of the benefits provided by hardware-assisted virtualization.
Troubleshooting Virtualization Issues
While enabling virtualization in VMware, you may encounter issues or errors that can hinder the proper functioning of virtualization. It is essential to be aware of potential troubleshooting steps to resolve these issues effectively. Here are some common virtualization issues and troubleshooting tips:
Issue 1: Virtualization option is missing in BIOS/UEFI: If you cannot locate the virtualization option in your computer’s BIOS/UEFI settings, ensure that your CPU supports virtualization technology. Check the manufacturer’s documentation or website for confirmation. If your CPU does support virtualization but the option is still missing, ensure your BIOS/UEFI firmware is up to date. You may need to update the firmware to enable the virtualization option.
Issue 2: Error messages during virtual machine startup: If you encounter error messages when starting a virtual machine, ensure that virtualization is enabled in both the BIOS/UEFI settings and within the VMware virtual machine settings. Confirm that you have selected the appropriate virtualization option (‘Virtualize Intel VT-x/EPT’ or ‘Virtualize AMD-V/RVI’) in the virtual machine settings. If the issue persists, check for updated drivers for your hardware and ensure that your VMware software is up to date.
Issue 3: Guest operating system does not recognize virtualization support: If your guest operating system does not acknowledge the presence of virtualization support, ensure that you have installed the necessary drivers and updates for the guest operating system. For Windows-based operating systems, ensure that the virtualization feature is enabled within the ‘Turn Windows Features On or Off’ settings. Verify that the system information tool you are using to check virtualization support is compatible with the guest operating system.
Issue 4: Slow performance or high CPU usage: If you notice sluggish performance or excessive CPU utilization within your virtual machine, verify that the virtualization options are correctly enabled in the BIOS/UEFI settings, VMware virtual machine settings, and guest operating system. Ensure that you have allocated sufficient resources to the virtual machine, including CPU cores, memory, and storage. Consider adjusting the resource allocation accordingly to optimize performance.
Issue 5: Incompatibility with certain software or applications: Some software applications may not be compatible with virtualization or may require specific settings to function correctly. Check the documentation or consult the software vendor to ensure that there are no known issues or required configurations for virtualized environments. If compatibility issues persist, consider running the software on a physical machine or exploring alternative virtualization solutions.
Issue 6: Hardware or driver conflicts: Virtualization issues can sometimes arise due to conflicts with certain hardware components or outdated drivers. Ensure that your hardware components, particularly the CPU, are compatible and supported for virtualization. Update the drivers to the most recent versions available from the manufacturer’s website. If conflicts persist, consider seeking assistance from the hardware manufacturer or VMware Support.
When troubleshooting virtualization issues, it is crucial to document any error messages encountered, check for software and firmware updates, and confirm compatibility with the hardware, VMware software, and guest operating system. If needed, consult online forums, knowledge bases, or seek assistance from relevant support channels to troubleshoot and resolve the issues effectively.
By addressing virtualization issues promptly, you can ensure smooth operation, improve performance, and fully leverage the benefits of virtualization technology within your VMware virtual machine.
Conclusion
Enabling virtualization in VMware virtual machines is a crucial step in harnessing the full potential of virtualization technology. By understanding the fundamentals of virtualization, verifying hardware support, enabling virtualization in the BIOS/UEFI settings, and verifying support within the guest operating system and VMware virtual machine settings, you can optimize resource utilization, enhance performance, and unlock the numerous benefits of virtualization.
Virtualization offers significant advantages such as improved resource utilization, cost savings, scalability, disaster recovery capabilities, and simplified testing and development. Server virtualization, desktop virtualization, application virtualization, and network virtualization are just some of the types of virtualization that organizations can leverage to enhance their IT infrastructure.
Throughout the process of enabling virtualization, it is important to troubleshoot and address any issues that may arise. By following troubleshooting tips and seeking support when needed, you can overcome challenges and ensure a seamless virtualization experience.
In conclusion, virtualization is a powerful technology that enables businesses to optimize hardware resources, streamline operations, and achieve cost savings. By enabling virtualization in VMware virtual machines, organizations can take full advantage of the benefits and capabilities provided by virtualization technology.
Embracing virtualization in VMware is a journey that continues to evolve as technology advances. Stay up to date with new features, updates, and best practices to continually optimize your virtualized environment and reap the rewards of virtualization.