Introduction
Welcome to our guide on how to enable HDMI audio in Windows 8. HDMI (High-Definition Multimedia Interface) is a standard for transmitting audio and video signals between devices. Many modern PCs and laptops come equipped with an HDMI port, allowing you to connect your computer to an external display or a TV.
When you connect your computer to a TV or monitor using an HDMI cable, it is important to ensure that the audio is also transmitted through the HDMI connection. However, in some cases, you may encounter issues where the audio doesn’t play through the HDMI output, or it might not be enabled by default.
In this guide, we will walk you through the necessary steps to check your hardware, update the drivers, and enable HDMI audio output on your Windows 8 system. Whether you’re using your computer for multimedia purposes, gaming, or simply watching movies and TV shows, enabling HDMI audio can greatly enhance your viewing experience by providing high-quality sound.
Please note that the steps in this guide are specifically tailored to Windows 8. If you’re using a different version of Windows, the process might vary slightly. However, the underlying principles and concepts remain the same, so you should be able to adapt the instructions accordingly.
Before we dive into the technical aspects of enabling HDMI audio, let’s first ensure that your hardware and connections are properly set up. It’s important to check these factors as they can often be the root cause of audio issues.
Checking Hardware and Connections
Before troubleshooting any audio issues, it’s essential to ensure that your hardware and connections are properly set up. Follow these steps to verify that everything is in order:
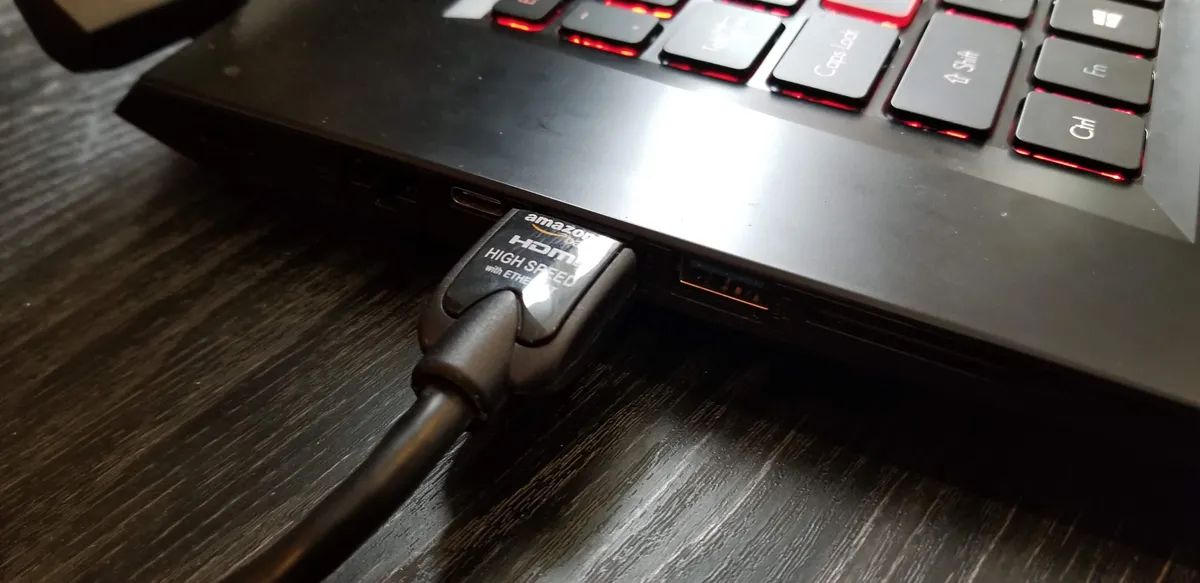
- Check the physical HDMI connections: Make sure that the HDMI cable is securely connected to both your computer and the external display or TV. Double-check that the plugs are inserted fully into the HDMI ports.
- Inspect the external display or TV: Ensure that the display or TV is powered on and set to the correct input source for HDMI. Use the remote control or buttons on the monitor to navigate to the appropriate input channel.
- Test the HDMI cable: If possible, try using a different HDMI cable to rule out the possibility of a faulty cable. Sometimes, a faulty cable can disrupt the audio signal.
- Inspect the HDMI port on your computer: Ensure that the HDMI port on your computer is not damaged or obstructed by dust or debris. If necessary, use compressed air or a soft brush to clean the port.
- Verify the audio settings on the external display or TV: Some displays or TVs have settings that control audio output through the HDMI port. Consult the user manual or the manufacturer’s website to confirm that the audio settings are correctly configured.
If the above steps do not resolve the audio issues, it’s time to move on to updating your drivers, which can often address compatibility or outdated driver issues. In the next section, we will explain how to update your drivers to potentially resolve HDMI audio problems.
Updating Drivers
Updating your drivers can often resolve compatibility issues and ensure that your computer communicates effectively with your HDMI audio device. Follow these steps to update your drivers:
- Open the Device Manager: Right-click on the Start button and select “Device Manager” from the list of options. This will open the Device Manager window.
- Expand the “Sound, video, and game controllers” category: Locate and click on the arrow next to this category to expand the list of devices. Look for any audio-related devices such as “Intel(R) Display Audio” or “Realtek High Definition Audio.”
- Right-click on the audio device: Select the audio device you are using (e.g., “Intel(R) Display Audio”) and click on “Update driver” from the context menu. This will initiate the driver update process.
- Choose the automatic driver search option: In the driver update wizard, select the option to search automatically for updated driver software. This will allow Windows to search and download the latest driver for your audio device from the internet.
- Follow the on-screen instructions: If Windows finds an updated driver, it will prompt you to install it. Follow the on-screen instructions to complete the driver update process.
- Restart your computer: After the driver update is complete, it’s recommended to restart your computer to ensure that the changes take effect.
If Windows fails to find an updated driver or the issue persists after updating the driver, there are alternative options available. You can visit the manufacturer’s website and download the latest driver specifically designed for your audio device or contact their support for further assistance.
Once you have updated your drivers, it’s time to proceed with enabling HDMI audio output on your Windows 8 system. We will explore the necessary steps in the next section.
Enabling HDMI Audio Output
Now that you have checked your hardware and updated your drivers, it’s time to enable HDMI audio output on your Windows 8 system. Follow these steps:
- Right-click on the volume icon: In the system tray located at the bottom-right corner of your screen, right-click on the volume icon.
- Select “Playback devices”: From the context menu, choose “Playback devices” to open the Sound settings window.
- Choose the HDMI audio device: In the Sound settings window, you will see a list of playback devices. Look for an HDMI audio device, usually labeled with the name of your external display or TV. Select the HDMI audio device.
- Set as default device: Click on the “Set Default” button located at the bottom-right corner of the Sound settings window. This will set the selected HDMI audio device as the default output device.
- Configure the HDMI audio device (if necessary): In some cases, you may need to configure additional settings for the HDMI audio device. To access the configuration options, select the HDMI audio device and click on the “Properties” button. From there, you can adjust settings such as sample rate and bit depth.
- Click “Apply” and “OK”: Once you have made your changes, click on the “Apply” button followed by “OK” to save the settings.
After enabling HDMI audio output and configuring the necessary settings, test the audio by playing a sound or video file on your computer. The audio should now be transmitted through the HDMI connection to your external display or TV.
If you encounter any issues during the process or the audio still doesn’t play through the HDMI output, we will explore some common troubleshooting techniques in the next section.
Troubleshooting Common Issues
If you’re experiencing issues with HDMI audio output on your Windows 8 system, don’t worry; there are several common problems and their corresponding solutions that can help resolve these issues. Consider the following troubleshooting techniques:
- Restart your computer and external display or TV: Sometimes, a simple restart can resolve technical glitches. Turn off both your computer and the external display or TV, then power them back on.
- Check for Windows updates: Make sure your Windows 8 system is up to date by checking for and installing any available updates. Often, Microsoft releases bug fixes and driver updates that address common issues.
- Disconnect and reconnect the HDMI cable: Unplug the HDMI cable from both your computer and the display device, then reconnect it securely. Sometimes, a loose connection can prevent audio from being transmitted.
- Try a different HDMI port: If your computer has multiple HDMI ports, try connecting the cable to a different port. This can help identify if the issue lies with a particular port.
- Reset the audio settings: In the Sound settings window, right-click on the HDMI audio device, select “Properties,” and click on the “Advanced” tab. Click on the “Restore Defaults” button to reset the audio settings to their default values.
- Update your graphics card driver: In some cases, the graphics card driver can affect HDMI audio output. Visit the website of your graphics card manufacturer and download the latest driver for your specific model.
- Disable other audio devices: If you have multiple audio devices connected to your computer, such as speakers or headphones, temporarily disable them. This can prevent conflicts and ensure that the HDMI audio device is the primary output option.
By following these troubleshooting techniques, you should be able to identify and resolve most issues with HDMI audio output in Windows 8. If the problem persists, it may be helpful to consult with technical support or seek assistance from the manufacturer of your computer or external display.
Now that you have learned how to troubleshoot common issues, let’s recap our guide and conclude this tutorial.
Conclusion
In this guide, we have explored the necessary steps to enable HDMI audio output in Windows 8. We began by checking the hardware and connections to ensure everything was properly set up. Then, we moved on to updating the drivers, which can often resolve compatibility issues.
After updating the drivers, we delved into enabling HDMI audio output in the Windows 8 system settings. By following the steps, you should be able to set the HDMI audio device as the default output and configure any necessary settings.
If you encountered any issues along the way, we provided troubleshooting techniques to help resolve common problems. Restarting the computer and external display, checking for Windows updates, and disconnecting and reconnecting the HDMI cable are just a few examples of the troubleshooting steps you can take.
By following this guide, you should be able to enjoy high-quality audio through the HDMI connection on your Windows 8 system. Remember, these steps are specific to Windows 8, but the underlying principles can be applied to other versions of Windows as well.
If you continue to experience difficulties with HDMI audio output, don’t hesitate to contact technical support or consult with the manufacturer of your computer or external display for further assistance.
We hope this guide has been helpful in enabling HDMI audio output on your Windows 8 system and enhancing your multimedia experience. Enjoy your audio-visual content with crisp and immersive sound!