Introduction
PDF (Portable Document Format) is a widely used file format for sharing and presenting documents in a consistent and reliable manner. However, there may be times when you need to make changes to a PDF document, such as editing the content, adding or deleting pages, or rearranging the order of pages. If you’re a Windows user, you’re in luck! There are several PDF editing software options available that can help you accomplish these tasks efficiently and effectively.
In this article, we will guide you through the process of editing a PDF on Windows. Whether you need to make minor adjustments to the text, insert images, or restructure the document, we’ve got you covered. We’ll walk you through each step of the process, providing you with valuable insights to make the editing experience a breeze.
Before we dive into the steps, it’s important to note that choosing the right PDF editing software is crucial. The market offers a wide range of options, each with its own set of features and capabilities. It’s essential to select software that meets your specific requirements, such as user-friendliness, advanced editing features, and compatibility.
Now, let’s get started and learn how to edit a PDF document on Windows!
Step 1: Choosing the right PDF editing software
When it comes to editing PDFs on Windows, having the right software can make all the difference. With the multitude of options available, it’s important to choose one that best suits your needs. Here are a few factors to consider when selecting the right PDF editing software:
- Features and functionality: Look for software that offers a comprehensive set of editing tools. This may include the ability to edit text, add or remove images, annotate, highlight, and more. Assess your specific editing requirements and ensure that the software you choose fulfills them.
- User-friendly interface: Editing a PDF should be a straightforward process, even for those who are not tech-savvy. Opt for software with an intuitive and easy-to-navigate interface. This will save you time and frustration, allowing you to focus on the actual editing process.
- Compatibility: Ensure that the software you choose is compatible with your Windows operating system. It’s also worth considering if the software allows you to work with various versions of PDF files, ensuring seamless compatibility regardless of the file’s origin.
- Price: PDF editing software comes in both free and paid options. Assess your budget and determine if investing in a paid software is necessary for your editing needs. Free software can be a great option for basic editing tasks, while paid software often offers advanced features.
- Customer support: Consider the level of customer support offered by the software provider. In case you encounter any technical issues or have questions, good customer support can provide timely assistance and ensure a smooth editing experience.
Once you have evaluated these factors, you can start exploring the options available to you. Some popular PDF editing software for Windows include Adobe Acrobat Pro, Nitro Pro, Foxit PhantomPDF, and PDFelement. Take the time to research and compare the features and reviews of different software before making your final decision.
Now that you know what to look for in PDF editing software, let’s move on to the next step and learn how to open a PDF file for editing.
Step 2: Opening the PDF file
Once you have chosen the right PDF editing software, it’s time to open the PDF file you want to edit. Here’s how you can do it:
- Launch the PDF editing software on your Windows computer.
- Click on the “Open” or “Open File” button within the software. This will prompt a file explorer window to appear.
- Navigate to the location where the PDF file is stored. Select the file by clicking on it and then click on the “Open” button.
- The software will now load the PDF file and display it within its interface. Depending on the software, you may see the entire document or just the first page.
If you have multiple PDF files open, you can switch between them using the tabs or windows provided by the software. This allows you to work on different PDFs simultaneously without having to close and reopen them.
If you encounter any issues while opening a PDF file, ensure that the file is not corrupted or damaged. If possible, try opening the file with another PDF reader to confirm if the issue is with the file or the software you are using. Additionally, make sure that the PDF editing software you have chosen supports the version of the PDF file you are trying to open.
Now that you have successfully opened the PDF file, it’s time to move on to the next step and learn how to edit its content.
Step 3: Editing the content of a PDF
Editing the content of a PDF is a common task, and with the right PDF editing software, it can be a straightforward process. Here are the steps to edit the content of a PDF:
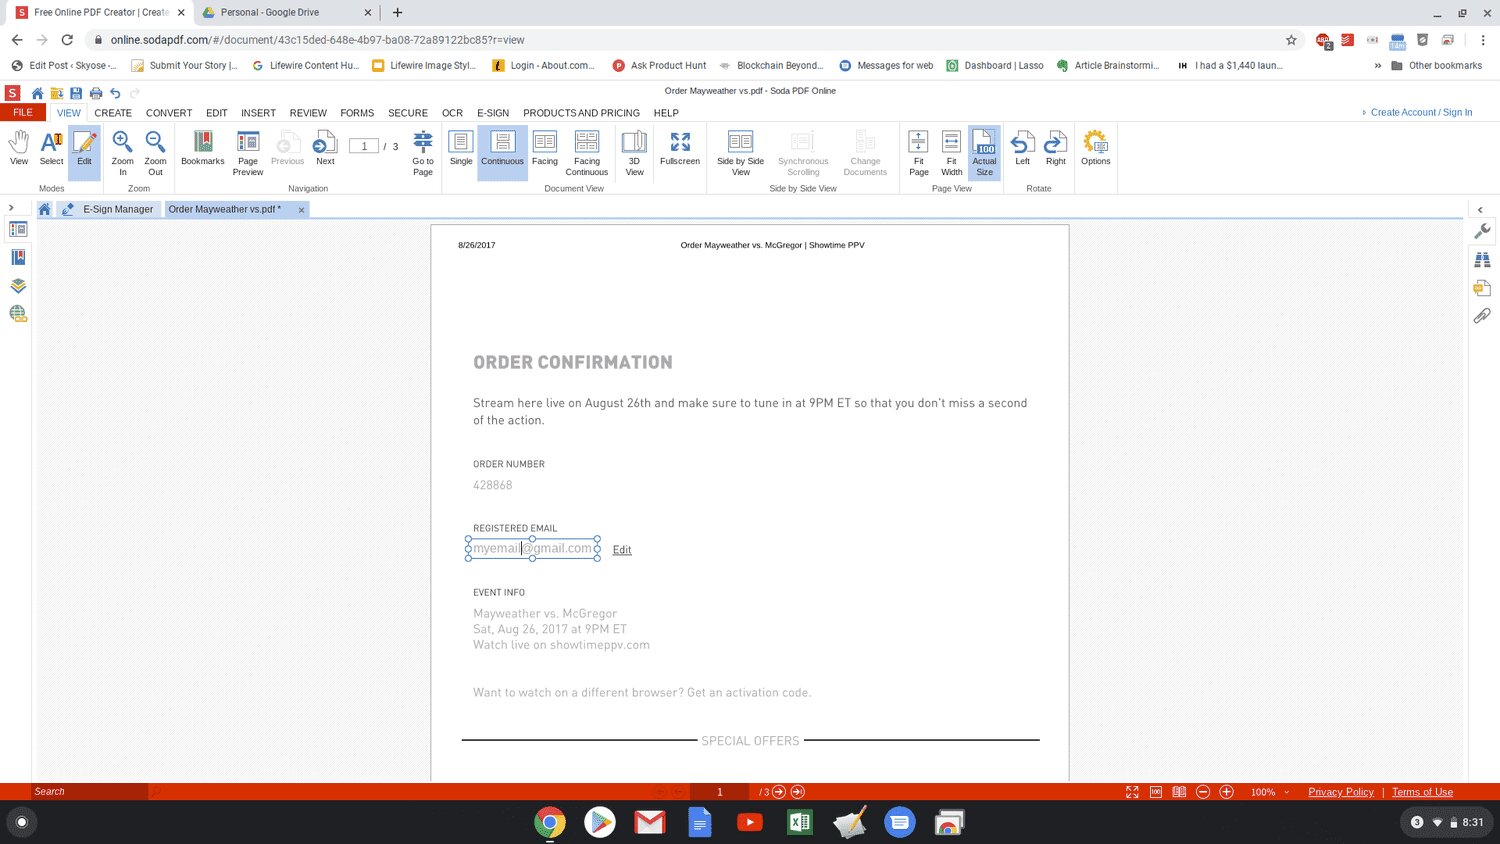
- Once you have opened the PDF file in your chosen PDF editing software, locate the editing tools. These tools are typically located in a toolbar or menu section labeled “Edit” or represented by icons.
- Select the text or element you want to edit by clicking and dragging your cursor over it. This will highlight the selected area.
- Depending on the software, you may see options such as changing the font, font size, font color, or applying formatting such as bold, italic, or underline.
- To edit the text, simply start typing to replace the existing content. You can also use the delete or backspace key to remove unwanted text.
- If you want to add new text, look for the option to insert or add text. Click on the area where you want to add text and start typing.
- For other elements like images, annotations, or drawing objects, you can use the respective tools provided by the software. These tools usually include options to add, delete, resize, or move objects around the PDF page.
It’s important to note that depending on the complexity of the PDF and the capabilities of your chosen software, some elements and formatting may not be editable. In such cases, you may need to convert the PDF to another format or use more advanced PDF editing software.
Before finalizing your edits, it’s a good practice to review the changes you’ve made by scrolling through the entire document. This ensures that all modifications are accurate and in line with your intended edits.
Now that you know how to edit the content of a PDF, let’s move on to the next step and learn how to add, delete, or rearrange pages in a PDF.
Step 4: Adding, deleting or rearranging pages
Another common task when editing a PDF is adding, deleting, or rearranging pages. Whether you want to insert a new page, remove unnecessary pages, or change the order of existing pages, your PDF editing software can assist you. Here’s how you can perform these actions:
- To add a new page, look for an option labeled “Insert” or “+” in your PDF editing software. Click on it, and a blank page will be inserted either before or after the current page, depending on the software settings.
- If you want to delete a page, select the page or multiple pages you want to remove. Look for an option like “Delete,” “Remove,” or a trash bin icon. Click on it, and the selected pages will be permanently deleted from the PDF.
- To rearrange pages, simply click and drag the pages to the desired position within the thumbnail view or page navigation panel of your PDF editing software. The software will automatically adjust the page order accordingly.
- Some PDF editing software also allows you to extract pages from one PDF and insert them into another. This can be helpful if you want to combine pages from multiple PDFs into a single document.
- After making the necessary changes, it’s important to save your edited PDF file. Look for a “Save” or “Save As” option in the software’s toolbar or menu. Choose the location where you want to save the file and provide a new name if desired.
Remember to review the changes you’ve made to the pages before saving to ensure the accuracy and flow of the document.
It’s essential to keep in mind that the options and functionality for adding, deleting, or rearranging pages may vary depending on the PDF editing software you are using. Some software may provide more advanced features, such as merging, splitting, or rotating pages.
Now that you know how to add, delete, and rearrange pages in a PDF, let’s move on to the final step: exporting and saving your changes.
Step 5: Exporting and saving changes
After you have made all the necessary edits to your PDF document, it’s time to save and export your changes. This final step ensures that your modifications are preserved and ready for sharing or further use. Here’s how you can export and save your edited PDF:
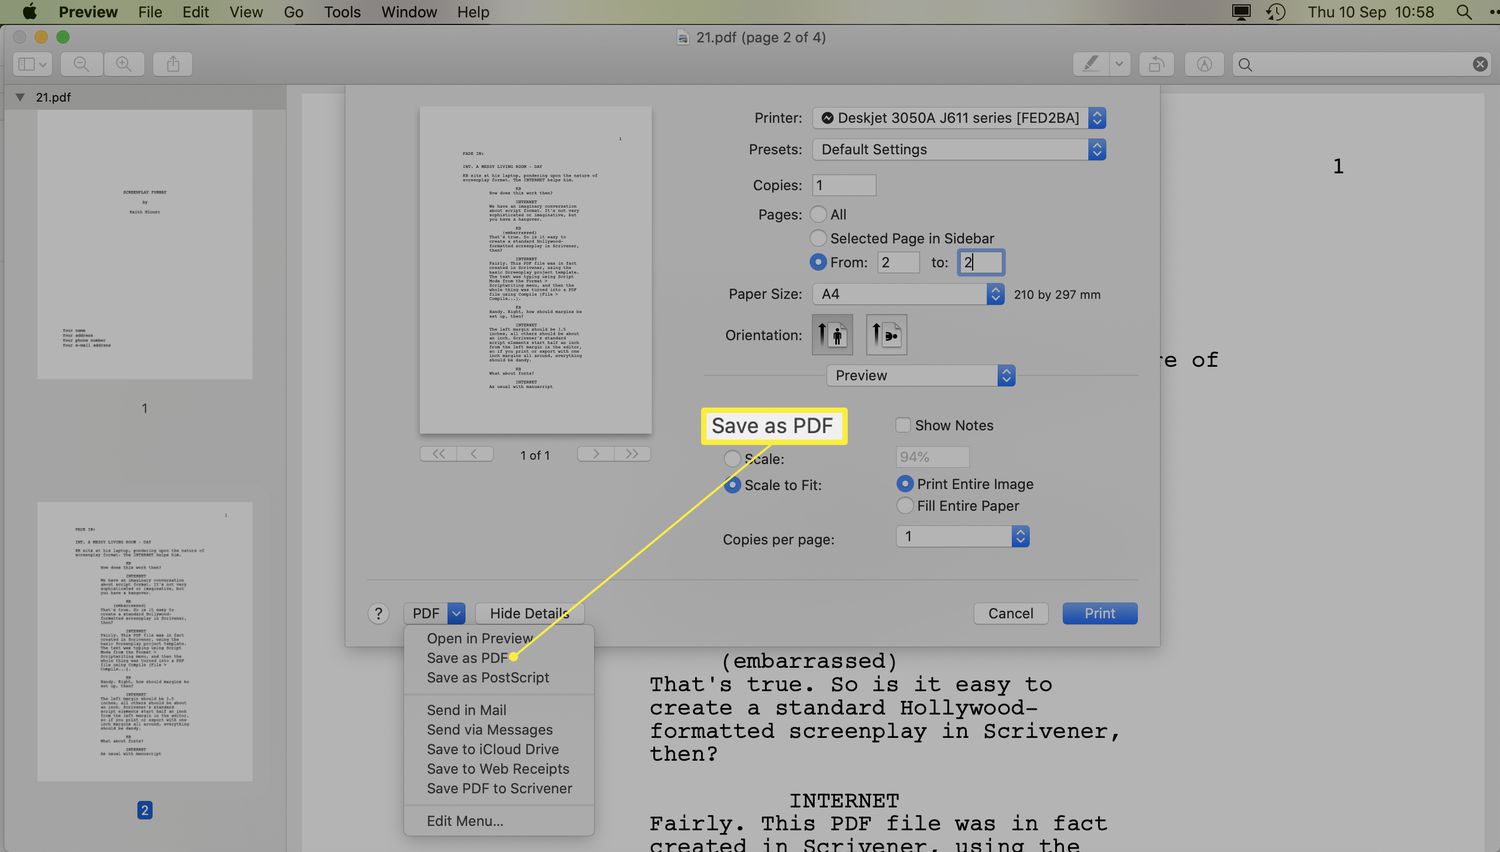
- Locate the “Save” or “Save As” option within your PDF editing software. This option is usually available in the toolbar or under the “File” menu.
- Click on the “Save” or “Save As” option, and a dialog box will appear, allowing you to choose the location and name for the modified PDF file.
- Browse to the desired location on your computer where you want to save the file. Provide a new name if you want to keep the original file intact or simply overwrite the existing file.
- Select the appropriate file format for your edited PDF. The most common choices are PDF, PDF/A, or other compatible formats.
- Click “Save” to save your changes. The software will process the file, and once completed, your edited PDF will be ready for use.
It’s recommended to double-check the exported PDF to ensure that all the changes and formatting are accurately reflected in the final document. Open the exported file in a PDF reader or your chosen PDF editing software to review the modifications.
Keep in mind that some PDF editing software may offer additional options during the saving process, such as optimizing file size, setting security options, or adding metadata. These options can further enhance the functionality and security of your edited PDF.
By exporting and saving your changes, you now have a complete and updated PDF file that reflects your edits and modifications. Congratulations, you have successfully edited a PDF on Windows!
In this article, we have covered the step-by-step process of editing a PDF on Windows. From choosing the right software to opening, editing, and saving the changes, you now have the knowledge and tools to effectively modify PDF documents to suit your needs.
Remember to explore the various features and functionalities offered by different PDF editing software to optimize your editing experience. Experiment with different tools and techniques to unlock the full potential of editing PDFs on Windows.
Conclusion
Editing a PDF on Windows may have seemed like a daunting task in the past, but with the right PDF editing software and the knowledge of the step-by-step process, it can be a seamless and efficient experience. Throughout this article, we have explored five essential steps to successfully edit a PDF on Windows.
We began by emphasizing the importance of choosing the right PDF editing software that aligns with your specific needs. By considering factors like features, user-friendliness, compatibility, price, and customer support, you can select the software that best suits your requirements.
We then moved on to opening the PDF file within the chosen software, ensuring that the document is properly loaded and ready for editing. Using the available tools and functionality, we learned how to edit the content of the PDF, including text, images, and other elements.
The next step focused on adding, deleting, or rearranging pages within the PDF. Whether you need to insert a new page, remove unnecessary pages, or adjust the page order, your PDF editing software can empower you to make these changes effortlessly.
Lastly, we discussed the crucial step of exporting and saving your edited PDF. By choosing the appropriate file format and saving preferences, you can ensure that your modifications are preserved and ready for use.
With the knowledge gained from this article, you now have the tools to confidently edit PDFs on Windows. However, it’s important to continue exploring and experimenting with the features and functionalities of your chosen PDF editing software to unlock its full potential.
Whether you need to edit PDFs for personal or professional use, the ability to make changes to these documents on Windows puts you in control of your content. So go ahead, leverage your newfound skills, and start editing PDFs with ease!