


Introduction
Adobe Acrobat DC is a powerful and versatile software program that allows users to view, create, edit, and manage PDF (Portable Document Format) files. Whether you need to work with PDF documents for business, education, or personal purposes, Adobe Acrobat DC provides a comprehensive set of tools and features to meet your needs.
In this guide, we will walk you through the step-by-step process of downloading Adobe Acrobat DC to your computer. Whether you are using a Windows PC or a Mac, we will provide clear instructions for both operating systems.
Adobe Acrobat DC offers several different versions depending on the level of functionality you require. Whether you need the Standard version for basic PDF viewing and editing, or the Pro version for more advanced features like form creation and document signing, we will help you choose the right version for your needs.
To get started, you will need to sign in or create an Adobe ID. This will allow you to access your Adobe account and manage your subscriptions or purchase new licenses. In addition, signing in will provide access to a range of Adobe services and resources, including the ability to sync and share PDF files across multiple devices.
Downloading and installing Adobe Acrobat DC is a straightforward process that can be completed in just a few minutes. Once installed, you can start using the software to view, create, edit, and manage your PDF files with ease.
So, whether you are a student needing to annotate PDF lecture slides, a business professional requiring advanced document editing tools, or a freelancer looking to create interactive forms, Adobe Acrobat DC is the go-to solution for all your PDF needs. Follow the steps outlined in this guide to download and install Adobe Acrobat DC, and unlock the full potential of your PDF documents.
Step 1: Go to the Adobe website
The first step to downloading Adobe Acrobat DC is to visit the official Adobe website. Open your preferred web browser and type in the URL www.adobe.com in the address bar. Press Enter or Return to load the page.
Once you arrive on the Adobe website’s homepage, you will see a search bar and a navigation menu at the top of the page. Take a moment to familiarize yourself with the various options available, as Adobe offers a wide range of products and services.
To quickly find Adobe Acrobat DC, you can either use the search bar by typing in “Adobe Acrobat DC” and pressing Enter or Return, or you can navigate to the “Products” section in the top menu and select “Acrobat” from the dropdown menu.
Once you are on the Adobe Acrobat DC product page, you will find more information about the software and its features. Take some time to explore the page and learn about the different versions available.
On the product page, you may also find some additional resources, such as tutorials, customer reviews, and frequently asked questions. These resources can provide valuable insights and help you make an informed decision about whether Adobe Acrobat DC is the right software for your needs.
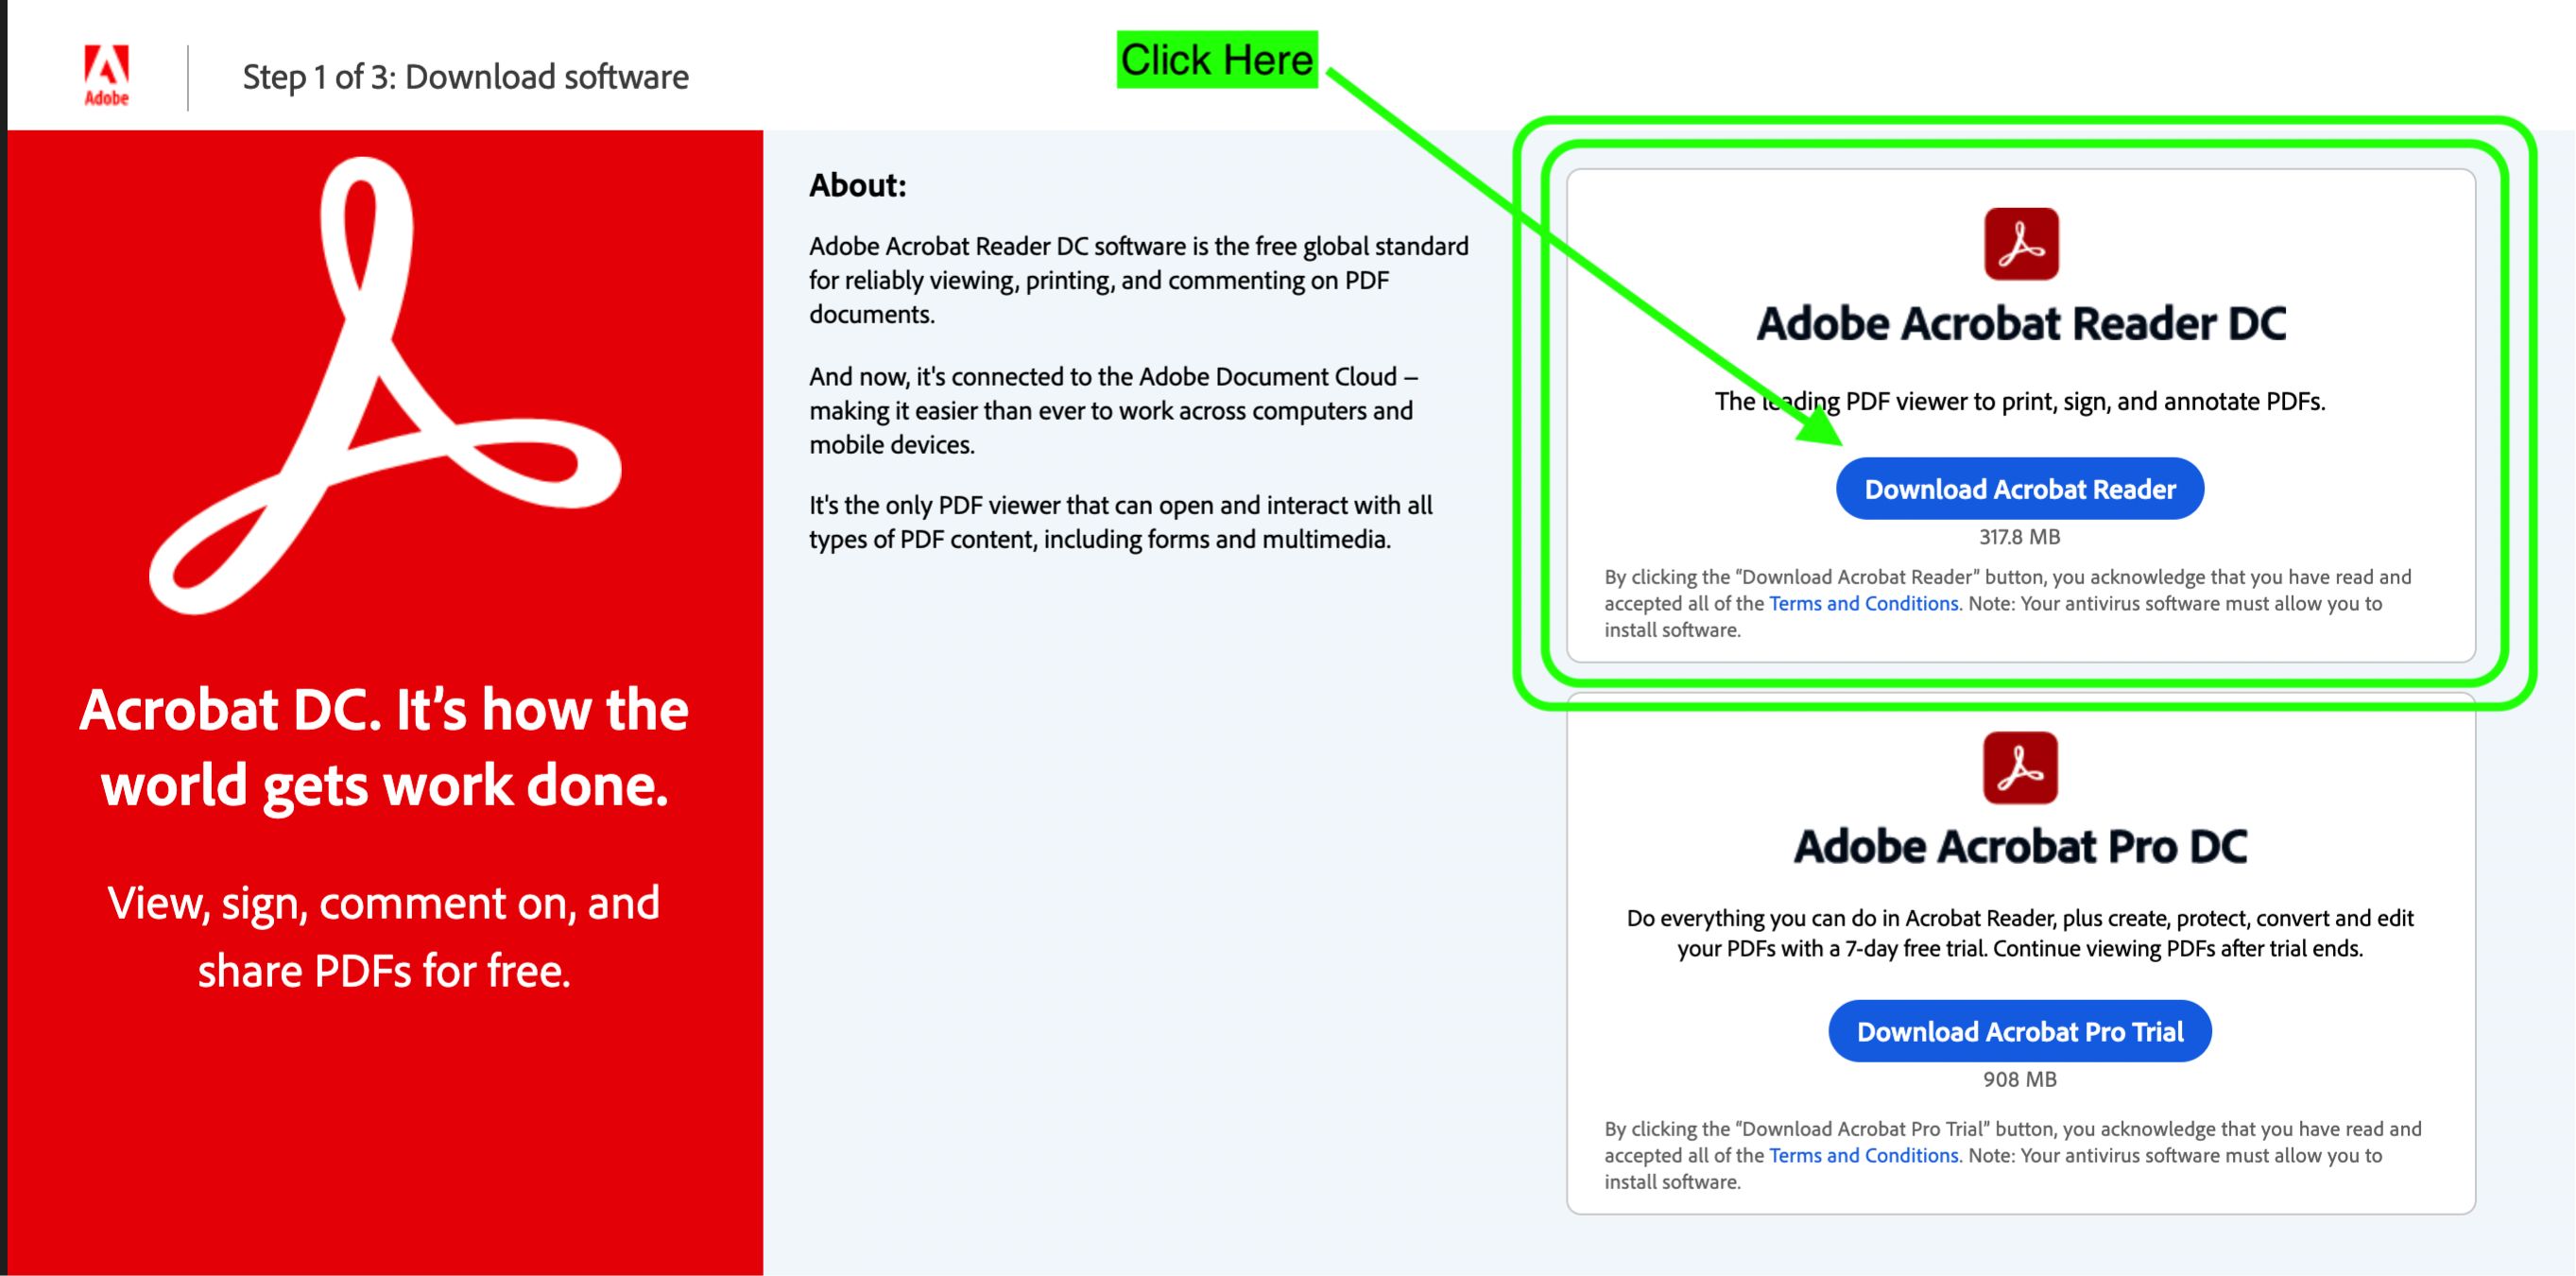
When you are ready to proceed with the download, look for a prominent button or link that says “Download” or “Try now.” Clicking on this button will take you to the download page, where you can initiate the download process for Adobe Acrobat DC.
Before proceeding to the next step, make sure you are using a trusted internet connection and that your computer meets the system requirements for Adobe Acrobat DC. This will ensure a smooth installation and optimal performance of the software.
Once you have reached the Adobe website and found the Adobe Acrobat DC product page, you are ready to move on to the next step: choosing the correct version of Adobe Acrobat DC for your operating system.
Step 2: Choose your operating system
After landing on the Adobe Acrobat DC product page, the next step is to choose the correct version of Adobe Acrobat DC for your operating system. Adobe offers different versions for both Windows and Mac users, so it’s important to select the right one for your specific setup.
If you are using a Windows computer, look for the section that displays the available versions for Windows. You will typically find options such as “Windows 10,” “Windows 8,” and “Windows 7.” Choose the version that matches the operating system installed on your computer.
For Mac users, there will be a separate section displaying the available versions for macOS. Look for options such as “macOS Big Sur,” “macOS Catalina,” or “macOS Mojave.” Select the version that corresponds to your Mac’s operating system.
It’s important to choose the correct version to ensure compatibility and optimal performance of Adobe Acrobat DC on your computer. Installing an incompatible version may lead to unexpected issues and limitations in functionality.
Once you have identified the appropriate version for your operating system, click on the corresponding download button or link. This will initiate the downloading process for Adobe Acrobat DC.
Before the download begins, you may be prompted to review and accept the terms and conditions of the software. It’s always a good idea to read through the terms and conditions to ensure you understand the usage rights and any limitations that may apply.
Once you have accepted the terms and conditions, the download will start automatically. The time it takes to complete the download will depend on the speed of your internet connection. During the download, you can monitor the progress either through a progress bar or a percentage indicator.
Ensure that you have a stable internet connection throughout the download process. Any interruptions may result in an incomplete download, requiring you to start the process again.
Once the download is complete, you are now ready to proceed to the next step: installing Adobe Acrobat DC on your computer.
Step 3: Select the correct version of Adobe Acrobat DC
Now that you have downloaded the Adobe Acrobat DC installer, it’s time to select the correct version of Adobe Acrobat DC for installation. Depending on your needs and preferences, Adobe offers different versions of the software, each with its own set of features and capabilities.
Before proceeding, make sure that the installer file you downloaded matches your operating system and is compatible with your computer’s specifications. This will ensure a smooth installation process with optimal performance.
Locate the downloaded installer file on your computer, which is typically saved in the “Downloads” folder or the location you specified during the download process. The installer file will have a file extension such as .exe for Windows or .dmg for Mac.
Double-click on the installer file to launch the Adobe Acrobat DC installation wizard. The installation wizard will guide you through the necessary steps to install the software on your computer.
During the installation process, you may be prompted to select the type of installation you prefer. You will typically have the option to choose between a standard installation, which includes the essential components of Adobe Acrobat DC, or a custom installation, allowing you to customize the features and components you want to install.
It’s recommended to choose the standard installation if you are unsure about which components you need. You can always modify the installation later if you want to add or remove specific features.
Follow the on-screen instructions provided by the installation wizard to proceed with the installation. This may include accepting the license agreement, specifying the installation location, and choosing additional options specific to your operating system.
Once you have selected the appropriate options, click on the “Install” or “Next” button to begin the installation process. The progress bar will indicate the status of the installation, and you may be required to wait for a few minutes while the software is installed on your computer.
After the installation is complete, you may be prompted to restart your computer. It’s recommended to follow this instruction to ensure that all necessary components are properly installed and activated.
Once your computer has restarted, the installation of Adobe Acrobat DC is now complete. You can launch the software from the desktop shortcut or by searching for “Adobe Acrobat DC” in the Start menu or Applications folder.
Now that Adobe Acrobat DC is installed on your computer, you are ready to move on to the next step: activating the software to unlock its full functionality.
Step 4: Sign in or create an Adobe ID
To fully utilize and access all the features of Adobe Acrobat DC, you will need to sign in or create an Adobe ID. An Adobe ID is a unique identifier that allows you to manage your Adobe products, subscriptions, and access various services provided by Adobe.
If you already have an Adobe ID, you can simply sign in using your email address and password. Visit the Adobe Acrobat DC login page, which can usually be found on the Adobe website, and enter your credentials in the designated fields. Click on the “Sign In” or “Log In” button to proceed.
If you don’t have an Adobe ID yet, you will need to create one. On the login page, look for the “Create an account” or “Get an Adobe ID” option. Click on this option to start the account creation process.
Provide the necessary information, including your email address and a password. Make sure to choose a strong password that includes a combination of letters, numbers, and special characters for security purposes.
Once you have entered your information, click on the “Create Account” or “Sign Up” button to create your Adobe ID. You may be required to verify your email address by clicking on a link sent to the provided email address.
After successfully signing in or creating your Adobe ID, you will gain access to additional benefits. These benefits may include the ability to sync your settings and preferences across multiple devices, access to cloud storage for your PDF files, and access to Adobe’s customer support resources.
Furthermore, signing in or creating an Adobe ID will allow you to manage your Adobe Acrobat DC subscription or license. If you have purchased a subscription or license for Adobe Acrobat DC, you can associate it with your Adobe ID to keep track of your payment and renewal details.
With your Adobe ID, you will also be able to easily install and activate Adobe Acrobat DC on other devices you own without the need for separate credentials or licenses.
Signing in or creating an Adobe ID is a crucial step in fully experiencing the features and benefits of Adobe Acrobat DC. By doing so, you can enhance your productivity, collaboration, and document management capabilities.
Once you have signed in or created your Adobe ID, you can now move on to the next step: downloading and installing Adobe Acrobat DC.
Step 5: Download Adobe Acrobat DC
With your Adobe ID ready, you can now proceed to download Adobe Acrobat DC to your computer. The download process will differ slightly depending on your operating system and the browser you are using. Follow the steps below to successfully download Adobe Acrobat DC.
1. Open the web browser of your choice and go to the official Adobe website at www.adobe.com.
2. Sign in to your Adobe account by clicking on the “Sign In” or “Log In” button and entering your Adobe ID credentials.
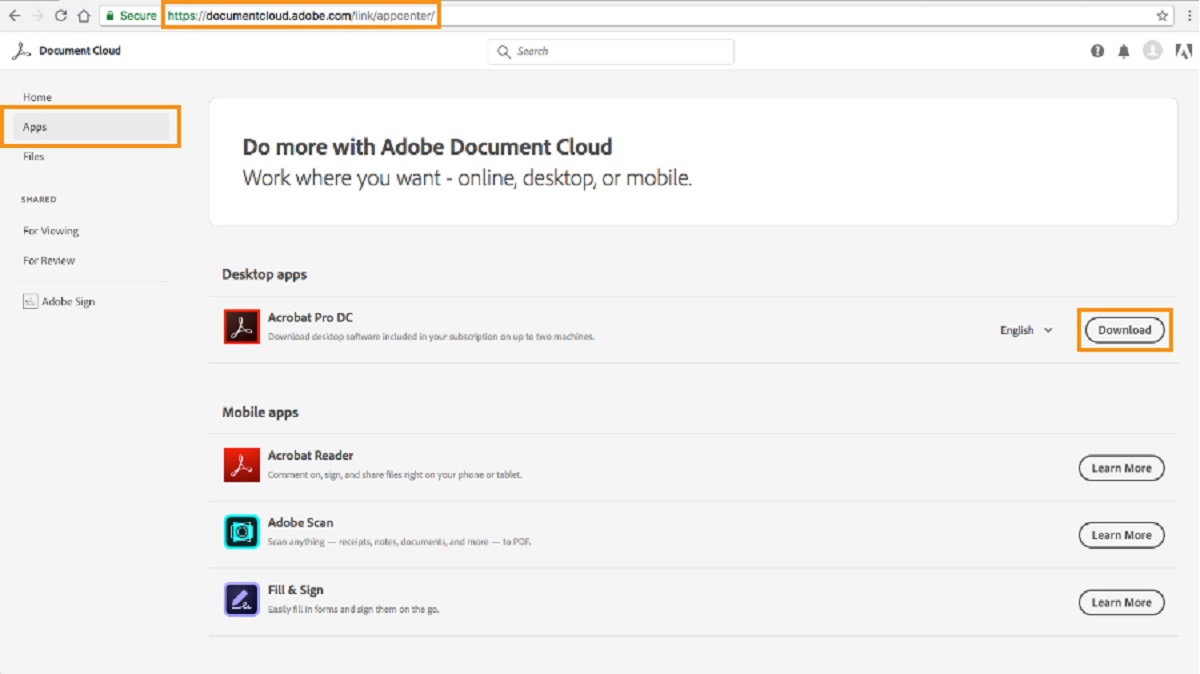
3. Once signed in, navigate to the Adobe Acrobat DC product page. You can use the search bar or the top menu to find the product page.
4. On the product page, select the version of Adobe Acrobat DC that matches your operating system (Windows or macOS) and click on the download button. The download button is usually labeled as “Download” or “Try now.”
5. A prompt may appear asking you to confirm the download. Click on “Download” or “Save” to initiate the download process.
6. The file will be downloaded to your computer’s default download location, unless you choose a specific directory for the file to be saved to.
7. Depending on your internet connection speed, the download may take a few moments or several minutes. Be patient and avoid interrupting the download process.
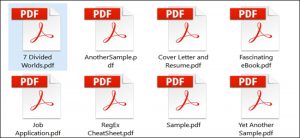
8. Once the download is complete, locate the downloaded installer file on your computer. It will typically be in the “Downloads” folder or the location you specified during the download process.
9. Congratulations, you have successfully downloaded Adobe Acrobat DC to your computer. Now, you can proceed to the next step: installing the software.
Remember to keep your internet connection stable and avoid any interruptions during the download process to ensure a successful and complete download of Adobe Acrobat DC.
Now that you have Adobe Acrobat DC downloaded to your computer, you are just a few steps away from being able to view, edit, and manage PDF documents easily and efficiently.
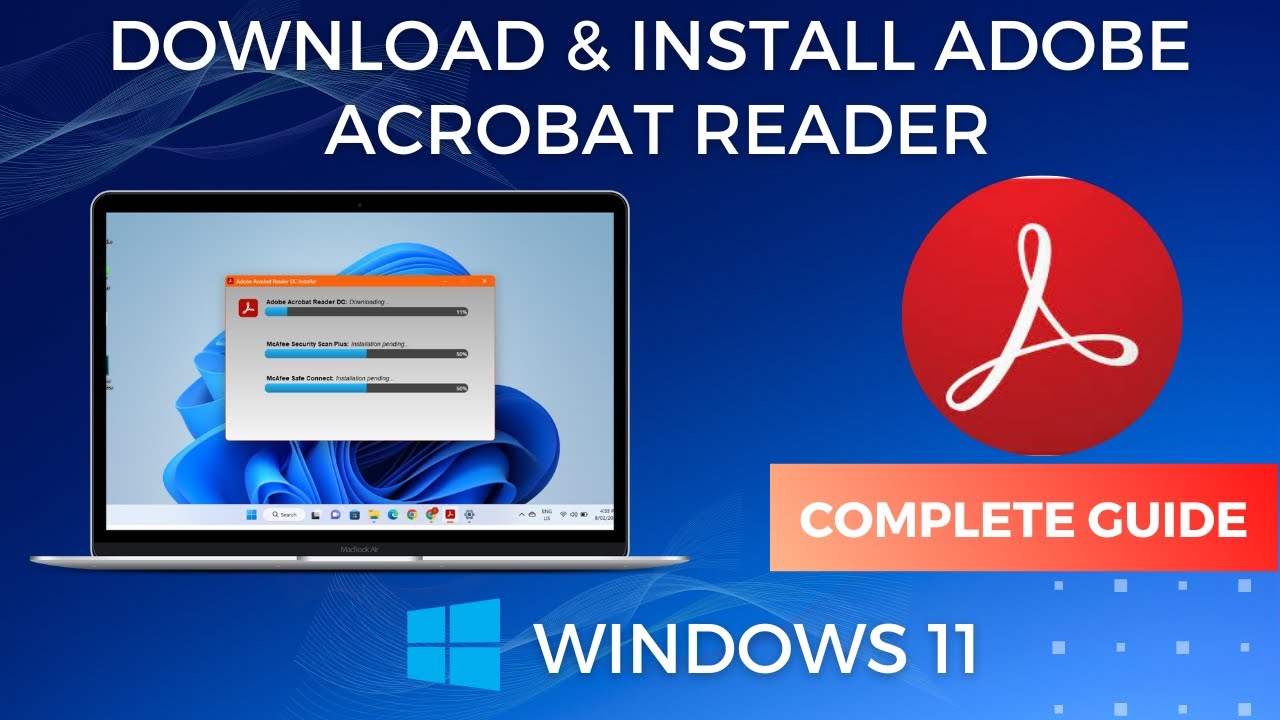
Step 6: Install Adobe Acrobat DC
Now that you have successfully downloaded the installer file for Adobe Acrobat DC, it’s time to proceed with the installation process. Follow the steps below to install Adobe Acrobat DC on your computer:
1. Locate the downloaded installer file. By default, it is usually located in the “Downloads” folder or the location you specified during the download process.
2. Double-click on the installer file to launch the installation wizard. The installation wizard will guide you through the necessary steps to install Adobe Acrobat DC on your computer.
3. Read and review any license agreements or terms and conditions that may appear. It’s important to understand and accept these before proceeding with the installation.
4. Choose the type of installation you prefer. Adobe Acrobat DC typically offers a standard installation option, which includes the essential components of the software. Alternatively, you may have the option for a custom installation, which allows you to customize the features and components you want to install.
5. Follow the on-screen instructions provided by the installation wizard. These instructions may include selecting the installation location for Adobe Acrobat DC, specifying any language preferences, and choosing additional optional components or features.
6. Once you have selected the appropriate options, click on the “Install” or “Next” button to begin the installation process. The installation progress will be indicated by a progress bar, and you may need to wait for a few minutes while the software is installed on your computer.
7. After the installation is complete, you may be prompted to restart your computer. It is recommended to follow this instruction to ensure that all necessary components of Adobe Acrobat DC are properly installed and activated.
8. Once your computer restarts, the installation of Adobe Acrobat DC is now complete. You can launch the software by finding the Adobe Acrobat DC icon on your desktop or by searching for “Adobe Acrobat DC” in the Start menu (Windows) or Applications folder (Mac).
9. Congratulations! You have successfully installed Adobe Acrobat DC on your computer. Now you can start utilizing the software’s robust features to view, edit, and manage your PDF documents with ease.
It’s important to note that during the installation process, you may encounter additional prompts or options that are specific to your operating system or Adobe Acrobat DC version. Make sure to carefully read and follow any instructions provided to ensure a smooth installation experience.
Now that Adobe Acrobat DC is installed, you can move on to the final step: activating Adobe Acrobat DC to unlock its full functionality and access all of its features.
Step 7: Activate Adobe Acrobat DC
After installing Adobe Acrobat DC on your computer, the final step is to activate the software. Activation ensures that you have a valid license to use Adobe Acrobat DC and allows you to access all of its features and functionality. Follow the steps below to activate Adobe Acrobat DC:
1. Launch Adobe Acrobat DC by finding the icon on your desktop or searching for “Adobe Acrobat DC” in the Start menu (Windows) or Applications folder (Mac).
2. If you are not automatically prompted to activate the software, click on the “Help” menu at the top of the application window and select “Activate” or “Sign In.” This will open the activation dialog box.
3. In the activation dialog box, you will have the option to sign in using your Adobe ID or enter a serial number if you have purchased a license. If you have already signed in during the installation process, you may not need to sign in again. Simply skip to the next step.
4. To sign in with your Adobe ID, enter your email address and password associated with your Adobe account. Click on the “Sign In” button to proceed. This will activate Adobe Acrobat DC using the credentials tied to your Adobe ID.
5. If you have purchased a license for Adobe Acrobat DC, select the option to enter a serial number. Enter the serial number provided to you when you purchased the license and click on the “Activate” or “Submit” button.
6. If the serial number is valid, Adobe Acrobat DC will be successfully activated, and you will have access to all its features. You may need to restart the application for the activation to take effect.
7. Once Adobe Acrobat DC is activated, you can start exploring its various tools and functionalities to view, create, edit, and manage your PDF documents.
In some cases, if you are using Adobe Acrobat DC as part of a subscription plan, activation may be handled automatically when you sign in with your Adobe ID. The software will validate your subscription status and activate accordingly.
It is important to ensure that you have a stable internet connection during the activation process. This allows Adobe Acrobat DC to communicate with the activation servers and verify your license or subscription status.
If you encounter any issues during the activation process, such as an invalid serial number or difficulties signing in with your Adobe ID, you can reach out to Adobe’s customer support for assistance. They will be able to guide you through the activation process and help resolve any issues you may be facing.
Once Adobe Acrobat DC is activated, you can start enjoying the full range of features and capabilities it offers, taking your PDF document management to the next level.
Conclusion
Congratulations! You have successfully completed the process of downloading, installing, and activating Adobe Acrobat DC on your computer. By following the step-by-step guide outlined in this article, you now have access to a powerful and versatile software program that allows you to view, create, edit, and manage PDF documents with ease.
Adobe Acrobat DC offers a wide range of features and functionalities that can enhance your productivity and streamline your PDF document-related tasks. Whether you are a student annotating lecture slides, a business professional collaborating on contracts, or an individual managing personal documents, Adobe Acrobat DC provides the tools you need to get the job done efficiently.
Remember to keep your Adobe ID credentials in a safe place, as this will allow you to manage your subscription or license, access cloud storage, and enjoy the benefits of Adobe’s customer support resources. By signing in with your Adobe ID, you can also sync your preferences and settings across multiple devices, making it convenient to work with your PDF documents wherever you go.
Continue to explore Adobe Acrobat DC to discover additional features such as form creation, document signing, and secure document sharing. Adobe also provides regular updates to ensure that you have the latest features and security enhancements at your disposal.
If you encounter any difficulties or have questions about Adobe Acrobat DC, don’t hesitate to reach out to Adobe’s customer support. They are available to assist you with any issues or inquiries you may have.
Now, take full advantage of Adobe Acrobat DC, and unlock the full potential of your PDF documents. Whether you need to collaborate with others, protect sensitive information, or optimize your workflow, Adobe Acrobat DC is your go-to solution.
Happy document management and editing with Adobe Acrobat DC!


![18 Best Online PDF Readers and Editors in 2022 [100% Working]](https://robots.net/wp-content/uploads/2020/06/PDF-image-300x196.jpg)


