Introduction
Are you tired of cluttered watch faces on your Apple Watch? Do you want to remove those unwanted or unused watch faces to make navigation easier? You’re in luck! In this guide, we’ll show you how to delete watch faces on your Apple Watch, allowing you to customize your device to your liking. Whether you’re looking to streamline your watch’s interface or simply want to remove watch faces you no longer use, this step-by-step tutorial will help you do just that.
Apple Watch is a versatile and customizable smartwatch, packed with a wide array of watch face options to suit different tastes and preferences. However, having too many watch faces can clutter your screen, making it harder to find the ones you actually use. By removing unnecessary watch faces, you can declutter your Apple Watch and keep only the watch faces you love.
Deleting watch faces is a simple process that can be accomplished within the Watch app on your paired iPhone. We’ll walk you through the steps, explaining each one in detail, so you can easily follow along and delete watch faces with ease. Whether you’re a seasoned Apple Watch user or a newcomer to the world of smartwatches, this guide is designed to make the process as straightforward as possible.
So, if you’re ready to clean up your Apple Watch and remove those unwanted watch faces, let’s dive into the step-by-step instructions. Follow along, and in no time, you’ll have a sleek and organized Apple Watch that reflects your personal style and preferences.
Step 1: Open the Watch App
The first step in deleting watch faces on your Apple Watch is to open the Watch app on your paired iPhone. This app is essential for managing and customizing the settings of your Apple Watch, including its watch faces. You can find the Watch app on your iPhone’s home screen or by swiping down on the home screen and searching for “Watch” in the search bar.
Once you’ve located the Watch app, tap on it to open it. The app will automatically sync with your Apple Watch, giving you access to a wide range of customization options.
It’s important to note that in order to delete watch faces from your Apple Watch, your iPhone must be connected to the same Wi-Fi network as your watch, and your watch must be within Bluetooth range of your iPhone. This ensures a seamless connection and allows you to manage your watch faces smoothly.
After opening the Watch app, you’ll be greeted with an interface that displays various settings and options for your Apple Watch. From here, you can easily navigate to the specific section where you can delete watch faces.
Now that you’ve successfully opened the Watch app, let’s move on to the next step and find the My Watch tab, where all your watch face settings are located.
Step 2: Find the My Watch Tab
Once you’ve opened the Watch app on your iPhone, the next step is to locate the “My Watch” tab. This tab contains all the settings and options related to your Apple Watch, including the watch faces you have installed.
To find the “My Watch” tab, look for the four icons at the bottom of the Watch app interface. They are labeled as “My Watch,” “Featured,” “Explore,” and “App Store.” Tap on the “My Watch” icon, which is the first icon on the left.
After tapping on the “My Watch” icon, you will be taken to a screen that displays a summary of your Apple Watch settings. This screen provides an overview of the available options for customization, including watch faces, notifications, general settings, and more.
Scroll down on the “My Watch” screen until you see the section titled “My Faces.” This is where all the watch faces you currently have installed on your Apple Watch are listed.
The “My Faces” section displays a thumbnail view of each watch face, along with its name. You can see a preview of each watch face to help you identify the ones you want to delete. Depending on the number of watch faces you have installed, you may need to scroll through to find the specific watch face you want to remove.
Now that you’ve found the “My Watch” tab and located the “My Faces” section, let’s move on to the next step and learn how to navigate within this section to delete watch faces on your Apple Watch.
Step 3: Navigate to the “My Faces” Section
After finding the “My Watch” tab in the Watch app, the next step is to navigate to the “My Faces” section. This section contains all the watch faces that are currently installed on your Apple Watch.
Scroll down on the “My Watch” screen until you reach the section titled “My Faces.” It is typically located after the “Notifications” and “App Layout” sections.
Once you’ve found the “My Faces” section, you will see a thumbnail view of each watch face you have installed. This view allows you to easily identify and select the watch face you want to delete.
If you have multiple watch faces installed, you may need to scroll through the list to locate the specific watch face you wish to remove. As you scroll, you can preview each watch face to jog your memory and help you decide which ones you want to delete.
This section also gives you the option to rearrange the order of your watch faces by using the drag handle on the right side of each thumbnail. This allows you to prioritize your most frequently used watch faces and keep them easily accessible.
When you’re ready to delete a watch face, move on to the next step and learn how to swipe left on the watch face to reveal the delete option.
Step 4: Swipe Left on the Watch Face You Want to Delete
Now that you’ve navigated to the “My Faces” section in the Watch app, it’s time to delete the watch face you no longer want on your Apple Watch. To do this, you’ll need to swipe left on the specific watch face you wish to remove.
Start by locating the watch face you want to delete from the list of thumbnails in the “My Faces” section. Once you’ve found it, swipe left on the watch face thumbnail with your finger.
As you swipe left, you will see a series of options become visible on the right side of the screen. These options include “Edit” and “Delete.” To proceed with the deletion, tap on the “Delete” option.
It’s important to note that swiping left is the common gesture used throughout the Apple ecosystem for revealing additional options or actions. This swipe gesture allows you to access hidden features quickly and efficiently.
If you accidentally swipe right or tap on the watch face thumbnail instead of swiping left, don’t worry. Simply swipe right again to hide the additional options and try swiping left once more to reveal the delete option.
Once you’ve successfully swiped left and tapped on the “Delete” option, you’re almost done deleting the unwanted watch face. However, it’s important to confirm the deletion to ensure you don’t accidentally remove a watch face.
Let’s move on to the next step to learn how to confirm the deletion of the watch face you’ve selected.
Step 5: Tap on the “Delete” Button
After swiping left on the watch face you want to delete in the “My Faces” section of the Watch app, you will see the “Delete” option appear on the right side of the screen. Now, it’s time to tap on the “Delete” button to confirm the removal of the watch face from your Apple Watch.
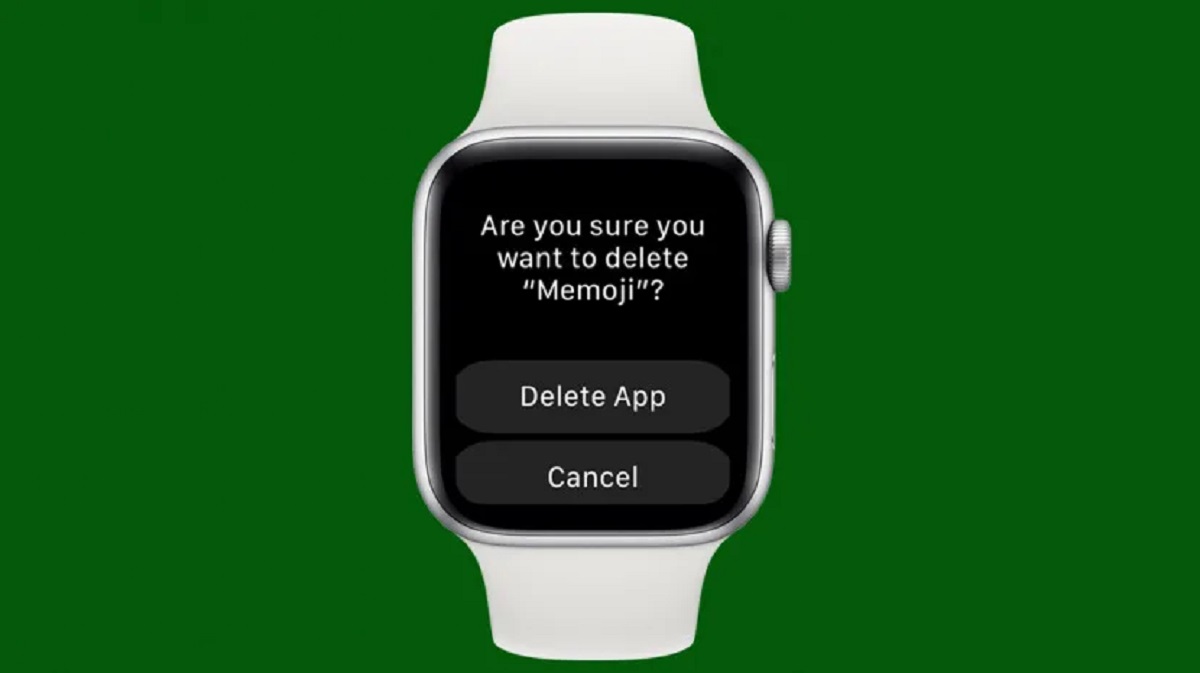
When you tap on the “Delete” button, a confirmation alert will pop up, asking if you’re sure you want to delete the watch face. This alert serves as a safety measure to prevent accidental deletions.
Take a moment to review the watch face thumbnail and make sure it’s the one you want to remove. If you’re certain, tap on the “Delete” button on the confirmation alert.
By tapping on the “Delete” button, you’re indicating your intention to permanently remove the watch face from your Apple Watch. Once deleted, the watch face will no longer be available for selection on your device.
If you’re having second thoughts or realize that you tapped on the wrong watch face, don’t worry! Simply tap on the “Cancel” option on the confirmation alert, and the watch face will not be deleted.
Now that you’ve confirmed the deletion, the watch face will be removed from your Apple Watch. It’s time to move on to the next step and learn how to repeat the process to delete additional watch faces, if needed.
Step 6: Confirm Deletion
After tapping on the “Delete” button in the confirmation alert, it’s important to take a moment to confirm the deletion of the watch face from your Apple Watch. This step ensures that you’ve made the right choice and prevents any accidental removal of watch faces.
Once you tap on the “Delete” button, the watch face will be permanently removed from your Apple Watch. You won’t be able to undo this action, so it’s crucial to double-check and make sure you’re deleting the watch face you intended to remove.
Review the watch face thumbnail and its name on the confirmation alert to confirm that it matches the watch face you wish to delete. If you’re certain, tap on the “Delete” button on the confirmation alert once again to proceed with the deletion.
Keep in mind that if you change your mind or realize that you tapped on the wrong watch face, you can tap on the “Cancel” option on the confirmation alert. This will prevent the watch face from being deleted, allowing you to retain it on your Apple Watch.
By confirming the deletion, you’re taking the final step toward removing the unwanted watch face from your Apple Watch. The watch face will no longer be accessible or visible on your device.
If you’ve successfully deleted the watch face, congratulations! You’ve streamlined your Apple Watch and removed unnecessary clutter. However, if you have more watch faces to delete, continue to the next step to learn how to repeat the process.
Step 7: Repeat Steps 4-6 for Additional Watch Faces
If you still have additional watch faces that you want to delete from your Apple Watch, you can easily repeat the process outlined in steps 4 to 6.
To remove another watch face, simply go back to the “My Faces” section in the Watch app by scrolling down on the “My Watch” screen. Locate the next watch face you wish to delete by swiping left on its thumbnail.
Once you see the “Delete” option, tap on it and confirm the deletion as described in step 6. Take a moment to review the watch face before confirming to ensure you’re deleting the correct one.
Repeat this process for each additional watch face you want to remove from your Apple Watch. By doing so, you can declutter your watch and have a more organized selection of watch faces.
Remember, you can rearrange the order of your watch faces in the “My Faces” section by using the drag handles on the right side of each thumbnail. This allows you to prioritize your most used watch faces and easily access them.
Continue deleting watch faces one by one until you’ve removed all the unwanted or unused ones from your Apple Watch. By customizing your watch faces to your preferences, you can make navigation and usability smoother and more efficient.
Once you’ve finished deleting the desired watch faces, take a moment to ensure that your Apple Watch now only displays the watch faces you enjoy and use the most.
With these steps, you now have the knowledge to delete and customize your watch faces on your Apple Watch. Enjoy the freedom of personalization and an uncluttered watch experience tailored to your preferences!
Conclusion
Congratulations! You have successfully learned how to delete watch faces on your Apple Watch. By following the step-by-step instructions provided in this guide, you can easily customize your Apple Watch and remove any unwanted or unused watch faces.
Deleting watch faces helps declutter your device and gives you a more streamlined interface, making it easier to navigate and find the watch faces you use the most. Whether you want to remove watch faces that no longer align with your style or simply want to minimize the options available, this process allows you to tailor your Apple Watch to your preferences.
Remember, the Watch app on your paired iPhone is your key to managing and customizing your Apple Watch, including its watch faces. Open the app, navigate to the “My Watch” tab, and access the “My Faces” section to delete the watch faces you no longer want.
Ensure that you carefully review each watch face before confirming its deletion. Once a watch face is deleted, it cannot be recovered without reinstalling it from the App Store or reconfiguring it from scratch.
Deleting watch faces is a simple and quick process, allowing you to easily customize your Apple Watch whenever you desire. Don’t be afraid to experiment with different watch face combinations to find the perfect setup that suits your needs and style.
Now it’s time to put your newfound knowledge into action. Open the Watch app, delete those unwanted watch faces, and enjoy a more personalized and clutter-free Apple Watch experience.
Happy customizing!