Introduction
Welcome to the exciting world of PlayStation! Whether you’re a seasoned gamer or new to the gaming scene, creating a PlayStation account is the first step towards unlocking a whole universe of entertainment. With your PlayStation account, you’ll gain access to a plethora of games, online multiplayer experiences, exclusive content, and much more.
In this guide, we will walk you through the simple process of creating your very own PlayStation account. Whether you want to play solo, connect with friends, or immerse yourself in adrenaline-pumping multiplayer battles, a PlayStation account is your ticket to endless gaming possibilities.
But before we dive into the step-by-step instructions, let’s take a moment to understand what exactly a PlayStation account is. Simply put, a PlayStation account is an online identity that allows you to access and enjoy everything PlayStation has to offer. It serves as your virtual hub, connecting you to the PlayStation Network (PSN) and providing access to online features, such as multiplayer gaming, downloading game updates, purchasing and downloading games from the PlayStation Store, and interacting with other gamers around the world.
Now that you have a basic understanding of what a PlayStation account is, let’s get started with the process of creating your own account. Don’t worry, it’s a quick and straightforward process that will have you gaming in no time!
Step 1: Go to the PlayStation website
To begin the process of creating your PlayStation account, you’ll need to visit the official PlayStation website. Open your preferred web browser and enter “www.playstation.com” in the address bar. Hit Enter, and you will be taken to the PlayStation homepage.
Once you’re on the PlayStation homepage, take a moment to familiarize yourself with the layout. You’ll notice various sections, including the latest game releases, featured content, and news. However, for now, we’re focused on creating your account, so let’s move on to the next step.
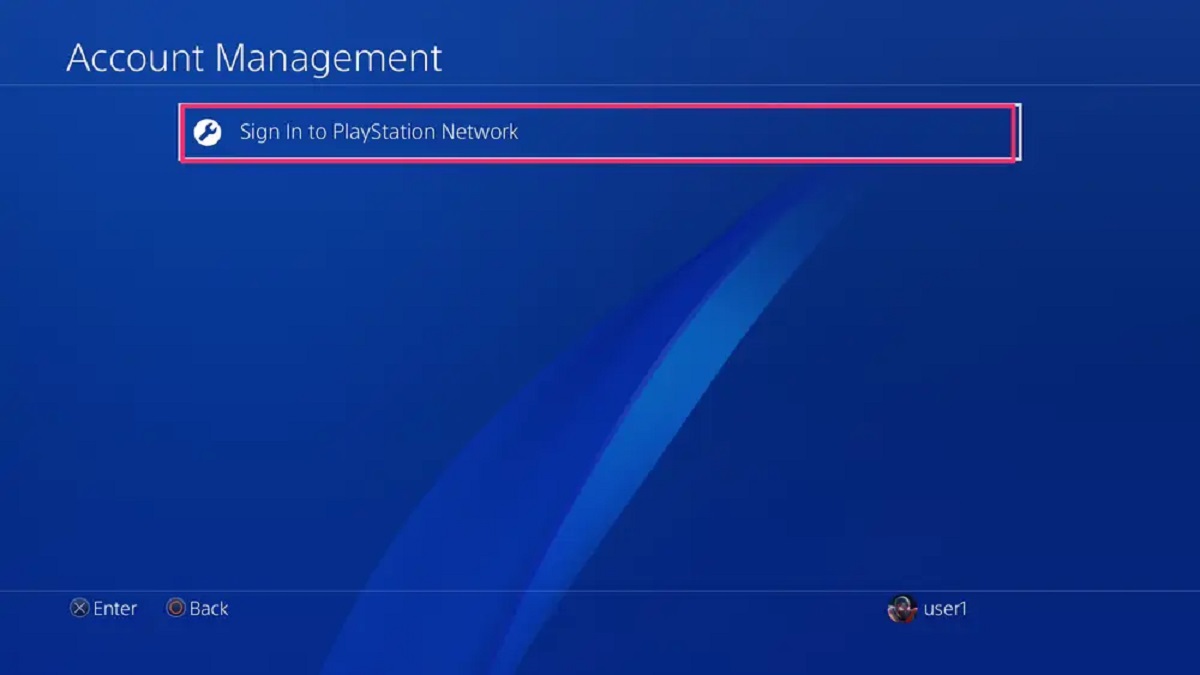
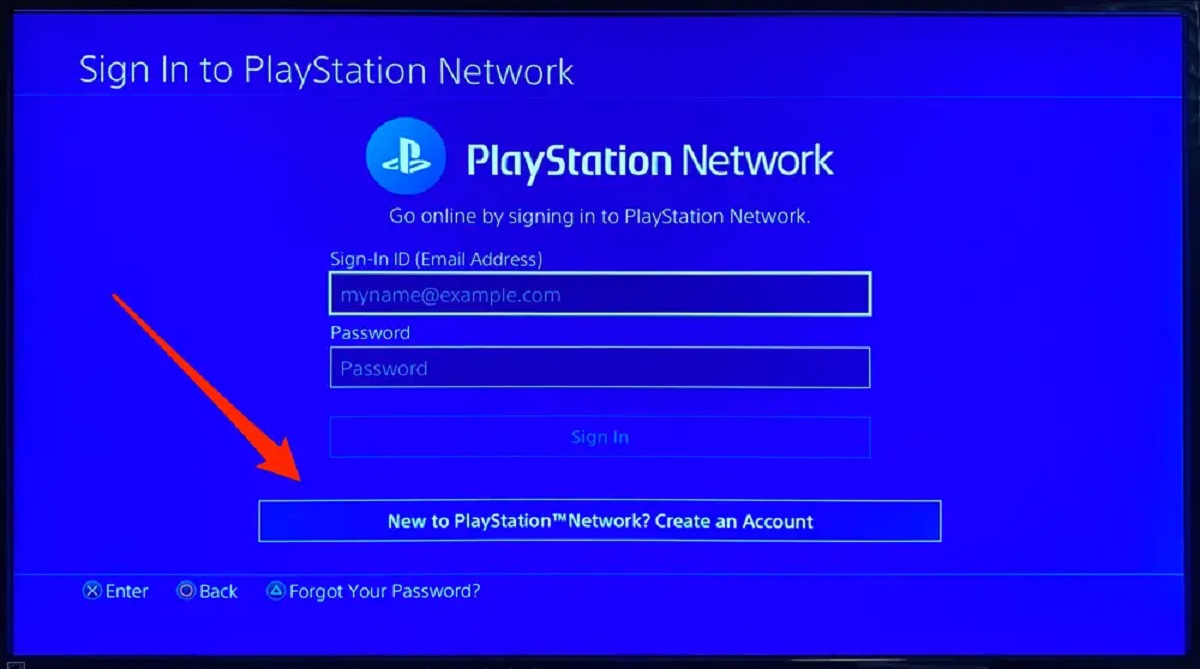
In the top-right corner of the page, you’ll see a “Sign In” button. Click on it, and a drop-down menu will appear. Since you don’t have an account yet, look for the option that says “Create an Account” and click on it. This will direct you to the account creation page.
Alternatively, you can also scroll down to the bottom of the homepage and find the “Create Account” link under the “SUPPORT” section. Clicking on it will take you directly to the account creation page.
By following these steps, you’ve successfully reached the PlayStation website and are now ready to move on to the next step. So let’s proceed with setting up your PlayStation account!
Step 2: Click on “Create New Account”
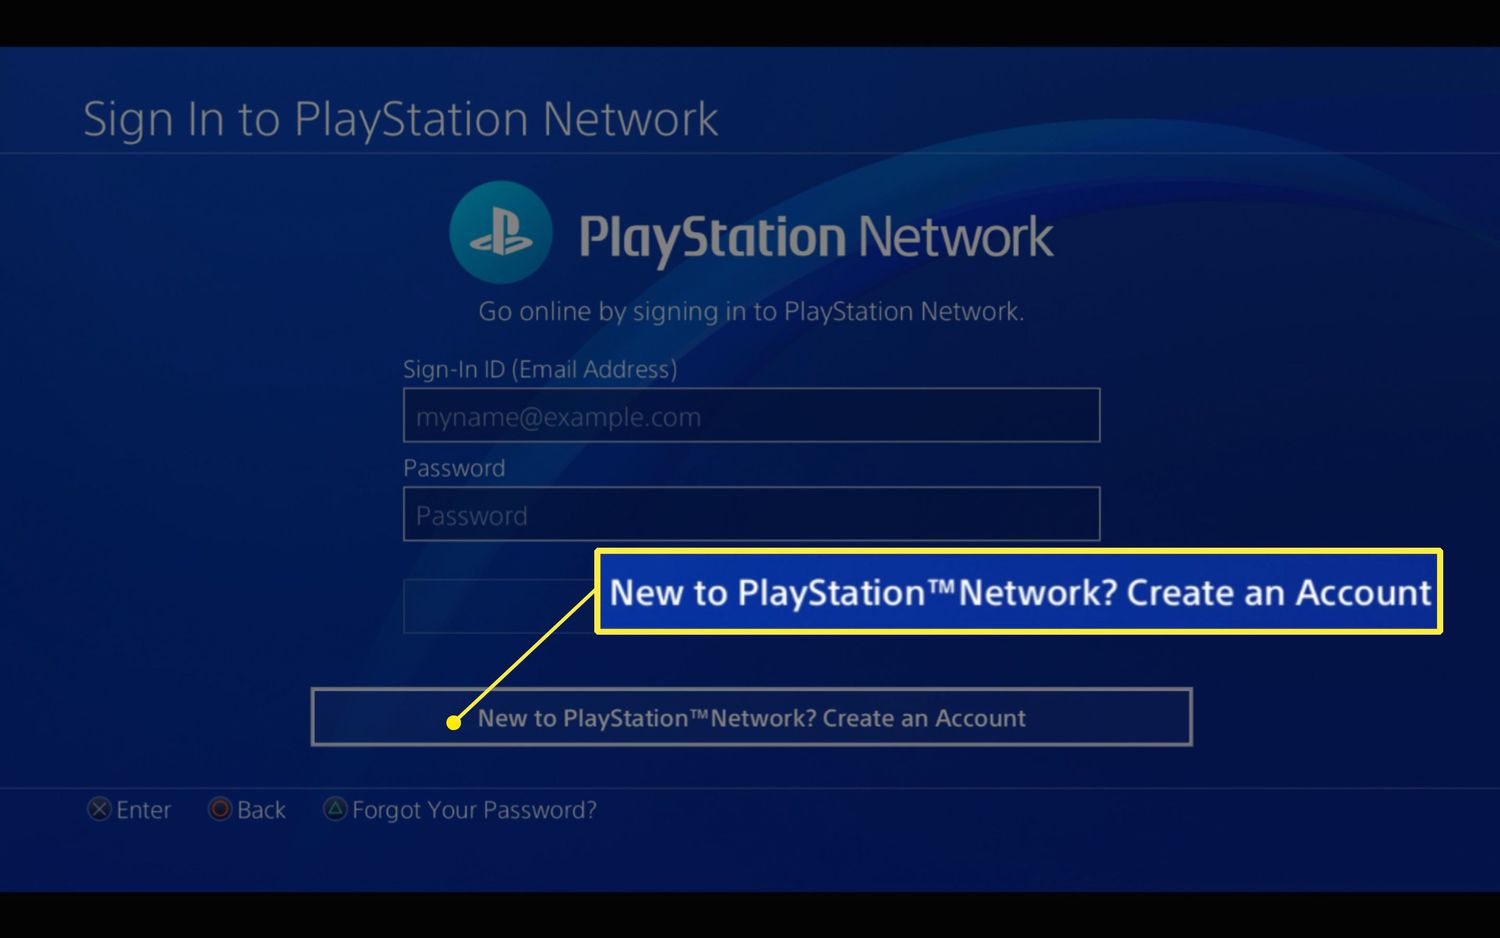
After reaching the account creation page on the PlayStation website, you’ll be presented with the option to either sign in with an existing account or create a new account. Since you’re starting from scratch, click on the “Create New Account” button to proceed.
Once you click on “Create New Account,” you will be directed to a new page where you’ll be asked to provide some essential information to set up your account. This includes your email address, date of birth, and country of residence. It’s crucial to provide accurate and up-to-date information to ensure the smooth creation of your PlayStation account.
Before you move forward, take a moment to review the terms of service and privacy policy. It’s essential to familiarize yourself with the rules and regulations set by PlayStation to ensure a safe and enjoyable gaming experience.
Once you’ve read and understood the terms, go ahead and click on the checkbox to indicate your acceptance. This action signifies that you agree to abide by the terms of service and privacy policy set forth by PlayStation.
After completing these steps, you are now ready to move on to the next section where you will provide your specific country/region information. Stay tuned!
Step 3: Choose your country/region
Once you’ve clicked on “Create New Account” and accepted the terms of service, you will reach a page where you’ll need to select your country or region. This step is important as it ensures that you have access to region-specific content and services.
To choose your country or region, you’ll typically be presented with a drop-down menu or a list of available options. Scroll through the list and find your country or region. Click on it to select it as your preferred choice.
It’s essential to choose the correct country or region, as this will impact the availability of games, promotions, and other features specific to your location. So take your time to ensure you select the right option.
After selecting your country or region, you may be required to provide additional information, such as your preferred language or time zone. Fill in these details as accurately as possible to ensure a personalized gaming experience tailored to your preferences.
Once you’ve filled in all the necessary information, double-check that everything is correct before proceeding. This will help prevent any issues or delays in the account creation process.
With this step completed, you’re on track to creating your PlayStation account successfully. In the next section, we will walk you through providing your personal information. So let’s move forward!
Step 4: Fill in your personal information
Now that you’ve selected your country or region, it’s time to fill in your personal information to continue creating your PlayStation account. This information will help verify your identity and ensure the security of your account.
The personal information required typically includes your first name, last name, gender, and language preference. Fill in these details accurately, ensuring that you use the correct spelling and format as requested.
Next, you will need to provide your email address. This should be a valid and active email address that you have access to as you will receive important account-related notifications and updates through this email.
Make sure to create a strong and unique password for your PlayStation account. It’s recommended to use a combination of uppercase and lowercase letters, numbers, and special characters to enhance the security of your account. Keep your password confidential and avoid sharing it with anyone.
Some additional information may be required, such as your date of birth and phone number. These details are important for various purposes, including age verification and account recovery. Ensure that you provide accurate information for these fields.
Remember to review all the information you’ve entered before proceeding to the next step. Double-check for any typos or errors to prevent complications later on. Once you’re satisfied with the accuracy of your personal information, proceed to the next step, where you’ll create a unique username and password for your PlayStation account.
By completing this step, you’re making significant progress in creating your PlayStation account. The next section will guide you through creating a unique username and password, so keep reading!
Step 5: Create a unique username and password
Creating a unique username and password is a crucial step in setting up your PlayStation account. Your username represents your online identity and will be visible to other players in the gaming community. Your password, on the other hand, ensures the security of your account.
When choosing a username, it’s essential to pick something that reflects your personality and is easy to remember. However, keep in mind that your username must adhere to the guidelines set by PlayStation, which may include restrictions on offensive or inappropriate language.
Additionally, it’s a good idea to choose a username that is not too common to avoid confusion with other players. You can try adding numbers, symbols, or a combination of letters to make your username more unique.
For your password, it’s important to create a strong and secure one to protect your account from unauthorized access. Avoid using easily guessable passwords like your name or birthdate. Instead, opt for a combination of uppercase and lowercase letters, numbers, and special characters.
Make sure to write down your username and password in a safe place or use a trusted password manager to securely store them. Remember that sharing your account information with others is not recommended, as it puts your account at risk.
After entering your desired username and password, you may be asked to re-enter your password for verification purposes. Take a moment to ensure that both entries match exactly to avoid any login issues in the future.
With your unique username and strong password in place, you’re one step closer to fully setting up your PlayStation account. The next section will guide you through the process of verifying your email address. So, let’s move on!
Step 6: Verify your email address
After creating your unique username and password, the next step in the process of setting up your PlayStation account is to verify your email address. Verifying your email is an essential security measure and ensures that you receive important account-related notifications.
Upon completing the previous step, you will receive an email from PlayStation to the address you provided during the account creation process. Open your email inbox and look for the verification email from PlayStation. If you can’t find it in your inbox, check the spam or junk folder, as it might have been mistakenly filtered there.
When you locate the email, open it and click on the verification link provided. This link will direct you to a webpage confirming that your email address has been successfully verified. Congratulations, you’ve completed the email verification process!
If, for any reason, you didn’t receive the verification email, you can request a new one by clicking on the “Resend Verification Email” option on the PlayStation website. Ensure that you’ve entered the correct email address and check your inbox again.
It’s important to note that some email providers or filters may mark the verification email as spam or send it to a separate folder. To avoid any such issues, add PlayStation’s email address to your contacts or whitelist to ensure that future emails from PlayStation are delivered to your inbox.
With your email address successfully verified, you’re one step closer to fully activating your PlayStation account. In the next section, we will explore customizing your profile settings to personalize your gaming experience. So let’s continue!
Step 7: Customize your profile settings
Now that your email address has been verified, it’s time to personalize your PlayStation account by customizing your profile settings. This step allows you to add a personal touch and makes your gaming experience more unique and enjoyable.
Start by accessing the settings menu of your PlayStation account. This can usually be done by clicking on your profile icon or username, which is typically located in the top-right corner of the PlayStation website. From there, select the “Settings” or “Profile Settings” option.
Within the profile settings, you’ll find various customization options. Here are a few key settings you can consider adjusting:
- Profile Picture: Choose an avatar or upload a profile picture that represents your gaming persona. This is a great way to express your individuality and make your profile visually appealing.
- About Me: Add a short bio or description to let other gamers know a bit about you. It can include your gaming interests, favorite genres, or a catchy gaming quote.
- Privacy Settings: Customize your privacy settings to control who can access your profile information, send you friend requests, or view your gaming activities. Adjust these settings based on your preferences for privacy and online interactions.
- Communication Preferences: Specify how you want to receive notifications and communications from PlayStation. You can choose to receive updates via email, push notifications on your mobile device, or both.
Remember to save your changes after customizing each setting to ensure that your preferences are applied to your PlayStation account.
Keep in mind that while personalizing your profile is a fun aspect of creating your PlayStation account, be mindful of maintaining a positive and respectful online presence. Ensure that your profile picture, bio, and any other information you share align with the community guidelines and terms of service set by PlayStation.
With the profile settings customized to your liking, your PlayStation account now reflects your unique gaming identity. In the next step, we will explore setting up parental controls, if necessary. So, let’s move forward!
Step 8: Set up parental controls if necessary
For parents or guardians who want to ensure a safe and age-appropriate gaming experience for their children, setting up parental controls is an essential step. PlayStation provides robust parental control features that allow you to monitor and manage your child’s access to different types of content and online interactions.
To set up parental controls, access the settings menu of your PlayStation account and look for the “Parental Controls” or “Family Management” option. This will open a dedicated section where you can manage and customize the settings for your child’s account.
Within the parental controls settings, you’ll find various options to control and restrict different aspects of your child’s gaming experience. Some key features include:
- Age Restriction: Set an age limit to control the types of games and content your child can access based on their age.
- Online Interaction: Adjust settings to control your child’s ability to communicate with other players online and restrict access to user-generated content.
- Play Time Limits: Set specific time limits for gameplay to manage your child’s screen time and ensure a healthy balance between gaming and other activities.
- Purchase Restrictions: Control and manage your child’s ability to make in-game purchases or access certain features that may require additional payment.
It’s important to thoroughly explore the parental controls settings and customize them based on your child’s age, maturity level, and your own preferences as a parent or guardian. Regularly review and update these settings as your child grows and their gaming needs change.
By setting up parental controls, you can have peace of mind knowing that your child’s gaming experiences are supervised and adjusted to ensure a safe and suitable environment.
With parental controls in place, you’ve taken an important step towards managing your child’s PlayStation account responsibly. In the next section, we will discuss exploring the PlayStation Store and getting started with gaming. So let’s continue!
Step 9: Explore the PlayStation Store and start gaming
Now that your PlayStation account is fully set up and ready to go, it’s time to dive into the exciting world of gaming! One of the best places to start your gaming journey is the PlayStation Store, where you can find a wide range of games, downloadable content, and other digital goodies.
To access the PlayStation Store, log in to your PlayStation account on your PlayStation console or visit the PlayStation Store website. Once you’re in, you’ll be greeted with a plethora of options to explore.
Browse through various game categories, including new releases, most popular titles, exclusive games, and more. You can also search for specific games or genres that interest you. The PlayStation Store offers a vast library of games, ranging from action-packed adventures to immersive storytelling experiences.
When you find a game that captures your interest, click on it to view more details. You can read descriptions, check out screenshots and trailers, and even see user reviews to help you make an informed decision. Once you’ve made your choice, follow the prompts to purchase and download the game to your console.
Aside from games, the PlayStation Store also offers additional content such as expansion packs, season passes, and in-game items. These can enhance your gaming experience and provide extra features, levels, or customization options.
As you explore the PlayStation Store, keep an eye out for special promotions, discounts, and freebies that are regularly offered. Taking advantage of these can help you expand your gaming library and enjoy fantastic deals.
Once you’ve downloaded your desired games or content, you’re ready to start gaming! Launch the game from your console’s menu and embark on epic adventures, engage in thrilling multiplayer battles, or immerse yourself in captivating stories.
Remember to check for regular updates and patches for your games to ensure optimal performance and access to new features. The PlayStation platform also offers online multiplayer capabilities, so don’t hesitate to connect with friends or join gaming communities to share your experiences.
With the PlayStation Store as your gateway to gaming possibilities, it’s time to unleash your gaming prowess and enjoy all the exciting adventures that await you.
With this final step, you have successfully completed the process of creating your PlayStation account and are now ready to embark on a journey filled with exhilarating gameplay. Happy gaming!
Conclusion
Congratulations on successfully creating your PlayStation account! You’ve taken the necessary steps to unlock a world of gaming adventures, online multiplayer experiences, and exclusive content. With your account in place, you can now fully immerse yourself in the PlayStation ecosystem and enjoy everything it has to offer.
Throughout this guide, we’ve walked you through the process of creating your account, from visiting the PlayStation website to customizing your profile settings. We’ve also covered important steps like verifying your email address, setting up parental controls (if needed), and exploring the PlayStation Store to download and start gaming.
As you venture into the vast array of games and online interactions, remember to prioritize safety and adhere to the guidelines set by PlayStation. Respect others in the gaming community, have fun, and don’t forget to take breaks and maintain a healthy gaming-life balance.
Furthermore, keep in mind that as technology and gaming evolve, PlayStation may introduce new features and updates. It’s always a good idea to stay informed about any changes to ensure you’re making the most of your PlayStation account.
Now, it’s time to grab your controller, choose your favorite game, and embark on exhilarating virtual journeys. Whether you’re exploring vast open worlds, competing in intense multiplayer battles, or immersing yourself in compelling narratives, your PlayStation account opens the door to endless entertainment possibilities.
Thank you for following this guide, and we hope you have an amazing gaming experience on your PlayStation! Happy gaming!