Introduction
Creating a custom email domain is a crucial step in establishing a professional online presence for your business or personal use. Having an email address that corresponds with your domain name gives a sense of credibility and authenticity to your communications. Whether you’re a small business owner, a freelancer, or an individual looking to create a personalized email address, this guide will walk you through the essential steps to create an email domain.
Having your own email domain offers numerous advantages. It allows you to have full control over your email accounts and provides branding opportunities by incorporating your domain name into the email address. Additionally, using a custom email domain can help you build trust with your recipients, as it demonstrates that you are serious about your online presence.
In this guide, we will take you through the necessary steps to create an email domain from start to finish. We will cover everything from choosing a domain name to setting up DNS records and configuring email clients. By following these steps, you can have a professional and personalized email address that aligns with your domain name.
Before we dive into the details, it’s important to note that creating an email domain requires a few essential components. Firstly, you will need to have a registered domain name. If you don’t have one yet, we’ll guide you through the process of selecting and registering a domain. Secondly, you will need an email hosting provider to store and manage your emails. We will help you choose the right provider and walk you through the setup process.
Now that we have covered the basics, let’s move on to the first step: choosing a domain name.
Step 1: Choose a Domain Name
The domain name you choose will be the foundation of your email domain, so it’s essential to choose wisely. Here are a few tips to help you select the perfect domain name:
- Keep it relevant: Choose a domain name that reflects your business, brand, or personal identity. It should be easy to remember and relevant to your industry or niche.
- Make it concise: Short and concise domain names are easier to type and remember. Avoid long or complex names that could be prone to typos.
- Avoid trademark infringement: Ensure that your chosen domain name doesn’t violate any trademarks. Conduct a thorough search to avoid legal issues down the line.
- Consider keywords: Including relevant keywords in your domain name can help with search engine optimization (SEO) and make it easier for users to find you online.
- Choose a reputable domain extension: The domain extension, such as .com, .net, or .org, should be appropriate for your purpose. Using a well-known extension like .com can add credibility to your email address.
Once you have brainstormed some ideas, you can use domain name registration platforms or domain name generators to check for availability. These tools will show you if the domain name you desire is already taken or if variations are available.
Remember, your domain name will not only be used for your email domain but also for your website and other online assets. Therefore, it’s important to select a domain name that you will be comfortable using across different platforms.
After you have chosen an available domain name, you can move on to the next step: registering your domain.
Step 2: Register Your Domain
Once you have chosen the perfect domain name for your email domain, the next step is to register it. Domain registration involves securing your chosen domain name and officially associating it with your online presence. Here’s how you can register your domain:
- Choose a domain registrar: Select a reputable domain registrar that offers domain registration services. Popular domain registrars include GoDaddy, Namecheap, and Google Domains.
- Check domain availability: Enter your chosen domain name into the registrar’s search tool to check if it’s available for registration. If the name is not available, you may need to choose a different domain name or try alternative extensions.
- Provide registration information: Fill out the necessary registration information, including your name, contact details, and billing information. Ensure that the information you provide is accurate and up to date.
- Select registration period: Choose the desired registration period for your domain. Registrations are typically available for one to ten years. Consider registering your domain for a longer period to avoid potential expiration issues.
- Complete the registration process: Follow the registrar’s instructions to complete the registration process. This may involve reviewing and confirming your registration details, making a payment, and agreeing to the terms and conditions.
Once your domain registration is completed, you will receive confirmation of ownership and access to domain management tools. It’s important to keep track of your domain registration details, including renewal dates and account login information.
Registering your domain is a vital step in establishing your online presence. Not only does it secure your chosen domain name, but it also enables you to set up email addresses and create a professional image for your business or personal use.
Now that you have successfully registered your domain, it’s time to move on to the next step: choosing an email hosting provider.
Step 3: Choose an Email Hosting Provider
After registering your domain, the next step in creating an email domain is to choose an email hosting provider. An email hosting provider is a service that allows you to store, send, and receive emails using your custom domain name. Here are some factors to consider when selecting an email hosting provider:
- Email features: Look for providers that offer essential features like reliable inbox delivery, spam filtering, virus protection, and ample storage space. Consider any specific requirements you may have, such as the ability to send large attachments or integration with other tools.
- Scalability: Evaluate the provider’s plans and pricing to ensure they align with your current needs and future growth. It’s important to choose an email hosting provider that can accommodate your expanding email requirements.
- User interface: A user-friendly and intuitive interface will make it easier to manage your email accounts, set up forwarding and autoresponders, and perform other administrative tasks. Look for providers with a well-designed and easy-to-navigate control panel.
- Customer support: Consider the level of customer support and technical assistance provided by the hosting provider. Responsive customer support can be invaluable in case you encounter any issues or need assistance with setup or configuration.
- Integration: If you use other tools or platforms for your business or personal use, ensure that the email hosting provider integrates seamlessly with them. This can include integration with productivity applications, CRM software, or website builders.
- Security: Email security is crucial to protect sensitive information and maintain the privacy of your communications. Look for providers that offer secure protocols like SSL/TLS encryption and multi-factor authentication.
Take the time to research and compare different email hosting providers to find the one that best suits your needs and budget. Read reviews, assess their reputation in the industry, and consider recommendations from trusted sources.
Once you’ve found a suitable email hosting provider, you’re ready to move on to the next step: setting up DNS records.
Step 4: Set Up DNS Records
Setting up DNS (Domain Name System) records is a critical step in configuring your email domain. DNS records act as the directory that directs incoming emails to the correct email servers. To set up DNS records for your email domain, follow these steps:
- Access your domain management panel: Log in to your domain registrar or hosting account and access the domain management panel. Look for options related to DNS settings or DNS management.
- Locate the DNS records section: Within the DNS settings, you will find a section dedicated to DNS records. This is where you will make the necessary changes.
- Create MX (Mail Exchanger) records: MX records specify the email servers responsible for receiving and delivering email for your domain. Create MX records and enter the details provided by your email hosting provider. This usually includes the server address or hostname and a priority value.
- Configure SPF (Sender Policy Framework) records: SPF records authorize specific email servers to send emails on behalf of your domain and help prevent email forgery. Consult your email hosting provider for the correct SPF record details and add them to your DNS configuration.
- Set up DKIM (DomainKeys Identified Mail) records: DKIM records add a digital signature to your outgoing emails, allowing recipients to verify the authenticity of the emails. Your email hosting provider will provide the necessary DKIM record details. Add these records to your DNS configuration.
- Include optional records: Depending on your email hosting provider and your specific requirements, there may be additional DNS records to add, such as DMARC records for enhanced email authentication and security.
- Save and verify: After adding the necessary DNS records, save the changes in your DNS configuration. It may take some time for the changes to propagate across the internet. Once the changes are fully propagated, you can use DNS lookup tools to verify that the records are set up correctly.
Correctly configuring DNS records plays a vital role in ensuring that your emails are properly routed to the correct servers. It may seem technical, but most domain registrars and hosting providers offer guidelines or support to help you through the process.
With DNS records properly set up, you’re now ready to move on to the next step: creating email accounts.
Step 5: Create Email Accounts
Now that you have set up the necessary DNS records, it’s time to create email accounts for your email domain. Email accounts allow you to send and receive emails using your custom domain name. Follow these steps to create email accounts:
- Login to your email hosting provider: Access your email hosting provider’s control panel or dashboard using the login credentials provided during the signup process.
- Navigate to the email account section: Look for an option that allows you to manage email accounts or create new accounts.
- Create a new email account: Click on the “Create” or “Add” button to initiate the process of setting up a new email account.
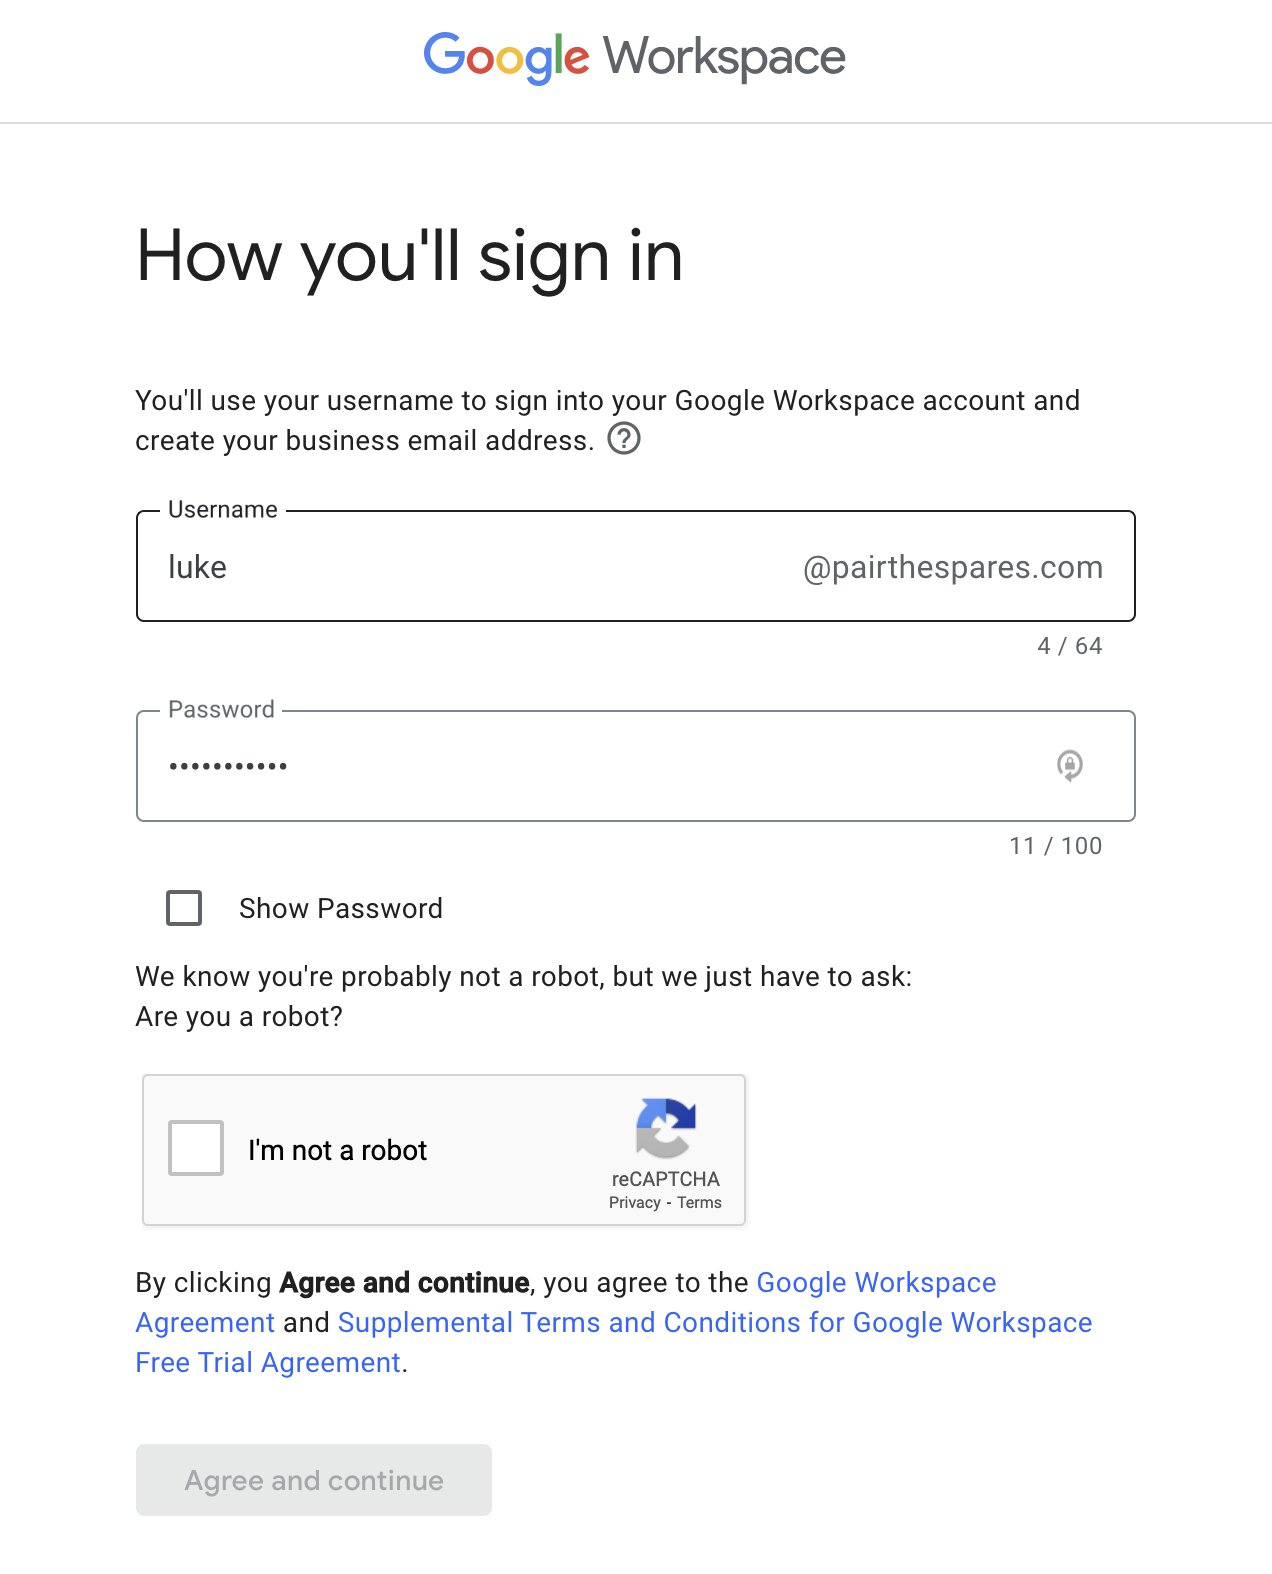
- Enter account details: Provide the necessary information for the email account, including the desired username (usually the part before the “@” symbol of your email address), password, and display name.
- Set mailbox size: Specify the mailbox size or storage allocation for the email account. Depending on the email hosting provider, you may have different options to choose from.
- Enable additional features: Some email hosting providers offer additional features like autoresponders, email forwarding, and spam filters. Configure these features based on your needs.
- Save and verify: Once you have entered all the necessary information, save the account settings. Test the newly created email account by sending a test email to ensure everything is working correctly.
- Repeat for additional accounts: If you need multiple email accounts for your domain, repeat the above steps to create additional accounts. Many email hosting providers allow you to create multiple accounts based on your subscription plan.
Creating email accounts is a straightforward process with the right email hosting provider. Make sure to choose strong and secure passwords for each email account to maintain the privacy and security of your communications.
With your email accounts set up, you’re now ready to proceed to the final step: configuring email clients.
Step 6: Configure Email Clients
Configuring email clients is the final step in creating an email domain. Email clients are software applications or programs that allow you to access and manage your email accounts. Here’s how you can configure email clients to work with your custom email domain:
- Select an email client: Choose an email client that suits your preferences and meets your requirements. Popular options include Microsoft Outlook, Mozilla Thunderbird, Apple Mail, and web-based clients like Gmail or Outlook.com.
- Open the email client: Launch the chosen email client application or access the web-based client using your preferred web browser.
- Choose the account setup option: Look for the account setup or add account option within the email client. This should typically be found in the settings or preferences menu.
- Enter account details: Provide the requested information, including your email address, password, and display name. The email client will attempt to automatically configure the account settings based on the domain and email address provided.
- Configure server settings (if needed): If the email client fails to automatically configure the account, you may need to manually enter the incoming and outgoing server settings provided by your email hosting provider. These settings include server addresses, port numbers, and encryption methods.
- Verify and test the setup: Once you have entered the account details and configured the server settings, save the changes and perform a test by sending and receiving emails to ensure the setup is working correctly.
- Repeat for additional email clients: If you use multiple devices or email clients, such as a smartphone or tablet, repeat the above steps to configure those devices or clients to work with your email domain.
Configuring email clients may vary slightly based on the specific client you choose. It’s recommended to consult the documentation or support resources provided by the email client or your email hosting provider for detailed instructions on configuring the client.
Once you have successfully configured your email client(s), you can start using your custom email domain to send and receive emails conveniently from your preferred email application or device.
Conclusion
Congratulations! You have successfully created your own email domain. By following the essential steps outlined in this guide, you’ve established a professional and personalized email address that aligns with your domain name. Let’s recap the steps you’ve taken to create your email domain:
In Step 1, you chose a domain name that is relevant, concise, and aligned with your business or personal identity. In Step 2, you registered your chosen domain name through a reputable domain registrar. Step 3 involved selecting an email hosting provider that offers the necessary features, scalability, and integration options.
In Step 4, you set up DNS records to ensure that incoming emails are directed to the correct email servers. Step 5 allowed you to create email accounts with your hosting provider, setting usernames, passwords, and mailbox sizes. Finally, in Step 6, you configured email clients to access and manage your email accounts conveniently.
Having your own email domain brings numerous benefits, including enhanced credibility, branding opportunities, and control over your email accounts. It allows you to establish a professional online presence and build trust with your recipients. Remember to regularly manage and secure your email accounts, update DNS records as needed, and stay vigilant against potential threats.
We hope this guide has been helpful in guiding you through the process of creating an email domain. Now, go ahead and start making the most of your personalized email address to communicate effectively and professionally with colleagues, clients, and contacts.


