Introduction
Welcome to the world of website creation with Google Workspace! In today’s digital age, having a website is crucial for businesses, organizations, and even individuals to establish their online presence. Google Workspace provides a comprehensive suite of tools and services that can help you build a professional and functional website without the need for advanced technical knowledge.
Google Workspace, previously known as G Suite, offers a range of productivity and collaboration tools, including Gmail, Google Drive, Google Docs, and more. These tools can be leveraged to create, customize, and optimize your website, making it easy to showcase your products, services, or ideas to the world.
Many people are intimidated by website creation, assuming it requires coding expertise and design skills. However, with Google Workspace, you can create a stunning website even if you have little to no experience in web development. Whether you are a small business owner, a freelancer, or an aspiring blogger, Google Workspace offers a user-friendly platform to bring your online presence to life.
This step-by-step guide will walk you through the process of creating a website using Google Workspace. From domain registration to adding content and customizing the appearance, we will cover all the essential steps to launch your website successfully. Additionally, we will explore how you can enhance your website’s functionality by integrating various Google Workspace applications.
By the end of this guide, you will be equipped with the knowledge and skills to create a professional website that reflects your brand, attracts visitors, and helps you achieve your online goals. So, let’s embark on this exciting journey of website creation with Google Workspace!
Why use Google Workspace for website creation?
When it comes to creating a website, you have a plethora of options to choose from. However, there are several compelling reasons why Google Workspace stands out as an excellent choice for website creation:
1. Integration of Tools: Google Workspace seamlessly integrates various tools and services, allowing you to manage your website and business operations from a single platform. From email management to document collaboration and cloud storage, Google Workspace offers a cohesive ecosystem that streamlines your workflow.
2. User-Friendly Interface: You don’t need to be a tech guru to use Google Workspace for website creation. Its intuitive interface and drag-and-drop functionality make it easy for beginners to build and customize their websites without any coding knowledge.
3. Professional Templates: Google Workspace provides a wide range of professionally designed templates that you can customize to suit your brand and style. These templates offer a great starting point and can be easily tailored to create a unique and visually appealing website.
4. Mobile-Friendly Designs: With the increasing use of smartphones and tablets, having a mobile-friendly website is crucial. Google Workspace ensures that your website automatically adjusts its layout and design to provide an optimal viewing experience on different devices, improving user engagement and search engine rankings.
5. Search Engine Optimization (SEO) Capabilities: Google Workspace enhances your website’s visibility in search engine rankings by providing built-in SEO tools and recommendations. You can optimize your website’s meta tags, titles, descriptions, and URLs to improve organic traffic and attract more visitors.
6. Security and Reliability: Google Workspace offers robust security measures, including data encryption, spam filters, and multi-factor authentication, to protect your website and sensitive information. Additionally, Google’s reliable infrastructure ensures a high uptime percentage, minimizing downtime and ensuring seamless website availability.
7. Collaborative Environment: If you have a team working on your website, Google Workspace enables easy collaboration. Multiple users can access and edit the website simultaneously, allowing for real-time collaboration and enhancing productivity.
No matter if you are a small business owner, an entrepreneur, or an individual looking to showcase your work, Google Workspace provides you with all the tools and features required to create a professional and functional website. With its user-friendly interface, seamless integration, and extensive customization options, Google Workspace stands as an ideal platform for website creation, enabling you to establish your online presence and reach your target audience effectively.
Step 1: Domain registration and setup
The first step in creating a website with Google Workspace is to register a domain name and set it up for your website. A domain name serves as the address or URL of your website, making it easy for visitors to find and access your site. Follow these steps to register and set up your domain:
1. Choose a domain registrar: Start by choosing a domain registrar, which is a company that sells domain names. There are numerous domain registrars available, such as GoDaddy, Namecheap, and Google Domains. Consider factors like pricing, customer support, and additional services offered before selecting a registrar.
2. Search for and select a domain: Use the domain registrar’s search function to find an available domain name that aligns with your brand or website. It’s advisable to choose a domain name that is short, memorable, and easy to spell. Consider using keywords related to your website’s content to improve its relevance in search engine results.
3. Complete the registration process: Once you find a suitable domain name, proceed with the registration process. Provide your contact information and choose the desired registration duration (typically one to ten years). Review and confirm your purchase, making sure to double-check all entered information.
4. Update domain DNS settings: After registering your domain, you need to configure its DNS (Domain Name System) settings to point to Google’s servers. Sign in to your domain registrar account and locate the DNS settings. Update the DNS records, including the A record and CNAME record, according to the instructions provided by Google Workspace.
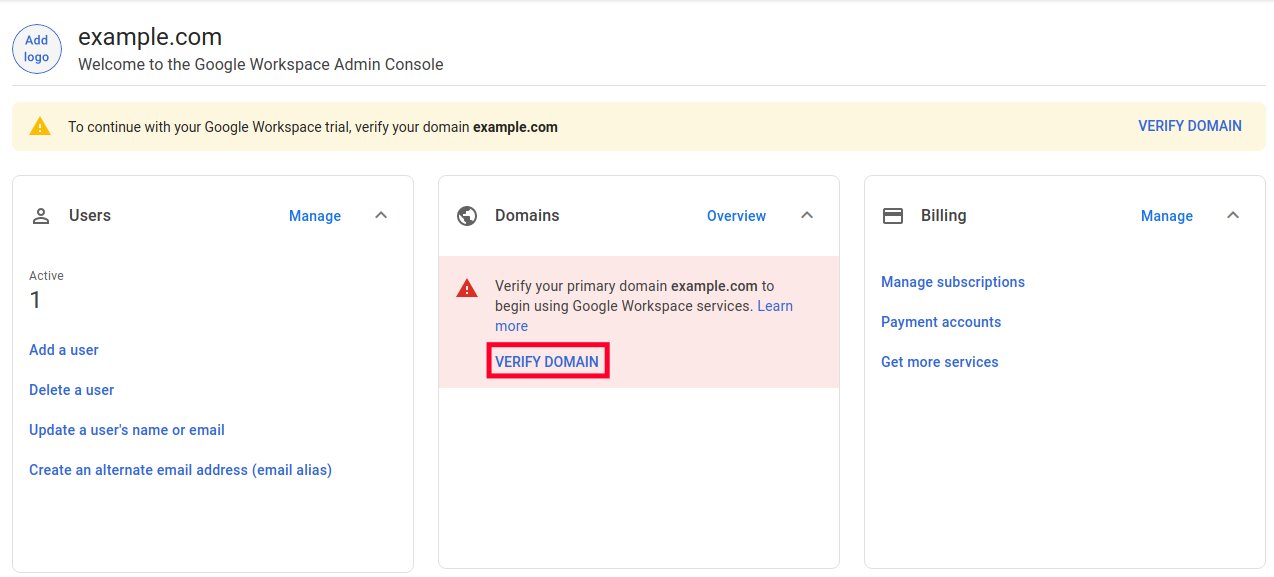
5. Verification and setup in Google Workspace: To connect your domain with Google Workspace, you will need to verify ownership and complete the setup process. Sign in to your Google Workspace account and follow the prompts to verify domain ownership. Google will provide you with DNS records that you need to add to your domain registrar’s settings. This verification process varies depending on the domain registrar, but Google provides clear instructions for each registrar.
6. Domain activation: Once you have completed the verification and setup process, it may take some time for the changes to propagate across the internet. This propagation period can range from a few minutes to 48 hours. During this time, your domain is being activated, and your website will become accessible via the registered domain name.
By following these steps, you can successfully register a domain and set it up for your website with Google Workspace. Remember to review the instructions provided by Google Workspace thoroughly and seek assistance from their support team if you encounter any difficulties. Having a domain registered and set up is essential as it gives your website a unique identity and establishes your online presence.
Step 2: Creating a Google Site
Now that you have your domain registered and set up, it’s time to create your website using Google Site, a user-friendly platform offered by Google Workspace. Follow these steps to create your Google Site:
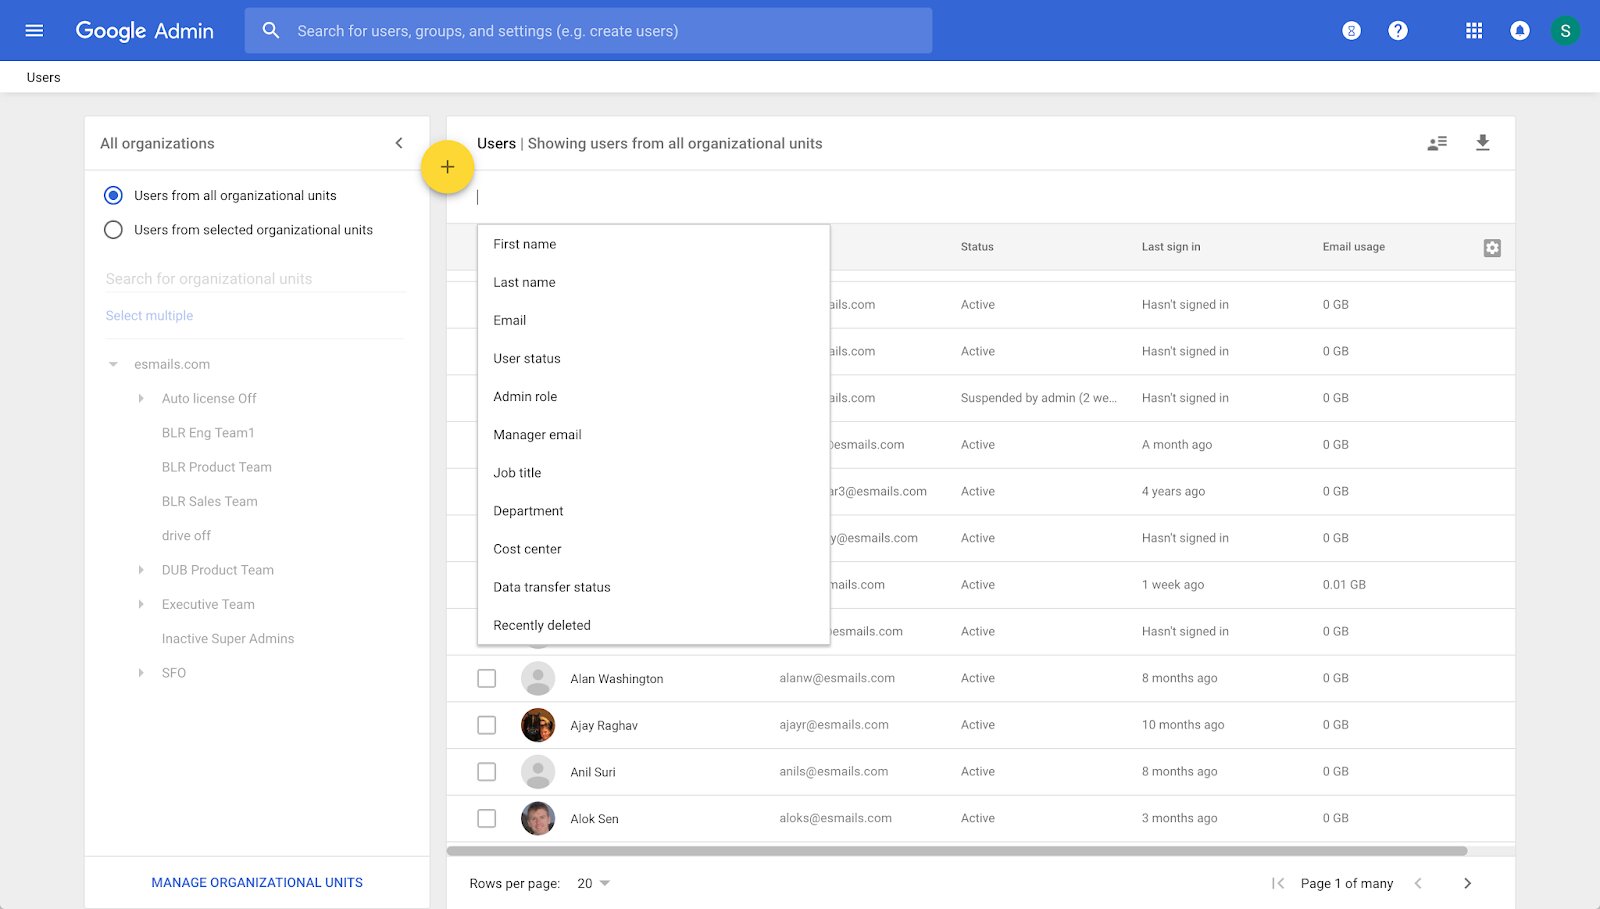
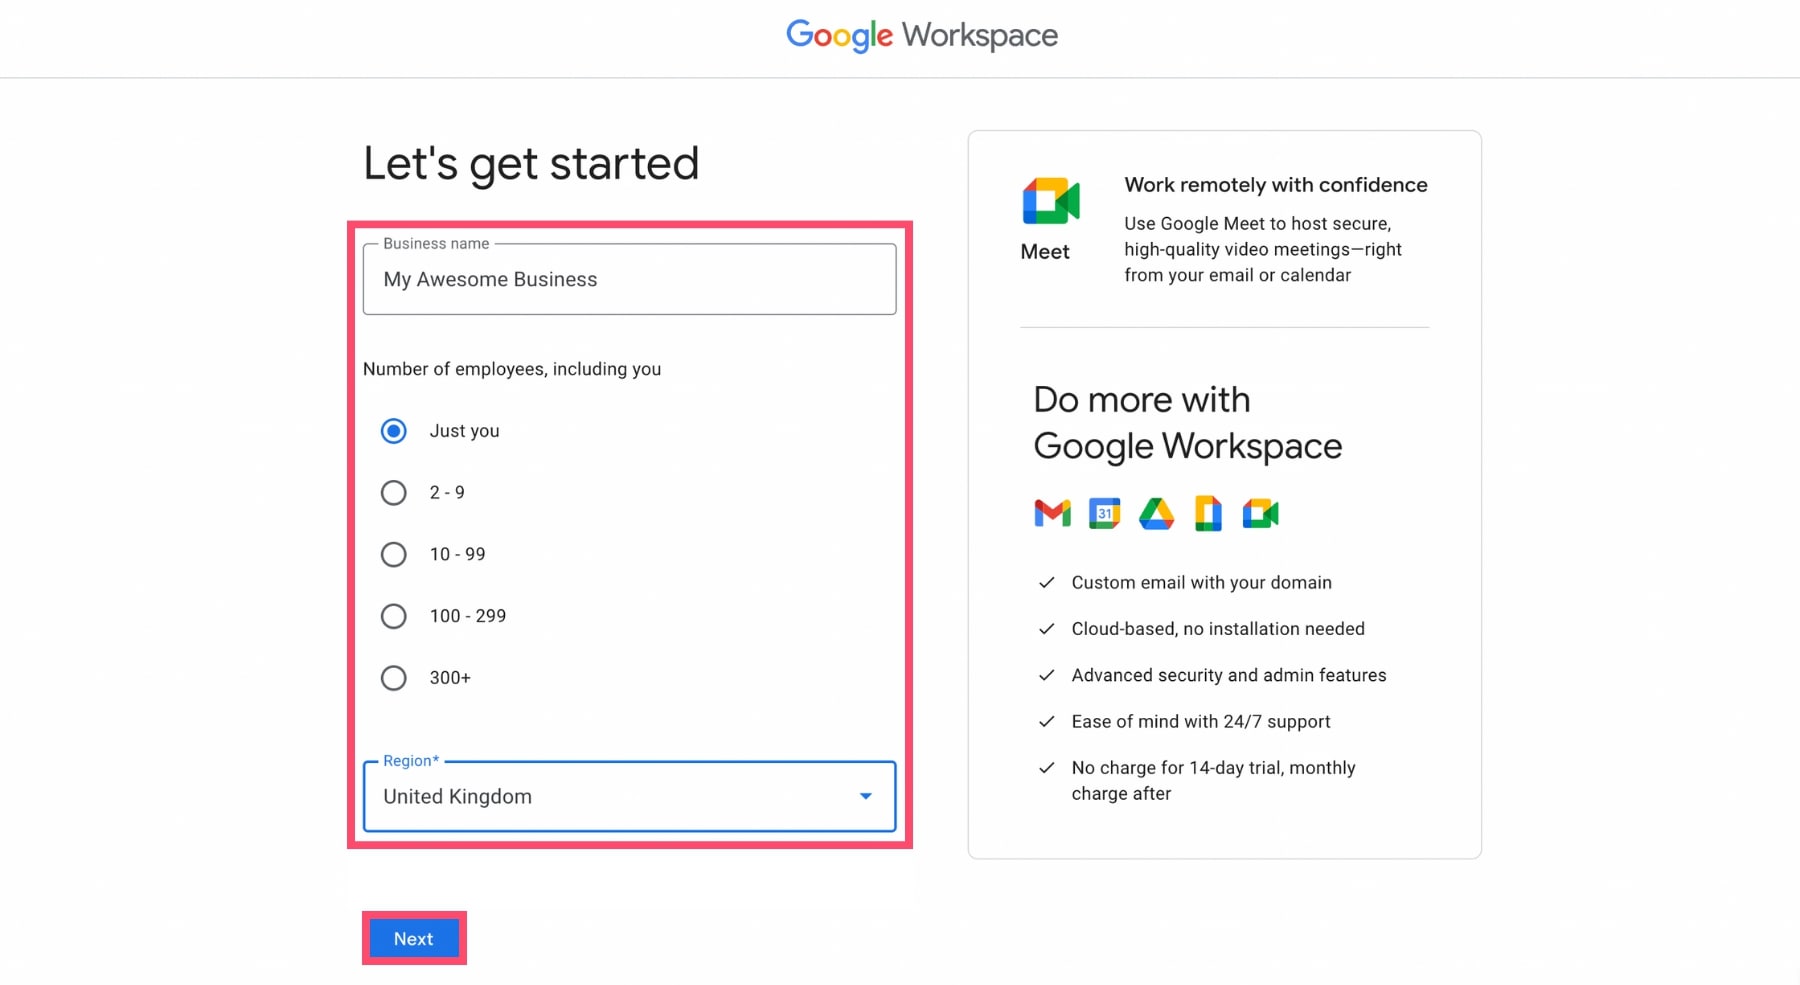
1. Access Google Sites: Sign in to your Google Workspace account and navigate to Google Sites. You can access it through the “Apps” menu or by searching for “Google Sites” in the Google Workspace dashboard.
2. Select a template: Google Sites offers various templates that you can use as a starting point for your website. Choose a template that aligns with the overall design and structure you envision for your site. You can select a blank template if you prefer to start from scratch.
3. Name your site: Give your site a descriptive and unique name. This name will be part of the URL, so choose wisely. Consider using keywords related to your website’s content to improve search engine optimization.
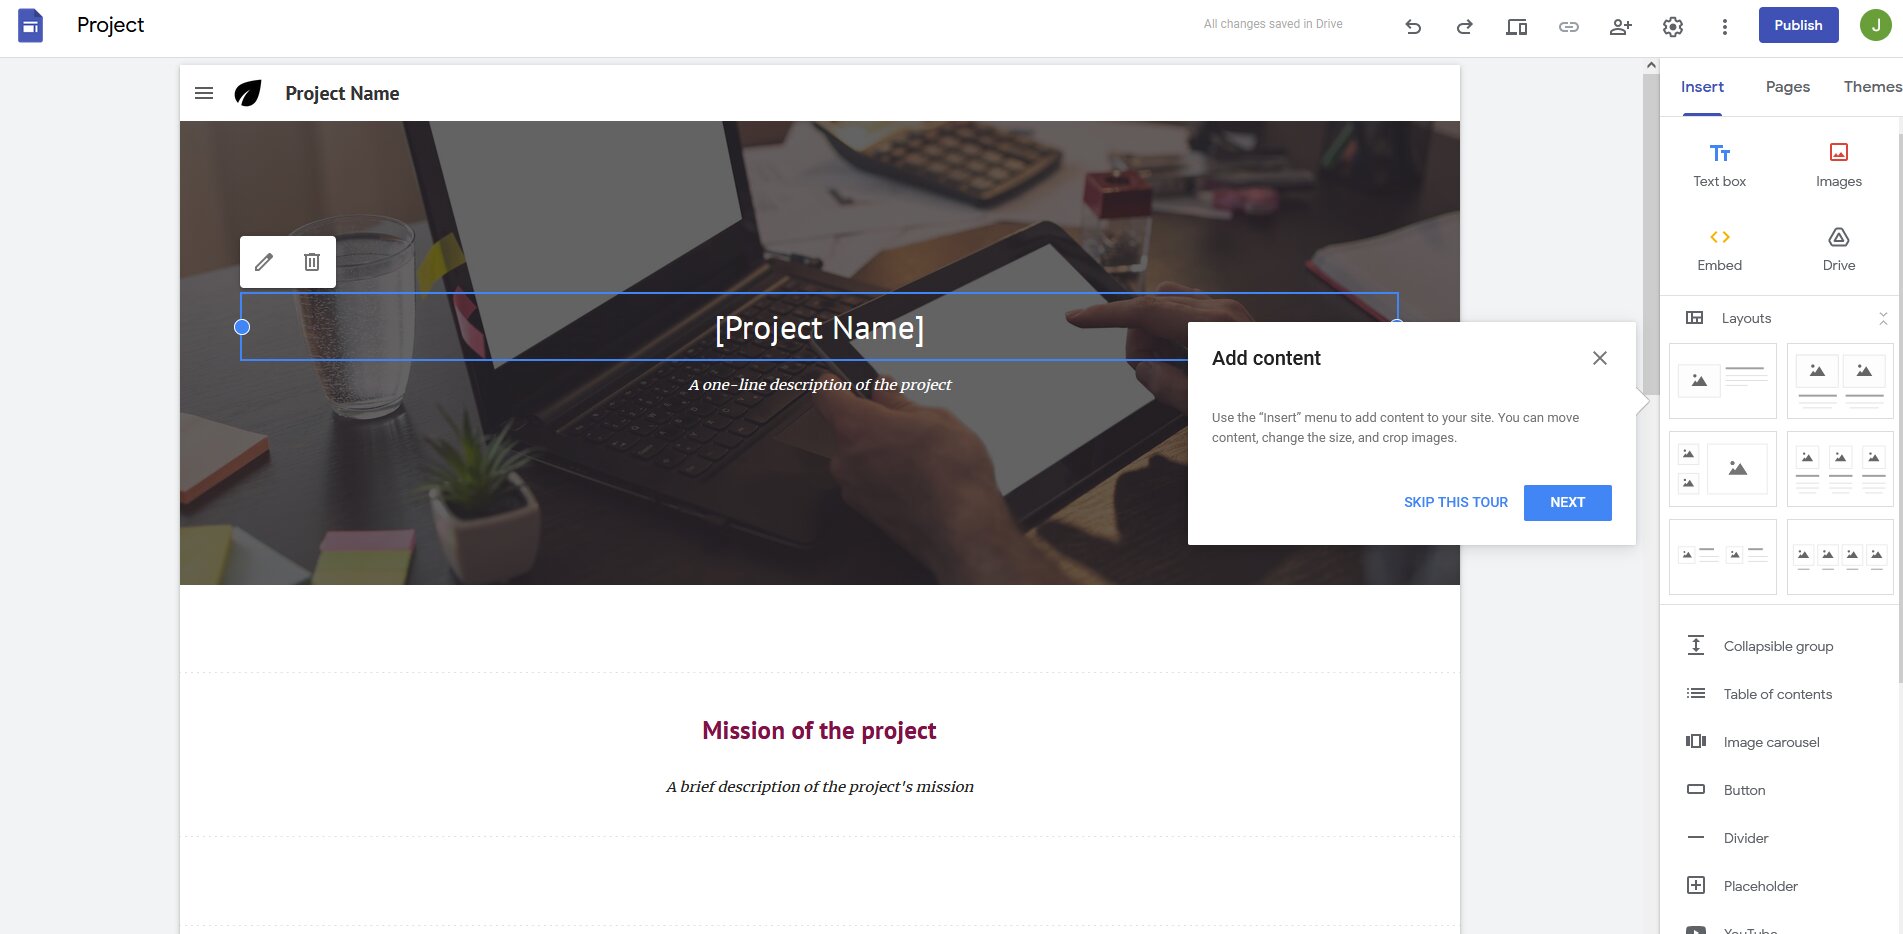
4. Customize the layout and design: Google Sites provides an intuitive interface that allows you to customize the layout and design of your website. You can add and arrange different sections, change fonts and colors, and upload images to personalize your site. Experiment with different options until you achieve the desired look and feel.
5. Create pages: Google Sites allows you to create multiple pages for your website. Click on “Create Page” or the ‘+’ icon to add new pages. Organize your content by creating pages for different sections like Home, About, Products, Services, and Contact. Make sure to plan the structure and hierarchy of your pages to ensure smooth navigation for your visitors.
6. Add content: Begin adding content to your pages. Use the text editor provided by Google Sites to insert text, images, videos, and other media elements. Write compelling and informative content that engages your audience and aligns with your website’s objectives. Break up the content into smaller sections with headings and subheadings for easier readability.
7. Organize your site navigation: Google Sites automatically creates a navigation menu based on your page structure. However, you can customize the navigation to showcase the most important pages prominently. Ensure that your navigation is intuitive and logical, enabling users to navigate through your website seamlessly.
8. Preview and revise: Before publishing your website, take the time to preview and revise your content and design. Check for any errors, broken links, or inconsistencies. Make sure your website is responsive and displays properly on different devices.
9. Collaborate and share: Google Sites allows you to collaborate with others on your website. Invite team members or stakeholders to contribute and review the site. Additionally, you can control the access levels for different individuals or groups to safeguard your website’s integrity.
By following these steps, you can create a functional and visually appealing website using Google Sites. Remember to regularly update and maintain your site to provide fresh content to your visitors. In the next step, we will explore how you can further customize your website’s appearance to make it truly unique.
Step 3: Customizing your Google Site
After creating the basic structure of your website, it’s time to customize the appearance of your Google Site and add personalized elements to make it truly unique. Follow these steps to customize your Google Site:
1. Choose a theme: Google Sites offers a range of pre-designed themes for you to choose from. Explore different themes to find one that best represents your brand or website’s aesthetic. You can change the theme at any time, so feel free to experiment until you find the perfect fit.
2. Customize the header and logo: Personalize your website by adding a custom header image and logo. These elements create a visual identity for your site and enhance brand recognition. Use high-quality images and ensure that the logo is in a clear and recognizable format.
3. Select font styles and colors: Google Sites allows you to choose from a variety of font styles and colors. Select fonts that are easy to read and align with your website’s overall design. Consider creating a color scheme that complements your branding and enhances the visual appeal of your site.
4. Add custom CSS: If you have advanced web design skills, you can add custom CSS to further customize the appearance of your Google Site. CSS (Cascading Style Sheets) allows you to modify elements such as fonts, colors, margins, and more. Use this feature to create a truly unique and tailored design for your website.
5. Incorporate multimedia elements: Make your website more engaging by incorporating multimedia elements. Embed videos, audio files, or image galleries into your pages to capture your visitors’ attention. Ensure that these elements are relevant to your content and enhance the overall user experience.
6. Optimize for mobile devices: With the majority of internet users accessing websites from mobile devices, it’s crucial to ensure that your Google Site is mobile-friendly. Test your site’s responsiveness by previewing it on different screen sizes. Make adjustments as necessary to ensure a seamless and enjoyable experience for mobile users.
7. Enable commenting and social sharing: Engage with your audience by enabling commenting and social sharing features on your Google Site. Allow visitors to leave comments or feedback on your content. Integrate social sharing buttons to make it easy for users to share your website’s content on their preferred social media platforms.
8. SEO optimization: Improve your website’s visibility in search engine results by optimizing it for SEO. Add relevant keywords in your headings, titles, and meta descriptions. Use descriptive URLs for your pages and include alt tags for your images. Regularly review your content to ensure it remains valuable, informative, and up to date.
By following these customization steps, you can transform your Google Site into a visually appealing and unique website that showcases your brand and captivates your audience. Remember to regularly review and update your website’s design to keep it fresh and appealing. In the next step, we will delve into adding content to your website to make it informative and engaging.
Step 4: Adding content to your website
Content is the heart and soul of your website. It’s what captures the attention of your visitors and keeps them engaged. Adding relevant and high-quality content to your Google Site is essential for conveying your message and achieving your website’s goals. Follow these steps to effectively add content to your website:
1. Identify your target audience: Before adding content to your website, it’s crucial to understand your target audience. Identify who you are creating the website for and tailor your content to meet their needs and interests. Consider their demographics, preferences, and pain points when creating your content strategy.
2. Create a content plan: Develop a plan for the type of content you want to include on your website. Decide on the topics you will cover, the format of your content (blogs, articles, videos, etc.), and the frequency of updates. A well-thought-out content plan will ensure consistency and provide valuable information to your audience.
3. Write engaging and informative content: Craft compelling and informative content that captures the attention of your visitors. Use a conversational tone and make your content easy to understand. Provide value to your audience by answering their questions, offering solutions, or sharing expert insights.
4. Optimize your content for SEO: Incorporate relevant keywords in your content to improve its search engine optimization. Use keywords naturally within headings, subheadings, and throughout the text. However, avoid keyword stuffing as it can have a negative impact on your website’s rankings.
5. Include multimedia elements: Enhance your content by incorporating multimedia elements such as images, infographics, videos, and slideshows. Visual elements not only make your content more engaging but also help in conveying complex information more effectively.
6. Organize your content with headings and subheadings: Break up your content using headings and subheadings to make it more scannable and digestible for your visitors. Clear headings help users navigate through your content and find the information they are looking for quickly.
7. Use internal linking: Incorporate internal linking within your content to guide your visitors to related pages or content on your website. Internal links also help search engines crawl and index your website more effectively, improving its overall visibility.
8. Proofread and edit: Before publishing your content, ensure it is free of grammatical errors, typos, and formatting issues. Edit carefully to maintain a professional tone and ensure clarity. Mistakes in your content can undermine your credibility and professionalism.
9. Regularly update your content: Keep your website fresh and relevant by regularly updating your content. Add new articles, blogs, or videos, and revisit existing content to ensure it remains accurate and up to date. This will not only provide value to your visitors but also improve your search engine rankings.
By following these steps, you can create compelling and informative content that engages your audience and achieves your website’s objectives. Remember to keep your content relevant, valuable, and regularly updated to provide the best possible user experience. In the next step, we will explore how to customize the appearance of your website to make it visually appealing.
Step 5: Customizing the website’s appearance
Customizing the appearance of your website is an important step in creating a visually appealing and engaging user experience. With Google Workspace, you have various options to customize the appearance of your website and make it stand out. Follow these steps to customize your website’s appearance:
1. Choose the right theme: Google Sites offers a range of themes that determine the overall look and feel of your website. Select a theme that aligns with your brand, industry, or the purpose of your website. Consider factors such as color schemes, font styles, and layouts when choosing a theme.
2. Customize the color scheme: Personalize your website by choosing a color scheme that reflects your brand personality. Experiment with different color combinations to create a visually appealing and cohesive look. Consider using colors that evoke the desired emotions or convey the right message to your target audience.
3. Upload custom images: Add visual interest to your website by uploading custom images that are relevant to your content or brand. Use high-quality images that are visually captivating and enhance your website’s overall appearance. Ensure that the images are appropriately sized and optimized for web use.
4. Use consistent branding elements: Maintain consistency throughout your website by incorporating your branding elements. Use your logo, brand colors, and chosen font styles consistently across different pages. Consistent branding creates a cohesive and professional look, helping to build brand recognition.
5. Arrange content with intuitive layouts: Organize your content using intuitive layouts that guide visitors through your website easily. Use grids, columns, or sections to provide structure and improve readability. Experiment with different layouts to find the one that best fits your content and engages your audience.
6. Add visual effects and animations: Spice up your website by adding visual effects and animations. However, use them sparingly and purposefully to avoid overwhelming or distracting your visitors. Subtle animations or parallax scrolling can add an element of interactivity and enhance the user experience.
7. Focus on responsive design: With a significant number of users accessing websites on mobile devices, it’s crucial to ensure your website is responsive. Test your website’s appearance and functionality on various screen sizes to ensure a seamless experience across devices. Make necessary adjustments to ensure your website adapts well to different screen resolutions.
8. Preview and revise: Regularly preview your website’s appearance and make necessary revisions. Review your website as if you were a visitor and ensure that it conveys the desired message and provides a positive user experience. Fix any formatting or visual issues to maintain a professional look.
Remember, customization plays a vital role in creating a visually appealing website that engages and retains visitors. Aim for a visually pleasing and consistent design that aligns with your branding and enhances the overall user experience. In the next step, we will explore how to add functionality and enhance your website with Google Workspace integrations.
Step 6: Adding functionality with Google Workspace integrations
Google Workspace offers a wide range of integrations and tools that can enhance the functionality of your website. By leveraging these integrations, you can add additional features and capabilities to provide a better user experience for your visitors. Follow these steps to add functionality to your website with Google Workspace integrations:
1. Google Forms: Embed Google Forms on your website to gather feedback, conduct surveys, or create contact forms. Google Forms is a versatile tool that allows you to collect valuable information from your visitors and engage with them.
2. Google Maps: Incorporate Google Maps into your website to provide interactive and dynamic location information. Whether you have a physical store or offer services in specific areas, Google Maps integration can help visitors find and navigate to your business easily.
3. Google Calendar: Display a Google Calendar on your website to showcase upcoming events, availability, or appointment booking. Keep your visitors informed about important dates, workshops, or any other time-sensitive information related to your business or organization.
4. Google Analytics: Integrate Google Analytics to track and analyze your website’s performance. Gain insights into visitor behavior, traffic sources, and popular content. Use this data to make informed decisions, optimize your website’s performance, and improve user engagement.
5. Google Drive: Share and embed files from Google Drive directly on your website. Whether it’s documents, presentations, or images, Google Drive integration allows you to easily showcase and share valuable resources with your visitors.
6. Google Translate: Make your website accessible to a wider audience by adding Google Translate. This integration enables users to translate your website’s content into their preferred language, breaking down language barriers and enhancing inclusivity.
7. Google Search Console: Connect your website to Google Search Console to monitor its performance in search engine rankings. Identify any issues that may be affecting your website’s visibility and take necessary steps to optimize its search engine optimization.
8. Google Ads: If you are looking to monetize your website or drive targeted traffic, consider integrating Google Ads. Google Ads allows you to create and display targeted advertisements on your website, generating revenue and promoting relevant products or services.
By integrating these Google Workspace tools into your website, you can enhance its functionality, improve user engagement, and provide a seamless experience for your visitors. Evaluate your specific needs and goals to determine which integrations will best serve your website and audience. In the next step, we will explore how to publish and promote your website effectively.
Step 7: Publishing and promoting your website
After putting in the effort to create a stunning website, it’s time to publish it and make it accessible to the world. In this step, we will explore how to publish and promote your website effectively to attract visitors and achieve your online goals. Follow these steps to publish and promote your website:
1. Choose a hosting option: Decide on a hosting option that suits your website’s needs. If you are using Google Sites, your website is already hosted on Google’s servers. However, if you have a custom-built website, you will need to choose a hosting provider and follow their instructions for publishing your site.
2. Configure search engine settings: Ensure that search engines can discover and index your website by configuring the necessary settings. If you are using Google Sites, your website is automatically optimized for search engines. However, if you have a custom site, you may need to customize the robots.txt file and submit a sitemap to search engines.
3. Create social media profiles: Establish a presence on popular social media platforms such as Facebook, Instagram, Twitter, and LinkedIn. Create profiles for your website or business and start sharing updates, engaging with your audience, and promoting your website’s content.
4. Share on social media: Utilize your social media profiles to promote your website’s content. Share links to your website, publish engaging posts, and encourage your followers to visit and explore your site. Take advantage of social media marketing strategies to increase your website’s visibility and attract relevant traffic.
5. Optimize for search engines (SEO): Implement SEO techniques to improve your website’s visibility in search engine rankings. Perform keyword research, optimize your page titles and descriptions, optimize your images, and build relevant backlinks. Regularly monitor your website’s performance in search engine results and make necessary adjustments to improve your SEO efforts.
6. Engage with your audience: Encourage feedback, comments, and interaction on your website and social media platforms. Respond to comments and engage with your audience to build a community around your website. Encourage visitors to share your content and recommend your website to others.
7. Consider paid advertising: If you want to generate immediate traffic and increase your website’s visibility, consider investing in paid advertising. Platforms such as Google Ads and social media advertising can help you target specific demographics and drive relevant traffic to your website.
8. Monitor and analyze: Regularly monitor your website’s performance using tools like Google Analytics. Analyze key metrics such as traffic sources, user behavior, and conversions. Use this data to make informed decisions, identify areas of improvement, and refine your promotional strategies.
By following these steps and consistently promoting your website, you can increase its visibility, attract visitors, and achieve your online goals. Don’t forget to regularly update your website with fresh content, engage with your audience, and adapt your promotional strategies based on the results. Good luck with your website publishing and promotion efforts!
Conclusion
Congratulations on completing the journey of creating a website with Google Workspace! You have learned how to register a domain, create a Google Site, customize its appearance, add compelling content, integrate useful tools, and promote your website effectively. Your newfound knowledge and skills will empower you to establish a strong online presence and connect with your target audience in a meaningful way.
Google Workspace provides a user-friendly platform that simplifies the website creation process, making it accessible to both individuals and businesses. With its seamless integration of productivity tools and extensive customization options, you can build a professional website without requiring advanced technical knowledge.
Remember to regularly review and update your website. Keep it fresh, informative, and visually appealing to engage visitors and provide a positive user experience. Monitor your website’s performance using analytics tools, make data-driven decisions, and adjust your strategies accordingly.
Creating and maintaining a successful website is an ongoing process that requires dedication, creativity, and adaptability. Stay informed about the latest trends and technologies in web design and digital marketing to stay ahead of the competition.
Now it’s time to unleash your website to the world. Share it on social media, optimize it for search engines, and engage with your audience. Continuously seek feedback and make improvements based on user input.
Lastly, enjoy the experience of website creation and take pride in your accomplishments. Your website is a reflection of your brand, ideas, and passions. Embrace the journey ahead, and may your website succeed in reaching your goals and making a positive impact online!