Introduction
Creating a restore point in Windows 10 is a smart move that can help avoid potential headaches and frustrations if something goes wrong with your computer. It’s a safety net that allows you to revert your system back to a previous state if any issues arise, such as software conflicts, unstable updates, or system errors.
When you create a restore point, you’re essentially taking a snapshot of your computer’s current state. This includes important system files, drivers, and registry settings. If you encounter a problem in the future, you can use this restore point to roll back your computer to a time when everything was working smoothly.
Whether you’re about to install new software, make changes to your settings, or simply want peace of mind, taking a moment to create a restore point is a worthwhile precaution. In this guide, we’ll walk you through the step-by-step process of creating a restore point in Windows 10.
Before we dive in, keep in mind that creating a restore point requires administrative privileges. So, make sure you’re logged in with an administrator account or have the necessary credentials to proceed.
Now, let’s get started and learn how to create a restore point in Windows 10.
Understanding Restore Points
Before we delve into the process of creating a restore point in Windows 10, let’s take a moment to understand what exactly a restore point is and how it can benefit you.
A restore point is a saved state of your computer’s system files, drivers, and registry settings. It serves as a reference point that you can use to restore your computer to a previous working condition. This can be incredibly useful if you encounter issues with your system, such as software conflicts, driver problems, or even malware infections.
When you create a restore point, Windows captures a snapshot of your system’s current configuration. This includes details about installed software, system settings, and important files. If you encounter a problem in the future, you can use this restore point to roll back your system to a time when everything was functioning properly.
One of the primary advantages of using restore points is that they are non-destructive. This means that your personal files, documents, and data remain untouched during the restoration process. Only system files and settings are affected, ensuring that you don’t lose any of your important data.
It’s important to note that creating a restore point manually is particularly useful before making system changes or installing new software. If a new installation or update causes problems or conflicts with your system, you can easily revert back to the restore point and undo any unwanted changes.
However, it’s important to keep in mind that restore points should not be seen as a substitute for regular data backups. While they can help restore your system to a previous state, they do not protect your personal files from accidental deletion or hardware failure. Therefore, it’s always advisable to have a robust backup solution in place.
Now that we have a clear understanding of what restore points are and their benefits, let’s move on to the step-by-step process of creating a restore point in Windows 10.
Step 1: Open the System Properties Window
To create a restore point in Windows 10, we need to access the System Properties window. This can be done in a few simple steps:
- Press the Windows key on your keyboard or click on the Start menu button located in the bottom-left corner of your screen.
- In the Start menu, click on the Settings icon, which is represented by a gear-shaped icon.
- Within the Settings window, locate and click on the System option.
- In the System settings, click on the About tab in the left sidebar.
- Scroll down until you see the System info section. Within this section, look for the System Protection link and click on it.
- This will open the System Properties window with the System Protection tab already selected, which is where we’ll proceed with the next steps.
Alternatively, you can also directly open the System Properties window by right-clicking on the Start menu button and selecting System. In the System window, click on the System Protection link in the left sidebar.
Once you have successfully opened the System Properties window, you are ready to move on to the next step in creating a restore point in Windows 10.
Step 2: Access the System Protection Tab
After opening the System Properties window, the next step in creating a restore point in Windows 10 is to access the System Protection tab. Here’s what you need to do:
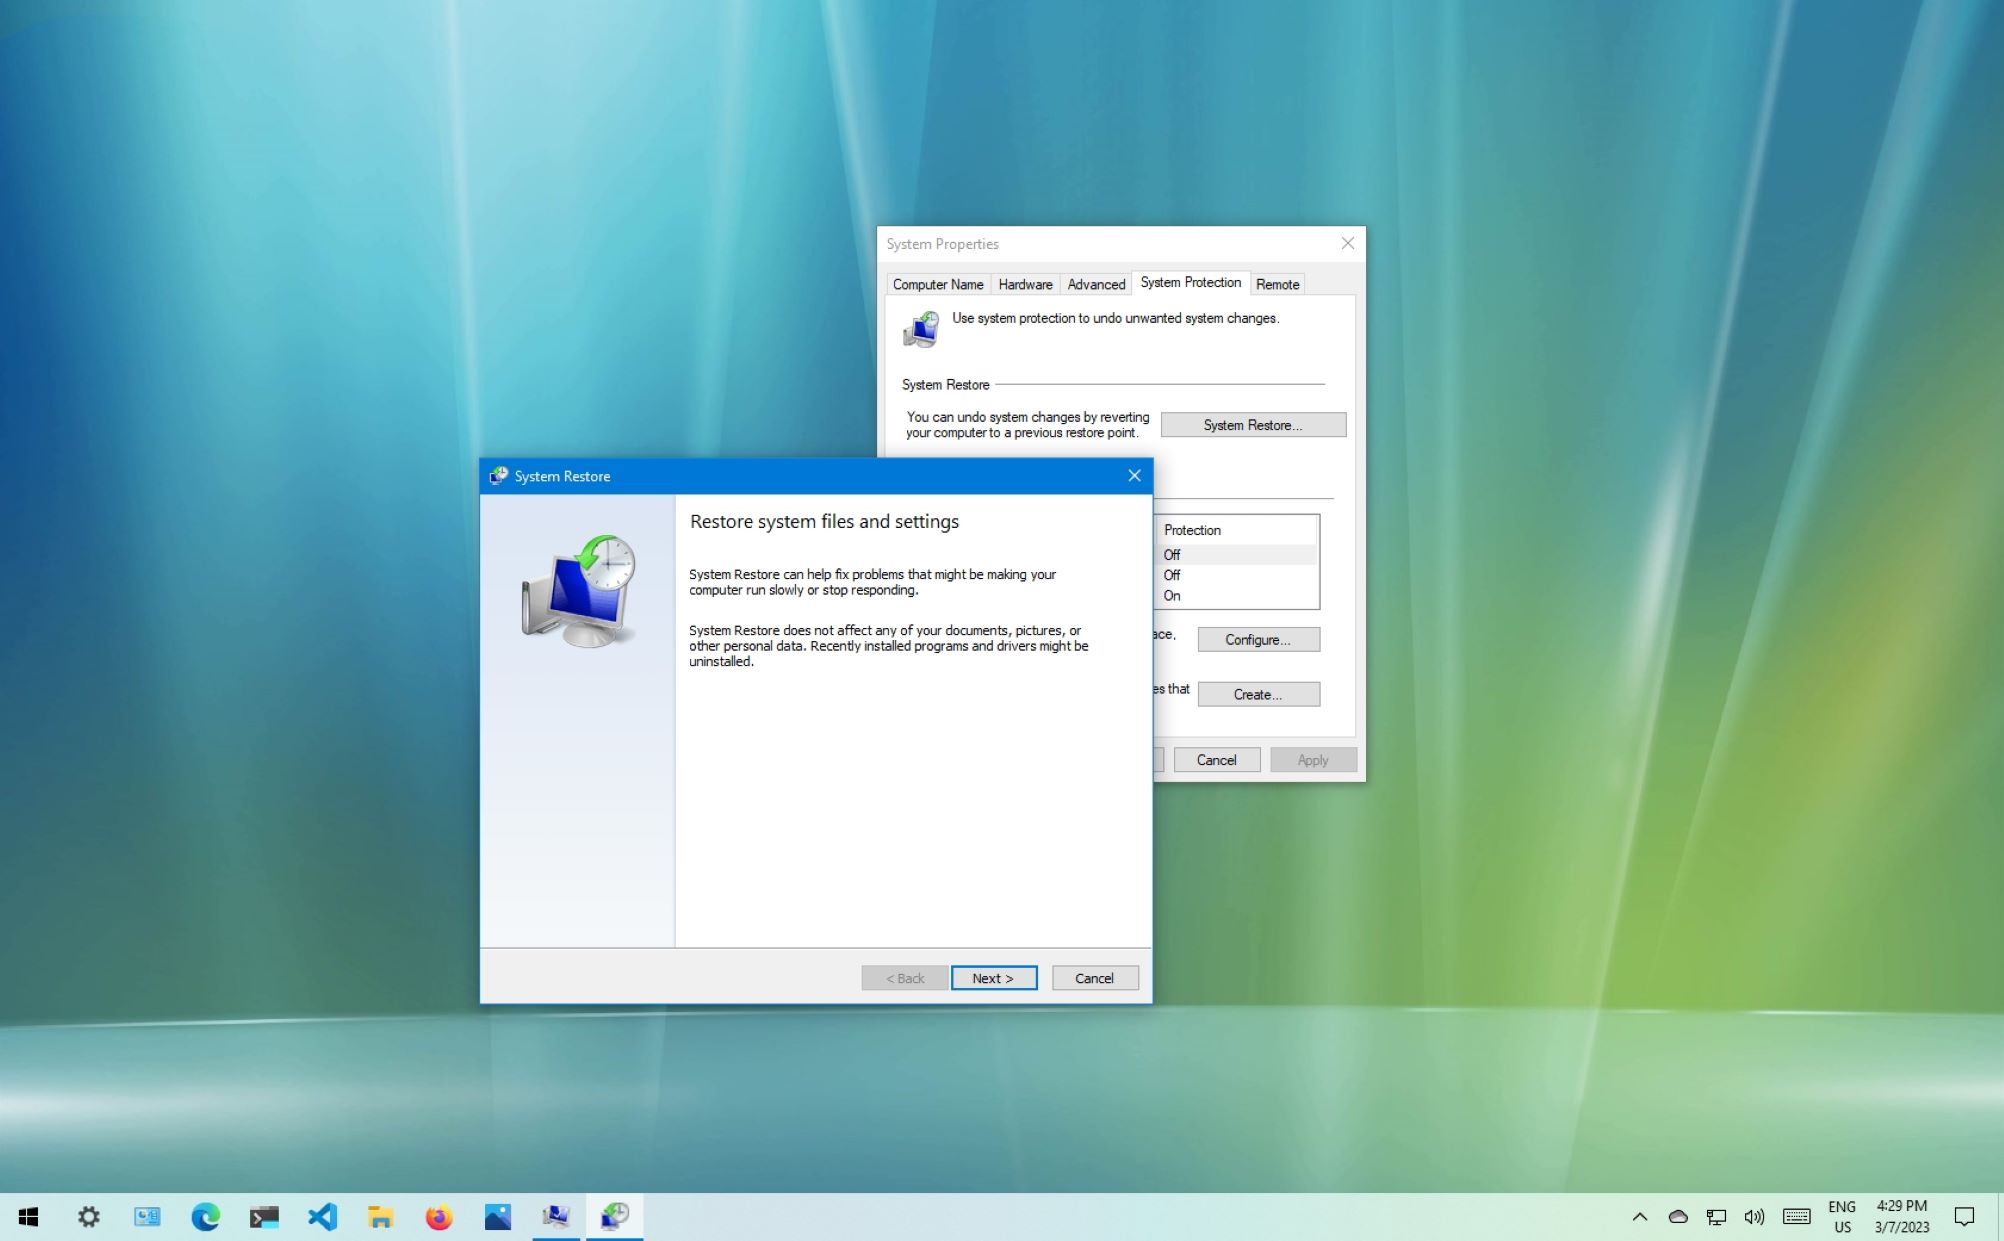
- In the System Properties window, make sure that the System Protection tab is selected. If not, click on it to access the necessary settings.
- Within the System Protection tab, you’ll see a list of available drives on your computer. These drives represent the different partitions or storage devices connected to your system. Select the drive for which you want to create a restore point by clicking on it. By default, the drive containing the Windows operating system is selected.
- After selecting the drive, click on the Create button located at the bottom of the window. This will initiate the process of creating a restore point for the selected drive.
Additionally, you’ll also notice a few other options within the System Protection tab. The “Configure” button allows you to manage the amount of disk space allocated for restore points. By default, Windows automatically allocates a certain portion of your disk space for this purpose. If you wish to adjust the allocation, you can click on the Configure button and make the necessary changes.
Furthermore, the “Delete” button allows you to remove existing restore points for the selected drive. This can be useful if you want to free up disk space or if there are older restore points that you no longer need.
Once you have accessed the System Protection tab and selected the appropriate drive, you are ready to proceed to the next step, where we will actually create the restore point.
Step 3: Create a Restore Point
Now that you have accessed the System Protection tab and selected the drive for which you want to create a restore point, it’s time to create the actual restore point. Follow these steps:
- In the System Protection tab, click on the Create button located at the bottom of the window.
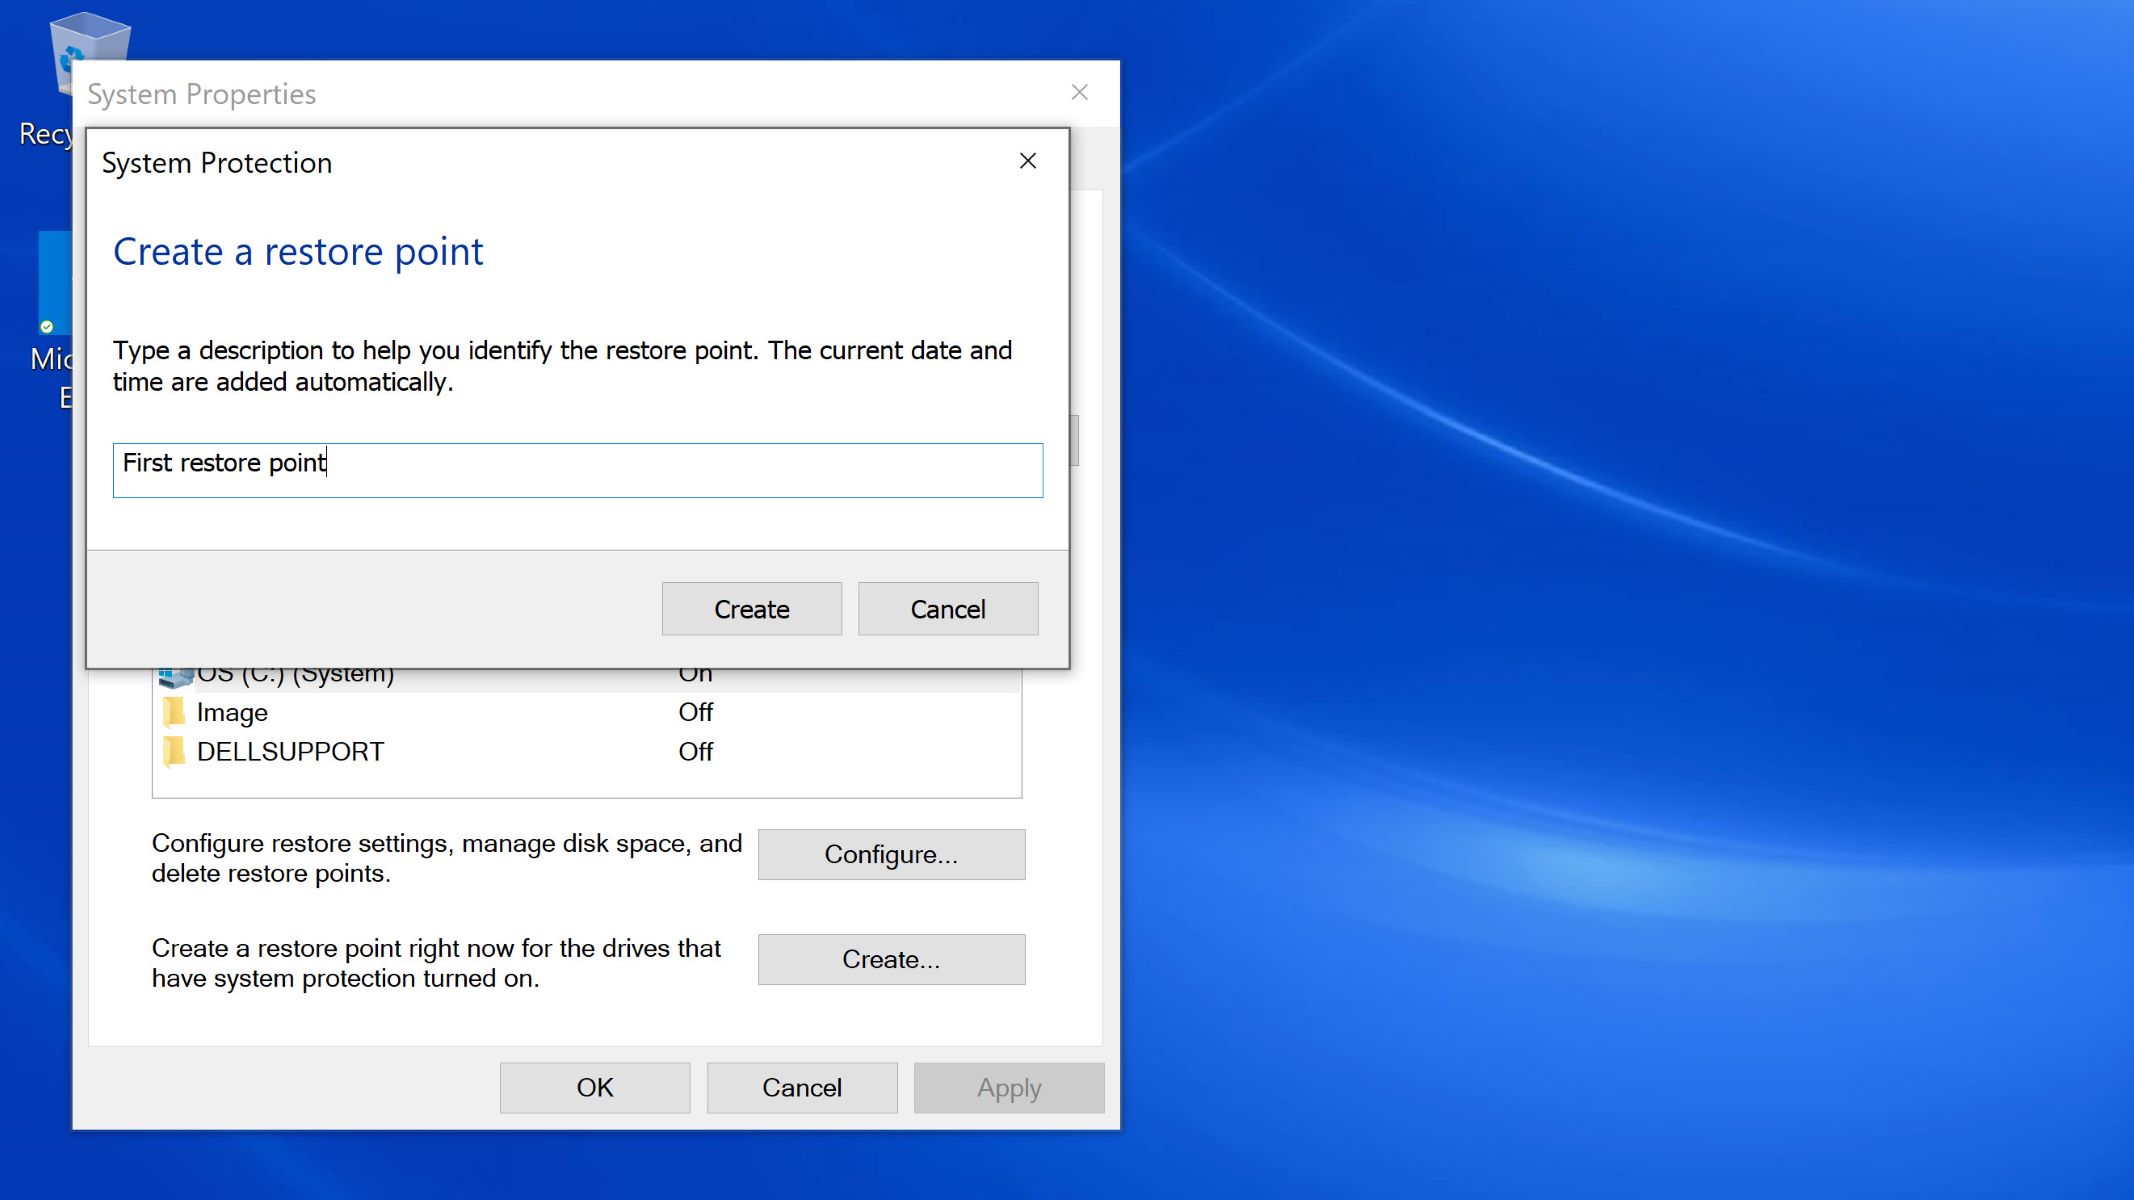
- The system will now prompt you to enter a description for the restore point. This description is optional but can be helpful for future reference, especially if you plan to create multiple restore points. Enter a brief and descriptive name to help you identify the restore point later on.
- Click on the Create button once you’ve entered the description.
- Windows will now begin creating the restore point. The time it takes to complete this process may vary depending on the size of the drive and the speed of your system. You’ll see a progress bar indicating the status of the creation process.
- Once the restore point has been successfully created, you’ll receive a notification confirming its completion.
It’s important to note that it’s recommended to create a restore point before making any major system changes, like installing new software or making significant modifications to settings. This way, if anything goes wrong or if you’re not satisfied with the changes, you can easily revert back to the restore point and restore your system to its previous state.
With the restore point created, you’re one step closer to safeguarding your system and ensuring that you can easily recover from any unforeseen issues. In the next step, we’ll explore the optional process of naming the restore point to make it easier to identify in the future.
Step 4: Naming the Restore Point (Optional)
While not required, naming the restore point can be a helpful practice, especially if you plan to create multiple restore points over time. Naming the restore point allows you to easily identify it later on when selecting a specific point to restore your system. Here’s how you can name the restore point:
- After clicking the Create button in the previous step, you will be prompted to enter a description for the restore point.
- In the description field, enter a brief and descriptive name that reflects the purpose or context of the restore point.
- Consider using a name that is specific and easily recognizable. For example, if you are creating a restore point before installing new software, you can use a name like “Pre-Software Installation” or “Software XYZ Installation”.
- Ensure that the name you choose accurately represents the restore point to make it easier for future reference.
- Once you’ve entered the desired name, click on the Create button to proceed with the creation of the restore point.
- The system will now generate the restore point with the specified name, making it easier for you to identify and select it in the future.
Remember that naming the restore point is completely optional. If you choose not to name it, the restore point will still be created with a default timestamp. However, taking the time to give it a descriptive name can save you effort and confusion down the line, especially if you have multiple restore points to choose from.
Now that you’ve learned about the optional step of naming the restore point, let’s move on to the next step, where we’ll confirm and create the restore point.
Step 5: Confirm and Create the Restore Point
Once you’ve entered a name for the restore point (if desired), it’s time to confirm and create the restore point. Follow these steps to proceed:
- Ensure that the name of the restore point, if you’ve chosen to give it one, accurately reflects the purpose or context of the restore point.
- Double-check that you have selected the correct drive for which you want to create the restore point. By default, the drive containing the Windows operating system is selected.
- Review all the information on the System Protection tab, making sure that the drive and the restore point name are as you intend them to be.
- If you’re satisfied with the selected drive and the name of the restore point, click on the Create button to initiate the creation process.
- Windows will now begin creating the restore point, capturing a snapshot of your system’s current configuration. You will see a progress bar indicating the status of the creation process.
- Once the restore point has been successfully created, you will receive a notification confirming its completion. Click on the OK button to close the confirmation window.
Creating the restore point may take some time, depending on the size of the drive and the speed of your system. It’s important to refrain from interrupting the process to ensure that the restore point is created successfully.
Now that you’ve confirmed and created the restore point, you have a safety net in place that allows you to revert your system back to this specific point in case of any issues or undesired changes. In the next step, we’ll explore how to use a restore point to restore your PC.
Step 6: Restoring Your PC to a Restore Point
Now that you have successfully created a restore point, you may eventually need to use it to restore your PC to a previous state. If you encounter any issues with your system or want to undo recent changes, follow these steps to restore your PC:
- Open the System Properties window again by following the steps outlined in Step 1.
- In the System Properties window, make sure that the System Protection tab is selected.
- Under the Protection Settings section, you will see a list of available drives. Select the drive for which you created the restore point by clicking on it.
- Click on the Restore button located at the bottom of the window.
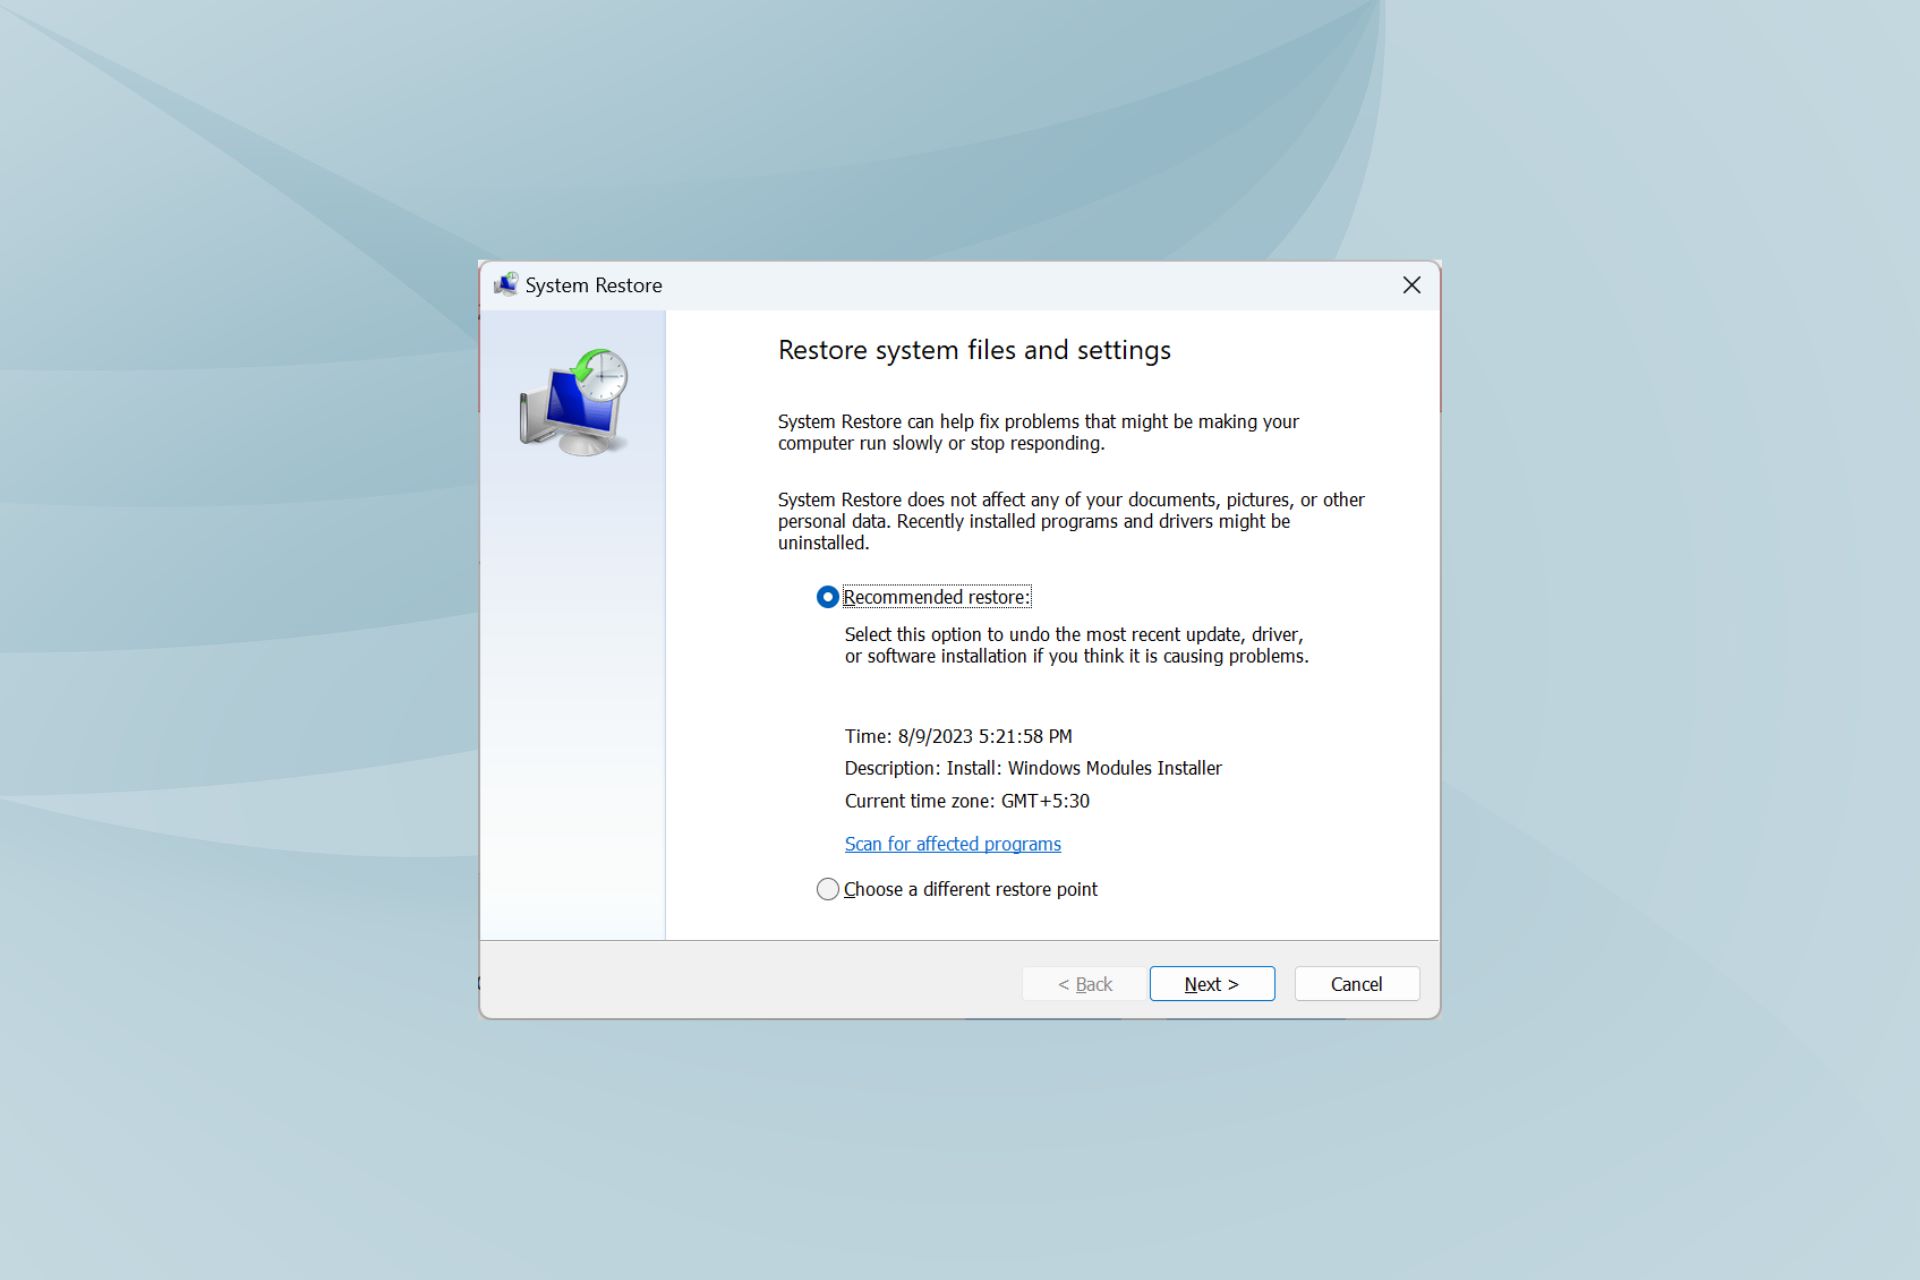
- A new window will open, displaying a list of available restore points. Each restore point will be accompanied by a date and time stamp. Choose the restore point that you want to use by selecting it.
- Click on the Next button to continue with the restoration process.
- Review the information displayed on the next screen, which provides details about the selected restore point and its associated consequences. Make sure to read this information carefully.
- If you’re certain about restoring your PC to the selected restore point, click on the Finish button to initiate the restoration process.
- Windows will start the restoration process, which may take some time. Your PC will restart during this process, so make sure to save any unsaved work before proceeding.
- Once the restoration is complete, your PC will boot up to the selected restore point, effectively reverting back to the system state at that time.
It’s important to note that restoring your PC to a restore point will undo any changes made to the system settings, installed programs, and system files after the selected restore point’s creation date. However, it does not affect your personal files or documents, so you don’t have to worry about losing any important data.
Now you know how to create a restore point and use it to restore your PC to a previous state. Having this knowledge empowers you to confidently make changes to your system, knowing that you have a safety net in place that can be easily used if anything goes wrong.