Introduction
Accidentally deleting important files on your Windows 10 computer can be a frustrating experience. Whether it’s a crucial document, cherished photos, or important work-related files, losing them can feel like a disaster. However, there’s no need to panic! Windows 10 provides several built-in options and tools that can help you recover deleted files.
When you delete a file on your computer, it is typically moved to the Recycle Bin. This acts as a safety net, allowing you to easily restore deleted items. But what if you’ve emptied the Recycle Bin? Don’t worry, Windows 10 still offers methods to recover your deleted files.
In this article, we will guide you through the process of recovering deleted files on Windows 10. We will explore various techniques, from checking the Recycle Bin to using advanced tools like data recovery software and backups. Whether you accidentally deleted a single file or an entire folder, we’ve got you covered with step-by-step instructions to help you retrieve your lost data.
Before we dive into the recovery process, it’s important to note that the success of file recovery depends on various factors such as the length of time since the file was deleted, the storage capacity of your computer, and whether any new data has overwritten the deleted file. It’s crucial to act quickly and avoid writing new data to the same storage device to maximize the chances of successful recovery.
Now, let’s take a closer look at the different methods you can use to recover deleted files on Windows 10.
Step 1: Check the Recycle Bin
The first and simplest step to recover deleted files on Windows 10 is to check the Recycle Bin. When you delete a file, it is initially moved to the Recycle Bin instead of being permanently erased from your computer. This provides you with an opportunity to restore deleted files easily.
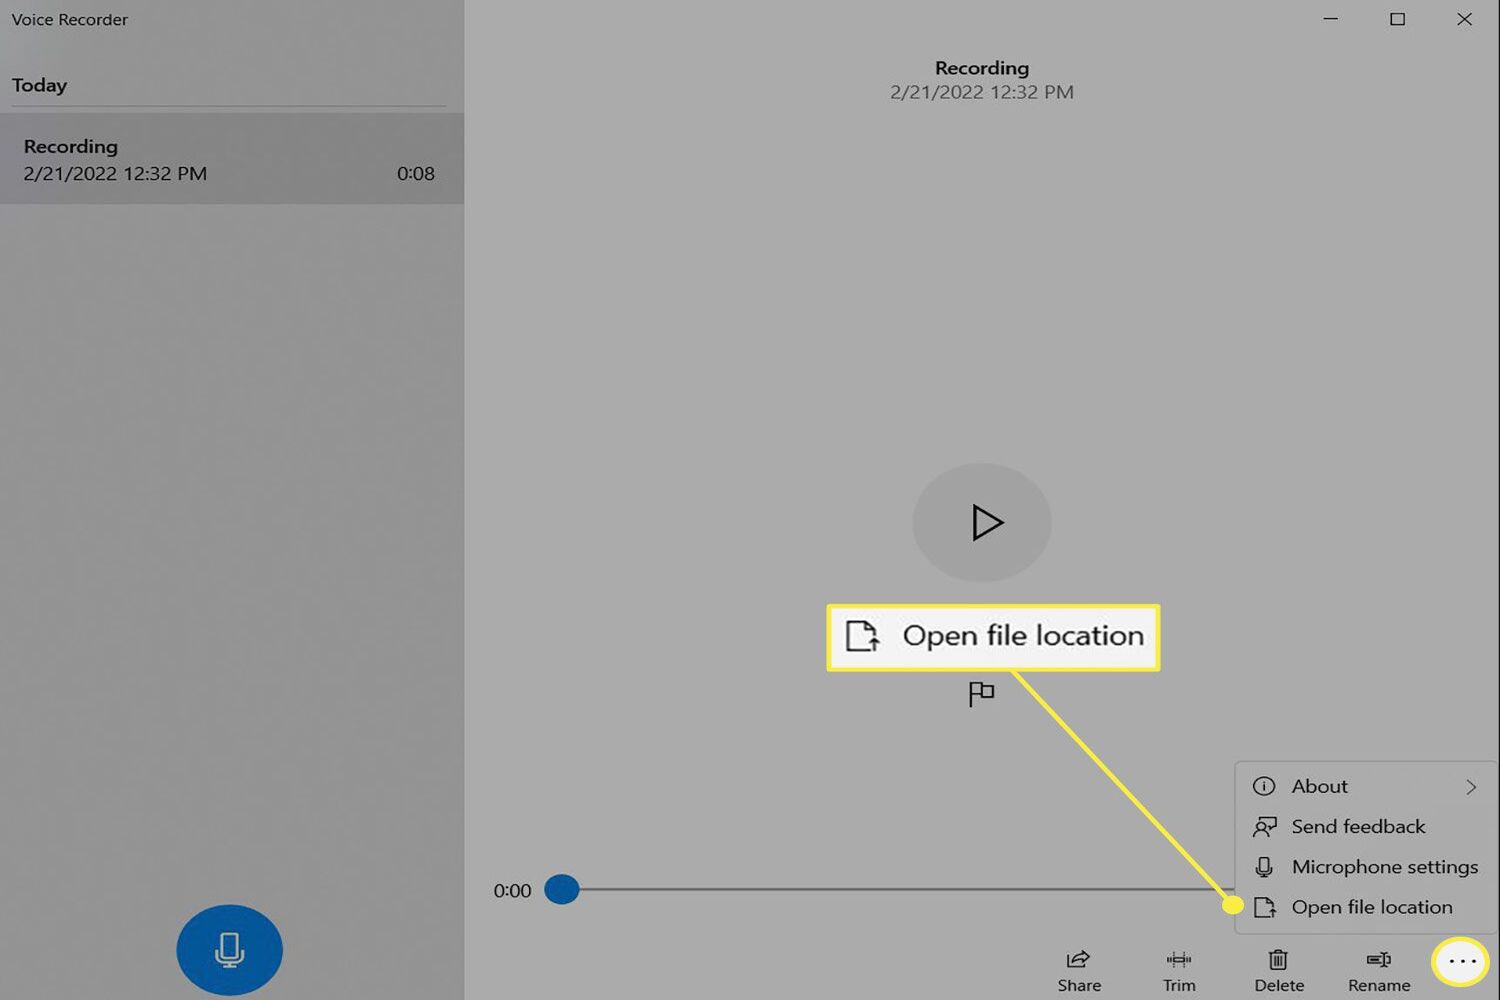
To access the Recycle Bin, simply double-click on its icon on your desktop or open the File Explorer and locate it in the left-hand navigation pane. Once you open the Recycle Bin, you will see a list of deleted files and folders.
If you spot the file you want to recover, right-click on it and select “Restore.” The file will be moved back to its original location on your computer. Alternatively, you can select multiple files and folders and click on the “Restore the selected items” button at the top of the window.
However, it’s important to note that the Recycle Bin has a storage limit. Once it reaches its maximum capacity, older files will be automatically deleted to make room for new deletions. If the file you are looking for is not in the Recycle Bin, it might have been permanently deleted or bypassed the Recycle Bin due to its size or deletion method.
If you can’t find your deleted file in the Recycle Bin, don’t panic just yet. There are still several other methods we can explore to help recover your lost data.
Step 2: Use File History
If you have enabled the File History feature on your Windows 10 computer, you have an additional option to recover deleted files. File History automatically creates regular backups of your files and allows you to restore previous versions of your deleted or modified files.
To use File History, follow these steps:
- Open the File Explorer and navigate to the folder where the deleted file was originally located.
- In the top menu, click on the “Home” tab and then select the “History” option.
- A new window will open, displaying the file history for that specific folder. Look for the deleted file you want to recover.
- Once you have located the file, you can preview it by right-clicking on it and selecting “Preview.” This will allow you to confirm that it is indeed the correct version of the file.
- To restore the deleted file, select it and click on the “Restore” button located at the bottom of the window. The file will be returned to its original location.
It’s important to note that File History requires an external storage device, such as an external hard drive or a network location, to store the backups. If you haven’t set up File History or haven’t backed up your files recently, this option may not be available to you.
Remember to regularly backup your files using File History to ensure you have a recent copy of important data. This can greatly simplify the file recovery process in the event of accidental deletion or loss.
If File History doesn’t enable you to recover the deleted file, don’t worry. There are still more methods to explore in order to recover your lost data.
Step 3: Utilize Previous Versions
If you didn’t have File History enabled or the deleted file isn’t available in your File History backups, you can still try to recover it using the “Previous Versions” feature in Windows 10. This feature takes advantage of the system’s automatic backups and allows you to restore previous versions of files and folders.
Here’s how you can utilize the Previous Versions feature:
- Open the File Explorer and navigate to the folder where the deleted file was originally located.
- Right-click on the folder and select “Properties” from the context menu.
- In the Properties window, go to the “Previous Versions” tab.
- A list of previous versions of the folder will be displayed, along with their corresponding timestamps. Select the version that contains the deleted file you want to recover.
- Click on the “Restore” button to restore the selected previous version of the folder and retrieve the deleted file.
It’s worth noting that the availability of previous versions depends on whether Windows 10 has created automatic backups of the file or folder in question. If the particular version you need is not listed, it means that a backup for that specific time or date is unavailable.
Previous Versions can be especially useful for recovering individual files or folders that have been accidentally modified or deleted. However, it’s important to keep in mind that this feature is not enabled by default on all system drives and may require proper configuration for optimal usage.
If Previous Versions doesn’t provide the desired results, don’t worry. There are still effective recovery methods to explore in the next steps.
Step 4: Try System Restore
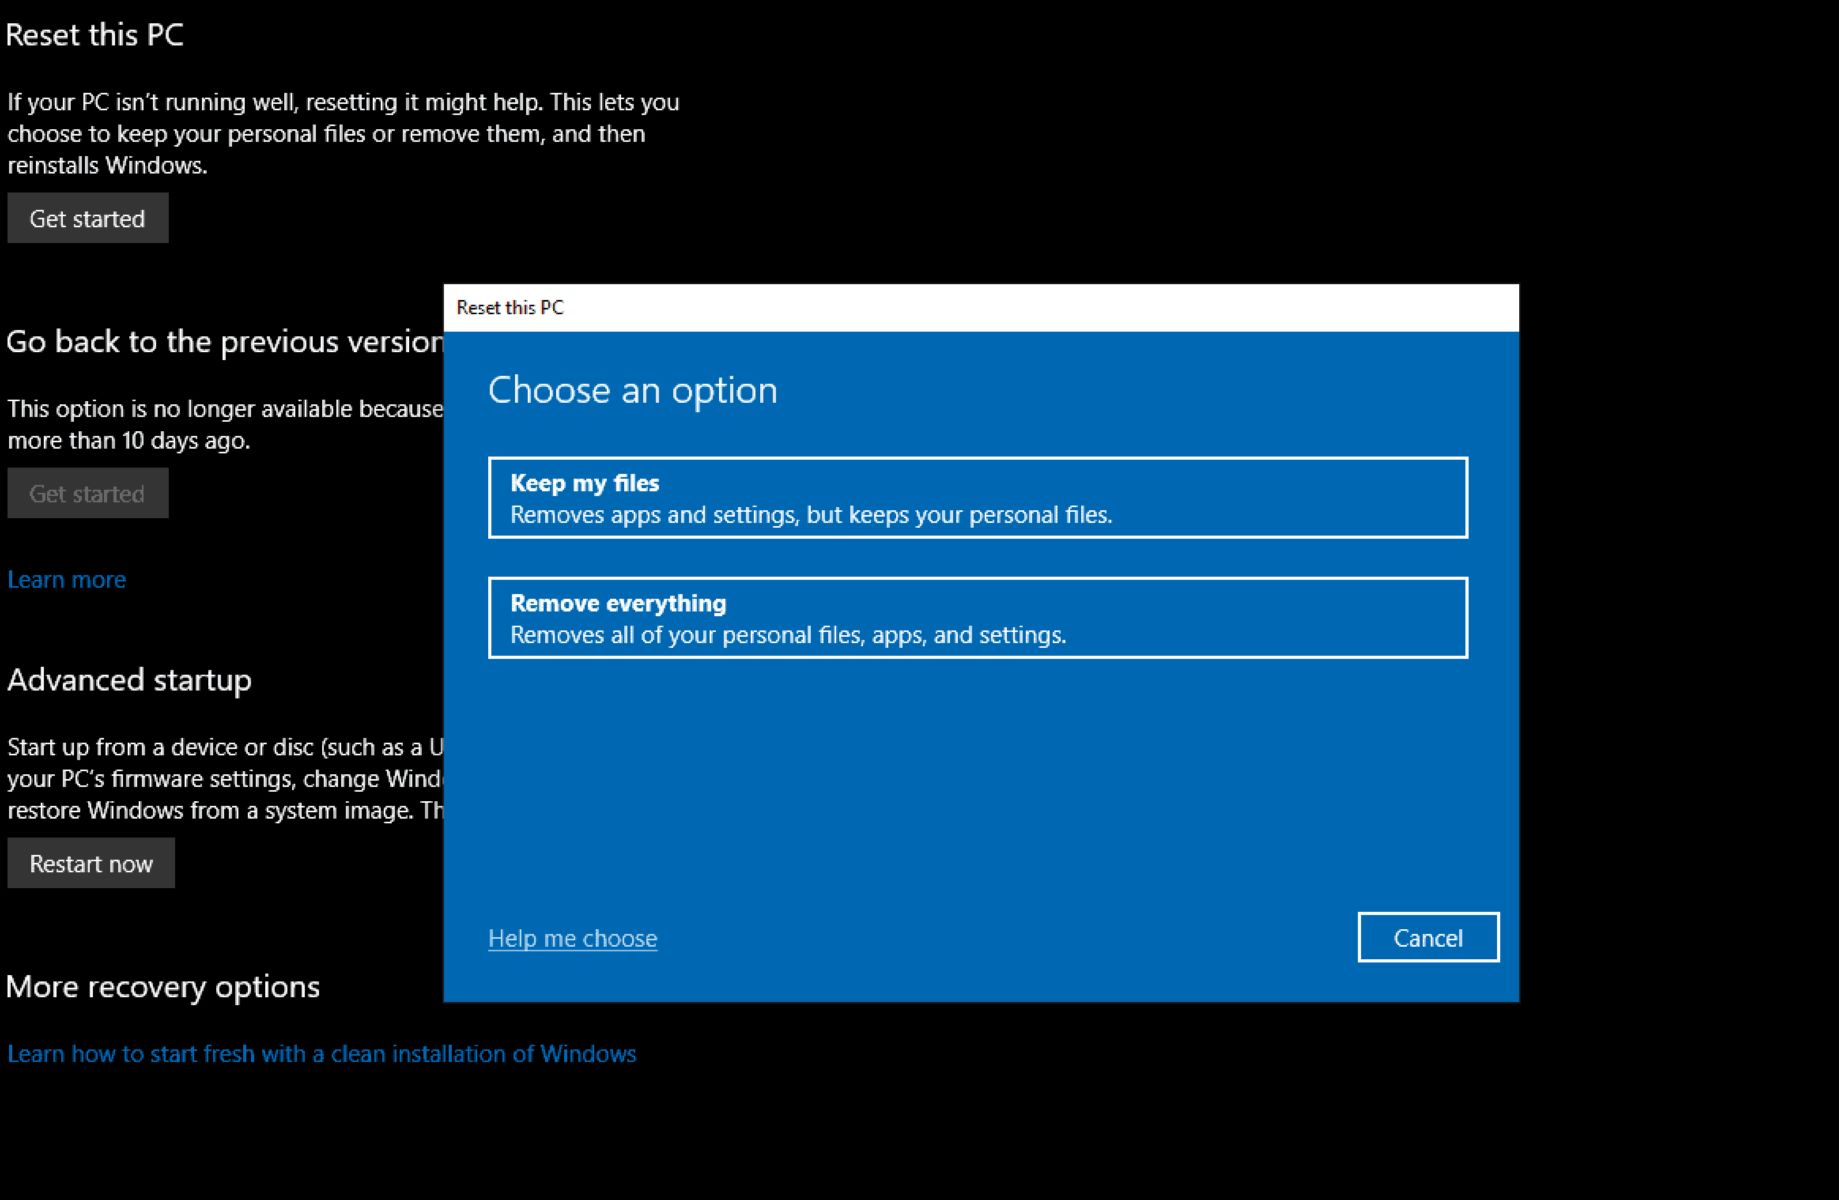
If the previous methods didn’t help you recover the deleted file, you can attempt to restore your system to a previous state using the System Restore feature in Windows 10. System Restore allows you to roll back your computer’s settings to a previous point in time, potentially recovering deleted files along the way.
Follow these steps to try System Restore:
- Press the Windows key and search for “System Restore” in the Start menu. Select the “Create a restore point” option from the search results.
- In the System Properties window that opens, click on the “System Restore” button.
- A new window will appear, displaying the available restore points. Select a restore point that predates the deletion of your file.
- Click on the “Next” button and follow the on-screen instructions to initiate the System Restore process.
- Once the restoration is complete, your computer will restart, and the system will be reverted to the selected restore point.
It’s important to note that performing a System Restore will undo any changes made to your system settings, installed programs, and system files since the selected restore point. Therefore, it’s recommended to create a backup of your important files and documents before proceeding with this method.
While System Restore can be a powerful tool for recovering deleted files, it’s not foolproof. It relies on the availability of a restore point that contains the deleted file. If no suitable restore point is available, it may not be possible to recover the file using this method.
If System Restore doesn’t yield the desired results, don’t worry. We still have more methods to explore to help you recover your lost files.
Step 5: Use a Data Recovery Software
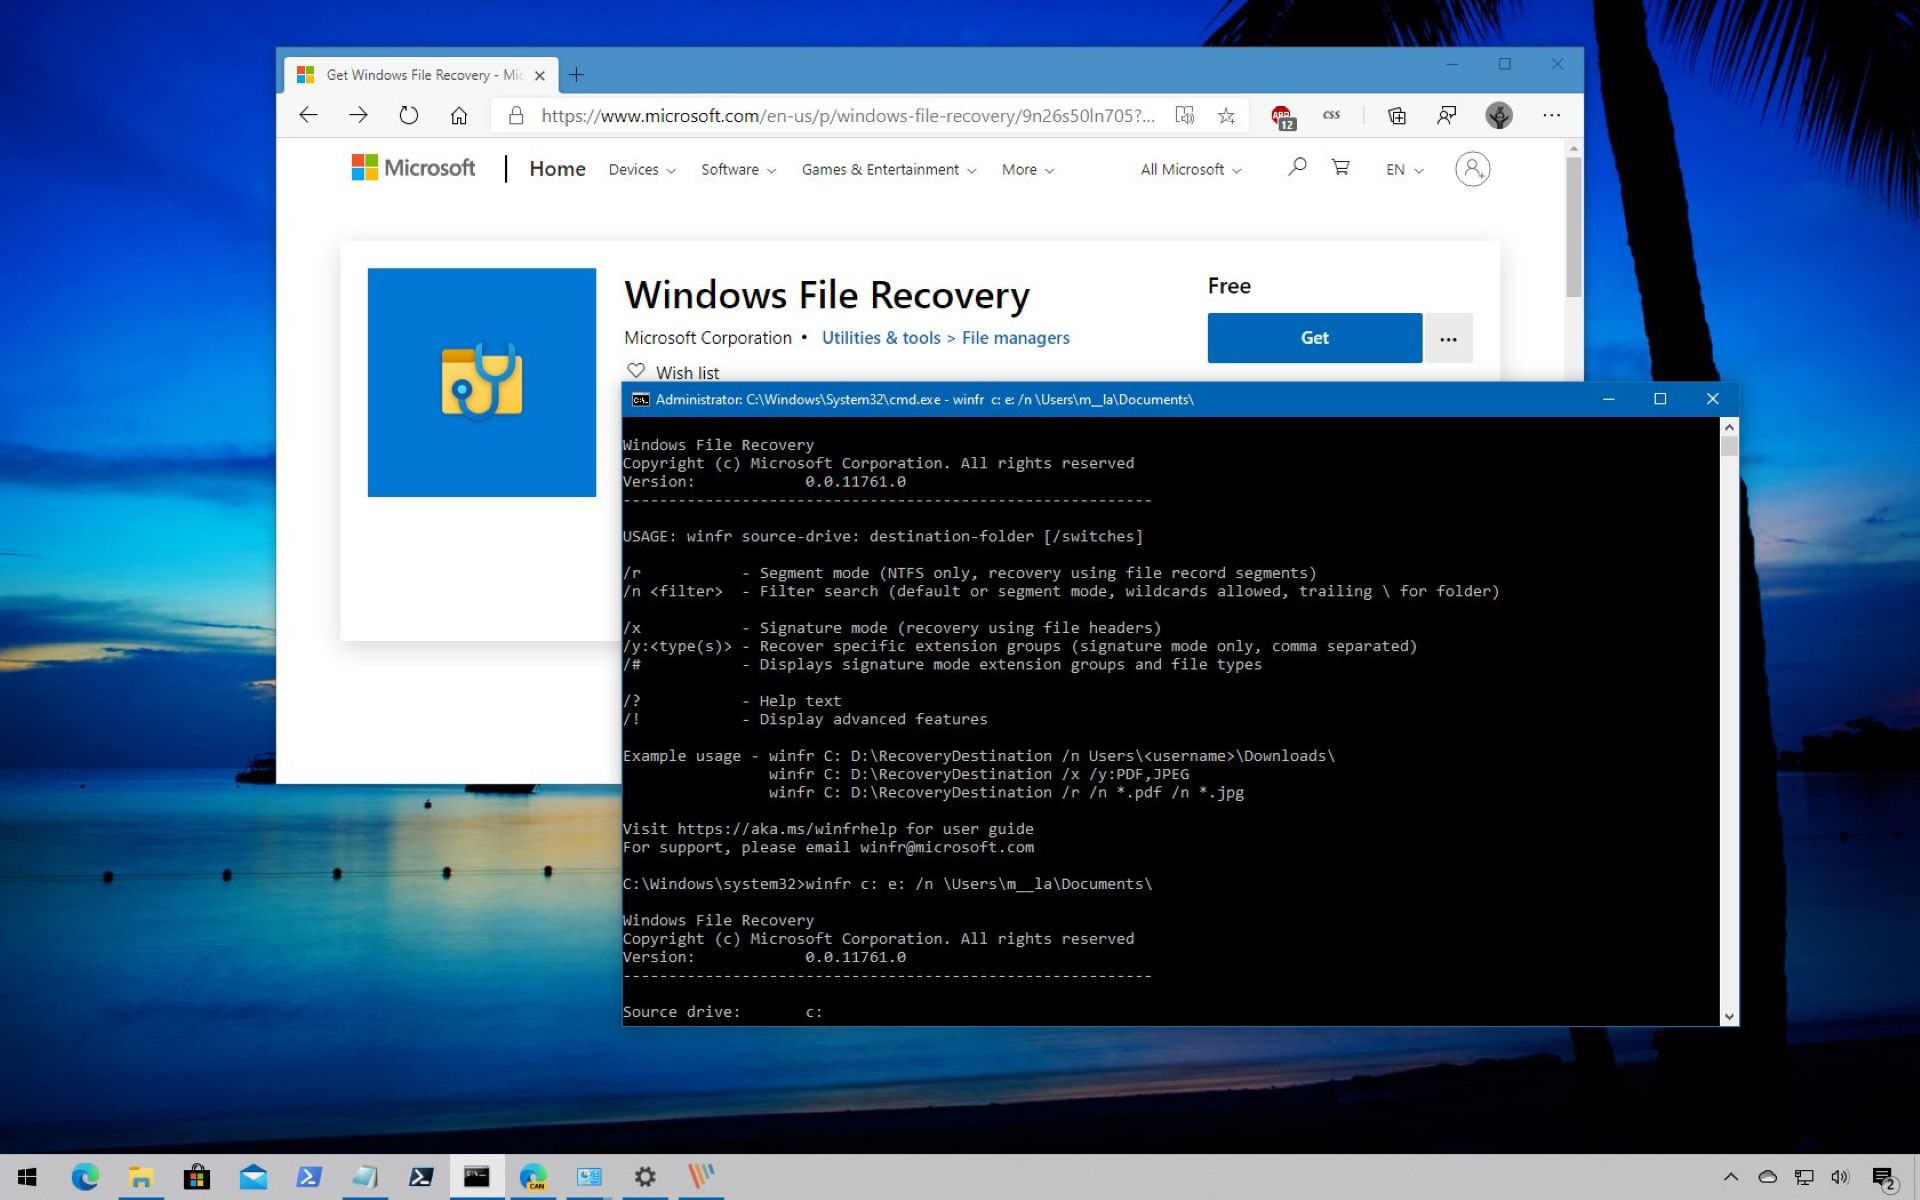
If the previous methods have not been successful in recovering your deleted files, you can turn to specialized data recovery software to assist you in the process. Data recovery software is designed to scan your storage device for traces of deleted files and restore them to a usable state.
Follow these steps to use a data recovery software:
- Research and choose a reputable data recovery software that meets your needs. There are many options available, both free and paid, with varying capabilities.
- Download and install the selected software on a different drive or device from the one containing the deleted files. This is to avoid overwriting any data on the drive and potentially decreasing the chances of successful recovery.
- Launch the software and select the drive or storage device where the deleted files were located.
- Initiate a scan of the selected drive. Depending on the size of the drive and the scanning method used, this process may take some time.
- Once the scan is complete, the software will display a list of recoverable files. Preview the files if possible to ensure they are intact and recoverable.
- Select the files you want to recover and specify a location to save them. It’s recommended to choose a different drive or external storage device to avoid overwriting any data.
- Start the recovery process, and the software will attempt to retrieve the deleted files and save them to the specified location.
Keep in mind that the success of data recovery software can vary depending on various factors, such as the level of data fragmentation, the storage device’s condition, and the length of time since the files were deleted. It’s essential to act quickly and avoid using the affected storage device to maximize the chances of successful recovery.
Remember to choose reliable and trustworthy data recovery software to ensure the safety of your files and protect your computer from potentially harmful programs.
If data recovery software does not yield satisfactory results, don’t worry. We still have one more method to explore to help you recover your lost files.
Step 6: Restore from a Backup
If you have a backup of your files, whether through a cloud storage service, external hard drive, or another backup method, you can easily restore your deleted files from the backup.
Follow these steps to restore your files from a backup:
- Identify the backup source that contains the deleted files you want to recover. This could be a cloud storage service, an external hard drive, or a network storage device.
- Access the backup source and navigate to the location where the deleted files were originally stored.
- Locate the deleted files within the backup, either by searching or by manually browsing through the backup folders.
- Once you have located the deleted files, select them and choose the option to restore or download them back to your computer.
- Specify a location on your computer where you want to restore the files to. It’s recommended to choose a different location than the original to avoid overwriting any existing files.
- Initiate the restoration process, and the files will be copied from the backup source and saved to the specified location on your computer.
Having a regular backup strategy is crucial in protecting your important files and preventing data loss. If you have been diligent in creating backups, restoring your deleted files becomes a straightforward process.
Remember to regularly update and maintain your backups to ensure the most recent versions of your files are protected. Additionally, make sure to test your backup restoration process periodically to ensure the integrity and effectiveness of your backups.
If you haven’t set up a backup system or haven’t been consistent with your backups, now is a good time to prioritize this practice to safeguard your data in the event of future accidents or system failures.
Conclusion
Accidentally deleting important files on your Windows 10 computer can be a distressing experience, but with the right methods, you can recover them. In this article, we have explored six steps to help you recover deleted files:
- Check the Recycle Bin: Start by locating the deleted file in the Recycle Bin and restoring it if it’s still available.
- Use File History: If you have enabled File History, you can recover previous versions of deleted files from the backups.
- Utilize Previous Versions: The Previous Versions feature allows you to restore files from earlier versions of folders.
- Try System Restore: Use System Restore to roll back your computer’s settings to a previous point in time and potentially recover deleted files.
- Use Data Recovery Software: Specialized data recovery software can scan your storage device for deleted files and restore them.
- Restore from a Backup: If you have a backup of your files, you can easily restore the deleted files from the backup source.
Remember, the success of file recovery depends on various factors, such as the time elapsed since deletion, storage device condition, and the effectiveness of your backup system. Acting quickly and avoiding overwriting data on the affected drive can increase your chances of successful recovery.
It’s crucial to regularly back up your files using methods like File History, system backups, or cloud storage services. Having a reliable backup system is the best protection against data loss.
We hope that by following the steps outlined in this article, you can successfully recover your deleted files on Windows 10 and mitigate the stress and inconvenience of accidental deletion. Remember to exercise caution and be proactive in implementing proper data backup practices to ensure the safety and accessibility of your important files.