Introduction
Welcome to the world of Instagram highlights! These nifty little features on Instagram allow you to curate and showcase your favorite stories for your followers to easily access. If you’ve ever wondered how influencers and businesses separate their stories into neat categories on their profile, it’s all thanks to Instagram highlights.
Instagram highlights provide a way to extend the lifespan of your stories beyond the usual 24-hour limit. Whether you’re a content creator, a brand, or just someone who enjoys sharing snippets of your daily life, creating highlights adds a touch of organization and creativity to your profile.
In this article, we’ll guide you through the process of creating and customizing Instagram highlights. We’ll cover everything from understanding how highlights work to adding stories, arranging them, and even deleting or editing highlights that no longer suit your needs. By the end of this guide, you’ll have all the tools you need to transform your Instagram profile into a curated and captivating visual storybook.
Before we dive into the nitty-gritty, it’s important to note that highlights are only available to users with an Instagram business profile or a creator account. If you don’t have one yet, don’t worry! We’ll also show you how to switch to a business profile or a creator account, if needed.
So, if you’re ready to level up your Instagram game and make your profile stand out, let’s get started with the basics of Instagram highlights!
Step 1: Understanding Instagram Highlights
Before you start creating your own Instagram highlights, it’s essential to understand how they work and the purpose they serve on your profile. Instagram highlights are customizable collections of your past stories that you want to showcase on your profile permanently.
Each highlight appears as a small icon located below your bio section. You can think of them as a visual table of contents that gives your followers a quick overview of the different categories or themes you have created. When someone taps on a highlight, they can view all the stories associated with it.
Highlights give you the opportunity to highlight specific moments, create compilations of related stories, or even share information in a more permanent and accessible way. They allow you to curate your profile and make it more organized and visually appealing.
Here are a few key points to remember about Instagram highlights:
- Visibility: Highlights appear directly below your bio section, making them one of the first things people see when they visit your profile.
- Categorization: You can create multiple highlight categories to group stories based on different topics, events, or interests.
- Story Expiration: While regular stories disappear after 24 hours, highlights remain on your profile until you decide to remove or edit them.
- Customizable Covers: You have the option to choose a cover image for each highlight, which helps to establish the visual theme or branding.
- Reordering: Highlights can be rearranged to control the order in which they appear on your profile.
Now that you have a better understanding of what Instagram highlights are and their potential benefits, you’re ready to dive into the practical aspects of creating your own highlights. The next step is to choose the right covers for your highlights, which we’ll explore in detail in the following section.
Step 2: Choosing the Right Covers
One of the key elements that make Instagram highlights visually appealing is the cover image. The cover image is the thumbnail that represents each highlight category on your profile. It’s important to choose a cover image that accurately reflects the content of the highlight and grabs the attention of your followers.
Here are some tips to help you choose the right covers for your Instagram highlights:
- Consistency: Maintaining visual consistency across your highlight covers can give your profile a cohesive look. Consider using a similar color scheme, font, or graphic style for all your covers.
- Branding: If you have a personal brand or a business, it’s a good idea to incorporate your brand elements into your highlight covers. This could include your logo, brand colors, or specific graphics that represent your brand identity.
- Relevance: The cover image should be relevant to the content of the highlight. For example, if you have a highlight category for travel stories, you could use a photo of a scenic location as the cover image.
- Eye-catching: Choose visually appealing images or graphics that will capture the attention of your followers. Consider using high-quality photos or engaging designs that stand out.
- Clarity: Ensure that the cover image is clear and easy to recognize at a glance. Avoid using cluttered or overly complex designs that could make it difficult for viewers to understand what the highlight is about.
When selecting your covers, take the time to think about the overall aesthetic and message you want to convey. Experiment with different options and see what resonates best with your audience. Remember, your highlight covers play a significant role in attracting and engaging viewers, so invest some effort into creating visually appealing and cohesive covers.
Once you have chosen your cover images, you can proceed to the next step, which involves creating your highlight categories. We’ll explore this process in detail in the following section.
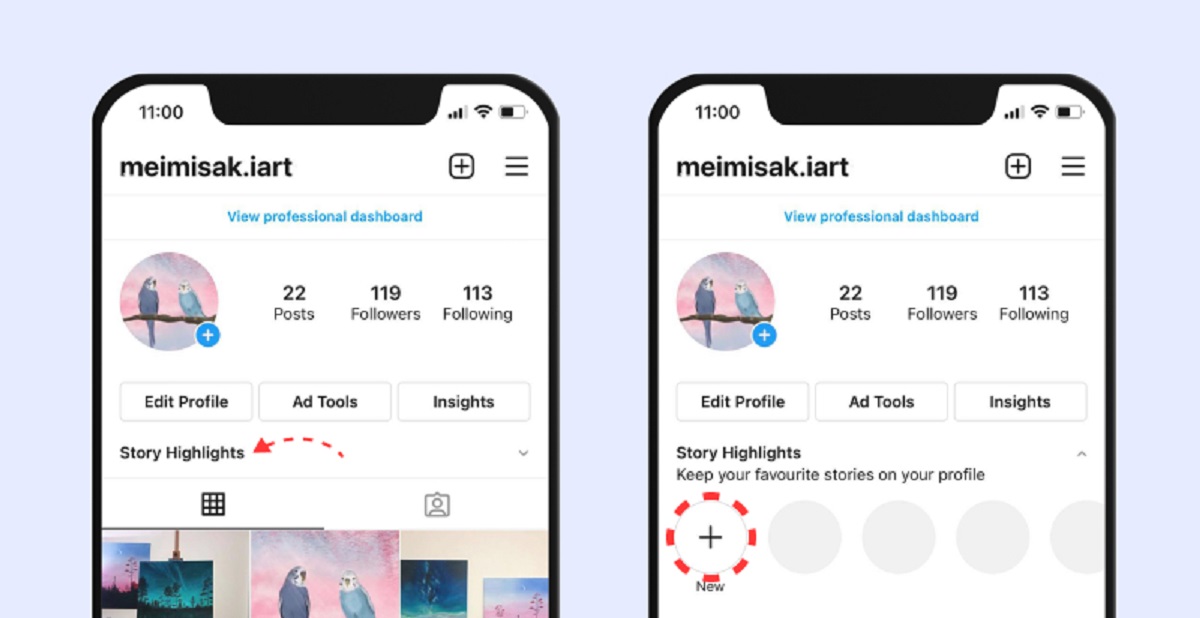
Step 3: Creating Highlight Categories
Now that you have chosen the right covers for your Instagram highlights, it’s time to create the highlight categories themselves. Highlight categories are the different sections or themes that you want to showcase on your profile. They serve as a way to organize your stories and make it easier for your followers to navigate through your content.
Here’s how you can create highlight categories on Instagram:
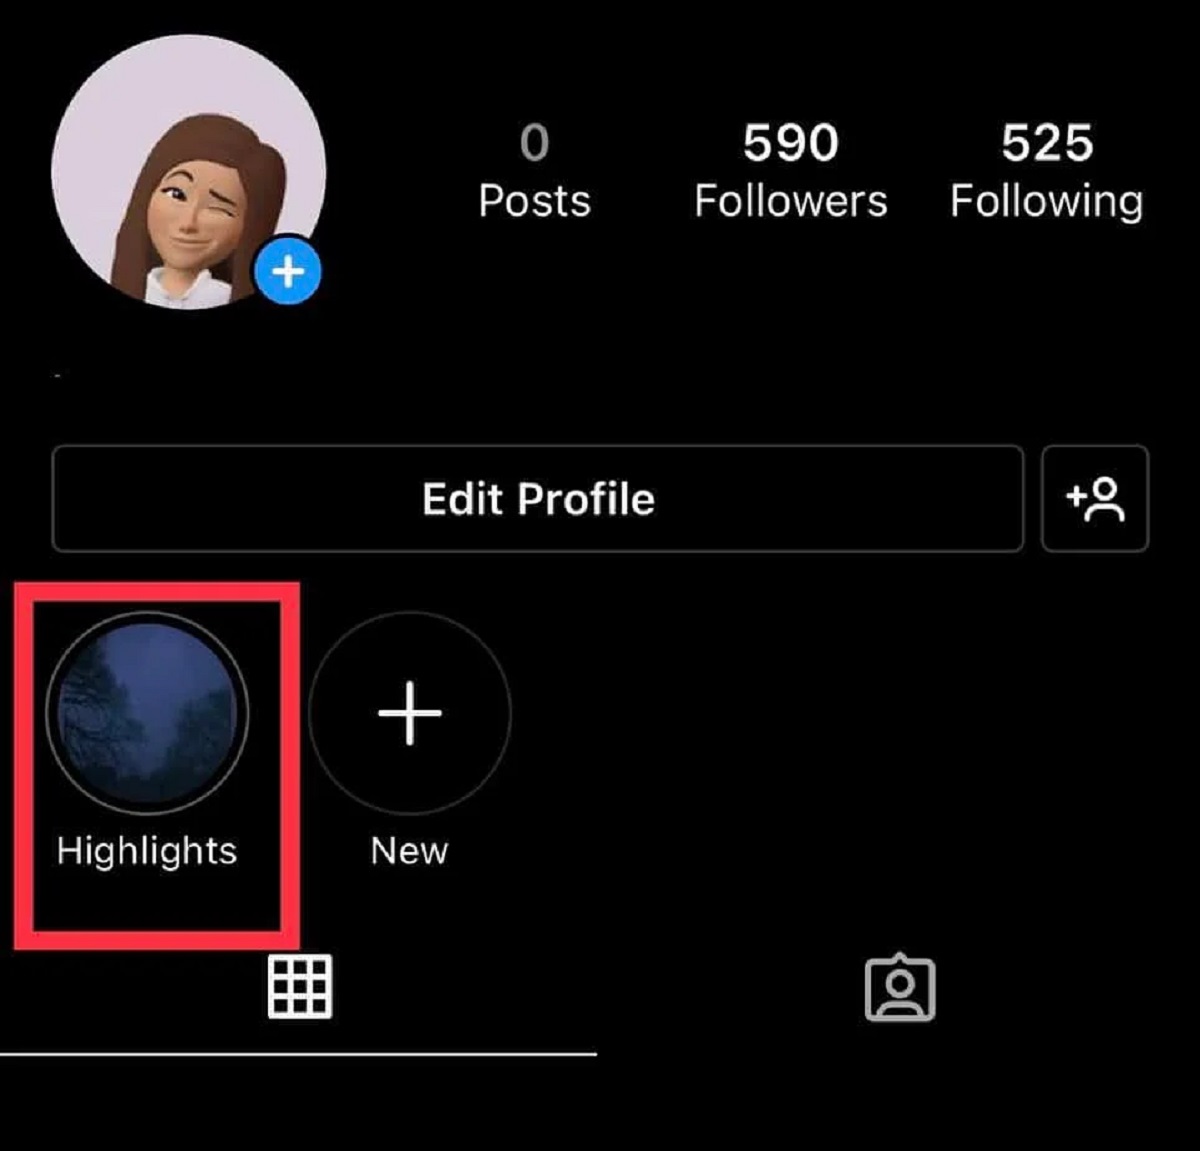
- Open Your Profile: Tap on your profile picture or go to your profile page by tapping on your username at the bottom right corner of the screen.
- Tap on the “+” Button: On your profile, you will see a circular “+” button below your bio section. Tap on it to start creating a new highlight.
- Select Stories: You will be directed to a screen where you can select the stories you want to add to the highlight. Choose the stories that are relevant to the category you are creating.
- Name Your Highlight: After selecting the stories, you will have the option to name your highlight. Choose a clear and descriptive name that reflects the content of the highlight category.
- Add a Cover: You can now choose a cover image for the highlight. Select the cover image that you have previously prepared, ensuring it represents the category effectively.
- Save Your Highlight: Once you are satisfied with the name and cover image, tap “Add” or “Save” to create the highlight category.
Repeat these steps for each new highlight category you want to create. You can have as many highlight categories as you need to organize and showcase your stories.
Remember to think about the overall structure and organization of your highlight categories. Consider the different topics or themes you want to highlight and group your stories accordingly. This will help your followers navigate your profile more easily and find the content that interests them.
Now that you have created your highlight categories, it’s time to start adding stories to them. In the next step, we’ll guide you through the process of adding stories to your highlights and making them visible on your profile for all your followers to enjoy.
Step 4: Adding Stories to Highlights
Now that you have created your highlight categories, it’s time to start adding stories to them. Adding stories to your highlights allows you to showcase your favorite or most important moments beyond their usual 24-hour lifespan. Here’s how you can add stories to your Instagram highlights:
- Open Your Story: Start by creating a new Instagram story or accessing an existing one.
- Tap on the Highlight Icon: At the bottom of the screen, you will see a highlight icon in the shape of a heart with a plus sign. Tap on it to add the story to one of your highlights.
- Select the Highlight Category: A list of your existing highlight categories will appear. Choose the category that you want to add the story to.
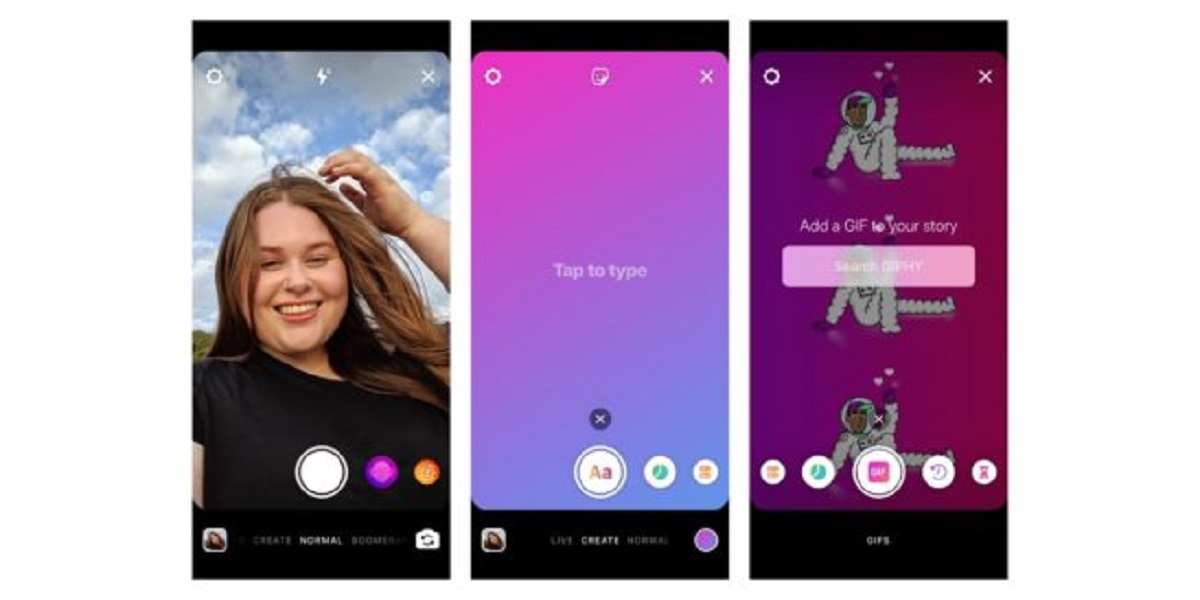
- Customize if Desired: You have the option to customize how the story appears in the highlight by tapping on it. You can edit the cover image, add text, stickers, or even trim the story if needed.
- Tap “Add to Highlight”: Once you are done customizing, tap on “Add to Highlight” to add the story to the selected category.
Repeat these steps for each story you want to add to your highlights. You can add multiple stories to each category, creating a collection of moments that you want to showcase on your profile.
It’s important to note that stories can only be added to highlights while they are still active. Once a story has expired after the 24-hour mark, you won’t be able to add it to your highlights. Therefore, if there’s a story you want to feature in your highlights, make sure to add it before the 24-hour time frame is up.
By adding stories to your highlights, you can keep important moments, promotions, or announcements accessible to your followers for an extended period of time. It’s a great way to showcase your best content and engage with your audience in a more permanent and organized way.
Now that you know how to add stories to your highlights, it’s time to start arranging and organizing them on your profile. In the next step, we’ll guide you through the process of arranging your highlights in the desired order.
Step 5: Arranging and Organizing Highlights
Once you have created your Instagram highlights and added stories to them, you have the flexibility to arrange and organize them in the desired order on your profile. This allows you to curate your profile and create a visually appealing layout that captures the attention of your followers. Here’s how you can arrange and organize your highlights:
- Open Your Profile: Tap on your profile picture or go to your profile page by tapping on your username at the bottom right corner of the screen.
- Tap and Hold a Highlight: Locate the highlight that you want to move and tap and hold on it.
- Drag and Drop: While still holding the highlight, drag it to the desired position among your other highlights.
- Release to Drop: Once you have the highlight in the desired position, release your finger to drop it in place.
- Repeat for Other Highlights: Repeat this process for each highlight you want to rearrange on your profile.
By rearranging your highlights, you can create a visual flow and hierarchy that aligns with your branding or storytelling goals. You may want to prioritize certain categories or showcase your best content first.
Organizing your highlights also involves considering the overall balance and distribution of different topics or themes. You may want to ensure that a variety of content is represented and that your profile remains diverse and engaging for your followers.
Take some time to experiment with different arrangements and find the layout that best suits your profile. Remember, you can always revisit and make changes to the organization of your highlights whenever you feel the need to refresh your profile or emphasize different content.
Once you are satisfied with the arrangement of your highlights, you can move on to the next step, where we’ll explore the process of customizing your highlight covers to add a personal touch to your profile.
Step 6: Customizing Your Highlights
Now that you have created and arranged your Instagram highlights, it’s time to add a personal touch and make them stand out by customizing the covers. Instagram allows you to choose a cover image for each highlight, giving you the opportunity to create a cohesive and visually appealing aesthetic for your profile. Here’s how you can customize your highlight covers:
- Open Your Profile: Tap on your profile picture or go to your profile page by tapping on your username at the bottom right corner of the screen.
- Tap and Hold the Highlight: Locate the highlight that you want to customize and tap and hold on it.
- Tap “Edit Highlight”: A pop-up menu will appear with the option to “Edit Highlight.” Tap on it to access the editing options.
- Choose a Cover Image: You will be presented with the option to change the cover. You can choose an existing story from the highlight or upload a new image from your device.
- Adjust and Position: Once you have selected the image, you can zoom in or out, rotate, and reposition it to get the desired framing for your cover.
- Tap “Done”: Once you are satisfied with the cover image, tap “Done” to save the changes.
Repeat these steps for each highlight cover you want to customize. You can choose different images, designs, or graphics that best represent the content of each highlight category.
When customizing your highlight covers, consider maintaining a consistent visual theme or brand identity. You can use a similar color palette, font style, or graphic elements to create a cohesive look across your covers. This helps to create a visually appealing and professional presence on your profile.
By personalizing your highlight covers, you can make your profile more engaging and unique. It allows you to add your own creative flair and capture the attention of your followers. Take the time to experiment with different designs and visuals until you find the perfect cover for each highlight category.
Now that you have customized your highlight covers, you may want to make changes to your existing highlights. In the next step, we’ll explore how you can delete or edit your highlights on Instagram.
Step 7: Deleting and Editing Highlights
As your content evolves and your profile changes, you may need to make adjustments to your Instagram highlights. Whether you want to remove outdated highlights or make edits to existing ones, Instagram provides easy options for deleting and editing your highlights. Here’s how you can manage your highlights:
To delete a highlight:
- Open Your Profile: Tap on your profile picture or go to your profile page by tapping on your username at the bottom right corner of the screen.
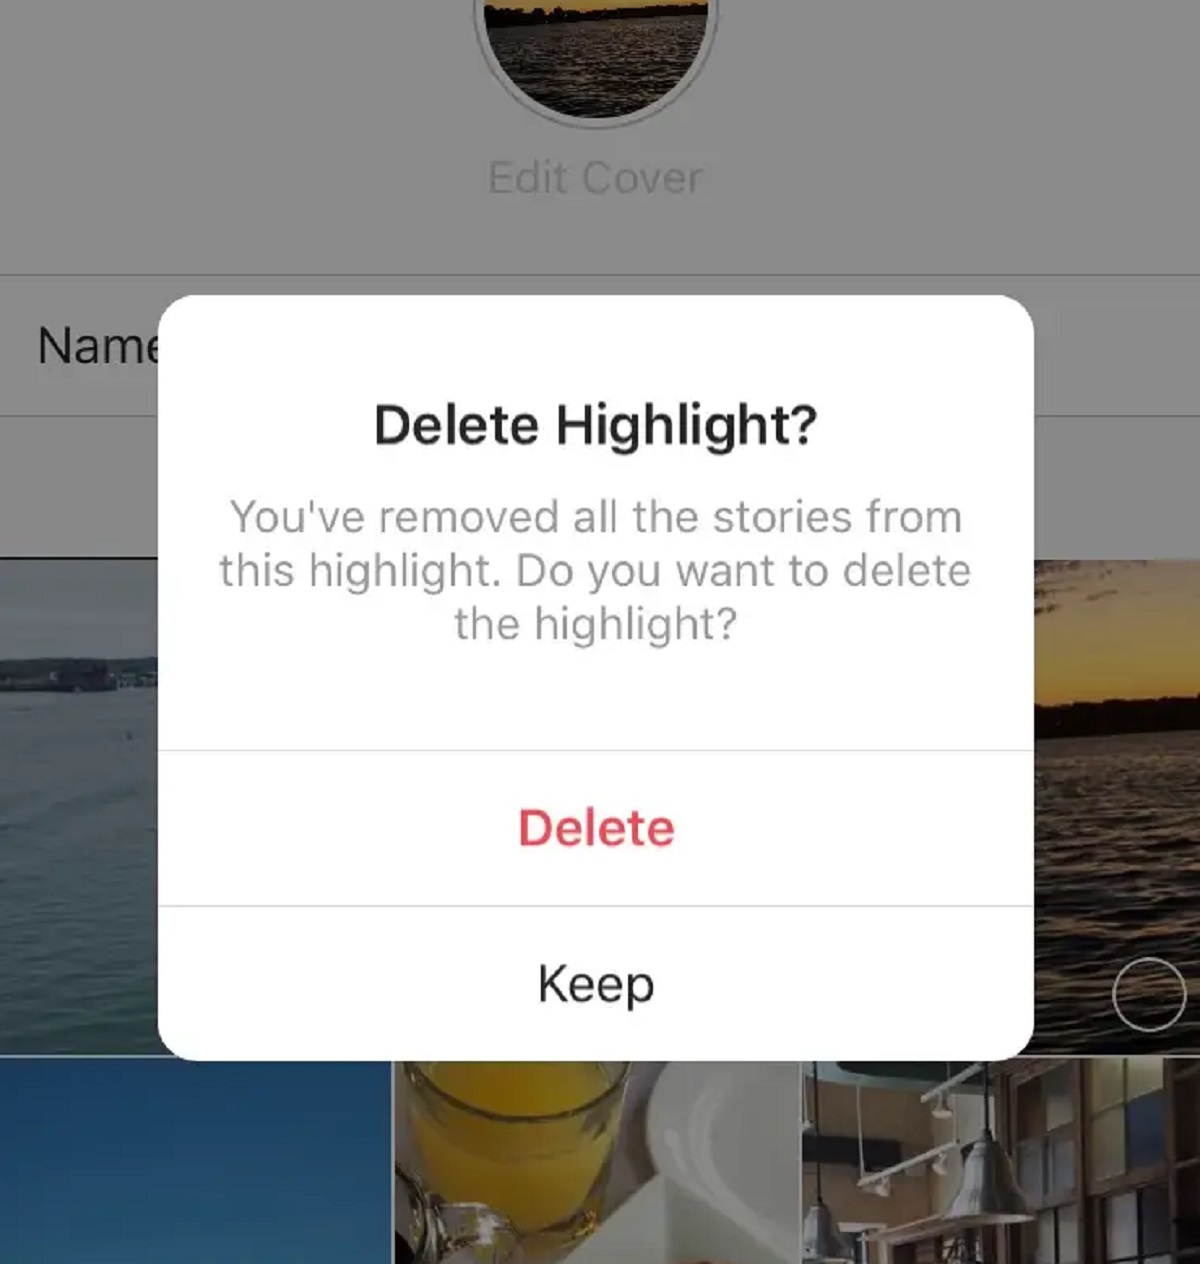
- Tap and Hold the Highlight: Locate the highlight that you want to delete and tap and hold on it.
- Tap “Delete Highlight”: A pop-up menu will appear with the option to “Delete Highlight.” Tap on it to confirm the deletion.
To edit a highlight:
- Open Your Profile: Tap on your profile picture or go to your profile page by tapping on your username at the bottom right corner of the screen.
- Tap and Hold the Highlight: Locate the highlight that you want to edit and tap and hold on it.
- Tap “Edit Highlight”: A pop-up menu will appear with the option to “Edit Highlight.” Tap on it to access the editing options.
- Make the Desired Edits: You can change the cover image, update the name of the highlight, or add/remove stories from the highlight.
- Tap “Done”: Once you have made the necessary edits, tap “Done” to save the changes.
Deleting or editing your highlights allows you to keep your profile updated and relevant to your current content. You have the flexibility to remove highlights that are no longer relevant or make necessary modifications to align with your evolving brand or interests.
It’s important to note that when you delete a highlight, it will also delete all the stories associated with it. If you want to keep the stories, make sure to save them to your device before deleting the highlight.
With the ability to delete and edit your highlights, you have full control over how your profile appears to your followers. Take the time to regularly review and manage your highlights to ensure they accurately represent your content and engage your audience effectively.
Now that you know how to delete and edit your highlights, you have all the necessary knowledge to create, manage, and customize your Instagram highlights. Remember to regularly update and refresh your highlights to keep your content dynamic and captivating.
Conclusion
Congratulations! You’ve learned how to create and optimize your Instagram highlights to showcase your best moments and organize your content on your profile. By following the steps outlined in this guide, you now have the tools to captivate your audience and make a lasting impression.
Remember, understanding the purpose and functionality of Instagram highlights is essential to effectively utilize this feature. Highlights allow you to extend the lifespan of your stories, categorize your content, and create a visually appealing profile that reflects your personal brand or interests.
In addition, carefully choosing the right covers for your highlights can significantly enhance the overall aesthetic of your profile. Consistency, relevance, and eye-catching designs play a key role in grabbing the attention of your followers and conveying your brand identity or storytelling style.
Creating highlight categories and adding stories to them enables you to curate and share specific moments, topics, or themes with your audience. This not only helps to engage and entertain your followers but also allows you to provide valuable and memorable content beyond the usual 24-hour time frame.
Arranging and organizing your highlights strategically ensures a visually pleasing flow to your profile and helps your audience navigate through your content more easily. By customizing your highlight covers, you can add a personalized touch and make your profile unique.
Lastly, understanding how to edit and delete highlights empowers you to adapt to changes in your content and keep your profile up to date.
With these steps in mind, go ahead and take your Instagram profile to the next level! Create compelling highlights, engage your audience, and share your story in a visually captivating way. Remember to regularly review and update your highlights as your content evolves to keep your profile fresh and engaging.
Now, it’s time to unleash your creativity and showcase your best moments through Instagram highlights. Happy highlighting!