Introduction
Welcome to the world of Slack, a powerful communication tool that allows you to collaborate with your team in real-time. One of the key features of Slack is the ability to create group chats, which are ideal for discussions, brainstorming, and sharing information among a specific group of people within your organization. In this article, we will guide you through the process of creating a group chat in Slack and provide tips on how to effectively manage and customize your group conversations.
Group chats in Slack are designed to bring teams together in a focused and organized manner. Whether you have a dedicated project team, a department within your company, or a group of individuals with a shared interest, creating a group chat can significantly enhance collaboration and streamline communication.
By creating a group chat in Slack, you will have a centralized space where your team members can share ideas, ask questions, and collaborate on various topics in real-time. Within the group chat, you can customize notifications, set permissions, and manage conversations to suit the needs of your team.
In the following sections, we will walk you through the process of setting up a group in Slack, adding members to the group, customizing group notifications, and managing group conversations. We will also discuss best practices for maximizing the effectiveness of your group chat. So, let’s dive in and discover the power of group chats in Slack!
Setting up a Group in Slack
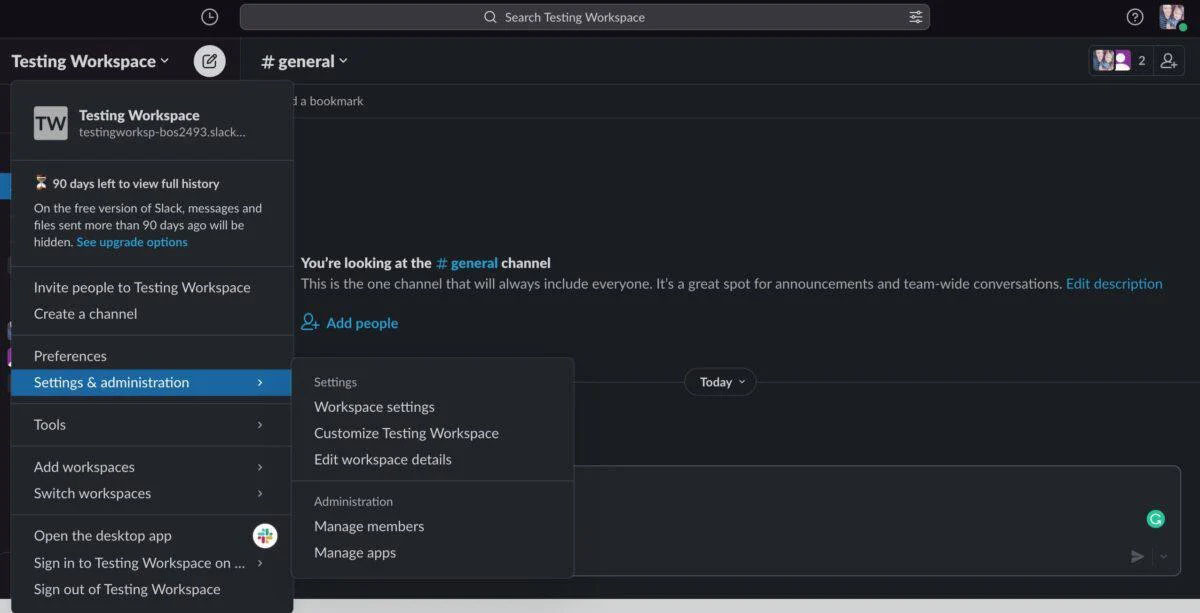
Setting up a group in Slack is a simple process that allows you to create a dedicated space for a specific team or project. Here’s how you can do it:
- Log in to your Slack workspace and navigate to the sidebar on the left-hand side of the screen.
- Click on the “+” button next to the “Channels” heading.
- From the drop-down menu, select “Create a channel”.
- Choose a name for your group chat that is descriptive and easy to remember. This name will be displayed in the sidebar and should reflect the purpose of the group.
- Optionally, you can provide a brief description of the group to give members a better understanding of its purpose.
- Decide whether the group should be public or private:
- Public groups are visible to all members of your Slack workspace, and anyone can join or leave the group.
- Private groups are only visible and accessible to invited members, providing a more secure and confidential environment for sensitive discussions.
- If you choose to make the group private, you need to invite members:
- Click on the “Add People” button and enter the names or email addresses of the individuals you want to add to the group.
- Slack will send an invitation to the invited members, and they can accept the invitation to join the group.
- Once you have configured all the necessary settings, click on the “Create” button to officially create the group chat.
That’s it! You have successfully set up a group in Slack. The new group chat will now appear in the sidebar, and you can start inviting members to join the conversations and collaborate effectively.
Next, let’s explore how you can add members to your newly created group in Slack.
Adding Members to the Group
Once you have created a group in Slack, the next step is to add members to the group chat. Here’s how you can do it:
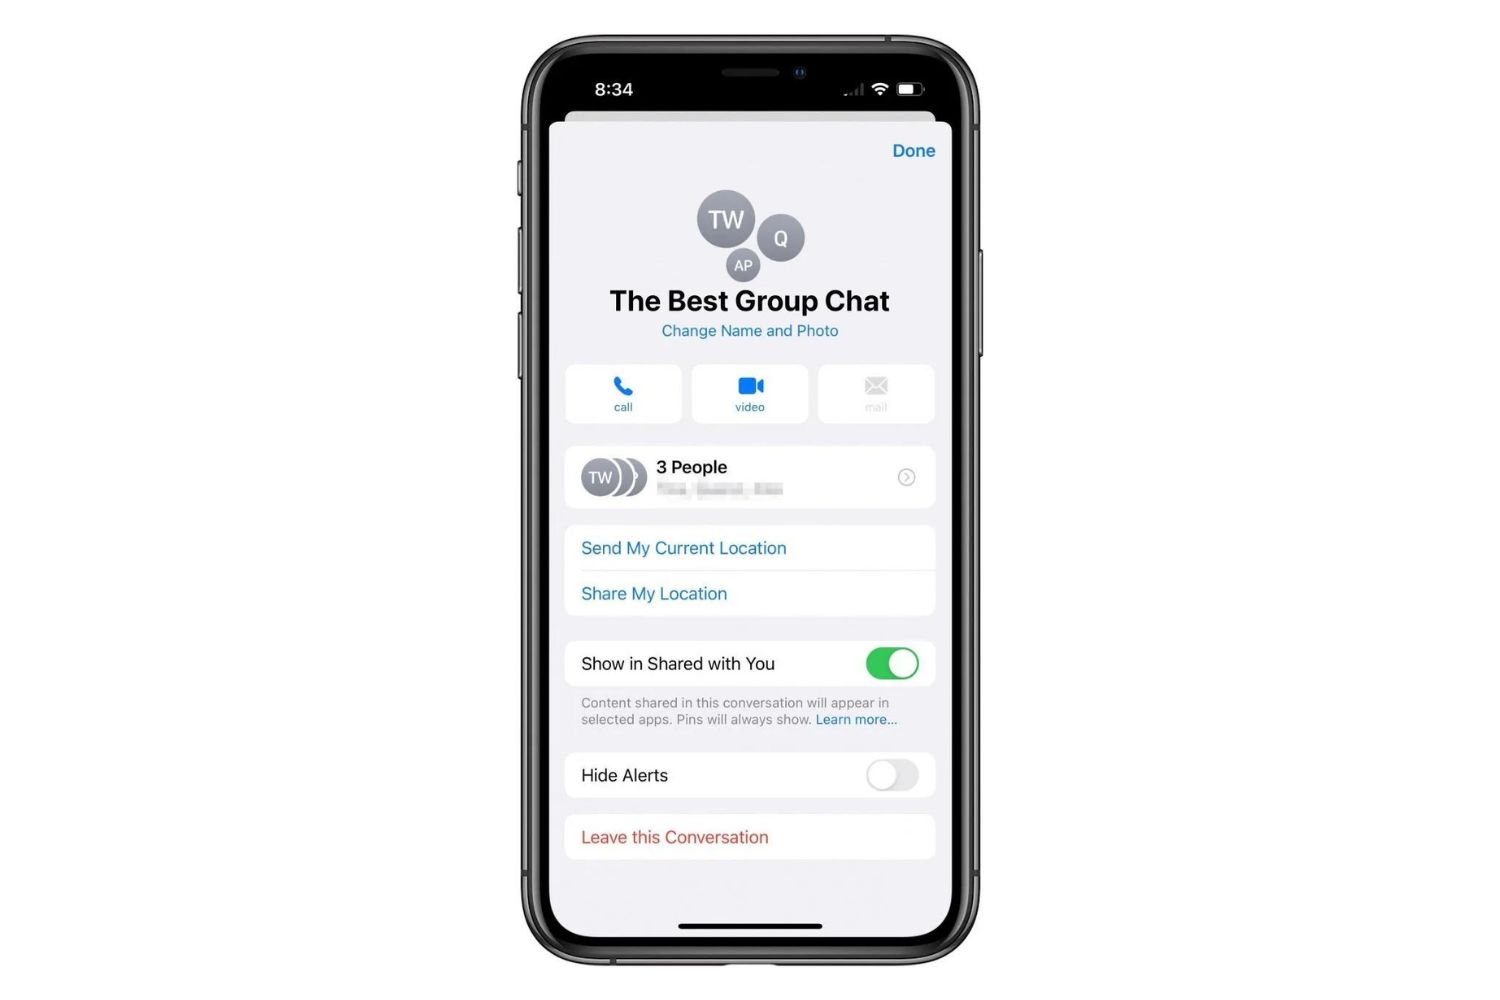
- Open the group chat you want to add members to.
- Click on the group name located at the top of the screen to access the group settings.
- In the settings menu, click on the “Invite members” option.
- Enter the names or email addresses of the individuals you want to add to the group.
- Slack will send an invitation to the invited members, and they can accept the invitation to join the group.
It is important to note that only the group creator or administrators have the authority to invite new members to a group. This ensures that the group remains secure and only authorized individuals can participate in the discussions.
Once the members have accepted the invitation and joined the group, they will have access to all the conversations, messages, and files shared within the group chat. They can actively participate in discussions, ask questions, and contribute to the overall collaboration efforts.
Adding the right members to your group is crucial for effective communication and collaboration. Choose individuals who are relevant to the purpose of the group and who can contribute valuable insights and expertise. By including the right team members, you can ensure that the group chat remains focused, productive, and inclusive.
Now that you have successfully added members to your group, let’s move on to the next step of setting group permissions in Slack.
Setting Group Permissions
Group permissions in Slack allow you to control the level of access and privileges that each member has within the group chat. By setting group permissions, you can ensure that the right individuals have the appropriate level of control and visibility within the group. Here are some key aspects to consider when configuring group permissions:
- Channel Roles: Slack offers a range of predefined roles that you can assign to different members within the group. These roles determine the level of access and permissions that each member has. The roles include:
- Owner: Has full control over the group, including the ability to add or remove members, change group settings, and delete the group.
- Admin: Has administrative privileges and can manage the group settings, but does not have the ability to delete the group.
- Member: Has standard access to the group chat and can participate in conversations, share files, and perform other basic actions.
- Guest: Has restricted access to the group and can only view specific channels or conversations.
- Channel-level Permissions: Apart from assigning roles, you can also modify individual permissions at the channel level. This allows you to grant or restrict certain actions for specific members or groups within the group chat.
- Message and File Permissions: Slack also provides options to specify who can edit or delete messages and files within the group chat. You can define whether all members have the ability to make edits or if only specific roles have this privilege.
- External Access: If you want to enable external access to the group chat, you can manage permissions for external guests. This allows individuals from outside your organization to join the group and contribute to discussions.
By carefully configuring group permissions in Slack, you can maintain control over the actions and visibility within the group chat. It is essential to strike a balance between giving members the freedom to collaborate and restricting access to sensitive information when necessary.
Now that you have established group permissions, it’s time to move on to the next step of customizing group notifications in Slack.
Customizing Group Notifications
Customizing group notifications in Slack allows you to fine-tune how and when you receive notifications for activities within the group chat. By personalizing your notification settings, you can stay informed without being overwhelmed by constant alerts. Here’s how you can customize group notifications in Slack:
- Open the group chat for which you want to customize notifications.
- Click on the group name at the top of the screen to access the group settings.
- In the settings menu, select “Preferences” and then “Notification preferences”.
- Here, you can choose the type of notifications you want to receive:
- All new messages: Receive a notification for every new message posted in the group chat.
- Direct mentions and keywords: Receive notifications only when you are directly mentioned or when specific keywords you have selected are mentioned in the group chat.
- No notifications: Disable all notifications for the group chat.
- You can further customize your notification preferences by selecting the delivery method:
- Desktop: Receive notifications on your desktop computer or web browser.
- Mobile: Receive notifications on your mobile device through the Slack app.
- Email: Receive notifications via email for important messages or mentions.
- Additionally, you can set a Do Not Disturb schedule to limit notifications during specific hours or days.
By tailoring your notification settings, you can ensure that you receive timely updates without being constantly interrupted. This allows you to focus on productive work and only be notified when necessary.
In addition to individual notification settings, Slack also provides the option to configure group-wide notification preferences. As an owner or admin of the group, you can define default notification settings for all members. However, members still have the flexibility to adjust their own notification preferences within these settings.
Now that you have customized your notifications, let’s move on to managing group conversations in Slack.
Managing Group Conversations
Effective management of group conversations in Slack is essential for maintaining clarity, organization, and productivity within the group chat. Here are some tips to help you manage group conversations effectively:
- Create Channels: Consider creating separate channels within the group chat for different topics or projects. This helps to keep discussions focused and ensures that conversations are easily searchable when needed.
- Use Threads: Slack offers the option to create threads within a conversation. Threads allow for more in-depth discussions on specific topics without cluttering the main chat. Encourage members to use threads for lengthy discussions to keep the main conversation stream clean and concise.
- Encourage Communication Norms: Establish communication norms within the group chat, such as using specific emojis or keywords to indicate urgency, action items, or decisions. This helps members quickly identify important messages and facilitates smoother communication.
- Monitor and Moderate: As an owner or admin of the group, actively monitor and moderate conversations to ensure they stay on topic, comply with group guidelines, and maintain a respectful tone. Intervene if necessary to redirect discussions or resolve conflicts.
- Encourage Active Participation: Foster a culture of active participation by encouraging all members to contribute to discussions, ask questions, and share updates. This ensures that everyone’s input is valued and promotes a collaborative environment.
- Archive or Delete Old Conversations: Periodically review and archive or delete old conversations that are no longer relevant or needed. This keeps the group chat organized and prevents excessive clutter.
- Regular Check-Ins: Conduct regular check-ins or status updates within the group to keep everyone aligned and informed. This helps to maintain accountability and ensures that all members are aware of the progress and updates related to the group’s objectives.
By implementing these effective management strategies, you can ensure that group conversations in Slack are streamlined, productive, and conducive to collaboration. They help to maintain focus, prevent information overload, and create a positive and engaging environment for all members.
Now that you have learned how to manage group conversations, let’s discuss the process of archiving or deleting a group in Slack.
Archiving or Deleting a Group
At times, you may need to archive or delete a group in Slack due to various reasons such as the completion of a project, disbanding a team, or simply decluttering your workspace. Here’s how you can archive or delete a group:
Archiving a Group:
- Open the Slack workspace and navigate to the sidebar.
- Locate the group you want to archive and click on the group name to access the group settings.
- In the settings menu, select “Additional options” and then choose “Archive this channel”.
- Confirm the action when prompted to archive the group.
Archiving a group preserves its entire chat history, files, and conversations. It removes the group from the active chat list but allows you to access and search through its content whenever needed. Archived groups are stored in the Archived Channels section in the sidebar, making it easy to refer back to past discussions if required.
Deleting a Group:
- Follow the same steps to access the group settings.
- Click on “Additional options” and select “Delete this channel”.
- Confirm the action when prompted to permanently delete the group.
Deleting a group permanently removes it from your Slack workspace. All chat history, files, and conversations associated with the group will be irreversibly deleted. Make sure to exercise caution when deleting a group, as this action cannot be undone.
Archiving or deleting a group can help declutter your workspace and keep it organized. It allows you to maintain a clear and concise list of active channels and ensures that only relevant groups remain in your workspace.
Now that you know how to archive or delete a group, let’s explore some best practices to maximize the effectiveness of group chats in Slack.
Best Practices for Group Chat in Slack
To maximize the effectiveness of group chats in Slack and promote efficient collaboration within your team, consider the following best practices:
- Establish Clear Guidelines: Set clear guidelines and expectations for the group chat, including the purpose, preferred communication style, and appropriate use of emojis, formatting, and language.
- Use Descriptive Channel Names: Choose descriptive and easily recognizable names for your group chat channels. This helps members quickly identify the purpose of each channel and navigate to the relevant conversation.
- Keep Conversations Focused: Encourage members to stay on topic and create separate channels for different discussions. This prevents conversations from becoming cluttered and allows members to easily track and contribute to specific topics.
- Encourage File and Knowledge Sharing: Utilize the file-sharing capabilities in Slack to easily share documents, presentations, and other relevant materials. This ensures that all team members have access to the necessary information and resources.
- Utilize Threads for In-Depth Discussions: Encourage the use of threads for lengthy or detailed discussions. Threads help keep the main chat organized and prevent important messages from getting buried in the conversation.
- Promote Active Participation: Encourage all members to actively participate in the group chat by asking questions, sharing updates, and contributing their expertise. This fosters a collaborative environment and ensures that everyone’s input is valued.
- Respect Others’ Time: Be mindful of others’ time and avoid excessive pinging or unnecessary notifications. Use mentions and notifications sparingly and only when necessary.
- Regularly Review and Update: Periodically review your group chats to ensure they are still relevant and align with the current needs of your team. Archive or delete channels that are no longer active to keep your workspace organized.
- Encourage the Use of Reactions: Utilize Slack’s reaction feature to quickly acknowledge and respond to messages without cluttering the conversation with additional replies.
- Provide Support and Feedback: Support and guide your team members in using Slack effectively. Provide feedback on communication practices and help troubleshoot any issues or confusion that may arise.
By implementing these best practices, you can create a productive and efficient group chat environment in Slack. These practices promote effective communication, organized discussions, and streamlined collaboration among team members.
Now that you have learned the best practices for group chat in Slack, let’s wrap up our guide.
Conclusion
Group chats in Slack offer a powerful and flexible platform for collaboration and communication within teams. By following the steps outlined in this guide, you can set up, customize, and manage group chats effectively to enhance productivity and foster seamless collaboration.
We began by introducing the concept of group chats in Slack and highlighting their importance in facilitating real-time discussions and information sharing. We then walked through the process of setting up a group, adding members, customizing group notifications, and managing conversations. By understanding the various features and settings available, you can tailor your group chat experience to suit the unique needs of your team.
Additionally, we explored best practices for group chat in Slack, including establishing clear guidelines, keeping conversations focused, utilizing threads, promoting active participation, and respecting others’ time. By implementing these best practices, you can create a more efficient and productive communication environment, ensuring that information is effectively shared and collaboration is seamless.
Remember to regularly review and update your group chat channels, archiving or deleting those that are no longer relevant. This helps maintain an organized workspace and ensures that the conversations remain focused on current topics.
With Slack’s group chat feature, you have the ability to connect and collaborate with your team members, improve communication, and streamline workflows. By following the guidance provided in this guide and harnessing the power of group chats in Slack, you can take your team collaboration to the next level.
So, go ahead and create your group chats, customize them to your team’s needs, and enjoy the benefits of seamless, real-time communication in Slack!