Introduction
Black beans are a versatile and nutritious ingredient that can be used in a variety of dishes, from soups and stews to salads and burritos. Cooking black beans in an electric pressure cooker is a convenient and time-saving method that results in perfectly tender beans every time. Whether you’re a seasoned cook or a beginner in the kitchen, this guide will take you through the step-by-step process of cooking black beans in an electric pressure cooker.
What makes the electric pressure cooker such a great tool for cooking black beans is its ability to rapidly cook food under high pressure. This not only reduces the cooking time significantly but also helps to retain the nutrients and flavors of the beans. The electric pressure cooker eliminates the need for pre-soaking the beans, making it a hassle-free cooking method.
In this article, we will walk you through the process of cooking black beans in an electric pressure cooker, from soaking the beans to seasoning and serving them. We will also provide some tips and variations to help you customize the flavor of your black beans to suit your taste preferences.
So, if you’re ready to embark on a culinary adventure and learn how to cook delicious and tender black beans in an electric pressure cooker, let’s get started!
Ingredients
To cook black beans in an electric pressure cooker, you will need the following ingredients:
- 1 cup dried black beans
- 4 cups water (for soaking the beans)
- 3 cups water (for cooking the beans)
- 1 teaspoon salt (optional, for seasoning)
- 1 tablespoon olive oil (optional, for added flavor)
These ingredients are easy to find and can be adjusted based on the quantity of black beans you wish to cook. It’s important to note that the cooking time will vary depending on the quantity of beans, so make sure to adjust the water and seasoning accordingly.
Additionally, you can customize the flavor of your black beans by adding other ingredients such as garlic, onion, cumin, or chili powder. These optional ingredients can elevate the taste of your black beans and give them a delicious depth of flavor.
Now that you have all the ingredients ready, we can move on to the step-by-step process of cooking black beans in an electric pressure cooker.
Step 1: Soaking the beans
Before cooking black beans in an electric pressure cooker, it’s recommended to soak them to help reduce cooking time and improve their texture. Here’s how you can soak the beans:
- Measure 1 cup of dried black beans and rinse them thoroughly under cold water to remove any dirt or debris.
- Transfer the rinsed beans into a large bowl and cover them with 4 cups of water. Make sure there’s enough water to fully submerge the beans.
- Allow the beans to soak for at least 6 hours or overnight. This soaking process helps to soften the beans and reduce cooking time.
- After soaking, drain the water from the beans and give them another quick rinse with fresh water.
Soaking the beans is an optional step, but it can significantly decrease the cooking time, especially for larger quantities of beans. If you’re short on time, you can skip the soaking step, but the cooking time will be slightly longer.
Now that the beans are properly soaked and ready, we can move on to the next step, which involves preparing the electric pressure cooker for cooking.
Step 2: Preparing the Pressure Cooker
Once the black beans are soaked and ready, it’s time to prepare the electric pressure cooker for cooking. Follow these steps to ensure a successful cooking process:
- Ensure that the electric pressure cooker is clean and in proper working condition.
- Add 3 cups of water to the pressure cooker. This water will create the steam necessary to cook the black beans.
- Place the soaked black beans into a strainer or colander and give them a final rinse.
- Transfer the rinsed black beans into the pressure cooker’s cooking pot.
- If desired, add a teaspoon of salt for seasoning and a tablespoon of olive oil for added flavor. These ingredients are optional but can enhance the taste of the black beans.
- Close the lid of the pressure cooker securely, ensuring it’s properly sealed.
It’s important to read and follow the manufacturer’s instructions for your specific electric pressure cooker model. Each cooker may have its own set of guidelines and safety precautions, so familiarize yourself with the manual before proceeding.
Now that the pressure cooker is prepared, it’s time to move on to the next step, which involves cooking the black beans under pressure.
Step 3: Cooking the Black Beans
With the pressure cooker prepared, it’s time to start cooking the black beans. Follow these steps to ensure a successful cooking process:
- Plug in the electric pressure cooker and set it to the “Pressure Cook” or “Manual” mode.
- Adjust the cooking time using the “+” or “-” buttons on the cooker’s control panel. For black beans, a general guideline is to cook them for around 25-30 minutes.
- Once the cooking time is set, press the “Start” or “Cook” button to begin the cooking process.
- The pressure cooker will take some time to build up pressure, and then the cooking process will start. You might hear a hissing sound as steam begins to escape from the cooker.
- During the cooking process, avoid opening the lid or interfering with the pressure cooker. This can disrupt the cooking time and result in undercooked beans.
- Allow the pressure cooker to cook the black beans for the set amount of time. The cooker will automatically release the pressure and switch to “Keep Warm” mode once the cooking time is complete.
Remember, the cooking time may vary slightly depending on the quantity of beans and the specific pressure cooker model. It’s best to follow the suggested cooking time in the recipe or adjust it based on the manufacturer’s recommendations.
Now that the black beans are cooking, we move on to the next step, which involves the natural pressure release.
Step 4: Natural Pressure Release
After the black beans have finished cooking, it’s important to allow for a natural pressure release. This gradual release of pressure helps to ensure that the beans remain tender and prevents any potential liquid from spewing out when the lid is opened. Follow these steps to perform a natural pressure release:
- Once the cooking time is complete, turn off the pressure cooker and let it sit undisturbed. The cooker will automatically switch to the “Keep Warm” mode.
- Allow the pressure to release naturally. This can take around 10 to 15 minutes, depending on the pressure cooker and the amount of food being cooked.
- Avoid using the quick release valve or manually releasing the pressure by opening the steam vent. Doing so can cause the beans to become mushy or result in liquid splatters.
- Once the pressure is fully released, the pressure indicator on the cooker lid will drop, indicating that it’s safe to open.
Performing a natural pressure release is essential to ensure that the black beans are cooked evenly and have the right texture. It allows the beans to continue cooking in the residual heat and the remaining steam.
With the natural pressure release complete, we can move on to the next step, which involves checking the beans for doneness.
Step 5: Checking the Beans
Once the pressure has been released, it’s important to check the black beans for doneness before serving. Here’s how to check if the beans are cooked to perfection:
- Carefully open the lid of the pressure cooker and use a spoon or fork to take a small sample of the black beans.
- Check the texture and tenderness of the beans. They should be soft and tender, without any hard or undercooked parts.
- If the beans are not yet fully cooked, you can close the pressure cooker lid and continue cooking them for an additional few minutes under pressure.
- Alternatively, if the beans are cooked to your liking, you can proceed to the next step and season them before serving.
Keep in mind that the cooking time can vary based on the specific pressure cooker model and the desired level of doneness. Adjust the cooking time accordingly if you prefer firmer or softer beans.
Once you’re satisfied with the tenderness of the black beans, it’s time to add some flavor by seasoning them.
Step 6: Seasoning and Serving
Now that the black beans have been cooked to perfection, it’s time to add some seasoning and prepare them for serving. Follow these steps to season and serve the black beans:
- Take a taste of the cooked black beans and adjust the seasoning according to your preference. Add more salt, spices, or herbs if desired.
- If you added optional ingredients such as garlic, onion, cumin, or chili powder, the flavors should now be infused into the beans.
- Gently mix the beans with the seasoning, ensuring that all the beans are coated evenly.
- At this point, you can serve the black beans as a side dish, or you can use them as an ingredient in various recipes such as salads, burritos, or soups.
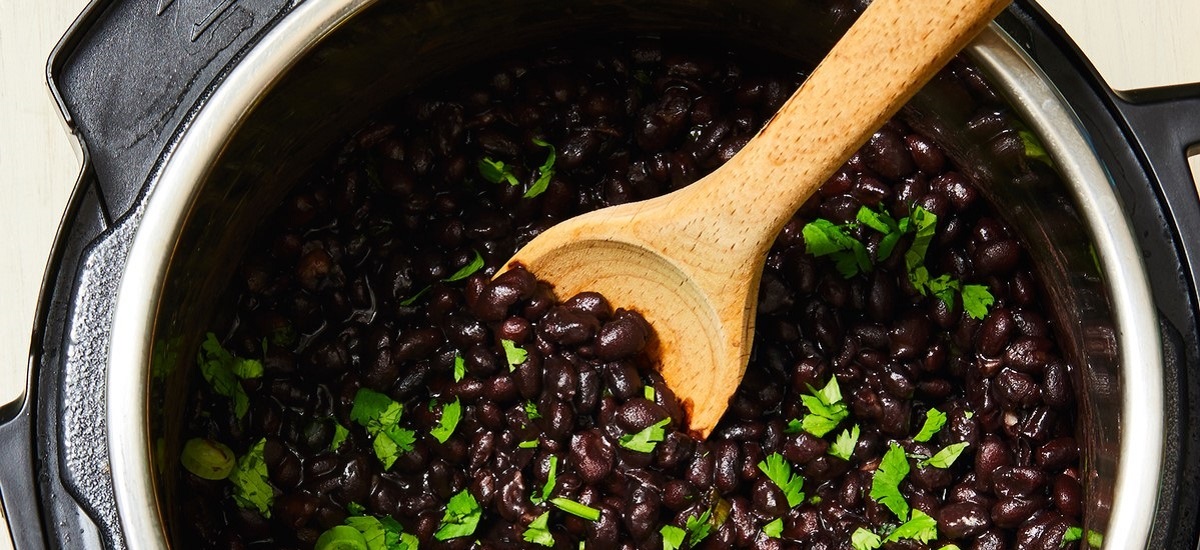
- Transfer the seasoned black beans into a serving dish and garnish with fresh herbs or a squeeze of lime juice for an added burst of freshness.
The cooked black beans can be stored in an airtight container in the refrigerator for up to 4-5 days, allowing you to enjoy them throughout the week. You can also freeze them in portion-sized containers for longer-term storage.
Now that you’ve learned how to cook and season black beans in an electric pressure cooker, you can explore various recipes and experiments to incorporate them into your meals.
With these simple steps, you can now confidently cook flavorful and tender black beans in an electric pressure cooker. Enjoy the rich and nutritious goodness of this versatile ingredient in your favorite dishes!
Conclusion
Cooking black beans in an electric pressure cooker is a convenient and efficient method that yields perfectly tender and flavorful results. By following the step-by-step guide outlined in this article, you can easily master the art of cooking black beans in an electric pressure cooker.
The soaking step helps to reduce the cooking time, but it is optional. However, if you do choose to soak the beans, it’s important to drain and rinse them before placing them in the pressure cooker. This ensures that you start with clean and fresh beans.
Preparing the pressure cooker correctly, with the right amount of water and any desired seasoning, is essential for successful outcomes. Ensure that the lid is properly sealed to maintain the pressure during the cooking process.
Cook the black beans under pressure for the recommended time, allowing the cooker to naturally release the pressure afterward. This gradual release preserves the texture and tenderness of the beans.
Checking the beans for doneness and adjusting the cooking time if necessary guarantees that you achieve the desired level of tenderness. Season the beans to your taste preferences, adding spices and herbs to enhance their flavor.
Once seasoned, the black beans can be enjoyed as a side dish or used as an ingredient in a variety of recipes. They store well in the refrigerator or freezer for future use.
Now that you have learned how to cook black beans in an electric pressure cooker, you have unlocked a world of culinary possibilities. Experiment with different flavors and recipes to make the most of this versatile ingredient.
So, grab your electric pressure cooker, a bag of black beans, and embark on a taste-filled journey. Enjoy the nourishing and delicious benefits of cooking black beans in an electric pressure cooker!