Why Cook Dried Beans in an Electric Pressure Cooker?
Electric pressure cookers have become increasingly popular in modern kitchens due to their convenience and time-saving capabilities. When it comes to cooking dried beans, using an electric pressure cooker offers numerous advantages.
Firstly, cooking dried beans in an electric pressure cooker significantly reduces the cooking time. Traditionally, beans can take several hours of simmering on the stovetop to become tender. However, with an electric pressure cooker, the cooking time can be cut down to a fraction of that. The high pressure created inside the cooker helps to break down the tough fibers of beans, resulting in quicker cooking times.
Another benefit is that using an electric pressure cooker preserves the nutrients in dried beans. The shorter cooking time helps to retain more vitamins, minerals, and antioxidants that are often lost during prolonged cooking methods. So, by using an electric pressure cooker, you can enjoy the nutritional benefits of beans without compromising their natural goodness.
Furthermore, electric pressure cookers are known for their ability to lock in flavors. The sealed environment inside the cooker ensures that the beans cook in their own juices, enhancing their taste and texture. This means you can achieve deliciously tender and flavorful beans in a fraction of the time it would take using traditional cooking methods.
Additionally, cooking dried beans in an electric pressure cooker eliminates the need for pre-soaking the beans. While soaking beans overnight can help reduce their cooking time, it requires advance planning. With an electric pressure cooker, you can skip the soaking process altogether. The pressure created inside the cooker allows the beans to rehydrate quickly during the cooking process, saving you valuable time and effort.
Lastly, using an electric pressure cooker avoids the risk of overcooking or undercooking dried beans. These cookers are designed to provide consistent heat and pressure, ensuring that the beans are cooked perfectly each time. No more worrying about ending up with mushy or crunchy beans!
In summary, cooking dried beans in an electric pressure cooker offers numerous benefits, including reduced cooking time, preserved nutrients, enhanced flavors, no need for pre-soaking, and foolproof cooking. Whether you want to whip up a quick weeknight dinner or meal prep for the week, an electric pressure cooker is a valuable kitchen appliance for cooking dried beans.
Step-by-Step Guide to Cooking Dried Beans in an Electric Pressure Cooker
Cooking dried beans in an electric pressure cooker is a straightforward process that yields deliciously tender beans in a fraction of the time. Here’s a step-by-step guide to help you get started:
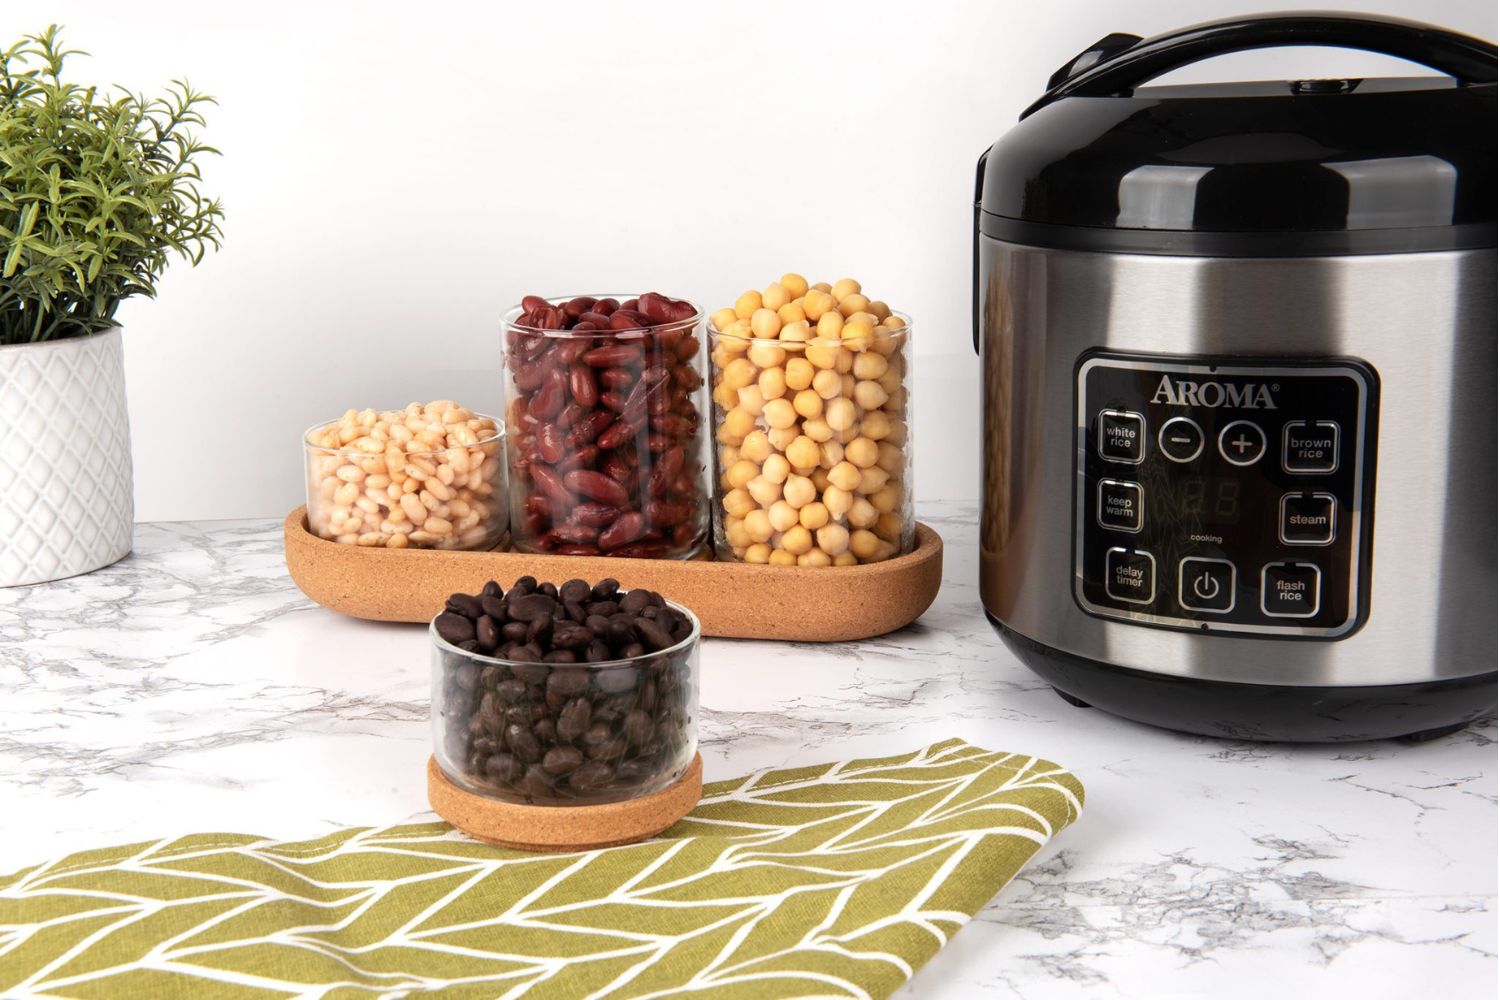
Step 1: Select and Measure
Choose your preferred variety of dried beans, such as black beans, kidney beans, or chickpeas. Measure the desired amount of beans according to your recipe or personal preference. It’s important to note that beans expand during cooking, so be cautious not to overfill the pressure cooker.
Step 2: Rinse the Beans
Place the dried beans in a colander or sieve and rinse them thoroughly under cold water. This helps to remove any dirt, debris, or impurities that may be present on the beans.
Step 3: Soak (Optional)
If time permits, you can soak the beans to reduce their cooking time. Simply transfer the rinsed beans to a bowl, cover them with water, and let them soak for 4-8 hours, or overnight. However, this step is optional, as the electric pressure cooker can effectively cook unsoaked beans as well.
Step 4: Add Beans and Liquid
Transfer the rinsed (or soaked) beans to the electric pressure cooker. Add enough liquid to cover the beans. You can use water, vegetable broth, or any other flavorful liquid as per your recipe. The ratio is typically 3 cups of liquid for every 1 cup of dried beans, but you can adjust it based on your preference.
Step 5: Set Cooking Time
Once the beans and liquid are in the pressure cooker, lock the lid and set the cooking time. Different varieties of beans may require different cooking times. As a general guideline, most beans can be cooked in 20-30 minutes under high pressure. Consult the manual of your pressure cooker or refer to a reliable cooking chart for precise cooking times.
Step 6: Start Cooking
Turn on the pressure cooker and select the appropriate cooking mode (e.g., “Pressure Cook” or “Beans/Legumes”). The cooker will begin to build pressure, and the beans will start cooking. It usually takes a few minutes for the pressure to build up before the actual cooking time begins.
Step 7: Release Pressure
Once the cooking time is complete, you need to release the pressure from the cooker. There are two methods: quick release and natural release. For the quick release, carefully vent the pressure by turning the steam valve to the “Venting” position. For the natural release, allow the pressure to come down naturally on its own. The time required for natural release varies depending on the recipe and the type of beans.
Step 8: Season and Serve
Once the pressure has been released, carefully open the lid of the pressure cooker. You can now season the cooked beans with salt, pepper, herbs, spices, or any other flavorings of your choice. Give everything a gentle stir, and your cooked beans are ready to be enjoyed in various dishes or as a nutritious standalone meal.
With this step-by-step guide, you can confidently cook dried beans in your electric pressure cooker, saving time and ensuring perfectly cooked beans with just a few simple steps.
Soaking the Beans
Soaking dried beans is an optional step that can help reduce their cooking time and improve their texture. While it may require some pre-planning, soaking beans can be beneficial for those who prefer a shorter cooking time or want to make the beans easier to digest. Here’s a guide to soaking beans before cooking them in an electric pressure cooker:
Step 1: Choose Your Method
There are two common methods for soaking beans: overnight soaking and quick soaking. Overnight soaking involves covering the beans with water and allowing them to soak for 8-12 hours. Quick soaking involves bringing the beans and water to a boil, simmering for 2-3 minutes, and then letting them soak for 1-2 hours. Both methods can help soften the beans and reduce cooking time.
Step 2: Rinse and Sort the Beans
Before soaking, rinse the beans under cold water to remove any dirt or debris. Additionally, sort through the beans and remove any damaged or discolored ones, as well as any small stones or other foreign objects that may have found their way into the bag.
Step 3: Soak the Beans
If using the overnight soaking method, transfer the rinsed beans to a large bowl and cover them with fresh, cold water. Ensure that there is enough water to fully submerge the beans, as they will expand during soaking. If using the quick soaking method, place the rinsed beans in a pot, add water, and bring it to a boil. Let the beans boil for 2-3 minutes, then remove them from the heat and allow them to soak for 1-2 hours.
Step 4: Drain and Rinse
After the beans have finished soaking, drain the soaking liquid and rinse the beans again under cold water. Rinsing helps remove any residual oligosaccharides, which are sugars that can cause gas and discomfort during digestion.
Step 5: Cook the Beans
Once the beans have been soaked and rinsed, they are ready to be cooked in the electric pressure cooker. Follow the instructions for cooking dried beans in the pressure cooker, adjusting the cooking time based on the pre-soaked beans. Keep in mind that soaked beans will cook faster than unsoaked beans, so you may need to reduce the cooking time accordingly.
Soaking dried beans before cooking them in an electric pressure cooker is a personal preference. While it can help reduce cooking time and improve texture, it is not necessary. If you choose not to soak the beans, simply rinse them thoroughly and proceed with the cooking instructions for unsoaked beans. Whether you choose to soak or not, cooking dried beans in an electric pressure cooker will result in delicious and nutritious beans to use in a variety of dishes.
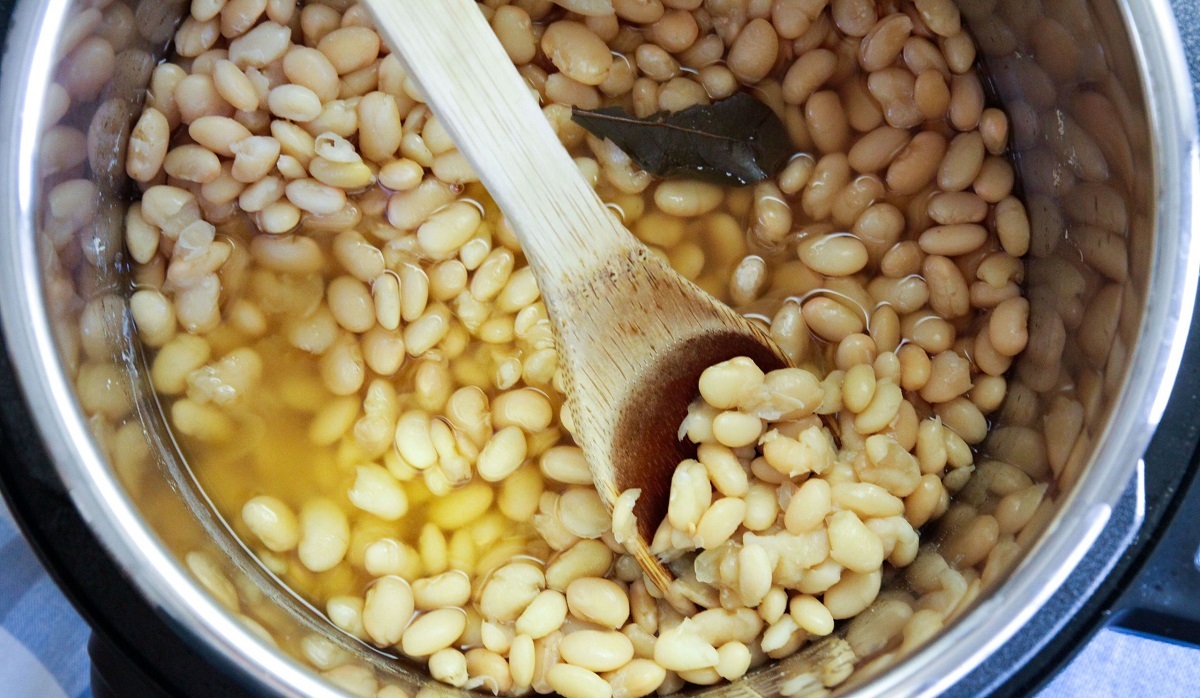
Cooking the Beans
Once you have prepared your dried beans by rinsing and, if desired, soaking them, it’s time to cook them in your electric pressure cooker. This cooking method not only saves time but also ensures that your beans turn out tender and flavorful. Here’s a step-by-step guide to cooking dried beans in an electric pressure cooker:
Step 1: Measure the Beans and Liquid
Start by measuring the desired amount of dried beans, taking into consideration that they will expand during cooking. As a general guideline, use 3 cups of liquid for every 1 cup of dried beans. You can use water, vegetable broth, or any other flavorful liquid to enhance the taste of the beans.
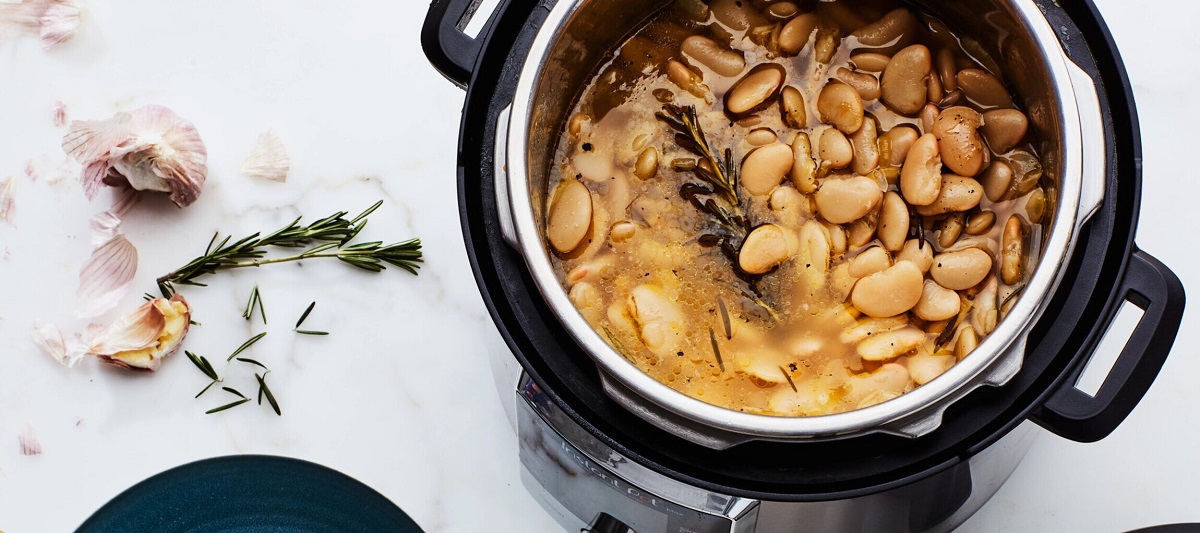
Step 2: Add Seasonings (Optional)
If desired, add seasonings or aromatics to the pot to infuse the beans with extra flavor. This can include ingredients like garlic, onions, bay leaves, herbs, or spices. Be mindful of the salt content as adding salt at this stage might result in tougher beans. It’s generally recommended to season the beans after they are cooked.
Step 3: Set Cooking Time
Refer to the cooking chart specific to your electric pressure cooker or recipe to determine the appropriate cooking time for the type of beans you are using. On average, most beans will cook in about 20-30 minutes on high pressure, but certain varieties may require longer or shorter cooking times. Adjust accordingly.
Step 4: Start Cooking
Lock the lid of the electric pressure cooker into place and set it to the appropriate cooking mode, often labeled as “Pressure Cook” or “Beans/Legumes.” The cooker will begin to build pressure, and the beans will start cooking. It may take a few minutes for the pressure to build up before the actual cooking time starts counting down.
Step 5: Release Pressure
Once the cooking time is complete, you can release the pressure from the electric pressure cooker. There are two common methods: quick release and natural release. For the quick release, carefully vent the pressure by turning the steam valve to the “Venting” position. For the natural release, allow the pressure to come down naturally on its own. The release method will vary based on the recipe and personal preference.
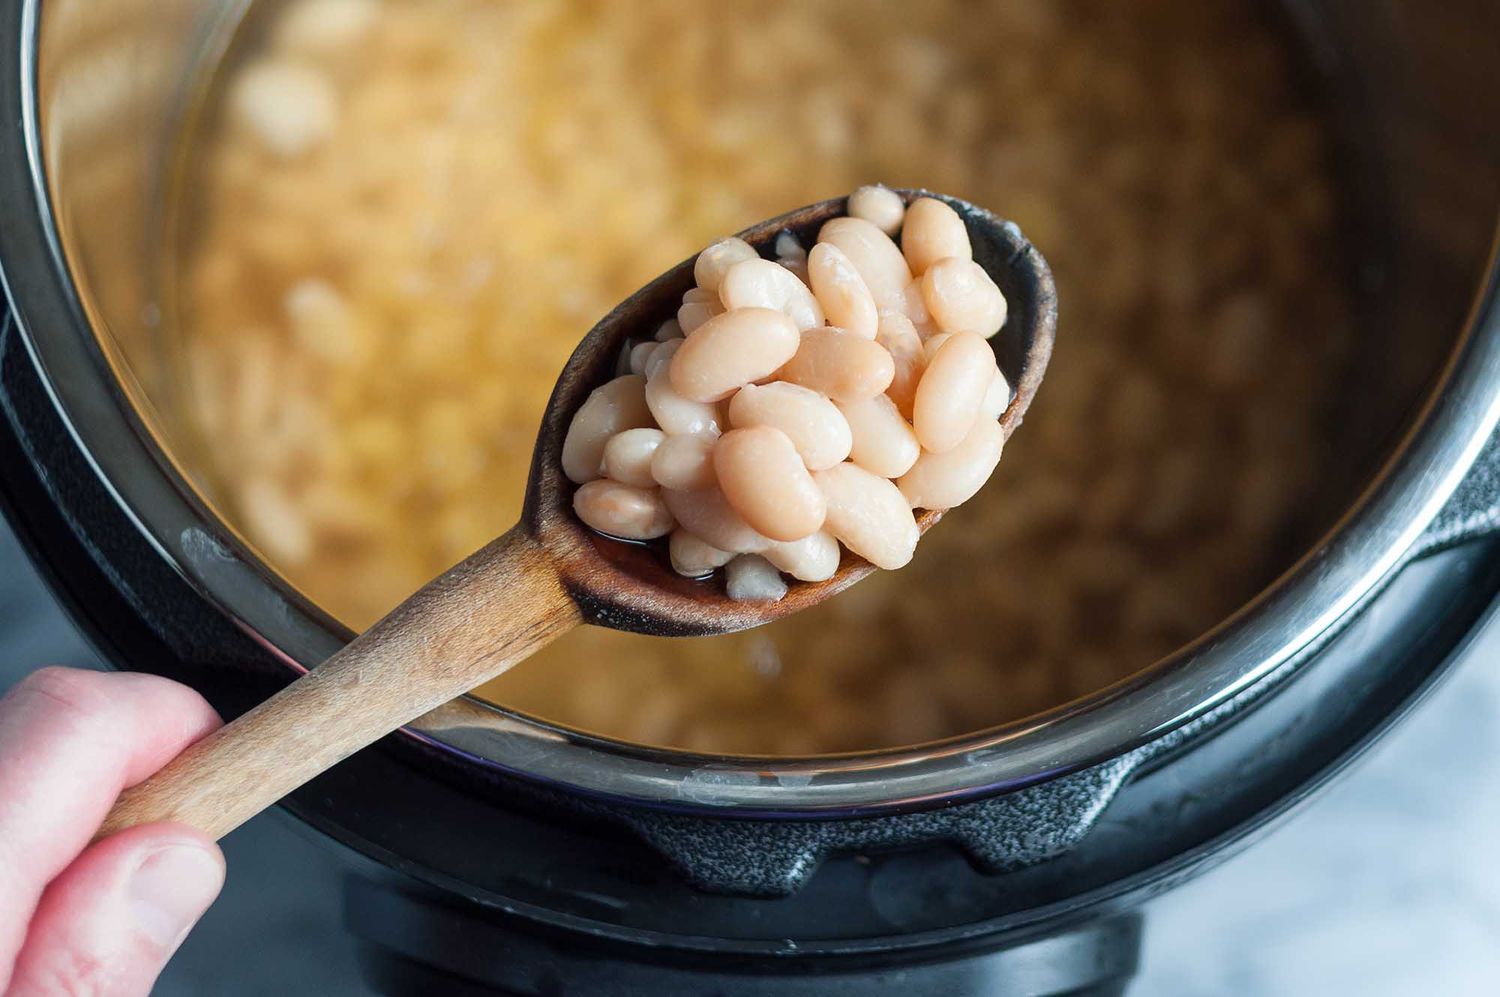
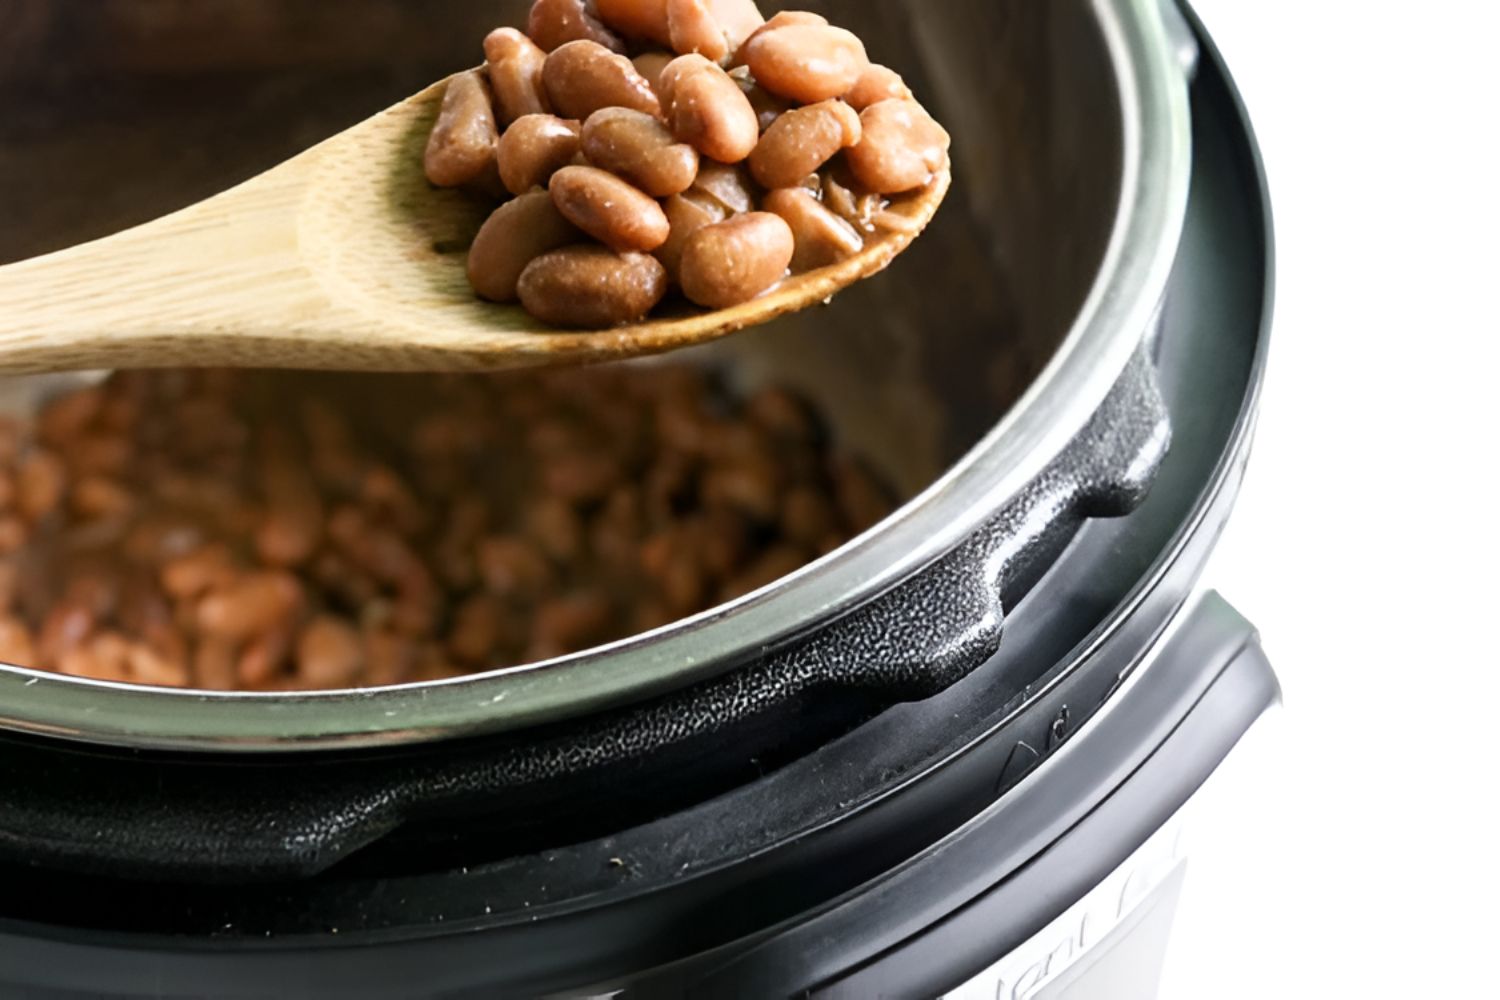
Step 6: Check for Doneness
After releasing the pressure, open the lid of the electric pressure cooker and check the beans for doneness. They should be tender and cooked through, without any raw or undercooked beans. If some beans still seem firm, you can return the pressure cooker to the high pressure mode and cook for a few additional minutes until they reach the desired consistency.
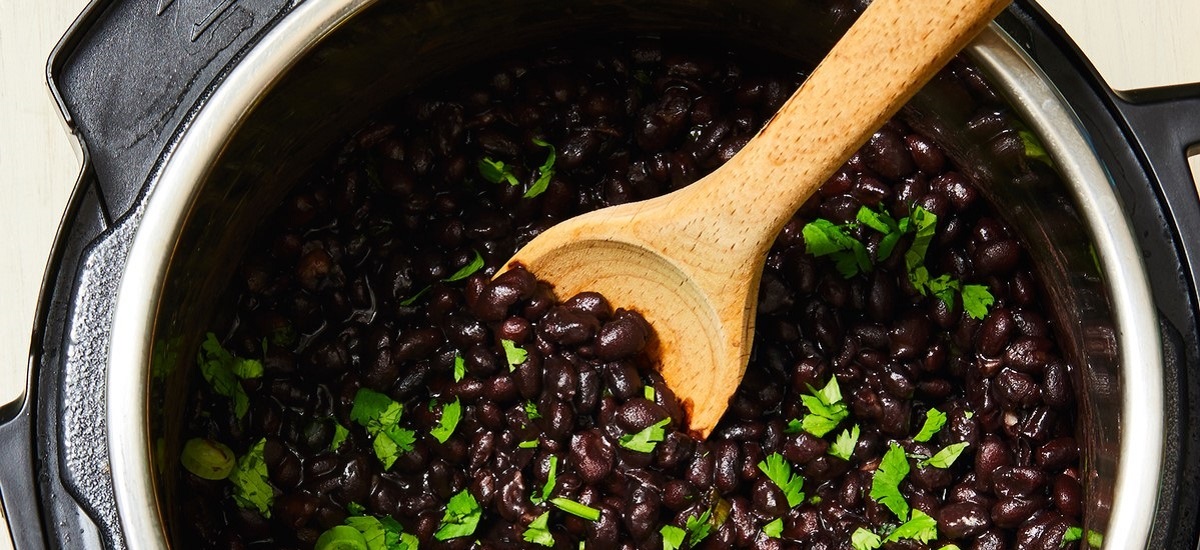
Step 7: Season and Serve
Now that your beans are cooked to perfection, it’s time to season them to taste. Add salt, pepper, and any other desired seasonings. You can also use the cooked beans in various recipes or enjoy them as a standalone dish. They are perfect for soups, stews, salads, or as a side dish for a complete meal.
Cooking dried beans in an electric pressure cooker is a simple and hassle-free way to achieve perfectly cooked beans in a fraction of the time compared to traditional stovetop methods. Experiment with different beans and seasonings to create a variety of delicious dishes that everyone will enjoy.
Quick Release vs Natural Release
When cooking dried beans in an electric pressure cooker, understanding the differences between quick release and natural release methods for releasing pressure is essential. The release method you choose can affect the final texture and flavor of the beans. Let’s explore the characteristics of each:
Quick Release
Quick release is the method of manually releasing the built-up pressure in the electric pressure cooker using the steam release valve. This method involves carefully turning the valve from the “Sealing” to the “Venting” position. The pressure is released rapidly, allowing the cooker to depressurize quickly. Quick release is ideal for when you want to stop the cooking process immediately or when you’re short on time.
However, it’s important to exercise caution when performing a quick release. The steam escaping from the valve can be hot, so protect your hands and be mindful of the hot steam. It is advisable to use a long utensil or wear oven mitts to ensure safety during this process.
Natural Release
Natural release, on the other hand, involves allowing the pressure to naturally decrease without any intervention. This method requires patience as the cooker gradually releases its pressure on its own. Natural release can take anywhere from 10 to 20 minutes, depending on the recipe and the type of beans being cooked.
Natural release is generally recommended for delicate or starchy foods, such as beans, grains, or dishes that contain a lot of liquid. Slowly releasing the pressure allows the beans to continue cooking gently, resulting in a more even texture and less likelihood of splitting or becoming mushy.
When using the natural release method, it’s important to note that the cooking time will continue as the pressure slowly releases. This means you may need to adjust the total cooking time to account for the residual heat and pressure that will continue cooking the beans.
Ultimately, the choice between quick release and natural release depends on the recipe and desired outcome. If you want to stop the cooking process immediately or are short on time, quick release is the way to go. However, if you prefer a more gentle cooking process or are cooking delicate beans, grains, or dishes with a lot of liquid, natural release is recommended.
It’s important to follow the recipe instructions or consult your electric pressure cooker manual to determine the appropriate release method for the specific recipe you’re preparing. By understanding the differences between quick release and natural release, you can confidently release pressure in your electric pressure cooker and achieve the desired texture and flavor in your cooked beans.
Seasoning and Flavoring the Beans
While beans on their own can be nutritious and delicious, adding seasoning and flavorings can take them to the next level. Seasoning and flavoring your cooked beans allows you to customize their taste, enhancing their natural flavors and complementing your desired dish. Here are some ideas and tips for seasoning and flavoring your beans:
1. Salt and Pepper
One of the simplest ways to season beans is to add salt and pepper to taste. Salt enhances the natural flavors of the beans while pepper adds a subtle kick. Adjust the seasoning gradually, tasting as you go, until the desired balance is achieved.
2. Aromatics
Another way to enhance the flavor of beans is by adding aromatics such as onions, garlic, and herbs. Sauté diced onions and minced garlic before adding the cooked beans to infuse them with a flavorful base. You can also experiment with adding herbs like bay leaves, thyme, rosemary, or parsley to enhance the overall taste.
3. Spices
Spices can add depth and complexity to your beans. Consider adding spices like cumin, paprika, chili powder, or smoked paprika to give your beans a smoky or spicy flavor. Feel free to experiment with different spice combinations to create unique and flavorful bean dishes.
4. Acidic Ingredients
Acidic ingredients like lemon juice, vinegar, or tomatoes can brighten up the flavors of your beans. Add a splash of lemon juice or a tablespoon of vinegar to add a tangy twist. If you’re making bean soups or stews, adding diced tomatoes or tomato paste can provide a rich and tangy depth of flavor.
5. Sweet and Savory Balance
To create a well-balanced flavor profile, consider adding a touch of sweetness to your beans. This can be done by adding a small amount of brown sugar, maple syrup, or a few dashes of Worcestershire sauce. The sweetness helps to balance the savory notes and bring out the natural sweetness of the beans.
6. Experiment with Complementary Ingredients
Don’t be afraid to get creative and experiment with complementary ingredients. Add diced bell peppers, corn kernels, diced carrots, or chopped celery to give your beans a burst of color and texture. You can also stir in cooked bacon, sausage, or ham for added richness and flavor.
7. Taste and Adjust
Throughout the seasoning and flavoring process, taste your beans and make adjustments as needed. Remember that everyone’s taste preferences are different, so feel free to customize the seasoning to suit your palate. Whether you like spicy, smoky, tangy, or milder flavors, the key is to taste and adjust until you’re satisfied with the final result.
By experimenting with different seasoning and flavoring options, you can transform plain cooked beans into a vibrant and flavorful dish. Whether you’re making bean salads, chili, soups, or side dishes, the right combination of seasonings can elevate your beans and make them an irresistible addition to any meal.
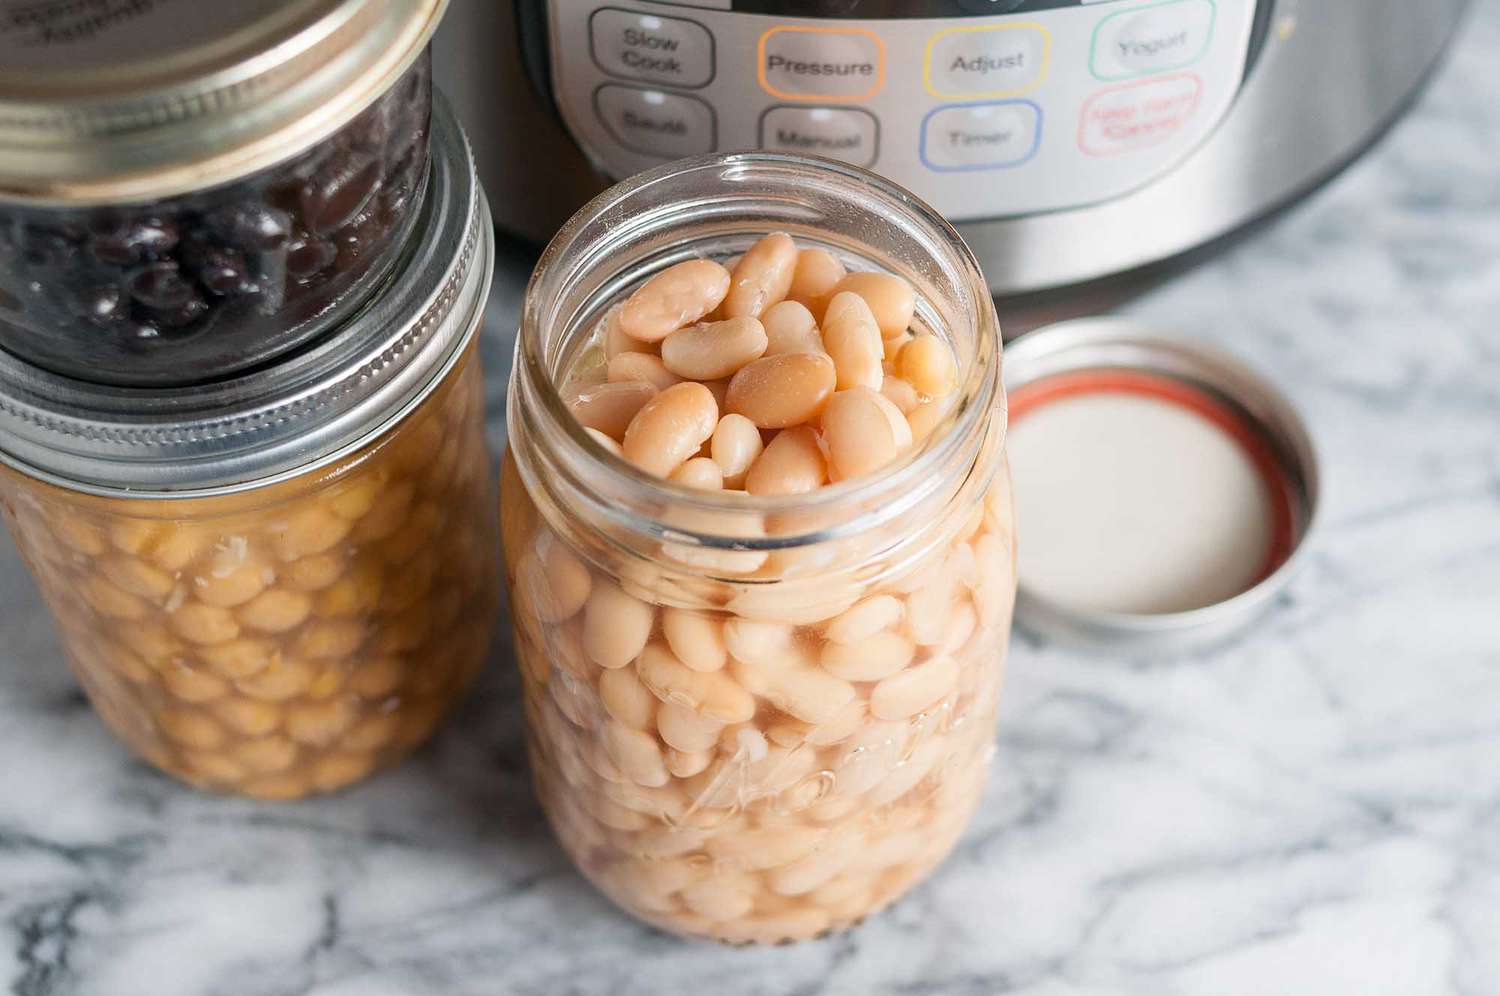
Storing and Freezing Cooked Beans
After cooking a batch of delicious beans, you may find yourself with leftovers or want to prepare a larger quantity for future use. Properly storing and freezing cooked beans will help preserve their freshness and ensure they remain tasty and ready to use whenever you need them. Here’s a guide on how to store and freeze cooked beans:
Storing Cooked Beans
1. Allow the beans to cool: Before storing, let the cooked beans cool down to room temperature. This prevents condensation and helps maintain their texture and flavor.
2. Choose your storage container: Use airtight containers or resealable bags to store the beans. Mason jars, plastic containers, or freezer-safe bags are all suitable options.
3. Portion sizes: Divide the beans into smaller portions that align with your future recipe needs. This makes it easier to defrost only what you require without having to thaw the entire batch.
4. Add liquid (optional): If desired, you can add some of the cooking liquid or broth to the containers with the beans. This can help preserve their moisture and flavor while in storage.
5. Label and date: Clearly label each container or bag with the type of beans and the date of storage. This ensures you can keep track of when they were cooked and prioritize the oldest beans for consumption.
6. Refrigerate or freeze: For short-term storage (up to 5 days), place the containers in the refrigerator. If you don’t plan to use the beans within that time, transfer them to the freezer for longer-term storage.
Freezing Cooked Beans
1. Flash-freeze on a baking sheet (optional): To prevent the beans from sticking together in the freezer, you can flash-freeze them on a baking sheet before transferring them to the storage containers. Simply spread the cooled beans in a single layer on the sheet and place it in the freezer for a couple of hours. This helps to maintain the individual shape of each bean.
2. Vacuum sealing (optional): If you have a vacuum sealer, consider vacuum-sealing the cooked beans before freezing. This can help remove excess air and further preserve the freshness and quality of the beans.
3. Freeze flat: Once the beans are prepared and ready for storage, place the containers or bags flat in the freezer. This allows for easy stacking and saves valuable freezer space.
4. Thawing the beans: When you’re ready to use the frozen beans, transfer them to the refrigerator and let them thaw overnight. Alternatively, you can defrost them quickly in the microwave or with a gentle reheat on the stovetop.
Properly stored and frozen cooked beans can remain good for up to three months. However, for the best quality and taste, it’s recommended to consume them within one to two months. Remember to always use your judgment and discard any beans that show signs of spoilage, off odors, or unusual textures.
By following these storage and freezing techniques, you can easily enjoy the convenience of cooked beans whenever you need them. Whether for use in soups, stews, salads, or as a side dish, having a stash of cooked beans on hand can save you time and effort in the kitchen.
Recipes Using Cooked Beans
Cooked beans are versatile ingredients that can be used in a wide variety of recipes, adding flavor, texture, and nutrition. From hearty soups and stews to satisfying salads and dips, here are some delicious and creative ways to incorporate cooked beans into your meals:
1. Bean Salad
Toss cooked beans with fresh vegetables like cherry tomatoes, cucumbers, bell peppers, and red onions. Drizzle with a simple dressing of olive oil, lemon juice, and your favorite herbs. You can also add some feta cheese or avocado for extra creaminess and flavor.
2. Bean Burgers
Mash cooked beans with breadcrumbs, minced garlic, onions, and your favorite spices to create a flavorful bean burger mixture. Form into patties and cook on a grill or stovetop until golden brown. Serve on a bun with your favorite toppings and condiments.
3. Bean Soup
Combine cooked beans with vegetable broth, diced tomatoes, carrots, onions, celery, and herbs. Let it simmer on the stovetop until the flavors meld together. Add cooked pasta, rice, or quinoa for a heartier version. Serve with crusty bread for a satisfying meal.
4. Bean Dip
Puree cooked beans with garlic, lemon juice, olive oil, and your choice of herbs or spices to create a tasty bean dip. Serve with fresh vegetables, pita bread, or tortilla chips for a healthy and satisfying snack or appetizer.
5. Bean and Grain Bowls
Create a nourishing grain bowl by combining cooked beans with cooked grains like quinoa, rice, or couscous. Add roasted vegetables, greens, and your favorite dressing or sauce for a complete and nutritious meal.
6. Bean Tacos
Warm up cooked beans and season with spices like cumin, chili powder, and paprika. Fill taco shells with the seasoned beans and top with fresh salsa, avocado slices, shredded lettuce, and a squeeze of lime juice. Serve with sour cream or Greek yogurt for a delicious and protein-packed taco night.
7. Bean and Vegetable Stir-Fry
Sauté cooked beans with a medley of vegetables like broccoli, bell peppers, snap peas, and carrots. Add soy sauce, ginger, and garlic for a savory Asian-inspired flavor. Serve over steamed rice or noodles for a quick and nutritious stir-fry.
These are just a few examples of how you can incorporate cooked beans into your meals. Feel free to get creative and adapt these recipes to suit your taste preferences and dietary needs. With their versatility and nutritional value, cooked beans can be a delicious addition to a variety of dishes, adding both flavor and substance.
Tips and Tricks for Cooking Dried Beans in an Electric Pressure Cooker
Cooking dried beans in an electric pressure cooker can be a game-changer in terms of convenience and speed. To ensure the best results and to make your bean-cooking experience even more enjoyable, here are some tips and tricks to keep in mind:
1. Rinse the Beans: Always start by rinsing the dried beans under cold water before cooking them. This helps remove any dirt, debris, or impurities that may be present.
2. Soaking (Optional): While soaking dried beans can reduce cooking time, it is not always necessary. Follow the instructions of your specific recipe or consult a reliable cooking chart to determine if soaking is recommended for the type of beans you are cooking.
3. Adjust the Liquid: The cooking liquid should be enough to cover the beans and leave room for them to expand. Refer to your pressure cooker’s manual or recipe guidelines for the appropriate liquid-to-bean ratio.
4. Timing is Everything: Cooking times may vary depending on the type and size of the beans. It’s essential to follow the recommended cooking time for the specific beans you are using. Experimentation may be necessary to find your preferred level of tenderness.
5. Use Natural Release for Delicate Beans: If you are cooking delicate beans like lentils or split peas, it’s best to use the natural release method to prevent them from turning mushy. The natural release allows for a gentle and gradual reduction of pressure.
6. Add Seasonings After Cooking: It’s generally recommended to add salt, spices, and other seasonings after the beans are cooked. Adding them earlier can result in tougher beans due to the salt hindering their ability to soften fully.
7. Avoid Overfilling: Be mindful not to overfill your electric pressure cooker when cooking beans. Beans tend to expand during cooking, so leave enough space to prevent any overflow issues.
8. Take Advantage of Bean Cooking Charts: Bean cooking charts are a valuable resource that provides cooking times for different types of beans. Use these charts as a guideline to ensure you achieve perfectly cooked beans with desired tenderness.
9. Experiment with Seasonings: Don’t be afraid to experiment with different herbs, spices, and seasonings to give your beans a flavorful twist. Whether it’s a pinch of cumin, a sprinkle of smoked paprika, or a dash of hot sauce, seasonings can elevate the taste of your beans.
10. Storage and Freezing: Cooked beans can be stored in airtight containers in the refrigerator for up to five days. Alternatively, you can freeze cooked beans for longer-term storage. Portion them into freezer-safe bags or containers for convenient use in future recipes.
By keeping these tips and tricks in mind, you can master the art of cooking dried beans in an electric pressure cooker. Experiment with different varieties of beans, flavor combinations, and cooking methods to discover your own signature bean recipes that will impress your family and friends.
Conclusion
Cooking dried beans in an electric pressure cooker is a convenient and efficient way to enjoy delicious, tender beans in a fraction of the time. By following the step-by-step guide, you can confidently cook a variety of beans, from black beans to chickpeas, with ease and expertise.
The benefits of using an electric pressure cooker for cooking beans are manifold. The reduced cooking time, preserved nutrients, enhanced flavors, and elimination of the need for pre-soaking make it an ideal method for busy individuals looking for nutritious and flavorful meals.
Remember to explore different options for seasoning and flavoring your beans, allowing you to customize them to your personal preferences and create unique and enticing dishes. From salads to soups, tacos to bean burgers, the possibilities are endless when it comes to incorporating cooked beans into your recipes.
Furthermore, understanding the differences between quick release and natural release methods when releasing pressure is crucial for achieving desired textures in your cooked beans. Both methods have their place based on the recipe and the type of beans being cooked, so experiment and find what works best for you.
Lastly, proper storage and freezing techniques ensure that your cooked beans can be enjoyed at a later time, providing you with quick and convenient meal options. Whether you’re meal prepping or saving leftovers, knowing how to store and freeze cooked beans will help preserve their freshness and taste.
In conclusion, cooking dried beans in an electric pressure cooker is a simple and effective way to prepare flavorful and nutritious meals. With these tips, techniques, and recipes at your disposal, you can elevate your cooking skills and enjoy the many benefits of incorporating beans into your culinary repertoire.