Introduction
Nowadays, with the rise of smartphones, people are capturing high-quality photos with advanced technology. One such technology is HEIC (High-Efficiency Image Format), which is widely used by Apple devices. HEIC offers superior image quality while maintaining smaller file sizes compared to the traditional JPG format. However, compatibility issues arise when HEIC files are transferred to devices or platforms that do not support this format.
Converting HEIC files to more widely compatible formats, such as JPG (Joint Photographic Experts Group), becomes essential in order to ensure easy sharing, editing, and viewing of these images across various devices and platforms. If you are a PC user and have encountered issues while handling HEIC files, worry not! In this article, we will explore various methods to convert HEIC to JPG on your PC.
Whether you are a professional photographer or a casual user, understanding how to convert HEIC to JPG can save you time and headaches when dealing with incompatible devices or software. By converting HEIC files to JPG, you can make your images accessible to a broader audience and take advantage of the numerous editing and sharing features available for this widely supported format.
In the following sections, we will outline four different methods for converting HEIC to JPG on your PC. These methods include using online HEIC to JPG converters, dedicated software, image editors, and even utilizing the Apple Photos App if you are a Windows 10 user. Let’s explore these methods in more detail, so you can choose the one that suits your needs best.
What is HEIC?
HEIC, which stands for High-Efficiency Image Format, is a file format developed by the MPEG (Moving Picture Experts Group) organization. It was introduced as the successor to the traditional JPEG (Joint Photographic Experts Group) format and offers several advantages over its predecessor.
HEIC utilizes advanced compression algorithms to achieve higher image quality while maintaining smaller file sizes. This means that you can store more photos on your device without compromising on the visual fidelity of the images. Additionally, HEIC supports various advanced features, such as transparency and multiple images (such as burst mode shots or Live Photos) within a single file.
One of the key benefits of HEIC is its ability to store a larger color gamut and greater dynamic range, resulting in more vibrant and detailed images. This format also supports High Dynamic Range (HDR) photography, allowing for better reproduction of highlights and shadows.
HEIC files are primarily used by Apple devices, including iPhones, iPads, and Mac computers, starting from iOS 11 and macOS High Sierra. Apple adopted this format to optimize storage usage since HEIC files occupy significantly less space than traditional JPEG files while preserving high-quality images.
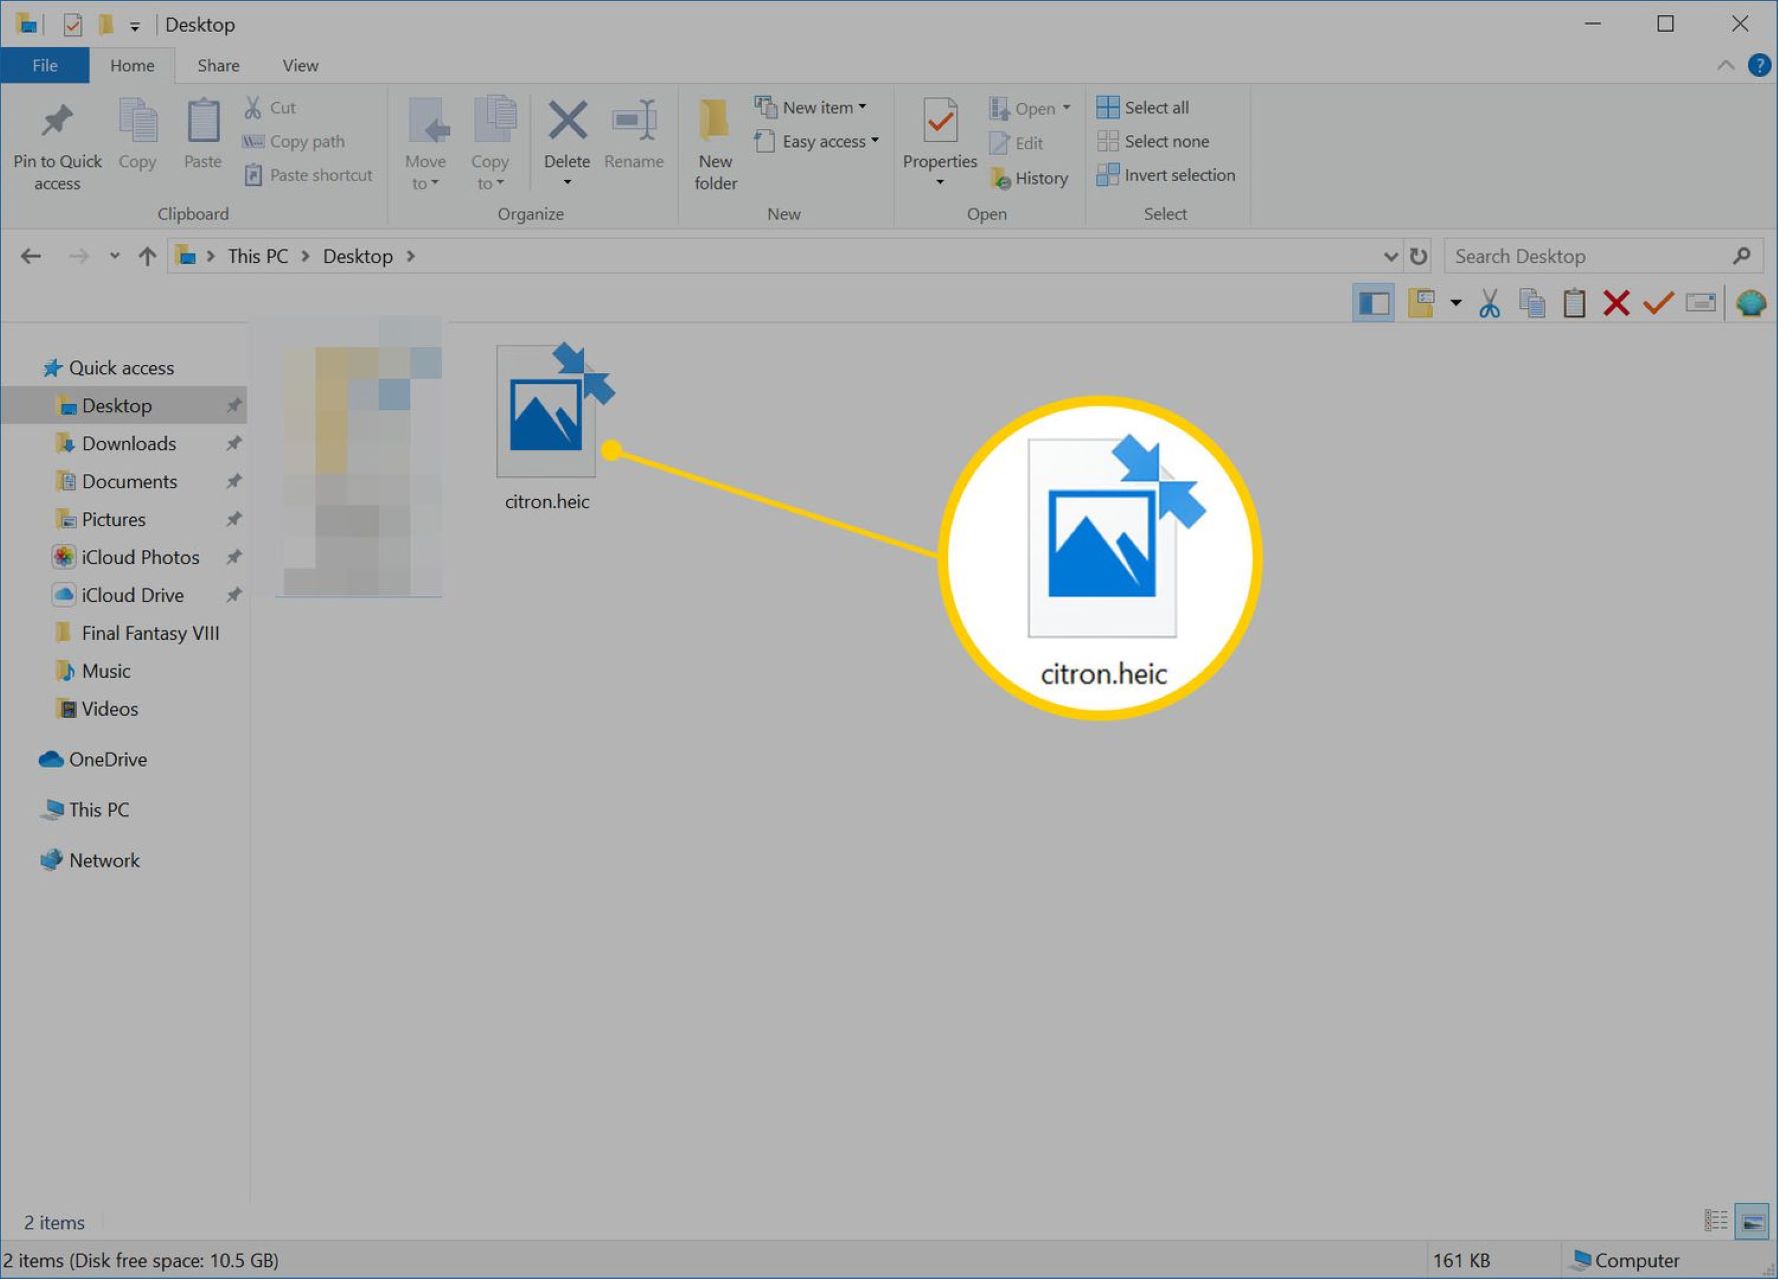
However, the main drawback of HEIC is its limited compatibility. Many non-Apple devices and software applications do not natively support HEIC, making it difficult to view or edit these files. When transferring HEIC images to non-Apple devices or sharing them with others, you may encounter compatibility issues.
Converting HEIC files to more universally compatible formats like JPG allows for seamless sharing and viewing across different platforms and devices. Fortunately, there are various methods available to convert HEIC to JPG on your PC, which we will discuss in the upcoming sections.
Why Convert HEIC to JPG?
While HEIC offers numerous advantages in terms of image quality and file size, there are several reasons why you might want to convert HEIC files to the more widely supported JPG format:
- Compatibility: HEIC files are primarily supported by Apple devices and certain software applications. If you frequently share your photos with users of non-Apple devices or platforms that do not support HEIC, converting to JPG ensures that everyone can easily view and access your images.
- Editing Flexibility: There is a vast range of image editing software available that offer powerful tools and features for working with JPG files. By converting HEIC to JPG, you can take advantage of these editing capabilities to enhance and modify your photos.
- Easy Printing: Many printing services and photo labs may not accept HEIC files for printing. Converting to JPG ensures compatibility with these services, allowing you to easily print your favorite photos.
- Website Compatibility: If you have a personal or professional website, it is crucial to ensure that your images are compatible with a wide range of browsers and devices. Converting HEIC files to the universally supported JPG format helps avoid any display issues and guarantees that your website visitors can view your images without any problems.
- Storage Accessibility: While HEIC files are space-efficient for Apple devices, transferring them to other storage mediums, such as external hard drives or cloud storage, may present compatibility issues. By converting to JPG, you can ensure that your images remain accessible across various storage platforms.
Converting HEIC to JPG provides you with greater flexibility in sharing, editing, printing, and storing your photos. It allows for compatibility with a wide range of devices, software applications, and online platforms, ensuring that your images can be enjoyed by everyone, regardless of their preferred devices or operating systems.
Method 1: Using Online HEIC to JPG Converters
One of the simplest and convenient methods to convert HEIC to JPG on your PC is by using online HEIC to JPG converters. These web-based converters allow you to upload your HEIC files and convert them to JPG format quickly. Here’s how to do it:
- Select a reliable online HEIC to JPG converter from a reputable website. There are several options available, such as HEICtoJPEG, Zamzar, and FileZigZag.
- Once on the converter’s website, click on the “Upload” or “Choose File” button to select the HEIC file from your PC that you want to convert.
- After selecting the file, some converters may require you to choose the output file format (JPG) or set other conversion preferences. Make sure to select JPG as the format for conversion.
- Once all the necessary settings are selected, click on the “Convert” or “Start Conversion” button to begin the conversion process.
- The online converter will then process the uploaded HEIC file and convert it to JPG format. The time taken for the conversion may vary depending on the file size and the converter’s processing speed.
- Once the conversion is complete, the converter will provide you with a download link or offer the option to directly download the converted JPG file to your PC.
- Download the converted JPG file to your desired location on your PC.
It is important to note that online converters may have limitations on file size or the number of files you can convert at once. Also, ensure that you use a trusted online converter to protect the privacy and security of your files. Additionally, remember to delete the uploaded HEIC files and any converted files from the online converter’s server after the download to maintain data privacy.
Using online HEIC to JPG converters is a quick and easy solution if you have only a few files to convert. However, keep in mind that this method may not be suitable for large batches of files or files with sensitive information due to potential file size restrictions and security concerns.
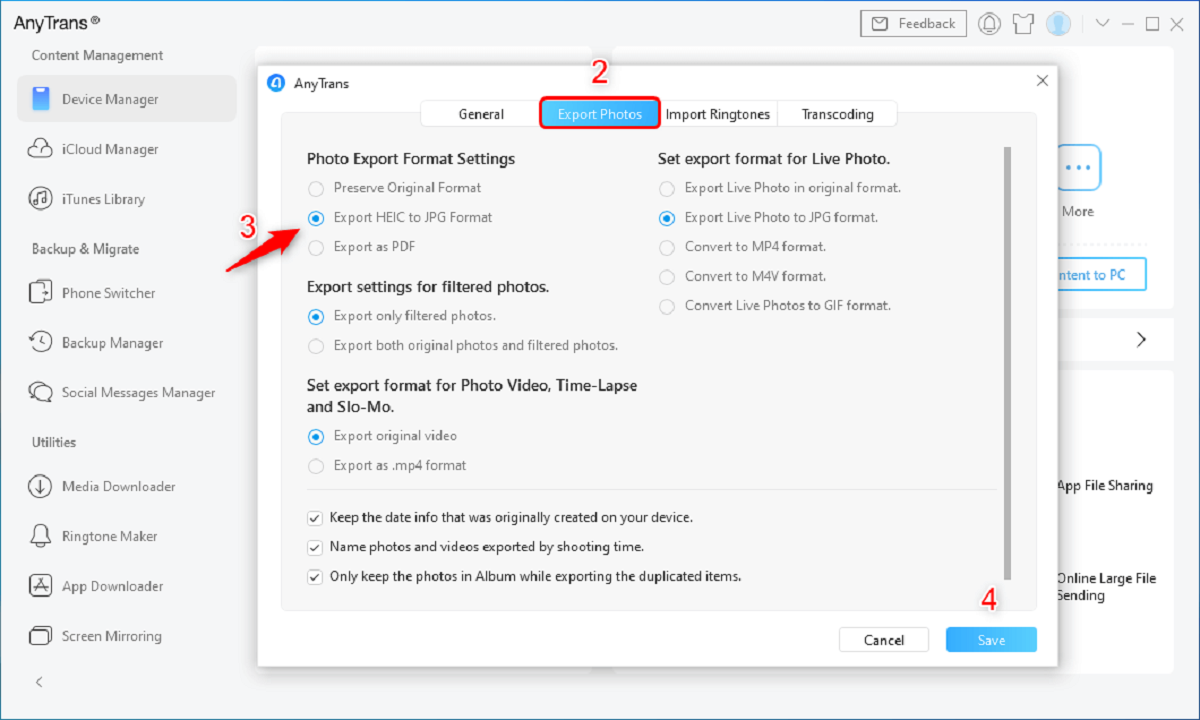
Method 2: Using HEIC to JPG Converter Software
If you have a large number of HEIC files to convert or prefer a more comprehensive and offline solution, using dedicated HEIC to JPG converter software is an excellent choice. These software programs are specifically designed to handle bulk conversions and provide more advanced features. Follow these steps to convert HEIC to JPG using dedicated software:
- Research and choose a reliable HEIC to JPG converter software that suits your needs. Some popular options include XnConvert, iMazing HEIC Converter, and BatchPhoto.
- Download and install the selected software on your PC.
- Launch the converter software and locate the HEIC files that you want to convert. This can be done by selecting the files or the folder containing the HEIC files.
- Configure any desired conversion settings or preferences. This may include selecting the output folder or adjusting the image quality settings.
- Initiate the conversion process by clicking on the “Convert” or “Start” button.
- The software will then proceed to convert the selected HEIC files to JPG format. The time taken for the conversion will depend on the number and size of the files being converted.
- Once the conversion is complete, the software will provide a notification or display the converted files in the output folder you specified.
- Open the output folder and verify that the HEIC files have been successfully converted to JPG format.
Dedicated HEIC to JPG converter software provides the advantage of handling large batches of files efficiently, making it a time-saving option for users with a significant number of HEIC files. Additionally, these software programs often offer additional features such as batch processing, customization options, and even advanced image editing capabilities.
Remember to periodically update the software to ensure compatibility with the latest HEIC format versions and enjoy the most up-to-date features and improvements.
Method 3: Converting HEIC to JPG Using Image Editors
If you already have image editing software installed on your PC, such as Adobe Photoshop or GIMP, you can utilize these tools to convert HEIC to JPG. Although image editors are primarily used for editing and enhancing images, they also support various file format conversions. Here’s how you can convert HEIC to JPG using image editing software:
- Open your preferred image editing software on your PC.
- Use the software’s file browser or “Open” option to locate and open the HEIC file you want to convert.
- Once the HEIC file is opened in the image editing software, go to the “File” menu and look for an option like “Save As” or “Export.”
- Choose the target output format as JPG or JPEG.
- If available, set any desired compression level or image quality settings for the JPG output format.
- Select the destination folder or location where you want to save the converted JPG file.
- Click on the “Save” or “Export” button to convert the HEIC file to JPG format.
- Wait for the software to process and save the converted JPG file.
- Once saved, open the destination folder to verify that the HEIC file has been successfully converted to JPG format.
Using image editing software to convert HEIC to JPG provides the benefits of customization and control over the conversion process. You can adjust the compression level, image quality, and other settings based on your preferences. Furthermore, if you already have an image editing software installed, this method eliminates the need to download additional converters or software specifically for the conversion process.
However, it’s essential to note that this method may be more time-consuming if you have a large number of HEIC files to convert. In such cases, using dedicated software or online converters might be a more efficient option.
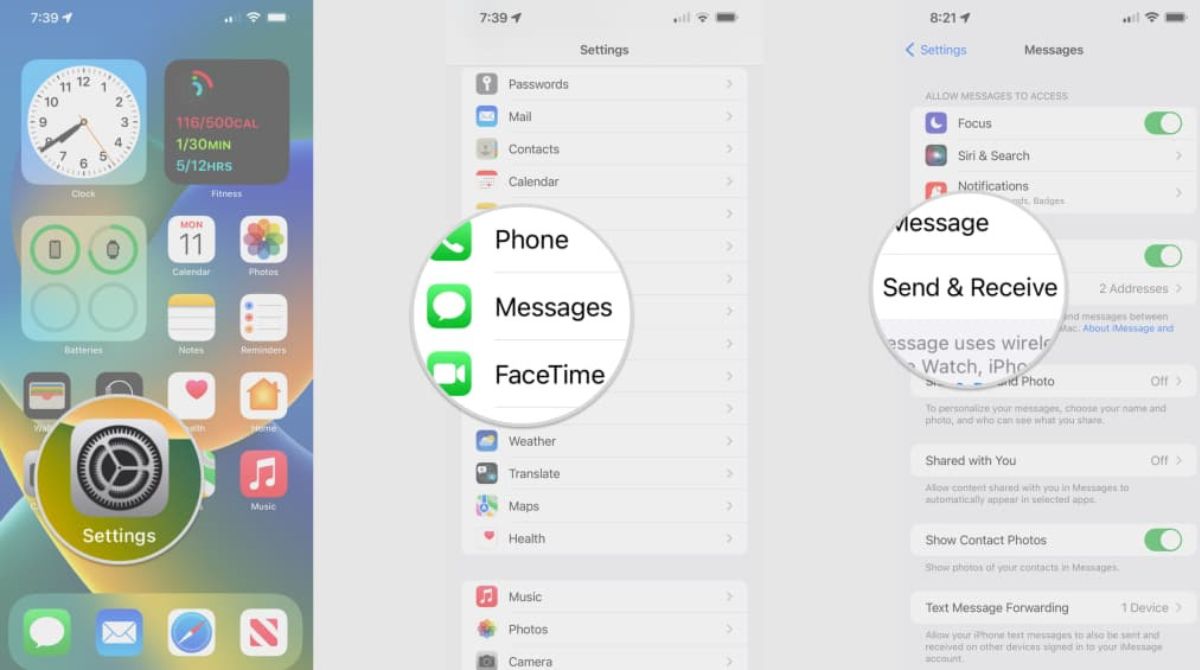
Method 4: Using Apple Photos App on Windows 10
If you are a Windows 10 user and have Apple Photos installed on your PC, you can utilize this application to convert HEIC to JPG. The Apple Photos app offers a simple and user-friendly interface, allowing you to convert your HEIC files without the need for any additional software. Here’s how you can convert HEIC to JPG using the Apple Photos app:
- Launch the Apple Photos app on your Windows 10 PC.
- Go to the “Settings” menu by clicking on the three-dot icon on the top right corner of the app window.
- Scroll down and find the “Transfer” section within the Settings menu.
- Under the Transfer section, click on the “Transfer to Mac or PC” option.
- Choose the “Keep Originals” option to ensure that HEIC files are transferred in their original format.
- Connect your iPhone or iPad to your Windows 10 PC using a USB cable.
- Unlock your device and trust the computer if prompted.
- In the Apple Photos app, select the HEIC files that you want to convert to JPG. You can use the Ctrl or Shift key to select multiple files.
- Click on the “Export” button located at the top of the app window.
- Choose the “Export Unmodified Originals” option to export the selected HEIC files as JPEG images.
- Specify the destination folder where you want to save the converted JPG files.
- Click on the “Export” button to initiate the conversion process. The Apple Photos app will convert the selected HEIC files to JPG format and save them to the specified folder.
- After the conversion is complete, open the destination folder to verify that the HEIC files have been successfully converted to JPG format.
Using the Apple Photos app on Windows 10 provides a straightforward solution for converting HEIC files to JPG format. This method is especially convenient for users who already have Apple Photos installed on their PCs and prefer a native solution provided by Apple.
Keep in mind that this method requires a USB connection between your Apple device and Windows 10 PC. Additionally, the Apple Photos app may only be useful for converting HEIC files from your connected Apple device and not for batch conversions or converting files stored on your PC.
Conclusion
Converting HEIC files to JPG format is a necessary step, especially when dealing with compatibility issues across different devices and platforms. By converting HEIC to JPG, you ensure that your images are accessible, editable, printable, and compatible with a wide range of software applications and browsers.
In this article, we have explored four different methods for converting HEIC to JPG on your PC. Online HEIC to JPG converters provide a quick and easy solution for converting a few files, while dedicated software offers more advanced features for handling large batches of HEIC files. Image editing software allows for customization and control over the conversion process, and the Apple Photos app on Windows 10 provides a native solution for users who prefer Apple’s ecosystem.
When choosing a method, consider factors such as the number of files you need to convert, customization options, convenience, and the level of technical expertise required. Remember to select reputable online converters and keep your software applications up to date to ensure compatibility with the latest versions of the HEIC format.
Converting HEIC to JPG opens up a world of possibilities in terms of sharing, editing, printing, and storing your images. With the right method at hand, you can seamlessly navigate through the compatibility challenges of HEIC files and enjoy the benefits of the widely supported JPG format.