Introduction
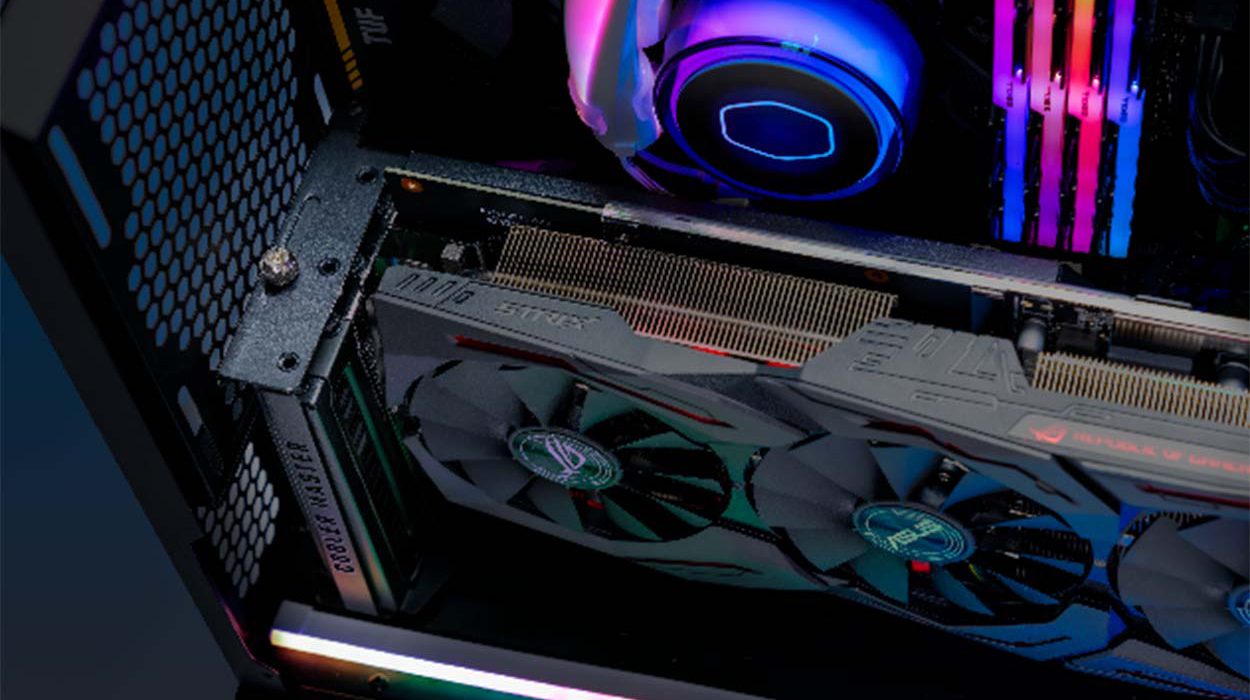
Graphics cards play a vital role in enhancing the visual performance of computers, especially for gaming enthusiasts and professionals working with graphic-intensive applications. With the increasing power and capabilities of modern graphics cards, the need for effective fan control has become crucial in order to maintain optimal temperatures during operation.
Controlling the fans on your graphics card allows you to strike the right balance between cooling performance and noise levels. By adjusting the fan speed, you can ensure that your graphics card stays within safe temperature limits while keeping the noise to a minimum.
In this article, we will explore two methods to control the fans on your graphics card: using software and accessing the BIOS settings. By following these steps, you will have the flexibility to customize the fan speed according to your preferences and system requirements.
Whether you are an avid gamer seeking a quieter gaming experience or a professional working on resource-intensive applications, understanding how to control your graphics card fans is essential. By optimizing the cooling system, you can improve the overall performance and lifespan of your graphics card while enjoying a more comfortable and efficient computing experience.
Why Control Graphics Card Fans?
Graphics cards are designed to handle heavy workloads and generate a significant amount of heat in the process. The cooling system, including the fans, is essential to maintain safe operating temperatures. However, the default fan settings may not always provide the optimal balance between cooling and noise levels.
By controlling the fans on your graphics card, you can achieve several benefits:
- Temperature Regulation: Controlling the fan speed allows you to maintain the temperature within safe limits. By increasing the fan speed, you can effectively dissipate heat and prevent thermal throttling, which can hinder the performance of your graphics card.
- Noise Reduction: Graphics cards with default fan settings can often produce a significant amount of noise, especially during intensive tasks. By adjusting the fan speed, you can reduce the noise to create a more pleasant and quieter computing environment.
- Customization: Every user has different needs and preferences. Whether you prioritize cooling performance, noise reduction, or a balance between the two, controlling the fan speed allows you to tailor the settings to your specific requirements.
- Performance Optimization: By effectively managing the fan speed, you can enhance the overall performance of your graphics card. Cooler temperatures can result in more stable and reliable performance, allowing you to push your graphics card to its limits without encountering thermal issues.
It is worth noting that controlling the graphics card fans requires careful consideration to avoid overheating and potential damage. It is important to strike the right balance between cooling and noise levels based on your system’s capabilities and the workload at hand.
Now that we understand the importance of controlling graphics card fans, let’s explore the methods to achieve this: using software and accessing the BIOS settings.
How to Control Graphics Card Fans Using Software
Controlling the fans on your graphics card can be conveniently done through software applications specifically designed for this purpose. These applications provide an intuitive interface that allows you to adjust the fan speed settings according to your preferences. Here are the steps to control graphics card fans using software:
- Step 1: Download and Install Software: Begin by identifying and downloading a reliable GPU fan control software. There are several popular options available, such as MSI Afterburner, EVGA Precision X1, and AMD Radeon Software. Visit the official website of the software provider and download the latest version compatible with your graphics card.
- Step 2: Open Software and Detect Graphics Card: After installation, launch the software and allow it to detect your graphics card. The software should automatically identify your graphics card model and provide access to the fan control settings.
- Step 3: Adjust Fan Speed Settings: Once the software has detected your graphics card, navigate to the fan control section. Here, you can adjust the fan speed by either manually setting a specific percentage or by using preset profiles. You can increase the fan speed for better cooling performance or decrease it for a quieter operation.
- Step 4: Apply Changes and Test: After making the necessary adjustments, apply the changes and test the fan speed settings. Monitor the temperature levels and ensure that they remain within safe limits. Adjust the fan speed as needed to strike the right balance between cooling performance and noise levels.
Using software to control graphics card fans offers a high level of convenience and flexibility. You can easily fine-tune the fan speed settings without having to access the computer’s BIOS. However, keep in mind that the availability and functionality of fan control software may vary based on your graphics card brand and model.
Now that we have covered software-based fan control, let’s explore another method: controlling graphics card fans using the BIOS settings.
Step 1: Download and Install Software
The first step in controlling the fans on your graphics card using software is to download and install a compatible GPU fan control application. Here’s how you can get started:
- Identify the Software: There are several software options available for controlling the fans on your graphics card, such as MSI Afterburner, EVGA Precision X1, and AMD Radeon Software. Before proceeding, you need to determine which software is compatible with your graphics card brand and model.
- Visit the Official Website: Once you have identified the software, visit the official website of the software provider. It is always recommended to download software from trusted sources to ensure your system’s security and reliability.
- Locate the Download Section: On the software provider’s website, navigate to the download section. Look for the latest version of the software that is compatible with your graphics card. It is advisable to download the most recent version to access the latest features and improvements.
- Download the Software: Click on the download link to initiate the downloading process. The file size varies depending on the software, so ensure that you have a stable and fast internet connection to prevent any interruptions during the download.
- Install the Software: Once the download is complete, locate the downloaded file on your computer and run the installation setup. Follow the on-screen instructions to install the software on your system. Make sure to review and accept any license agreements or terms of service if prompted.
- Open the Software: After successful installation, open the software by locating and clicking on the program icon on your desktop or in your system’s applications menu.
It is important to note that different software applications may have slightly different installation procedures. Always refer to the software provider’s instructions or documentation for specific details.
By completing this step, you have successfully downloaded and installed the software required to control the fans on your graphics card. The next step is to open the software and proceed with detecting your graphics card.
Step 2: Open Software and Detect Graphics Card
Once you have successfully installed the GPU fan control software on your computer, the next step is to open the software and allow it to detect your graphics card. Here’s how you can proceed:
- Locate the Software Icon: Find the software’s icon on your desktop or in your system’s applications menu. Double-click on the icon to launch the software.
- Software Interface: Upon opening the software, you will be presented with the main interface, which may vary depending on the software you are using. Look for an option or tab related to fan control or GPU settings.
- Automatic Graphics Card Detection: Most modern GPU fan control software applications automatically detect the installed graphics card. The software utilizes the system information to identify the make and model of your graphics card.
- Manual Graphics Card Selection: In some cases, the software may not automatically detect your graphics card. If this happens, look for a manual selection option within the software’s interface. Here, you can browse through a list of supported graphics cards and select the appropriate one.
- Confirm Graphics Card Detection: Once the software has successfully identified your graphics card, you will typically see the make and model information displayed in the software’s interface. This confirms that the software has detected your graphics card and is ready for further customization.
It is important to note that the process of detecting your graphics card may vary slightly depending on the software you are using. Always refer to the software provider’s documentation or tutorials for guidance specific to your chosen application.
At this stage, you have opened the GPU fan control software and allowed it to detect your graphics card. The next step is to adjust the fan speed settings according to your preferences and requirements.
Step 3: Adjust Fan Speed Settings
Once you have opened the GPU fan control software and your graphics card has been detected, you can proceed to adjust the fan speed settings. This step allows you to customize the fan speed according to your preferences and system requirements. Follow these instructions to adjust the fan speed settings:
- Navigate to the Fan Control Section: Look for a tab, menu, or section within the software’s interface that is specifically dedicated to fan control. The exact location and labeling may vary depending on the software you are using.
- Set a Manual Fan Curve: Many GPU fan control software applications offer the option to set a manual fan curve. A fan curve represents the relationship between the temperature of your graphics card and the corresponding fan speed. Adjust the curve by dragging the control points or inputting values to determine the desired fan speed at different temperature levels.
- Choose a Fan Speed Percentage: Some software may offer a simple slider or numerical input field to directly adjust the fan speed as a percentage. Increase the percentage to ramp up the fan speed for better cooling performance, or decrease it for a quieter operation.
- Use Preset Fan Profiles: Alternatively, some GPU fan control software provides preset fan profiles, such as “Quiet,” “Balanced,” or “Performance.” These profiles automatically adjust the fan speed based on predefined settings. Select the profile that best suits your needs or customize the profile settings to your liking.
- Monitor Changes: As you make adjustments to the fan speed settings, monitor the changes in real-time. Keep an eye on the temperature readings provided by the software and ensure that they remain within safe operating limits. Make further adjustments if needed to strike a balance between cooling performance and noise levels.
It is important to note that the available options and functionality may vary depending on the GPU fan control software you are using. Refer to the software’s documentation or tutorials for specific instructions and details.
By following these steps, you have successfully adjusted the fan speed settings using the GPU fan control software. The next step is to apply the changes and test the new settings to ensure they meet your requirements.
Step 4: Apply Changes and Test
After adjusting the fan speed settings using the GPU fan control software, the next step is to apply the changes and test the new settings. This allows you to ensure that the fan speed is effectively controlling the temperature of your graphics card while also considering the noise levels. Follow these steps to apply the changes and test the settings:
- Save Settings: Look for a “Apply” or “Save” button within the software’s interface. Click on it to save the changes you have made to the fan speed settings.
- Monitor Temperatures: Once the changes are applied, monitor the temperature readings provided by the software in real-time. Keep an eye on the temperature fluctuations during various tasks, such as gaming or running graphic-intensive applications.
- Observe System Performance: While monitoring the temperatures, simultaneously observe the overall performance of your system. Ensure that the new fan speed settings do not negatively impact the performance, stability, or responsiveness of your graphics card.
- Listen for Noise Levels: Pay attention to the noise levels produced by your graphics card’s fans. If the fan speed has been increased, you may notice a slight increase in noise. Conversely, if the fan speed has been decreased, the overall noise levels should be reduced. Assess whether the noise levels are acceptable based on your preferences.
- Make Further Adjustments: If you are not satisfied with the initial results, you can make further adjustments to the fan speed settings. Fine-tune the settings to strike the perfect balance between cooling performance and noise levels that suit your needs.
It is important to note that the ideal fan speed settings may vary depending on the specific characteristics of your graphics card, such as its cooling capabilities and workload requirements. Experiment with different settings and observe the impact on temperatures and noise levels before settling on the optimal configuration.
By applying the changes and testing the new fan speed settings, you have successfully controlled the fans on your graphics card using the GPU fan control software. These adjustments allow you to maintain optimal temperatures while ensuring a comfortable and efficient computing experience.
How to Control Graphics Card Fans Using BIOS
In addition to using software applications, you can also control the fans on your graphics card by accessing the BIOS settings of your computer. The BIOS (Basic Input/Output System) is a firmware interface that allows you to configure various hardware settings, including fan controls. Here’s how you can control graphics card fans using the BIOS:
- Step 1: Restart Computer and Access BIOS: Begin by restarting your computer. As the computer starts up, you will see a prompt to press a key (usually Del, F2, or F10) to enter the BIOS setup. Press the corresponding key to access the BIOS.
- Step 2: Locate Fan Control Settings: Once inside the BIOS, navigate through the menus using the arrow keys on your keyboard. Look for a section related to hardware or system settings, or a specific category dedicated to fan controls. The exact location and naming of these settings may vary depending on your motherboard manufacturer and BIOS version.
- Step 3: Adjust Fan Speed Settings: Within the fan control settings, you will typically find options to adjust the fan speed. These options may include setting a specific fan speed percentage or selecting from predefined profiles such as “Silent,” “Standard,” or “Performance.”
- Step 4: Save Changes and Exit BIOS: After adjusting the fan speed settings to your desired configuration, save the changes made in the BIOS. Look for a “Save and Exit” option, or similar wording, usually located at the bottom of the BIOS screen. Confirm the changes and exit the BIOS to boot into your operating system.
Keep in mind that not all motherboards provide extensive fan control options in the BIOS. The available settings may vary depending on your motherboard’s manufacturer and model. Refer to the motherboard’s user manual or online documentation for specific details on fan control settings in the BIOS.
Controlling graphics card fans using the BIOS provides a direct and hardware-level approach, allowing for fan control even before the operating system loads. However, it requires caution and understanding of the BIOS interface to avoid unintended changes or system instabilities.
Now that you are familiar with controlling graphics card fans using the BIOS, let’s move on to some additional tips for effectively managing graphics card fan control.
Step 1: Restart Computer and Access BIOS
To control the fans on your graphics card using the BIOS, the first step is to restart your computer and access the BIOS setup. The BIOS (Basic Input/Output System) is a firmware interface that allows you to configure various hardware settings. Here’s how you can do it:
- Restart Your Computer: Begin by restarting your computer. You can do this by clicking on the “Start” menu, selecting the “Power” option, and choosing “Restart.”
- Access the BIOS Key: As your computer restarts, you need to press a specific key to access the BIOS setup. The key to access the BIOS varies depending on the motherboard manufacturer and BIOS version. Common keys include Del, F2, F10, or Esc. Keep an eye on the screen during startup as it usually displays a message indicating which key to press.
- Press the BIOS Key: Once you have identified the key to access the BIOS, press it repeatedly during the startup process. Be mindful of the timing, as you need to press the key before the operating system loads. This ensures that you enter the BIOS setup instead of the regular boot sequence.
- Enter the BIOS Setup: After successfully pressing the BIOS key, your computer will enter the BIOS setup. The BIOS screen typically displays a menu-based interface with different options and settings.
It’s important to note that the steps to access the BIOS may vary slightly depending on your computer’s manufacturer and model. If you’re unsure which key to press or need more guidance, consult your computer’s user manual or the manufacturer’s website for specific instructions related to accessing the BIOS.
By restarting your computer and accessing the BIOS setup, you have accomplished the first step in controlling the fans on your graphics card using the BIOS. The next step is to locate and adjust the fan control settings to effectively manage your graphics card’s fans.
Step 2: Locate Fan Control Settings
After accessing the BIOS setup, the next step in controlling the fans on your graphics card is to locate the fan control settings. These settings may vary depending on your motherboard manufacturer and BIOS version. Here’s how you can locate the fan control settings:
- Explore BIOS Menus: Within the BIOS setup, navigate through the menus using the arrow keys on your keyboard. Look for a section or category related to hardware, system settings, or advanced options. Fan control settings are often found within these sections.
- Identify Fan Control Options: Once you have found the relevant section, look for options related to fan control. The labels may vary, but they often include terms like “Fan Control,” “Smart Fan,” or “Fan Settings.” Some motherboard manufacturers provide specific names for their fan control features, so refer to your motherboard’s documentation for more accurate labeling.
- Adjust Fan Speed: Within the fan control settings, you may have the ability to adjust the fan speed. Depending on your motherboard, you can typically set the fan speed as a percentage or choose from predefined speed profiles. Select the appropriate option and adjust the settings according to your preferences and system requirements.
- Save Changes: Once you have made the desired adjustments to the fan control settings, save the changes. Look for a “Save,” “Apply,” or “Exit” option within the BIOS setup. Follow the on-screen instructions to confirm and save the changes you made to the fan control settings.
It’s important to note that the specific location and naming of fan control settings may differ among motherboard manufacturers and BIOS versions. If you’re having trouble locating the fan control settings, consult your motherboard’s user manual or the manufacturer’s website for detailed instructions.
By locating the fan control settings in the BIOS setup, you are one step closer to effectively managing the fans on your graphics card. The next step is to adjust the fan speed settings and optimize the cooling performance based on your preferences and system requirements.
Step 3: Adjust Fan Speed Settings
Once you have located the fan control settings in the BIOS setup, the next step is to adjust the fan speed settings. This allows you to customize the fan speed according to your preferences and the cooling requirements of your graphics card. Here are the steps to adjust the fan speed settings:
- Select Fan Control Mode: Look for an option that allows you to set the fan control mode. Depending on your motherboard and BIOS version, you may have options such as “Manual,” “Automatic,” or “Smart.” Choose the desired mode that aligns with your preferences for fan speed control.
- Adjust Fan Speed: Once you have selected the fan control mode, you can proceed to adjust the fan speed. Depending on your BIOS, you may have options to set the fan speed as a percentage or select from predefined speed profiles. Increase the fan speed for better cooling performance or decrease it for a quieter operation.
- Configure Temperature Thresholds: Some BIOS versions allow you to configure temperature thresholds at which the fan speed will increase. This feature is useful for creating a dynamic fan curve that adjusts the speed according to the temperature of your graphics card. Set the temperature thresholds to your desired levels.
- Save Changes: Once you have made the necessary adjustments to the fan speed settings, save the changes in the BIOS setup. Look for a “Save,” “Apply,” or “Exit” option in the BIOS menu. Follow the on-screen instructions to save and exit the BIOS setup.
It is important to note that the available options and functionality may vary depending on your motherboard manufacturer and BIOS version. Some motherboards provide more comprehensive fan control options, while others may have limited options. Refer to your motherboard’s documentation or manufacturer’s website for specific details on adjusting fan speed settings in the BIOS.
By adjusting the fan speed settings, you can optimize the cooling performance of your graphics card to meet your preferences and system requirements. The next step is to save the changes and exit the BIOS setup.
Step 4: Save Changes and Exit BIOS
After adjusting the fan speed settings in the BIOS, the final step is to save the changes you made and exit the BIOS setup. This ensures that the new fan control settings are applied and take effect. Here’s how you can save changes and exit the BIOS:
- Save Changes: In the BIOS menu, locate the option to save the changes you made. This option is often labeled as “Save,” “Apply,” or “Exit.” Select this option and confirm your choice when prompted to save the changes to the BIOS settings.
- Exit BIOS: After saving the changes, you need to exit the BIOS setup. Find the “Exit” or similar option in the BIOS menu and select it. This will prompt your computer to restart and boot into your operating system.
- Confirmation Prompt: Before exiting the BIOS, you may encounter a confirmation prompt to ensure that you want to exit and discard any unsaved changes. Verify that you have saved the changes you made to the fan control settings, and proceed with exiting the BIOS setup.
It’s important to note that the location and labeling of the “Save” and “Exit” options may vary slightly depending on your motherboard manufacturer and BIOS version. Refer to your motherboard’s user manual or manufacturer’s website for specific instructions on saving changes and exiting the BIOS setup.
By saving the changes you made to the fan control settings and exiting the BIOS setup, the new settings will be applied to your graphics card. The fans will now operate according to the adjusted fan speed settings, helping to maintain optimal temperature levels and balance cooling performance with noise levels.
Tips for Controlling Graphics Card Fans
Controlling the fans on your graphics card is essential for maintaining optimal performance and temperature levels. Here are some tips to help you effectively manage and control the fans on your graphics card:
- Monitor Temperatures: Keep an eye on the temperatures of your graphics card using monitoring software. This will help you determine if the fan speed settings need adjustment to prevent overheating. High temperatures can negatively impact your card’s performance and longevity.
- Strike a Balance: Aim to find a balance between fan speed and noise levels. Increasing the fan speed improves cooling performance but can lead to increased noise. Experiment with different fan speed settings to find what works best for your needs and personal tolerance for noise.
- Create Custom Fan Curves: If your software or BIOS allows, consider creating custom fan curves. These curves adjust the fan speed based on the temperature of your graphics card, allowing for more precise cooling control. Custom curves can help minimize unnecessary noise and maintain optimal temperatures during different workloads.
- Regularly Clean your Graphics Card: Dust accumulation on the heatsink and fans can hinder airflow and cooling efficiency. Regularly clean your graphics card using compressed air or a soft brush to remove any debris. This will help improve cooling performance and prevent overheating.
- Update Graphics Card Drivers: Ensure that you have the latest graphics card drivers installed. Driver updates often include optimizations and improvements for fan control and temperature management. Check the website of your graphics card manufacturer for driver updates periodically.
- Consider Aftermarket Cooling Solutions: For enthusiasts or those who require extensive cooling, aftermarket cooling solutions like aftermarket GPU coolers or liquid cooling can provide more efficient cooling performance. These solutions offer better heat dissipation and lower noise levels compared to stock cooling options.
- Experiment and Fine-tune: Controlling graphics card fans is a process of trial and error. Experiment with different fan speed settings and monitor the results. Fine-tune the settings until you find the optimal balance between cooling performance and noise levels for your specific usage scenarios.
Remember that every graphics card and system configuration is unique, so what works for others may not work perfectly for you. Take the time to understand your graphics card, optimize the fan control settings, and regularly monitor your temperatures to ensure the longevity and performance of your graphics card.
Conclusion
Controlling the fans on your graphics card is crucial for maintaining optimal performance, temperature levels, and overall system stability. By adjusting the fan speed, you can find the perfect balance between cooling performance and noise levels to suit your preferences and system requirements.
In this article, we explored two methods for controlling graphics card fans: using software and accessing the BIOS settings. Software applications provide a user-friendly interface for adjusting fan speed settings, while accessing the BIOS offers direct hardware-level control. Both methods allow you to customize fan speed to ensure efficient cooling and a comfortable computing experience.
When using software, follow a step-by-step process to download, install, and open the software. Detect your graphics card and make necessary adjustments to the fan speed settings. With BIOS control, restart your computer, access the BIOS setup, locate the fan control settings, and adjust the fan speed to your preference.
Remember to monitor temperatures, strike a balance between cooling and noise, and fine-tune your settings to optimize your graphics card’s cooling performance. Regularly clean your graphics card to prevent dust buildup and consider aftermarket cooling solutions or driver updates for enhanced efficiency and performance.
Controlling graphics card fans is an iterative process, and it might take some time to find the ideal fan speed settings for your specific requirements. Experimentation and careful observation are key to achieving the best performance and temperature balance.
By effectively controlling the fans on your graphics card, you can ensure its longevity, prevent overheating, and enjoy a quieter computing experience. Take advantage of the software and BIOS options available to you, follow the provided tips, and adjust your fan speed settings with confidence.
Now, armed with this knowledge, you can confidently optimize the cooling performance of your graphics card and maximize your overall system’s potential. Happy computing!