Introduction
Welcome to the world of wireless earbuds! It’s no secret that technology has made our lives easier and more convenient, and wireless earbuds are a perfect example of that. Gone are the days of tangled cords and limitations in mobility. With wireless earbuds, you can enjoy your favorite music, podcasts, and calls without the hassle of wires.
If you’re an Android phone user and are ready to experience the freedom that wireless earbuds offer, you’re in the right place. In this guide, we will walk you through the step-by-step process of connecting your wireless earbuds to your Android phone.
Whether you’re a tech enthusiast or someone new to the world of wireless devices, don’t worry – we’ve got you covered. We will guide you through each step, ensuring that you can seamlessly pair your earbuds and start enjoying the wireless audio experience.
Before we dive into the detailed steps, it’s important to note that the process may vary slightly depending on the make and model of your wireless earbuds. However, the basic principles remain the same across most devices, so you’ll be able to apply these instructions to a wide range of wireless earbuds.
Ready to learn how to connect your wireless earbuds to your Android phone? Let’s get started!
Step 1: Ensure Bluetooth is enabled on your Android phone
Before you can connect your wireless earbuds to your Android phone, you need to make sure that Bluetooth is enabled on your device.
To do this, go to the Settings menu on your Android phone. You can typically access this by swiping down from the top of the screen and tapping on the gear icon or by finding the Settings app in your app drawer.
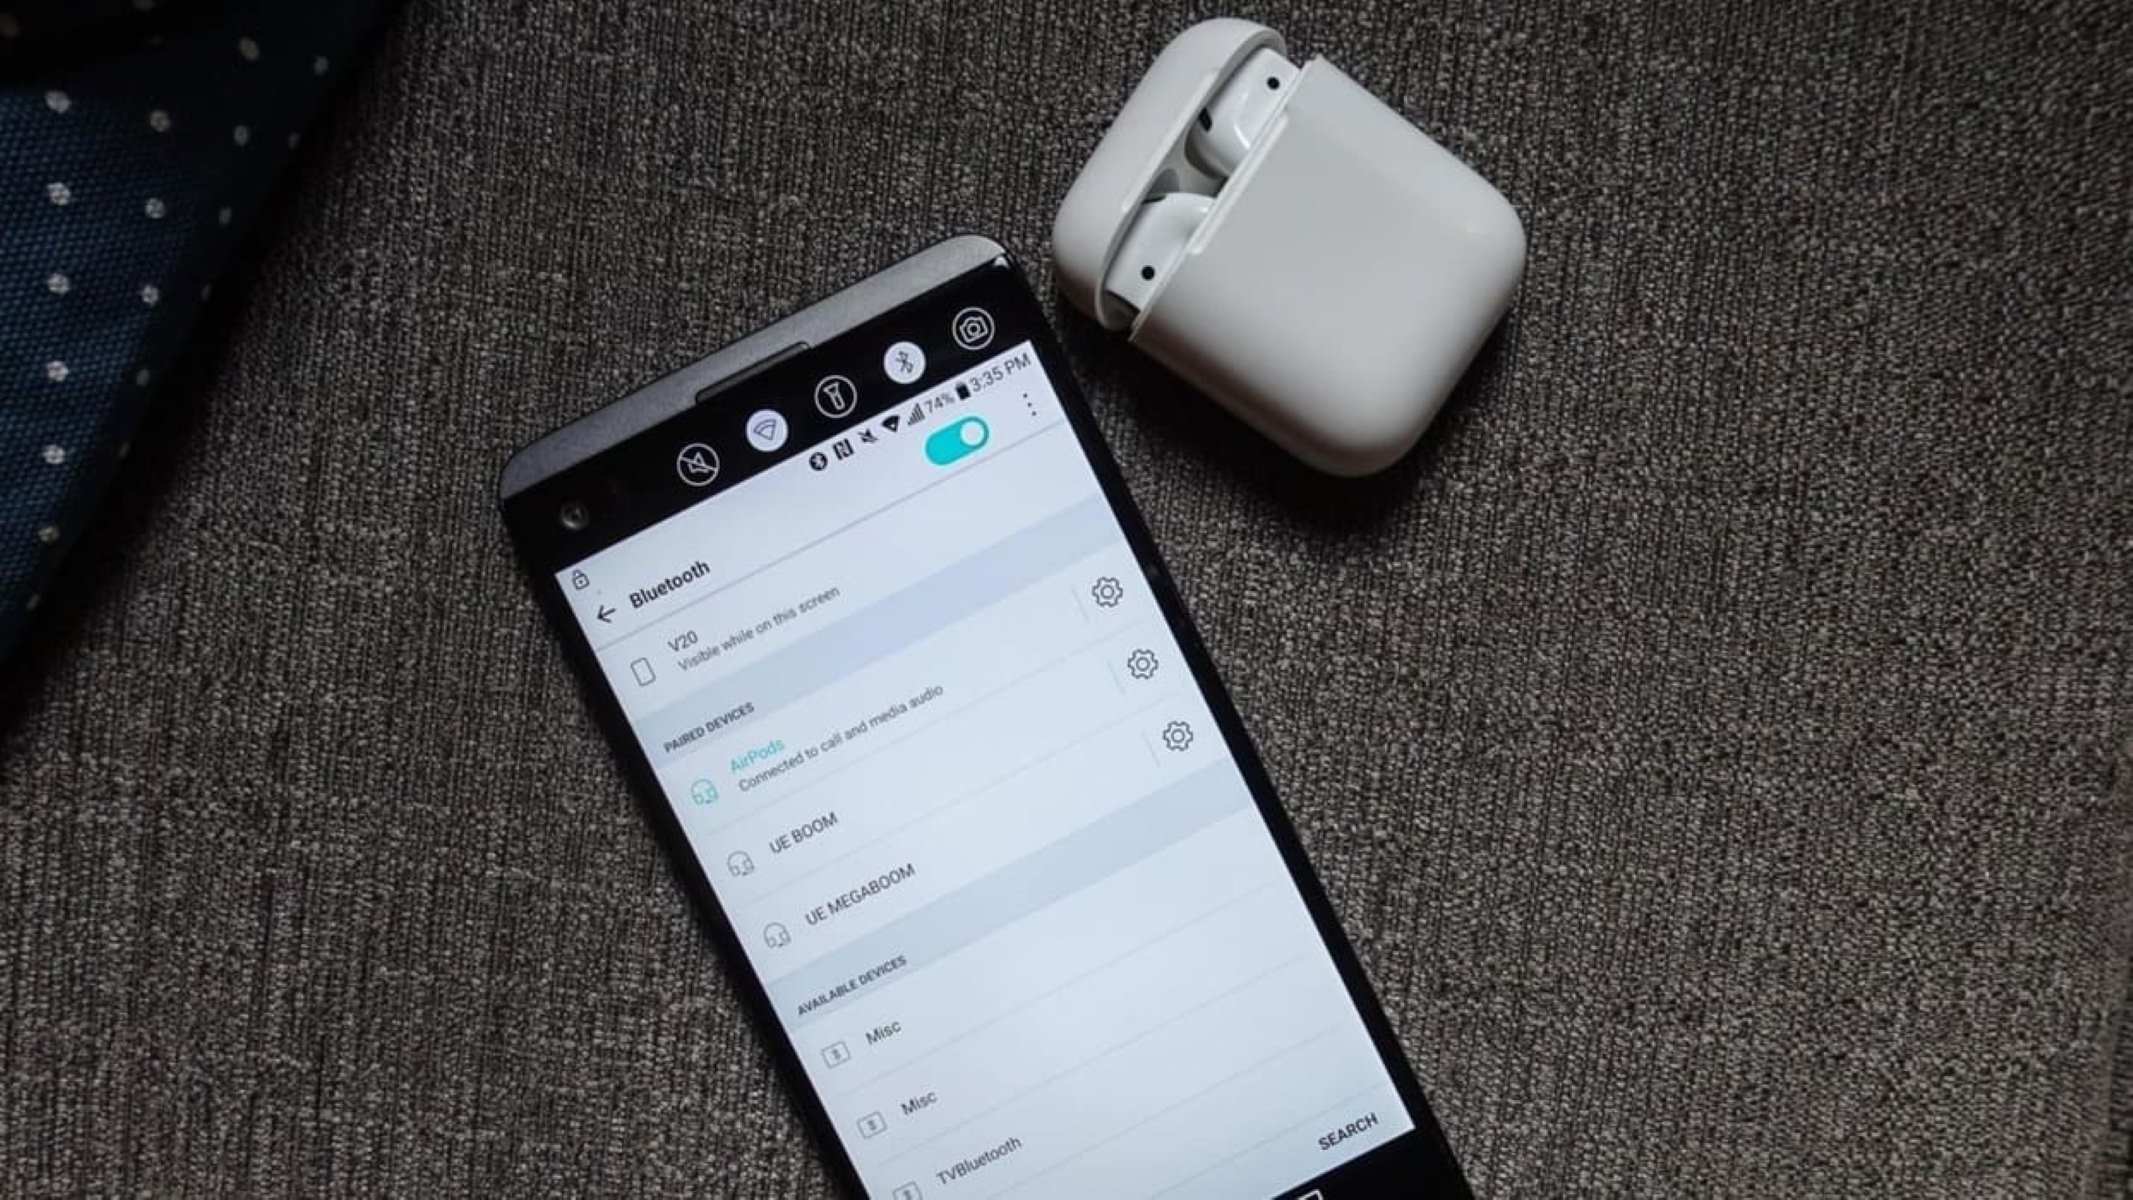
Once you’re in the Settings menu, look for the Bluetooth option. It is usually represented by an icon that looks like a “B” made up of two vertical lines. Tap on it to access the Bluetooth settings.
On the Bluetooth settings screen, you’ll see a toggle switch or button that allows you to turn Bluetooth on and off. Make sure the switch is in the “On” position. If it’s already on, you can proceed to the next step.
Enabling Bluetooth on your Android phone is essential as it allows your device to discover and connect to nearby Bluetooth devices, including your wireless earbuds.
If you can’t find the Bluetooth option in your Settings menu, it’s possible that your Android phone doesn’t support Bluetooth or that it’s hidden in a different location. In such cases, refer to your phone’s user manual or do a quick internet search for instructions specific to your device.
Once you’ve confirmed that Bluetooth is enabled on your Android phone, you’re ready to move on to the next step and put your wireless earbuds into pairing mode.
Step 2: Put your wireless earbuds into pairing mode
In order for your Android phone to detect and connect to your wireless earbuds, you need to put the earbuds into pairing mode. This mode allows the earbuds to be discoverable by other devices.
The process of putting your wireless earbuds into pairing mode may vary depending on the brand and model. However, the general steps are relatively similar across most devices.
Typically, to enter pairing mode, you’ll need to press and hold a button on the earbuds or the charging case. Look for a button or switch that is specifically designated for pairing. It is commonly indicated by a Bluetooth symbol or a multi-function button.
When you find the pairing button, follow the manufacturer’s instructions to activate pairing mode. This usually involves pressing and holding the button for a few seconds until a light or indicator starts flashing. The exact duration and visual cues may differ based on your earbuds’ design.
If you have trouble finding the pairing button or activating pairing mode, you can refer to the user manual or visit the manufacturer’s website for more detailed instructions.
It’s worth noting that some wireless earbuds may enter pairing mode automatically when they are turned on for the first time or when they don’t have any stored connections. In such cases, simply turning on the earbuds should put them into pairing mode without any additional steps.
Once your wireless earbuds are in pairing mode, they are ready to establish a connection with your Android phone. In the next step, we will guide you through the process of opening the Bluetooth settings on your Android phone.
Step 3: Open the Bluetooth settings on your Android phone
Now that your wireless earbuds are in pairing mode, it’s time to open the Bluetooth settings on your Android phone to initiate the connection.
To access the Bluetooth settings, navigate back to the Settings menu on your Android phone. You can usually find it by swiping down from the top of the screen and tapping on the gear icon or locating the Settings app in your app drawer.
Once in the Settings menu, scroll down or search for the “Bluetooth” option. It should be located under the “Connections” or “Wireless & Networks” section.
Tap on the Bluetooth option to open the Bluetooth settings on your Android phone. This will display a list of available Bluetooth devices in your vicinity.
It’s important to note that your wireless earbuds may take a few moments to appear on the list, especially if you’ve just put them into pairing mode. Patience is key!
If you’re unable to see your earbuds on the list, try moving closer to your device or restarting the pairing process from step 2.
Once your earbuds appear in the list of available devices, you’re ready to move on to the next step and establish a connection between your Android phone and your wireless earbuds. We’ll guide you through this process in step 4.
Step 4: Select your wireless earbuds from the available devices list
After opening the Bluetooth settings on your Android phone, you should see a list of available devices in the Bluetooth settings menu. This list displays the nearby Bluetooth devices that are discoverable, including your wireless earbuds.
Scroll through the list of available devices and locate the entry that corresponds to your wireless earbuds. The entry may include the name or model number of your earbuds.
Once you’ve identified your earbuds, tap on their name in the list to select them as the desired device for pairing.
Keep in mind that if you don’t see your wireless earbuds in the list, make sure they are still in pairing mode. You may need to repeat step 2 and put your earbuds back into pairing mode.
Additionally, if there are multiple entries that seem to match your earbuds, choose the one that closely matches the name or model number of your device. This ensures that you’re connecting to the correct pair of earbuds.
Once you’ve selected your wireless earbuds, your Android phone will establish a connection with them. The pairing process may take a few seconds to complete.
During this process, you might see a prompt on your Android phone asking for a confirmation code or PIN. If that’s the case, refer to the user manual of your earbuds as some devices require a specific code, while others may use a standard pairing code like “0000” or “1234”. Follow the instructions provided by your earbuds’ manufacturer to complete the pairing.
Once the pairing is successful, you’re just one step away from enjoying your wireless audio experience!
Step 5: Complete the pairing process
Now that you’ve selected your wireless earbuds from the available devices list on your Android phone, it’s time to complete the pairing process.
During the pairing process, your Android phone will establish a secure connection with your wireless earbuds, allowing you to transmit audio wirelessly.
If prompted, confirm the pairing on both your Android phone and your wireless earbuds. This step ensures that you have authorized the connection between the devices.
Once the pairing process is complete, you will usually see a confirmation message on your Android phone indicating that the connection with your wireless earbuds has been successfully established.
If you encounter any issues during the pairing process, such as unsuccessful connections or error messages, double-check that your earbuds are still in pairing mode and try again. Additionally, make sure that your earbuds have enough battery power to maintain a stable connection with your Android phone.
Once the pairing is complete, your Android phone will remember your wireless earbuds, making it easier to reconnect them in the future. You can simply turn on your earbuds, and they will automatically connect to your phone when Bluetooth is enabled.
Now that you’ve successfully completed the pairing process, you’re ready to move on to the next step: testing the connection and adjusting any necessary settings.
Step 6: Test the connection and adjust settings if needed
With the pairing process complete, it’s time to test the connection between your Android phone and your wireless earbuds. This step ensures that the audio is streaming seamlessly and that you’re ready to enjoy your favorite music, podcasts, or phone calls.
Start by playing a piece of audio on your Android phone, such as a song or a YouTube video. Make sure the sound is coming through your wireless earbuds.
If you’re not hearing any audio through your earbuds, there are a few troubleshooting steps you can take:
- Ensure that the volume on both your Android phone and your earbuds is turned up.
- Check that your earbuds are properly inserted into your ears and are securely in place. Adjust their position if needed.
- Verify that your earbuds are within the range of your Android phone. If you move too far away from your device, the connection may become unstable or disconnected.
- If the sound is distorted or of poor quality, try adjusting the equalizer or sound settings on your Android phone. Some Android phones have built-in audio customization options that allow you to enhance the sound quality.
Take this opportunity to explore the settings and features of your wireless earbuds. Depending on the model, you may have access to additional controls such as touch gestures or advanced sound profiles.
Refer to the user manual or the manufacturer’s website for instructions on how to customize and optimize your wireless earbuds’ settings according to your preferences.
Once you’ve tested the connection and adjusted any necessary settings, you’re all set to enjoy the freedom and convenience of wireless audio with your Android phone and your wireless earbuds.
Keep in mind that each time you want to use your earbuds with your Android phone, make sure Bluetooth is enabled on your device and your earbuds are turned on. They should automatically connect if they were previously paired.
Now you’re ready to immerse yourself in your favorite audio content, untethered from the constraints of wires. Enjoy your wireless earbuds and all the benefits they bring!
Troubleshooting common issues
While connecting wireless earbuds to your Android phone is usually a seamless process, it’s important to be aware of common issues that may arise. Here are some troubleshooting tips to help you overcome any challenges you may encounter:
- No connection or pairing failure: If you’re unable to establish a connection between your Android phone and your earbuds, ensure that both devices are in pairing mode. Restart the pairing process and make sure Bluetooth is enabled on your phone. You may also try resetting your earbuds and repeating the previous steps.
- Intermittent or unstable connection: If you experience audio dropouts or inconsistent connection quality, try moving closer to your Android phone. Keep in mind that obstructions like walls or other electronic devices may hinder the Bluetooth signal. In some cases, interference from Wi-Fi networks can also affect the connection quality.
- Low volume or distorted sound: If you’re experiencing low volume or distorted sound, check that both your Android phone and your earbuds are set to an appropriate volume level. Also, ensure that the earbuds are correctly positioned in your ears. If the issue persists, try adjusting the sound settings on your phone or resetting your earbuds to their default settings.
- Battery life and charging issues: If your wireless earbuds have battery-related problems, such as quick discharge or trouble charging, verify that the charging case or cable is properly connected. Clean any charging contacts and ensure they are free from debris. If you’re still encountering issues, consult the user manual or contact the manufacturer’s support for further assistance.
- Incompatibility: In rare cases, certain wireless earbuds may not be compatible with your Android phone due to hardware or software differences. Before purchasing wireless earbuds, ensure that they are compatible with your specific Android phone model to avoid any compatibility issues.
If none of the troubleshooting steps above resolve your issues, consider reaching out to the customer support of your earbuds’ manufacturer or the manufacturer of your Android phone for further assistance.
Remember, each wireless earbud brand and model may have unique troubleshooting steps, so always refer to the user manual or manufacturer’s support resources for specific guidance.
Conclusion
Congratulations! You have successfully learned how to connect your wireless earbuds to your Android phone. By following the steps outlined in this guide, you can enjoy the convenience and freedom that wireless audio brings, whether you’re listening to your favorite music, engaging in phone calls, or enjoying podcasts.
We started by ensuring that Bluetooth is enabled on your Android phone, a crucial step for establishing a connection. Then, we walked through the process of putting your wireless earbuds into pairing mode and opening the Bluetooth settings on your Android phone to find and select your earbuds from the available devices list.
After completing the pairing process, we emphasized the importance of testing the connection and adjusting settings if needed. It’s essential to ensure that the audio is streaming seamlessly and that your wireless earbuds are optimized for the best sound quality.
Finally, we provided troubleshooting tips for common issues that may arise during the connection process. These tips can help you overcome any challenges you may encounter along the way, such as pairing failures, unstable connections, low volume, or battery-related issues.
Remember, the specific steps and features may vary slightly depending on the brand and model of your wireless earbuds and Android phone. Always refer to the user manuals and support resources provided by the manufacturers for detailed instructions and troubleshooting guidance.
Now that you’re armed with the knowledge of how to connect your wireless earbuds to your Android phone, go ahead and enjoy the freedom and convenience of wireless audio! Immerse yourself in your favorite music, podcasts, and phone calls with the seamless connection provided by your wireless earbuds and Android phone.
Feel free to refer back to this guide anytime you need a refresher or encounter any issues. Happy listening!