Introduction
Welcome to our guide on how to connect to a router’s Wi-Fi network! In today’s digital age, a stable and secure Wi-Fi connection is essential for staying connected to the internet and accessing various online services. Whether you’re setting up a new router or need to connect to an existing network, this article will walk you through the steps to get connected.
Connecting to a router’s Wi-Fi network is a simple process that requires a few key steps. In this guide, we’ll cover everything from accessing the router’s settings to finding the network name (SSID) and entering the Wi-Fi password. By following these steps, you’ll be able to establish a reliable connection and enjoy seamless internet access.
Before we begin, it’s important to note that the exact steps may vary depending on the router model and manufacturer. However, the general principles outlined in this guide should apply to most routers. Now, let’s dive into the steps to connect to a router’s Wi-Fi network.
Step 1: Access the Router’s Settings
The first step to connecting to a router’s Wi-Fi network is accessing the router’s settings. To do this, you’ll need to connect your device (such as a laptop or smartphone) to the router either through a wired connection or via the default Wi-Fi network.
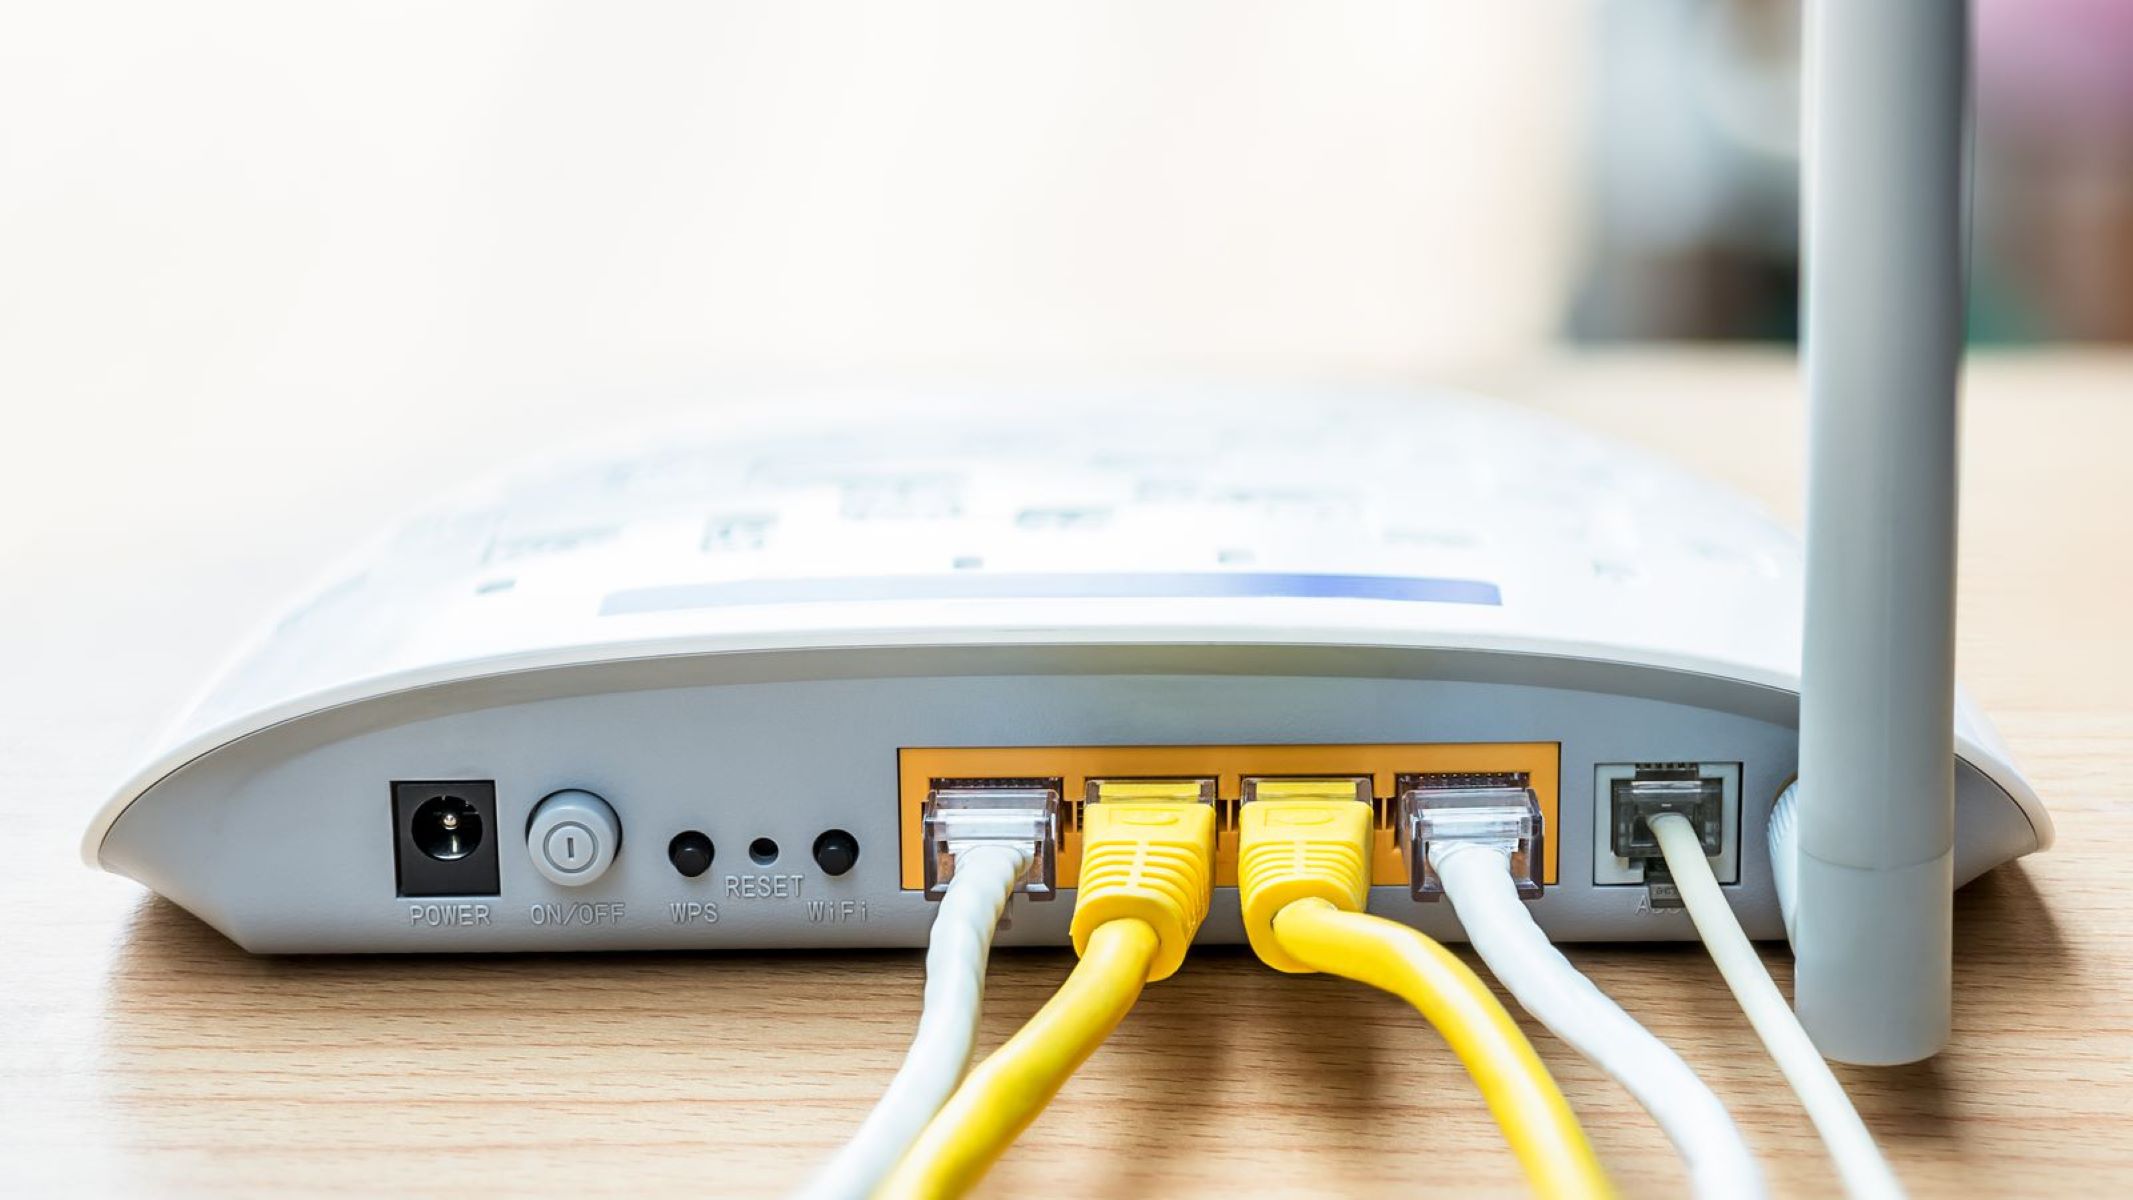
If you’re connecting through a wired connection, use an Ethernet cable to connect your device to one of the LAN ports on the back of the router. Make sure the cable is securely plugged in on both ends.
If you prefer to connect wirelessly, look for the default Wi-Fi network name (SSID) and password printed on a sticker on the router. Use these credentials to connect your device to the router’s network. Keep in mind that these default credentials are often changed for security purposes, so if you’re unable to connect using them, you may need to consult the router’s documentation or contact your Internet Service Provider (ISP).
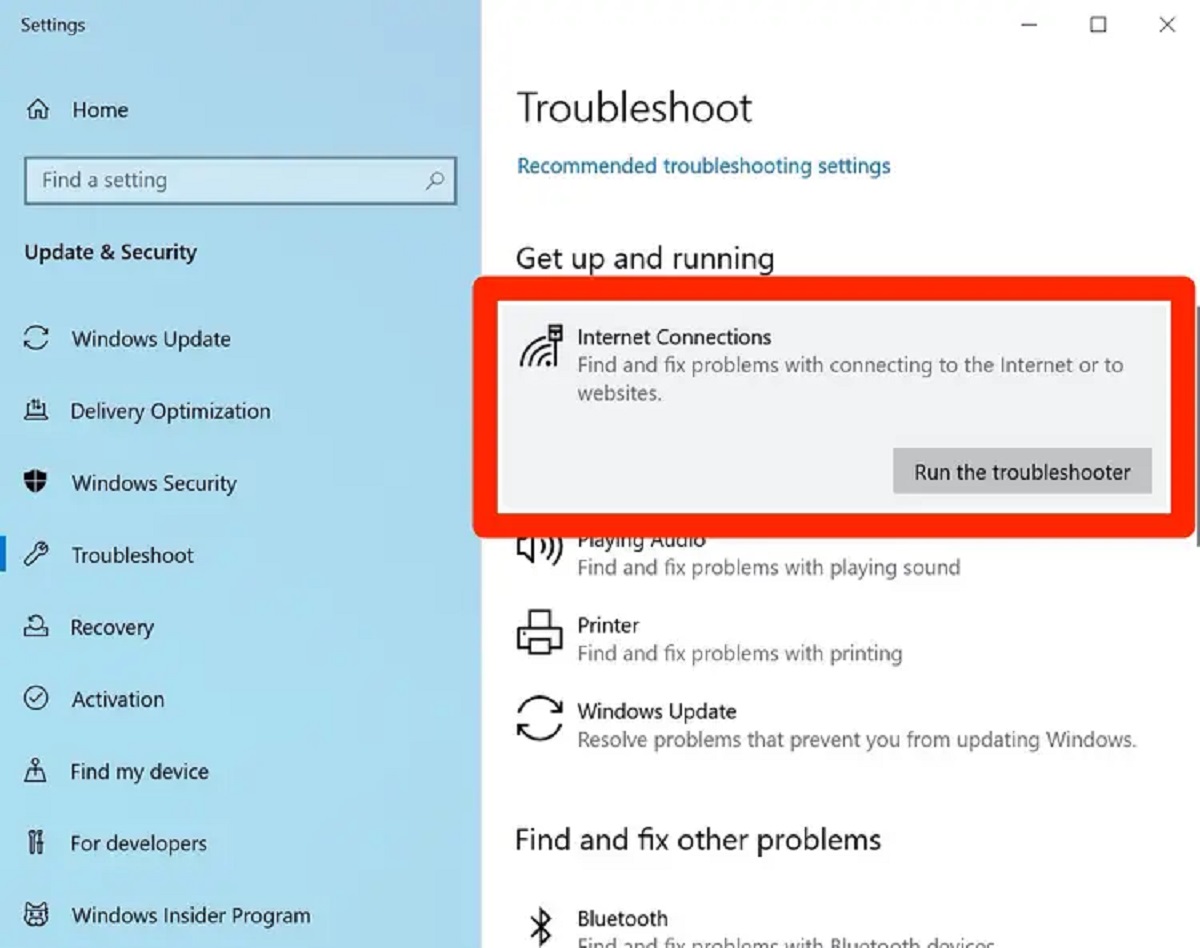
Once your device is connected to the router, open a web browser such as Google Chrome, Mozilla Firefox, or Microsoft Edge. In the address bar, type in the router’s IP address. Common IP addresses for routers include 192.168.0.1, 192.168.1.1, or 192.168.2.1. Press Enter to proceed.
This will take you to the router’s login page, where you’ll be prompted to enter a username and password. Again, these credentials may vary depending on the router’s manufacturer and any changes made by the user or the ISP. If you’re unsure of the login details, refer to the router’s documentation or contact your ISP for assistance.
Once you enter the correct login credentials, you’ll gain access to the router’s settings page, often called the administration panel or configuration interface. This is where you can make changes to various router settings, including Wi-Fi configuration, security options, and more.
Step 2: Locate the Wi-Fi Settings
After accessing the router’s settings, the next step is to locate the Wi-Fi settings. These settings will allow you to enable Wi-Fi and customize your network’s name (SSID) and security options.
Once in the router’s settings page, look for a tab or menu labeled “Wireless” or “Wi-Fi.” The exact location of this tab may vary depending on the router’s interface. If you’re having trouble finding it, refer to the router’s documentation or perform a quick online search using your router’s model number.
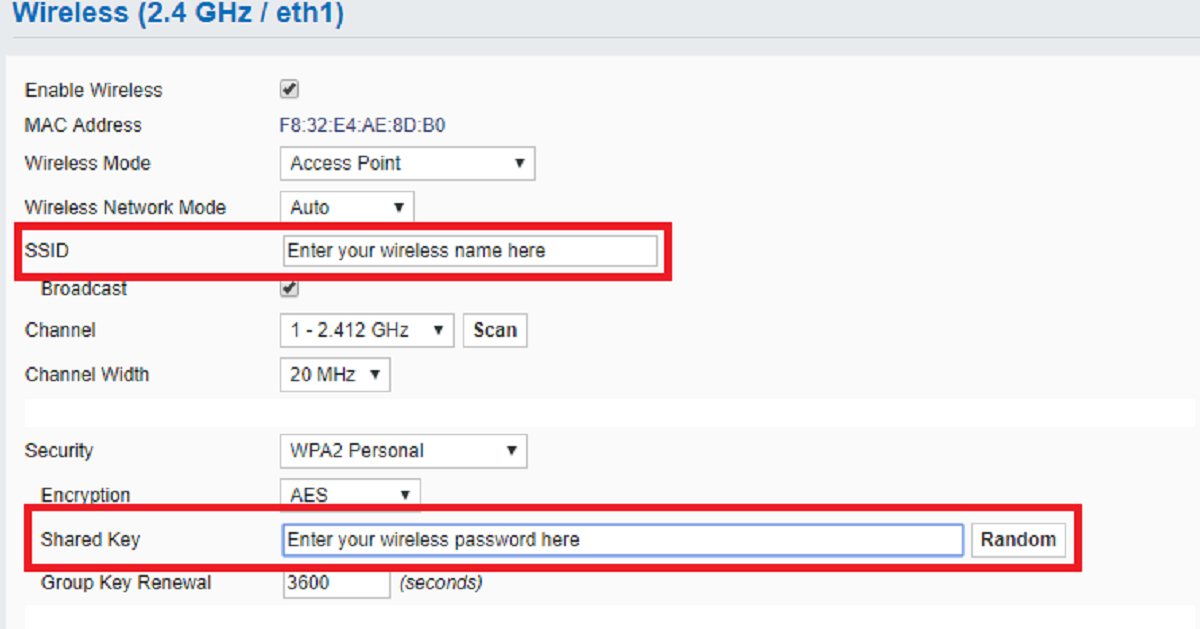
Click on the “Wireless” or “Wi-Fi” tab to expand the options. Here, you’ll find various settings related to your router’s Wi-Fi network. The most important settings to pay attention to are:
- Enable Wi-Fi: Ensure that the Wi-Fi is enabled or turned on. If it’s disabled, toggle the switch or checkbox to enable it.
- Network Name (SSID): This is the name of your Wi-Fi network that will be visible to other devices. You can leave it as the default name or customize it to something unique and easily recognizable.
- Security Options: It’s crucial to secure your Wi-Fi network to protect it from unauthorized access. Look for the security options, such as WPA2 or WPA3, and choose the most secure option available. You’ll also need to set a Wi-Fi password or security key that will be required for devices to connect to your network.
Take note of the network name (SSID) and the Wi-Fi password as you’ll need them in the following steps to connect your devices to the Wi-Fi network.
Once you’ve made any necessary changes to the Wi-Fi settings, be sure to save the changes by clicking the “Save” or “Apply” button. The router will then apply the new settings, and you’ll be ready to proceed to the next step to connect your devices to the router’s Wi-Fi network.
Step 3: Enable Wi-Fi and Find the Network Name (SSID)
After configuring the Wi-Fi settings in the router’s administration panel, it’s time to enable Wi-Fi and locate the network name (SSID), which is the identifier for your Wi-Fi network.
Go back to the main settings page or the home dashboard of your router’s administration panel. Look for a section labeled “Wireless” or “Wi-Fi” where you can enable or disable the Wi-Fi feature.
Toggle the Wi-Fi switch or checkbox to the “On” position to enable Wi-Fi on your router. This will activate the wireless signal and allow devices to connect to your network.
Next, find the network name (SSID) of your Wi-Fi network. In the same Wi-Fi settings section, you should see the name displayed prominently. It may be labeled as “Network Name,” “SSID,” or something similar.
The network name (SSID) is the identifier that devices will see when searching for available Wi-Fi networks. By default, it may be a generic name provided by the manufacturer, but you can customize it to something more unique and easily recognizable.
Take note of the network name (SSID) as you’ll need to select it on your devices when connecting to the Wi-Fi network.
At this point, you have successfully enabled Wi-Fi on your router and located the network name (SSID). Now, let’s move on to the next step to set up the Wi-Fi password (security key) for a secure connection.
Step 4: Enter the Wi-Fi Password (Security Key)
Now that you have enabled Wi-Fi and found the network name (SSID), the next step is to enter the Wi-Fi password, also known as the security key. This password ensures that only authorized devices can connect to your Wi-Fi network.
In the router’s administration panel, navigate back to the Wi-Fi settings section where you found the network name (SSID). Look for the option labeled “Security Key,” “Wi-Fi Password,” or something similar.
Click or tap on the field next to the password option to enter your desired Wi-Fi password. Make sure to choose a strong and unique password that combines a mix of uppercase and lowercase letters, numbers, and special characters. Avoid using easily guessable information such as your name or address.
Keep in mind that the Wi-Fi password is case-sensitive, so make sure to enter it exactly as you want it to be. It’s a good practice to write down your Wi-Fi password and keep it in a safe place for future reference.
Once you have entered the Wi-Fi password, save the changes by clicking the “Save” or “Apply” button in the router’s settings. The router will apply the new password and update the security settings for your Wi-Fi network.
Remember, when connecting devices to your Wi-Fi network, they will need to enter this password to establish a secure connection. So, be sure to inform any users who will need access to the network of the Wi-Fi password.
With the Wi-Fi password set, you’re almost ready to connect your devices to the router’s Wi-Fi network. In the next step, we will cover how to connect to your Wi-Fi network on various devices.
Step 5: Connect to the Router’s Wi-Fi Network
Now that you have enabled Wi-Fi, found the network name (SSID), and set the Wi-Fi password, it’s time to connect your devices to the router’s Wi-Fi network.
On your device (such as a laptop, smartphone, or tablet), go to the Wi-Fi settings. This can usually be accessed through the device’s settings menu or the taskbar/notification center.
In the list of available Wi-Fi networks, locate and select the network name (SSID) of your router. It should match the name you set in the previous steps. If you’re unable to find the network name, try refreshing the list or moving closer to the router to ensure a strong signal.
Once you select the network name, you will be prompted to enter the Wi-Fi password (security key) that you set earlier. Carefully enter the password and ensure it matches the exact case and characters you configured in the router’s settings.
After entering the correct Wi-Fi password, click or tap on the “Connect” or “Join” button. The device will attempt to connect to the router’s Wi-Fi network.
If the password is correct, the device will successfully connect to the Wi-Fi network. You may see a notification or icon indicating that you are connected to the network.
Repeat these steps for any other devices you want to connect to your Wi-Fi network. Each device will need to select the network name (SSID) and enter the correct Wi-Fi password to establish a connection.
Once connected, you can enjoy fast and reliable internet access on your devices through the router’s Wi-Fi network. Remember, if you ever change the Wi-Fi password or want to connect new devices, you’ll need to repeat this process.
That’s it! You have successfully connected to your router’s Wi-Fi network. Now you can browse the internet, stream movies, play games, and connect with friends and family wirelessly from the comfort of your home or office.
Conclusion
Connecting to a router’s Wi-Fi network is a fundamental step in setting up a reliable and secure internet connection. By following the steps outlined in this guide, you can easily connect your devices to the router and enjoy seamless wireless connectivity.
We started by accessing the router’s settings, whether through a wired connection or the default Wi-Fi network. Then, we located the Wi-Fi settings and customized the network name (SSID) and security options. Next, we enabled Wi-Fi and found the network name (SSID) to identify our Wi-Fi network.
In step 4, we entered the Wi-Fi password (security key) to secure our network and prevent unauthorized access. Finally, we connected our devices to the router’s Wi-Fi network by selecting the network name (SSID) and entering the correct Wi-Fi password.
Remember, each router may have a slightly different interface, so the exact steps and labels may vary. However, the general principles outlined in this guide should apply to most routers.
With your devices connected to the router’s Wi-Fi network, you can enjoy the convenience of wireless internet access. Whether you’re working from home, streaming your favorite shows, or just browsing the web, a stable and secure Wi-Fi connection is essential.
If you encounter any issues during the setup process or have trouble connecting your devices, consult the router’s documentation or contact your Internet Service Provider (ISP) for assistance. They will be able to provide further guidance and troubleshooting steps specific to your router model.
Now that you have successfully connected to your router’s Wi-Fi network, go ahead and enjoy the benefits of wireless internet access throughout your home or office.
Thank you for reading this guide, and we hope it has been helpful in assisting you with connecting to your router’s Wi-Fi network. Stay connected and enjoy the online world at your fingertips!