Introduction
Welcome to this guide on how to connect your Qkk Mini Projector to your iPhone! With the rise in popularity of portable projectors, being able to connect them to your mobile devices, like the iPhone, has become increasingly important. Whether you’re looking to stream movies, share photos, or give a presentation, connecting your iPhone to a mini projector allows you to enjoy your content on a bigger screen.
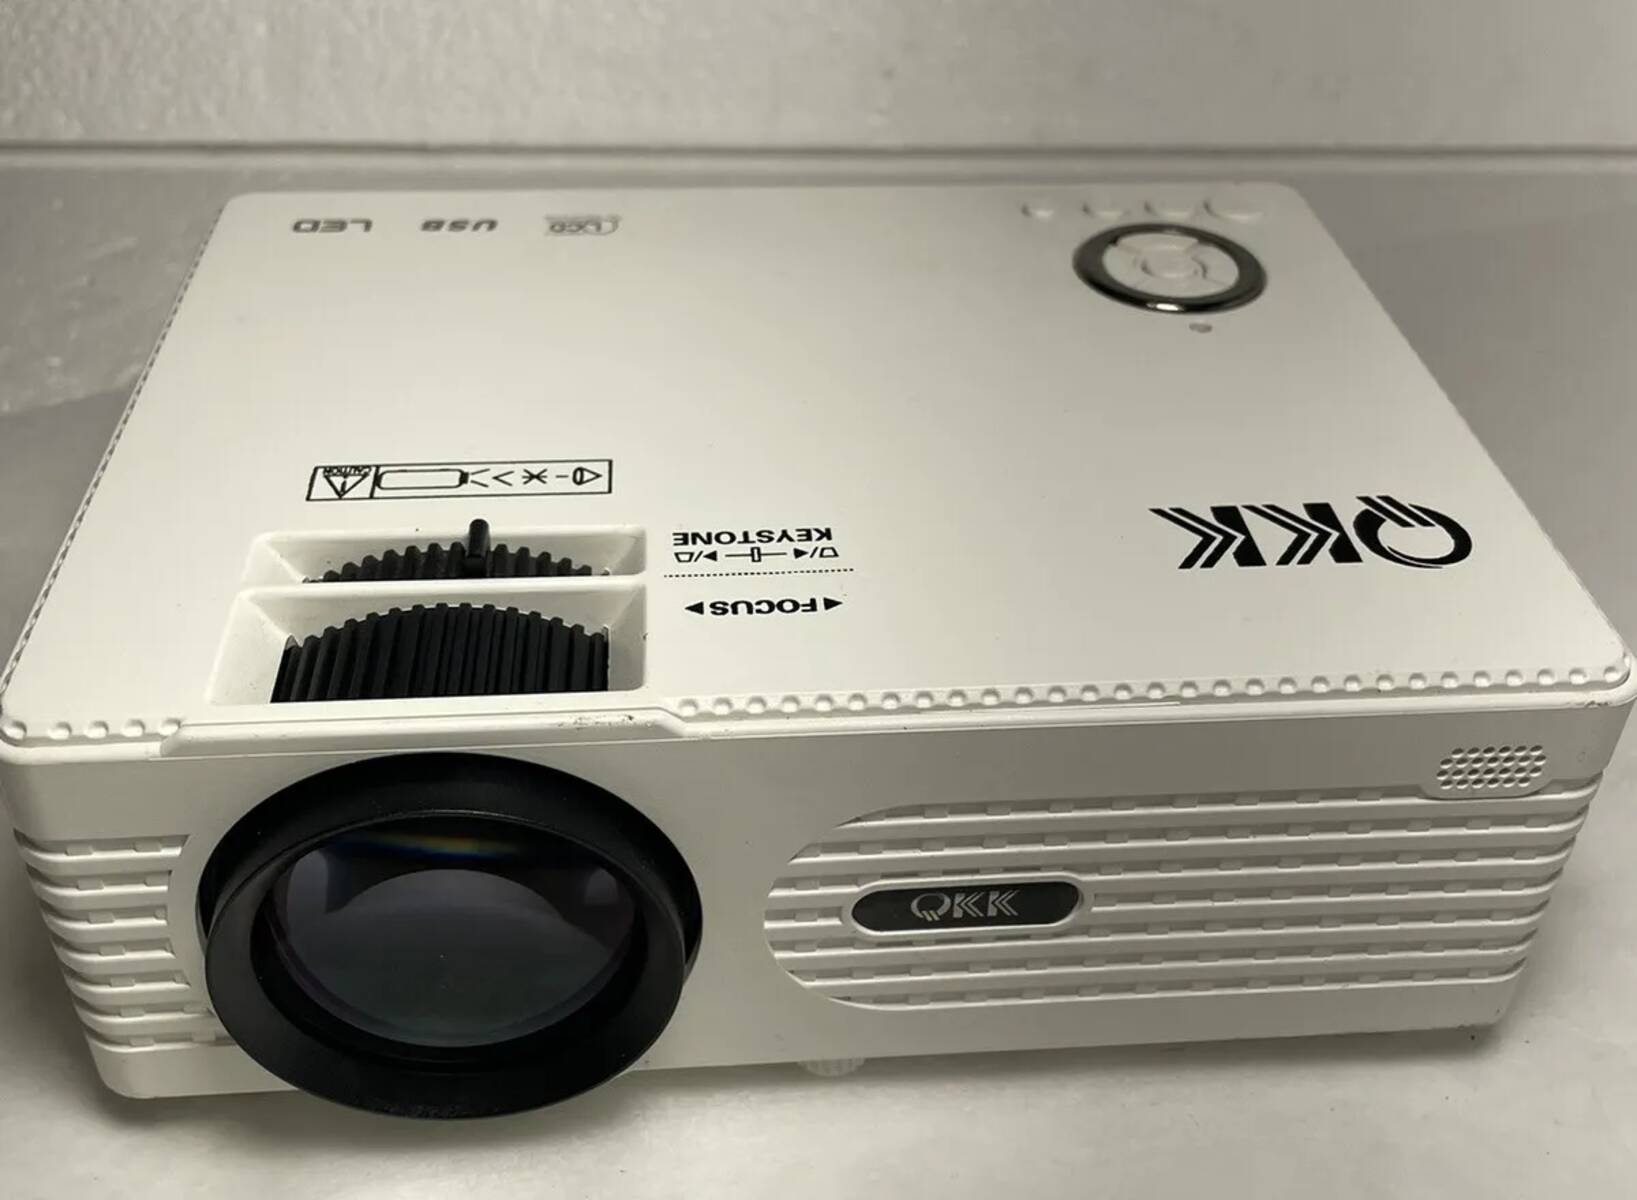
The Qkk Mini Projector is a versatile device that offers excellent image quality and portability. With its compact size and powerful features, it’s a perfect choice for those who want to take their entertainment or business presentations to the next level. However, connecting the projector to your iPhone may seem daunting at first. But fear not! This guide will walk you through the steps, ensuring a seamless connection process.
Before we dive into the steps, it’s important to note that the compatibility between the Qkk Mini Projector and your iPhone is a crucial factor. Ensure that your iPhone is compatible with the projector before proceeding. Additionally, make sure you have all the necessary equipment ready to connect your iPhone successfully.
In the next sections, we’ll go through the step-by-step process of connecting your iPhone to the Qkk Mini Projector. We’ll cover everything from gathering the required equipment to adjusting settings on your iPhone. So, without any further ado, let’s get started!
Step 1: Check the Compatibility
Before you begin the process of connecting your iPhone to the Qkk Mini Projector, it’s essential to check if your devices are compatible. While the Qkk Mini Projector is compatible with most modern smartphones, including iPhones, it’s crucial to ensure that your specific iPhone model is supported. This will help avoid any potential issues or frustrations during the connection process.
To check the compatibility between your iPhone and the Qkk Mini Projector, follow these simple steps:
- Identify your iPhone model: Start by identifying the specific model of your iPhone. You can do this by going to the “Settings” app on your iPhone, then tapping on “General,” followed by “About.” Here, you will find information about your iPhone model, such as the model name and number.
- Refer to the Qkk Mini Projector manual: Once you have identified your iPhone model, refer to the user manual or documentation that came with your Qkk Mini Projector. Look for a section that details the supported smartphone models or a compatibility chart.
- Check online resources: If you don’t have access to the Qkk Mini Projector manual or documentation, you can always visit the Qkk website or other trusted online resources. Most manufacturers provide detailed information about device compatibility on their websites.
- Consult customer support: If you’re still unsure about the compatibility between your iPhone and the Qkk Mini Projector, don’t hesitate to reach out to customer support. They will be able to provide you with accurate information and guide you through the process.
By taking the time to check the compatibility between your iPhone and the Qkk Mini Projector, you can ensure a smooth and hassle-free connection experience. This step will save you time and frustration, allowing you to enjoy your iPhone’s content on the big screen without any issues.
Step 2: Gather the Required Equipment
Before you can connect your iPhone to the Qkk Mini Projector, it’s important to gather all the necessary equipment. Having the right tools at hand will ensure a seamless connection process and an optimal viewing experience. Here’s a list of the equipment you’ll need:
- Your Qkk Mini Projector: Make sure you have your Qkk Mini Projector ready and fully charged. Ensure that it’s in good working condition before proceeding.
- An iPhone: Of course, you’ll need an iPhone to connect to the mini projector. Any recent iPhone model should work, but it’s always a good idea to double-check the compatibility, as mentioned in the previous step.
- A Lightning to HDMI adapter: Since the Qkk Mini Projector typically uses HDMI input, you’ll need a Lightning to HDMI adapter to connect your iPhone to the projector. This adapter allows you to convert the video output from your iPhone into a format compatible with the HDMI input of the projector.
- An HDMI cable: Ensure you have an HDMI cable of sufficient length to connect the Lightning to HDMI adapter to the Qkk Mini Projector. Ideally, choose a high-quality cable to ensure a stable and reliable connection.
- An audio cable (optional): If you want to enhance the sound quality, you can also consider using an audio cable to connect the audio output of your iPhone to an external speaker or audio system. This is optional but can greatly enhance your viewing experience.
Once you have gathered all the required equipment, you’re one step closer to connecting your iPhone to the Qkk Mini Projector. Ensure that everything is in good working order and that you have the necessary cables and adapters readily available.
Now that you have your Qkk Mini Projector and all the required equipment, you’re ready to move on to the next step: connecting your iPhone to the projector. Let’s proceed to the next section to learn how to connect your devices seamlessly.
Step 3: Connect iPhone to the Mini Projector
Now that you have gathered all the necessary equipment, it’s time to connect your iPhone to the Qkk Mini Projector. Follow these steps to establish a reliable connection:
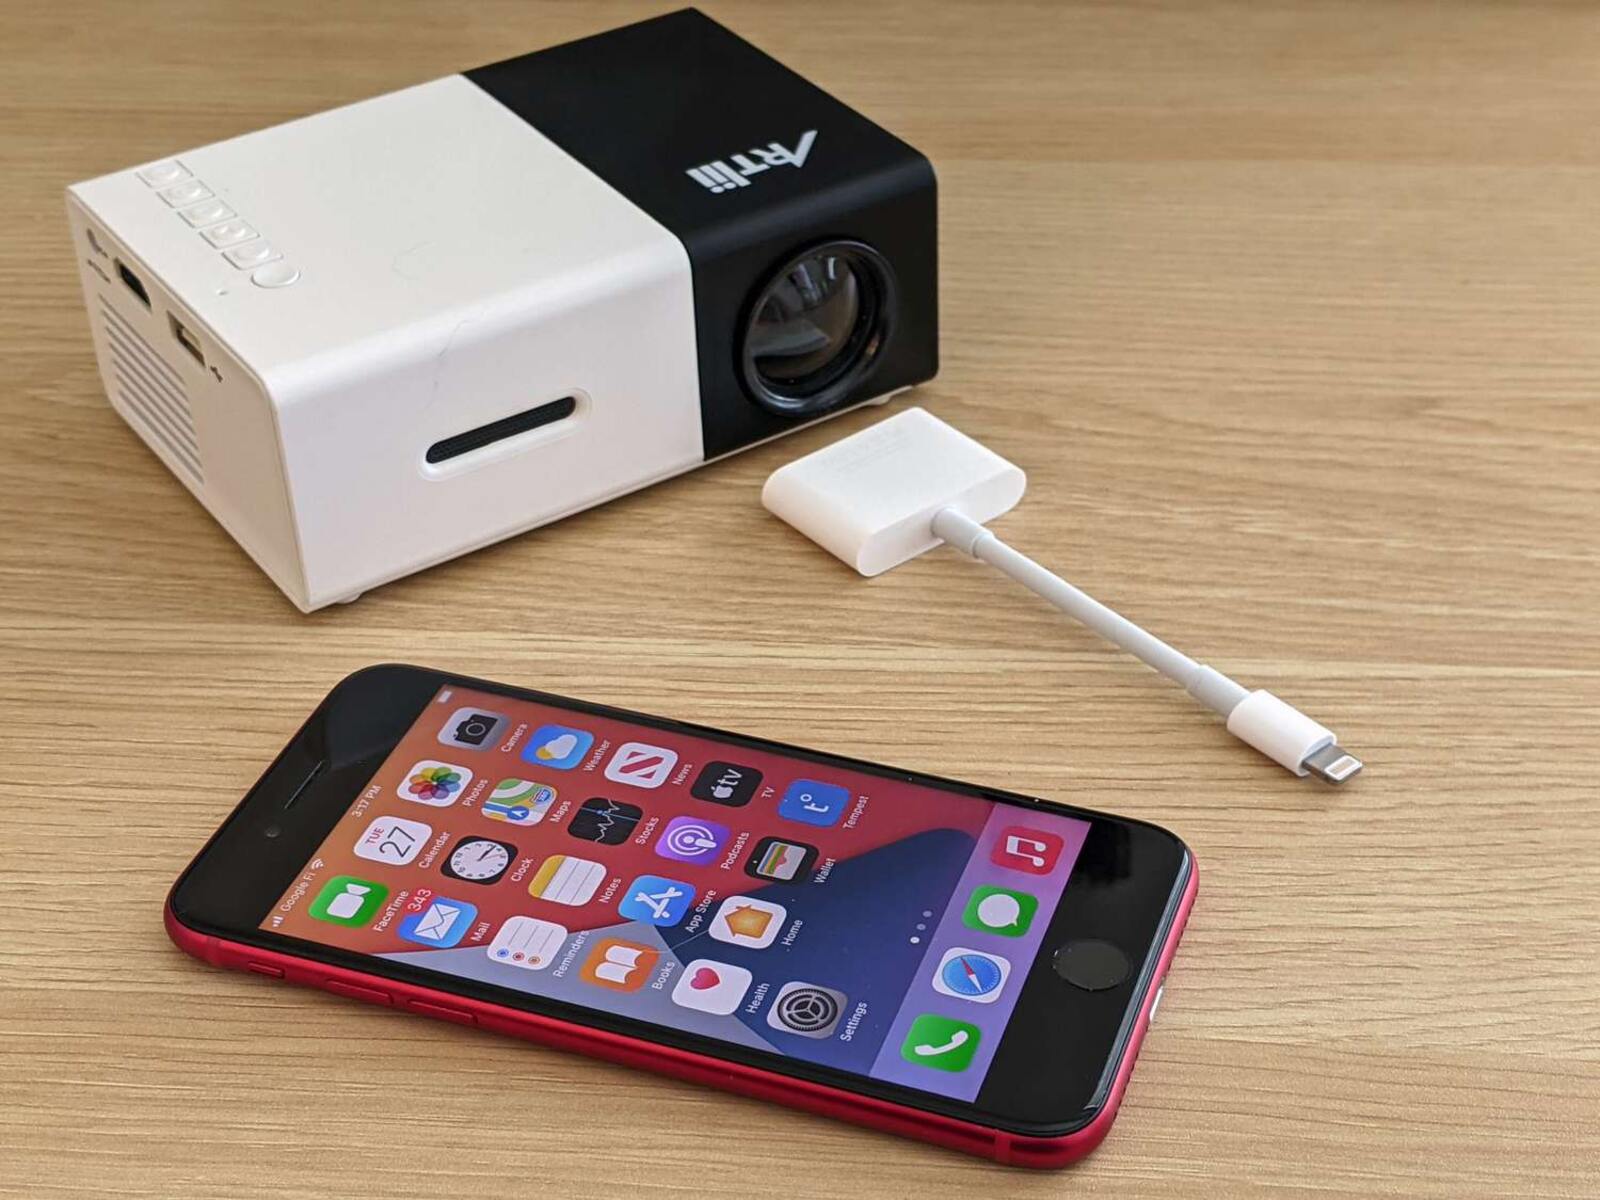
- Connect the Lightning to HDMI adapter: Begin by connecting one end of the Lightning to HDMI adapter to the charging port on your iPhone. Ensure that it’s firmly plugged in.
- Connect the HDMI cable: Take the other end of the Lightning to HDMI adapter and connect it to one end of the HDMI cable. Ensure a secure connection.
- Connect the HDMI cable to the Mini Projector: Find the HDMI input port on the Qkk Mini Projector and plug in the other end of the HDMI cable. Make sure it’s firmly connected.
- Power on the Mini Projector: Turn on the Qkk Mini Projector and wait for it to boot up. Follow the manufacturer’s instructions for powering on the projector.
- Select the HDMI input on the Mini Projector: Use the projector’s menu or remote control to select the HDMI input as the source.
- Unlock your iPhone: If your iPhone has a passcode or Face ID, unlock it to access the home screen. Make sure the audio and video output are not muted or turned down to minimum volume.
Once you have completed these steps, your iPhone should be successfully connected to the Qkk Mini Projector. You should now be able to see your iPhone’s screen on the projected display. If you encounter any issues, double-check the connections and settings to ensure they are correct.
It’s worth mentioning that some projectors may require additional steps or settings for the connection. Therefore, it’s advisable to consult the user manual or manufacturer’s instructions specific to your Qkk Mini Projector if you encounter any difficulties during the connection process.
With your iPhone and Qkk Mini Projector connected, you’re almost ready to enjoy your content on the big screen. However, before diving into your favorite movies or presentations, it’s important to adjust a few settings on your iPhone.
Step 4: Adjust Settings on your iPhone
Now that your iPhone is connected to the Qkk Mini Projector, it’s time to make some adjustments in the settings to ensure the best viewing experience. Follow these steps to optimize the settings on your iPhone:
- Display settings: Open the “Settings” app on your iPhone and navigate to “Display & Brightness.” Adjust the brightness level according to your preference and the ambient lighting conditions.
- Orientation lock: To avoid any unintentional screen rotations during your presentation or movie, consider enabling the orientation lock on your iPhone. This will lock the screen in either portrait or landscape mode, depending on your preference.
- Zoom settings: If needed, you can enable the Zoom feature on your iPhone to enlarge the content displayed on the Qkk Mini Projector. This can be useful for detailed presentations or for viewers with visual impairments.
- Sound settings: Ensure that the sound output is set to the appropriate source. If you are using an external speaker or audio system, make sure the sound is routed through that device and adjust the volume accordingly.
- Auto-lock: To prevent your iPhone from automatically locking or sleeping during your presentation or movie, consider disabling the auto-lock feature temporarily. This will ensure that your iPhone stays on and connected to the projector.
- Sound output options: If you want to improve the audio experience, go to the “Settings” app, select “Bluetooth,” and connect your iPhone to a compatible Bluetooth speaker or audio system.
By making these adjustments, you can optimize the settings on your iPhone for a seamless and enjoyable viewing experience on the Qkk Mini Projector. Remember to adjust the settings back to their default positions when disconnecting from the projector.
Now that you have adjusted the settings on your iPhone, it’s time to set up the Qkk Mini Projector for an optimal viewing experience. Let’s move on to the next step to learn how to do that.
Step 5: Set Up the Mini Projector
With your iPhone connected and the settings adjusted, it’s time to set up the Qkk Mini Projector for an optimal viewing experience. Follow these steps to ensure everything is set up correctly:
- Position the projector: Find a suitable location to place the Qkk Mini Projector. Make sure it’s close enough to a power source and the projection surface.
- Adjust the projection distance: Determine the desired size of the projected image and adjust the distance between the projector and the screen or wall accordingly. Refer to the projector’s user manual for the recommended projection distance and image size specifications.
- Focus the image: Use the focus adjustment ring or button on the projector to sharpen the projected image. Rotate the ring or press the button until the image appears clear and crisp.
- Keystone correction: If the projected image appears distorted due to the angle or positioning of the projector, use the keystone correction feature on the Qkk Mini Projector to adjust the image and ensure it appears rectangular and aligned.
- Adjust other settings (optional): Explore other projector settings, such as brightness, contrast, and color temperature, to fine-tune the image quality according to your preferences and the environment in which you’re using the projector.
- Test the audio output (optional): If you’re using the built-in speakers of the Qkk Mini Projector, test the audio output to ensure it’s clear and at an adequate volume. If you’re using an external audio system, make sure it’s connected and functioning properly.
By following these steps, you can set up the Qkk Mini Projector to deliver an optimal viewing experience. Take the time to adjust the projection distance, focus, and keystone correction settings to ensure the best possible image quality on the screen or wall.
Now that you have successfully set up both your iPhone and the Qkk Mini Projector, it’s time to move on to the final step and start enjoying your iPhone’s content on the big screen.
Step 6: Enjoy your iPhone’s Content on the Big Screen
Congratulations! You have successfully connected your iPhone to the Qkk Mini Projector and completed all the necessary setup steps. It’s now time to sit back, relax, and enjoy your iPhone’s content on the big screen. Follow these tips to have the best experience:
- Choose your content: Open your favorite apps, such as Netflix, YouTube, or PowerPoint, on your iPhone and select the content you want to watch or present.
- Control playback: Use your iPhone to control playback of videos, slideshows, or presentations. You can pause, play, rewind, or skip to the next content directly from your iPhone.
- Adjust volume: Use the volume buttons on your iPhone to adjust the sound level. If you are using an external audio system, make sure to adjust the volume on that device as well.
- Sit back and enjoy: Find a comfortable spot and immerse yourself in the larger-than-life entertainment or presentation experience that the Qkk Mini Projector offers. Enjoy the crisp visuals and, if applicable, the enhanced audio quality.
- Interact with your content: If you’re giving a presentation, take advantage of the larger screen to interact with your content more freely. Engage your audience and make the most of the immersive experience.
Remember to take proper care of both your iPhone and the Qkk Mini Projector during usage. Avoid exposing the projector to extreme temperatures or rough handling, and ensure your iPhone is securely placed and protected during the session.
Lastly, don’t forget to disconnect your iPhone from the projector once you’re done. Safely detach the cables and adapters, and power off the Qkk Mini Projector. Store the equipment in a safe place for future use.
With that, you have successfully connected your iPhone to the Qkk Mini Projector and enjoyed your content on the big screen. We hope this guide has been informative and helpful in enhancing your viewing or presentation experience.
Thank you for following this step-by-step guide! Enjoy the immersive entertainment and impressive presentations brought to you by the Qkk Mini Projector and your iPhone.
Troubleshooting Tips
While connecting your iPhone to the Qkk Mini Projector is generally a straightforward process, you may encounter some common issues. Don’t worry, though! Here are some troubleshooting tips to help you overcome any hurdles along the way:
- Check the connections: Make sure all cables and adapters are securely connected. Sometimes, loose connections can result in a lack of audio or video output.
- Restart devices: If you’re experiencing connection issues or unexpected behavior, try restarting both your iPhone and the Qkk Mini Projector. This can often resolve minor glitches.
- Update software: Ensure that both your iPhone’s operating system and the Qkk Mini Projector’s firmware are up to date. Outdated software can cause compatibility issues, so keeping everything updated is vital.
- Reset video settings: If the projected image appears distorted or misaligned, check the video settings on the Qkk Mini Projector and reset them to default. This can help restore the correct display settings.
- Check audio settings: If you’re not getting any sound, verify that the audio output settings on your iPhone and the Qkk Mini Projector are correctly configured. Adjust the volume levels and ensure the mute button is not activated.
- Try a different cable: If you suspect a faulty cable, try using a different HDMI cable or Lightning to HDMI adapter to rule out any connection issues caused by faulty equipment.
- Examine HDMI ports: Inspect the HDMI ports on both your iPhone and the Qkk Mini Projector for any debris, dust, or damage that may interfere with the connection. Clean the ports carefully if necessary.
- Consult customer support: If none of the above steps resolve your issues, reach out to the customer support of either your iPhone or the Qkk Mini Projector. They can provide further assistance and guidance specific to your devices.
Remember, troubleshooting is a normal part of any technical setup. Don’t get discouraged if you experience difficulties along the way. With a bit of patience and persistence, you’ll be able to resolve any issues and enjoy a seamless connection between your iPhone and the Qkk Mini Projector.
Keep these troubleshooting tips in mind, and you’ll be well-prepared to tackle any obstacles that may arise during the setup and usage of your iPhone with the Qkk Mini Projector.
Conclusion
Connecting your iPhone to the Qkk Mini Projector opens up a world of possibilities for enjoying your favorite content on the big screen. Whether you’re streaming movies, sharing photos with friends and family, or giving an engaging presentation, the Qkk Mini Projector provides a convenient and portable solution.
In this guide, we’ve walked through the step-by-step process of connecting your iPhone to the Qkk Mini Projector. We started by checking the compatibility between the two devices, ensuring a smooth connection. Then, we gathered the necessary equipment, including a Lightning to HDMI adapter and an HDMI cable.
Next, we connected the iPhone to the mini projector and adjusted the settings on both devices to optimize the viewing experience. We set up the Qkk Mini Projector, adjusting the projection distance, focus, and other settings to ensure a crisp and clear image on the screen or wall.
Lastly, we provided troubleshooting tips to help you overcome any common issues that may arise during the connection process. These tips will aid in troubleshooting any audio or video problems, ensuring a smooth and enjoyable experience every time.
Now, armed with the knowledge from this guide, you can confidently connect your iPhone to the Qkk Mini Projector, immerse yourself in your favorite content, and captivate your audience with stunning presentations.
Remember, always refer to the user manual and instructions specific to your iPhone and the Qkk Mini Projector for any device-specific details or troubleshooting steps. With proper care, maintenance, and troubleshooting, your iPhone and the Qkk Mini Projector will continue to provide you with incredible viewing experiences for years to come.