Introduction
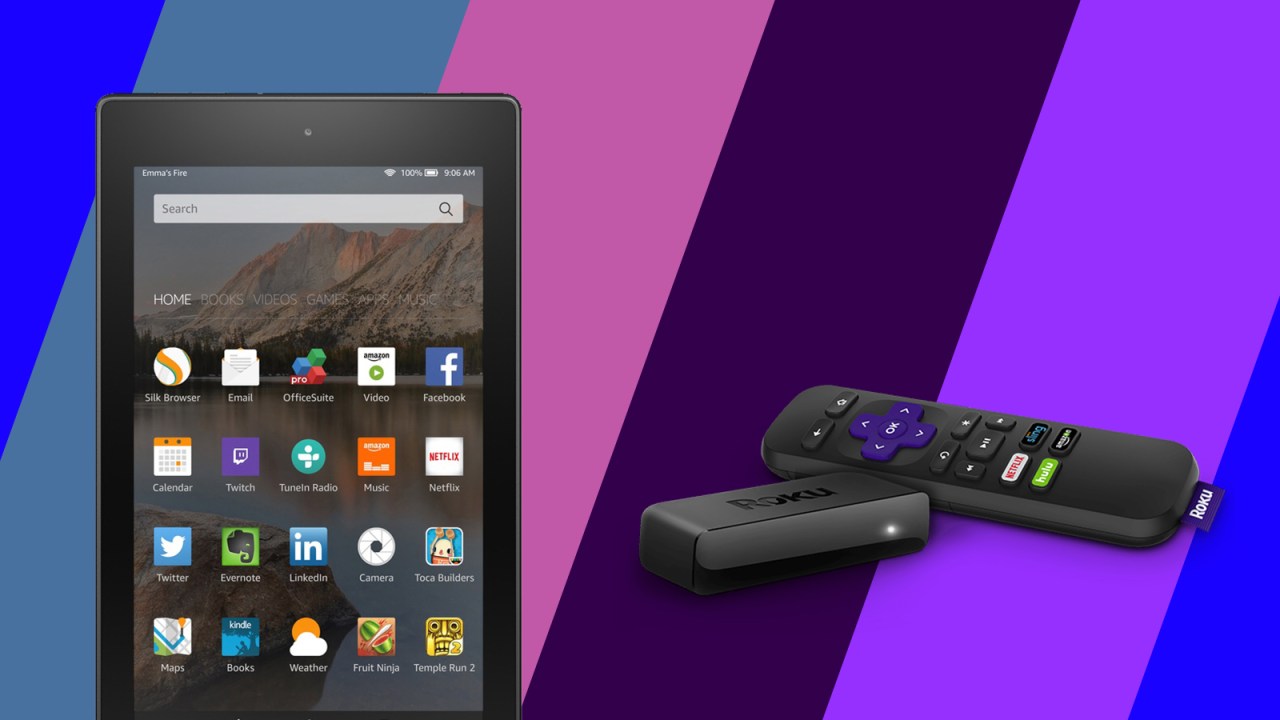
Welcome to the world of seamless entertainment! Roku TVs have become immensely popular due to their user-friendly interface and broad range of streaming options. If you own a tablet and want to enhance your viewing experience by connecting it to your Roku TV, you’re in luck. This guide will walk you through the steps to connect your tablet to a Roku TV, so you can enjoy your favorite content on the big screen.
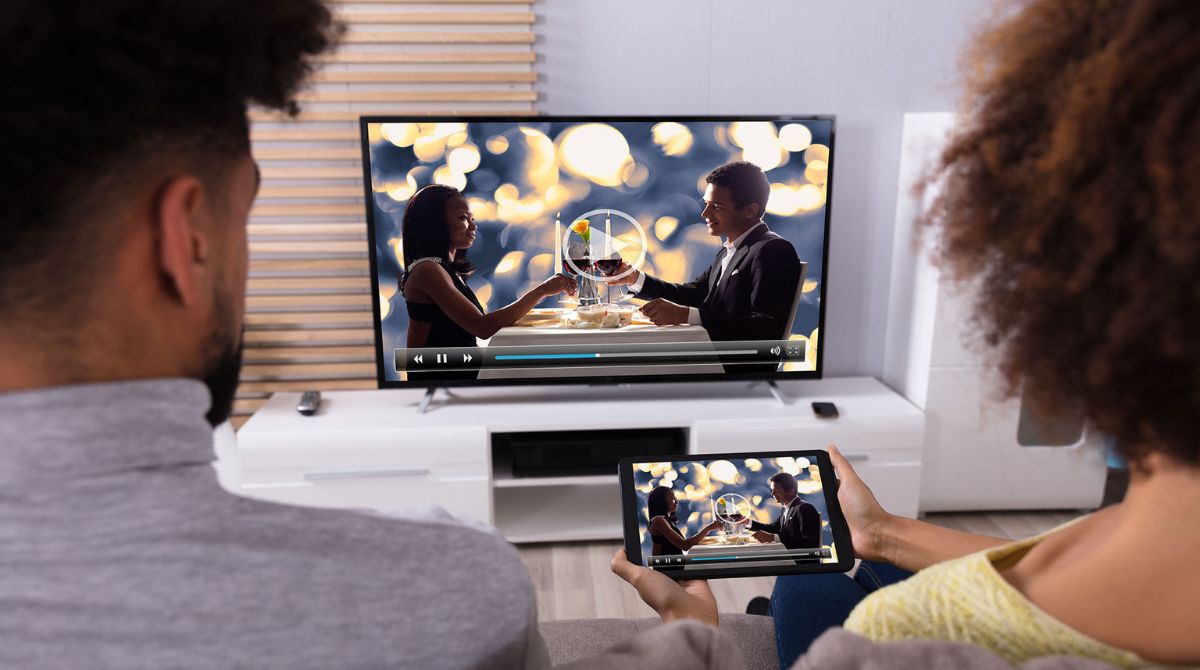
Connecting your tablet to your Roku TV opens up a wide array of possibilities. You can stream videos, photos, and music from your tablet directly to your TV, giving you a more immersive and enjoyable viewing experience. Whether you want to binge-watch your favorite TV shows, share vacation photos with friends and family, or play games on a larger screen, connecting your tablet to your Roku TV can make it all possible.
Before we dive into the step-by-step instructions, it’s essential to ensure that your devices are compatible. You’ll need a tablet that is running on Android operating system version 4.4.2 or newer, or iOS 9.3 or newer for Apple devices. Your Roku TV should also be connected to the same Wi-Fi network as your tablet to establish a connection.
Now that we have covered the basics let’s move on to the step-by-step process of connecting your tablet to your Roku TV. Please keep in mind that the exact steps may vary slightly depending on the brand and model of your tablet and Roku TV, but the general process remains the same.
Step 1: Ensure Device Compatibility
Before you begin the process of connecting your tablet to your Roku TV, it is crucial to check the compatibility of your devices. The compatibility requirements will ensure a smooth and seamless connection between the two devices.
To begin, ensure that your tablet meets the requirements for compatibility. For Android devices, your tablet should be running on Android operating system version 4.4.2 or newer. If you’re using an Apple device, such as an iPad, make sure it is running iOS 9.3 or newer.
Next, confirm that your Roku TV is connected to the same Wi-Fi network as your tablet. Both the tablet and the Roku TV must be connected to the same network for them to communicate with each other. This step is essential as it allows the devices to establish a stable connection for streaming.
Moreover, it’s important to ensure that your tablet and Roku TV have the necessary updates installed. Keeping your devices up to date ensures that you have access to the latest features and enhancements, making your streaming experience more enjoyable.
For Android devices, navigate to the Settings menu and look for the software updates option. If an update is available, follow the prompts to install it. Similarly, for Apple devices, go to the Settings app, select General, and then Software Update. If an update is available, download and install it on your device.
Lastly, make sure that both your tablet and Roku TV are powered on and in close proximity to each other. This proximity is essential for establishing a strong and stable connection between the two devices.
By verifying the compatibility of your tablet and Roku TV, you have laid the foundation for a successful connection. Now that you have confirmed these requirements, you are ready to move on to the next step: connecting your tablet to your Roku TV via Wi-Fi.
Step 2: Connect Tablet to Roku TV via Wi-Fi
Now that you have ensured the compatibility of your tablet and Roku TV, it’s time to connect them via Wi-Fi. This method allows you to share content from your tablet to your Roku TV wirelessly.
To begin, make sure that both your tablet and Roku TV are connected to the same Wi-Fi network. This ensures that they are on the same network and can communicate with each other. Ensure that the Wi-Fi signal is strong and stable for a smooth streaming experience.
Once your devices are connected to the same network, grab your tablet and navigate to the Settings. Look for the option that says “Screen Mirroring” or “Cast Screen” and tap on it. The exact location of this option may vary depending on the brand and model of your tablet.
After tapping on the Screen Mirroring or Cast Screen option, your tablet will start scanning for available devices. Wait for a moment until you see your Roku TV appear on the list of available devices. When you see your Roku TV listed, tap on it to establish the connection.
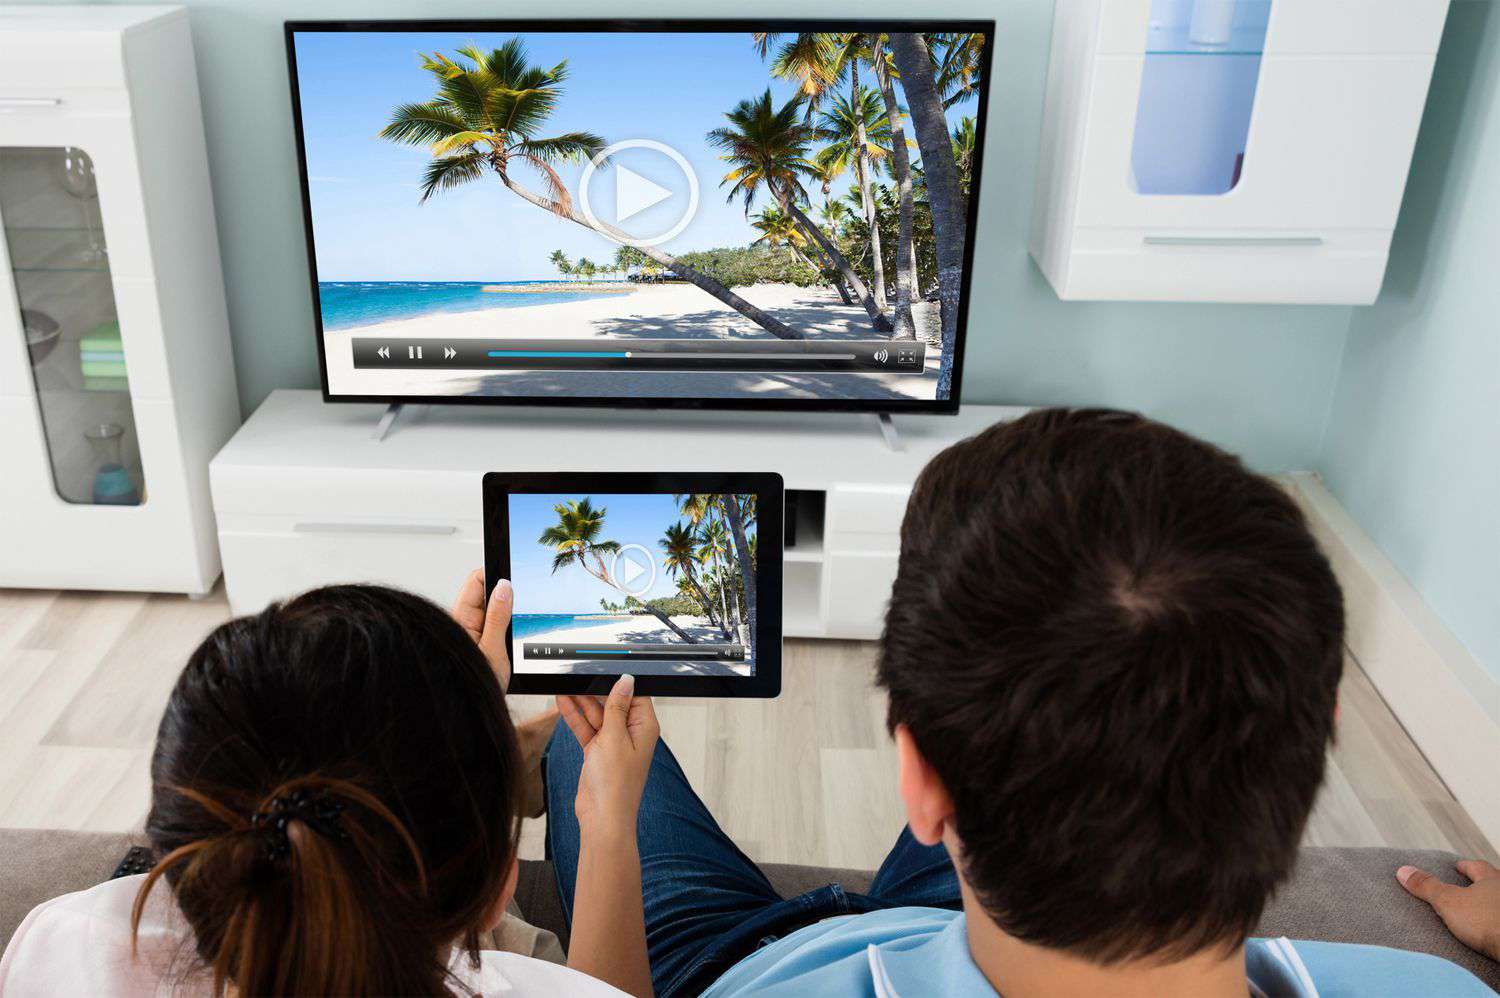
Now, your tablet’s screen should be mirrored on your Roku TV. You can now enjoy your favorite apps, videos, and photos on the big screen. Keep in mind that the screen mirroring feature may have a slight delay, so it’s best suited for videos, photos, and non-interactive tasks.
Remember to keep your tablet screen on while using the screen mirroring feature. If your tablet goes into sleep mode, the connection may be lost. Additionally, you can control the volume and playback options from your tablet while the content is being mirrored on your Roku TV.
If you wish to stop the screen mirroring, simply go back to the Screen Mirroring or Cast Screen settings on your tablet and choose the option to stop or disconnect. This will return your tablet’s screen to normal and disconnect it from your Roku TV.
Connecting your tablet to your Roku TV via Wi-Fi provides the convenience of wirelessly sharing content on a larger screen. However, if you prefer a more dedicated and seamless experience, you can explore the option of using the Roku Mobile App to connect your tablet to your Roku TV, which we will cover in the next step.
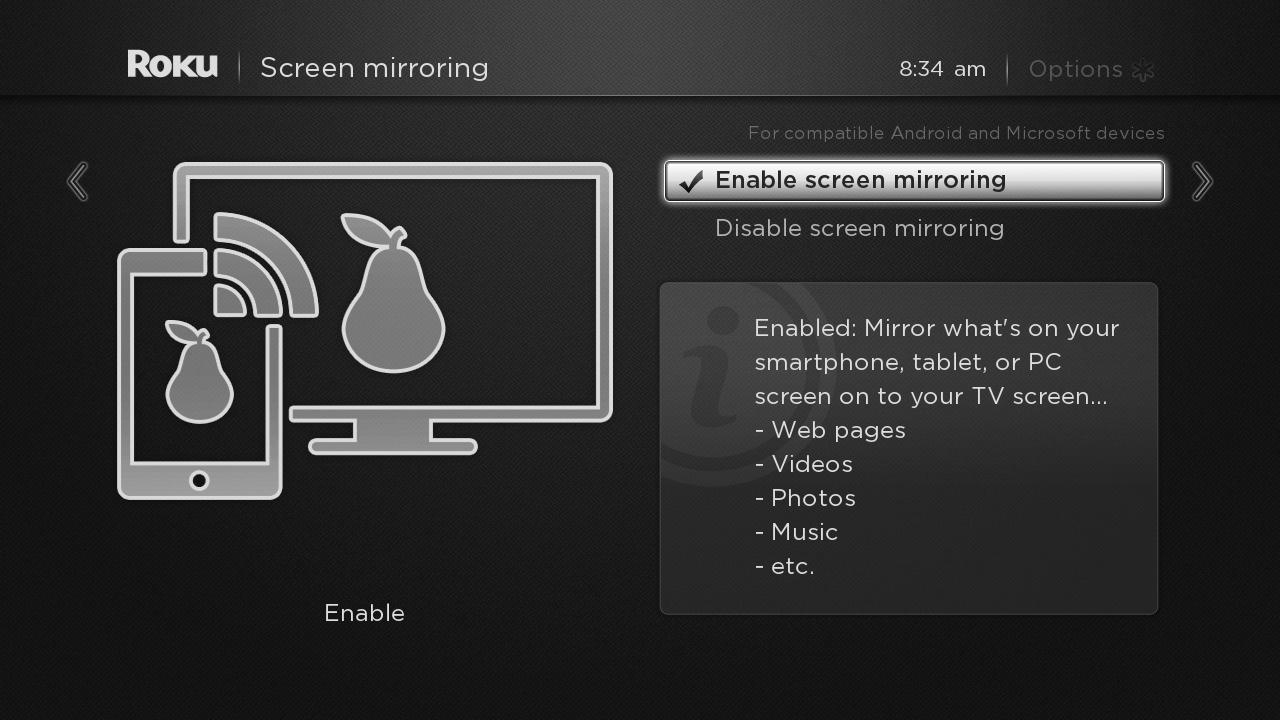
Step 3: Connect Tablet to Roku TV with Screen Mirroring
If you prefer a more dedicated and seamless experience for connecting your tablet to your Roku TV, you can utilize the Screen Mirroring feature. This feature allows you to display your tablet’s screen directly on your Roku TV, providing a hassle-free and immersive viewing experience.
Before proceeding, ensure that your tablet and Roku TV are connected to the same Wi-Fi network. This is crucial for establishing a stable connection between the two devices.
To initiate the screen mirroring process, open the Settings app on your tablet and navigate to the Display or Screen section. Look for the option that says “Cast” or “Wireless Display” and tap on it.
Your tablet will now scan for available devices to connect to. Locate your Roku TV from the list of available devices and select it. This will prompt your tablet to establish a connection with your Roku TV.
Once the connection is established, your tablet’s screen will be mirrored on your Roku TV. You can now navigate through the various apps, videos, and content on your tablet, and it will be displayed on the bigger screen.
With screen mirroring, you can enjoy a wide range of activities on your Roku TV. Whether you want to watch your favorite TV shows and movies, browse the internet, play games, or showcase photos and videos to friends and family, the screen mirroring feature allows you to do it all.
During the screen mirroring session, you can control the playback and volume directly from your tablet. This means you don’t have to reach for the Roku TV remote every time you want to make adjustments.
To stop the screen mirroring session, simply go back to the Cast or Wireless Display settings on your tablet and choose the option to stop or disconnect. This will return your tablet’s screen to normal and end the connection with your Roku TV.
Using the screen mirroring feature provides a dedicated and seamless way to connect your tablet to your Roku TV. However, if you are looking for additional functionalities and control over your Roku TV, you can explore the option of using the Roku Mobile App, which will be covered in the next step.
Step 4: Connect Tablet to Roku TV using Roku Mobile App
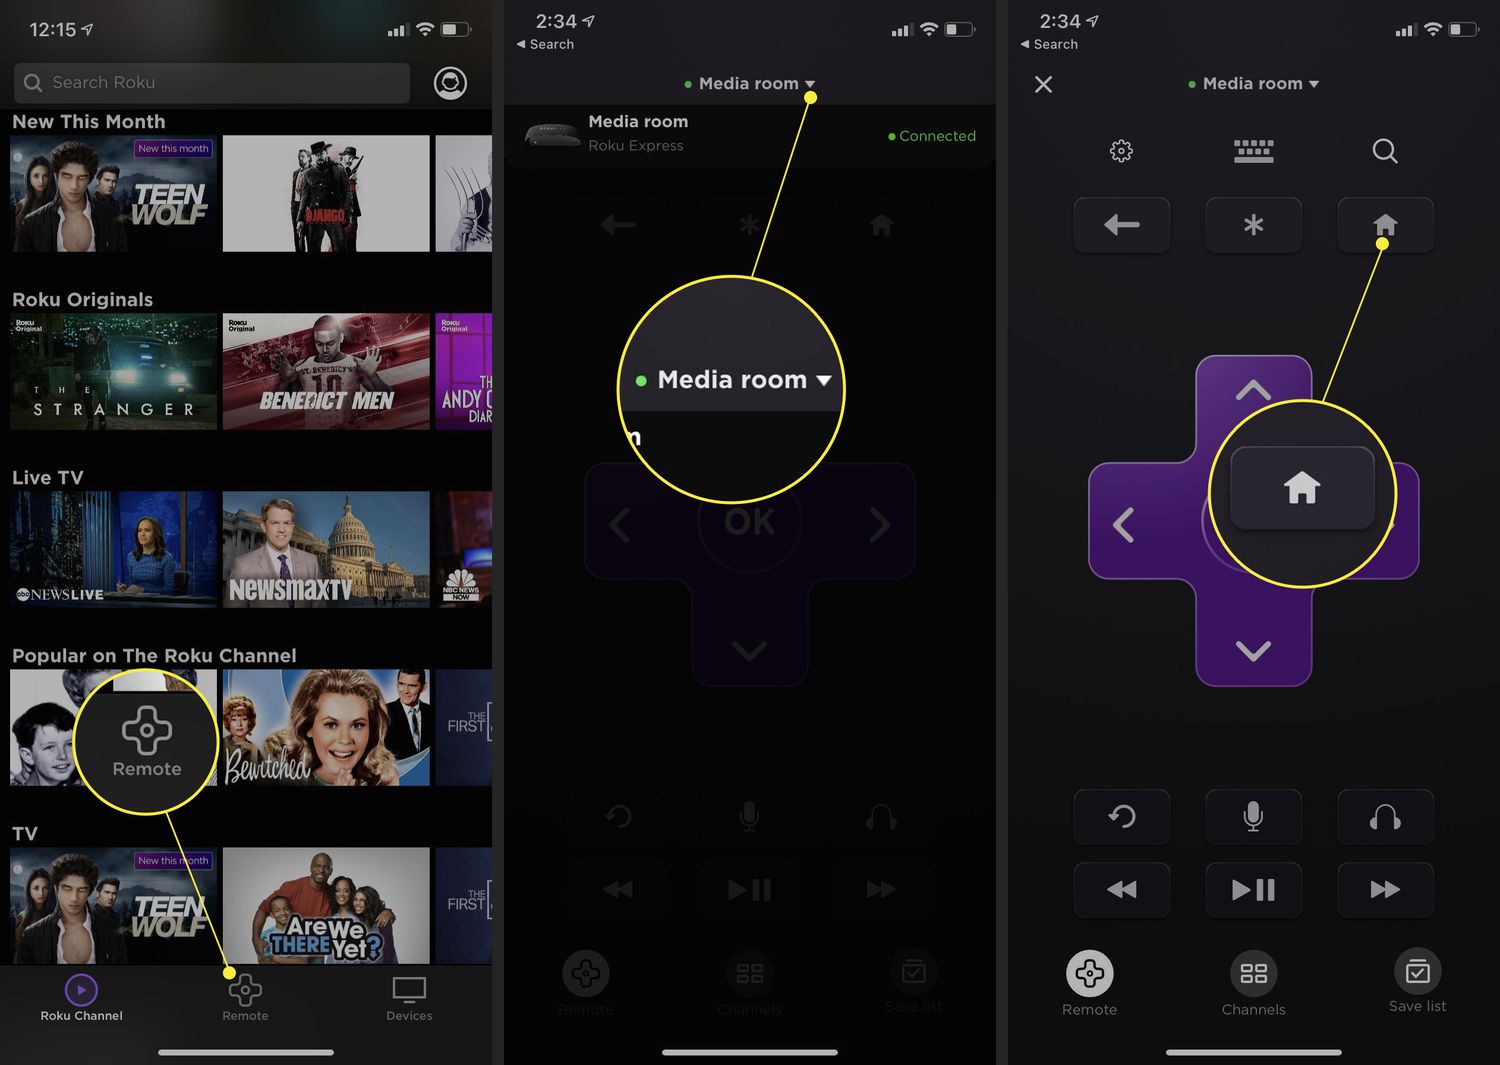
If you’re looking for enhanced control and additional functionalities when connecting your tablet to your Roku TV, the Roku Mobile App is a great option. The Roku Mobile App allows you to control your Roku TV directly from your tablet, giving you a seamless and personalized streaming experience.
To get started, make sure your tablet is connected to the same Wi-Fi network as your Roku TV. This ensures that the devices can communicate with each other.
First, launch the app store on your tablet and search for “Roku Mobile App”. Download and install the app onto your tablet.
Once the app is installed, open it and follow the on-screen instructions to set up the connection with your Roku TV. This typically involves signing in to your Roku account and enabling the “Networked Standby” option in the Roku TV settings.
After the setup process is complete, your tablet should be paired with your Roku TV. You can now enjoy a variety of features and functionalities offered by the Roku Mobile App.
With the Roku Mobile App, you have the ability to control your Roku TV directly from your tablet. This includes adjusting the volume, changing channels, and navigating through the Roku interface with ease.
Additionally, the Roku Mobile App provides a convenient way to search for content. Use the search function on the app to find specific shows, movies, and channels, and then launch them directly on your Roku TV.
One of the standout features of the Roku Mobile App is the ability to use your tablet as a virtual remote control. The app replicates the functionality of the physical Roku remote, allowing you to navigate the menus, control playback, and even use voice search for a hands-free experience.
Furthermore, the Roku Mobile App offers a “Private Listening” feature, which allows you to listen to the audio from your Roku TV through headphones connected to your tablet. This is particularly useful when you want to watch TV without disturbing others around you.
To wrap it up, the Roku Mobile App provides a seamless and personalized way to connect your tablet to your Roku TV. With its comprehensive control options and additional features, it enhances your overall streaming experience and makes it more convenient to enjoy your favorite content.
Step 5: Stream Content from Tablet to Roku TV
Now that you have connected your tablet to your Roku TV, it’s time to start streaming content and enjoying your favorite apps, videos, photos, and more on the big screen.
To begin streaming content from your tablet to your Roku TV, launch the app or open the video/photo you want to stream. Look for the casting or streaming icon, usually represented by a rectangle with wireless waves or an icon that indicates sharing or casting.
Tap on the casting or streaming icon, and you should see a list of available devices to cast to. Look for your Roku TV and select it as the target device. Your tablet will establish a connection with your Roku TV and start streaming the content.
While streaming, you can also control the playback, volume, and other settings directly from your tablet. This provides a convenient and interactive way to enjoy your content.
Streaming content from your tablet to your Roku TV allows you to take advantage of the larger screen for a more immersive viewing experience. Whether you’re watching videos on YouTube, streaming movies or TV shows from streaming apps, or showcasing your photos to friends and family, streaming content to your Roku TV offers a wide range of possibilities.
Keep in mind that the streaming capabilities will depend on the apps and services you have installed on your tablet. Make sure to have the necessary apps installed so that you can stream content seamlessly to your Roku TV.
When you’re finished streaming content, you can stop the streaming session by tapping the casting or streaming icon on your tablet and selecting the option to stop or disconnect. This will end the connection between your tablet and your Roku TV.
Streaming content from your tablet to your Roku TV opens up a world of entertainment possibilities. You can access a vast library of movies, TV shows, music, and more, all from the comfort of your couch and on a larger screen.
By following these steps, you can now enjoy a seamless streaming experience by connecting your tablet to your Roku TV. So grab your tablet, sit back, and get ready to embark on a whole new level of entertainment.
Conclusion
Connecting your tablet to your Roku TV opens up a world of entertainment possibilities. Whether you want to stream your favorite videos, browse the internet, play games, or showcase your photos and videos, the ability to connect your tablet to your Roku TV allows you to enjoy content on a larger and more immersive screen.
In this guide, we covered five steps to connect your tablet to your Roku TV. We started by ensuring the compatibility of your devices and making sure they are connected to the same Wi-Fi network. Then, we explored different methods such as screen mirroring and using the Roku Mobile App to establish a connection between your tablet and Roku TV.
We discussed how to stream content from your tablet to your Roku TV, giving you the ability to enjoy a wide range of apps, movies, TV shows, and more on the big screen.
Remember, the specific steps may vary slightly depending on the brand and model of your tablet and Roku TV. It’s always a good idea to refer to the device manuals or online support resources for detailed instructions tailored to your specific setup.
Now that you have the knowledge and guidance, it’s time to grab your tablet, follow the steps, and start enjoying a seamless streaming experience on your Roku TV. Say goodbye to squinting at a small screen and welcome the immersive entertainment experience on your larger television display.
Whether you’re curling up for a cozy movie night, sharing a slideshow of your latest vacation photos, or immersing yourself in your favorite games, connecting your tablet to your Roku TV will take your entertainment to the next level.
So, go ahead and take the leap by connecting your tablet to your Roku TV. Sit back, relax, and enjoy the seamless streaming experience that awaits you!