Introduction
Connecting your laptop to a smart TV opens up a whole new world of possibilities. Whether you want to stream your favorite movies and shows on a bigger screen or give a presentation at the office, the ability to connect these devices seamlessly is essential. With the advancements in technology, connecting a laptop to a smart TV has become easier than ever.
However, before diving into the various methods of connection, it is important to ensure compatibility between your laptop and smart TV. Most smart TVs come with multiple input options, including HDMI, VGA, and USB ports, which can be used to connect your laptop. Depending on the available ports and capabilities of your TV and laptop, different connection methods may be required.
In this guide, we will explore some of the most common and effective ways to connect your laptop to a smart TV. From using HDMI cables to wireless display mirroring and streaming devices, we’ve got you covered. So, let’s get started and turn your laptop and smart TV into a dynamic duo!
Check for Compatibility
Before attempting to connect your laptop to a smart TV, it is crucial to check for compatibility between the two devices. This step will ensure that you have the necessary ports and connections on both your laptop and smart TV to establish a successful connection.
Start by identifying the available input ports on your smart TV. The most common port used for laptop connections is HDMI (High Definition Multimedia Interface). You can usually find multiple HDMI ports on the back or side of the TV. If your laptop has an HDMI port as well, you’re in luck. Simply connect the two devices using an HDMI cable, and you should be good to go.
If your laptop doesn’t have an HDMI port, don’t worry. Some laptops have VGA (Video Graphics Array) ports, which can be used to connect to the TV using a VGA cable. However, keep in mind that VGA cables only transmit video signals and not audio. In such cases, you’ll need to use an additional audio cable to get sound from your laptop to the TV.
Another option is to use a USB port on your smart TV, but this method is less common and may have limited functionality. Make sure to check your TV’s user manual or online specifications to determine if it supports USB connections with laptops.
Additionally, it’s important to consider the operating systems of both your laptop and smart TV. Some operating systems may have specific requirements or limitations when it comes to connecting to other devices. For example, if you’re using a Macbook with macOS, you may need to adjust some settings or install additional software for a smooth connection with non-Apple smart TVs.
Overall, checking for compatibility between your laptop and smart TV is the first step in ensuring a successful connection. Take some time to identify the available input ports on your TV, the ports on your laptop, and any necessary adjustments based on the operating systems. Once you have confirmed compatibility, you can move on to the next steps of connecting the two devices.
Connect via HDMI Cable
One of the most straightforward and widely used methods to connect a laptop to a smart TV is through an HDMI cable. HDMI (High Definition Multimedia Interface) cables transmit both audio and video signals, making them ideal for connecting devices with high-quality output.
To connect your laptop to the smart TV via an HDMI cable, follow these steps:
- Locate the HDMI ports: On both your laptop and smart TV, look for HDMI ports. They are usually labeled as “HDMI” and come in different sizes (standard, mini, or micro HDMI).
- Insert the HDMI cable: Once you’ve identified the HDMI ports, insert one end of the HDMI cable into the HDMI port on your laptop and the other end into the HDMI port on your smart TV.
- Switch to the correct input source: Using your TV’s remote control, change the input source to the HDMI port that you connected the cable to. This can usually be done by pressing the “Input” or “Source” button on the remote and selecting the corresponding HDMI input.
- Adjust the display settings on your laptop: Most laptops will automatically detect the connection and adjust the display settings accordingly. However, if the TV screen doesn’t display anything or the resolution is incorrect, you may need to manually adjust the display settings on your laptop. To do this, right-click on the desktop and select “Display Settings” or a similar option. From there, you can choose the appropriate display mode and resolution for your TV.
- Enjoy the content: Once the connection is established and the display settings are adjusted, you can start streaming or mirroring content from your laptop to the smart TV. Whether it’s watching movies, playing games, or giving presentations, the HDMI connection provides a high-quality viewing experience.
Remember to use a high-quality HDMI cable for the best results and ensure that both your laptop and smart TV are powered on during the connection process. It’s also worth noting that HDMI connections do not require any additional software or drivers, making this method a convenient choice for most users.
Connect using Wireless Display Mirroring
If you prefer a wireless connection, many laptops and smart TVs support wireless display mirroring. This feature allows you to mirror your laptop’s screen onto your smart TV without the need for any cables. However, it’s important to note that both your laptop and smart TV must support this functionality.
To connect your laptop to the smart TV using wireless display mirroring, follow these steps:
- Check for compatibility: Ensure that both your laptop and smart TV support wireless display mirroring. Some common technologies for wireless mirroring include Miracast, AirPlay, and Google Cast. Refer to the user manuals or specifications of your devices to confirm compatibility.
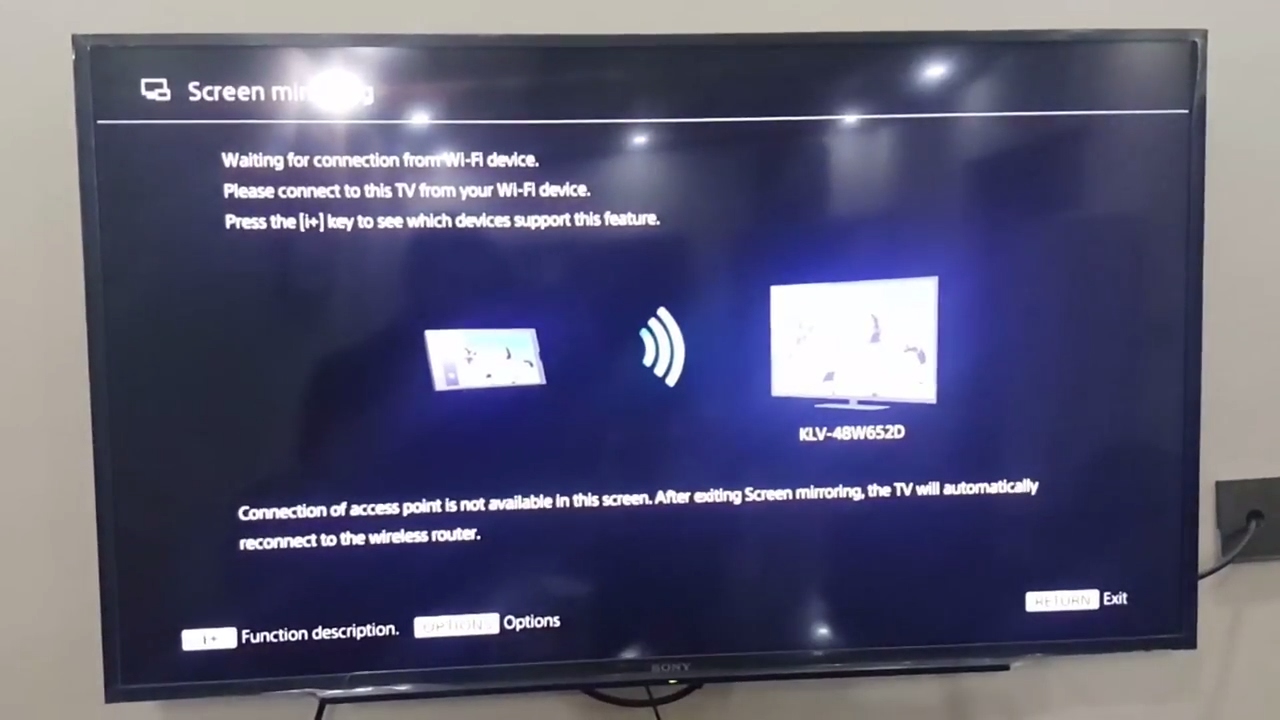
- Enable wireless display mirroring on the TV: Access your smart TV’s settings menu and look for the “Screen Mirroring” or “Wireless Display” option. Enable this feature to allow your TV to receive signals from your laptop.
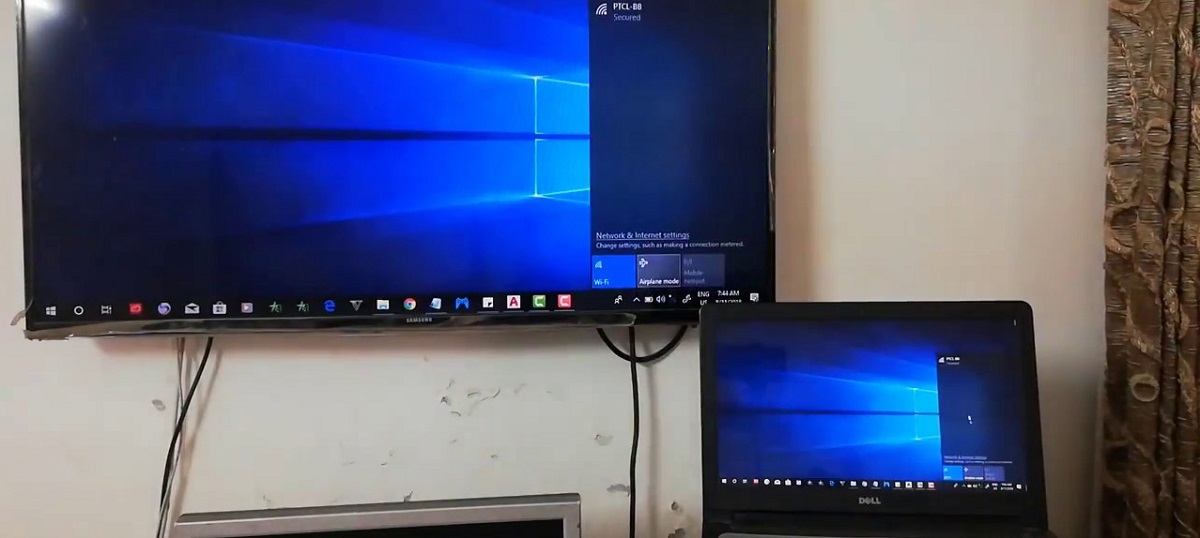
- Enable wireless display mirroring on your laptop: On your laptop, open the “Settings” menu and navigate to the display settings or the wireless display section. Look for an option like “Connect to a wireless display” or “Screen Mirroring.” Activate this feature to search for available devices to connect to.
- Select your smart TV: Once the wireless display mirroring is enabled on both devices, your laptop should detect the available smart TV(s). Select your smart TV from the list of detected devices to establish the connection.
- Authorize the connection: Depending on the mirroring technology used, you may be prompted to enter a code on your laptop or smart TV to verify and authorize the connection. Follow the on-screen instructions to complete this step.
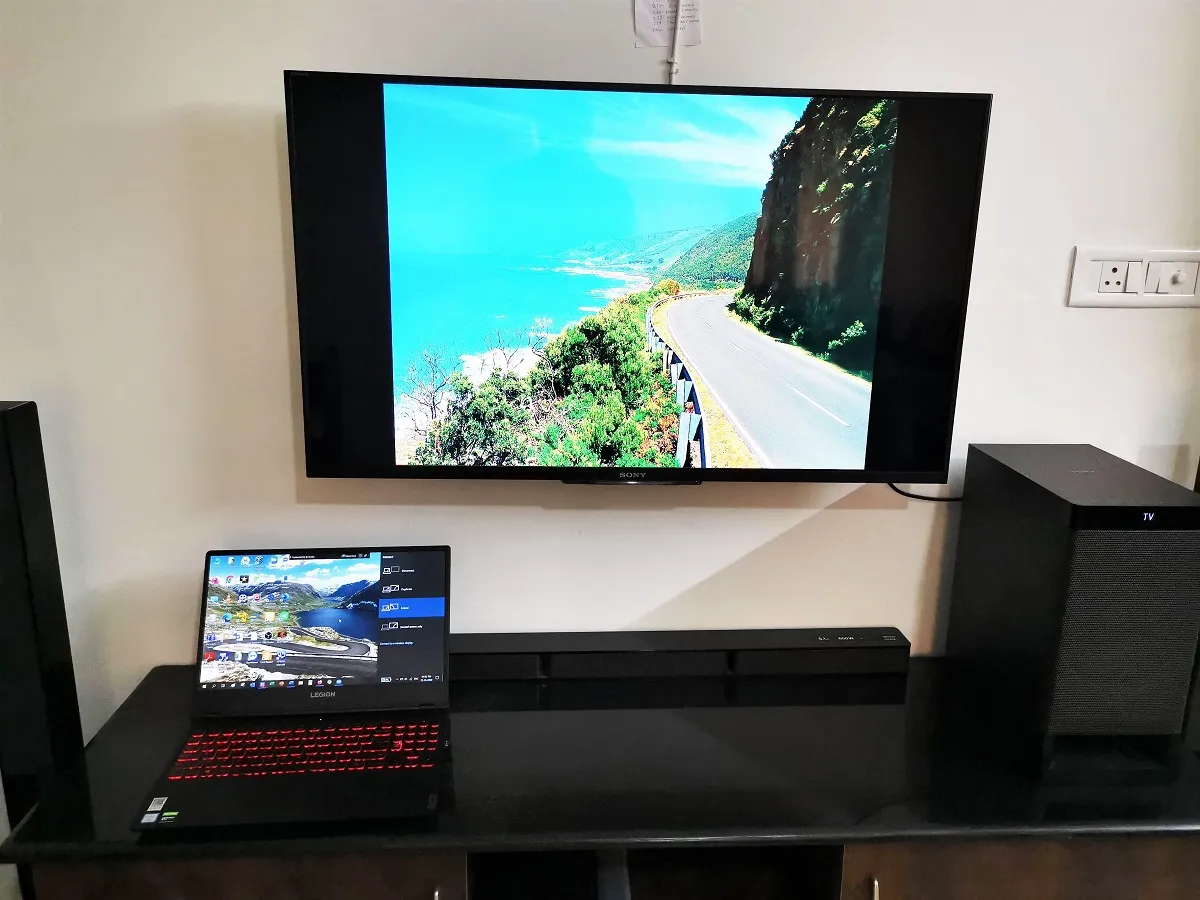
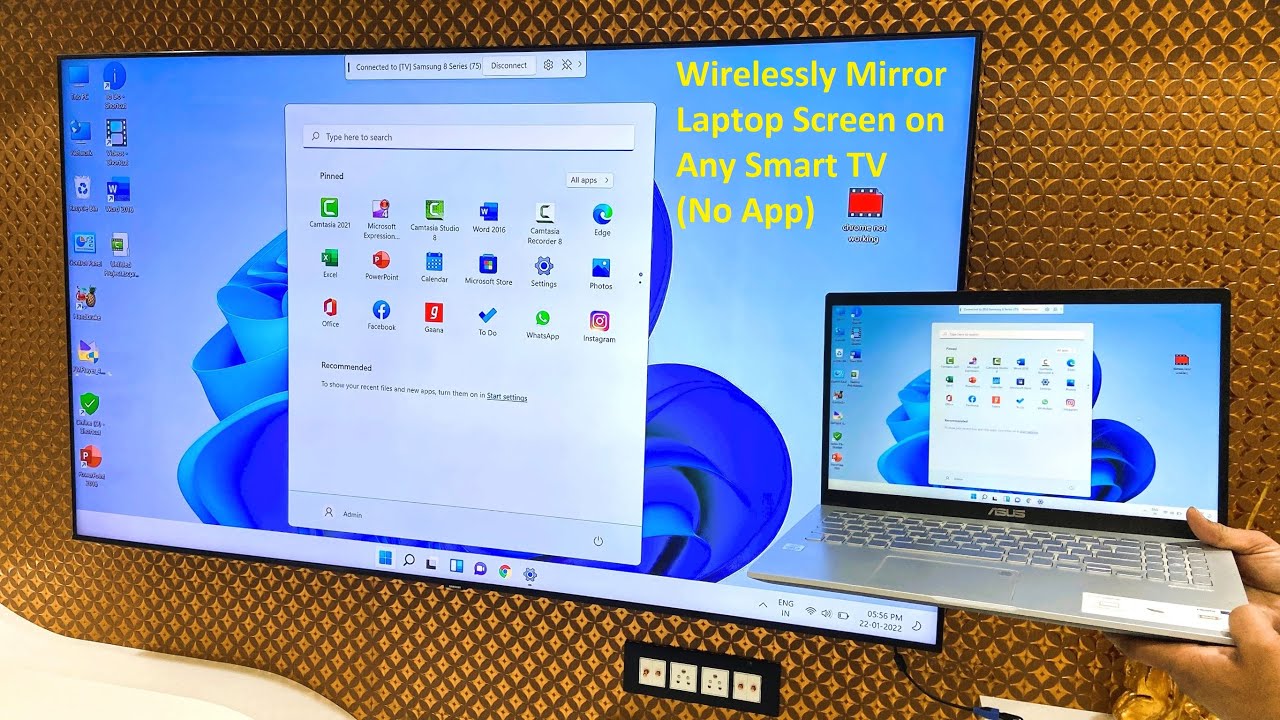
- Start mirroring: Once the connection is established and authorized, your laptop’s screen will be mirrored on the smart TV. You can now navigate your laptop, open applications, play multimedia content, or give presentations, and it will be displayed on the TV screen wirelessly.
Wireless display mirroring offers the convenience of a cable-free connection, allowing you to enjoy content without being constrained by physical cables. Nevertheless, keep in mind that wireless mirroring may have some limitations, such as potential latency or lower quality compared to a direct HDMI connection. Experiment with the settings and ensure a stable Wi-Fi connection for the best experience.
Connect using Chromecast or other Streaming Devices
If you’re looking for a versatile and user-friendly method to connect your laptop to a smart TV, using a streaming device like Chromecast can be a great option. Chromecast, along with other streaming devices, enables you to wirelessly stream content from your laptop to your TV, providing a seamless and convenient connection.
Here’s how you can connect your laptop to a smart TV using Chromecast or a similar streaming device:
- Set up the streaming device: Plug the streaming device (e.g., Chromecast) into an available HDMI port on your smart TV. Follow the instructions provided with the device for the initial setup and connect it to your Wi-Fi network.
- Install the necessary software: On your laptop, install the corresponding software or app for the streaming device you’re using. For Chromecast, you can install the Google Home app or the Google Chrome browser extension.
- Connect your laptop and the streaming device: Make sure your laptop and streaming device are connected to the same Wi-Fi network. Open the software or app on your laptop and follow the prompts to connect to the streaming device.
- Start streaming: Once the connection is established, you can start streaming content from your laptop to the smart TV. Whether it’s videos, music, or presentations, you can control playback directly from your laptop, and it will be displayed on the TV screen.
In addition to streaming devices like Chromecast, you may also consider other options such as Roku, Amazon Fire TV Stick, or Apple TV. Each device has its own setup process and compatible apps, so consult the user manual or online resources for specific instructions.
Streaming devices provide a user-friendly and versatile solution for connecting your laptop to a smart TV. They offer additional features such as access to streaming services, apps, and even voice control. With the ability to wirelessly stream content, you can enjoy a wide range of multimedia content on the big screen with ease.
Connect using DLNA or Miracast
DLNA (Digital Living Network Alliance) and Miracast are technologies that allow for wireless streaming and mirroring of multimedia content between devices on the same network. These technologies are commonly supported by many smart TVs and laptops, providing an easy way to connect and share content.
Here’s how you can connect your laptop to a smart TV using DLNA or Miracast:
- Check compatibility: Ensure that both your laptop and smart TV support DLNA or Miracast. This information can usually be found in the device specifications or user manuals.
- Enable DLNA or Miracast on the TV: Access the settings menu on your smart TV and look for options like “DLNA,” “Screen Mirroring,” or “Miracast.” Enable the corresponding feature to allow your TV to receive signals from your laptop.
- Enable DLNA or Miracast on your laptop: On your laptop, open the settings and look for options related to DLNA or Miracast. Activate this feature to search for available devices to connect to.
- Select your smart TV: Once both the TV and laptop have DLNA or Miracast enabled, your laptop should detect the available smart TVs. Select your smart TV from the list of detected devices to establish the connection.
- Authorize the connection: Depending on the technology used (DLNA or Miracast), you may be prompted to authorize the connection by entering a code on either your laptop or smart TV. Follow the on-screen instructions to complete this step.
- Start streaming or mirroring: Once the connection is established and authorized, you can start streaming or mirroring content from your laptop to the smart TV. Whether it’s photos, videos, or music, you can easily share your multimedia files wirelessly.
DLNA and Miracast offer a convenient way to connect your laptop to a smart TV without the need for any cables. However, keep in mind that the performance and functionality may vary depending on the devices and network conditions. Ensure a stable Wi-Fi connection and experiment with different file formats and network settings to optimize the streaming experience.
Adjust Display Settings
After connecting your laptop to a smart TV, it’s important to ensure the display settings are properly adjusted to achieve the best viewing experience. This step ensures that the content displayed on the TV screen is optimized for clarity, color accuracy, and aspect ratio.
Here are some key display settings to consider:
- Resolution: Check the resolution settings on both your laptop and smart TV. Ideally, you should set the resolution to match the native resolution of your TV to avoid any stretching or cropping of the image. Higher resolutions such as 1080p (Full HD) or 4K (Ultra HD) will provide a sharper and more detailed image.
- Aspect ratio: Adjust the aspect ratio settings to ensure that the content displayed on the TV is correctly proportioned. Common aspect ratios are 16:9 (widescreen) or 4:3 (standard). It’s recommended to use the aspect ratio that matches the content you plan to view.
- Color and picture settings: Adjust the color, brightness, contrast, and other picture settings on both your laptop and smart TV to achieve optimal visual quality. Each device may have different settings or presets, so try experimenting to find the settings that suit your preferences.
- Audio settings: In addition to the display settings, make sure to check the audio settings to ensure that the sound is being routed to the correct output source (TV speakers, external sound system, etc.). Check the volume levels and audio modes to enhance the audio experience.
Most laptops and smart TVs provide intuitive menus or settings options to adjust these display settings. You can usually access these settings through the control panel on your laptop or the menu buttons on your smart TV or remote control. Refer to the user manuals or online resources if you encounter any difficulties in finding or adjusting the display settings.
By properly configuring the display settings, you can optimize the visual and audio output for a more immersive and enjoyable viewing experience on your smart TV.
Troubleshooting Common Connection Issues
While connecting your laptop to a smart TV is generally a straightforward process, there may be instances where you encounter connection issues. Here are some common problems and their potential solutions:
- No signal: If you’re not getting a signal on your smart TV, double-check that the HDMI, VGA, or other cable connections are secure and properly plugged in. Also, confirm that you’ve selected the correct input source on your TV.
- Unsupported resolution: If the resolution on your TV screen appears distorted or doesn’t match your laptop’s display, try adjusting the display settings on your laptop to a supported resolution for your TV.
- Poor or no audio: If you’re not getting audio on your TV, make sure the volume is turned up and not muted on both your laptop and TV. Additionally, ensure your laptop’s audio output is set to the correct option (HDMI or audio jack).
- Interference or lag: Wireless methods like screen mirroring or streaming devices may experience interference or lag. Try moving your laptop closer to the TV or reducing the number of other Wi-Fi devices in use to improve the connection quality.
- Incompatible devices: Confirm that your laptop and smart TV are compatible and support the same connection method (HDMI, wireless, etc.). If they aren’t compatible, consider using alternative methods such as streaming devices or different cables.
- Outdated software or drivers: Ensure that your laptop’s operating system, GPU drivers, and firmware on your smart TV are up to date. Outdated software can cause compatibility issues and affect the connection quality.
- Firewall or antivirus interference: Firewalls and antivirus software may sometimes interfere with the connection between your laptop and smart TV. Temporarily disable them to see if it resolves the issue. Remember to re-enable them once the connection is established.
If you encounter persistent connection issues, consult the user manuals or online support resources provided by the manufacturers of your laptop and smart TV. They may have specific troubleshooting steps or firmware updates available to address common connectivity problems.
By troubleshooting these common connection issues, you can overcome any obstacles and establish a reliable and seamless connection between your laptop and smart TV.
Conclusion
Connecting your laptop to a smart TV opens up a whole new world of possibilities, allowing you to enjoy your favorite content on a larger screen or share presentations with ease. Throughout this guide, we explored various methods for connecting your laptop to a smart TV, including HDMI cables, wireless display mirroring, streaming devices, and DLNA/Miracast.
Before attempting any connection, it’s crucial to ensure compatibility between your laptop and smart TV. Check the available input ports on both devices and confirm that they support the same connection method. Additionally, consider the operating systems and software requirements to ensure a smooth connection process.
Using an HDMI cable provides a straightforward and reliable connection, allowing you to transmit both audio and video signals between your laptop and smart TV. Wireless display mirroring offers cable-free convenience, enabling you to mirror your laptop’s screen wirelessly onto the TV. Streaming devices like Chromecast provide versatility and additional features for wireless streaming of content from your laptop.
DLNA and Miracast offer wireless streaming and mirroring capabilities, allowing you to share multimedia content seamlessly across your laptop and smart TV. These technologies utilize your local network to establish a connection between the devices.
While connecting your laptop to a smart TV is generally a straightforward process, it’s important to troubleshoot any common connection issues that may arise. Problems such as signal loss, unsupported resolutions, audio issues, and interference can often be resolved through simple troubleshooting steps.
Remember to adjust the display settings on both your laptop and smart TV to ensure optimal visual and audio output. This includes adjusting the resolution, aspect ratio, and picture settings to match your preferences and the capabilities of your devices.
By following the methods and tips outlined in this guide, you can confidently connect your laptop to a smart TV and enjoy a seamless and immersive viewing experience. So, whether you’re streaming movies, giving presentations, or sharing memories with loved ones, the possibilities are endless with your laptop and smart TV duo!