Introduction
Connecting a laptop to a Sharp Smart TV wirelessly opens up a world of possibilities for entertainment and productivity. You can easily stream movies and videos, share photos and presentations, and even extend your laptop’s screen to enjoy your favorite content on a larger display. However, before you dive into the wireless connection process, it’s important to ensure that your laptop and Sharp Smart TV are compatible with each other.
In this guide, we will walk you through the steps to connect your laptop to a Sharp Smart TV wirelessly. Whether you’re using a Windows laptop or a MacBook, these steps will help you establish a seamless connection and enjoy the benefits of a larger screen without the hassle of cables and wires.
Note: The specific steps may vary slightly depending on the model of your Sharp Smart TV and the operating system of your laptop.
Before we begin, make sure both your laptop and Sharp Smart TV are turned on and connected to a stable Wi-Fi network. Sit back and relax as we guide you through the process of wirelessly connecting your laptop to a Sharp Smart TV.
Step 1: Check the compatibility of your laptop and Sharp Smart TV
Before attempting to connect your laptop to a Sharp Smart TV wirelessly, it is essential to ensure that both devices are compatible. Here are a few things to consider:
- Operating system compatibility: Check if your laptop’s operating system supports screen mirroring or wireless display. For Windows laptops, Windows 8.1 or later versions usually have built-in support for screen mirroring. MacBook users can utilize the AirPlay feature if their laptop is running macOS 10.14 or later.
- Wi-Fi technology: Make sure that your Sharp Smart TV supports the same Wi-Fi technology as your laptop. The most common Wi-Fi standards are 802.11n and 802.11ac. If your laptop supports newer Wi-Fi standards, ensure that your Sharp Smart TV is also compatible with those.
- Screen resolution: Check the maximum screen resolution supported by both your laptop and Sharp Smart TV. It is essential to match the resolutions for a seamless display. If the screen resolutions differ, it may result in distorted or improperly scaled content.
- Hardware requirements: Some laptops may require additional hardware, such as a compatible wireless display adapter or a Smart TV dongle, to establish a wireless connection. Verify if your laptop requires any such hardware and have it ready before proceeding.
By ensuring the compatibility of your laptop and Sharp Smart TV, you can avoid any potential connectivity issues and enjoy a hassle-free wireless connection experience. If you’re unsure about the compatibility or have any doubts, refer to the user manuals or consult the manufacturer’s website for detailed information about your laptop and Sharp Smart TV’s compatibility.
Step 2: Connect your laptop and Sharp Smart TV to the same Wi-Fi network
Before establishing a wireless connection between your laptop and Sharp Smart TV, ensure that both devices are connected to the same Wi-Fi network. Here are the steps to follow:
- Turn on your Sharp Smart TV: Using your TV remote, turn on your Sharp Smart TV and wait for it to fully boot up.
- Access the network settings: Navigate to the Settings menu on your Sharp Smart TV. The exact path may vary depending on the model, but generally, you can find the network settings under Network or Wi-Fi settings.
- Select your Wi-Fi network: In the network settings, locate your Wi-Fi network from the list of available networks. Select your Wi-Fi network and enter the password if prompted. Once connected, your Sharp Smart TV will display a confirmation message indicating a successful connection.
- Connect your laptop to Wi-Fi: On your laptop, open the network settings and locate your Wi-Fi network. Select the same network that your Sharp Smart TV is connected to. Enter the Wi-Fi password if required, and once connected, your laptop will display a confirmation message.
By ensuring that both your laptop and Sharp Smart TV are connected to the same Wi-Fi network, you establish the foundation for establishing a wireless connection between the two devices. This ensures a seamless and stable connection for screen mirroring and other wireless activities.
Step 3: Enable screen mirroring on your Sharp Smart TV
Before you can connect your laptop to your Sharp Smart TV wirelessly, you need to enable the screen mirroring feature on your TV. Here’s how:
- Access the settings: Using your Sharp Smart TV remote, navigate to the Settings menu. The location of the settings may vary depending on the model of your TV, but typically, you can find it in the main menu or by pressing the “Menu” button on your remote.
- Open Display settings: Look for the Display or Screen Mirroring settings within the Settings menu. Once you locate it, select it to access the display settings.
- Enable screen mirroring: Within the display settings, you should find an option to enable screen mirroring or wireless display. Select this option to activate it.
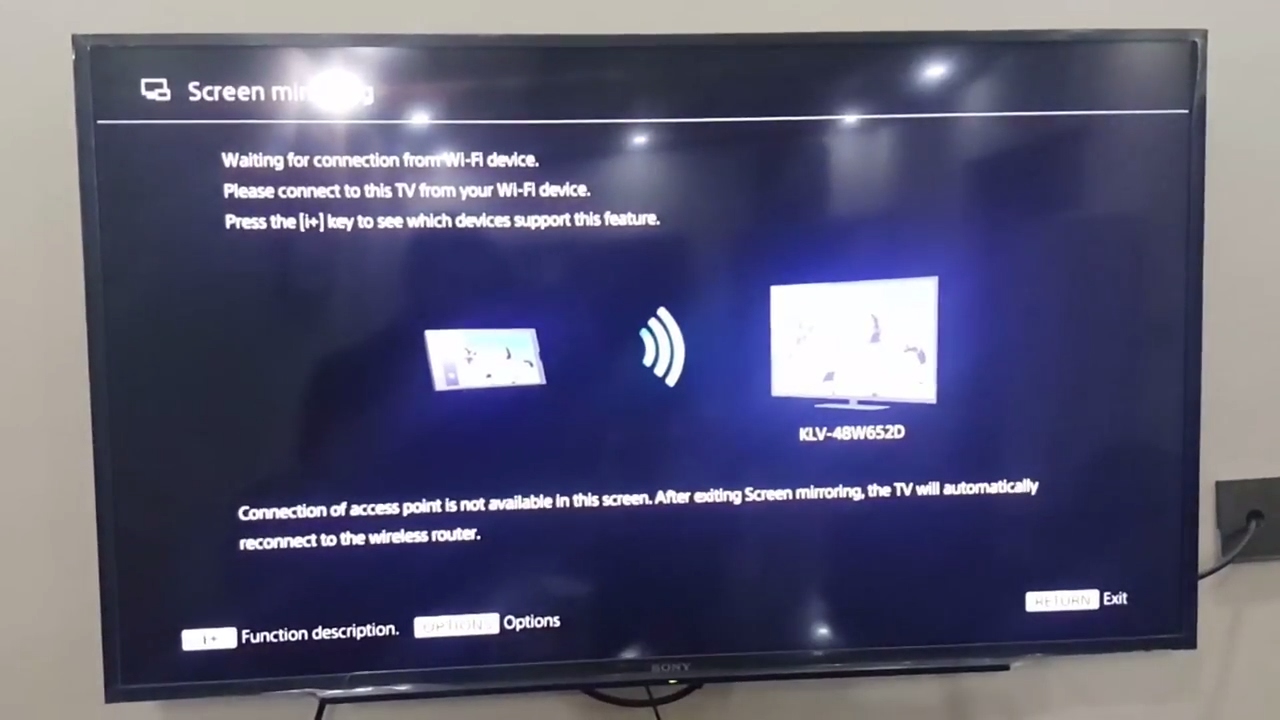
- Wait for the TV to detect devices: After enabling screen mirroring, your Sharp Smart TV will start searching for available devices to connect to. Keep your TV on this screen as you proceed to the next step.
Enabling screen mirroring on your Sharp Smart TV allows it to receive signals wirelessly from your laptop and mirror its display. This is a crucial step in establishing a successful wireless connection and ensuring that your laptop’s screen can be viewed on your TV.
Step 4: Enable screen mirroring on your laptop
Now that screen mirroring is enabled on your Sharp Smart TV, it’s time to enable it on your laptop as well. The steps may slightly vary depending on whether you’re using a Windows laptop or a MacBook. Let’s go through the process for each:
For Windows laptops:
- Open the Action Center: On your Windows laptop, click on the Notifications icon on the taskbar or press the Windows key + A to open the Action Center.
- Toggle screen mirroring: Within the Action Center, look for the screen mirroring or projection icon. Click on it to open the screen mirroring options.
- Select your Sharp Smart TV: In the screen mirroring options, you should be able to see the name of your Sharp Smart TV listed. Click on it to connect your laptop to the TV.
- Wait for the connection to establish: Once you’ve selected your Sharp Smart TV, your laptop will start connecting to it. Wait for a few seconds for the connection to establish. Once connected, your laptop’s screen will be mirrored on your Sharp Smart TV.
For MacBook:
- Open the AirPlay menu: On your MacBook, click on the AirPlay icon in the menu bar at the top of the screen.
- Select your Sharp Smart TV: In the AirPlay menu, you should see the name of your Sharp Smart TV listed. Click on it to establish the connection.
- Enter the AirPlay code: If prompted, enter the AirPlay code displayed on your TV screen to connect your MacBook to your Sharp Smart TV.
- Wait for the connection to establish: Once you’ve entered the AirPlay code, your MacBook will start connecting to your Sharp Smart TV. Be patient as the connection is established. Once connected, your MacBook’s screen will be mirrored on your TV.
By enabling screen mirroring on your laptop, you allow it to send its display wirelessly to your Sharp Smart TV. This step completes the process of establishing a wireless connection between your laptop and TV, allowing you to enjoy your laptop’s content on a larger screen.
Step 5: Connect your laptop to your Sharp Smart TV wirelessly
Now that both your laptop and Sharp Smart TV have screen mirroring enabled, it’s time to establish the wireless connection between them. Follow these steps:
- Ensure that your laptop and Sharp Smart TV are on the same Wi-Fi network: As mentioned in Step 2, both devices need to be connected to the same Wi-Fi network for the wireless connection to work.
- Activate screen mirroring on your laptop: For Windows laptops, open the Action Center by clicking on the Notifications icon on the taskbar or pressing Windows key + A. In the screen mirroring or projection options, select your Sharp Smart TV’s name to connect it. For MacBook users, open the AirPlay menu and select your Sharp Smart TV from the list.
- Confirm the connection on your Sharp Smart TV: On your TV screen, a notification or prompt will appear asking for your confirmation to connect. Use your TV remote to select “Allow” or “Accept” to establish the connection.
- Wait for the connection to be established: Once the connection is confirmed, your laptop’s screen will be wirelessly mirrored on your Sharp Smart TV. It may take a few seconds for the connection to be fully established.
Once connected, you can enjoy all the benefits of having your laptop’s screen displayed on your Sharp Smart TV. Whether you want to watch movies, share presentations, or browse the internet, you can now do it on a larger, more immersive display.
Note: The specific steps may vary depending on your laptop’s operating system and the model of your Sharp Smart TV. Please refer to the user manuals or online documentation for more detailed instructions based on your specific devices.
Conclusion
Connecting your laptop to a Sharp Smart TV wirelessly opens up a whole new world of possibilities for entertainment and productivity. By following the steps outlined in this guide, you can establish a seamless and convenient wireless connection between your laptop and Sharp Smart TV.
First, it is essential to ensure compatibility between your laptop and Sharp Smart TV by checking the operating system compatibility, Wi-Fi technology support, screen resolution, and any additional hardware requirements. This ensures a smooth connection process and optimal performance.
Next, connect both your laptop and Sharp Smart TV to the same Wi-Fi network. This is crucial for establishing a stable connection and enables efficient communication between the devices.
Once connected, enable screen mirroring on your Sharp Smart TV by accessing the settings menu and activating the screen mirroring option. This allows your TV to receive wireless signals from your laptop and mirror its display.
On your laptop, enable screen mirroring by using the appropriate method for your operating system. For Windows laptops, open the Action Center and select your Sharp Smart TV from the screen mirroring options. For MacBook users, use the AirPlay menu to connect to your TV.
Finally, confirm the connection on your Sharp Smart TV and wait for the wireless connection to be established. Once connected, you can enjoy your laptop’s content on the larger screen of your Sharp Smart TV, whether it’s streaming movies, sharing presentations, or browsing the internet.
Remember, the specific steps may vary depending on your laptop’s operating system and the model of your Sharp Smart TV. Refer to the user manuals or online documentation for more detailed instructions based on your specific devices.
Now that you have successfully connected your laptop to your Sharp Smart TV wirelessly, sit back, relax, and enjoy the enhanced viewing experience and productivity possibilities that this wireless connection provides.