Introduction
Discord and Battle.net are two popular platforms that gamers use to connect with friends and participate in online gaming communities. Discord is a communication app designed specifically for gamers, offering features like voice chat, text chat, and video chat. On the other hand, Battle.net is a gaming platform developed by Blizzard Entertainment, which allows players to access and play their favorite Blizzard games like World of Warcraft, Overwatch, and Diablo III.
If you are an avid gamer who uses both Discord and Battle.net, you may find it convenient to connect these two platforms. By doing so, you can enhance your gaming experience by easily communicating with your friends and fellow gamers while playing your favorite Blizzard games.
In this guide, we will walk you through the steps to connect Discord to Battle.net, allowing you to seamlessly integrate these two platforms and enjoy a hassle-free gaming experience. This integration will enable you to stay connected with your gaming buddies, coordinate strategies, and share exciting gaming moments, all within the Discord platform while playing your favorite Blizzard games.
So, if you’re ready to level up your gaming experience, let’s dive into the step-by-step process of connecting Discord to Battle.net.
Step 1: Download and Install Discord
The first step in connecting Discord to Battle.net is to download and install Discord. Discord is available for Windows, macOS, Linux, iOS, and Android, allowing you to use it on a wide range of devices.
To get started, follow these simple steps:
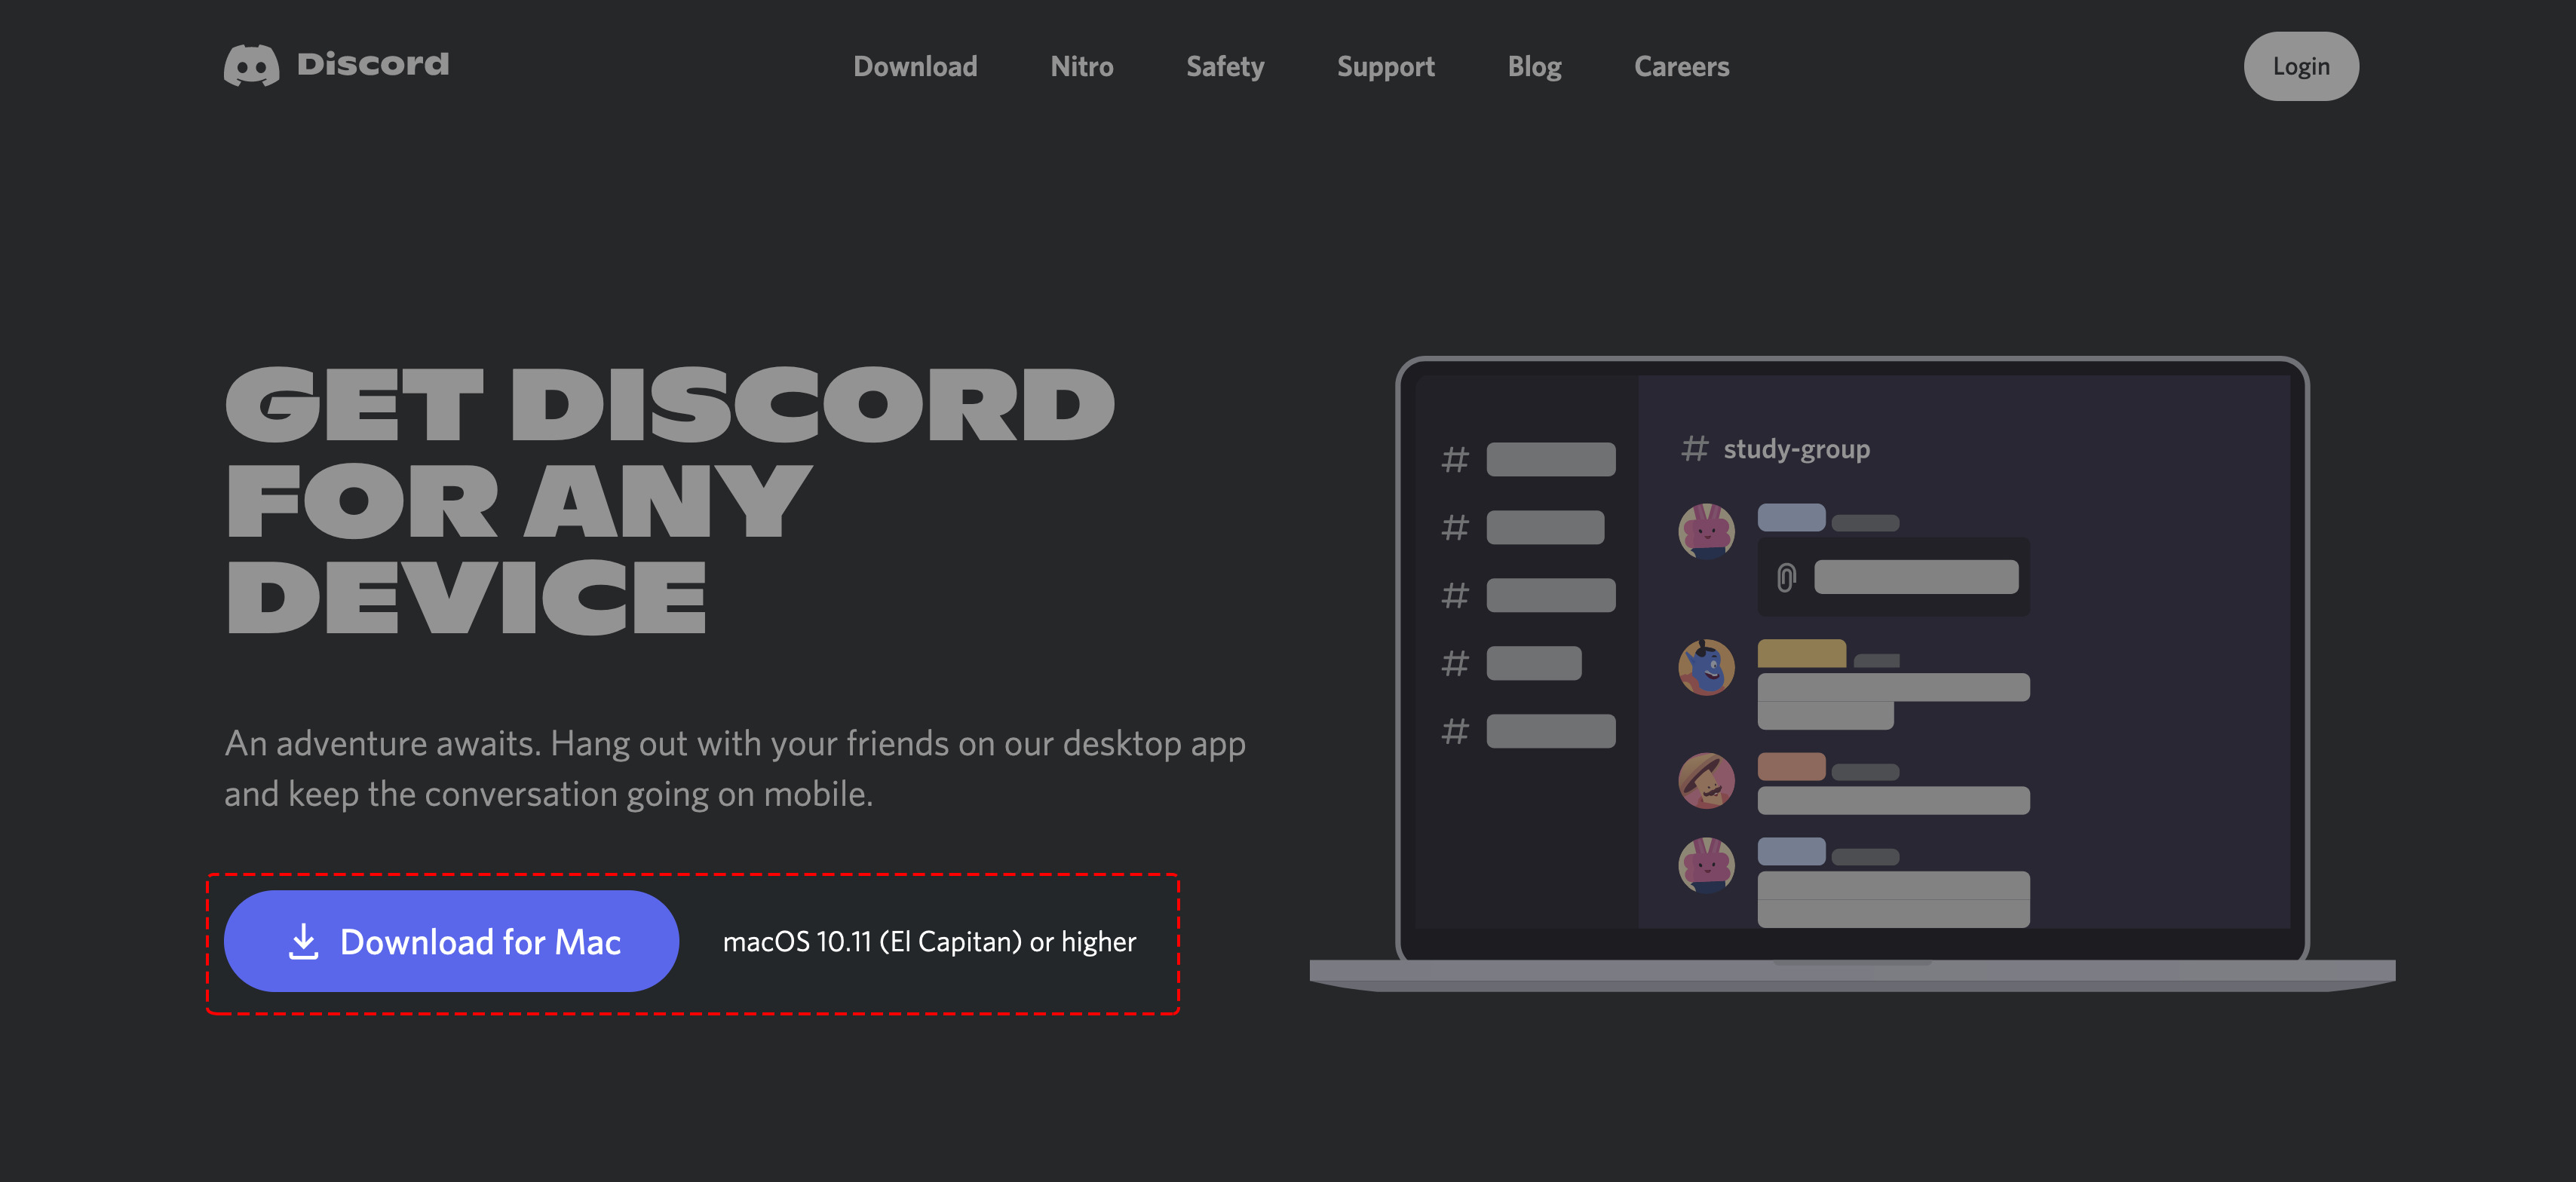
- Visit the official Discord website at discord.com/download.
- On the download page, you will see options for different operating systems. Choose the version that corresponds to your device.
- Click on the download button to start the download process.
- Once the download is complete, locate the installer file on your device and run it.
- Follow the on-screen instructions to install Discord on your device.
Once the installation process is complete, you will have Discord installed and ready to use.
It’s worth mentioning that Discord also offers a web version that can be accessed through your preferred web browser. However, for the best experience and access to all Discord features, it is recommended to download and install the desktop or mobile app.
After successfully installing Discord, you can proceed to the next step to create a Discord account.
Step 2: Create a Discord Account
In order to connect Discord to Battle.net, you will need to have a Discord account. Creating a Discord account is free and easy. Follow the steps below to get started:
- Open the Discord application on your device.
- Click on the “Register” button or the “Create an account” link, depending on the version of Discord you are using.
- You will be presented with two options for creating an account: using your phone number or using an email address. Choose the option that is most convenient for you.
- Follow the prompts to enter the necessary information, such as your username, password, and email/phone number. Make sure to choose a unique and memorable username.
- After entering the required information, click on the “Continue” or “Create Account” button.
- You may be asked to verify your email or phone number through a verification code that will be sent to you. Follow the instructions to complete the verification process.
Once you have successfully created your Discord account, you will be able to access all the features and functionalities of Discord.
It’s important to note that your Discord username will be visible to others, so choose a username that you are comfortable sharing with your friends and gaming community.
With your Discord account ready, you can now proceed to the next step to navigate to the user settings in Discord.
Step 3: Navigate to User Settings
In order to connect Discord to Battle.net, you’ll need to access your user settings in Discord. Here’s how you can do that:
- Open Discord on your device or web browser and log in to your account.
- Click on the gear icon located in the bottom left corner of the Discord interface. This will open the User Settings menu.
- In the User Settings menu, you will find various options to customize your Discord experience. Take a moment to explore these settings, but for now, focus on the left sidebar where you’ll find a list of different settings categories.
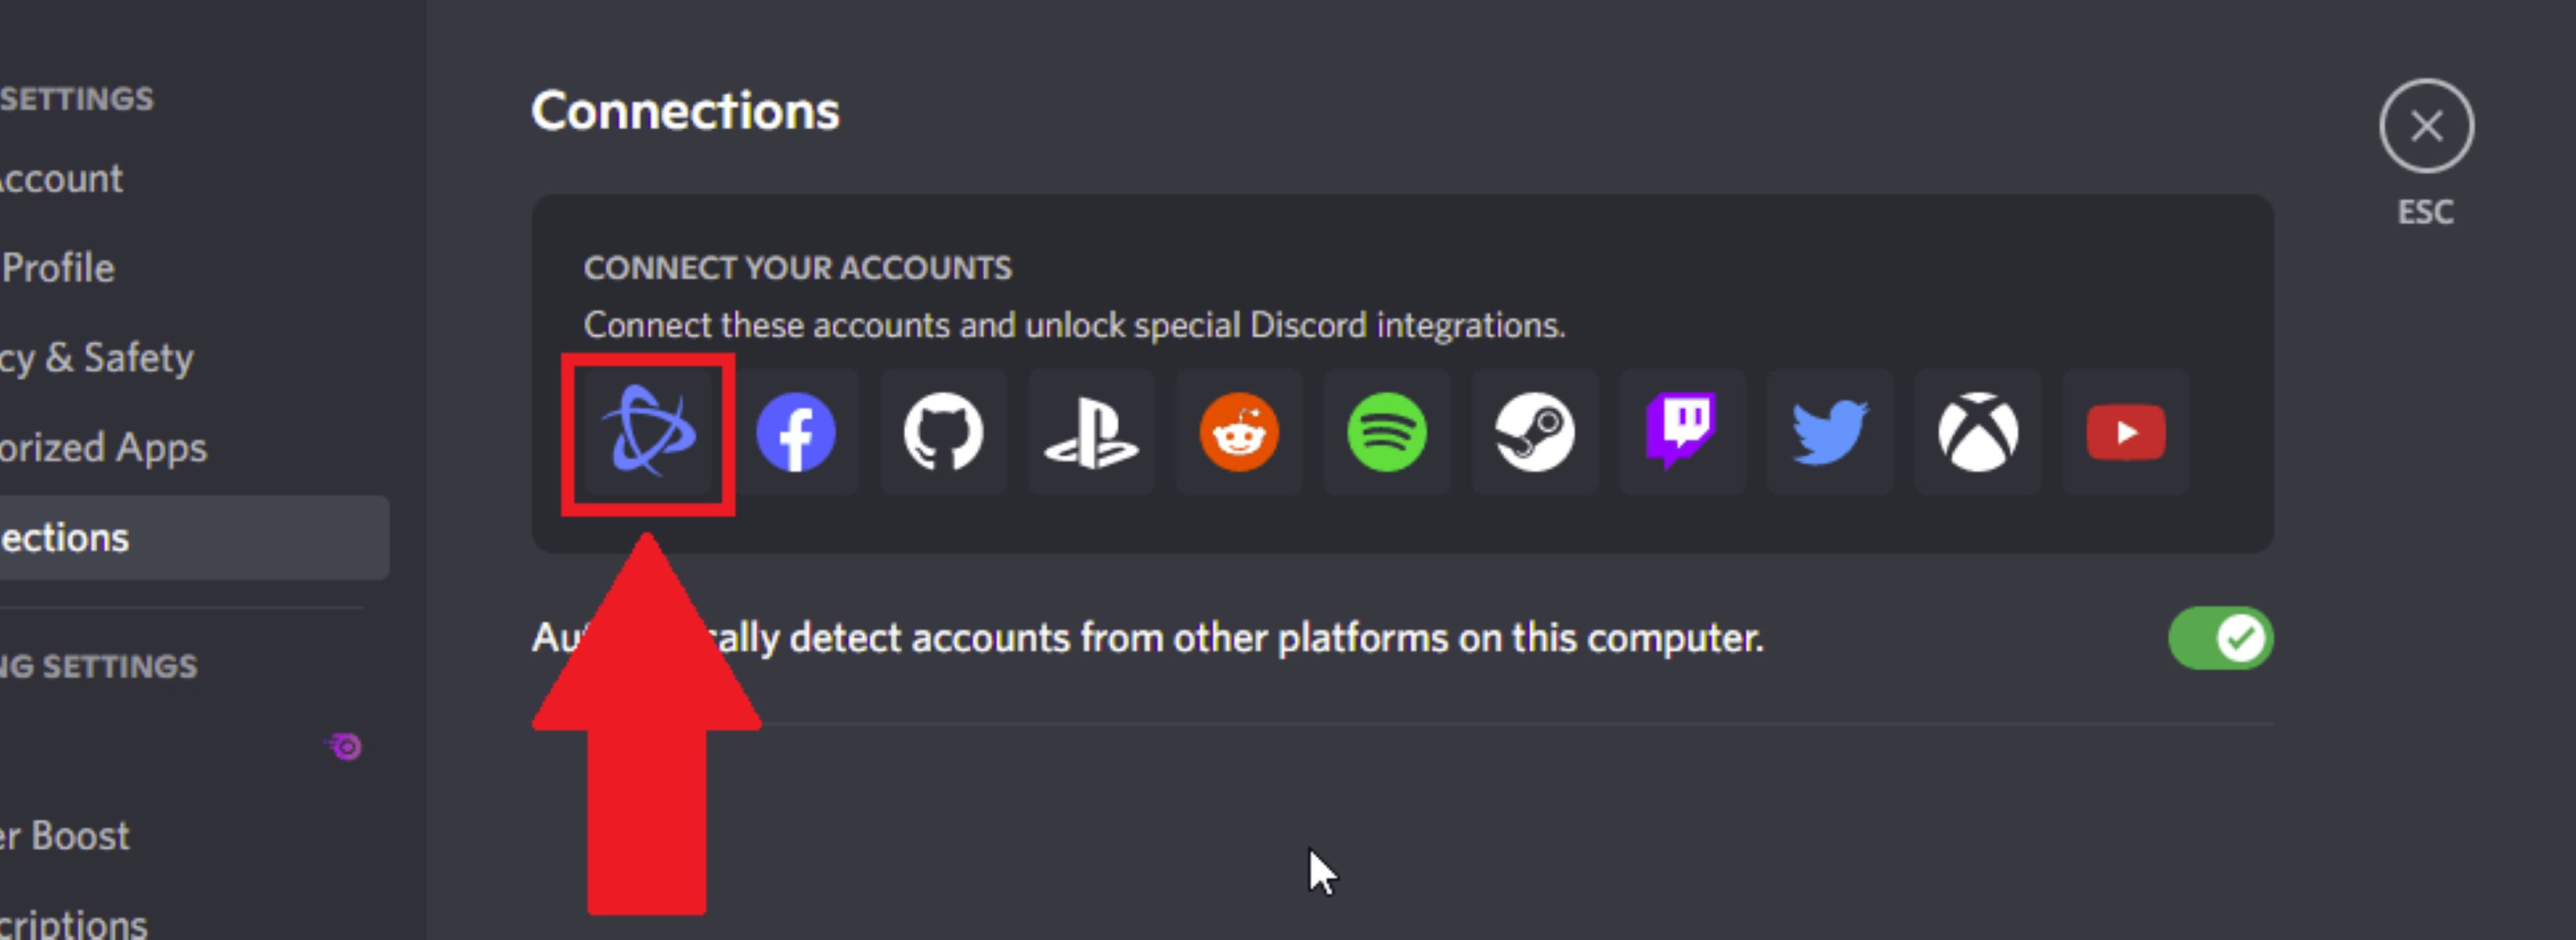
- Scroll down the list of categories and locate the option called “Connections.” Click on it to access the Connections settings.
By navigating to the User Settings and then the Connections section, you are now ready to connect Discord to Battle.net in the next step. But before we proceed, ensure that you have logged in to your Battle.net account so that you can complete the connection process smoothly.
Now that you’ve reached the Connections settings, let’s move on to the next step to connect Discord to Battle.net.
Step 4: Connect Discord to Battle.net
Once you have accessed the Connections settings in Discord, you’re ready to connect Discord to Battle.net. Here’s how:
- In the Connections settings, you will see a list of different platforms and services that you can connect to Discord. Look for the option labeled “Battle.net” and click on the “Connect” button next to it.
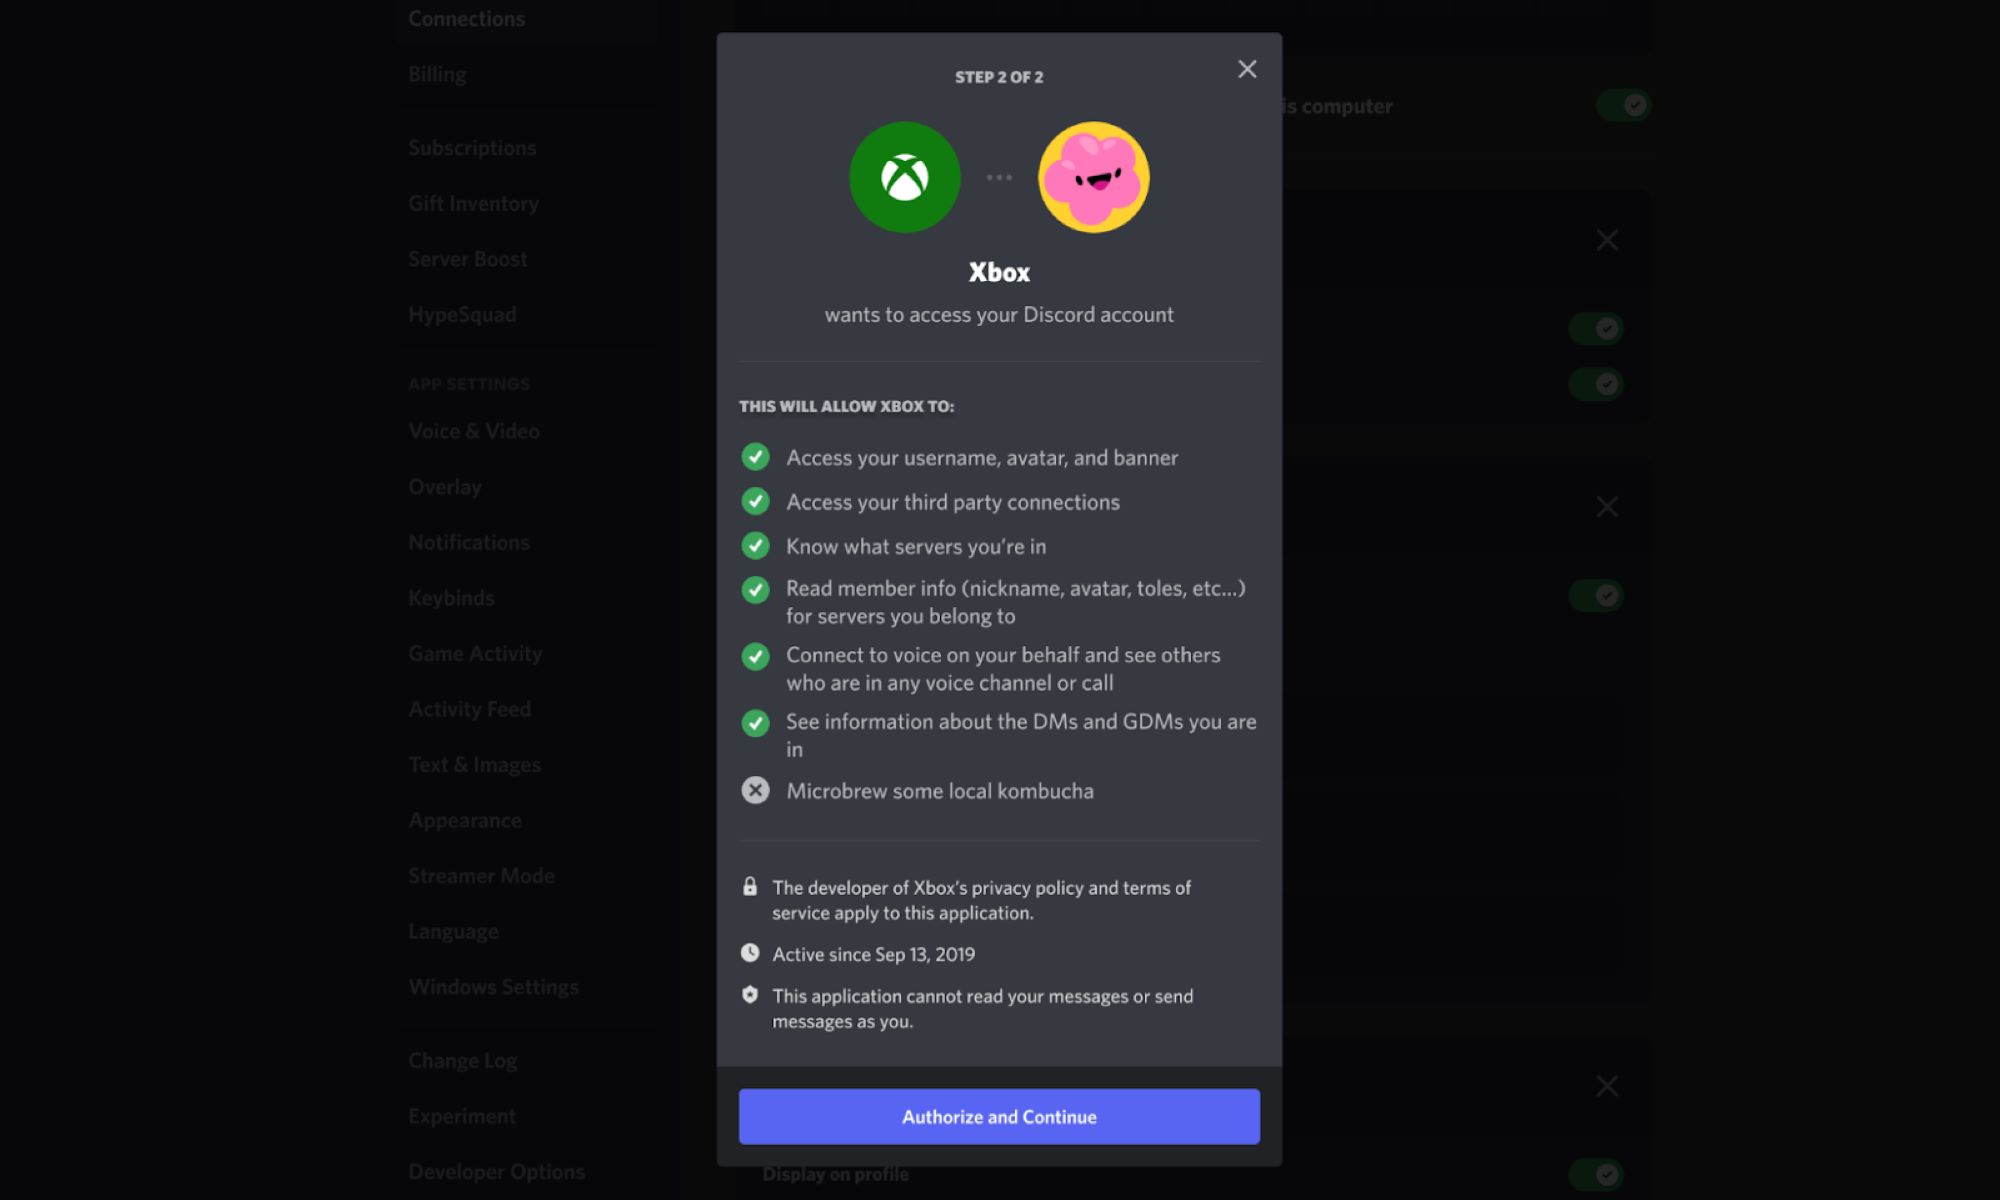
- A new window will appear asking you to authorize the Discord app to access your Battle.net account. This step is necessary to establish the connection.
- Click on the “Authorize” button to grant permission to Discord to access your Battle.net account information.
Once you have authorized the connection, Discord will establish a secure link with your Battle.net account.
It’s important to note that this connection will only allow Discord to access certain information from your Battle.net account, such as your online status and game activity. Discord will not have access to your personal or financial information related to your Battle.net account.
By connecting Discord to Battle.net, you’ll be able to showcase your gaming activity and the games you’re currently playing on the Discord platform. This can help you find other gamers who share your interests and enable seamless communication while enjoying your favorite Blizzard games.
With the connection established, let’s move on to the next step to verify the connection and ensure that everything is working as expected.
Step 5: Authorize the Connection
After connecting Discord to Battle.net, you will need to authorize the connection to ensure that Discord can access the necessary information from your Battle.net account. Let’s look at how you can do that:
- Once you have clicked on the “Authorize” button to connect Discord to Battle.net, a new window will appear.
- In this window, you will be asked to log in to your Battle.net account using your username and password.
- Enter your Battle.net account credentials in the respective fields and click on the “Log In” button.
- After successful authentication, you will see a confirmation message indicating that the connection has been authorized.
By authorizing the connection, you are giving Discord permission to access certain information from your Battle.net account. This information includes your online status, game activity, and other relevant details.
It’s important to note that Discord will only be able to access the information you have granted permission for. Your personal and financial information will remain private and secure, as Discord does not have access to that data.
Once you have authorized the connection, you can proceed to the next step to verify that the connection between Discord and Battle.net is working correctly.
Note: If you ever wish to revoke the connection between Discord and Battle.net, you can do so at any time by accessing the Connections settings in Discord and clicking on the “Disconnect” button next to the Battle.net option.
Step 6: Verify the Connection
Once you have authorized the connection between Discord and Battle.net, it’s important to verify that the connection is working as intended. Here’s how you can do that:
- Go back to your Discord interface and navigate to a channel or server where you can interact with other users.
- In the user list or member list, you should see your Battle.net username displayed next to your Discord username or nickname. This indicates that the connection is successful.
- To further verify the connection, you can start playing a game on Battle.net and see if your Discord status updates to reflect the game you’re currently playing.
- If your Discord status updates and shows the game you’re playing on Battle.net, it means that the connection is working correctly.
Verifying the connection is crucial to ensure that you can showcase your gaming activity and communicate with your friends and gaming community seamlessly. If the connection is not working, double-check the steps you followed to connect Discord to Battle.net and make sure you have authorized the connection properly.
If you encounter any issues with the connection, you can refer to Discord’s help documentation or reach out to their support team for further assistance. They will be able to guide you through any troubleshooting steps and address any questions or concerns you may have.
By successfully verifying the connection, you can now enjoy the benefits of integrating Discord with Battle.net. Stay connected with your gaming buddies, participate in active discussions, coordinate strategies, and share your gaming experiences with ease, all within the Discord platform.
Congratulations! You have now successfully connected Discord to Battle.net and verified the connection. Enjoy your enhanced gaming experience!
Conclusion
Connecting Discord to Battle.net can greatly enhance your gaming experience by seamlessly integrating communication and gaming platforms. By following the step-by-step guide outlined above, you can establish a connection between these two platforms and unlock a range of benefits.
Throughout this guide, we covered the essential steps, starting from downloading and installing Discord, creating a Discord account, navigating to user settings, connecting Discord to Battle.net, authorizing the connection, and finally, verifying the connection. Each step is crucial to ensure a smooth and successful integration between these two platforms.
By connecting Discord to Battle.net, you gain the ability to showcase your gaming activity, coordinate with friends, and stay connected with your gaming community while enjoying your favorite Blizzard games. You can share your gaming experiences, coordinate strategies, and participate in active discussions, all within the Discord platform.
Remember, if you encounter any issues during the process or have any questions, Discord provides extensive documentation and support to help you troubleshoot and resolve any connectivity problems.
Now that you have successfully connected Discord to Battle.net, dive into your gaming adventures with the added convenience and social aspect that Discord integration brings. Enjoy seamless communication, connect with fellow gamers, and enhance your overall gaming experience.
So, gear up, connect Discord to Battle.net, and embark on unforgettable gaming experiences with your friends and gaming community!