Introduction
Warzone Caldera is the highly anticipated latest update to the immensely popular game Call of Duty: Warzone. Developed by Activision, Warzone Caldera introduces a brand new map, filled with adrenaline-pumping gameplay, intense firefights, and strategic challenges. Whether you are a seasoned gamer or new to the series, Warzone Caldera offers an immersive and unforgettable experience.
In this article, we will guide you through the process of downloading Warzone Caldera on your PC. We will start by checking if your system meets the minimum requirements, then walk you through the steps of downloading Battlenet, creating an account, and finally, accessing Warzone Caldera.
Before you dive into the action, it’s important to ensure that your PC meets the necessary specifications for a smooth gaming experience. The visuals of Warzone Caldera are stunning, and the gameplay is demanding, so having the right hardware is crucial. Let’s take a look at the system requirements in the next section.
System Requirements
Before downloading Warzone Caldera, it’s important to ensure that your PC meets the minimum system requirements. Failing to meet these requirements may result in subpar performance or even an inability to run the game. Here are the recommended specifications:
- Operating System: Windows 10 (64-bit)
- Processor: Intel Core i5-2500K or AMD Ryzen R5 1600X
- Memory: 12GB RAM
- Graphics Card: NVIDIA GeForce GTX 970 / GTX 1660, or AMD Radeon R9 390 / RX 580
- DirectX: Version 12
- Storage Space: 175GB available storage
These are the recommended system requirements for a smooth and enjoyable gaming experience. However, if your PC does not meet these specifications, you can still try running the game at lower settings, but you may experience lower FPS and visual quality.
It’s important to note that these requirements can change over time with new updates and patches. It’s always a good idea to check the official website or the game’s community forums for the most up-to-date information on system requirements.
Now that you have confirmed that your system meets the requirements, let’s move on to the next step: downloading Battlenet.
Step 1: Check if your PC meets the minimum requirements
Before diving into the world of Warzone Caldera, it’s important to ensure that your PC is capable of running the game smoothly. To do this, you need to check if your system meets the minimum requirements. Here’s how:
- Start by opening the System Settings on your PC. You can access this by clicking on the Windows Start button and searching for “System Settings.”
- In the System Settings, you will find information about your PC’s specifications, including the operating system, processor, memory, and graphics card.
- Compare your PC’s specifications with the minimum requirements mentioned in the previous section. Make sure that your processor, memory, and graphics card meet or exceed the recommended specifications.
- Keep in mind that meeting the minimum requirements doesn’t guarantee flawless performance, but it ensures that you can run the game without major issues.
- If your PC meets or exceeds the minimum requirements, congratulations! You’re ready to move on to the next step. If not, you may need to consider upgrading your hardware or adjusting the game’s settings for lower performance.
Checking your PC’s specifications is essential to ensure that your gaming experience is smooth and enjoyable. It’s crucial to have the necessary hardware to handle the demanding graphics and gameplay of Warzone Caldera. Once you’ve confirmed that your PC meets the minimum requirements, you can proceed confidently to the next step: downloading Battlenet.
Step 2: Downloading Battlenet
In order to access Warzone Caldera, you will need to download and install Battlenet, the gaming platform developed by Blizzard Entertainment. Battlenet serves as the launcher for various Blizzard games, including Call of Duty: Warzone. Here’s how you can download Battlenet:
- Visit the official Battlenet website. You can do this by opening your preferred web browser and navigating to www.battlenet.com.
- On the Battlenet homepage, you will find a “Download for Windows” button. Click on it to start the download process. If you’re using a Mac, there will be a separate option for downloading the Mac version.
- Once the download is complete, locate the installation file on your computer. It is usually saved in the “Downloads” folder by default.
- Double-click on the installation file to start the setup process. Follow the on-screen instructions, such as agreeing to the terms and conditions, selecting the installation folder, and creating a desktop shortcut.
- After the installation is complete, you will find the Battlenet launcher on your desktop or in the Start menu. Double-click on it to launch the Battlenet application.
- Upon launching Battlenet for the first time, you will be prompted to log in or create a new Battlenet account. If you already have a Battlenet account, simply log in with your credentials. Otherwise, follow the instructions to create a new account.
Once you have successfully installed and logged into Battlenet, you’re one step closer to diving into the world of Warzone Caldera. In the next step, we will guide you through the process of creating a Battlenet account. Stay tuned!
Step 3: Create a Battlenet Account
In order to access Warzone Caldera and other exciting games on Battlenet, you will need to create a Battlenet account. Here’s how you can do it:
- Open the Battlenet launcher on your computer by double-clicking the Battlenet icon on your desktop or in the Start menu.
- On the login screen, click on the “Create a free Battlenet account” link located below the login fields.
- You will be taken to the account creation page. Fill in the required information, including your email address, password, and date of birth. Make sure to choose a strong password to protect your account.
- Agree to the Terms of Service and Privacy Policy by checking the respective boxes.
- Complete the captcha verification to confirm that you’re not a robot.
- Finally, click on the “Create Account” button to complete the account creation process.
- A verification email will be sent to the email address you provided during registration. Open your email inbox and click on the verification link to activate your Battlenet account.
Once your account is activated, you can log in to Battlenet using your email address and password. With a Battlenet account, you gain access not only to Warzone Caldera but also to other exciting games and features on the platform.
Creating a Battlenet account is quick and easy, and it opens up a world of gaming possibilities. In the next step, we will guide you on how to navigate to Warzone Caldera within the Battlenet launcher. Keep reading!
Step 4: Navigating to Warzone Caldera
Now that you have successfully created a Battlenet account, it’s time to navigate to Warzone Caldera within the Battlenet launcher. Follow the steps below:
- Launch the Battlenet application on your computer by double-clicking the Battlenet icon on your desktop or in the Start menu.
- On the Battlenet home screen, you will see a list of games available on the platform. Look for and click on the “Call of Duty: Warzone” icon.
- If the game is not visible on the home screen, click on the “Games” tab located at the top of the Battlenet window. Then, use the search bar to search for “Call of Duty: Warzone.”
- Once you have located Warzone Caldera, click on it to access the game’s page.
- On the game’s page, you will find information about Warzone Caldera, such as the latest updates, patch notes, and system requirements. It’s worth checking this page regularly for any important announcements or updates regarding the game.
By reaching the game’s page, you have successfully navigated to Warzone Caldera within the Battlenet launcher. In the next step, we will guide you on how to initiate the download process for Warzone Caldera. Stay with us!
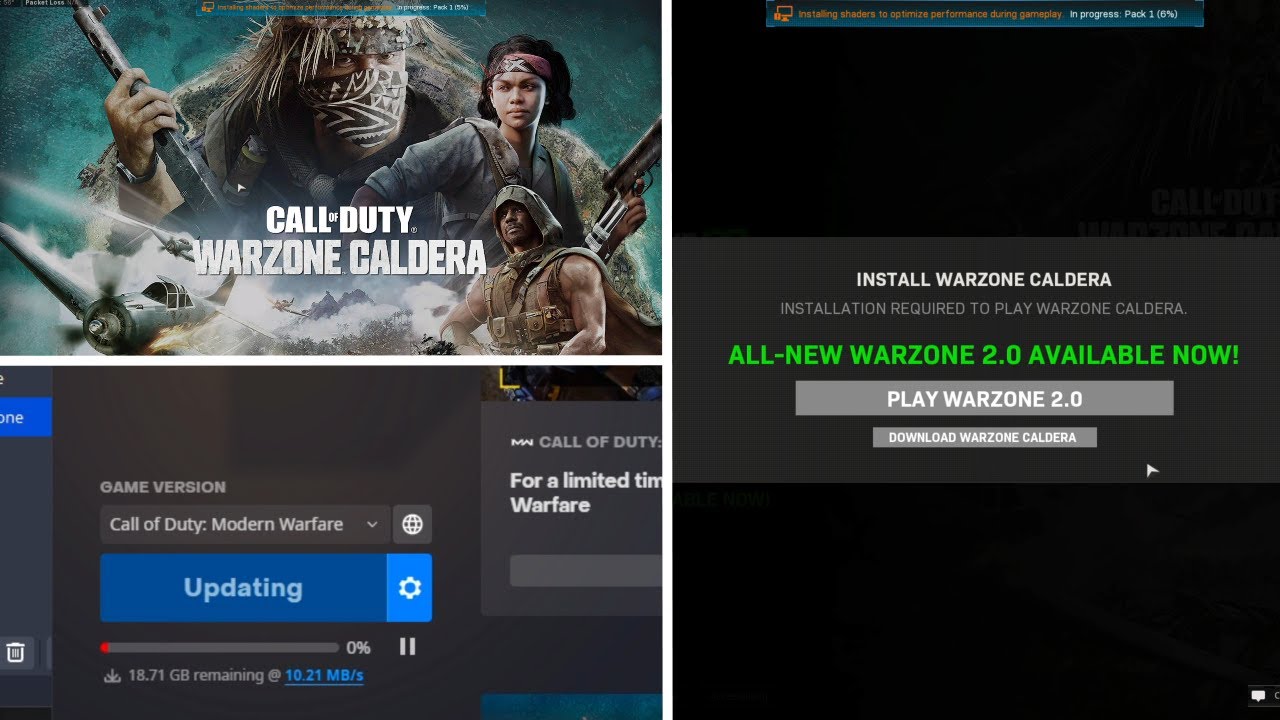
Step 5: Click on “Download Warzone Caldera”
With Warzone Caldera’s page open in the Battlenet launcher, you are now ready to initiate the download process. Follow the steps below to start downloading Warzone Caldera:
- On Warzone Caldera’s page, look for the “Play” or “Download” button. It might be located prominently on the page or within a dropdown menu.
- Click on the “Play” or “Download” button to begin the download process for Warzone Caldera. The download size may vary depending on your PC’s specifications, as well as any previous updates or additional content packs.
- If prompted, select the desired installation location on your computer where you want to store the game files. Ensure that you have sufficient storage space available.
- Wait for the download to complete. The time required may vary depending on the speed of your internet connection and the size of the game files.
While the game is downloading, you can track the progress within the Battlenet launcher. Take this time to get excited about the epic battles and thrilling adventures that await you in Warzone Caldera.
Once the download is complete, you can proceed to the next step, where we will discuss the installation options for Warzone Caldera. Keep reading!
Step 6: Choose your installation options
After the successful download of Warzone Caldera, you will be presented with installation options in the Battlenet launcher. Follow the steps below to choose your preferred installation options:
- In the Battlenet launcher, go to your library or the “Games” tab.
- Locate Warzone Caldera in your list of installed games.
- Click on the game’s tile or icon to open its options menu.
- Within the options menu, you will find various installation options. These may include selecting the installation folder, language preferences, and additional content to install.
- Select your preferred options based on your preferences and available resources.
- Once you have chosen your installation options, click on the “Apply” or “Install” button to begin the installation process.
- Depending on the options selected and the speed of your computer, the installation process may take some time to complete.
It’s worth noting that the installation options can be customized to suit your needs. If you have limited storage space or want to conserve bandwidth, you can choose to install only the necessary components initially and download additional content later.
Now that you have chosen your installation options, you are just moments away from jumping into the action-packed world of Warzone Caldera. In the next step, we will discuss how to start the game and begin your gaming adventure. Keep reading!
Step 7: Start the installation process
With your preferred installation options selected, you are now ready to start the installation process for Warzone Caldera. Follow the steps below to begin installing the game:
- In the Battlenet launcher, locate Warzone Caldera in your list of installed games.
- Click on the game’s tile or icon to open its options menu.
- Within the options menu, you will find an “Install” button.
- Click on the “Install” button to start the installation process.
- The Battlenet launcher will begin unpacking and installing the necessary game files onto your computer.
- During the installation process, you can monitor the progress bar to see how much of the game has been installed.
- Depending on your computer’s speed and the size of the game, the installation may take some time to complete. It is recommended to have a stable internet connection for faster installation.
While the installation is in progress, feel free to take a break or explore other features of the Battlenet launcher. Excitement is building as you get closer to entering the immersive world of Warzone Caldera.
Once the installation is complete, you are just one step away from embarking on your gaming adventure. In the next step, we will guide you on how to launch Warzone Caldera and start playing. Keep reading!
Step 8: Launch Warzone Caldera and start playing
Congratulations! You have successfully installed Warzone Caldera on your computer. Now, let’s dive into the exciting world of the game.
- In the Battlenet launcher, go to your library or the “Games” tab.
- Locate Warzone Caldera in your list of installed games.
- Click on the game’s tile or icon to launch the game.
- The Battlenet launcher will initiate the launch process for Warzone Caldera.
- Once the game launches, you may need to log in with your Battlenet account credentials.
- After logging in, you will be greeted with the main menu of Warzone Caldera.
- Take a moment to explore the menu options, customize your settings, and familiarize yourself with the controls.
- Now, you’re ready to jump into intense battles, team up with friends, and experience the thrill of Warzone Caldera.
Remember to keep your Battlenet launcher up to date with the latest game updates and patches. The developers frequently release new content and optimizations to enhance your gaming experience.
Get ready to immerse yourself in the fast-paced action and strategic gameplay of Warzone Caldera. Enjoy the game and may victory be yours!
Conclusion
Congratulations on successfully downloading and installing Warzone Caldera! You are now ready to embark on an exciting gaming adventure filled with intense battles, strategic gameplay, and pulse-pounding action.
In this guide, we walked you through the step-by-step process of downloading Warzone Caldera on your PC. We started by checking if your PC met the minimum system requirements and guided you through the processes of downloading Battlenet, creating a Battlenet account, navigating to Warzone Caldera, choosing installation options, and starting the installation process. Finally, we concluded with launching Warzone Caldera and beginning your gaming experience.
As you delve into the world of Warzone Caldera, make sure to keep your Battlenet launcher up to date to enjoy the latest features and optimizations. Stay connected with the game’s official website and community forums for news, updates, and tips from fellow players.
Remember, Warzone Caldera is a dynamic game that offers various modes, challenges, and rewards. Take the time to explore the different aspects of the game, experiment with different strategies, and have fun with friends or other players around the world.
Now that you are equipped with the knowledge and steps to download and install Warzone Caldera, it’s time to jump into the action. Prepare yourself for epic battles, immersive gameplay, and unforgettable moments. Good luck and may your victories be plentiful in Warzone Caldera!