Introduction
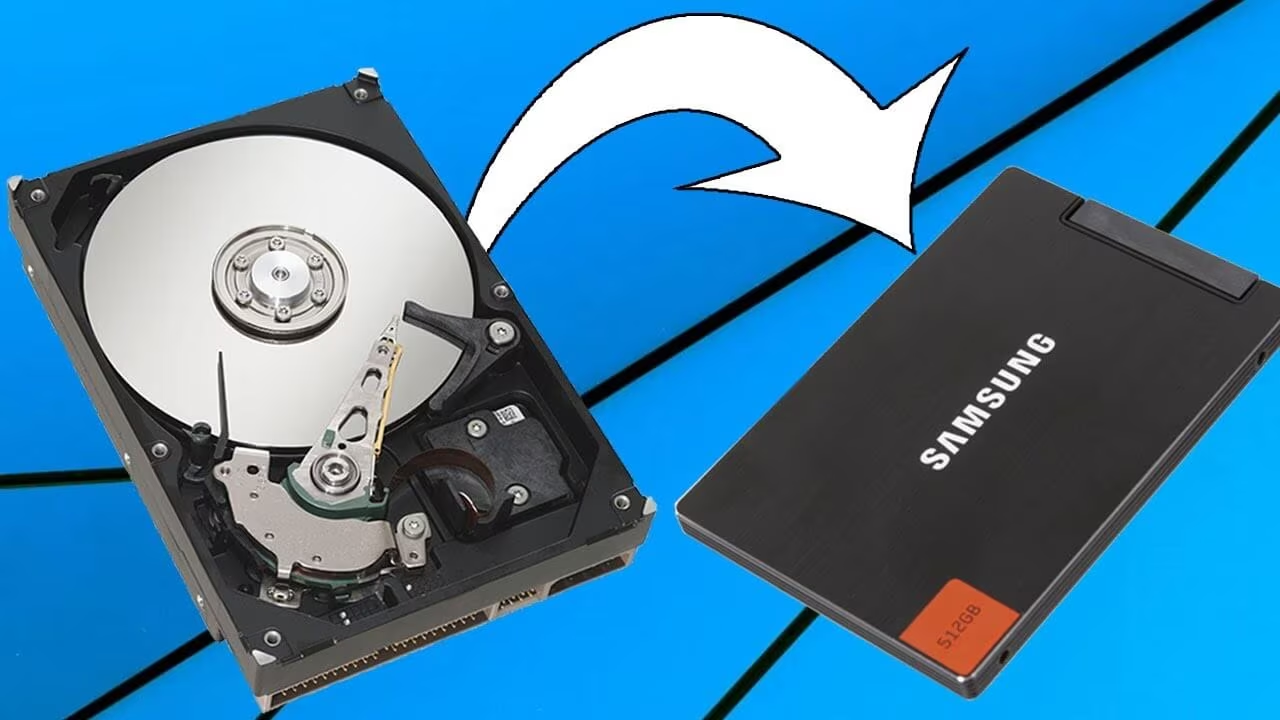
Cloning a M.2 SSD (Solid State Drive) to another M.2 SSD is a useful process for various reasons. Whether you want to upgrade to a larger capacity SSD, replace a failing drive, or simply have a backup of your data, cloning allows you to seamlessly transfer all your files and settings from one drive to another.
In this guide, we will walk you through the step-by-step process of cloning a M.2 SSD to another M.2 SSD. We will cover everything from checking compatibility and gathering necessary tools to performing the actual cloning process and verifying the results.
By following this guide, you can save time and effort by avoiding the need to reinstall your operating system, applications, and data. Cloning ensures that your new SSD will have an exact replica of your old one, allowing you to pick up right where you left off.
Whether you are a tech enthusiast looking to upgrade your storage or a professional who relies on their computer for work, this guide will help you successfully clone your M.2 SSD and ensure a smooth transition without any data loss.
Before we begin, it is important to note that the cloning process may vary depending on the specific hardware and software you are using. Therefore, it is highly recommended to refer to the user manual or documentation provided by the manufacturer of your M.2 SSDs for any specific instructions or precautions.
Prerequisites
Before you embark on the process of cloning a M.2 SSD to another M.2 SSD, there are a few prerequisites that you need to fulfill. These prerequisites ensure that you have everything you need to successfully complete the cloning process.
1. Source M.2 SSD and Destination M.2 SSD: You will need both the source M.2 SSD, which contains the data you want to clone, and the destination M.2 SSD, which will receive the cloned data. Ensure that both SSDs are M.2 form factor and have sufficient capacity to accommodate the data from the source SSD.
2. Compatible computer: Make sure that the computer you will be working with has a spare M.2 slot for the destination SSD. Additionally, ensure that the computer supports booting from the M.2 SSD, as this will be necessary for the cloning process.
3. Cloning software: You will need cloning software to facilitate the cloning process. There are various options available, both free and paid, such as Clonezilla, Macrium Reflect, or Acronis True Image. Choose a software that is compatible with your operating system and M.2 SSDs.
4. External storage: Depending on the size of the data you want to clone, you may need external storage, such as an external hard drive or USB flash drive, to temporarily store the cloned data. Ensure that the external storage has sufficient capacity to accommodate the data from the source SSD.
5. USB bootable drive: You will need a USB drive to create a bootable drive that allows you to boot into the cloning software. This can be a USB flash drive with a capacity of at least 8GB. Make sure to backup any important data on the USB drive before proceeding with the bootable creation process.
By ensuring that you have all these prerequisites in place, you can proceed with confidence knowing that you have the necessary tools and hardware to successfully clone your M.2 SSD to another M.2 SSD.
Step 1: Check Compatibility and Capacity
Before you begin the cloning process, it is crucial to check the compatibility and capacity of both the source M.2 SSD and the destination M.2 SSD. Ensuring compatibility will prevent any issues during the cloning process, while checking the capacity will ensure that the destination SSD can accommodate all the data from the source SSD.
Here’s how you can check compatibility and capacity:
1. Check Compatibility: Make sure that both the source and destination M.2 SSDs are compatible with your computer’s M.2 slots. Check the specifications or user manual of your computer’s motherboard or laptop to determine the type and size of M.2 SSDs supported. This might be M.2 SATA or M.2 NVMe, so it’s important to confirm compatibility before proceeding.
2. Check Capacity: Assess the size of the data on the source M.2 SSD and ensure that the destination M.2 SSD has sufficient capacity to accommodate it. You can do this by checking the properties or file size of the data on the source SSD. It’s essential to choose a destination SSD with enough capacity to store all your data, as attempting to clone to a smaller SSD will result in data loss.
Keep in mind that the actual usable capacity of an SSD may be slightly lower than the advertised capacity due to formatting and system files. It is always recommended to choose a destination SSD with a capacity equal to or larger than the source SSD to ensure a successful cloning process.
If you find that either the compatibility or capacity is not suitable for your needs, you may need to consider alternative solutions such as using an external storage device or purchasing a different SSD that meets the necessary requirements.
By carefully checking the compatibility and capacity of the M.2 SSDs, you can proceed to the next steps of the cloning process with confidence, knowing that you have the right hardware for a successful cloning process.
Step 2: Gather the Necessary Tools
Before you can begin the process of cloning a M.2 SSD to another M.2 SSD, it is important to gather all the necessary tools. Having the right tools at hand will ensure a smooth and efficient cloning process.
Here are the tools you will need:
1. Cloning Software: Select a reliable and compatible cloning software that suits your needs. This software will facilitate the cloning process by allowing you to create an exact copy of the source SSD on the destination SSD. Some popular options include Clonezilla, Macrium Reflect, and Acronis True Image. Make sure to download and install the software before proceeding.
2. USB Flash Drive: You will need a USB flash drive with a capacity of at least 8GB to create a bootable drive for the cloning process. Ensure that the flash drive is empty or that you have backed up any important data, as it will be formatted during the creation of the bootable drive.
3. Screwdriver and ESD Strap (optional): Depending on your computer’s configuration, you may need a screwdriver to open the computer and access the M.2 SSD slots. Additionally, it is recommended to use an ESD (Electrostatic Discharge) strap to prevent any static electricity from damaging the SSDs or other components.
4. External Storage (optional): If you have a large amount of data on the source SSD and the destination SSD does not have sufficient capacity, you will need external storage such as an external hard drive or USB flash drive. This external storage will serve as a temporary location to store the cloned data before transferring it to the destination SSD.
By gathering all these necessary tools and ensuring they are readily available, you will be prepared and equipped to proceed with the cloning process smoothly and efficiently.
Step 3: Backup Important Data
Prior to cloning your M.2 SSD to another M.2 SSD, it is crucial to backup any important data or files that are stored on the source SSD. While the cloning process is designed to create an exact copy, there is still a small possibility of data loss or corruption. Taking the time to back up your data ensures that you have a safeguard against any unforeseen issues.
Follow these steps to back up your data:
1. Identify Critical Files: Determine which files or data are important to you and should be backed up. This includes documents, photos, videos, music, and any other personal or work-related files that you don’t want to lose.
2. Choose Backup Method: Select a suitable backup method based on your preferences and available resources. You can use an external hard drive, cloud storage services like Google Drive or Dropbox, or create a disk image using software like Clonezilla. Choose a method that aligns with your storage needs and available resources.
3. Transfer Data: Copy or transfer the identified important files to your chosen backup location. Ensure that the backup process is complete and verify that all files have been successfully transferred. It is always a good practice to double-check the integrity of your backups to avoid any potential issues during the cloning process.
4. Verify Backup: Once the data is backed up, verify that the backup files are accessible and intact. Test a few random files to ensure they open correctly and check for any data corruption or errors. This step will give you peace of mind knowing that your important data is safely stored.
Remember, backing up your data is an essential precautionary step to prevent any potential loss or damage during the cloning process. By taking the time to perform a backup, you can proceed with the cloning process confidently, knowing that your important data is securely stored.
Step 4: Create a Bootable USB Drive
In order to clone your M.2 SSD to another M.2 SSD, you’ll need to create a bootable USB drive. This USB drive will enable you to boot into the cloning software and initiate the cloning process. Here’s how you can create a bootable USB drive:
1. Obtain the Cloning Software: Download the cloning software of your choice from a reputable source. Ensure that the software is compatible with your operating system and M.2 SSDs. Popular options include Clonezilla, Macrium Reflect, and Acronis True Image.
2. Format the USB Drive: Insert the USB drive into your computer and format it to ensure it is empty. Backup any important data on the USB drive before proceeding, as formatting will erase all existing data.
3. Create Bootable USB: Open the cloning software and follow the instructions to create a bootable USB drive. This process may vary depending on the software you are using, but generally involves selecting the USB drive as the target device and initiating the creation process.
4. Wait for Completion: Allow the software to complete the creation of the bootable USB drive. This may take a few minutes depending on the speed of your computer and the size of the software. Once completed, you will have a bootable USB drive ready for the cloning process.
5. Confirm Boot Priority: Access your computer’s BIOS settings by restarting your computer and pressing the designated key (usually F2, F10, or Del) during the startup process. Make sure the USB drive is set as the first boot device in the boot priority order. This will ensure that your computer boots from the USB drive when you restart it.
By creating a bootable USB drive, you will have the necessary tool to initiate the cloning process. Make sure to keep the bootable USB drive in a safe place as it will be required during the cloning process.
Step 5: Open the Computer and Locate the M.2 SSDs
In order to clone your M.2 SSD to another M.2 SSD, you will need to physically access the M.2 slots inside your computer. This requires you to open the computer and locate the M.2 SSDs. Follow the steps below to accomplish this:
1. Shutdown and Disconnect Power: Before opening your computer, ensure that it is fully powered off and disconnected from the power source. This will help avoid any potential electrical damage and ensure your safety during the process.
2. Ground Yourself: To protect the sensitive electronic components, it is highly recommended to wear an ESD (Electrostatic Discharge) strap or periodically touch a grounded metal object to prevent any static electricity from damaging the SSDs.
3. Open the Computer Case: Depending on the type of computer you have, you will need to open the case. This may involve unscrewing panels or removing clips. Refer to your computer’s user manual or web resources for specific instructions on how to open your particular computer model.
4. Locate the M.2 Slots: Once the computer case is open, locate the M.2 slots on the motherboard. The slots are typically labeled and can be found near other storage connectors such as SATA ports. Refer to your motherboard’s manual to identify the exact location and number of M.2 slots available.
5. Identify the Source and Destination SSDs: Identify which M.2 SSD is the source (the one with the data you want to clone) and which one is the destination (the one that will receive the cloned data). Make sure to take note of their respective locations and orientations.
6. Remove the Source SSD (Optional): If you plan to replace the source SSD entirely and use it for another purpose, remove it from the M.2 slot by gently pushing the retention clip away and lifting the SSD out of its slot. Take care not to apply excessive force or damage the SSD or the slot.
By opening your computer and locating the M.2 slots, you are now ready to proceed with the next steps of preparing the destination SSD and initiating the cloning process.
Step 6: Prepare the Destination M.2 SSD
In order to successfully clone your M.2 SSD to another M.2 SSD, you need to prepare the destination SSD that will receive the cloned data. This involves ensuring the destination SSD is properly installed and ready for the cloning process. Follow the steps below:
1. Insert the Destination SSD: If you haven’t already done so, insert the destination M.2 SSD into the corresponding M.2 slot on your motherboard. Gently align the SSD with the slot and insert it at a slight angle. Apply even pressure until the SSD is fully seated in the slot, and then use the retention screw or clip to secure it in place.
2. Confirm Proper Alignment: Ensure that the destination SSD is properly aligned with the M.2 slot. It should be inserted in the correct orientation, following any markings or notches on the SSD and slot. Double-check for any visible misalignment before proceeding.
3. Tighten the Retention Screw (if applicable): If your motherboard requires a retention screw to secure the M.2 SSD, carefully tighten it to ensure the SSD is firmly held in place. Be cautious not to overtighten, as this could damage the SSD or strip the screw thread.
4. Check SSD Recognition: Start or restart your computer and access the BIOS settings by pressing the appropriate key (usually F2, F10, or Del) during the startup process. Navigate to the boot or storage section in the BIOS and verify that the destination SSD is detected and recognized by the system. If not, check the physical connections and ensure the SSD is properly seated in the M.2 slot.
5. Initialize and Format (if necessary): If the destination SSD is not already initialized or formatted, you may need to do so before proceeding with the cloning process. This can typically be done within the Disk Management utility in your operating system. Consult the documentation or support resources provided by the SSD manufacturer for specific instructions.
By properly preparing the destination M.2 SSD, you are now ready to connect it to your computer and proceed with the cloning process to transfer the data from the source SSD.
Step 7: Connect the Destination SSD to the Computer
In order to proceed with the cloning process, you need to connect the destination SSD to your computer. This step involves ensuring a proper connection between the destination SSD and the computer’s M.2 slot. Follow the steps below:
1. Power Off and Disconnect: Before connecting or disconnecting any hardware, ensure that your computer is fully powered off and disconnected from the power source. This will prevent any potential electrical damage and ensure your safety during the process.
2. Locate the Destination SSD: Identify the M.2 slot where you installed the destination SSD during the previous step. Take note of its location and orientation within the computer.
3. Connect the SSD: Gently insert the destination SSD into the M.2 slot on your motherboard, aligning it properly with the slot. Apply even pressure until the SSD is fully seated, and then secure it in place with the retention screw or clip, if applicable.
4. Confirm Secure Connection: After connecting the SSD, visually verify that it is securely attached to the M.2 slot. The SSD should be flush with the motherboard, and the retention screw or clip should be tightened appropriately to prevent any movement or disconnection.
5. Reassemble and Plug In: Once the destination SSD is securely connected, reassemble your computer by placing any removed panels or components back into their original positions. Ensure that all connections, such as power cables and data cables, are properly plugged back in.
6. Power On the Computer: After reassembly, reconnect the power source and power on your computer. The system will recognize the newly connected destination SSD as an available storage device.
By connecting the destination SSD to your computer, you have successfully completed the necessary step to begin the cloning process. You are now ready to move on to the next step and clone the data from the source SSD to the destination SSD.
Step 8: Clone the Source SSD to the Destination SSD
Now that you have successfully connected the destination SSD to your computer, it’s time to clone the data from the source SSD to the destination SSD. This step involves using the cloning software and initiating the cloning process. Follow the steps below:
1. Boot from the Bootable USB Drive: Restart your computer and enter the BIOS settings by pressing the designated key during startup (usually F2, F10, or Del). Set the boot priority to boot from the USB drive that contains the cloning software. Save the changes and exit the BIOS.
2. Launch the Cloning Software: Once the computer restarts, the cloning software should boot from the USB drive. Follow the instructions provided by the software to launch it. Depending on the software you are using, the interface may vary, but the basic cloning process remains similar.
3. Select Source and Destination SSDs: From within the cloning software, identify and select the source SSD (the one containing the data you want to clone) and the destination SSD (the newly connected SSD). Double-check that you have selected the correct SSDs to avoid any accidental data loss.
4. Configure Cloning Options: Configure any additional cloning options provided by the software, such as enabling sector-by-sector cloning or resizing partitions. Consult the documentation or help resources of the software to understand the available options and select the ones that meet your requirements.
5. Initiate the Cloning Process: Once you have reviewed and confirmed the cloning settings, initiate the cloning process. Sit back and let the software perform the cloning operation. The time required for the cloning process to complete will depend on the size of the data being cloned and the speed of your computer and SSDs.
6. Monitor Progress and Verify Completion: While the cloning process is ongoing, monitor the progress displayed by the cloning software. Once the process is complete, the software will usually display a notification or progress summary. Ensure that the cloning process has been successfully completed before proceeding to the next step.
By cloning the data from the source SSD to the destination SSD, you have successfully transferred all your files, settings, and data to the new SSD. Now you can move on to the next steps and verify the results of the cloning process to ensure a successful migration.
Step 9: Verify the Cloning Process
After completing the cloning process, it’s crucial to verify that the cloning was successful and that all data has been accurately transferred from the source SSD to the destination SSD. This step ensures that you have a functional and reliable clone of your original SSD. Follow the steps below to verify the cloning process:
1. Compare File Structure: Access the destination SSD and compare the file structure with the source SSD. Verify that all folders, files, and directories have been replicated correctly on the destination SSD. Check for any missing or corrupted data.
2. Check File Sizes: Randomly select a few files from different directories on both the source and destination SSDs. Compare their file sizes to ensure they match. If there are significant discrepancies, it might indicate an issue with the cloning process.
3. Test File Access: Open different types of files, such as documents, images, and videos, to ensure they can be accessed without any errors. Run a few programs or applications installed on the destination SSD to confirm their functionality.
4. Validate Boot: Restart your computer and test whether the system boots up properly from the destination SSD. Ensure that the operating system, drivers, and settings are functioning as expected. If any boot issues arise, it may indicate a problem with the cloning process.
5. Run Diagnostic Tools: Use SSD diagnostic tools, provided by the SSD manufacturer, to perform a health and performance check on the destination SSD. These tools can help identify any underlying issues or errors that occurred during the cloning process.
6. Verify Overall Performance: Finally, run benchmark tests or perform typical tasks on your computer to ensure that the overall performance and speed of the destination SSD are comparable to the source SSD. Any significant performance differences could indicate a potential issue.
By thoroughly verifying the cloning process, you can ensure that all data has been successfully transferred and that the destination SSD is fully functional. If any issues are detected during the verification process, it may be necessary to repeat the cloning process or seek further assistance to resolve the problems.
Step 10: Replace the Source SSD with the Destination SSD
Once you have verified the successful cloning of your M.2 SSD, the final step is to replace the source SSD with the destination SSD. This step involves physically removing the source SSD and installing the destination SSD in its place. Follow the steps below:
1. Shutdown and Disconnect Power: Before performing any hardware changes, ensure that your computer is fully powered off and disconnected from the power source to avoid any potential electrical damage and for your safety.
2. Locate the Source SSD: Identify the M.2 slot where the source SSD is installed. Take note of its location and orientation within the computer.
3. Remove the Source SSD: Gently push the retention clip, usually located on one side of the source SSD slot, to release the SSD. Carefully lift the SSD at an angle to disconnect it from the slot. Avoid applying excessive force or bending the SSD.
4. Install the Destination SSD: Take the destination SSD, align it properly with the M.2 slot, and insert it at a slight angle. Apply even pressure until the SSD is fully seated in the slot. Use the retention screw or clip to secure it in place if required.
5. Reassemble and Plug In: Once the destination SSD is securely installed, reassemble your computer by placing any removed panels or components back into their original positions. Ensure that all connections, such as power cables and data cables, are properly plugged back in.
6. Power On and Verify: Reconnect the power source and power on your computer. The system should recognize the destination SSD as the primary storage device. Ensure that the computer boots up properly and that all files and settings are intact on the destination SSD.
Once the source SSD has been replaced with the destination SSD, you have completed the final step of the cloning process. The destination SSD should now function as the primary storage device in your computer, containing all the data that was successfully cloned from the source SSD.
Conclusion
Cloning a M.2 SSD to another M.2 SSD is a powerful and efficient process for transferring all your data, files, and settings from one SSD to another. By following the step-by-step guide outlined in this article, you can successfully clone your M.2 SSD and ensure a smooth transition without any data loss.
We started by checking the compatibility and capacity of the source and destination SSDs, ensuring they are suitable for cloning. Gathering the necessary tools, including cloning software and a bootable USB drive, prepared us for the cloning process.
We then backed up important data to ensure its safety during the cloning process and created a bootable USB drive to initiate the cloning software. Opening the computer and locating the M.2 SSDs allowed us to prepare the destination SSD and connect it to the computer.
With the destination SSD in place, we were ready to clone the source SSD using the chosen software. Verifying the cloning process ensured that all data was accurately transferred, and the cloned SSD was fully functional. Finally, we replaced the source SSD with the destination SSD, completing the cloning process.
Remember, cloning an SSD requires careful attention to detail, taking appropriate precautions, and choosing reliable software. Always refer to the documentation and resources provided by the SSD and software manufacturers for specific instructions and troubleshooting assistance.
By successfully cloning your M.2 SSD to another M.2 SSD, you can upgrade your storage, replace a failing drive, or create a reliable backup, ensuring your data remains safe and accessible. Now you can enjoy the increased capacity and improved performance of your new SSD, continuing to work and play without interruption.