Introduction
Welcome to this guide on how to clear your RAM on Windows 10. If you’ve noticed that your computer is running slow or experiencing performance issues, one possible solution is to clear your RAM. RAM, or Random Access Memory, is a crucial component of your computer that temporarily stores data that is being actively used by programs. Over time, as you use various applications and tasks, the RAM can become cluttered with unnecessary data, leading to decreased performance.
Clearing your RAM can help free up space and improve the overall speed and responsiveness of your computer. There are several methods you can use to clear your RAM on Windows 10, ranging from simple restarts to more advanced settings adjustments. In this article, we will guide you through these methods step by step.
Before we dive into the methods, it’s important to note that clearing your RAM does not permanently delete any files or data. It simply frees up space in the memory for your computer to operate more efficiently. Additionally, the methods mentioned here are specifically for Windows 10, but some of them may also be applicable to earlier versions of Windows.
Now, let’s explore the different methods you can use to clear your RAM on Windows 10 and get your computer running at its optimal speed!
What is RAM and why does it need to be cleared?
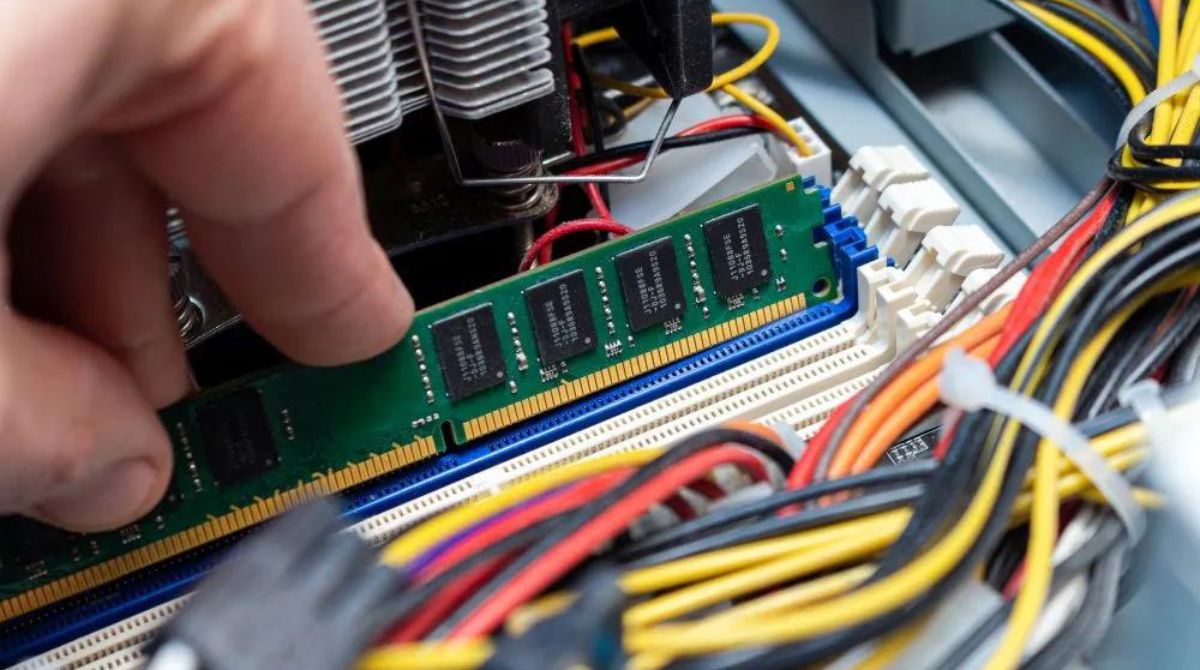
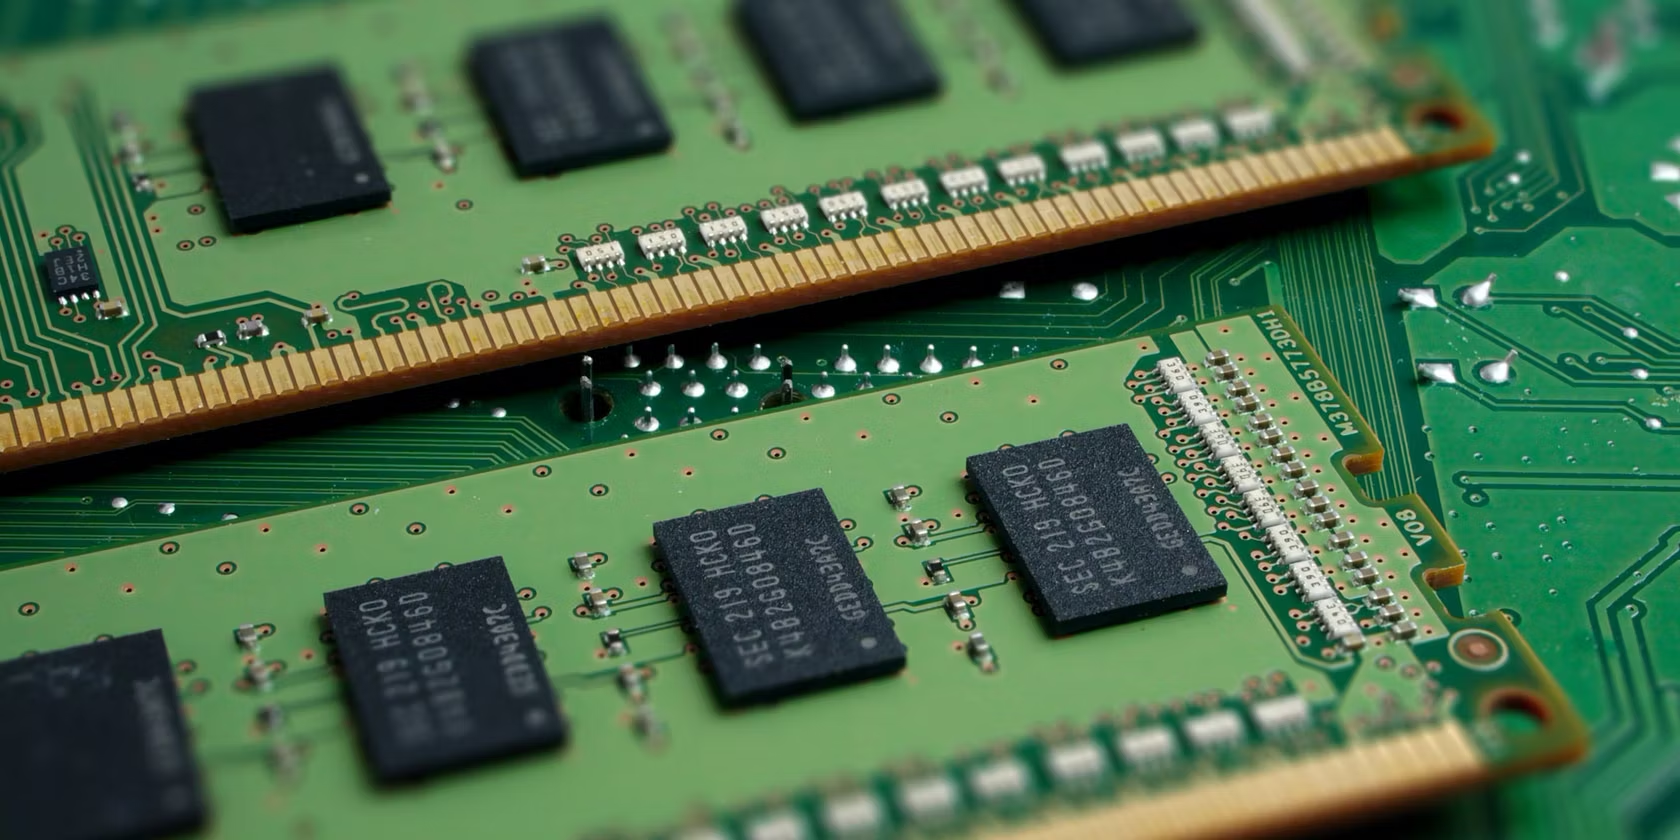
RAM, or Random Access Memory, is a vital component of your computer’s hardware. It is a form of temporary storage that allows your computer to access data quickly. Unlike a hard drive or solid-state drive, which are used for long-term storage, RAM is used for temporary storage while your computer is running. Whenever you open an application or perform a task, the relevant data is loaded into the RAM to provide fast access.
RAM plays a crucial role in your computer’s performance. The more RAM your computer has, the more data it can store for quick access, resulting in smoother multitasking, faster application loading times, and overall improved performance. However, as you use your computer, the RAM can become overloaded with unnecessary data from various programs and tasks.
When the RAM is filled with unnecessary data, it can result in decreased performance and slower response times. Your computer may start to lag, freeze, or become unresponsive, especially when running memory-intensive programs or performing multiple tasks simultaneously. Clearing the RAM helps alleviate these issues by freeing up space and allowing your computer to operate more efficiently.
By clearing the RAM, you essentially remove the clutter and unnecessary data that has accumulated, providing your computer with more available memory to handle current tasks. This can result in faster program execution, smoother multitasking, and an overall improvement in system performance.
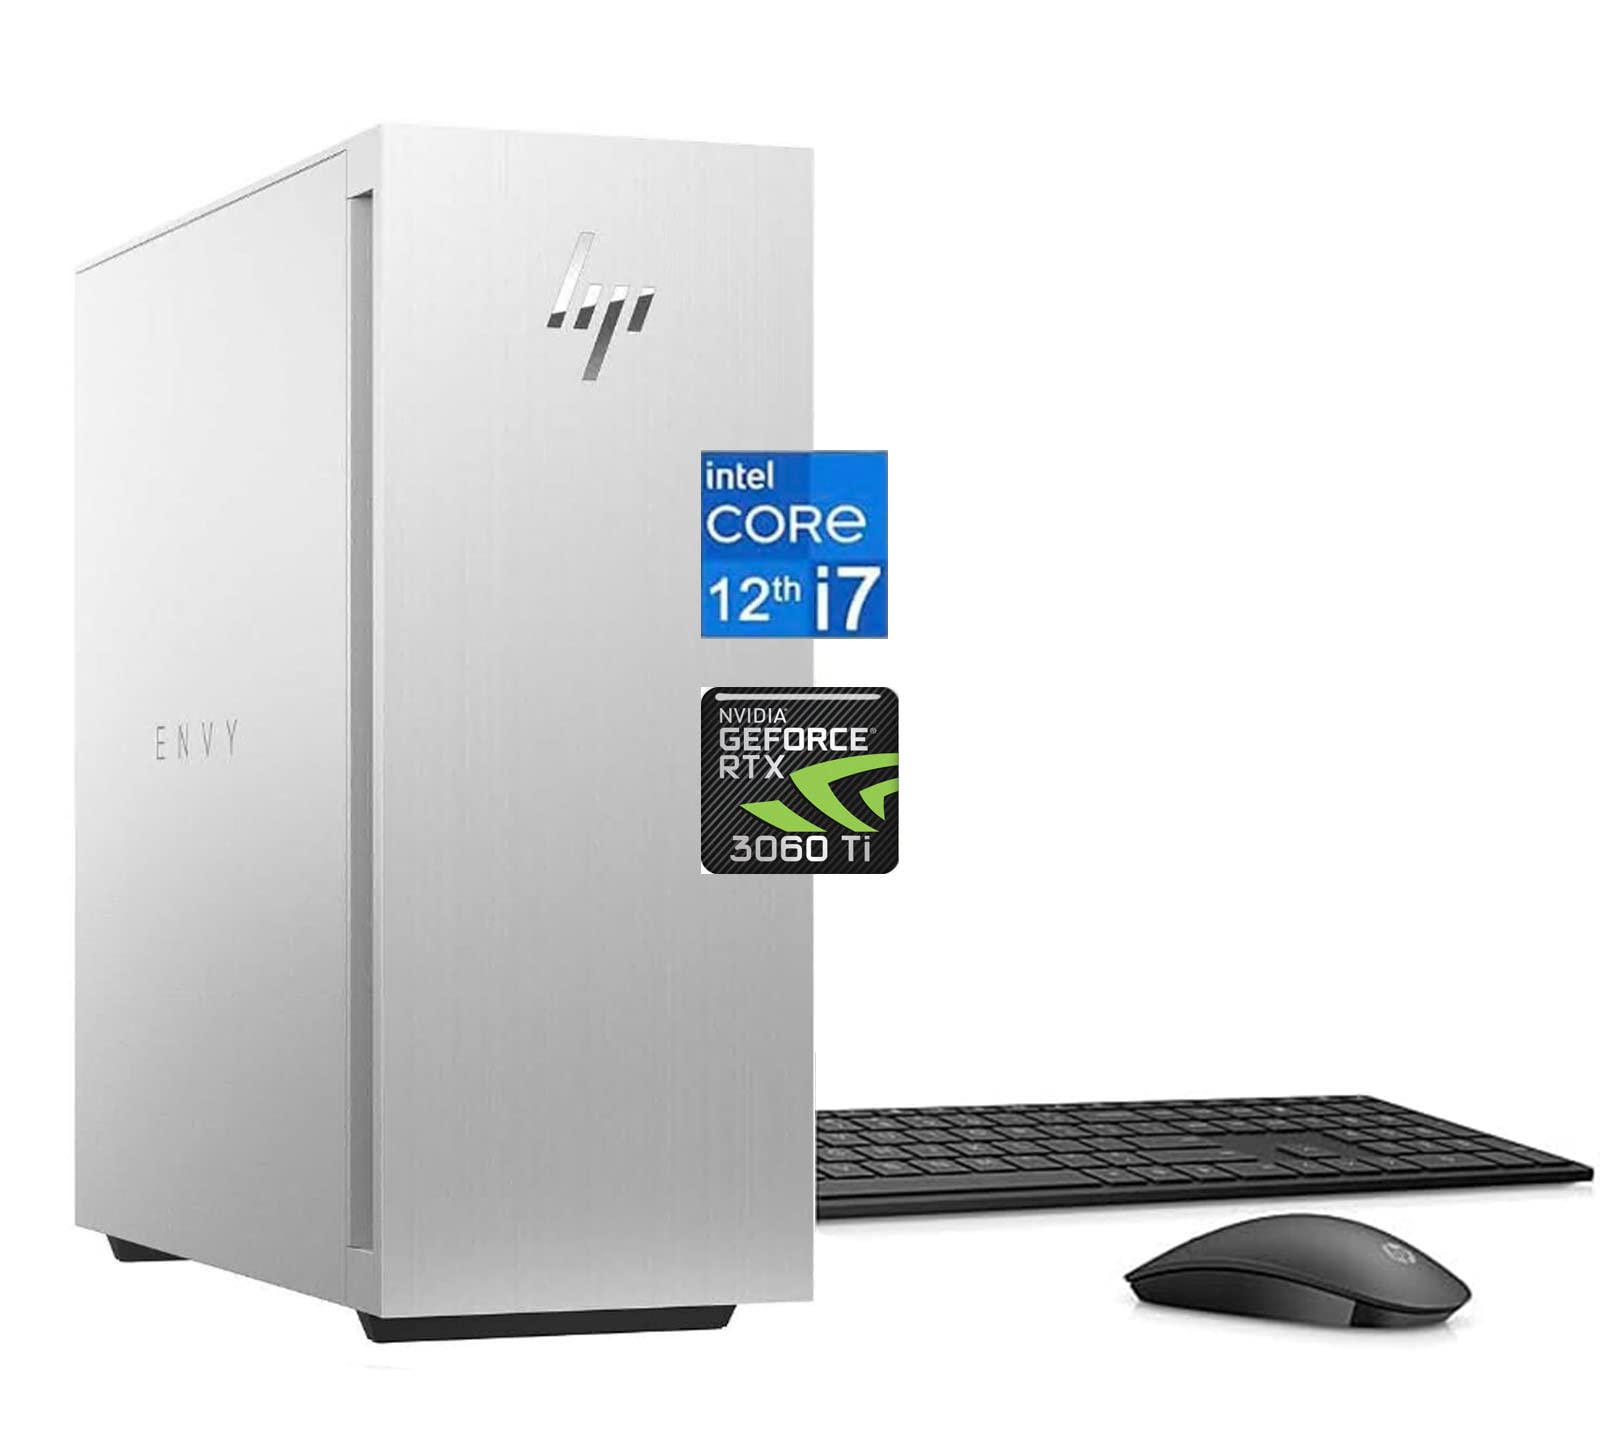
It’s important to note that clearing your RAM is a temporary solution and not a substitute for adding more physical RAM to your computer. If you consistently experience performance issues, consider upgrading your RAM for a more permanent solution.
Now that we understand what RAM is and why it needs to be cleared, let’s explore the different methods you can use to clear your RAM on Windows 10.
Method 1: Restart your computer
One of the simplest and most effective ways to clear your RAM on Windows 10 is to restart your computer. This method works by shutting down all running programs and processes, effectively clearing the RAM and starting fresh when the computer boots up again.
Restarting your computer helps to clear any temporary files, caches, and unnecessary processes that may be occupying the RAM. It allows your computer to free up memory and allocate it to the current tasks and applications you’ll be using.
To restart your computer, follow these steps:
- Save and close any important files or applications that you are currently working on.
- Click on the “Start” button in the bottom left corner of your screen.
- Click on the “Power” button, then select “Restart” from the drop-down menu.
- Your computer will now begin the restart process. Wait for it to shut down and start up again.
Once your computer has restarted, check if you notice any improvements in performance. This method is often effective in clearing up RAM-related issues and can give your computer a fresh start.
Keep in mind that restarting your computer only provides a temporary solution. As you continue to use your computer, the RAM will gradually fill up again. If you find that you consistently experience performance issues, you may need to consider other methods to optimize your RAM usage or upgrade your computer’s hardware.
Now that you know how to restart your computer to clear the RAM, let’s move on to another method that can help clear up memory usage on Windows 10.
Method 2: Use the built-in Task Manager
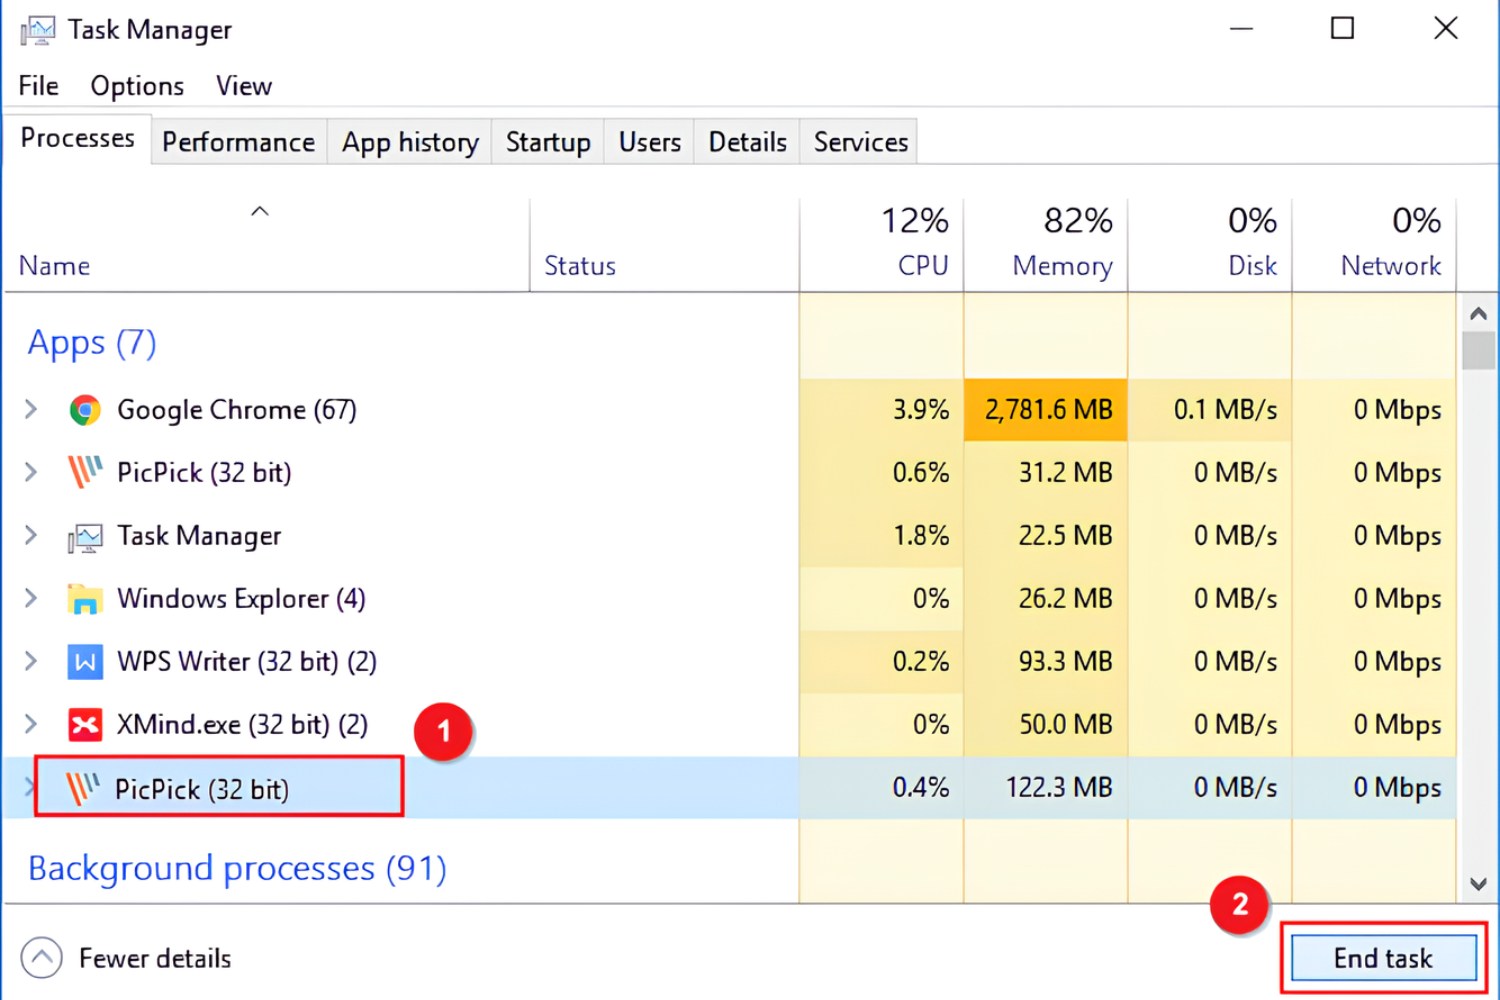
The built-in Task Manager in Windows 10 is a powerful tool that not only allows you to monitor the performance of your computer but also provides the ability to manage and control the processes and applications running on your system. Using the Task Manager, you can identify resource-hungry processes and terminate them to free up RAM.
Here’s how you can use the Task Manager to clear your RAM:
- Press the “Ctrl + Shift + Esc” keys together on your keyboard. This will open the Task Manager.
- Click on the “More details” button at the bottom of the Task Manager window to expand it and display additional information.
- Go to the “Processes” tab. Here, you will see a list of all the running processes on your computer.
- Click on the “Memory” column header to sort the processes in descending order based on their memory usage. This will help you identify the processes that are consuming the most RAM.
- Select the processes that you want to close by clicking on them, then click on the “End Task” button at the bottom-right corner of the Task Manager window.
Caution: When using the Task Manager to end processes, be careful not to terminate any essential system processes or processes associated with critical applications. Terminating such processes can cause system instability or lead to data loss.
By closing unnecessary or resource-intensive processes, you can free up RAM and improve the overall performance of your computer. After closing the selected processes, monitor your computer’s performance to see if the RAM usage has decreased and if you experience any improvements in speed and responsiveness.
Using the built-in Task Manager is a convenient and efficient way to manage your system’s resources and clear up RAM usage in Windows 10. However, keep in mind that the effects may be temporary as the RAM will gradually fill up again as you use your computer. If you consistently encounter performance issues due to high memory usage, you may need to explore other methods or consider upgrading your hardware.
Now that you know how to use the built-in Task Manager to clear your RAM, let’s move on to another method that involves using the command prompt.
Method 3: Use the command prompt
Another method to clear your RAM on Windows 10 is by using the command prompt, which is a powerful tool that allows you to execute various commands and perform system tasks. Using specific commands, you can flush the memory cache and release any unnecessary data stored in the RAM.
Follow these steps to clear your RAM using the command prompt:
- Open the command prompt by pressing the “Windows + R” keys on your keyboard, then typing “cmd” and pressing Enter.
- In the command prompt window, type the following command:
echo off && color 0c && echo 1 && Ping -n 2 127.0.0.1 > nul && echo 2 && start /B taskkill /F /IM explorer.exe && Ping -n 2 127.0.0.1 > nul && echo 3 && explorer.exe && exit. - Press Enter to execute the command. The screen may briefly flash, and you will notice the command processing different steps to clear the RAM.
This command prompts the system to perform certain actions, including restarting the File Explorer process, which helps in releasing the memory used by the applications and files you have opened.
After the command finishes executing, you should notice an improvement in the performance of your computer. The RAM will be cleared, and any unnecessary data stored in it will be released.
It’s worth noting that this method is more advanced, and if not executed correctly, it can have negative impacts on your system. Ensure you type the command accurately and follow the instructions to avoid any potential issues.
Using the command prompt to clear your RAM provides a quick and effective solution. However, keep in mind that the effects are temporary, and as you continue using your computer, the RAM will gradually fill up again. If you face consistent performance issues due to high memory usage, you may need to consider additional methods or look into upgrading your computer’s hardware.
Now that you know how to clear your RAM using the command prompt, let’s proceed to another method that involves adjusting the virtual memory settings.
Method 4: Adjust your virtual memory settings
Adjusting the virtual memory settings can help clear up your RAM on Windows 10 by utilizing the computer’s hard drive as additional memory space. Virtual memory is a feature that allows the operating system to use a portion of the hard drive as temporary memory, supplementing the physical RAM.
Here’s how you can adjust your virtual memory settings to optimize your RAM usage:
- Right-click on the “Start” button and select “System” from the context menu.
- In the System window, click on “Advanced system settings” on the left-hand side.
- In the System Properties window that appears, go to the “Advanced” tab and click on the “Settings” button under the “Performance” section.
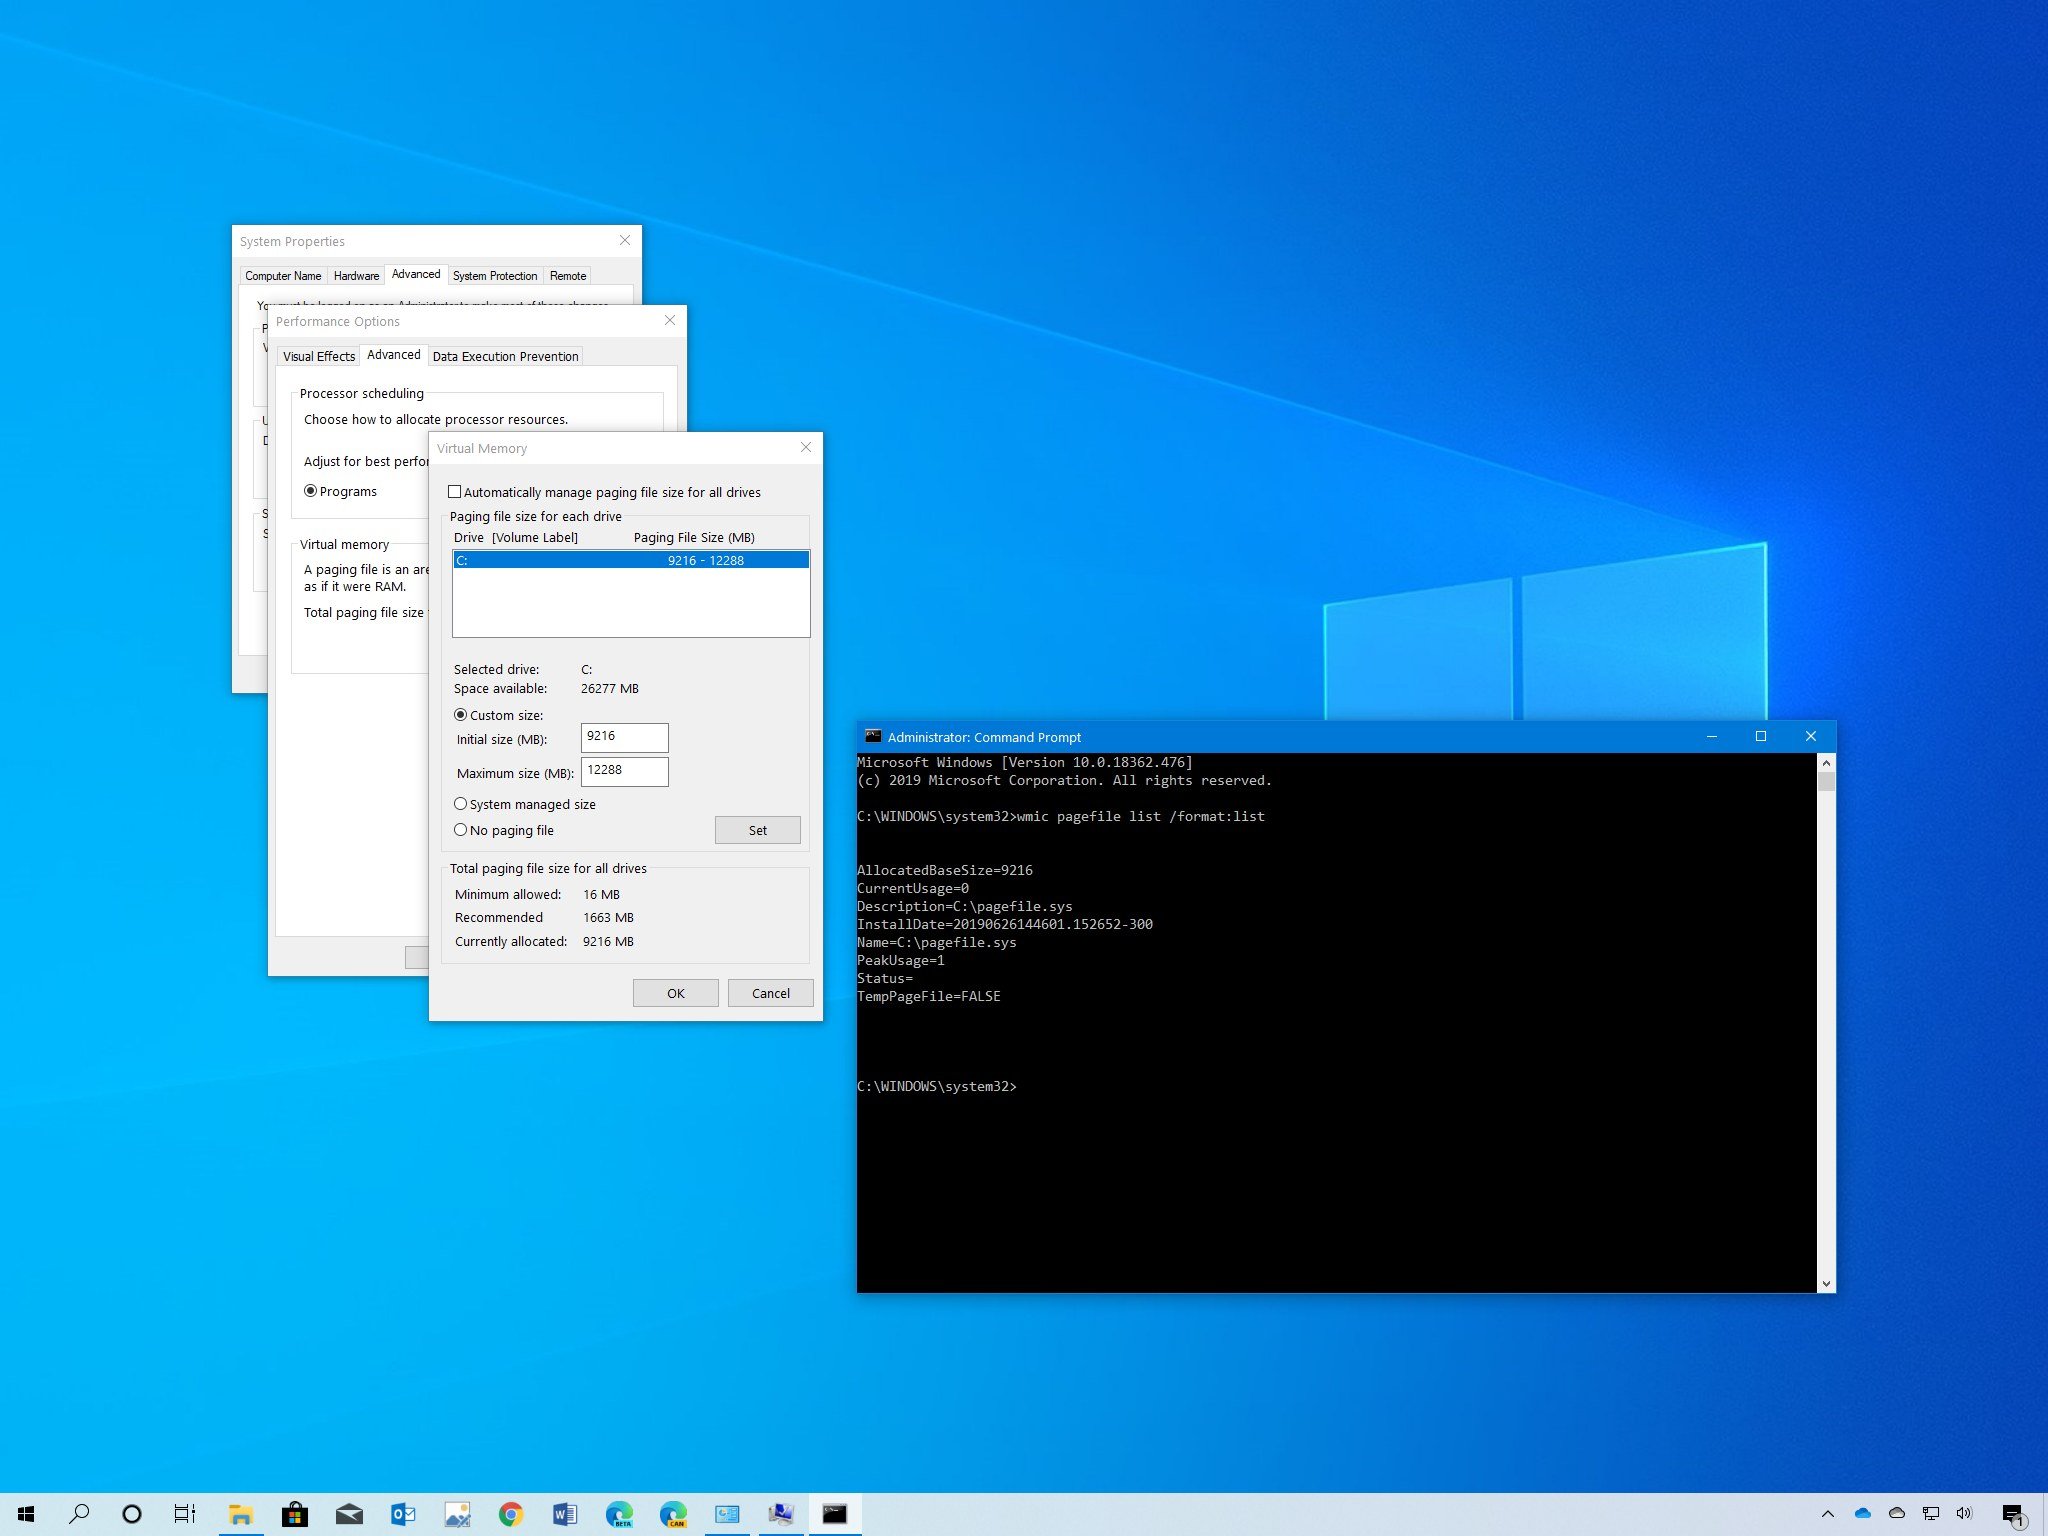
- In the Performance Options window, navigate to the “Advanced” tab and click on the “Change” button under the Virtual Memory section.
- Uncheck the “Automatically manage paging file size for all drives” option.
- Select the “Custom size” option.
- Set the initial size and maximum size for the virtual memory based on your system’s requirements. The recommended value is usually 1.5 times the amount of your physical RAM.
- Click “Set” and then “OK” to save the changes and exit the windows. You may need to restart your computer for the changes to take effect.
By adjusting the virtual memory settings, you provide your computer with additional memory resources to allocate when the physical RAM becomes insufficient for the tasks being executed. This can help alleviate RAM-related performance issues and improve the overall system responsiveness.
It’s important to note that while increasing the virtual memory can help clear up the RAM, it is not a substitute for physical RAM. Adding more physical RAM to your computer is always the best solution for improving performance. However, adjusting the virtual memory settings can serve as a temporary measure to optimize available resources.
Now that you know how to adjust your virtual memory settings to clear up your RAM usage, let’s explore another method that involves updating your device drivers.
Method 5: Update your device drivers
Outdated or incompatible device drivers can contribute to performance issues and can also affect the proper functioning of your computer’s hardware components, including the RAM. Updating your device drivers can help improve the overall system stability and efficiency, which in turn can contribute to better RAM utilization.
Here’s how you can update your device drivers to optimize your RAM usage:
- Right-click on the “Start” button and select “Device Manager” from the context menu.
- In the Device Manager window, expand the categories and locate the devices that have a yellow exclamation mark or a warning icon next to them.
- Right-click on the device with the warning icon and select “Update driver”.
- Choose the option to search automatically for updated driver software. Windows will search online for the latest drivers and install them if available.
- Repeat this process for all devices with a warning icon or an outdated driver.
- Alternatively, you can visit the manufacturer’s website for each device and manually download the latest drivers. Then, follow the installation instructions provided by the manufacturer.
Updating your device drivers ensures that your computer’s hardware components are running with the latest software improvements and bug fixes. This can resolve compatibility issues, improve system stability, and potentially optimize RAM usage.
Keep in mind that Windows typically handles driver updates automatically through Windows Update. However, it may not always have the latest drivers available for all devices. Therefore, manually checking for driver updates and installing them can be beneficial.
If you frequently experience RAM-related performance issues, updating your device drivers can be a crucial step in resolving them. It is a good practice to periodically check for driver updates to ensure your computer is running with the most up-to-date software.
Now that you know how to update your device drivers to optimize RAM usage, let’s explore another method that involves removing unnecessary startup programs.
Method 6: Remove unnecessary startup programs
When you start your computer, several programs and applications may automatically launch and run in the background. These startup programs consume system resources, including RAM, which can slow down your computer’s performance. By removing unnecessary startup programs, you can free up valuable resources, including RAM, and improve the overall speed and responsiveness of your system.
Here’s how you can remove unnecessary startup programs on Windows 10:
- Right-click on the taskbar and select “Task Manager” from the context menu.
- In the Task Manager window, navigate to the “Startup” tab.
- On the “Startup” tab, you will see a list of programs that are set to run automatically when your computer starts up.
- Review the list and identify the programs that you don’t need or use regularly.
- Right-click on the program and select “Disable” or “Disable all” if you want to disable multiple startup programs.
- Repeat this process for all the unnecessary startup programs.
Disabling unnecessary startup programs helps reduce the number of processes running in the background, thus freeing up RAM and improving the overall performance of your computer.
It’s important to note that not all startup programs are harmful or unnecessary. Some programs, such as antivirus software, may be essential for the security of your computer. Exercise caution when disabling startup programs and ensure that you are not disabling any critical system processes or programs.
Regularly reviewing and managing your startup programs can optimize RAM usage and contribute to a more efficient system. If you notice any performance improvements after disabling unnecessary startup programs, you have successfully cleared up valuable system resources.
Now that you know how to remove unnecessary startup programs, let’s explore another method that involves disabling unnecessary visual effects.
Method 7: Disable unnecessary visual effects
Windows 10 comes with various visual effects and animations that enhance the user interface but can also consume system resources, including RAM. Disabling unnecessary visual effects can help improve the performance of your computer by reducing the strain on the RAM and other hardware components.
Here’s how you can disable unnecessary visual effects on Windows 10:
- Right-click on the “Start” button and select “System” from the context menu.
- In the System window, click on “Advanced system settings” on the left-hand side.
- In the System Properties window that appears, go to the “Advanced” tab and click on the “Settings” button under the “Performance” section.
- In the Performance Options window, select the “Adjust for best performance” option to disable all visual effects. Alternatively, you can choose the “Custom” option and manually select which visual effects to enable or disable.
- Click “Apply” and then “OK” to save the changes.
Disabling unnecessary visual effects reduces the strain on your computer’s resources, including the RAM. By prioritizing performance over visual aesthetics, you can experience a smoother and more responsive system.
It’s important to note that disabling visual effects will make your user interface appear less visually appealing. However, the sacrifice in visual aesthetics can be worthwhile if it improves the overall performance of your computer and clears up valuable system resources.
Regularly reviewing and adjusting the visual effects settings based on your preferences and system’s capabilities can help optimize RAM usage and enhance the efficiency of your Windows 10 system.
Now that you know how to disable unnecessary visual effects, let’s summarize the methods discussed in this guide to clear your RAM on Windows 10.
Conclusion
Clearing your RAM on Windows 10 is an effective way to optimize system performance and improve the overall speed and responsiveness of your computer. In this guide, we explored several methods to help you clear your RAM and enhance the efficiency of your Windows 10 system.
We started by discussing the importance of RAM and why it needs to be cleared. RAM plays a crucial role in your computer’s performance, but it can become cluttered with unnecessary data over time, leading to decreased performance. Clearing the RAM frees up space and allows your computer to operate more efficiently.
We then went through various methods to clear your RAM on Windows 10, including restarting your computer, using the built-in Task Manager to end resource-hungry processes, utilizing the command prompt to release memory cache, adjusting virtual memory settings, updating device drivers, removing unnecessary startup programs, and disabling unnecessary visual effects.
These methods provide different approaches to clearing your RAM, catering to various preferences and system configurations. It’s important to remember that clearing your RAM is a temporary solution, and for long-term improvement, considering hardware upgrades, such as adding more physical RAM, may be necessary.
By implementing these methods, you can optimize your RAM usage, thereby experiencing improved performance, faster application loading times, and smoother multitasking on your Windows 10 system.
Remember to periodically assess your computer’s performance and RAM usage to ensure optimal efficiency. Each system configuration is unique, so feel free to experiment with different methods and find what works best for you.
We hope this guide has provided you with valuable insights and practical steps to clear your RAM and enhance the performance of your Windows 10 computer.