Introduction
Welcome to the world of technology, where every piece of hardware plays a crucial role in the smooth functioning of your computer. Among the many components that contribute to its performance, random access memory (RAM) holds a critical position. RAM is responsible for temporarily storing data, allowing your computer to access and retrieve information quickly.
Given the importance of RAM, it is essential to ensure that it is working optimally. A malfunctioning or failing RAM module can lead to system crashes, freezing, slow performance, and data loss. Therefore, regularly checking the status of your RAM is vital.
In this article, we will explore the signs of failing RAM, as well as the software tools available to check if your RAM is working properly. We will also provide step-by-step instructions for performing memory diagnostics on both Windows and Mac systems. Additionally, we will discuss a popular RAM testing tool called Memtest86 and explain how to use it.
By the end of this article, you will have a comprehensive understanding of how to check if your RAM is working and how to identify and resolve any issues that may arise. Let’s dive in!
Why it’s important to check if RAM is working
RAM is a critical component of your computer’s performance, and ensuring it is working properly is of utmost importance. Here are several reasons why regular checks on your RAM are necessary:
1. System Stability: Faulty RAM can cause system crashes, freezes, and unexpected computer reboots. By checking if your RAM is working correctly, you can maintain system stability and prevent frustrating disruptions to your work or entertainment.
2. Performance Optimization: RAM plays a crucial role in the overall performance of your computer. Insufficient or malfunctioning RAM can lead to slow performance, lagging applications, and decreased productivity. Regularly checking your RAM ensures optimal performance and a seamless user experience.
3. Data Integrity: RAM is responsible for temporarily storing and accessing data while your computer is running. If your RAM is faulty, it can result in data corruption or loss. By regularly checking your RAM, you can safeguard your precious files and prevent potential data disasters.
4. Identifying Hardware Issues: RAM-related problems can sometimes be indicative of other hardware issues. By checking your RAM, you can rule out or identify potential problems with other components such as motherboard or processor, helping you take necessary actions to resolve them.
5. Cost Savings: Identifying and addressing RAM issues early can help you avoid costly repairs or even the need for a complete hardware replacement. By regularly checking your RAM, you can catch and address any problems before they escalate, saving both money and time.
6. Peace of Mind: Knowing that your computer’s RAM is in good working condition brings peace of mind. You can use your computer confidently, knowing that it will perform reliably and efficiently without the worry of sudden crashes or data loss.
Overall, checking if your RAM is working properly is essential for maintaining system stability, optimizing performance, ensuring data integrity, identifying hardware issues, saving costs, and enjoying peace of mind while using your computer.
Physical signs of failing RAM
While RAM issues primarily manifest as software or performance-related problems, there are some physical signs that might indicate failing RAM. These signs are helpful in identifying potential RAM issues and taking necessary actions. Here are some physical signs to look out for:
- Random system crashes: If your computer frequently crashes or restarts unexpectedly, it may be a sign of faulty RAM. When RAM fails, it can cause your system to become unstable and crash during regular operations.
- System slowdowns: RAM plays a pivotal role in the speed and responsiveness of your computer. If you notice a significant slowdown in application launches, file access, or overall system performance, it could indicate a problem with your RAM.
- Blue screen of death (BSOD): A blue screen error, commonly known as the “blue screen of death,” often occurs due to hardware-related issues, including faulty RAM. If you encounter frequent blue screen errors, it is recommended to check your RAM.
- Intermittent or inconsistent system behavior: RAM issues can cause strange and unexpected behavior in your computer. This includes random freezes, program crashes, or unusual error messages. These inconsistencies could be attributed to faulty RAM modules.
- Failure to boot: If your computer fails to boot or struggles to reach the operating system, it could be due to a problem with the RAM. Insufficient or malfunctioning RAM can prevent your computer from properly initializing during the boot process.
- Overheating: RAM modules generate some heat during operation, but excessive overheating can be a sign of a hardware issue. If you notice excessive heat coming from your RAM modules, it is recommended to check for any potential problems.
It is important to note that these physical signs can also be indicative of other hardware or software issues. Therefore, it is best to conduct further diagnostic tests to confirm if the RAM is indeed the cause of the problem.
By being vigilant about these physical signs, you can identify potential RAM issues early on and take appropriate measures to address them, ensuring the smooth operation and longevity of your computer.
Software tools to check if RAM is working
When it comes to checking the functionality of your computer’s RAM, there are several software tools available that can help diagnose any potential issues. These tools can assess the overall health of your RAM, detect errors or faults, and provide detailed reports on its performance. Here are some popular software tools to check if your RAM is working:
- Windows Memory Diagnostic Tool: Built into Windows operating systems, the Windows Memory Diagnostic Tool is a reliable and convenient option for checking RAM. It performs a series of tests to identify memory problems and provides detailed results that can help pinpoint any issues.
- Memtest86: Memtest86 is a widely-used third-party RAM testing tool that is highly regarded for its accuracy and effectiveness. It creates a bootable USB or CD that allows you to run extensive memory tests outside of your operating system, giving you a comprehensive analysis of your RAM’s performance.
- Memtest86+: Similar to Memtest86, Memtest86+ is another popular RAM testing software tool. It employs advanced algorithms and performs comprehensive tests to identify errors or faults within your RAM modules.
- MemTest: MemTest is a user-friendly RAM testing software that is compatible with multiple operating systems, including Windows, Mac, and Linux. It performs extensive memory tests and provides comprehensive reports to help you identify and resolve any RAM issues.
- Windows Resource Monitor: While not solely dedicated to RAM testing, the Windows Resource Monitor can provide valuable insights into your computer’s memory usage. It allows you to monitor RAM usage, identify any applications consuming excessive memory, and make informed decisions about optimizing your computer’s performance.
Each of these software tools offers various features and levels of testing to ensure a thorough assessment of your RAM’s functionality. It is recommended to use multiple tools or perform multiple tests for a more accurate diagnosis.
Whether you choose built-in Windows tools, third-party software like Memtest86, or other RAM testing tools, regularly checking your RAM’s functionality will help you identify any potential issues and take proactive measures to maintain your computer’s performance and stability.
How to perform a Windows Memory Diagnostic
Performing a Windows Memory Diagnostic is a straightforward process that allows you to check the functionality of your RAM. Follow these simple steps to perform a Windows Memory Diagnostic:
- Open the start menu and type “Windows Memory Diagnostic” to search for the tool.
- Click on “Windows Memory Diagnostic” from the search results to launch the tool.
- In the Windows Memory Diagnostic window, you will be presented with two options: Restart now and check for problems (recommended) or Check for problems the next time I start my computer. Select the option that suits your preference. Note that selecting the first option will restart your computer immediately and initiate the diagnostic process.
- After your computer restarts, it will automatically run the Windows Memory Diagnostic tool. The scanning process may take several minutes, so be patient.
- While the scan is in progress, you will see a progress bar indicating the status of the memory test. The tool will perform a series of tests to check for any memory errors.
- Once the scan is complete, your computer will automatically restart again. When your computer starts up, it will display the test results on the screen.
- Review the test results to identify any errors or issues with your RAM. The results will provide information about the detected problems, such as the specific memory module affected.
- If any errors are found, it is recommended to replace the faulty RAM module to ensure optimal performance.
Performing a Windows Memory Diagnostic is an effective way to assess the health of your RAM. By following these steps and reviewing the test results, you can identify any potential memory errors and take the necessary actions to resolve them.
How to perform a Mac Memory Diagnostic
Performing a memory diagnostic on your Mac can help you identify any issues with your RAM and ensure optimal performance. To perform a Mac Memory Diagnostic, follow these steps:
- Restart your Mac and hold down the D key immediately after the system restarts. This will launch the Apple Hardware Test or Apple Diagnostics utility, depending on your Mac model. Older Macs may use the Apple Hardware Test, while newer models use Apple Diagnostics.
- Wait for the utility to load. It may take a few minutes to complete the initial scan.
- Once the utility is loaded, you will see a window with options to choose from. Select the “Memory” or “Memory Check” option to initiate the memory diagnostic test.
- The utility will then run a series of tests to check the functionality of your RAM. This process may take some time, so be patient and let the test complete.
- While the memory diagnostic test is running, you will see the progress and status of the test on your screen. It will display if any errors or issues are detected.
- After the test is completed, the utility will display the results. It will indicate if any memory problems are found, such as faulty RAM modules or other memory-related issues.
- If the memory diagnostic test identifies any errors, it is recommended to replace the faulty RAM module to ensure optimal performance.
- Once you have reviewed the test results, you can exit the utility by restarting your Mac.
Performing a memory diagnostic on your Mac using the built-in Apple Hardware Test or Apple Diagnostics utility is a reliable way to check the health of your RAM. By following these steps and reviewing the test results, you can identify and resolve any potential memory issues, ensuring that your Mac continues to operate smoothly and efficiently.
How to diagnose RAM issues with Memtest86
Memtest86 is a powerful and widely-used third-party tool to diagnose RAM issues. By running extensive memory tests, Memtest86 can help identify errors or faults in your RAM modules. Here’s how to use Memtest86 to diagnose RAM issues:
- Visit the Memtest86 website and download the latest version of the tool. Choose either the USB or CD version, depending on your preference.
- Create a bootable USB drive or burn the Memtest86 ISO file onto a CD using appropriate software.
- Insert the bootable USB drive or CD into your computer and restart it.
- As your computer restarts, access the boot menu by pressing the specific key (usually F2, F8, F12, or Del) displayed on the screen. Select the USB drive or CD as the boot device.
- Memtest86 will start automatically and begin running memory tests. It will scan your RAM modules for errors and faults.
- Let Memtest86 complete the testing process, which may take several hours depending on the size of your RAM.
- While the tests are running, you will see a detailed display of the memory testing progress, including any errors or faults detected in your RAM modules.
- If any errors or faults are found, take note of the details provided. This includes the specific memory address and failure type.
- Once the Memtest86 test is complete, restart your computer and remove the bootable USB drive or CD.
- Based on the results of the Memtest86 tests, you can identify which RAM module is causing the issues. It is recommended to replace the faulty RAM module to resolve the problems.
Using Memtest86 is an effective way to diagnose RAM issues. By following these steps and analyzing the test results, you can pinpoint any errors or faults in your RAM and take the necessary actions to ensure optimal performance and stability of your system.
How to interpret RAM test results
Interpreting RAM test results is crucial in understanding the health of your RAM modules and identifying any potential issues. When performing memory tests using tools such as Memtest86 or Windows Memory Diagnostic, you will receive detailed reports that provide insights into the status of your RAM. Here are some key aspects to consider when interpreting RAM test results:
- Error Count: RAM tests will indicate the number of errors encountered during the memory testing process. A higher error count usually points to faulty RAM modules or other memory-related issues. Even a single error can be significant, as it indicates the presence of a problem.
- Error Type: The test results might categorize errors based on specific types, such as bit errors, pattern errors, or address errors. Understanding the error type can help identify the underlying cause of the problem and determine a suitable solution.
- Error Location: Memory tests can identify the specific memory address or slot where errors occur. This information is essential for pinpointing which RAM module is experiencing issues. By knowing the error location, you can target your troubleshooting efforts more accurately.
- Error Frequency: Some RAM tests indicate how frequently errors occur during the testing process. If an error consistently appears at the same memory address or slot, it indicates a persistent problem that requires attention.
- Error Severity: The severity of errors can vary. Some errors may be minor and infrequent, while others may be more critical or occur extensively. Understanding the severity helps prioritize troubleshooting and determine the urgency of replacing faulty RAM.
- Consistency of Results: If multiple memory tests consistently produce the same error results, it strengthens the likelihood of a genuine RAM issue. Consistent errors across different tests validate the need for further investigation and potential replacement of faulty RAM modules.
- Comparison with Specifications: Compare the test results with the specifications of your RAM modules. If the detected errors deviate from the expected specifications, it suggests a problem. Incorrect timing configurations, voltage settings, or incompatible RAM can cause errors specifically related to the configured parameters.
When interpreting RAM test results, it is important to evaluate the overall picture rather than focusing solely on individual errors. The severity, frequency, and consistency of errors play a crucial role in determining the validity and seriousness of RAM-related issues.
If you are unsure about how to interpret the test results or need assistance, it is recommended to consult with a professional technician or seek guidance from the respective software tool’s support resources.
By carefully analyzing RAM test results, you can gain insights into the health of your RAM modules and make informed decisions regarding troubleshooting, repairs, or replacements to ensure the optimal functioning of your computer.
How to replace faulty RAM
If you have determined that your RAM modules are faulty and need to be replaced, follow these steps to ensure a smooth and successful replacement process:
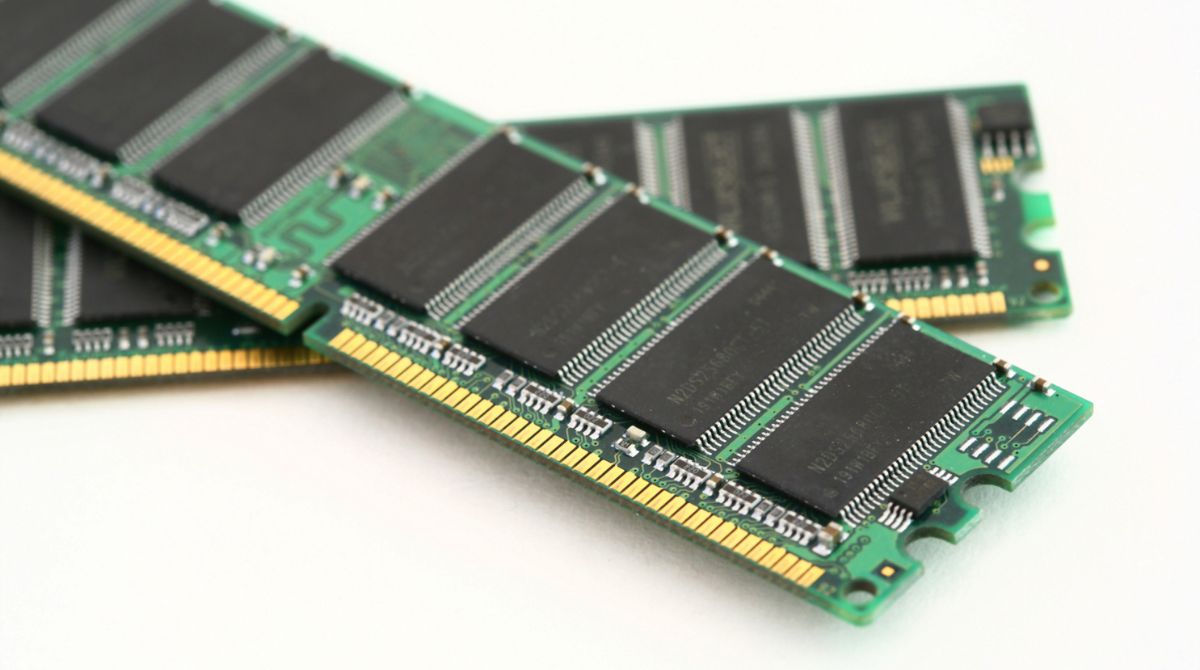
- Gather necessary information: Identify the specifications of your existing RAM modules, including the type (DDR3, DDR4, etc.), capacity, and speed. This information will help you purchase compatible replacement RAM.
- Power off and unplug your computer: Before working on your computer, ensure that it is completely powered off and unplugged from the electrical outlet to prevent any potential damage.
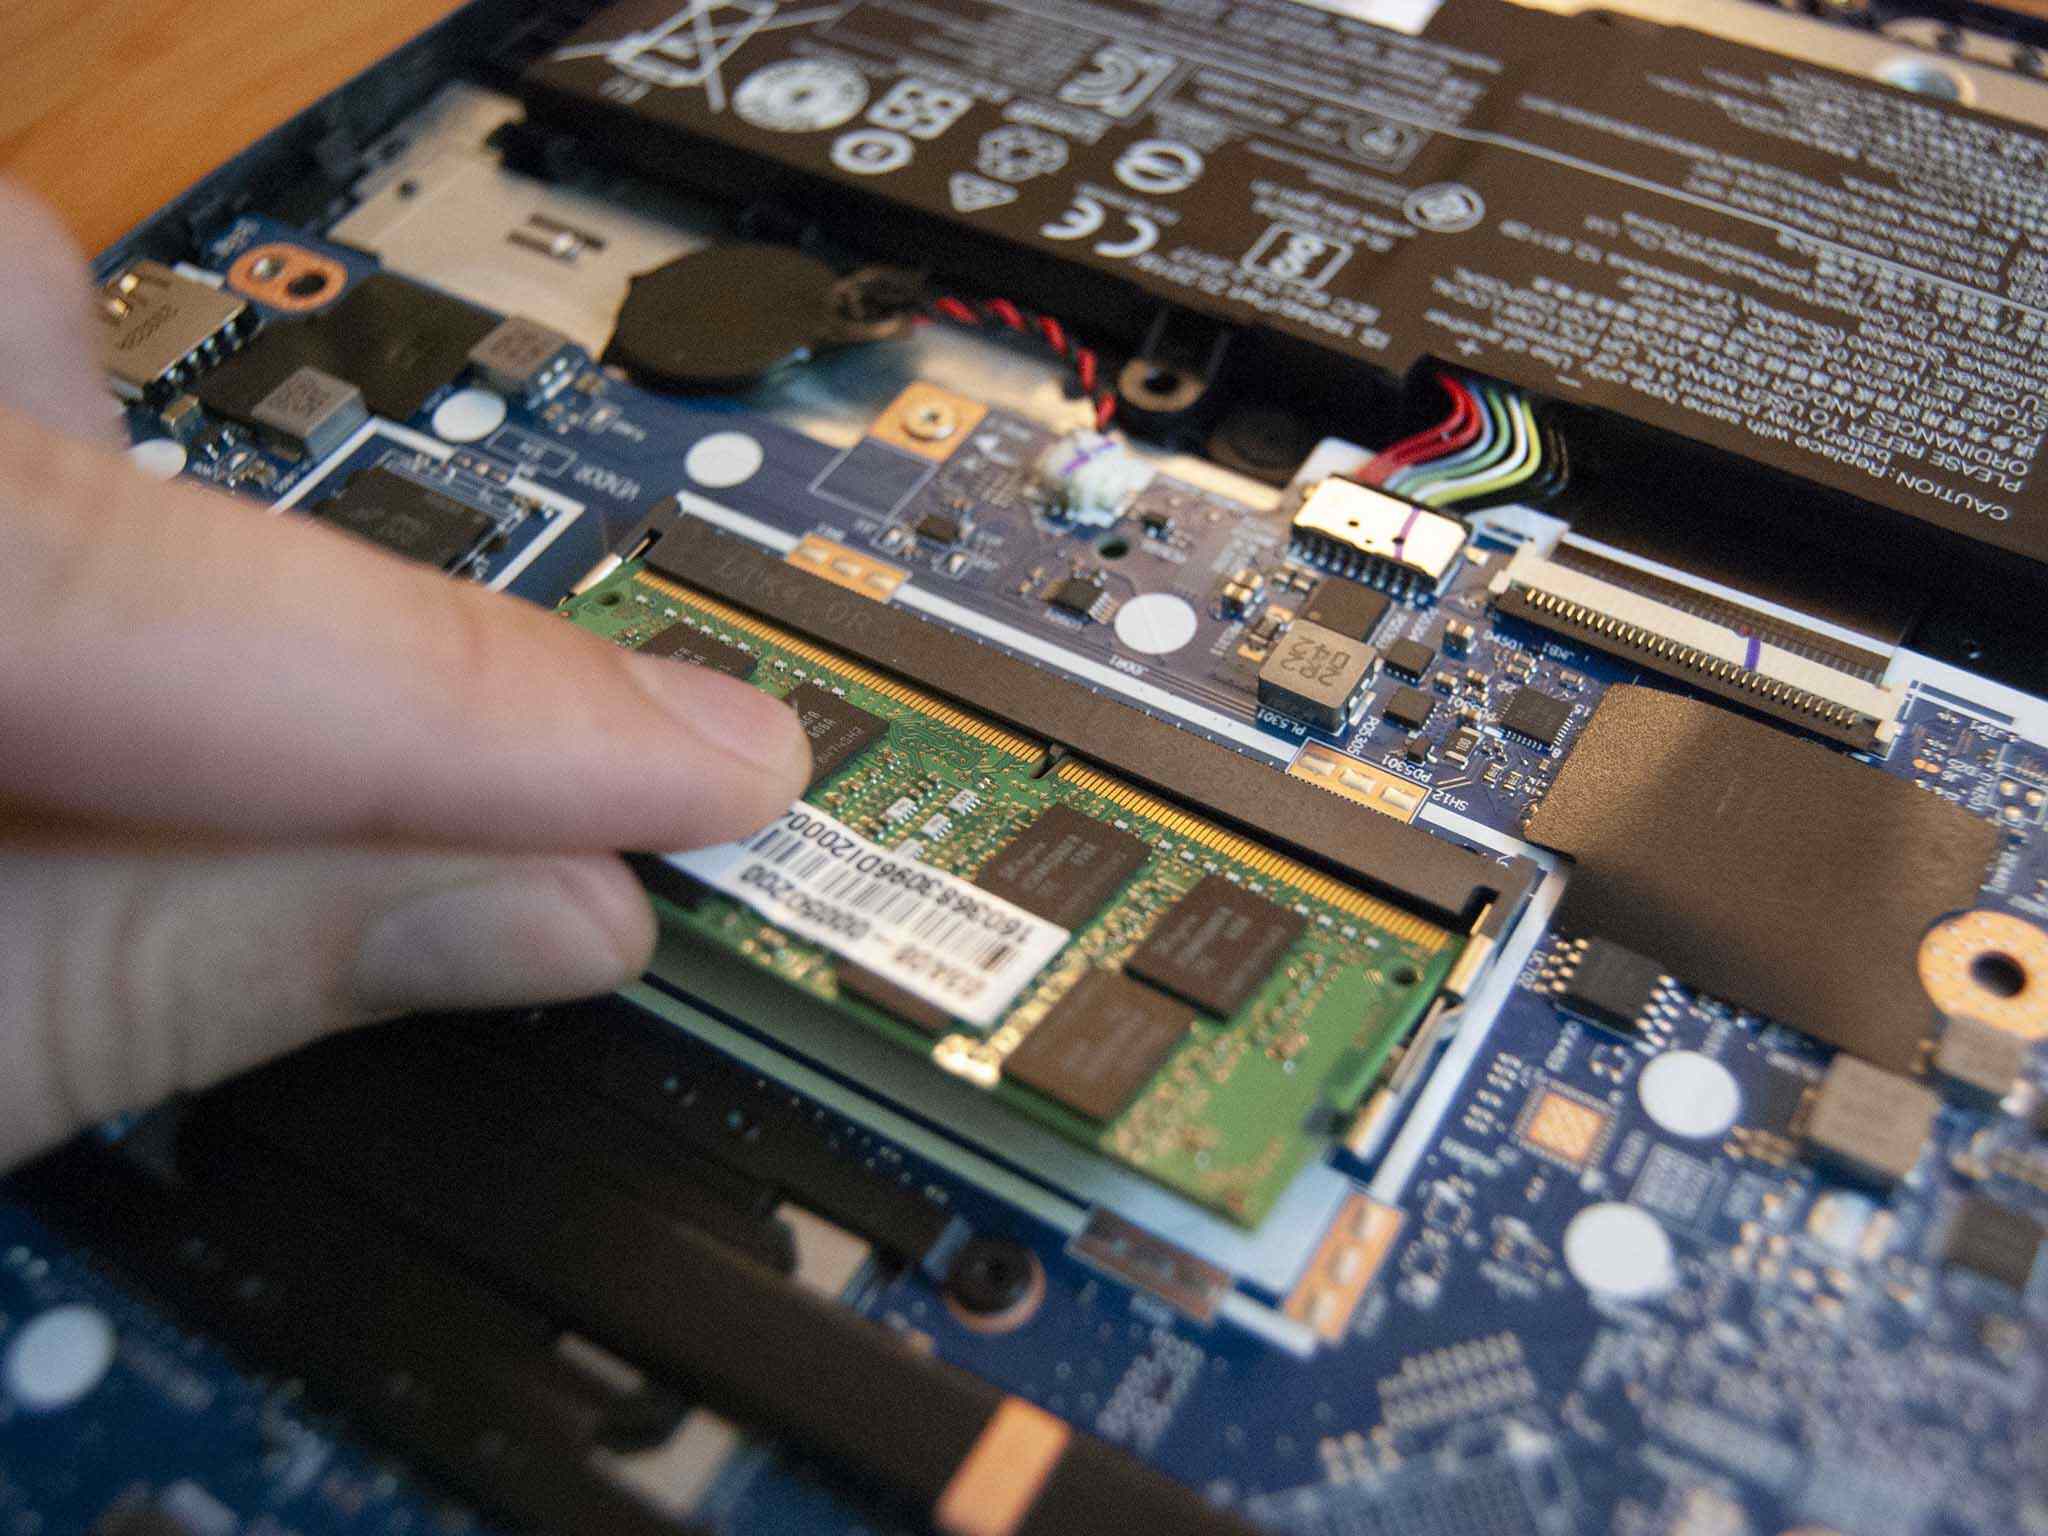
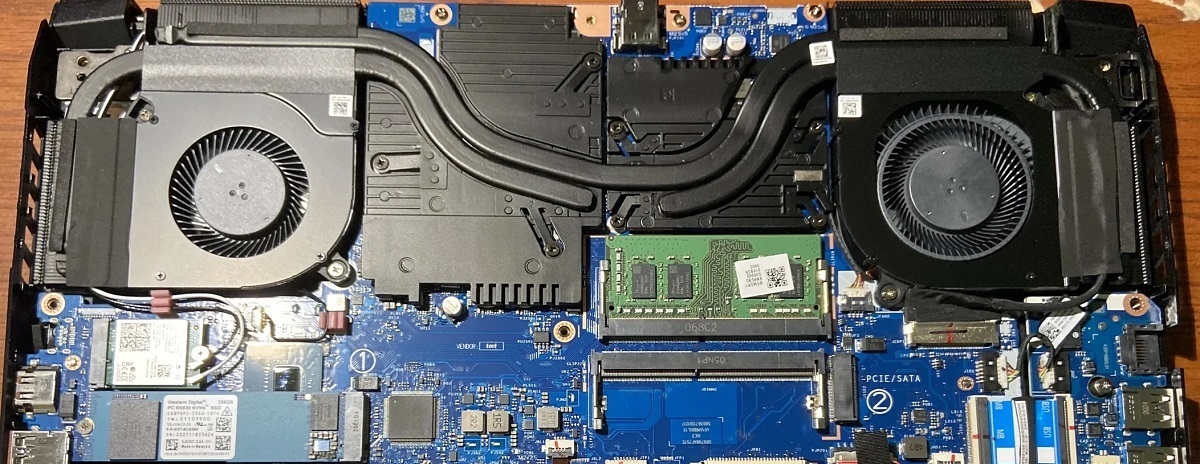
- Locate the RAM slots: Depending on your computer model and motherboard, the RAM slots are typically located near the CPU. Refer to your computer’s documentation for specific instructions on locating the RAM slots.
- Remove the faulty RAM: Gently push apart the tabs or remove any retaining clips on the sides of the RAM module. Once free, carefully remove the module from the slot by pulling it straight out. Take note of the orientation of the module for correct installation of the new RAM.
- Insert the new RAM module: Align the new RAM module with the empty slot by ensuring that the notch in the module matches the key in the slot. Press down firmly but gently until the module is fully seated. The retaining clips should automatically secure the module in place.
- Repeat for additional modules (if applicable): If you are replacing multiple RAM modules, repeat the removal and installation process for each module, ensuring correct orientation and alignment.
- Power on your computer: Once all the new RAM modules are installed, power on your computer and observe if the system recognizes the new RAM. You can verify this through the BIOS or the operating system’s system information tool.
- Test the new RAM: To ensure that the new RAM is functioning properly, run memory tests, such as Memtest86 or the built-in Windows Memory Diagnostic tool. This will confirm that the replacement RAM is error-free and working efficiently.
- Dispose of the faulty RAM modules: Safely dispose of the faulty RAM modules according to local regulations to prevent environmental harm. Consult your local recycling facilities or electronic waste collection centers for proper disposal methods.
Replacing faulty RAM is a simple process as long as you handle the modules with care and ensure compatibility with your system. If you are unsure about the replacement process, consider seeking assistance from a professional technician to avoid any possible damage to your computer.
By following these steps, you can successfully replace faulty RAM and restore optimal performance to your computer.
Conclusion
Checking if your RAM is working properly is a crucial step in maintaining the stability and performance of your computer. By being aware of the physical signs of failing RAM and utilizing software tools like Windows Memory Diagnostic, Memtest86, or Mac Memory Diagnostic, you can effectively assess the health of your RAM modules and identify any issues that need attention.
Interpreting the RAM test results and understanding the significance of error counts, types, locations, and severities is essential in diagnosing and resolving RAM-related problems. If faulty RAM is identified, replacing the defective modules with compatible ones is a straightforward process that can be accomplished by following a few simple steps.
Regularly checking your RAM and addressing any issues promptly can lead to improved system stability, optimized performance, data integrity, and long-term cost savings. It also provides peace of mind, knowing that your computer’s essential hardware component is functioning optimally.
Remember to take precautionary measures when handling RAM modules, power off your computer before making any changes, and dispose of the faulty RAM properly. If you encounter any difficulties or uncertainties during the process, it is recommended to seek professional assistance to ensure the best outcome.
With the knowledge and tools provided in this article, you now have the capability to check if your RAM is working, diagnose any potential issues, and take the necessary steps to resolve them. By investing time and effort in maintaining the health of your RAM, you can enjoy a smooth and efficient computing experience.