Introduction
Welcome to our guide on how to clean your power supply unit. Your power supply unit plays a crucial role in providing your computer with the necessary electrical power to function properly. Over time, dust, and dirt can accumulate within the power supply, leading to reduced performance, overheating, and even potential hardware damage.
Cleaning your power supply unit is an important maintenance routine that can help improve its longevity and ensure optimal performance. In this article, we will walk you through the step-by-step process of cleaning your power supply unit, from safely shutting down your computer to reassembling the unit after cleaning.
Before we begin, it’s important to note that working with the power supply unit requires caution and proper handling. Make sure to follow each step carefully and take any necessary precautions to protect yourself and your computer.
By the end of this guide, you will have the knowledge and confidence to clean your power supply unit effectively, thereby promoting the overall health and efficiency of your computer system.
Tools you will need
Before you begin cleaning your power supply unit, gather the following tools:
- Screwdriver: You’ll need a screwdriver to open your computer case and remove the power supply unit.
- Compressed air canister: This tool will allow you to blow away accumulated dust and debris without causing any damage.
- Soft-bristle brush: A soft-bristle brush is ideal for gently removing dust from hard-to-reach areas.
- Cotton swabs: These can be used for detailed cleaning in tight spaces or delicate components.
- Isopropyl alcohol: Isopropyl alcohol is an effective solution for cleaning connectors and removing stubborn grime.
- Lint-free cloth: Use a lint-free cloth to wipe down the exterior and interior of the power supply unit.
It’s important to ensure that the tools you use are clean and in good condition. This will help prevent any damage to your power supply unit or other computer components during the cleaning process.
By having these tools ready, you’ll be well-equipped to tackle the task of cleaning your power supply unit effectively and efficiently.
Precautions before cleaning
Before you start cleaning your power supply unit, it’s important to take a few precautions to ensure your safety and prevent any damage to your computer. Follow these steps before you begin:
- Turn off your computer: Make sure to shut down your computer properly and disconnect it from the power source. This will prevent any electrical shock or damage during the cleaning process.
- Ground yourself: Before opening your computer case, ground yourself by touching a metal surface. This will help discharge any static electricity and protect your computer’s sensitive components from being damaged by electrostatic discharge (ESD).
- Choose a clean and well-ventilated workspace: Find a clean and open area to work on your computer. Make sure there is ample ventilation to prevent the accumulation of dust particles in the air.
- Take note of connections and components: Before removing the power supply unit, take a moment to note the connections and components attached to it. This will make it easier to reassemble everything correctly after cleaning.
- Avoid excessive force: When handling the power supply unit, avoid applying excessive force or pressure. This can lead to damage to the unit or the motherboard.
- Don’t touch sensitive components: Avoid touching any sensitive components on the power supply unit or other parts of your computer. Static electricity can damage these components, so it’s best to handle them with care or avoid touching them altogether.
By taking these precautions, you’ll ensure a safe and smooth cleaning process, reducing the risk of damage to your equipment and minimizing the chances of accidents or mishaps.
Step 1: Shut down your computer and unplug the power supply
The first step in cleaning your power supply unit is to shut down your computer properly and disconnect the power supply.
- Save your work and close all open programs: Before powering off your computer, save any unsaved work and close all open programs. This will prevent data loss and ensure a smooth shutdown process.
- Shut down your computer: Click on the “Start” button on your computer’s desktop and select the “Shut Down” option from the menu. Allow the computer to shut down completely before proceeding.
- Unplug the power supply: Once your computer is fully shut down, unplug the power supply from the wall socket or surge protector. This will ensure that there is no electrical current running through the unit while you work on it.
It’s crucial to follow these steps to avoid any risk of electrical shock or damage to your computer components. By shutting down your computer and disconnecting the power supply, you ensure a safe working environment for cleaning.
Continue to the next step once you have successfully shut down your computer and unplugged the power supply.
Step 2: Open the computer case and locate the power supply unit
Now that your computer is shut down and the power supply is disconnected, it’s time to open the computer case and locate the power supply unit.
- Remove the computer case cover: Depending on the type of computer case you have, you may need to use a screwdriver to remove the screws holding the case cover in place. Carefully take off the case cover and set it aside.
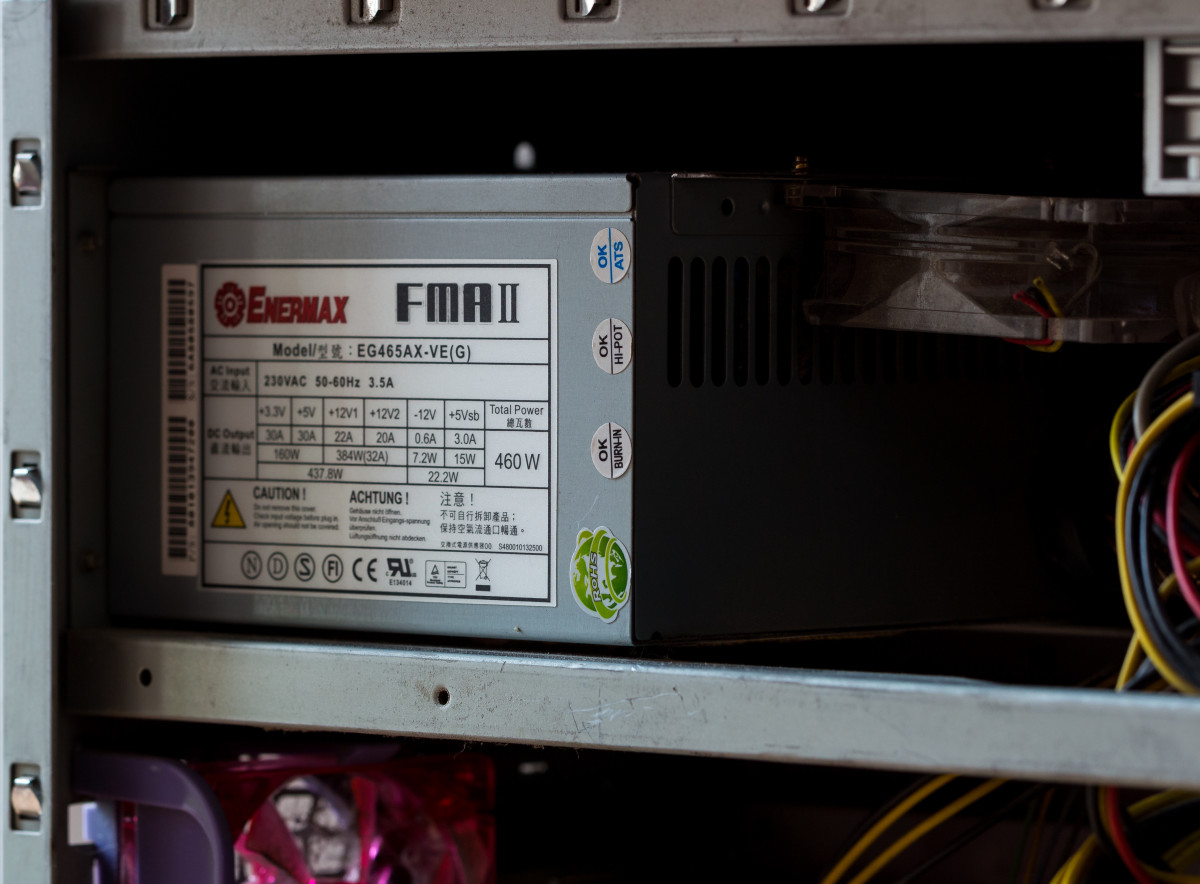
- Locate the power supply unit: Once the case cover is removed, you will see the interior of your computer. Look for the power supply unit. It is usually located at the top or bottom of the back panel of the case. It is a rectangular metal box with a fan on one end.
Take a moment to familiarize yourself with the power supply unit’s position and the cables connected to it. This will help you during the cleaning process and when it’s time to reassemble everything later.
Remember to handle the computer case and components with care to avoid any damage. Now that you have located the power supply unit, you are ready to move on to the next step.
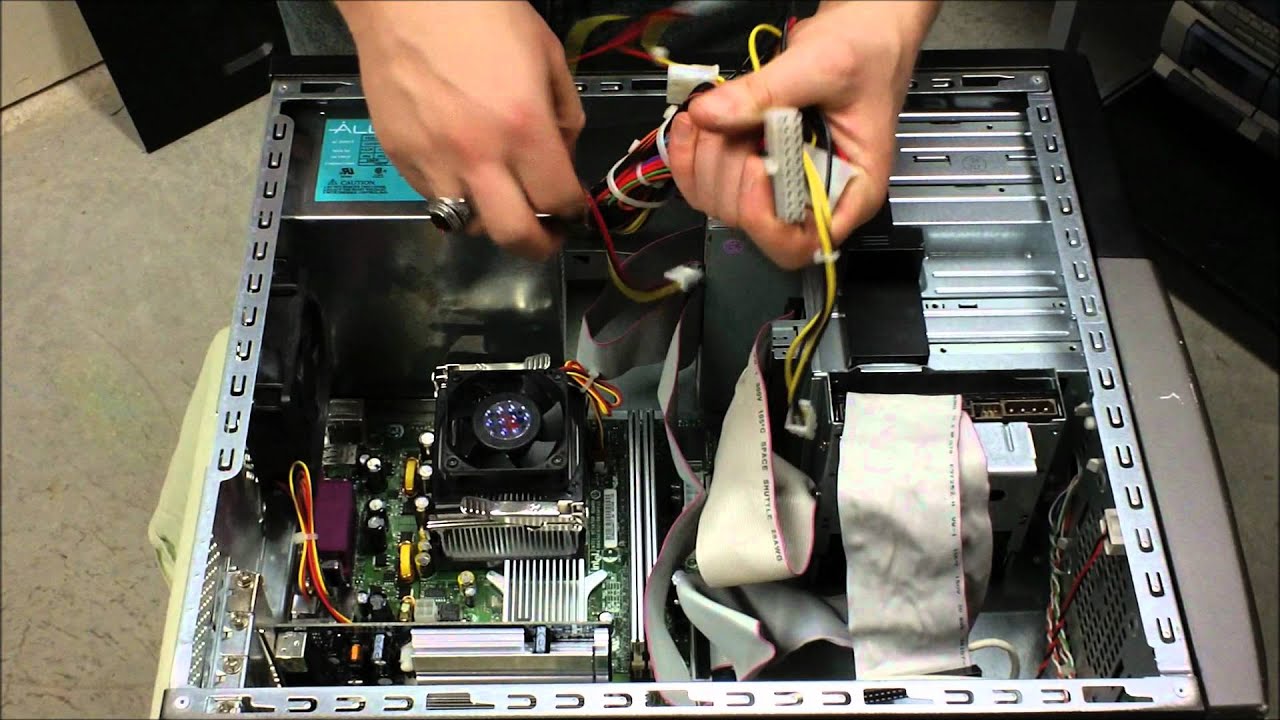
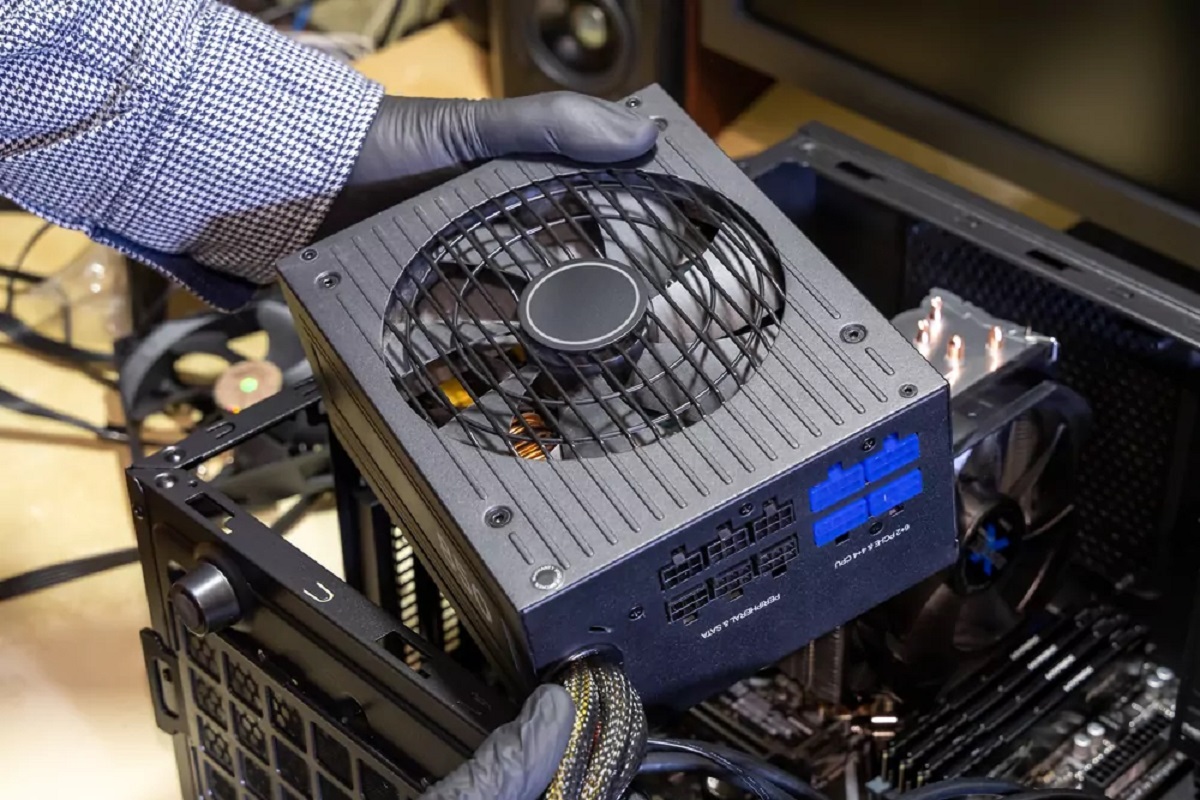
Step 3: Remove the power supply unit from the case
With the computer case open and the power supply unit located, it’s time to remove the power supply unit from the case for easy access and thorough cleaning.
- Disconnect the power supply cables: Start by carefully disconnecting the power supply cables connected to the various components of your computer. This includes the main power cable, SATA power connectors, and any other cables connected to the power supply unit.
- Remove the mounting screws: Look for the mounting screws that hold the power supply unit in place. There are usually four screws, one on each corner of the power supply unit. Use a screwdriver to remove these screws, keeping them in a safe place.
- Gently slide out the power supply unit: Once the screws are removed, gently slide out the power supply unit from its position within the case. Take care not to tug on any cables that may still be attached.
By removing the power supply unit from the case, you will have better access to clean both the exterior and interior of the unit thoroughly. Be cautious while handling the power supply unit to avoid any damage or accidental disconnection of cables.
Continue to the next step once you have successfully removed the power supply unit from the case.
Step 4: Clean the exterior of the power supply unit
Now that the power supply unit is removed from the case, it’s time to clean the exterior of the unit. This step will help remove dust, dirt, and any other debris that may have accumulated on the surface.
- Use compressed air: Start by using a can of compressed air to blow away any loose dust and debris from the exterior of the power supply unit. Be sure to direct the air towards the vents and fan areas to dislodge any trapped particles.
- Wipe with a lint-free cloth: Take a clean lint-free cloth and dampen it with a small amount of isopropyl alcohol. Gently wipe the exterior surfaces of the power supply unit to remove any stubborn grime or residue. Avoid using excessive moisture, as it may damage the unit.
- Focusing on the fan: Pay special attention to cleaning the fan blades and the surrounding area. Dust buildup on the fan can impede its operation and lead to overheating. Use a soft brush or a cotton swab to remove any dust or debris from the fan blades.
Ensure that the unit is completely dry before proceeding to the next step. This will prevent any damage to the internal components when you clean the interior of the power supply unit.
By cleaning the exterior of the power supply unit, you help maintain proper airflow and prevent overheating. A clean exterior also improves the overall aesthetic appeal of your computer.
Move on to the next step once you have successfully cleaned the exterior of the power supply unit.
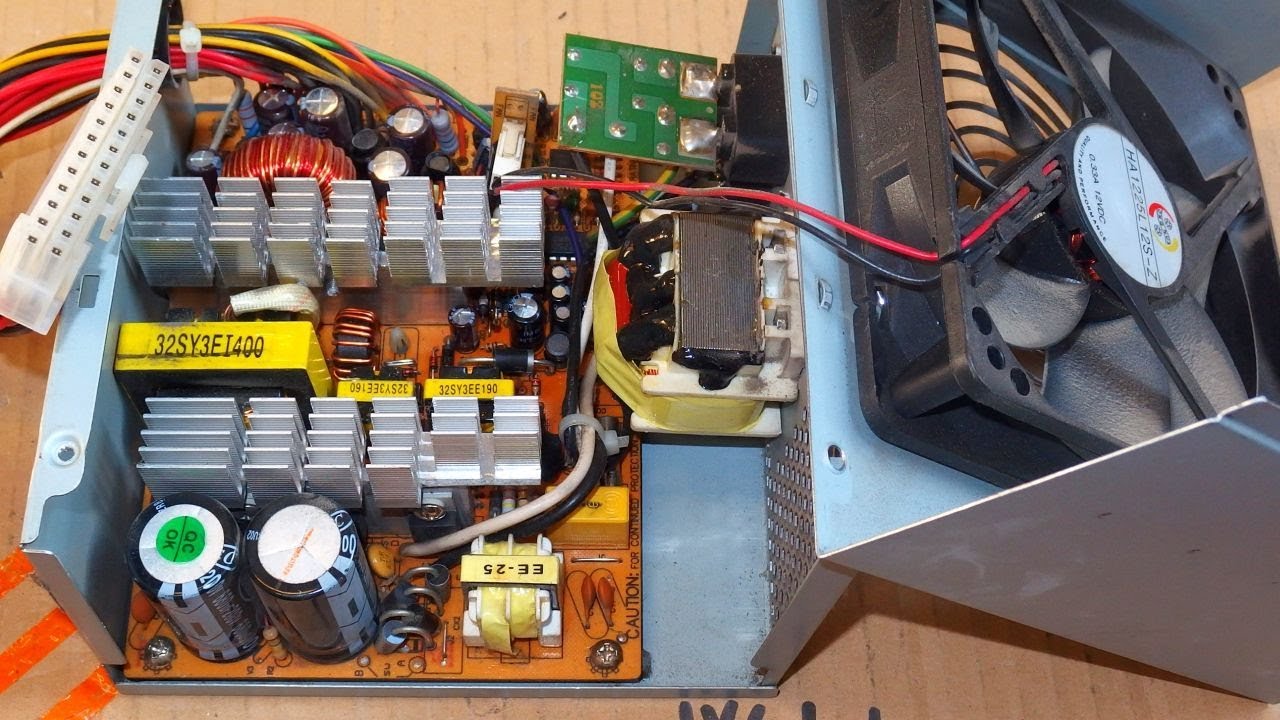
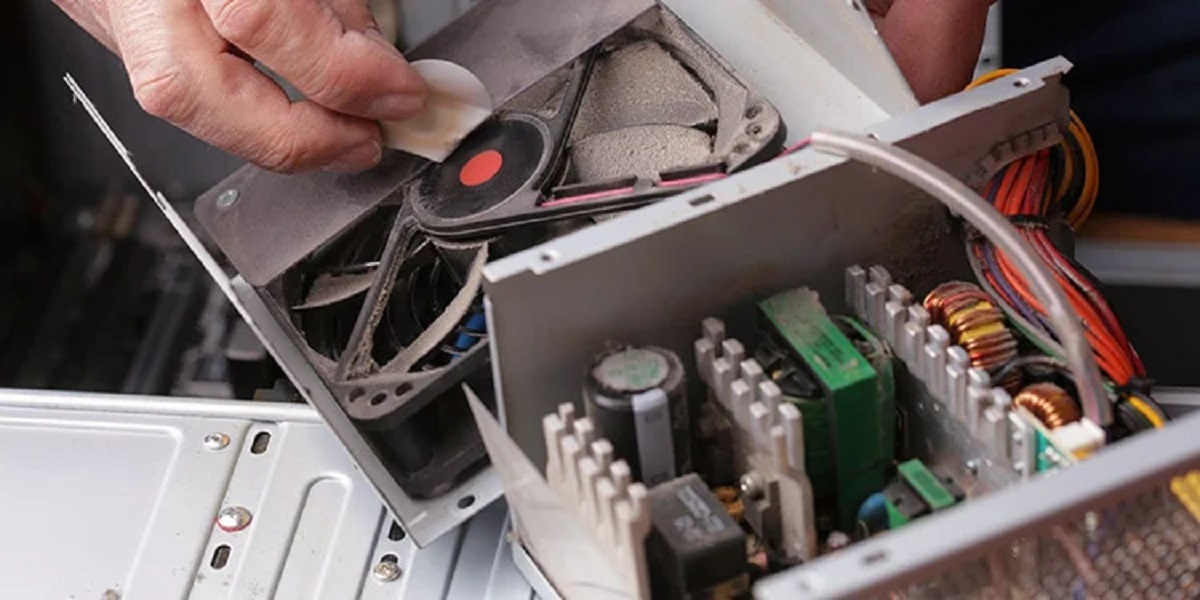
Step 5: Clean the interior of the power supply unit
Cleaning the interior of the power supply unit is crucial to remove dust and debris that may have accumulated on the components and could potentially cause overheating or other issues. Follow these steps to clean the interior of the power supply unit:
- Use compressed air: Start by using a can of compressed air to blow away any loose dust and debris from the interior of the power supply unit. Pay extra attention to the fan, heat sinks, and other visible components.
- Gently brush off residue: With a soft-bristle brush or a clean, dry cloth, gently brush off any remaining dust or residue from the components. Be careful not to apply excessive force or touch sensitive parts.
- Clean connectors: Dip a cotton swab in isopropyl alcohol and gently clean the connectors inside the power supply unit. This helps remove any dirt or grime that may affect the performance of the unit.
- Inspect the fan: Check the fan inside the power supply unit for any excessive dust or debris. If necessary, use a brush or cotton swab to clean off any buildup. Ensure that the fan spins freely and smoothly.
Remember to be gentle when cleaning the interior of the power supply unit. Avoid using any liquid cleaners other than isopropyl alcohol, as they may damage the components. Take your time to thoroughly clean each area, ensuring that all dust and debris are removed.
Once you are satisfied with the cleanliness of the interior, move on to the next step to reassemble the power supply unit and place it back in the computer case.
Step 6: Reassemble the power supply unit and place it back in the case
After cleaning the power supply unit, it’s time to reassemble it and place it back in the computer case. Follow these steps to ensure a proper reassembly:
- Align the power supply unit: Carefully align the power supply unit with the mounting holes inside the computer case. Ensure that the connectors and cables are in their correct positions.
- Secure the unit with mounting screws: Once aligned, use the screws you removed earlier to secure the power supply unit back into place. Tighten the screws firmly but avoid applying excessive force.
- Reconnect the power supply cables: Take the time to reconnect all the power supply cables to their respective components. Double-check that each connection is secure and in the correct orientation.
- Organize cables: Neatly organize and route the cables within the case to ensure proper airflow and prevent cable interference with fans or other components. Use cable ties or clips to secure and manage the cables.
- Close the computer case: Place the computer case cover back onto the case and secure it with the screws. Ensure that all edges align properly and there are no loose or protruding cables.
By following these steps, you can ensure that the power supply unit is properly reassembled and securely positioned within the computer case.
Once the power supply unit is reassembled and back in place, you are ready to move on to the final step of the process.
Step 7: Plug in the power supply and turn on your computer
With the power supply unit securely reassembled and back in the computer case, it’s time to plug it back in and turn on your computer. Follow these steps to complete the cleaning process:
- Plug in the power supply: Connect the power supply cable to the wall socket or surge protector and ensure a stable power source. Double-check that the power cable is securely inserted into the power supply unit.
- Check cable connections: Verify that all the necessary cables are properly connected to the power supply unit and other components inside the computer.
- Turn on the computer: Press the power button on your computer case to turn it on. Listen for the usual startup sounds and observe the fans to ensure proper functioning.
- Monitor your computer: Once your computer is powered on, monitor its operation closely. Ensure that the power supply unit is working efficiently and that your computer is running smoothly.
- Run tests if necessary: If you notice any abnormal behavior or issues with your computer after cleaning the power supply unit, consider running diagnostic tests or seeking professional assistance.
By following these steps, you can complete the cleaning process and ensure that your computer is up and running with a clean, properly functioning power supply unit.
Congratulations! You have successfully cleaned your power supply unit and taken steps to enhance the overall performance and longevity of your computer. Remember to conduct regular maintenance and cleaning to keep your power supply unit and computer running smoothly.
Additional tips for maintaining your power supply unit
Cleaning your power supply unit is just one aspect of maintaining its optimal performance. To further ensure the longevity and efficiency of your power supply, consider the following additional tips:
- Keep your computer in a clean environment: Dust and debris are primary culprits of power supply unit issues. Keep your computer in a dust-free environment to minimize the accumulation of particles inside the case.
- Regularly clean your computer case: In addition to cleaning the power supply unit, regularly clean the entire computer case, including the fans, vents, and filters. This will help prevent dust buildup and ensure proper airflow.
- Avoid overloading the power supply: Be mindful of the power requirements of your computer components. Ensure that the power supply unit’s wattage can handle the load to prevent strain or potential failure.
- Use a surge protector: Invest in a good-quality surge protector to safeguard your computer and power supply unit from electrical surges. Surge protectors help prevent damage caused by sudden power fluctuations.
- Monitor your computer’s temperature: Run temperature monitoring software to keep an eye on your computer’s internal temperatures. Excessive heat can affect the power supply unit’s efficiency and lifespan.
- Upgrade your power supply when necessary: As you add more power-hungry components or peripherals to your computer, consider upgrading to a higher-wattage power supply that can handle the increased demand.
Following these additional maintenance tips will help prolong the life of your power supply unit and ensure that it continues to deliver reliable and efficient power to your computer system.
By taking the time to maintain your power supply unit and implement these best practices, you can optimize the performance and reliability of your computer system as a whole.
Conclusion
Cleaning your power supply unit is an essential maintenance task that helps keep your computer system running smoothly and efficiently. By following the step-by-step guide outlined in this article, you can effectively clean your power supply unit and maintain its optimal performance.
Throughout the cleaning process, make sure to take necessary precautions to ensure your safety and protect your computer components. Shut down your computer, unplug the power supply, and work in a clean and well-ventilated environment. Using the proper tools and techniques, clean both the exterior and interior of the power supply unit, paying special attention to the fan and connectors.
Once you have completed the cleaning process, reassemble the power supply unit, reconnect all cables, and securely place it back in the computer case. Finally, plug in the power supply, turn on your computer, and monitor its operation to ensure everything is functioning properly.
Remember to incorporate additional tips for maintaining your power supply unit, such as keeping your computer environment clean, avoiding power overload, and monitoring temperatures. These practices will help prolong the life of your power supply unit and prevent potential issues in the long run.
By regularly cleaning and maintaining your power supply unit, you can ensure stable power delivery, prevent overheating, and extend the overall lifespan of your computer system. Incorporate these maintenance tasks into your routine to keep your computer performing at its best.
Take care of your power supply unit, and it will take care of you by providing reliable and efficient power to support your computing needs.