Introduction
Keeping your graphics card clean and well-maintained is essential for optimal performance and longevity. Over time, dust, dirt, and debris can accumulate on the cooling elements of your graphics card, causing it to overheat and potentially leading to performance issues, crashes, or even permanent damage.
Regularly cleaning your graphics card not only helps keep it running smoothly but also extends its lifespan, allowing you to enjoy your gaming or graphics-intensive tasks without any hindrances. However, cleaning your graphics card requires some precautions and the right tools to ensure you don’t inadvertently cause damage during the process.
By taking the time to properly clean your graphics card, you can improve its overall performance, prevent unnecessary overheating, and potentially avoid expensive repairs or replacements. In this guide, we will walk you through the process of cleaning your graphics card, step by step.
Before we delve into the details, it’s important to note that cleaning your graphics card may void its warranty. If your graphics card is still under warranty, it’s advisable to check the manufacturer’s guidelines or contact their support to determine if cleaning it yourself will affect the warranty status.
Additionally, it’s important to handle the graphics card with care during the cleaning process. Avoid using excessive force and make sure to ground yourself to prevent static electricity buildup, as this can damage sensitive components on the graphics card.
Now that you understand the importance of cleaning your graphics card and the precautions involved, let’s move on to the necessary tools required for the cleaning process.
Understanding the Importance of Cleaning Your Graphics Card
As a crucial component in your computer system, the graphics card is responsible for rendering and displaying high-quality images, videos, and games. Over time, the cooling elements of the graphics card can become clogged with dust, hindering their ability to dissipate heat effectively. This buildup of debris can lead to increased temperatures, reduced performance, and even system instability.
One of the primary reasons for cleaning your graphics card is to ensure proper heat management. When the cooling fins, fans, and heat sinks are covered in dust and dirt, heat transfer is impeded, resulting in higher operating temperatures. Prolonged exposure to high temperatures can cause the graphics card to throttle, reducing its performance to prevent overheating. This can lead to dropped frame rates, stuttering, and overall decreased gaming or graphic-intensive experience.
Cleaning your graphics card can also help prevent unnecessary wear and tear. When the cooling system is clogged, the card may have to work harder to maintain a desirable temperature. Over time, this additional strain can contribute to the degradation of the graphics card’s components, shortening its lifespan and potentially causing irreversible damage.
In addition to performance issues, a dirty graphics card can also impact your system’s overall stability. Increased temperatures can lead to system crashes, freezes, or unexpected shutdowns. By keeping your graphics card clean, you can minimize the risk of encountering these frustrating issues and maintain a stable and reliable computing experience.
Furthermore, regular cleaning of your graphics card is especially crucial for those who overclock their GPUs. Overclocking involves increasing the clock speeds and voltages of the graphics card to achieve higher performance. However, overclocking can generate more heat. Therefore, keeping the cooling system clean and running efficiently is essential to prevent overheating and potentially damaging the graphics card when overclocking.
Overall, understanding the importance of cleaning your graphics card is vital for maximizing its performance, extending its lifespan, and ensuring the stability of your computer system. In the next section, we will discuss the precautions you need to take before proceeding with the cleaning process.
Precautions Before Cleaning Your Graphics Card
Before you begin the process of cleaning your graphics card, there are several precautions you need to take to ensure the safety of both yourself and your hardware. By following these precautions, you can minimize the risk of damaging your graphics card and prevent accidents during the cleaning process.
First and foremost, it’s crucial to power off your computer and disconnect it from the power source. This not only ensures your safety but also prevents any potential damage to the graphics card or other components due to electric shock or accidental power surges.
Next, it’s important to ground yourself to eliminate any static electricity that could harm sensitive electronic components on the graphics card. You can do this by touching a grounded metal surface or by wearing an anti-static wrist strap during the cleaning process. By grounding yourself, you reduce the risk of static discharge damaging your graphics card.
Additionally, handle the graphics card with extreme care, avoiding any unnecessary force during the cleaning process. Use gentle and deliberate movements to avoid bending or damaging any delicate components on the card.
It’s also recommended to wear an antistatic glove while handling the graphics card. This further prevents any potential static discharge from your body that could damage the card.
If your graphics card is still under warranty, it’s essential to check the manufacturer’s guidelines before cleaning it yourself. Some warranties may become void if you perform any maintenance tasks on the card, so be sure to understand the terms and conditions to avoid any complications.
Lastly, have a clean and well-lit workspace to carry out the cleaning procedure. This will help you identify any potential issues and ensure that you don’t misplace any screws or small components during disassembly.
By adhering to these precautions, you can minimize the risk of accidents and damage to your graphics card. Now that you’re aware of the necessary precautions, let’s move on to the tools that you’ll need for the cleaning process.
Tools Required for Cleaning Your Graphics Card
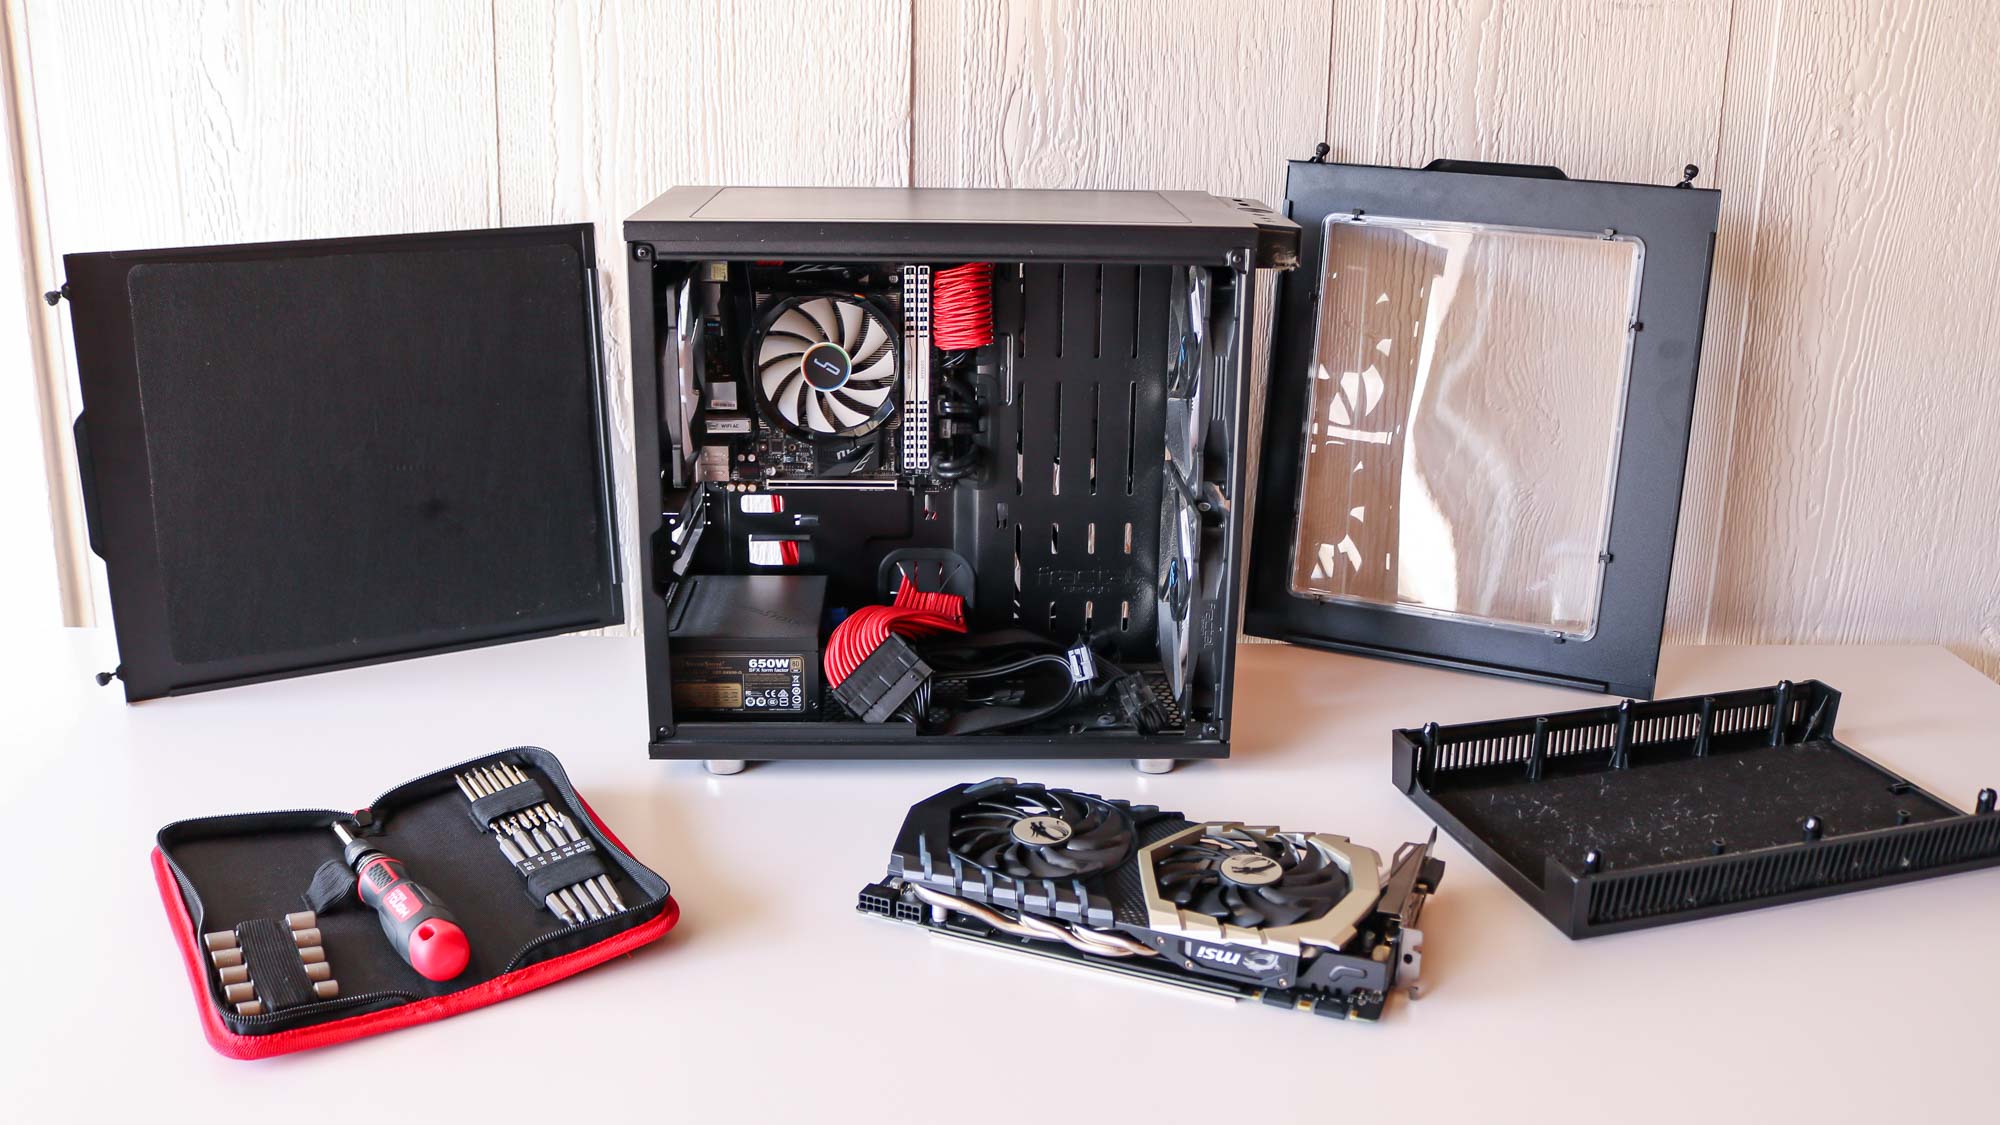
Before you begin cleaning your graphics card, it’s important to gather the necessary tools to ensure a smooth and effective cleaning process. These tools will help you safely disassemble and clean your graphics card without causing any damage.
Here are the essential tools you’ll need:
- Screwdriver: A small Phillips screwdriver is typically required to remove the screws that secure the graphics card to your computer’s motherboard or the GPU heatsink.
- Compressed Air Canister: An air canister or air compressor with a nozzle attachment is essential for blowing away dust and debris from the graphics card and its cooling system. Make sure to use a canister specially designed for electronics to prevent the release of moisture or harmful chemicals.
- Cleaning Brush: A soft-bristled brush or an antistatic brush can help remove dust and debris from hard-to-reach areas, such as between the cooling fins and fan blades. Avoid using abrasive brushes that can potentially damage delicate components.
- Isopropyl Alcohol: Isopropyl alcohol, also known as rubbing alcohol, is an effective solvent for removing thermal paste and other stubborn residues from the GPU and heatsink. Use a high concentration (90% or higher) for best results.
- Lint-Free Cloth or Microfiber Cloth: A lint-free cloth or microfiber cloth is ideal for wiping off excess thermal paste, cleaning the GPU and heatsink surfaces, and ensuring a clean and polished finish.
- Plastic Container: A small plastic container or tray can be useful for holding and organizing the screws and small components that you remove during disassembly.
It’s important to use these tools with care and follow the instructions outlined in the next section to prevent any damage to your graphics card.
Now that you’ve gathered the necessary tools, let’s proceed to the step-by-step guide on how to clean your graphics card properly.
Step-by-Step Guide to Cleaning Your Graphics Card
Cleaning your graphics card may seem daunting, but by following a step-by-step guide, you can safely and effectively clean it without any issues. Here’s a breakdown of the process:
- Power off your computer and disconnect it from the power source. This ensures your safety and prevents any potential damage due to electric shock.
- Ground yourself by touching a grounded metal surface or wearing an anti-static wrist strap. This eliminates any static electricity that could harm sensitive electronic components on the graphics card.
- Locate and remove the screws that secure the graphics card to your computer’s motherboard or the GPU heatsink. Use a small Phillips screwdriver for this step and carefully set aside the screws in a plastic container.
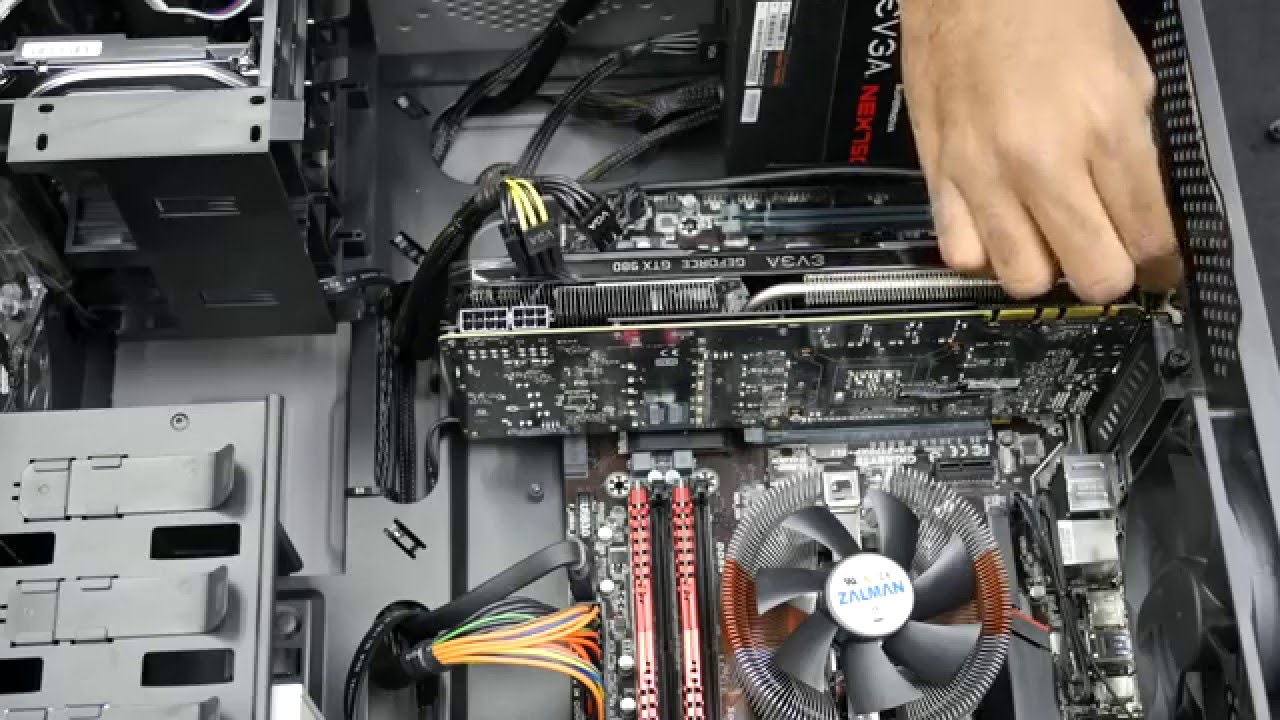
- Gently detach the graphics card from the motherboard or heatsink, being mindful of any connectors or cables that may be attached. Slowly lift the card to avoid any unnecessary force or damage.
- Use a can of compressed air or an air compressor with a nozzle attachment to blow away dust and debris from the graphics card and its cooling system. Pay attention to the cooling fins, fan blades, and other areas where dust might accumulate.
- Take a soft-bristled brush or an antistatic brush and gently remove any remaining dust and debris from hard-to-reach areas. Be careful not to apply too much pressure or cause any damage to the components.
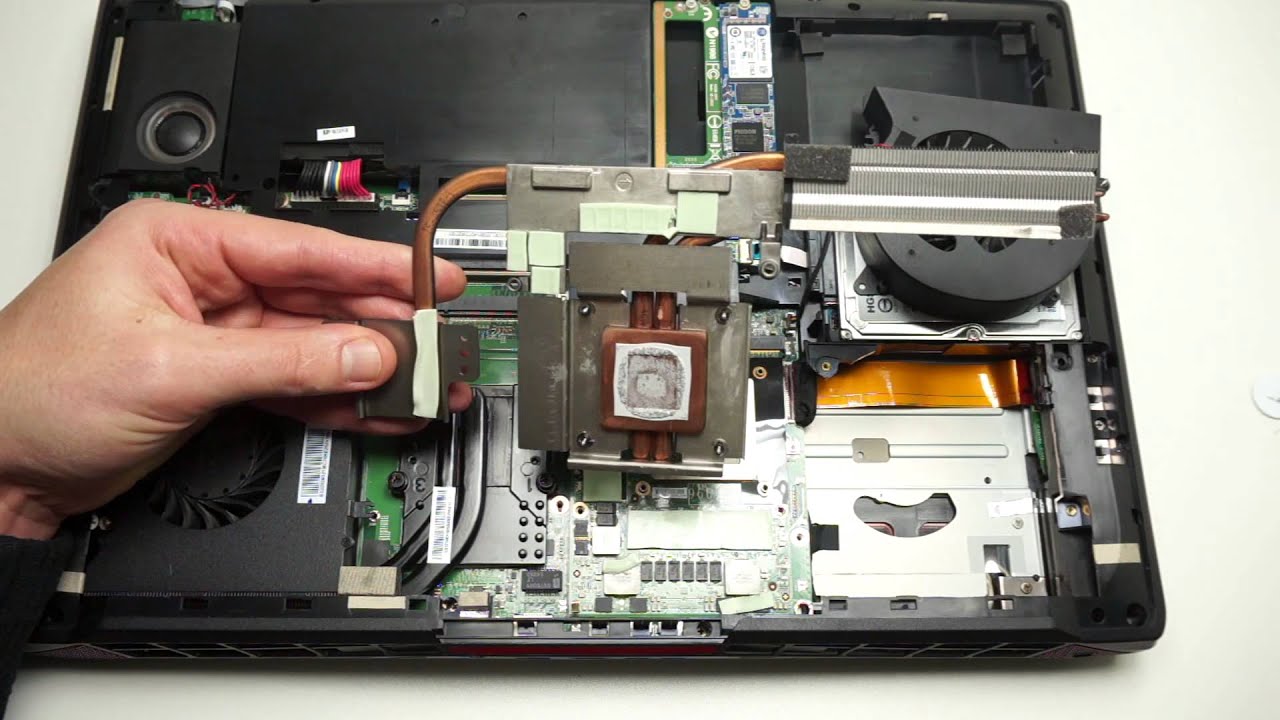
- If there is thermal paste on the GPU and heatsink, use isopropyl alcohol and a lint-free cloth or microfiber cloth to carefully remove it. Apply a small amount of isopropyl alcohol to the cloth and gently wipe the surfaces until they’re clean. Allow the alcohol to evaporate completely before reassembling.
- Inspect the graphics card for any other components that may need cleaning. Clean them using the appropriate tools and methods, ensuring a thorough and meticulous approach.
- Once everything is clean and dry, reattach the graphics card to the motherboard or heatsink. Make sure to properly align the connectors and attach any necessary cables or connectors.
- Secure the graphics card in place by reinstalling the screws that you previously removed. Ensure they are tightened appropriately but not overly tightened to avoid damage.
Following these steps will help you clean your graphics card effectively and safely. Remember to take your time and exercise caution during the process. If you’re unsure about any step, it’s always best to consult the manufacturer’s documentation or seek professional assistance.
Now that your graphics card is clean, it’s important to ensure proper ventilation and cleanliness to maintain its performance. We’ll discuss this in the next section.
Ensuring Proper Ventilation and Cleanliness After Cleaning Your Graphics Card
After you have successfully cleaned your graphics card, it’s crucial to ensure that proper ventilation and cleanliness are maintained to optimize its performance and prevent dust accumulation. Here are some steps to follow:
- Reinstall the graphics card in its respective slot with care, ensuring that it is securely seated in place. This ensures proper contact with the motherboard and allows for efficient heat dissipation.
- Check the airflow inside your computer case. Ensure that all fans, including the graphics card fan, CPU fan, and case fans, are clean and functioning properly. If needed, use compressed air to remove any dust buildup on the fans and ensure unrestricted airflow.
- Regularly clean the inside of your computer case to prevent dust from accumulating on the graphics card and other components. Use compressed air to blow away dust from hard-to-reach areas and wipe surfaces with a lint-free cloth or microfiber cloth.
- Consider installing additional case fans or upgrading your existing fans to improve airflow and cooling efficiency. Proper ventilation is crucial in maintaining the optimal operating temperature of your graphics card.
- Monitor the temperature of your graphics card using software utilities or monitoring tools. Keep an eye on the temperatures during gaming or other graphics-intensive tasks to ensure they stay within safe limits. If temperatures consistently run high, it may indicate an issue with the cooling system that needs further attention.
- Regularly check and replace thermal paste on the graphics card. Over time, the thermal paste can dry out or lose its effectiveness, hindering heat transfer. Follow the manufacturer’s guidelines on how often you should replace the thermal paste.
- Keep your computer and the area around it clean and dust-free. This helps prevent external dust from being drawn into your computer case and settling on the graphics card and other components.
By following these steps, you can ensure that your graphics card has proper airflow, remains clean, and operates at optimal temperatures. Regular maintenance and cleanliness will go a long way in prolonging the lifespan of your graphics card and enhancing its performance.
Now that you understand the importance of maintaining proper ventilation and cleanliness, let’s conclude this guide.
Conclusion
Cleaning your graphics card is an essential maintenance task that helps optimize its performance, extend its lifespan, and ensure the stability of your computer system. By regularly removing dust and debris from the cooling elements and ensuring proper ventilation, you can enjoy a smoother gaming experience, prevent overheating, and avoid potential system crashes.
In this guide, we discussed the importance of cleaning your graphics card and the precautions to take before beginning the cleaning process. We also outlined the tools needed and provided a step-by-step guide to help you clean your graphics card effectively. Additionally, we highlighted the significance of maintaining proper ventilation and cleanliness after cleaning to optimize performance and prevent dust buildup.
Remember, when cleaning your graphics card, always follow manufacturer guidelines, take necessary precautions, and handle components with care. If you are unsure about any step, it is advisable to seek professional assistance to avoid any damage or voiding of warranty.
Taking the time to clean your graphics card regularly will not only ensure optimal performance but also potentially save you from costly repairs or replacements down the line. By keeping your graphics card clean and well-maintained, you can continue to enjoy the best possible gaming or graphics-intensive experience.
So, what are you waiting for? Get started on cleaning your graphics card and unlock its full potential!