Introduction
Our smartphones have become an essential part of our lives, and Android phones are no exception. We rely on them for communication, entertainment, and productivity. However, as we use our phones daily, they can accumulate dirt, grime, and unnecessary clutter, which can impact their performance and overall user experience. That’s why it’s important to regularly clean your Android phone and ensure it stays in optimal condition.
Keeping your Android phone clean involves more than just wiping the screen with a cloth. It also entails clearing out storage, removing temporary files, cleaning the charging port, and much more. Fortunately, cleaning your Android phone doesn’t have to be a daunting task. With a bit of knowledge and some simple tools, you can easily maintain a clean and efficient device.
In this article, we will guide you through the process of cleaning your Android phone, inside and out. Whether you have a brand-new phone or one that has seen better days, these cleaning tips and tricks will help you optimize its performance and prolong its lifespan. From cleaning the exterior to clearing out unnecessary files and data, we will cover all aspects of Android phone cleaning, ensuring that your device functions smoothly and remains in pristine condition.
Why do you need to clean your Android phone?
Your Android phone is a powerhouse of technological innovation, but it is also a magnet for dirt, dust, and bacteria. Cleaning your Android phone regularly is crucial for several reasons:
1. Improved Performance: Over time, your Android phone can accumulate unnecessary files, cache data, and temporary files. These can slow down your device and impact its performance. By cleaning out these unwanted files, you can free up storage space and ensure smooth operation.
2. Extended Battery Life: Unused apps running in the background, excessive notifications, and unoptimized settings can drain your Android phone’s battery quickly. By cleaning up your phone and optimizing its settings, you can extend your battery life and enjoy more usage time between charges.
3. Enhanced Storage Space: With the increasing number of apps, photos, videos, and documents we store on our Android phones, storage space can quickly become limited. By regularly removing unnecessary files, clearing app caches, and deleting unused apps, you can free up valuable storage space and store more of what matters to you.
4. Reduced Risk of Malware: Malicious software can find its way onto your Android phone and compromise your privacy and security. By keeping your phone clean and up-to-date, you minimize the risk of malware and keep your personal information safe.
5. Improved Camera Quality: Dust, smudges, and fingerprints on your phone’s camera lenses can negatively impact the quality of your photos and videos. By keeping them clean, you ensure that your memories are captured in the best possible way.
6. Better Hygiene: Our hands can transfer a significant amount of bacteria onto our phones. Regularly cleaning your phone helps maintain proper hygiene, reducing the risk of transferring bacteria to your face or causing potential skin irritations.
Considering these reasons, it is clear that cleaning your Android phone is essential for its longevity, performance, and your overall user experience. By investing a little time in regular maintenance, you can ensure that your phone remains a reliable and enjoyable companion for years to come.
Precautions before cleaning your Android phone
Before diving into the cleaning process, there are a few important precautions to keep in mind to ensure the safety of your Android phone:
1. Power Off Your Phone: Before cleaning your Android phone, always power it off to avoid any accidental damage or input while you are cleaning the device. This will also prevent any electrical mishaps.
2. Remove the Case and Accessories: If your Android phone has a protective case, remove it before cleaning. This allows you to clean both the phone and the case separately. Also, remove any attached accessories such as screen protectors or pop sockets.
3. Use Gentle Cleaning Solutions: When cleaning the screen and exterior of your Android phone, avoid using harsh cleaning agents or abrasive materials like paper towels. Instead, use a soft microfiber cloth slightly dampened with water or a mild cleaning solution specifically designed for electronic devices.
4. Avoid Excessive Moisture: While it’s important to clean your phone, excessive moisture can damage the internal components. Do not pour liquids directly onto your phone or submerge it in water. Use minimal amounts of liquid on the cloth and ensure it is wrung out well.
5. Be Careful Around Ports and Openings: When cleaning the charging port, headphone jack, or speakers, be gentle and avoid inserting anything sharp or metallic that could cause damage. Use canned air or a small soft-bristle brush to remove any debris from these areas.
6. Protect the Screen: If your Android phone has a tempered glass screen protector, be cautious when cleaning it to avoid scratching the screen. Use a gentle touch and a soft microfiber cloth to remove dirt and fingerprints. If necessary, you can use a screen cleaning solution specifically made for touchscreen devices.
7. Avoid Using Excessive Force: While cleaning the exterior, screen, and camera lenses, avoid applying excessive pressure to prevent any damage or scratches. A gentle touch with the appropriate cleaning tools will suffice.
By following these precautions, you can ensure that your cleaning process is safe and effective, minimizing any potential risks or damages to your Android phone. Taking the time to prepare and protect your device will enhance your cleaning experience and contribute to its overall longevity.
Cleaning the exterior of your Android phone
The exterior of your Android phone can accumulate dirt, fingerprints, and smudges, making it look less appealing and hygienic. Here’s how you can effectively clean the exterior:
1. Power Off Your Phone: Before cleaning the exterior of your Android phone, make sure to power it off and remove any accessories or cases for a thorough clean.
2. Use a Soft Cloth: Start by using a soft, lint-free cloth, such as a microfiber cloth, to wipe away any visible dirt or dust from the phone’s surface. Gently wipe in a circular motion to remove smudges and fingerprints. You can slightly dampen the cloth with water for stubborn marks, but make sure it is not too wet.
3. Avoid Harsh Chemicals: Avoid using harsh chemicals or cleaning agents like alcohol, ammonia, or bleach, as they can damage the phone’s finish or screen coating. Stick to mild cleaning solutions or water for regular cleaning.
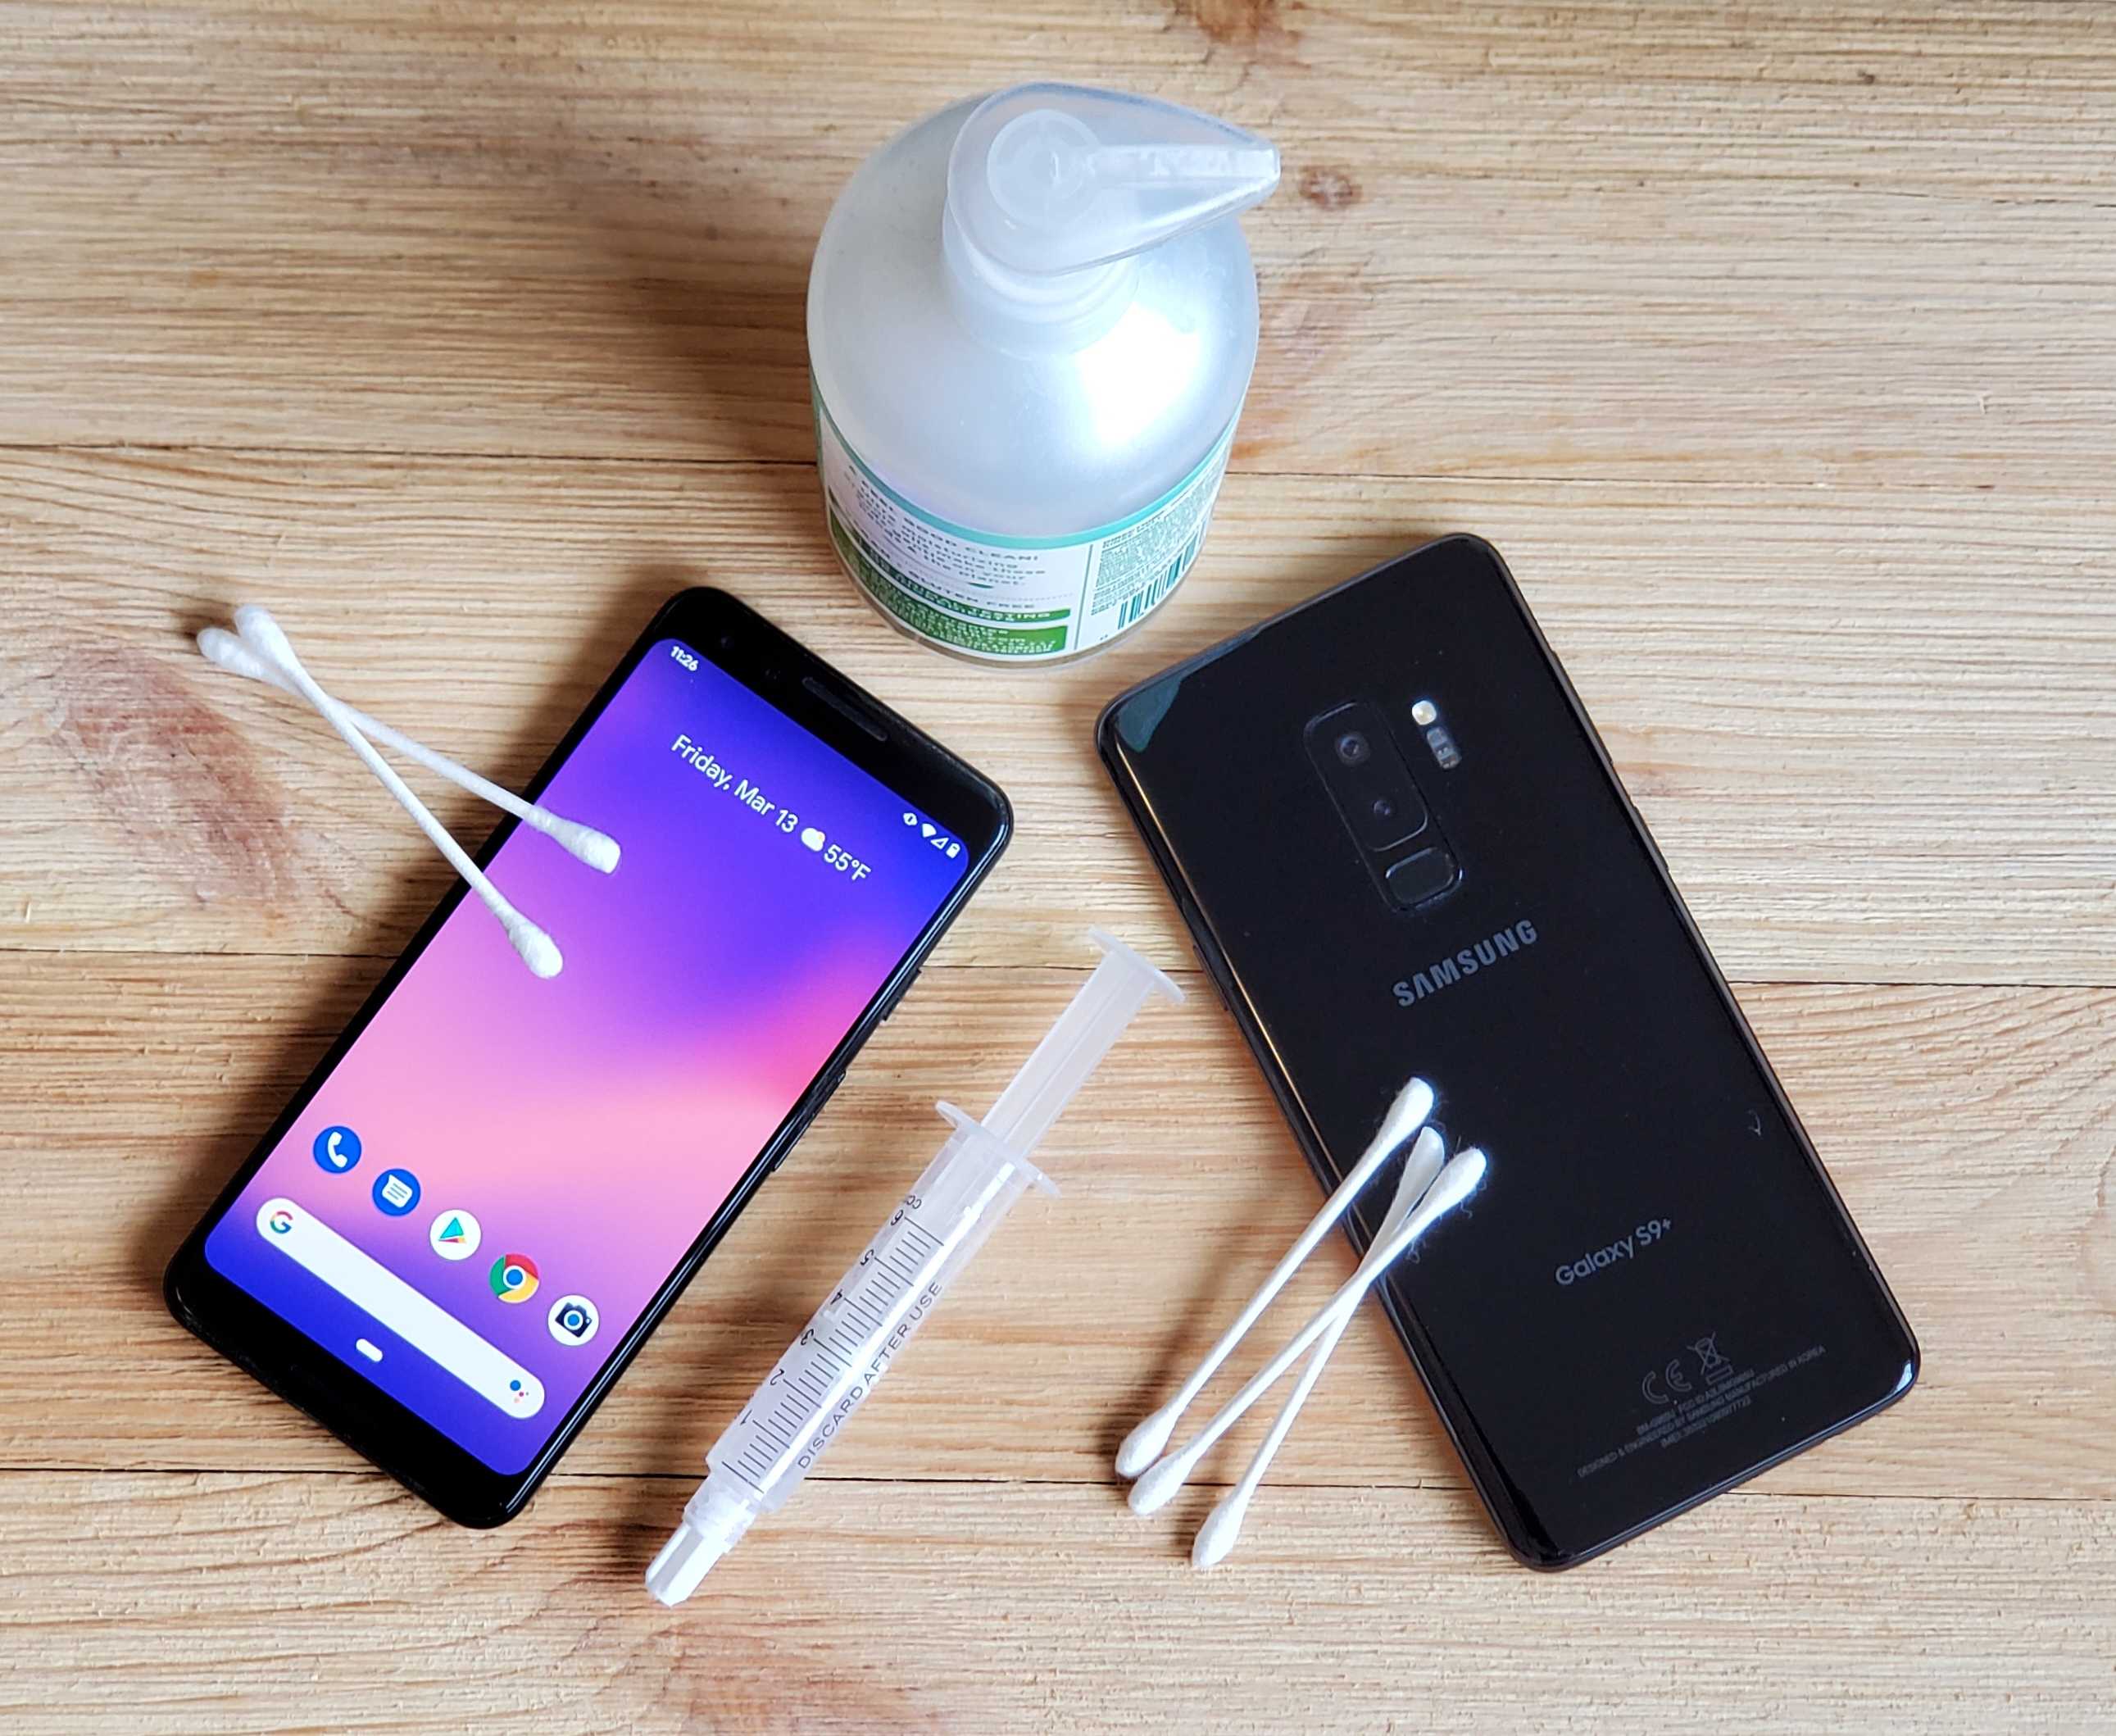
4. Pay Attention to the Buttons and Ports: Use a cotton swab or a soft-bristled brush to clean the hard-to-reach areas around the buttons, speakers, charging port, and headphone jack. Be careful not to get any liquid or debris inside these openings.
5. Clean the Back Cover: If your Android phone has a removable back cover, remove it and gently wipe it with a clean cloth. In case the cover is made of a different material, follow the manufacturer’s instructions for proper cleaning methods.
6. Sanitize with Disinfectant Wipes: If you want to sanitize the exterior of your phone, use disinfectant wipes that are safe for electronic devices. Make sure the wipe is not dripping wet and avoid excessive moisture. Carefully wipe the entire surface of the phone, including the edges and corners.
7. Dry the Phone Thoroughly: After cleaning the exterior, allow the phone to air dry or use a clean, dry cloth to remove any excess moisture. Avoid turning on the phone until it is completely dry to prevent any damage.
By following these steps, you can keep the exterior of your Android phone clean and free from dust, fingerprints, and germs. Regular cleaning not only improves the appearance of your device but also contributes to its overall hygiene and longevity.
Cleaning the screen of your Android phone
The screen of your Android phone is one of the most important and frequently touched components. It can quickly accumulate fingerprints, smudges, and dirt, affecting both its appearance and functionality. Follow these steps to effectively clean the screen of your Android phone:
1. Turn Off Your Phone: Before cleaning the screen, make sure your Android phone is powered off. This will allow you to see the smudges and dirt more clearly and prevent any accidental input.
2. Use a Soft, Lint-free Cloth: Start by using a clean microfiber cloth—a cloth designed specifically for electronics is ideal. Gently wipe the screen in a circular motion to remove any fingerprints or smudges. Avoid using rough materials like paper towels, as they can leave scratches behind.
3. Dampen the Cloth: If there are stubborn marks on the screen, slightly dampen the corner of the cloth with water. Do not spray water directly onto the screen, as excessive moisture can damage the phone. Wring out the cloth well to ensure it is only slightly damp.
4. Avoid Using Harsh Chemicals: It’s important to avoid using harsh chemicals like alcohol, ammonia, or abrasive cleaners on the screen of your Android phone. These substances can damage the screen coating and affect touch sensitivity. Stick to mild cleaning solutions specifically designed for electronic screens, if necessary.
5. Focus on Problem Areas: Pay extra attention to areas with visible smudges or fingerprints. Gently apply pressure and repeat the wiping motion until the marks are removed. Avoid pressing too hard, as excessive force can damage the screen.
6. Remove Stubborn Stains: If there are stubborn stains on the screen that cannot be removed with water alone, you can use a small amount of isopropyl alcohol (70% concentration or lower) on the cloth. Moisten a corner of the cloth and carefully wipe the affected area, being cautious not to saturate the screen with excessive liquid.
7. Dry the Screen: After cleaning, use a dry part of the cloth or a separate dry cloth to remove any moisture from the screen. Allow the screen to air dry completely before turning on your Android phone.
By following these steps, you can keep the screen of your Android phone clean and clear, ensuring optimal visibility, touch sensitivity, and overall user experience. Regular screen cleaning will contribute to the longevity and functionality of your device.
Cleaning the camera lenses of your Android phone
The camera lenses on your Android phone play a crucial role in capturing clear, sharp, and vibrant photos. However, over time, they can accumulate dust, fingerprints, and smudges, which can lead to blurry or hazy images. Here’s how you can effectively clean the camera lenses of your Android phone:
1. Check the Lens Surface: Before cleaning, make sure to inspect the lens surface for any visible dirt, dust, or fingerprints. Hold your phone under a bright light source or use a flashlight to aid in the inspection.
2. Blow Away Dust: Use a can of compressed air specifically designed for electronics or a small handheld blower to blow away any loose dust particles from the lens surface. This will minimize the chances of scratching the lens during the cleaning process.
3. Use a Soft, Lint-free Cloth: Take a clean microfiber cloth or a lens cleaning cloth and gently wipe the camera lens in a circular motion. Avoid using rough materials or paper towels, as they can leave scratches or residue behind. If needed, dampen the cloth slightly with water or a lens cleaning solution designed for camera lenses.
4. Focus on the Lens Center: Pay close attention to the center of the lens, as this is the area where most smudges and fingerprints tend to accumulate. Apply gentle pressure and repeat the wiping motion until the lens is clean and free from marks.
5. Be Gentle with Multiple Lens Arrays: If your Android phone has multiple camera lenses, take extra care to clean each lens individually. Avoid applying excessive force or touching the lenses with your fingers, as the oils from your skin can smear and smudge the lenses.
6. Use Lens Cleaning Solutions: If the lens is particularly dirty or has stubborn marks, you can use a lens cleaning solution or lens cleaning wipes specifically designed for camera lenses. Apply a small amount of the solution to a lens cleaning cloth and gently wipe the lens surface. Make sure to follow the manufacturer’s instructions for the specific product you are using.
7. Dry the Lens Completely: After cleaning, use a dry portion of the cloth or a separate dry cloth to remove any moisture from the lens. Ensure the lens is completely dry before using the camera to avoid any blurring or distortion caused by water droplets.
By following these steps, you can keep the camera lenses of your Android phone clean and ensure that you capture sharp, high-quality photos. Regular cleaning of the camera lenses will contribute to excellent image quality and enhance your photography experience.
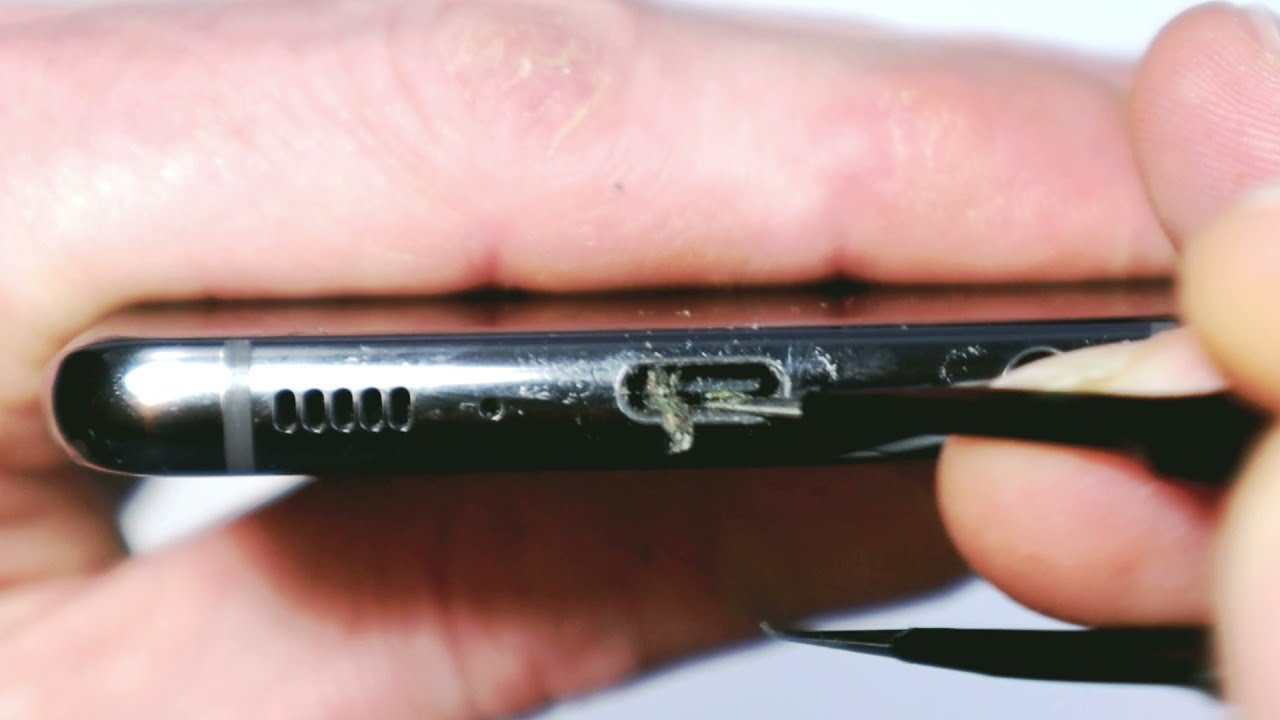
Cleaning the charging port of your Android phone
The charging port of your Android phone is not only essential for keeping your device powered up but also susceptible to accumulating dust, lint, and debris. Over time, this can hinder the charging process and potentially damage the port. Here’s how you can effectively clean the charging port of your Android phone:
1. Power Off Your Phone: Before cleaning the charging port, ensure that your Android phone is powered off to prevent any accidental damage or electrical mishaps.
2. Inspect the Port: Use a flashlight or another light source to visually inspect the charging port for any visible debris or obstructions. Look for lint, dust, or other foreign particles that may be blocking the port.
3. Use Compressed Air: To remove loose particles from the charging port, use a can of compressed air specifically designed for electronics. Hold your phone with the charging port facing downwards and carefully insert the nozzle of the compressed air can into the port. Give a few short bursts of air to dislodge any dust or debris. Avoid using excessive force as this can damage the port.
4. Clean with a Soft Brush: If the compressed air alone does not remove all the debris, use a small, soft-bristled brush to gently sweep away any remaining particles. Be cautious not to apply too much pressure or use a brush with stiff bristles that could damage the port. A clean, dry toothbrush or a dedicated electronics cleaning brush works well for this purpose.
5. Avoid Liquid Cleaners: It is important to note that liquid cleaners or chemicals should not be used to clean the charging port. Moisture can damage the delicate components inside the port and potentially cause a short circuit. Stick to dry methods to clean the port effectively.
6. Reinspect and Repeat if Necessary: After using compressed air and a brush, carefully inspect the charging port again to ensure it is clean. If you spot any remaining debris, repeat the process until the port is completely free from obstructions.
7. Avoid Using Metal Objects: While cleaning the charging port, it’s crucial to never use metal objects like pins or paperclips to remove debris. These objects can damage the port’s delicate internal components, resulting in permanent damage to your device.
By following these steps, you can keep the charging port of your Android phone clean and free from debris. Regular maintenance of the charging port ensures a secure and uninterrupted charging connection, prolonging the lifespan of your phone and preventing potential charging issues.
Cleaning the speakers and microphone of your Android phone
The speakers and microphone of your Android phone play a vital role in clear audio playback and communication. However, they can collect dust, lint, and debris over time, affecting the sound quality and overall performance. Here’s how you can effectively clean the speakers and microphone of your Android phone:
1. Power Off Your Phone: Before cleaning the speakers and microphone, ensure that your Android phone is powered off to prevent any accidental damage or disturbances.
2. Inspect the Speaker Grills: Take a close look at the speaker grills, located at the bottom or on the front of your phone, for any visible debris or clogging. Observe if there is any noticeable blockage that may impede sound output.
3. Use Compressed Air or a Soft Brush: To remove loose particles from the speaker grills, gently use a can of compressed air specifically designed for electronics. Hold the can at a slight angle and give a few short bursts of air to clear out any dust or debris. Alternatively, you can use a soft-bristled brush to sweep away the particles. Make sure not to press too hard or use a brush with stiff bristles, as this can damage the speakers.
4. Avoid Liquid Cleaners: It’s important to note that liquid cleaners or chemicals should not be used to clean the speakers or microphone. Moisture can damage the internal components or affect sound quality. Stick to dry methods for cleaning these areas.
5. Check the Speaker and Microphone Holes: Inspect the tiny holes on the speaker and microphone for any blockage or accumulated debris. Use a clean, dry toothbrush or a soft brush specifically designed for electronics, and gently brush the holes to dislodge any particles. Ensure that the brush bristles are clean and not abrasive.
6. Use a Soft Cloth: If necessary, you can also use a soft, lint-free cloth to wipe the speaker grill and microphone area. Gently dab or wipe the surface to remove any remaining dust or smudges. Be careful not to insert the cloth into the speaker holes, as it could leave fibers behind or push debris further into the device.
7. Test the Audio: After cleaning, power on your Android phone and test the speakers and microphone to ensure that they are functioning properly. Play music or make a test call to ensure clear sound output and proper audio reception.
Regularly cleaning the speakers and microphone of your Android phone helps maintain optimal sound quality and ensures that you can communicate effectively. By following these steps, you can keep these components clean and free from obstructions, enhancing your overall audio experience.
Cleaning the headphone jack of your Android phone
The headphone jack of your Android phone can accumulate dust, lint, and debris over time, leading to poor audio quality or connection issues. To ensure a clean and reliable audio experience, it’s important to clean the headphone jack regularly. Here’s how you can effectively clean the headphone jack of your Android phone:
1. Power Off Your Phone: Before cleaning the headphone jack, make sure to power off your Android phone to prevent any accidental damage or unnecessary interference.
2. Visual Inspection: Use a flashlight or another light source to visually inspect the headphone jack for any visible debris or obstruction. Look for dust, lint, or any other foreign objects that may be stuck inside.
3. Use Compressed Air: To remove loose particles from the headphone jack, use a can of compressed air specifically designed for electronics. Hold your phone with the headphone jack facing downward and carefully insert the nozzle of the compressed air can into the jack. Give a few short bursts of air to dislodge any dust or debris. Avoid using excessive pressure, as it may cause damage to the internal components.
4. Avoid Liquid Cleaners: It’s important to note that liquid cleaners or moisture should not be used to clean the headphone jack. Liquid can damage the delicate internal circuitry of your phone. Stick to dry methods while cleaning.
5. Use a Soft Brush: If the compressed air alone does not remove all the debris, use a small, clean, and dry soft-bristled brush, such as a clean toothbrush or a dedicated electronics cleaning brush. Gently insert the brush into the headphone jack and rotate it in a circular motion to dislodge any remaining particles. Do not apply excessive force that could potentially damage the jack.
6. Inspect and Repeat if Necessary: After using compressed air and a brush, carefully inspect the headphone jack again to ensure it is clean and free from obstructions. If you spot any remaining debris, repeat the process until the jack is completely clean.
7. Keep It Covered: To prevent future accumulation of dust and debris, consider using a protective cover or a small silicone plug specifically designed for the headphone jack. These covers or plugs can help keep the jack clean and prolong its lifespan.
Regularly cleaning the headphone jack of your Android phone ensures optimal audio quality and prevents any connection issues with your headphones or earphones. By following these steps, you can maintain a clean and reliable connection in your headphone jack, resulting in an enjoyable audio experience.
Cleaning the storage of your Android phone
The storage of your Android phone can quickly become cluttered with unnecessary files and apps, leading to reduced performance and limited storage space. Cleaning the storage is essential to free up space, improve device speed, and optimize overall functionality. Here’s how you can effectively clean the storage of your Android phone:
1. Identify and Delete Unused Apps: Start by reviewing the apps installed on your phone and deleting any that you no longer use or need. Go to the “Settings” menu, select “Apps,” and uninstall the apps that are taking up valuable storage space.
2. Clear App Cache: Many apps accumulate cache files over time to improve performance. However, these files can take up a significant amount of storage. Go to the “Settings” menu, select “Storage,” and choose “Cached data” to clear the cache of individual apps or use a cache cleaner app to clear the cache of multiple apps at once.
3. Delete Unwanted Media Files: Review your photos, videos, and audio files, and delete any that are no longer needed. You can use the file manager app on your phone to locate and remove unwanted media files. Consider transferring important files to cloud storage or backup them to your computer to free up additional space.
4. Remove Duplicate Files: Use a file manager app or a dedicated duplicate file remover app to identify and delete duplicate files on your phone. Removing duplicates not only frees up storage space but also helps in keeping your files organized.
5. Clear Downloads Folder: Open your file manager app or go to the “Downloads” folder on your phone and delete any unnecessary files that have been downloaded. These can take up significant storage space if left unchecked.
6. Move Apps and Files to SD Card: If your Android phone has an external SD card slot, consider moving apps and files that can be stored on the SD card. This can help free up internal storage for essential apps and files.
7. Regularly Empty the Recycle Bin: Some Android phones have a recycle bin or trash feature that temporarily stores deleted files before they are permanently removed. Regularly empty the recycle bin to reclaim storage space.
By following these steps, you can effectively clean the storage of your Android phone, freeing up space and improving device performance. Regularly performing these cleanup tasks will help prevent your phone from becoming cluttered and ensure that you have enough storage for the apps and files you genuinely need.
Cleaning the cache and temporary files of your Android phone
The cache and temporary files stored on your Android phone can accumulate over time and consume valuable storage space. Cleaning these files is crucial to optimize device performance, reclaim storage, and ensure smooth operation. Here’s how you can effectively clean the cache and temporary files of your Android phone:
1. Clear App Cache: Many apps store temporary files, known as cache, to improve performance and load times. However, these files can take up a significant amount of storage space. To clear app cache, go to the “Settings” menu, select “Apps,” and choose the app you want to clear the cache for. Tap on “Storage” and then select “Clear cache.” Repeat this process for other apps consuming a large amount of cache.
2. Clear System Cache: In addition to app cache, your Android phone also has a system cache that contains temporary files from various processes. Clearing the system cache can help optimize device performance. To clear the system cache, power off your phone and boot it into recovery mode by holding down specific buttons (varies by phone model). From the recovery mode, select the option to wipe the cache partition. Use the volume buttons to navigate and the power button to select.
3. Use a Cache Cleaner App: You can also use cache cleaner apps available on the Google Play Store to automatically scan and clear cache files from all your installed apps. These apps can analyze your phone’s storage and help you identify and remove cache files that might have been missed manually.
4. Delete Temporary Files: Temporary files from downloads, app installations, and system processes can accumulate and take up storage space over time. To delete temporary files, go to the “Settings” menu, select “Storage,” and choose “Temporary files.” Select the files you want to delete, such as downloaded files, installation packages, or miscellaneous files.
5. Automate Cleaning with Storage Optimization Apps: There are several storage optimization apps available that can automatically clean cache and temporary files on your Android phone. These apps can schedule regular cleanups, provide recommendations on files to delete, and help you optimize your phone’s storage efficiently.
6. Regularly Restart Your Phone: Restarting your Android phone regularly can also help clear out temporary files and refresh system processes. This simple step can contribute to a smoother and more efficient user experience.
By regularly cleaning the cache and temporary files of your Android phone, you can ensure optimal device performance, reclaim storage space, and keep your phone running smoothly. Implementing these cleaning practices will help you maintain a clutter-free and efficient phone.
Cleaning the apps and app data of your Android phone
The apps and app data on your Android phone can accumulate over time and occupy significant storage space. Cleaning up unnecessary apps and their data not only helps reclaim storage but also enhances device performance. Here’s how you can effectively clean the apps and app data of your Android phone:
1. Uninstall Unused Apps: Start by reviewing the apps installed on your phone and uninstalling any that you no longer use or need. Go to the “Settings” menu, select “Apps,” and choose the app you want to uninstall. Tap on “Uninstall” or “Disable” to remove unwanted apps from your device.
2. Clear App Data: Some apps store large amounts of data, such as cached files, offline content, or user preferences. To clear app data, go to the “Settings” menu, select “Apps,” and choose the app you want to clear data for. Tap on “Storage” and then select “Clear data” or “Clear storage.” Note that clearing app data may reset app settings or require you to log back into certain apps.
3. Manage App Permissions: Take some time to review and manage app permissions on your phone. Some apps may have unnecessary permissions that they don’t actually need, posing privacy concerns. Go to the “Settings” menu, select “Apps,” and choose the app you want to manage permissions for. Tap on “Permissions” to adjust individual permissions according to your preferences.
4. Disable Pre-installed Bloatware: Many Android phones come pre-loaded with apps that you may not need or want. These apps are often referred to as bloatware and can take up storage space. While you may not be able to uninstall all pre-installed apps, you can usually disable them. Go to the “Settings” menu, select “Apps,” and choose the app you want to disable. Tap on “Disable” to prevent it from running and free up storage space.
5. Manage App Updates: By default, apps on your Android phone may automatically update, which can consume storage and data. To manage app updates, go to the Google Play Store, tap on the three horizontal lines in the top-left corner, and select “Settings.” Under “General,” choose “Auto-update apps” and select your preferred option, such as updating apps over Wi-Fi only or disabling automatic updates.
6. Utilize App Cleaner Apps: You can utilize app cleaner apps available on the Google Play Store to scan and remove unused and residual files left behind by uninstalled apps. These apps can help you optimize your phone’s storage and enhance device performance with just a few taps.
By regularly cleaning the apps and app data on your Android phone, you can reclaim storage space, improve device performance, and maintain a streamlined app ecosystem. Implementing these cleaning practices will help keep your phone organized and efficient.
Cleaning the contacts and messages of your Android phone
The contacts and messages on your Android phone can accumulate over time, making it difficult to find important information and occupying unnecessary storage space. Cleaning up your contacts and messages not only helps declutter your device but also ensures that you have a well-organized and efficient communication system. Here’s how you can effectively clean the contacts and messages of your Android phone:
1. Review and Merge Duplicate Contacts: Start by reviewing your contacts list and identifying any duplicate entries. Duplicate contacts can clutter your list and make it challenging to locate the right information when needed. Use the “Merge” or “Link” feature within your Contacts app to consolidate duplicate entries into a single contact.
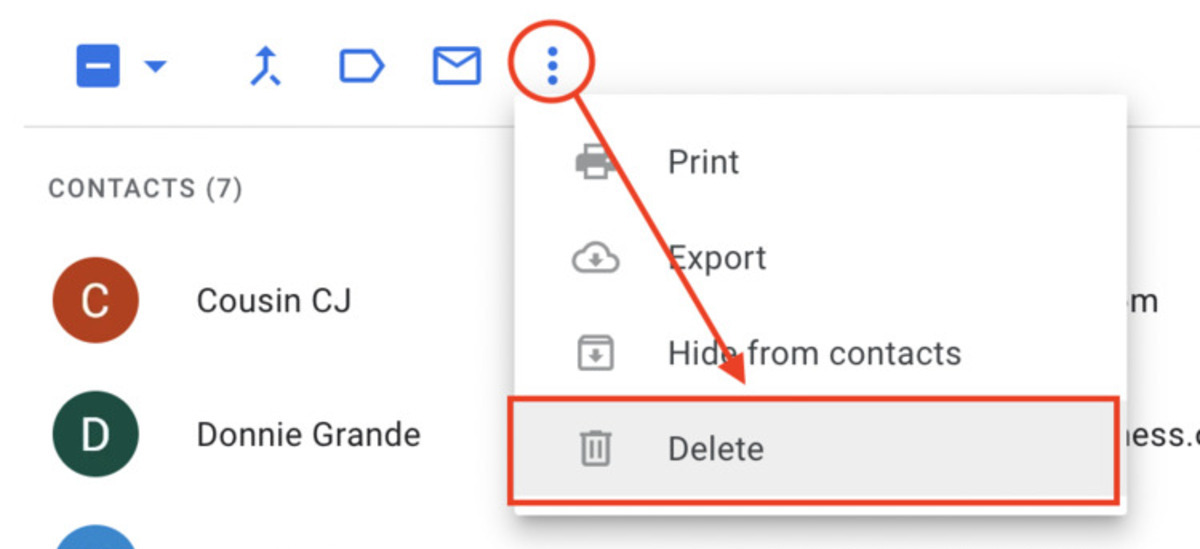
2. Delete Unwanted Contacts: Go through your contacts list and identify any obsolete or unnecessary contacts that you no longer communicate with. Remove these contacts to streamline your list and free up storage space. Most contact apps allow you to delete contacts individually or in bulk.
3. Organize Contacts into Groups: To further organize your contacts, consider creating groups according to specific criteria, such as work contacts, family members, or friends. Grouping contacts can make it easier to locate and manage specific sets of contacts, helping you stay organized.
4. Delete Unimportant Messages: Messages can accumulate quickly, taking up valuable storage space on your device. Go through your message threads and delete any old or unimportant messages. Most messaging apps allow you to delete individual messages or entire threads. Consider archiving important conversations instead of deleting them if you want to keep a record without cluttering your messaging app.
5. Clear Message Attachments: Multimedia attachments, such as photos, videos, and audio files, can take up significant storage space within your messaging app. Review your conversations and delete any unnecessary attachments. You can manually remove attachments or use built-in features within the messaging app to clear media files.
6. Back Up Important Messages: If you have valuable or sentimental messages that you want to keep, consider backing them up to an external storage option, such as cloud storage, email, or computer. This way, you can free up space on your device while still retaining important conversations.
7. Use Messaging App Features: Different messaging apps offer various features to help manage messages efficiently. Explore the settings and options within your messaging app to customize the amount of message history stored, enable automatic deletion of old messages, or set up filters to categorize and organize incoming messages.
By regularly cleaning your contacts and messages on your Android phone, you can keep a well-organized communication system, improve device performance, and free up storage space. Implementing these cleaning practices will help you maintain a clutter-free and efficient messaging experience.
Cleaning the browser history and cookies of your Android phone
Browsing the internet on your Android phone can leave a trail of browsing history and accumulated cookies, which can not only compromise your privacy but also slow down your browsing experience. Cleaning your browser history and cookies regularly is essential to maintain your privacy, improve performance, and keep your browsing activities organized. Here’s how you can effectively clean the browser history and cookies of your Android phone:
1. Clearing Browsing History: Open your browser app and access the settings menu. Look for the option labeled “History” or “Privacy.” From there, you can choose to clear your browsing history. This will remove the record of websites you’ve visited, including URLs and page titles. Select the appropriate time frame you want to clear, whether it’s the past hour, day, week, or everything.
2. Clearing Cookies and Site Data: Alongside browsing history, cookies and site data are stored on your device. Cookies are small files that websites use to remember your preferences and login information. Clearing cookies can help protect your privacy and prevent websites from tracking your activities. To clear cookies and site data, go to your browser’s settings menu, look for “Privacy” or “Clear data,” and select the option to clear browsing data. Make sure to check the box next to “Cookies and site data” before confirming the deletion.
3. Managing Auto-Fill Data: Auto-fill data, such as saved usernames and passwords, can also compromise your privacy if not managed properly. Within your browser settings, look for the section related to auto-fill or auto-complete data. From there, you can review and delete any stored credentials or personal information you no longer need. This will help ensure that sensitive information does not inadvertently remain accessible.
4. Using Incognito/Private Browsing Mode: To prevent future accumulations of browsing history and cookies, consider using your browser’s incognito or private browsing mode. This mode allows you to browse the internet without storing any browsing history or cookies on your device. Open a new incognito/private tab before accessing sensitive or private websites to ensure your browsing activities remain private and temporary.
5. Consider Using Privacy-Focused Browsers: Some browsers prioritize privacy by default and block tracking cookies. Consider using privacy-focused browsers as an alternative to the pre-installed browser on your Android phone. These browsers often offer additional features, such as built-in ad blockers and advanced privacy settings, to enhance your online privacy.
By regularly cleaning your browser history and cookies on your Android phone, you can protect your privacy, improve browsing performance, and ensure a clutter-free browsing experience. Implementing these cleaning practices will help you maintain control over your browsing activities and keep your device running smoothly.
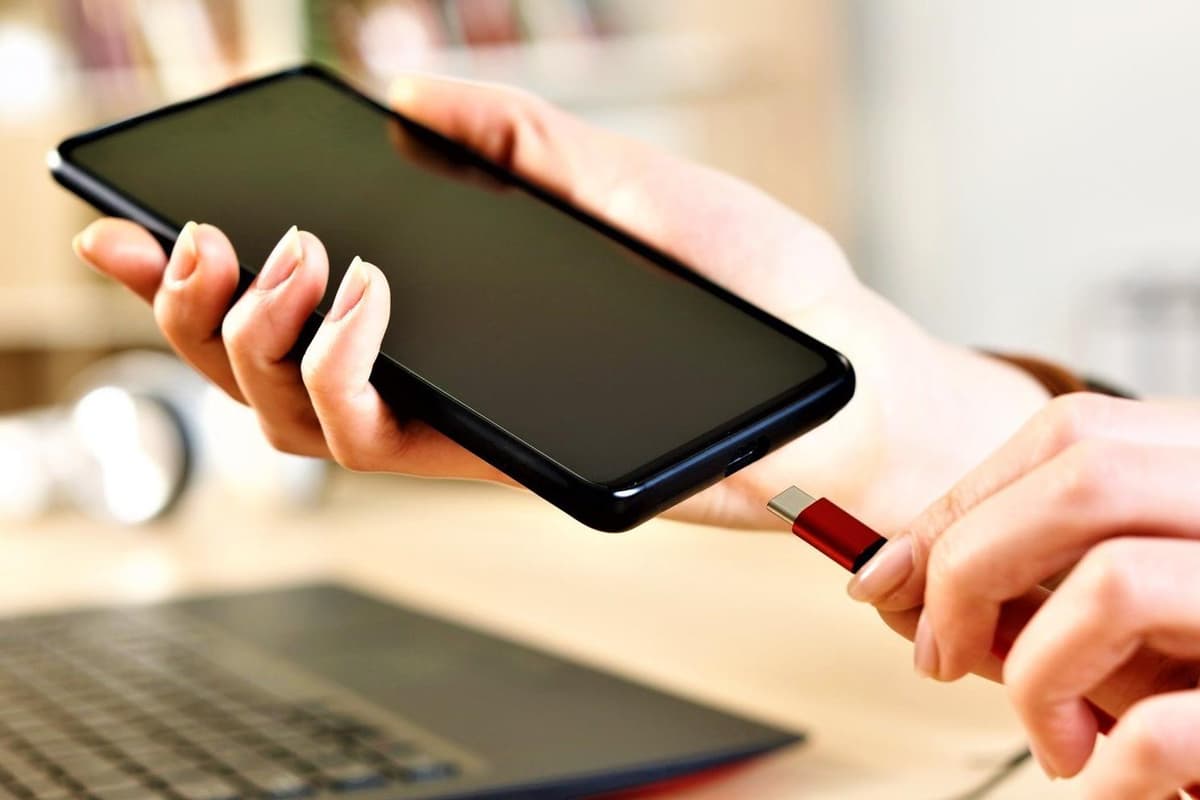
Cleaning the battery and power usage of your Android phone
The battery is a vital component of your Android phone, and managing its usage can greatly impact your device’s performance and battery life. Cleaning the battery and optimizing power usage can help extend battery life, improve efficiency, and ensure a smooth user experience. Here’s how you can effectively clean the battery and manage power usage on your Android phone:
1. Optimize Battery Usage: Go to the “Settings” menu on your Android phone and select “Battery” or “Battery usage.” Here, you can view which apps consume the most power. Identify any power-draining apps and consider reducing their usage, force-stopping them, or placing unnecessary apps into “Sleep” or “Battery Optimization” mode to minimize power consumption.
2. Adjust Screen Brightness: The display is one of the biggest power-draining components of your phone. Reduce screen brightness to an optimal level that is comfortable for you but not excessively bright. Alternatively, enable adaptive brightness, which adjusts the screen brightness automatically based on ambient light conditions.
3. Shorten Screen Timeout: Set a shorter screen timeout duration, so your phone’s screen turns off sooner when idle. This helps conserve battery power when you are not actively using your device. Consider setting it to a time interval that suits your preferences.
4. Disable Vibration: Vibration can consume a significant amount of battery power. Consider disabling vibration for incoming calls, notifications, and keyboard presses, and opt for sound alerts instead.
5. Turn Off Background App Refresh: Background app refresh allows apps to update and fetch data in the background, which can drain battery power. Check your phone’s settings and disable background app refresh for apps that you don’t need or those that are not critical for real-time updates.
6. Enable Battery Saver Mode: Activate the built-in battery saver mode on your Android phone. This mode conserves battery power by limiting background activities, reducing screen brightness, and disabling certain features like push email. Battery saver mode helps maximize your phone’s battery life when it’s running low on charge.
7. Regularly Restart Your Phone: Restart your Android phone regularly to clear temporary system files and processes that may be consuming unnecessary power. A simple restart can help optimize power usage and improve overall device performance.
8. Avoid Extreme Temperatures: High and low temperatures can impact battery performance and lifespan. Keep your phone in a cool and dry environment, avoiding direct exposure to sunlight or extreme heat. Extreme cold can also affect battery performance, so it’s best to avoid exposing your phone to freezing temperatures.
By implementing these steps to clean the battery and optimize power usage on your Android phone, you can extend battery life, enhance efficiency, and ensure a longer-lasting and more reliable device. Efficient power management ultimately leads to a more enjoyable and uninterrupted user experience.
Conclusion
Cleaning your Android phone is essential for maintaining its performance, longevity, and overall user experience. By following the cleaning and optimization tips provided in this article, you can effectively clean your Android phone inside and out, ensuring that it remains in pristine condition.
From cleaning the exterior and screen of your phone to clearing out storage, cache, and app data, each step plays a crucial role in keeping your phone running smoothly and efficiently. By regularly cleaning the contacts and messages, browser history, and battery usage, you can organize your data, protect your privacy, and extend the battery lifespan.
Remember to always take precautions before cleaning your phone, carefully follow instructions, and avoid using harsh chemicals or abrasive materials. Prioritize gentle cleaning methods and use appropriate tools to avoid damaging sensitive components.
Cleaning your Android phone is not just about maintaining its physical appearance; it’s about improving performance, optimizing storage, protecting your privacy, and enhancing the overall user experience. Whether you have a brand-new phone or an older model, regular cleaning and maintenance will ensure that your device remains a reliable companion for years to come.
By incorporating these cleaning practices into your phone maintenance routine, you can enjoy a cleaner, more efficient, and longer-lasting Android phone. So, take the time to clean your phone—it’s a worthwhile investment in the optimal functioning and longevity of your device.