Why do you need to check what SSD you have in Windows 11?
Knowing the specific model of the SSD installed on your Windows 11 system is essential for several reasons. Let’s explore why it is important to check what SSD you have:
Compatibility: Different SSD models have unique hardware specifications, such as the connector type, form factor, and interface. By knowing the exact model of your SSD, you can ensure that any upgrades or replacements you choose are compatible with your system.
Performance: SSDs vary in terms of speed, capacity, and technology. Some SSDs offer faster read and write speeds, making them ideal for tasks that require high performance, such as gaming, video editing, or running resource-intensive applications. By identifying your SSD model, you can assess its performance capabilities and make informed decisions about optimizing storage usage.
Troubleshooting: If you encounter any issues with your SSD, such as slow performance, errors, or instability, identifying the specific model can help in troubleshooting. You can search for firmware updates or known issues specific to your SSD model and take necessary actions to resolve the problem.
Warranty and support: Different SSD manufacturers offer varying warranty periods and customer support. By knowing the exact model of your SSD, you can easily reach out to the manufacturer’s support team for assistance, warranty claims, or accessing specific support resources tailored to your SSD model.
Upgrade planning: If you are planning to upgrade your SSD in the future, knowing the current model allows you to research and select a suitable replacement based on your storage requirements, performance needs, and budget.
Ultimately, checking what SSD you have in Windows 11 enables you to make informed decisions regarding compatibility, performance optimization, troubleshooting, warranty coverage, and future upgrades. It is a crucial step in managing your system’s storage effectively and ensuring a smooth computing experience.
Step 1: Open the Device Manager
Device Manager is a built-in Windows utility that allows you to view and manage the hardware devices connected to your computer. To check what SSD you have in Windows 11, follow these steps:
- Press the Windows key + X on your keyboard to open the Power User menu.
- From the menu, select Device Manager. This will launch the Device Manager window.
- Alternatively, you can also open the Device Manager by right-clicking on the Start button and selecting Device Manager from the context menu.
Once you have successfully opened the Device Manager, you are ready to proceed to the next step to identify your SSD model in Windows 11.
Note: If prompted for administrative access or a User Account Control (UAC) confirmation, click Yes to continue.
Step 2: Expand the Disk Drives category
After opening the Device Manager in Windows 11, you need to locate and expand the Disk Drives category to access the information about your SSD. Here’s how:
- In the Device Manager window, you will see a list of different hardware categories.
- Scroll down the list and look for the Disk Drives category.
- Click on the small arrow icon (▶) located next to the Disk Drives category. This will expand the category and display the connected disk drives, including your SSD.
By expanding the Disk Drives category, you will be able to see the specific model of your SSD listed below it. The name of the SSD may include the brand name and model number, providing you with the necessary details to identify your SSD accurately.
Now that you have expanded the Disk Drives category and located your SSD, you are ready to move on to the next step to identify the exact model of your SSD in Windows 11.
Step 3: Identify the SSD model
Once you have expanded the Disk Drives category in Device Manager, it’s time to identify the model of your SSD. Follow these steps:
- Locate your SSD in the list of disk drives under the Disk Drives category.
- Right-click on the SSD and select Properties from the context menu. This will open the Properties window for your SSD.
- In the Properties window, click on the Details tab.
- From the drop-down menu under the Property section, select Hardware Ids.
- In the Value section, you will see a list of information.
- Look for the entry that starts with VEN_ or DEV_. The alphanumeric values following these prefixes represent the Vendor ID and Device ID of your SSD.
- Take note of these values as they will help you identify the exact model of your SSD.
Once you have identified the Vendor ID and Device ID, you can search for them online or visit the manufacturer’s website to find detailed information about your SSD model. This will provide you with specifications, firmware updates, and any other relevant details to better understand your SSD.
Congratulations! You have successfully identified the model of your SSD in Windows 11. Proceed to the next step if you want to explore additional methods to check your SSD.
Step 4: Additional methods to check your SSD in Windows 11
In addition to using the Device Manager method, there are a few other ways to check what SSD you have in Windows 11. Let’s explore these alternative methods:
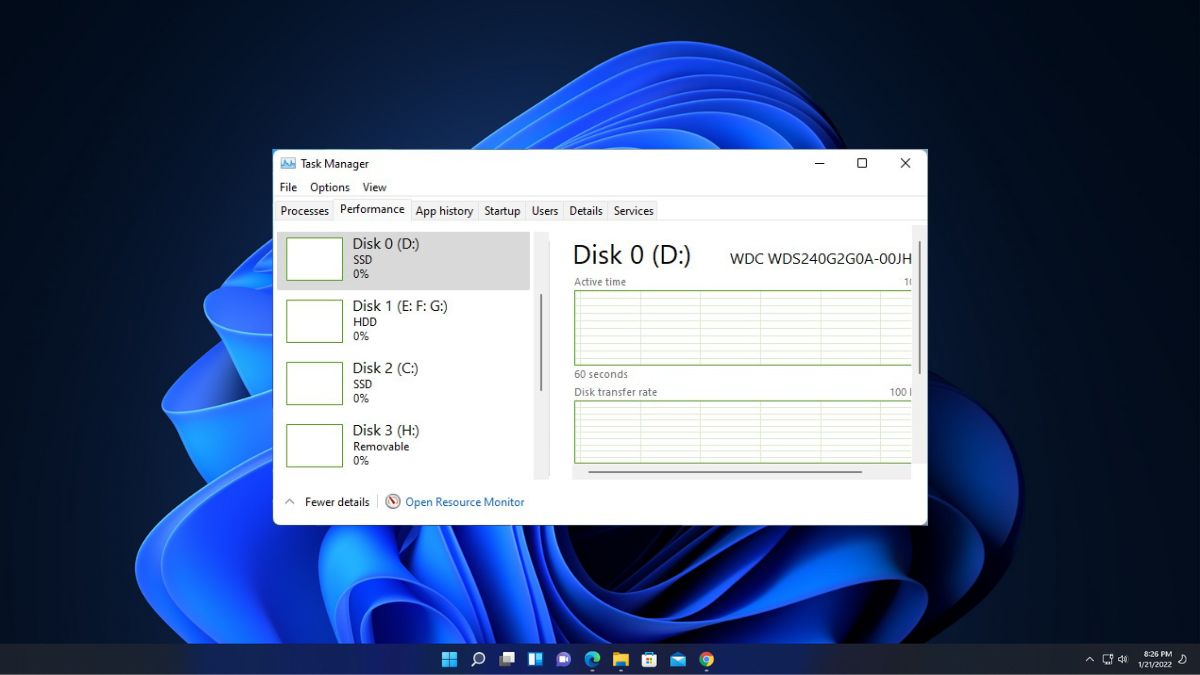
- System Information: Open the Run dialog by pressing Windows key + R. Type msinfo32 and hit Enter. In the System Information window, navigate to Components > Storage > Disks. Here, you can find the details of your SSD, including the manufacturer and model.
- Command Prompt: Open the Command Prompt or PowerShell by searching for it in the Start menu. Type the command wmic diskdrive get Model and press Enter. This will display a list of all the disk drives on your system, including your SSD with its exact model name.
- Third-party software: There are several third-party software tools available, such as CrystalDiskInfo or Speccy, that provide detailed information about your SSD and other hardware components. Simply download and install any of these programs, and they will display the SSD model and other relevant details.
Using these additional methods, you can cross-verify the details of your SSD and have multiple options to check its model, ensuring accurate information.
Now that you are familiar with different methods to check your SSD in Windows 11, you can choose the one that suits your preference or use multiple methods for confirmation.
Conclusion
Knowing the model of the SSD installed on your Windows 11 system is essential for compatibility, performance optimization, troubleshooting, warranty coverage, and future upgrades. By following the steps outlined in this guide, you can easily check what SSD you have.
Starting with opening the Device Manager, you can expand the Disk Drives category to locate your SSD. By right-clicking on it and accessing the Properties window, you can find the Vendor ID and Device ID, which will help identify the exact model of your SSD. Additionally, you can use alternative methods such as System Information, Command Prompt, or third-party software to cross-verify the information.
With the knowledge of your SSD model, you can ensure compatibility when upgrading or replacing your drive. It allows you to make informed decisions based on performance, troubleshoot effectively, and take advantage of warranty and support resources specific to your SSD model. Furthermore, you can plan your future upgrades more accurately based on your storage requirements and budget.
Remember, checking what SSD you have in Windows 11 is a crucial step in managing your system’s storage effectively and ensuring a smooth computing experience. Stay informed about your SSD model and leverage that knowledge to optimize your system’s performance and storage capabilities.
Now that you have successfully checked your SSD model, you can confidently make choices regarding your system’s storage needs and future enhancements.