Introduction
Managing storage space on your Windows 10 computer is essential to maintain optimal performance and keep track of your available storage. Whether you need to free up space for new files or want to ensure you have enough storage for future use, knowing how to check your storage is vital.
Luckily, Windows 10 provides several methods to easily check your storage capacity. In this article, we will explore four different options: using the Settings app, File Explorer, Command Prompt, and PowerShell. Each method offers a unique way to access and analyze your storage, allowing you to choose the one that best suits your needs or preferences.
By monitoring your storage, you can identify and remove unnecessary files, uninstall unused applications, and back up critical data. This proactive approach not only helps optimize your system’s performance but also prevents storage-related issues, such as running out of space when you need it most.
Whether you are a novice or an experienced Windows user, this article will guide you through the process of checking your storage on Windows 10. So, let’s dive into each method and discover how to easily keep track of your storage space.
Option 1: Using Settings
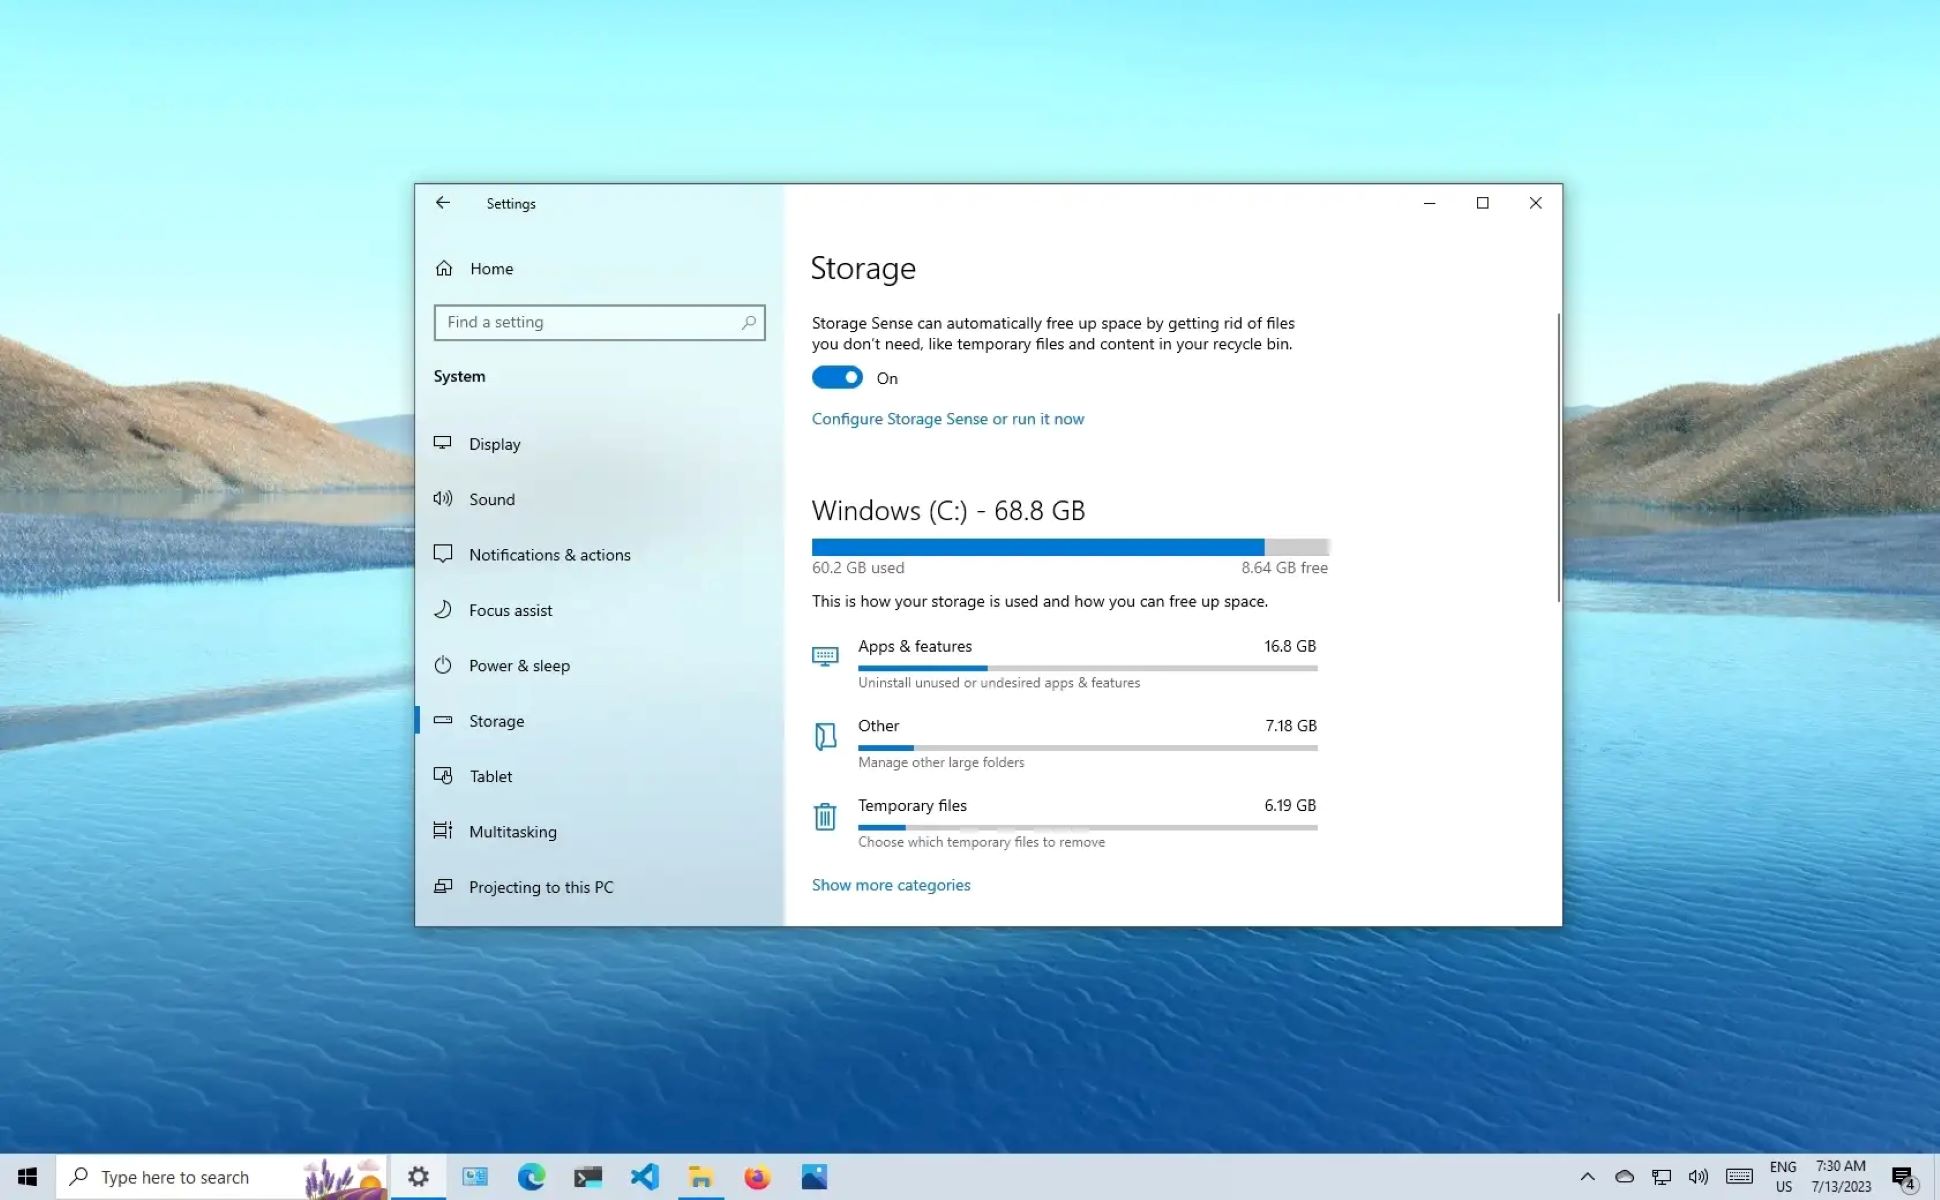
Windows 10 offers a user-friendly method to check your storage through the Settings app. This option provides a comprehensive overview of your storage, including the amount of used and free space on your computer. Here’s how you can access this information:
- Open the Start menu and click on the gear icon to open the Settings app.
- In the Settings window, click on the “System” category.
- On the left sidebar, select the “Storage” option.
- Wait for the system to calculate and display the storage usage.
Once the storage information is displayed, you can easily see the total capacity of your hard drive, as well as the amount of space used by different file categories such as apps, documents, pictures, videos, and more. Additionally, this screen provides options to manage storage, including suggestions on freeing up space and controlling storage usage for individual apps.
By using the Settings app to check your storage, you can quickly assess the current storage status of your Windows 10 computer. It is a straightforward and convenient method that doesn’t require any technical expertise. However, if you prefer a more detailed view or want to explore other aspects of your storage, you may consider using alternative methods like File Explorer, Command Prompt, or PowerShell, which will be discussed in the following sections.
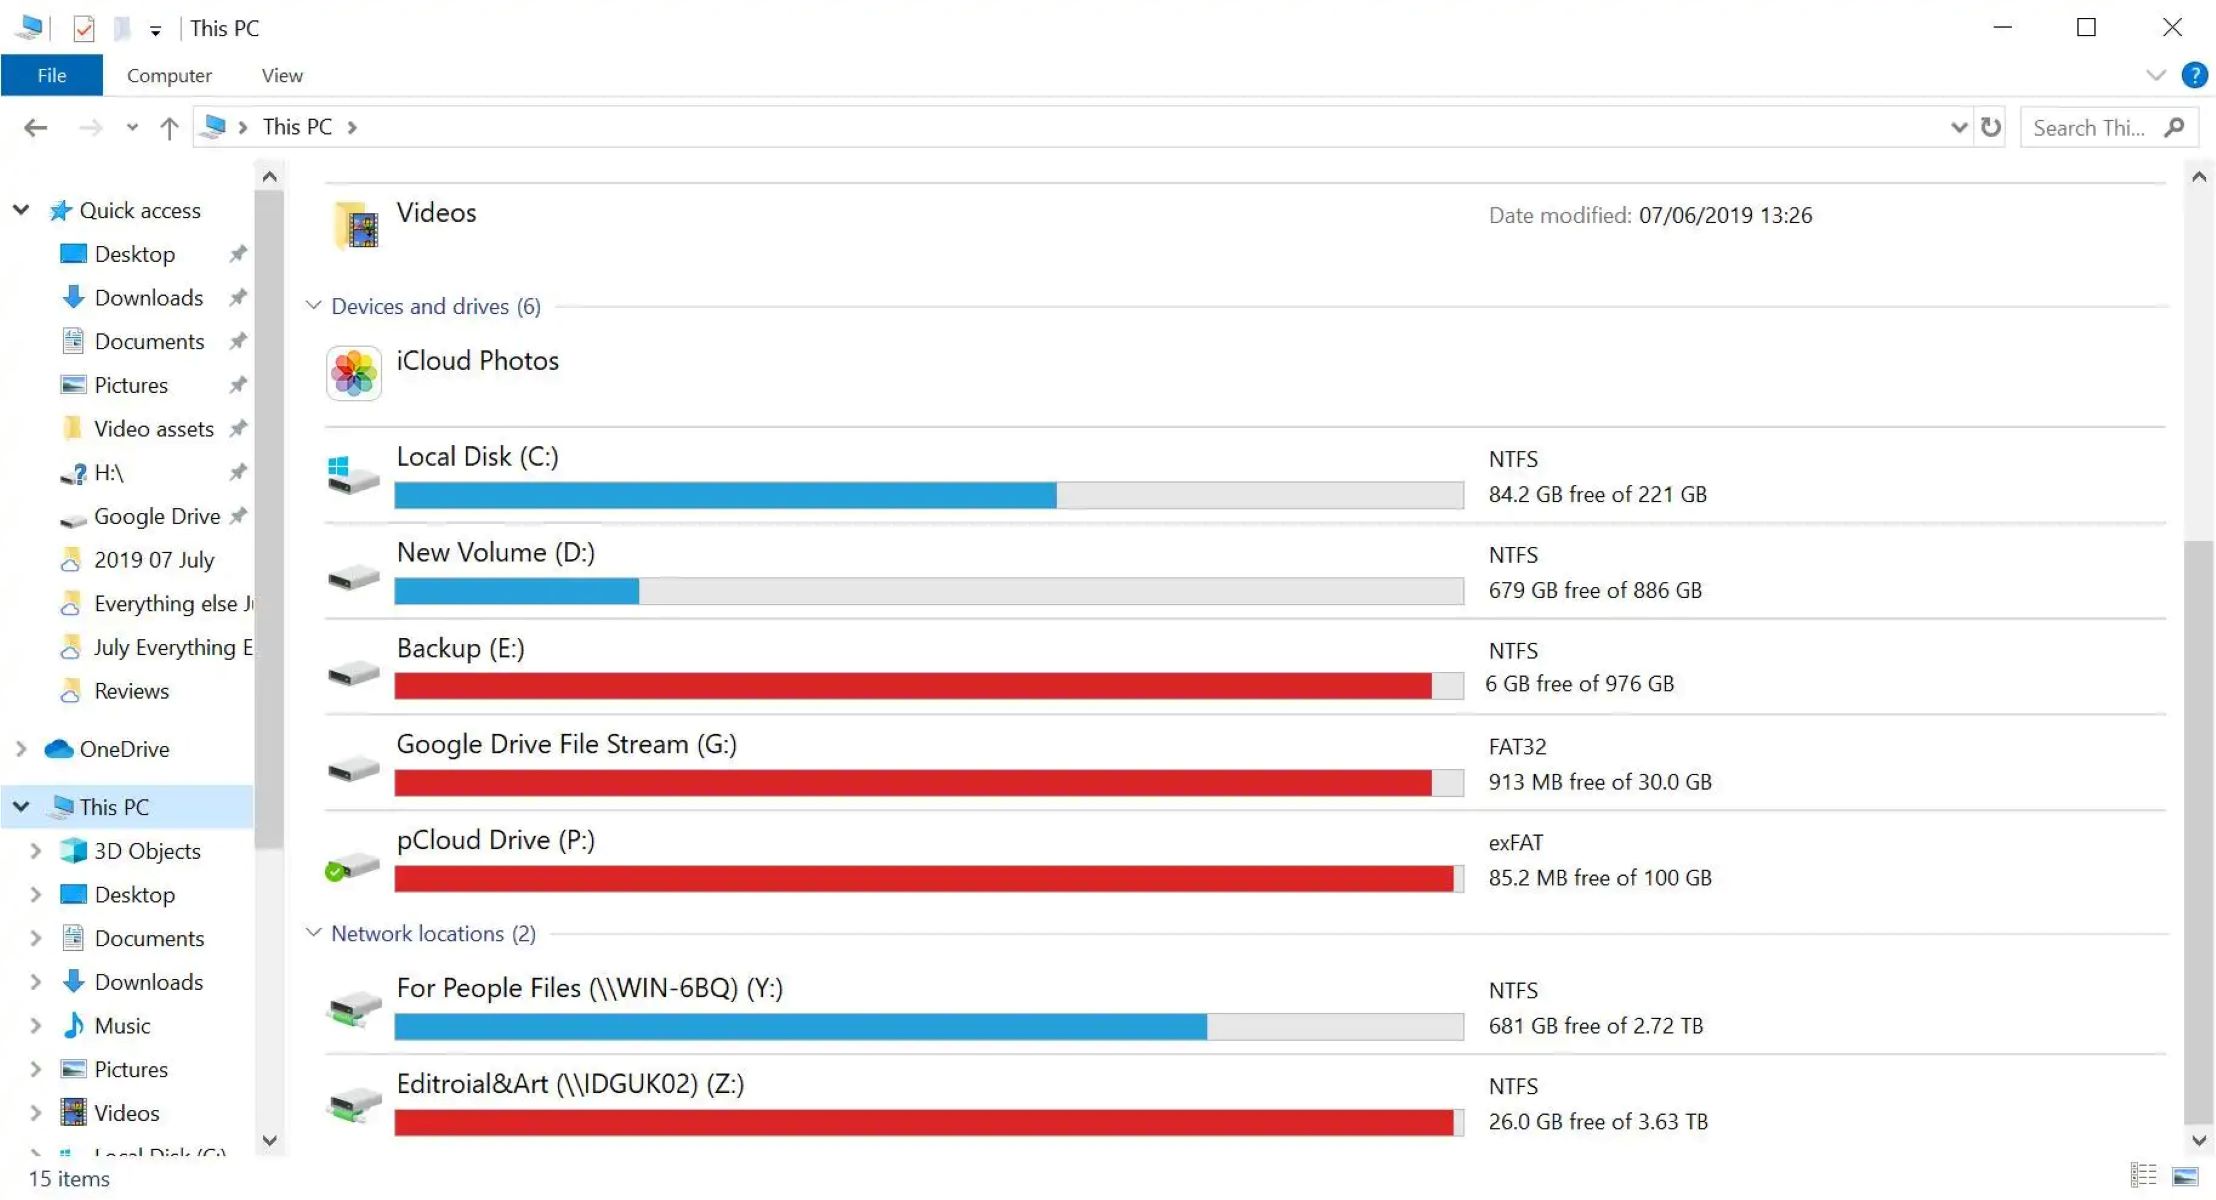
Option 2: Using File Explorer
Another way to check your storage on Windows 10 is by using File Explorer. This method allows you to explore the storage on your computer in more detail, providing you with information about individual files and folders. Here’s how you can check your storage using File Explorer:
- Open File Explorer by pressing the Windows key + E on your keyboard or by clicking on the File Explorer icon in the taskbar.
- On the left sidebar of File Explorer, locate and click on “This PC” or “My Computer.” This will display a list of all the drives connected to your computer.
- Right-click on the drive you want to check and select “Properties” from the dropdown menu.
- In the Properties window, you will find detailed information about your selected drive, including the used and free space, the file system, and the capacity of the drive.
Using File Explorer to check your storage allows you to delve deeper into your files and folders. You can easily identify large files or folders that are taking up significant space, making it convenient to clean up your storage and free up valuable disk space. Furthermore, this method also provides information about the file system used on the selected drive, which can be useful for troubleshooting and compatibility purposes.
Although File Explorer provides a more detailed view of your storage, it may not be the most efficient method if you’re looking for a quick overview. If you prefer a simpler and faster way to check your storage, continue reading to learn about other options like Command Prompt and PowerShell.
Option 3: Using Command Prompt
If you prefer using the command line interface, you can check your storage on Windows 10 by utilizing Command Prompt. This method provides a quick way to retrieve storage information without the need for any graphical interface. Here’s how you can do it:
- Open Command Prompt by pressing the Windows key + R on your keyboard, then type “cmd” and press Enter.
- In the Command Prompt window, type the following command and press Enter:
wmic logicaldisk get size,freespace,caption - Wait for the command to execute. You will see a list of all the drives connected to your computer, along with their total size and free space in bytes.
Using Command Prompt to check your storage provides a straightforward and efficient way to obtain information about your drives. However, the format of the output may be less user-friendly compared to other methods. If you prefer a more intuitive and visually appealing way to view your storage details, you may want to explore the final method: using PowerShell.
It’s important to note that Command Prompt offers many other commands and functionalities that allow you to manage and control various aspects of your computer. If you are familiar with the command line interface or want to further explore the capabilities of Command Prompt, it can be a powerful tool for managing your storage on Windows 10.
Option 4: Using PowerShell
PowerShell is a powerful command-line tool in Windows 10 that provides advanced functionality for managing various aspects of your computer, including checking your storage. Using PowerShell allows you to access detailed information about your drives and perform more advanced tasks. Here’s how you can check your storage using PowerShell:
- Open PowerShell by pressing the Windows key + X on your keyboard and selecting “Windows PowerShell” or “Windows PowerShell (Admin)” from the menu.
- In the PowerShell window, type the following command and press Enter:
Get-PhysicalDisk | Format-Table FriendlyName,Size,MediaType,MediaType - Wait for the command to execute. You will see a table displaying information about your physical disks, including the friendly name, size, and media type.
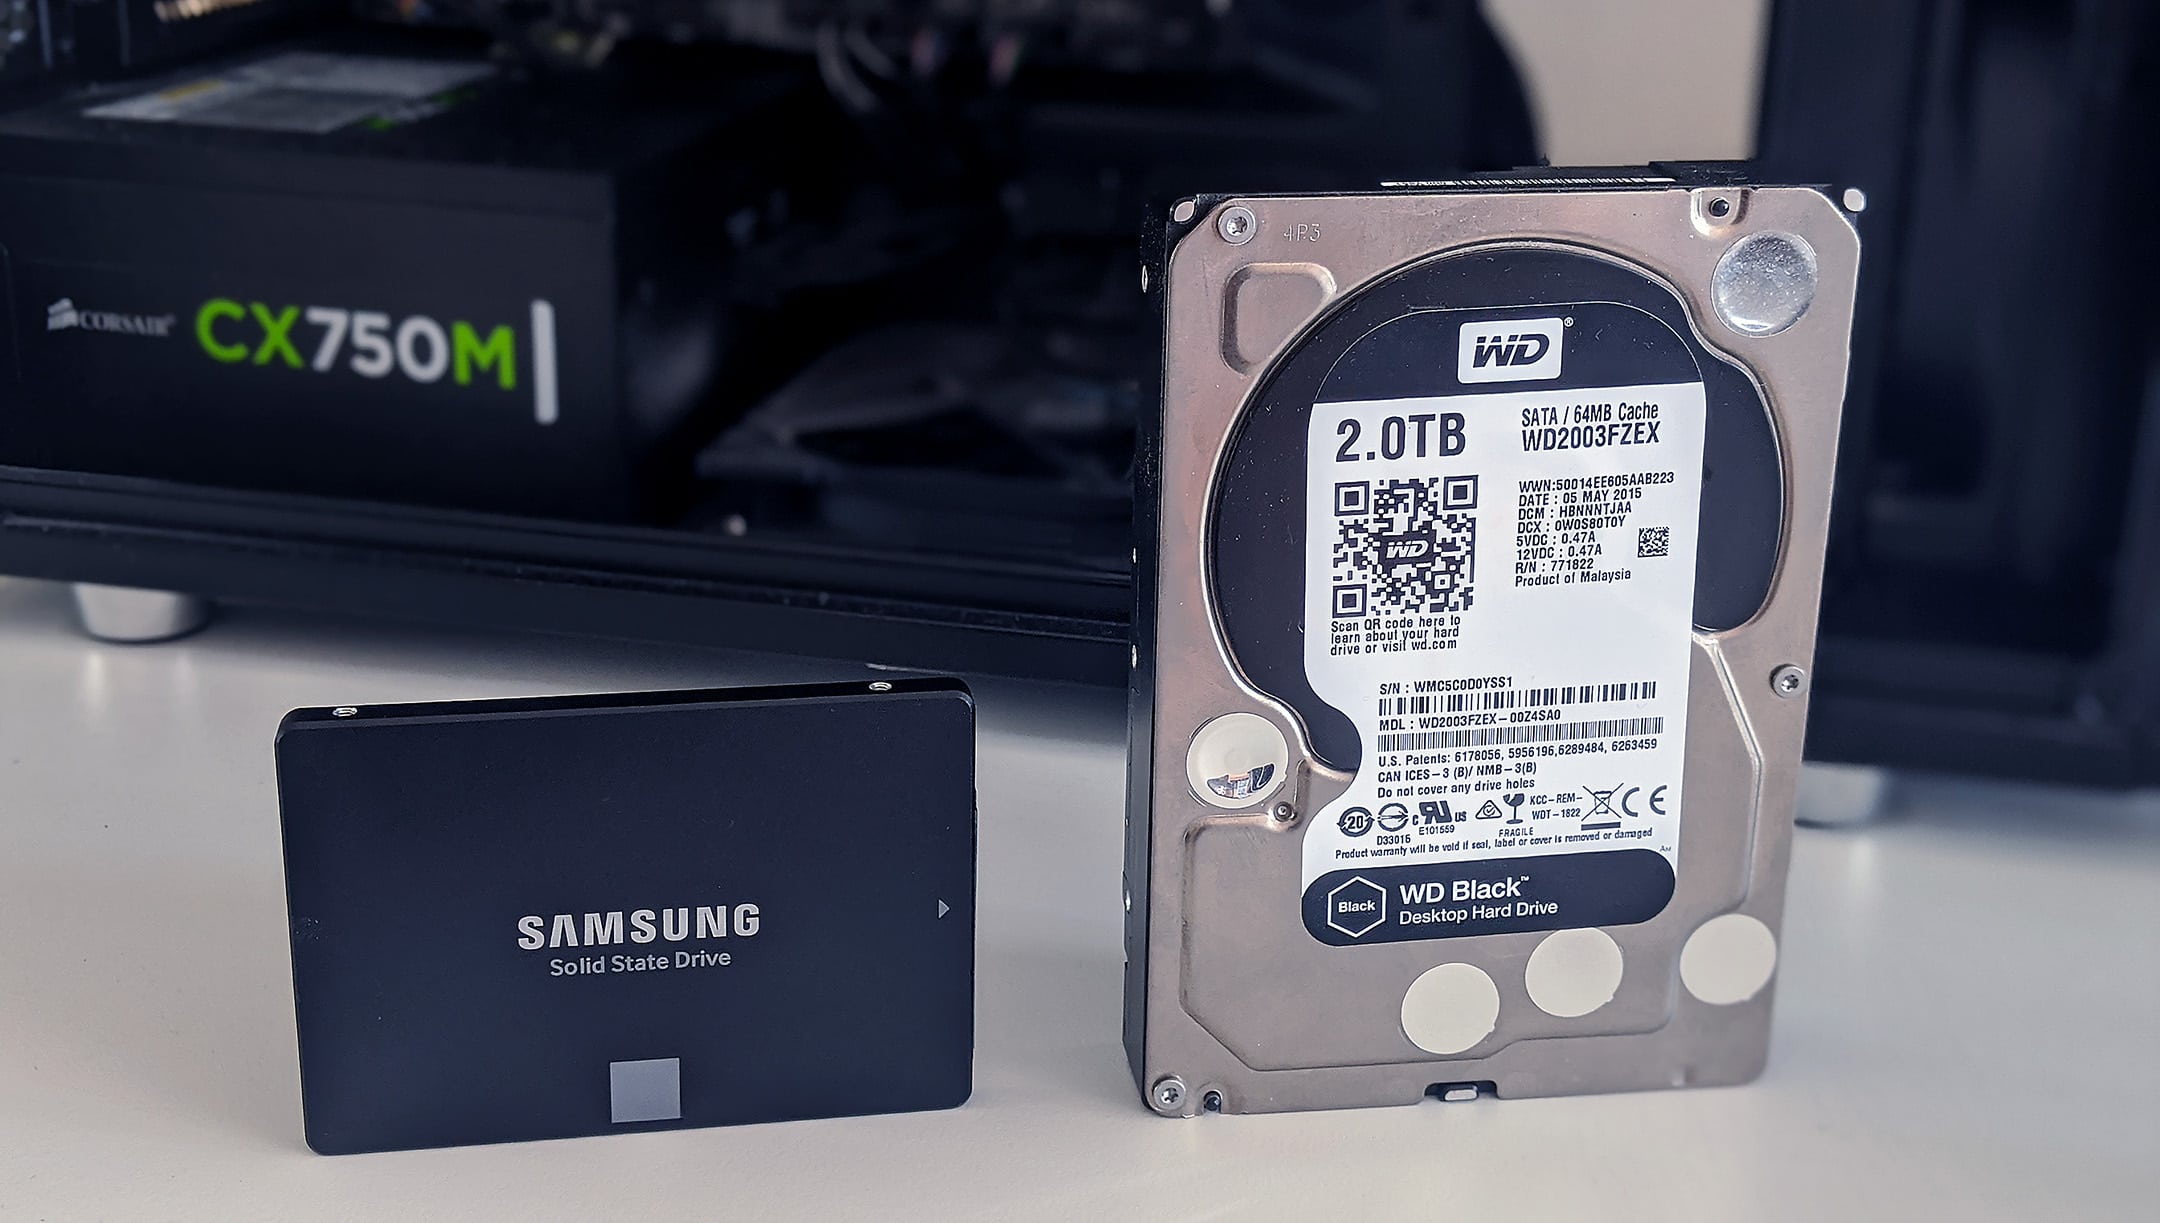
PowerShell provides more detailed information about your disks compared to other methods. You can view the friendly name of the disks, which can be useful if you have multiple drives connected to your computer. Additionally, PowerShell also displays the media type of the disks, such as HDD (Hard Disk Drive) or SSD (Solid-State Drive).
Apart from checking storage, PowerShell offers a wide array of commands and modules that enable you to perform various system administration tasks efficiently. If you are familiar with PowerShell or want to explore its capabilities further, you can leverage its power to manage and optimize your storage space on Windows 10.
While PowerShell may be more suitable for advanced users or those who prefer a command-line experience, it provides a comprehensive way to check your storage and perform advanced operations, making it a valuable tool in your Windows 10 arsenal.
Conclusion
In conclusion, checking your storage on Windows 10 is crucial for maintaining optimal performance and managing your computer’s storage capacity. By regularly monitoring your storage space, you can identify and delete unnecessary files, free up valuable disk space, and ensure that you have enough storage for future use.
Throughout this article, we have explored four different options to check your storage on Windows 10. The Settings app provides a user-friendly method to quickly assess your storage capacity and offers suggestions for freeing up space. Using File Explorer allows you to delve deeper into your files and folders, providing a more detailed view of your storage. Command Prompt offers a command-line interface for retrieving storage information efficiently. Lastly, PowerShell provides advanced functionality and detailed disk information for more experienced users.
It’s important to choose the method that best suits your needs and preferences. If you prefer simplicity and a graphical interface, the Settings app and File Explorer are the ideal choices. On the other hand, if you are comfortable with the command line interface and want more advanced capabilities, Command Prompt and PowerShell are excellent options.
Regardless of the method you choose, regularly checking your storage on Windows 10 will help you stay organized, optimize your system’s performance, and ensure smooth operation in the long run. Take the time to explore and utilize the options available to you to effectively manage your storage space and keep your computer running efficiently.