Introduction
When you start up your Windows 10 computer, you may find that certain programs automatically launch along with the operating system. While some of these startup programs are essential for the smooth functioning of your system, others might be unnecessary and can slow down your computer’s performance. Fortunately, Windows 10 provides several methods to change startup programs and manage what applications open when your computer boots up.
In this article, we will explore different ways to modify startup programs in Windows 10. Whether you prefer a user-friendly approach or are comfortable diving into advanced settings, we’ve got you covered. By following these methods, you can optimize your startup experience and ensure that only the programs you need are running when you log in.
We will walk you through the steps to change startup programs using the Task Manager, the Startup folder, the Settings app, and the Registry Editor. Each method offers varying levels of control, so you can choose the one that suits your preferences and technical skills.
Before we dive into the methods, it’s important to note that modifying startup programs should be done carefully. Disabling or removing essential programs can cause errors or affect the functionality of your system. Therefore, exercise caution and only make changes to programs you are familiar with or have researched.
Now, let’s explore the different methods to change startup programs in Windows 10, giving you the flexibility and control you need for a customized startup experience.
Method 1: Using the Task Manager
The Task Manager in Windows 10 provides a straightforward and convenient way to manage startup programs. Here’s how you can use the Task Manager to modify your startup programs:
- Right-click on the taskbar and select “Task Manager” from the context menu. Alternatively, you can press
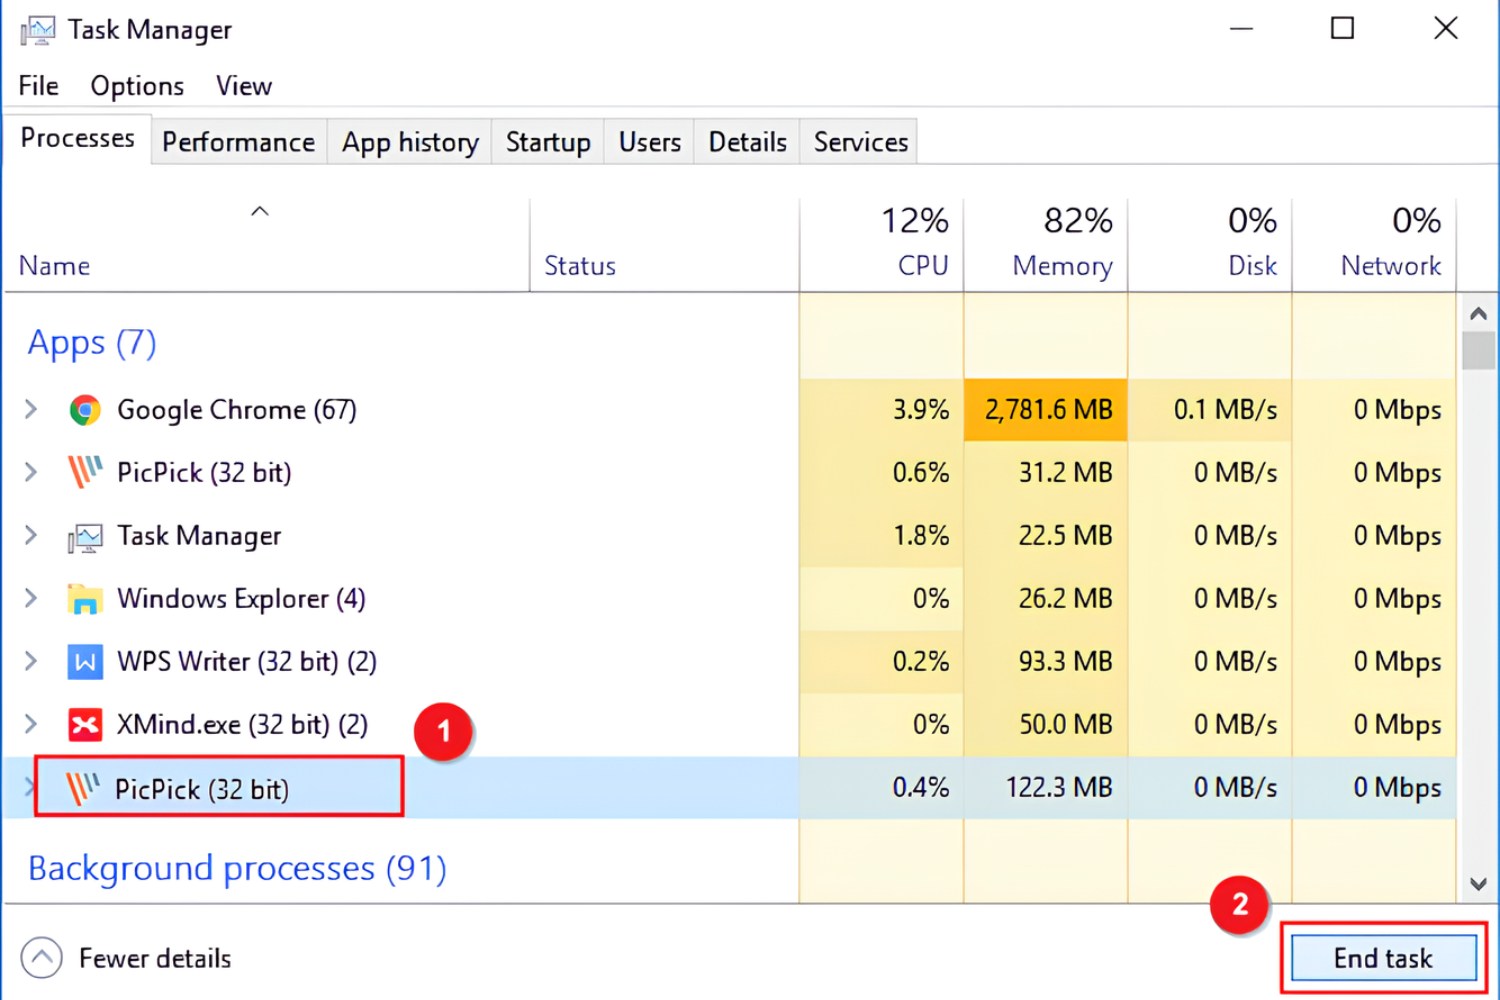
Ctrl + Shift + Escto directly open the Task Manager. - In the Task Manager window, click on the “Startup” tab.
- You will see a list of all the programs that start up with your computer. Right-click on the program you want to disable and select “Disable” from the drop-down menu. Note that some programs may have a “Status” column indicating whether they are enabled or disabled.
- Alternatively, if you want to completely remove a program from the startup list, select it and click on the “Disable” button located at the bottom-right corner of the Task Manager window.
- Continue disabling or removing any other unnecessary programs from the list.
- Once you are done making changes, close the Task Manager. The next time you start your computer, the disabled or removed programs will no longer launch on startup.
By using the Task Manager, you have full control over which programs start when you boot up your Windows 10 computer. It allows you to easily disable or remove unnecessary startup programs, thereby improving your system’s performance and reducing the time it takes to start up.
Keep in mind that disabling or removing certain startup programs may have an impact on their functionality. It’s always a good idea to research the program or consult the program’s documentation to determine if it’s safe to disable or remove from startup.
Now that you know how to manage startup programs using the Task Manager, let’s explore another method in the next section.
Method 2: Using the Startup Folder
Another method to change startup programs in Windows 10 is by utilizing the Startup folder. This method allows you to directly manage the programs that are set to launch at startup by placing shortcuts in the Startup folder. Follow these steps to make use of the Startup folder:
- Open File Explorer by right-clicking on the Start button and selecting “File Explorer” from the menu.
- In the File Explorer window, navigate to the following directory:
C:\Users\YourUserName\AppData\Roaming\Microsoft\Windows\Start Menu\Programs\Startup
ReplaceYourUserNamewith your actual Windows username. - Once you are in the Startup folder, you will see a collection of shortcuts to various programs. These are the programs that are set to open at startup.
- To add a program to the startup list, simply drag and drop a shortcut of the desired program into the Startup folder. You can create a shortcut by right-clicking on the program executable file and selecting “Create shortcut” from the context menu. Alternatively, you can copy an existing shortcut from another location and paste it into the Startup folder.
- If you want to remove a program from the startup list, simply delete its shortcut from the Startup folder.
Using the Startup folder provides a convenient way to manage your startup programs. You can easily add or remove program shortcuts in the designated folder, giving you control over the applications that launch when your computer starts.
It’s important to note that not all programs create shortcuts in the Startup folder. Some programs may use other methods to start at boot, such as registry entries or system services. So, while this method is effective for programs that have a shortcut in the Startup folder, you may need to utilize other methods to manage startup programs that don’t create shortcuts in this location.
Now that you’re familiar with managing startup programs using the Startup folder, let’s move on to explore another method in the next section.
Method 3: Using the Settings App
If you prefer a more user-friendly approach to managing startup programs in Windows 10, you can make use of the Settings app. The Settings app provides a simplified interface, making it easy to control which programs launch at startup. Follow these steps to change startup programs using the Settings app:
- Open the Settings app by clicking on the “Start” button and selecting the gear icon for “Settings”. You can also use the shortcut
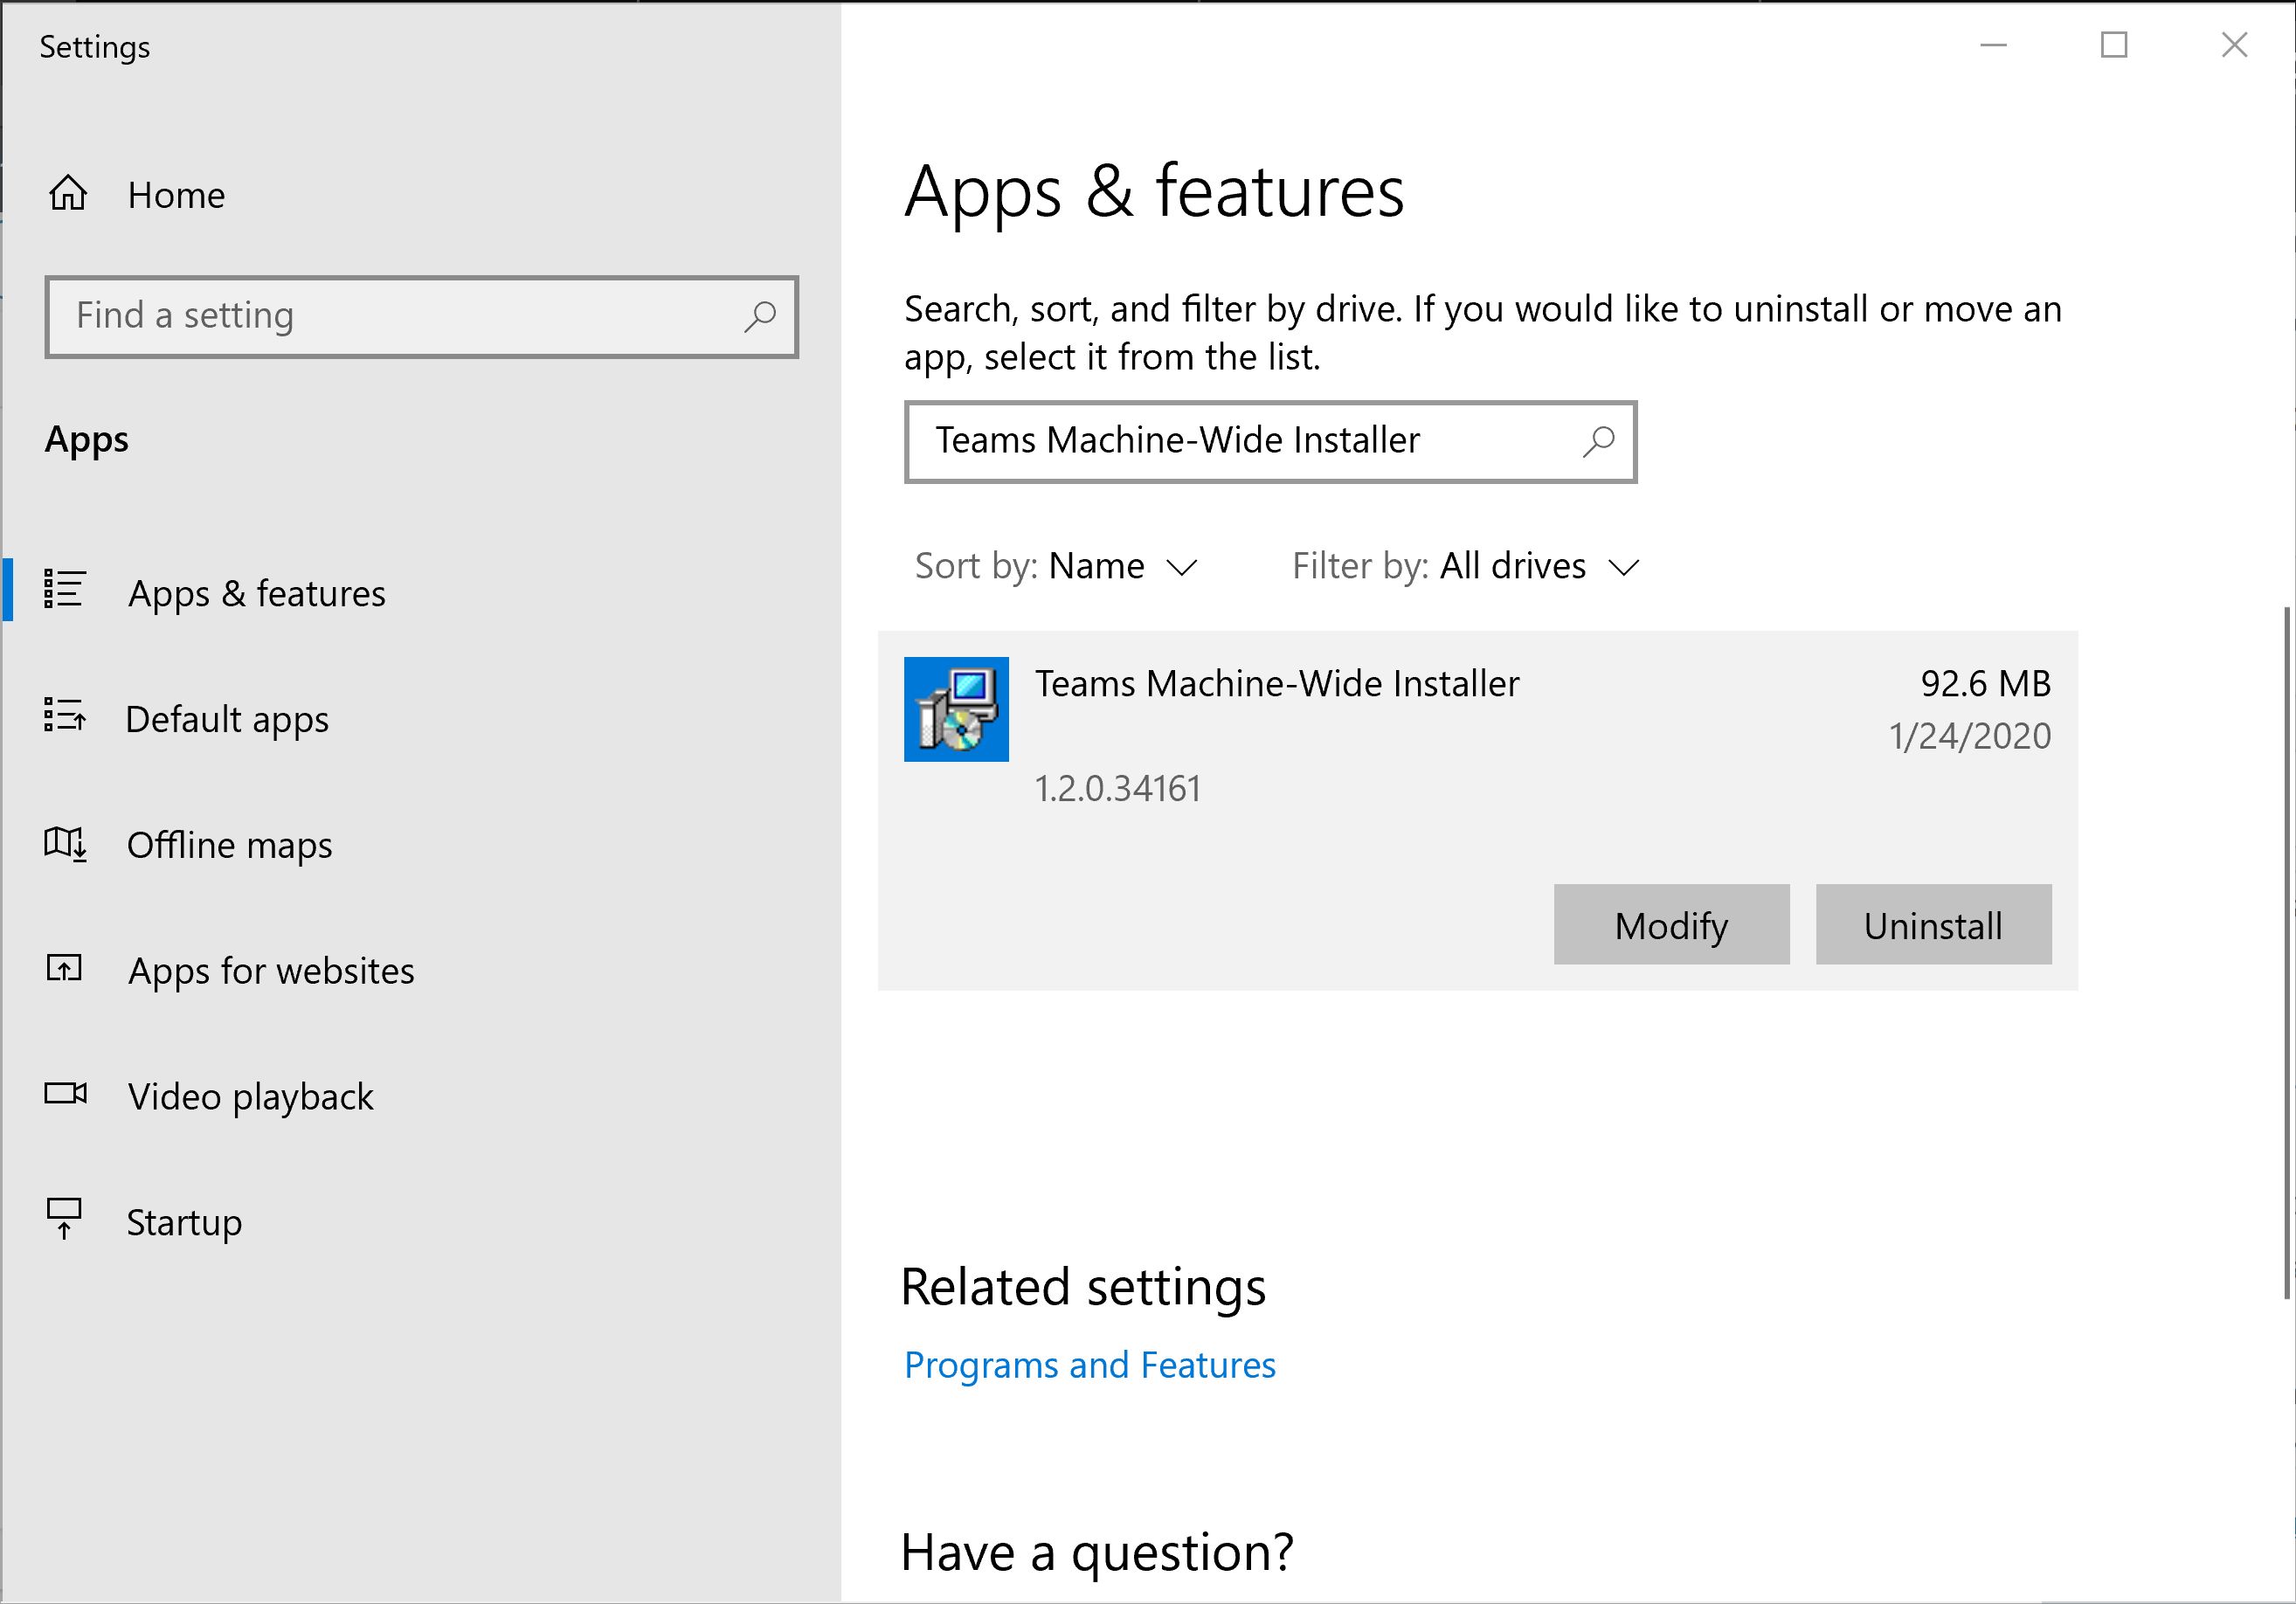
Windows key + Ito directly open the Settings app. - In the Settings app window, click on the “Apps” category.
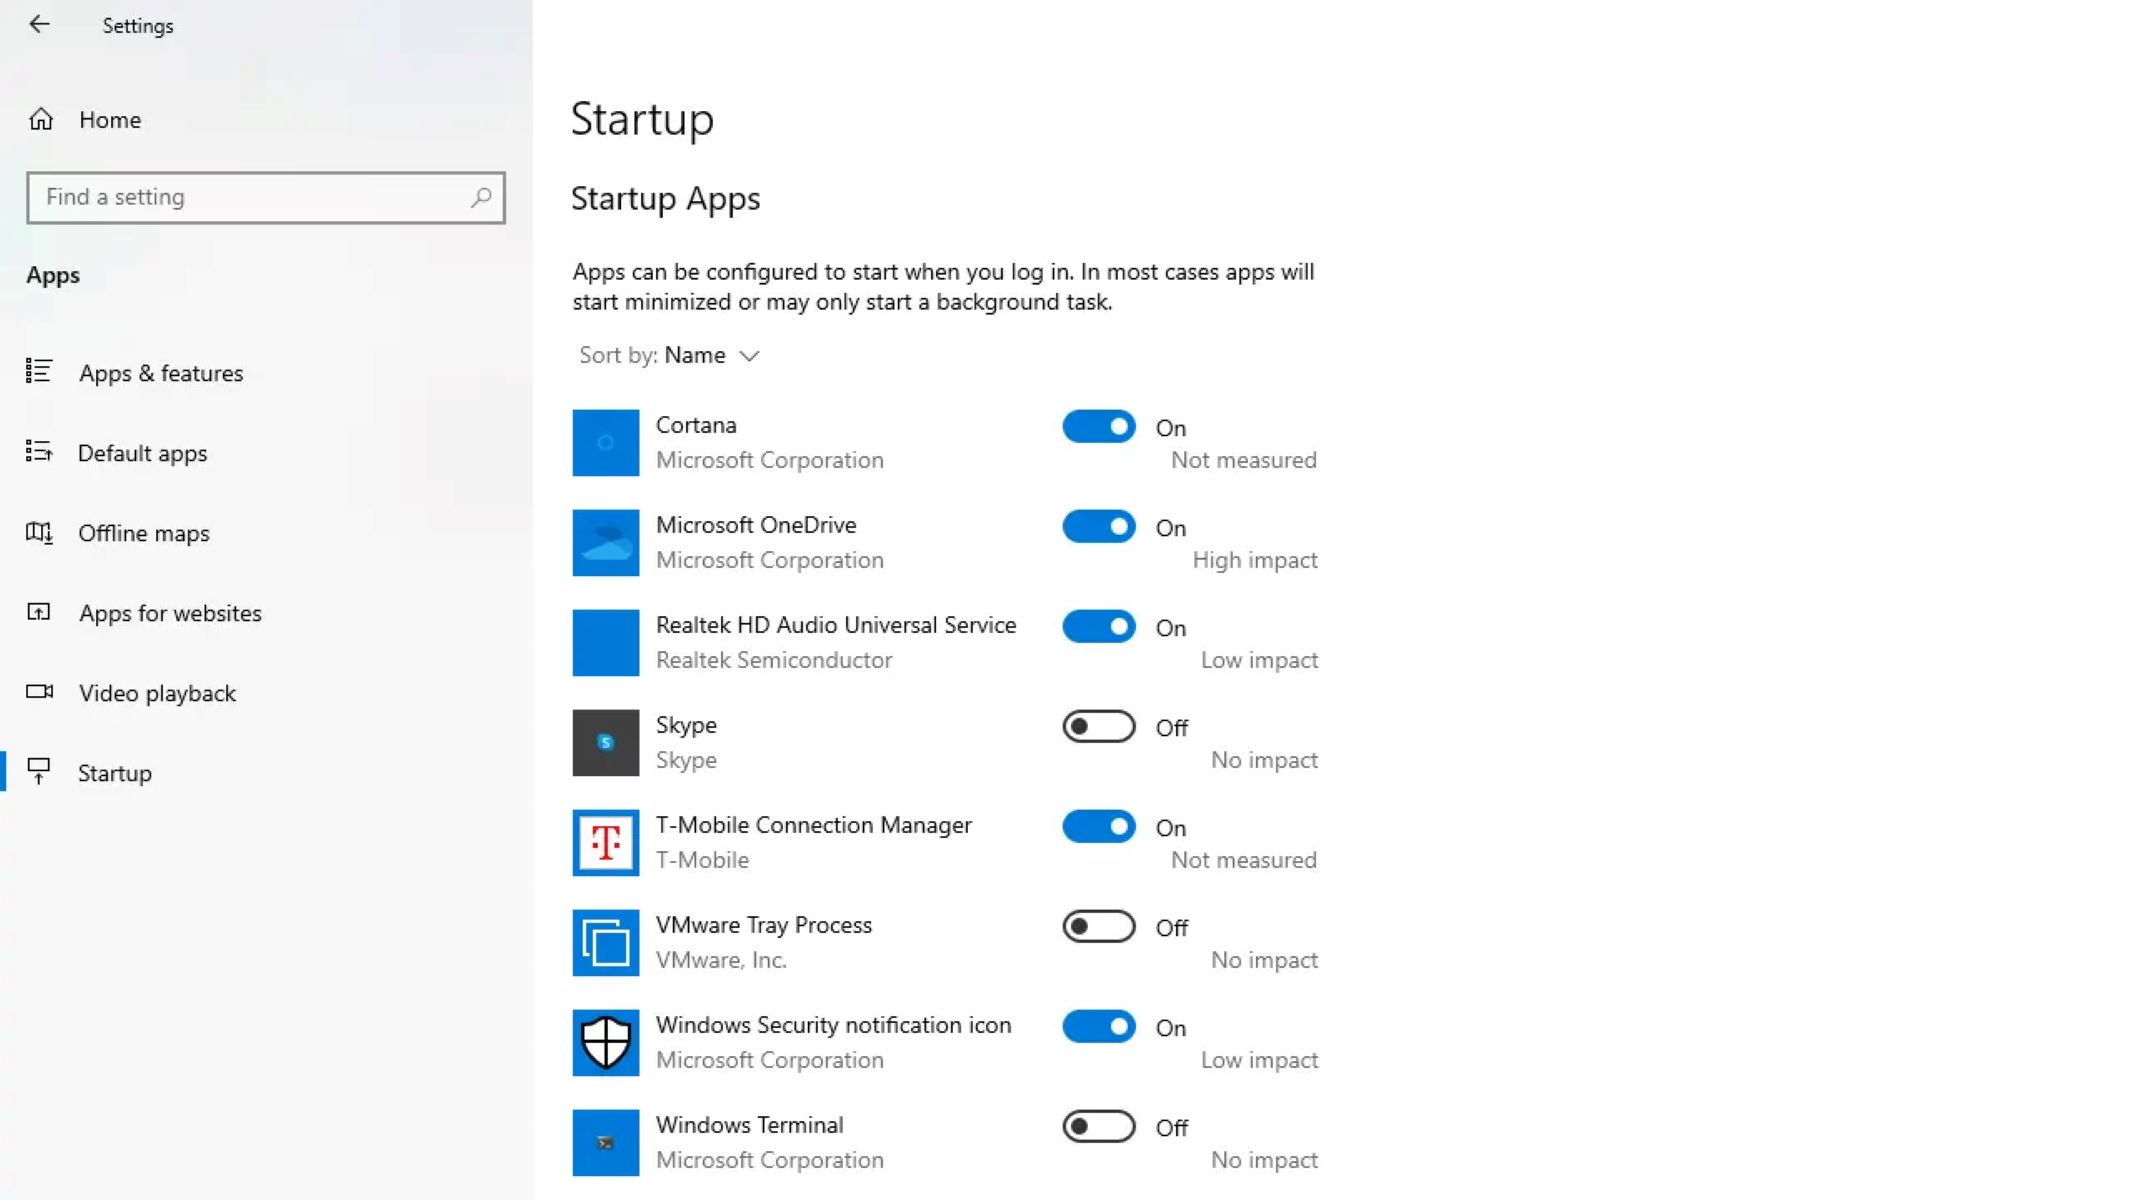
- In the left sidebar, click on “Startup”. This will display a list of programs that are set to start automatically when you log in to your Windows account.
- To disable a program from starting up, toggle the switch next to the program to the “Off” position.
- If you want to enable a previously disabled program to start up again, simply toggle the switch to the “On” position.
Using the Settings app provides a simple and intuitive way to manage startup programs. You can easily toggle the switches to enable or disable programs from launching at startup, giving you control over your system’s startup behavior.
It’s worth noting that the Settings app only displays programs that have been specifically designed to have a startup functionality. Some programs may not show up in the list, but they can still be managed using other methods, such as the Task Manager or the Startup folder.
Now that you know how to manage startup programs using the Settings app, let’s explore another method in the next section.
Method 4: Using the Registry Editor
For advanced users who are comfortable making changes to the Windows registry, the Registry Editor provides a powerful method to modify startup programs. The registry contains settings and configurations for various aspects of the operating system, including startup programs. Before proceeding, it’s important to note that making incorrect changes to the registry can have serious consequences, so it is recommended to create a backup or restore point before making any modifications. Follow these steps to change startup programs using the Registry Editor:
- Open the Run dialog by pressing
Windows key + Rand typeregedit. Press Enter or click “OK” to open the Registry Editor. - In the Registry Editor, navigate to the following path:
HKEY_CURRENT_USER\Software\Microsoft\Windows\CurrentVersion\Run - On the right-hand side, you will see a list of entries representing the programs that are set to start at user login.
- To disable a program, right-click on its entry and choose “Delete” from the context menu. This will remove the entry and prevent the program from launching at startup.
- If you want to add a program to the startup list, right-click on an empty area on the right-hand side, choose “New”, and then select “String Value”. Rename the new entry to a descriptive name and double-click on it to set the value data to the program’s executable path.
- Make sure to input the correct path to the program’s executable file to ensure it starts up correctly.
- Close the Registry Editor when you are done making changes.
Editing the registry allows you to have more control over your startup programs. However, it’s crucial to be cautious when making changes to the registry, as incorrect modifications can cause system instability or even prevent Windows from functioning properly.
Now that you know how to change startup programs using the Registry Editor, it’s important to exercise caution and only make changes if you are comfortable working with the registry.
Conclusion
Managing startup programs in Windows 10 is essential for optimizing system performance, reducing startup time, and ensuring that only necessary programs launch during boot. In this article, we explored four different methods to change startup programs: using the Task Manager, the Startup folder, the Settings app, and the Registry Editor.
The Task Manager provides a convenient way to disable or remove startup programs, giving you control over what applications launch when you start your computer. The Startup folder allows you to manage programs by adding or removing shortcuts, simplifying the process of controlling startup behavior. The Settings app offers a user-friendly interface to enable or disable programs from starting at boot. Lastly, the Registry Editor provides more advanced control for experienced users, allowing direct modifications to the Windows registry.
When modifying startup programs, it’s important to exercise caution. Disabling or removing essential programs can lead to system errors or functional issues. Always research the program or consult its documentation before making any changes.
By utilizing the methods described in this article, you can customize your startup experience and ensure that only the programs you need are running when you log in to your Windows 10 computer.
Remember, the key is finding the right balance between having essential programs launch at startup while keeping unnecessary ones from slowing down your system. Take some time to evaluate your startup programs and make adjustments as needed to enhance your Windows 10 startup experience.