Introduction
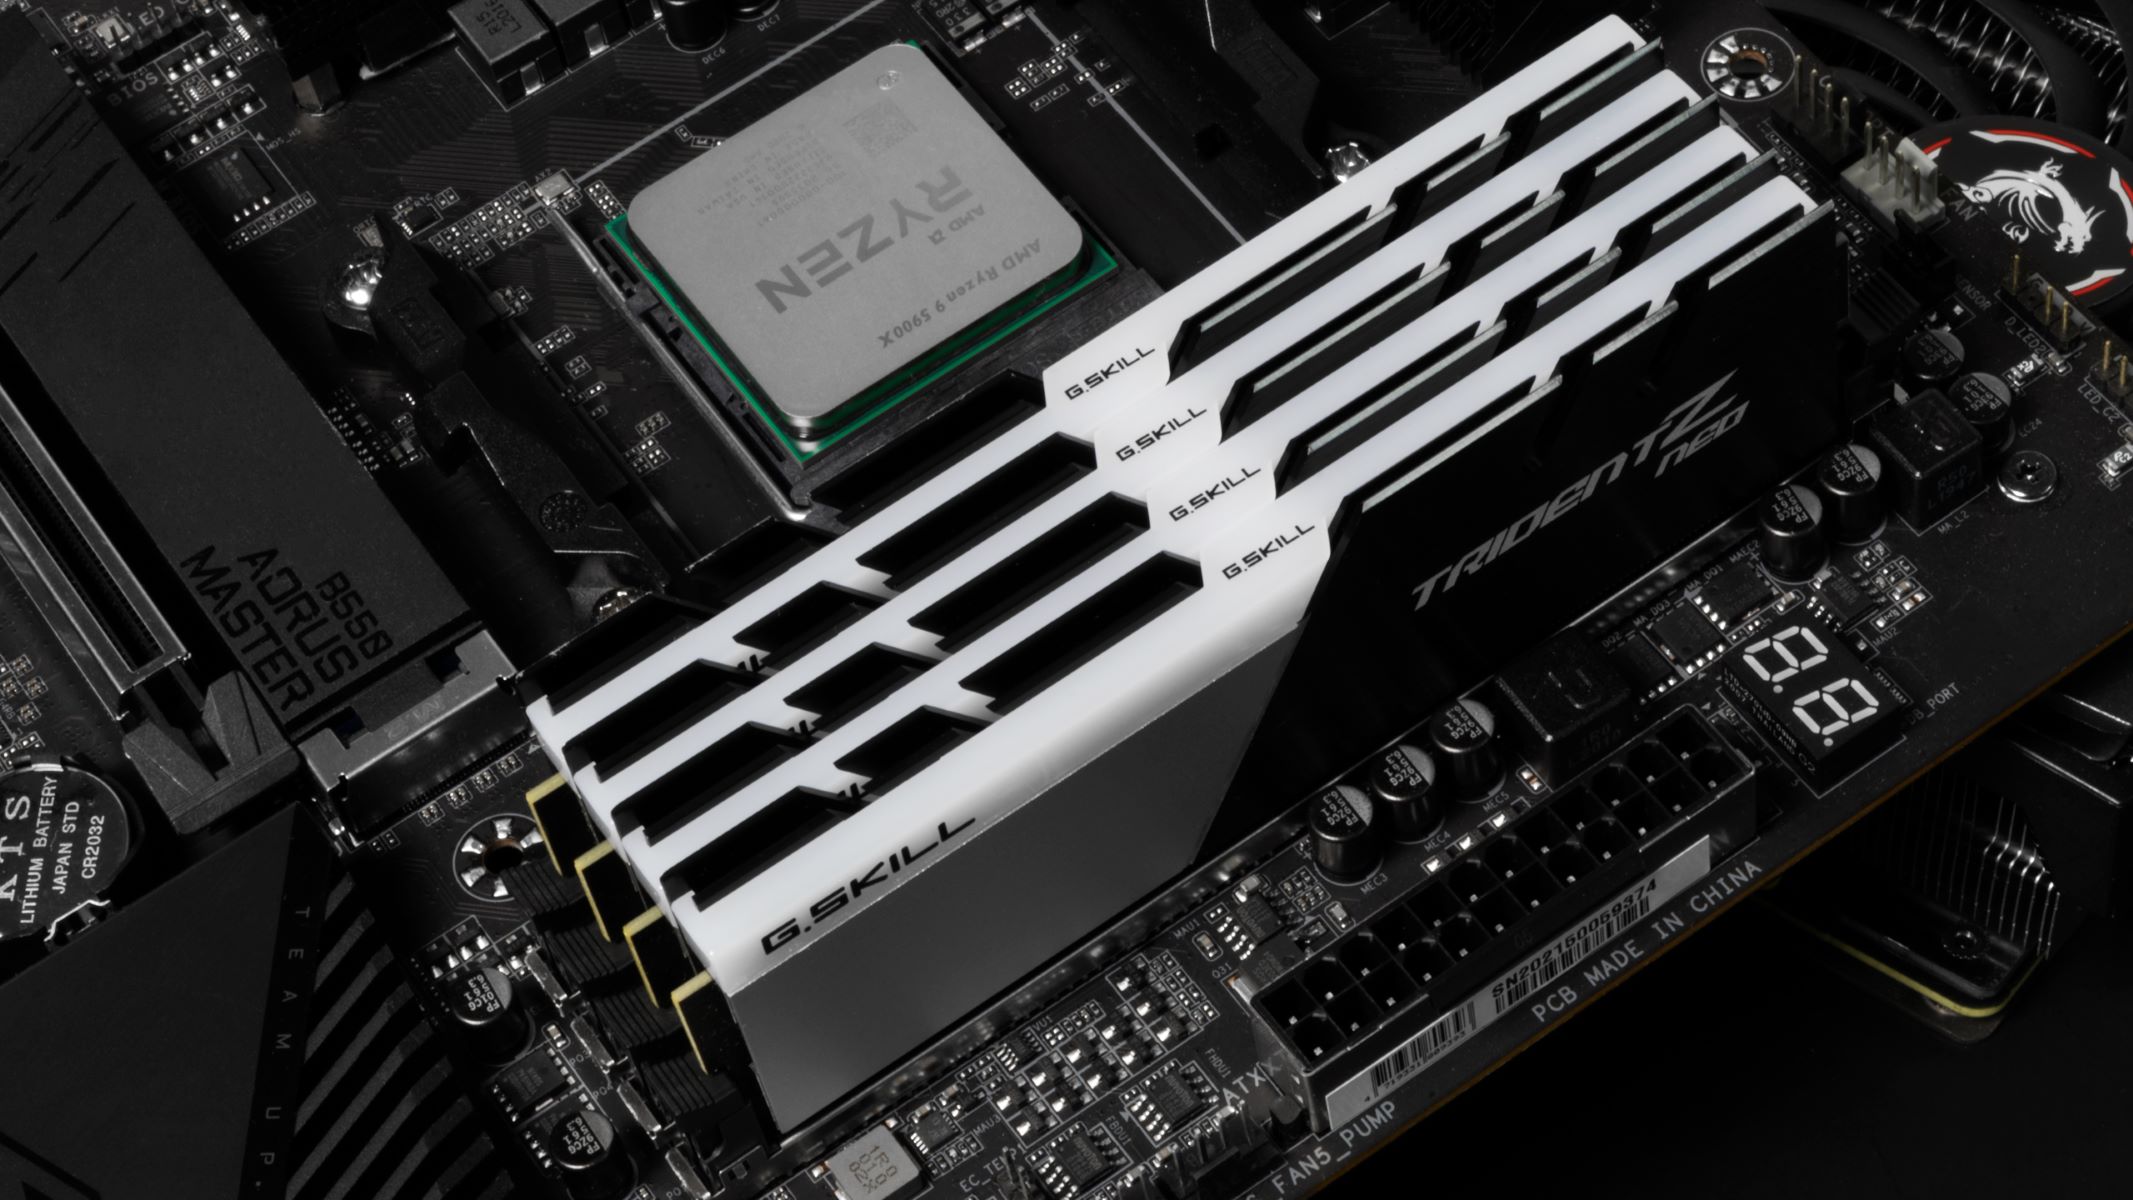
Changing the RAM speed in the ASUS BIOS can have a significant impact on the performance of your computer. RAM, or Random Access Memory, is a key component that determines how quickly data can be stored and accessed by the computer’s processor. By adjusting the RAM speed, you can optimize the performance of your system and ensure that it is running at its peak efficiency.
The ASUS BIOS, also known as the Basic Input/Output System, is a software program embedded in the motherboard of your computer. It provides a user-friendly interface that allows you to make changes to various hardware settings, including the RAM speed. However, accessing and navigating the BIOS interface can be intimidating for those who are not familiar with it.
In this article, we will guide you through the step-by-step process of changing the RAM speed in the ASUS BIOS. Whether you want to overclock your RAM for enhanced performance or adjust it to match the specifications of new RAM modules, this guide will help you do it easily and safely.
Before we proceed, it’s important to note that adjusting the RAM speed in the BIOS should be done with caution. Incorrect settings can lead to system instability or even damage to your hardware. It is always recommended to refer to the specifications and guidelines provided by the RAM manufacturer or consult with an experienced technician if you are unsure about any settings.
Now, let’s dive into the process of changing the RAM speed in the ASUS BIOS and unleash the full potential of your computer’s performance.
Step 1: Accessing the ASUS BIOS
Before you can change the RAM speed in the ASUS BIOS, you need to access the BIOS interface. The method of accessing the BIOS may vary depending on the model of your ASUS motherboard. Here are the general steps to access the BIOS:
- Restart your computer. As the computer is booting up, you need to press a specific key to enter the BIOS. The key may be different for each ASUS motherboard model, but common keys include Del, F2, or F10. Look for the prompt that says “Press [key] to enter BIOS” during the boot-up sequence.
- Quickly press the designated key to enter the BIOS. Timing is crucial, so be ready to press the key as soon as you see the prompt. If you miss the opportunity, you will need to restart your computer and try again.
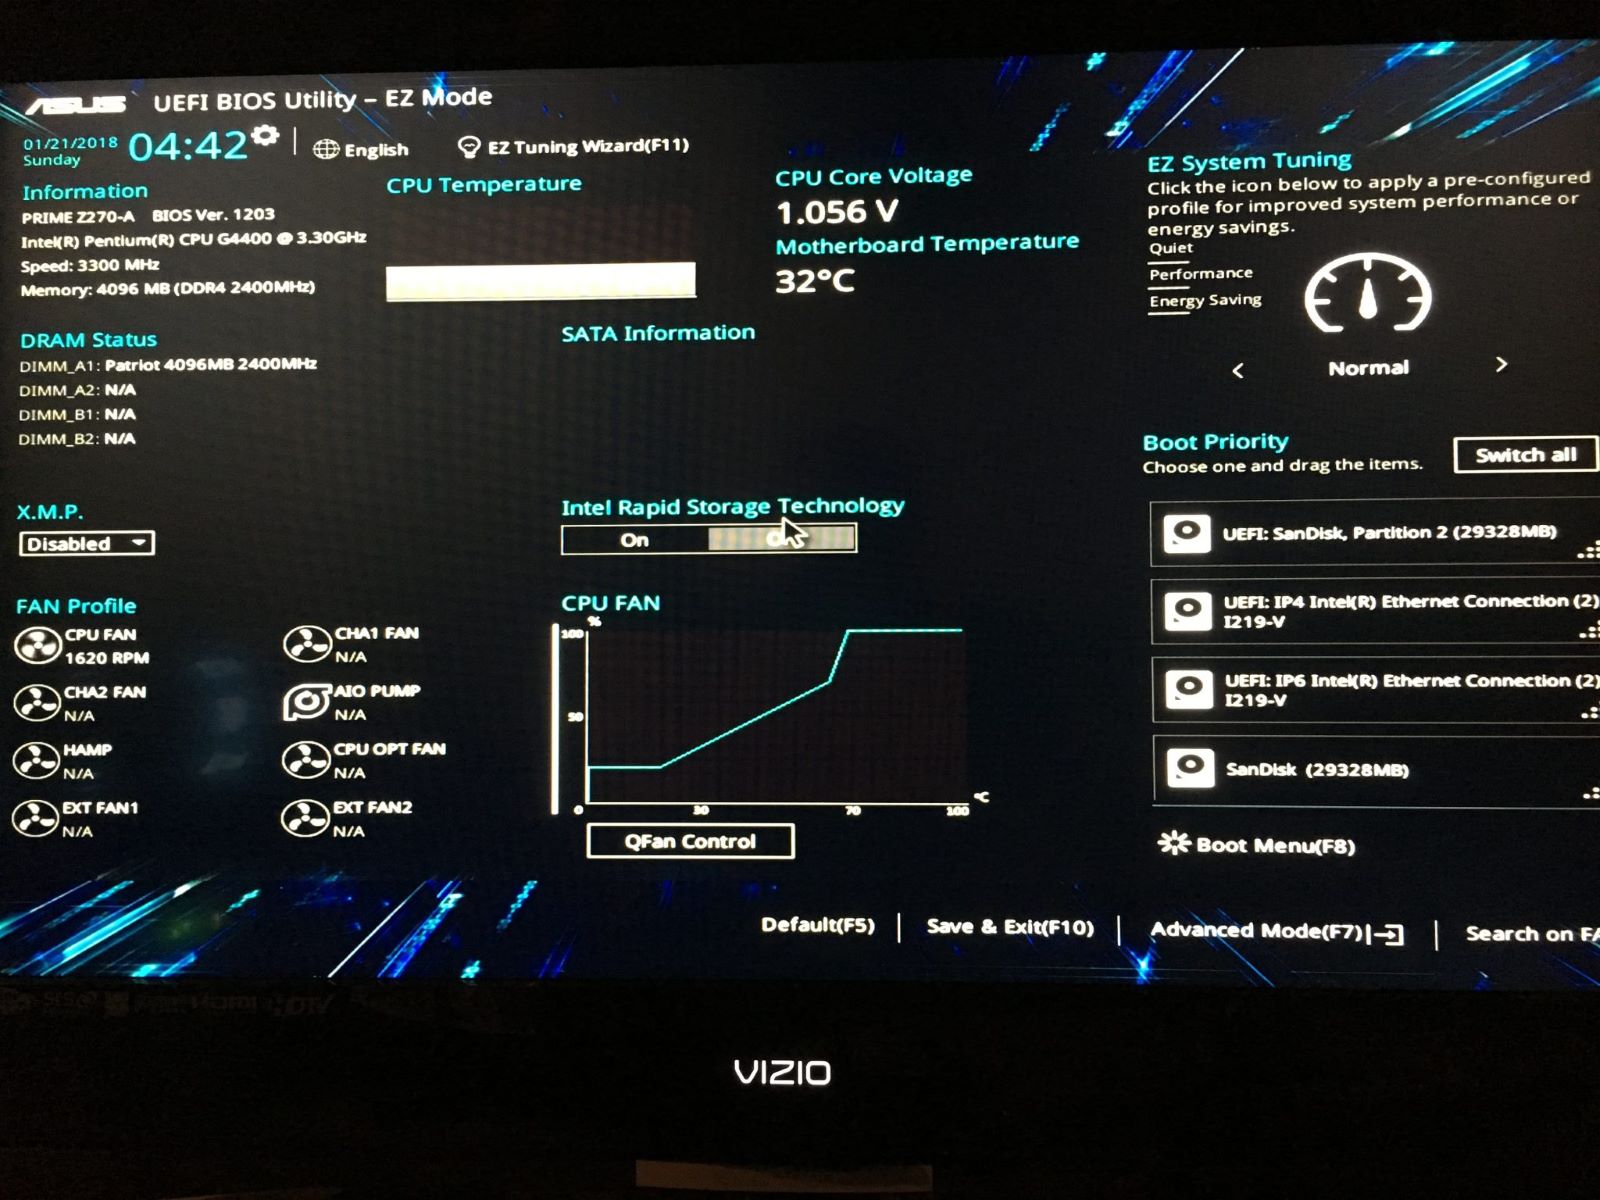
- You should now enter the ASUS BIOS interface. The interface may vary depending on the version of the BIOS installed on your motherboard. It typically consists of a series of menus and submenus, allowing you to navigate through the different settings.
It’s worth noting that some newer ASUS motherboards also offer the option to access the BIOS through software applications such as AI Suite or the UEFI BIOS Utility. If your motherboard has these options, you can access the BIOS through the respective software tools provided by ASUS.
Now that you’ve successfully accessed the ASUS BIOS, you can proceed to the next step of changing the RAM speed. Remember to take caution while navigating the BIOS interface and follow the instructions carefully to avoid any unintended changes to other settings.
Step 2: Navigating the BIOS Interface
Once you have entered the ASUS BIOS interface, you will need to navigate through the menus to locate the RAM speed settings. Here’s how to do it:
- Use the arrow keys on your keyboard to navigate through the different menus and options in the BIOS interface. The specific layout and organization of the menus may vary depending on your ASUS motherboard model.
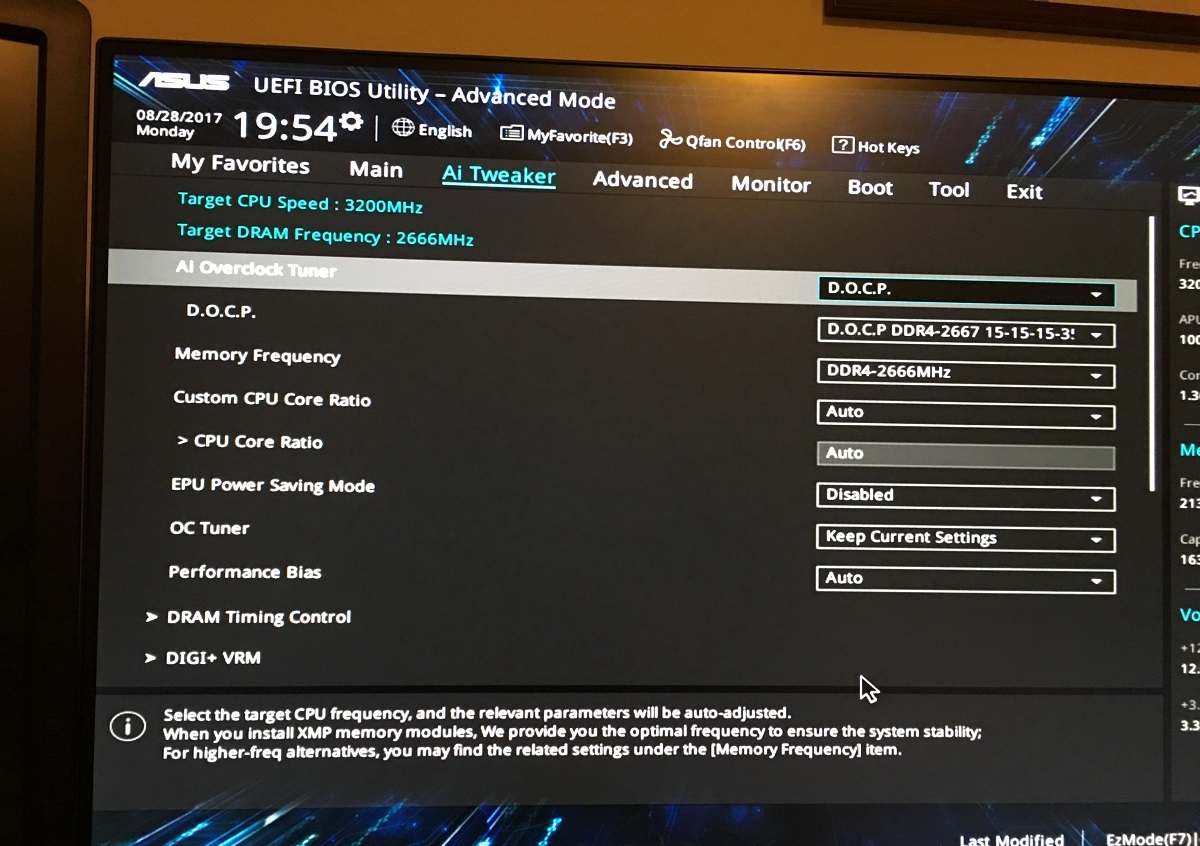
- Look for a menu that is related to memory settings or overclocking. In some BIOS versions, this menu may be labeled as “Advanced Settings,” “Extreme Tweaker,” or something similar. The RAM speed settings are usually located within this menu.
- Once you have found the appropriate menu, navigate to it and press Enter to access the submenus and options within it.
- Within the memory settings or overclocking menu, you may come across options such as “DRAM Frequency,” “Memory Clock,” or “Memory Speed.” These are the settings that control the RAM speed.
It’s important to note that the exact wording and placement of these settings may differ depending on your ASUS motherboard model and the version of the BIOS installed. If you’re unsure about the location of the RAM speed settings, consult your motherboard’s manual or search for specific instructions related to your model online.
Remember to be cautious while navigating the BIOS interface. Avoid making changes to any settings that you are uncertain about, as this could lead to system instability or other issues. Only make changes to the RAM speed settings and other related options.
Now that you have successfully navigated to the appropriate menu, it’s time to proceed to the next step and change the RAM speed in the ASUS BIOS.
Step 3: Locating the RAM Speed Settings
Once you have entered the appropriate menu in the ASUS BIOS interface, you are now ready to locate the RAM speed settings. Follow these steps:
- Scan through the options and submenus within the memory settings or overclocking menu to find the specific settings related to RAM speed. Look for options that mention “DRAM Frequency,” “Memory Clock,” or “Memory Speed.”
- Depending on your ASUS motherboard model and BIOS version, you may find the RAM speed settings in a submenu labeled “Memory Configuration,” “DRAM Timing Control,” or similar. Enter that submenu to access more granular settings for the RAM.
- Once you have located the RAM speed settings, take note of the current values. You may also see additional options such as “Auto,” which automatically adjusts the RAM speed based on the detected hardware, or “XMP,” which enables the use of preconfigured profiles for optimized RAM performance.
It’s important to understand that changing the RAM speed settings requires careful consideration and knowledge of your RAM modules’ capabilities. Reference the specifications provided by the RAM manufacturer to ensure compatibility with the desired speed settings.
If you plan to manually adjust the RAM speed, you may have the option to input the desired speed directly or choose from a list of predefined values. Higher speed settings can provide better performance but require stable hardware and proper cooling. It’s recommended to consult the RAM manufacturer’s specifications or seek advice from knowledgeable sources to find the optimal RAM speed for your system.
Once you have familiarized yourself with the RAM speed settings and determined the changes you wish to make, proceed to the next step to adjust the RAM speed in the ASUS BIOS.
Step 4: Changing the RAM Speed
Now that you have located the RAM speed settings in the ASUS BIOS, you can proceed with changing the speed according to your desired configuration. Follow these steps:
- Select the desired RAM speed option or manually input the desired speed using the keyboard or the arrow keys. Depending on your ASUS motherboard model and BIOS version, you may have options such as “Auto,” “XMP,” or specific speeds in megahertz (MHz).
- If you choose to manually input the RAM speed, ensure that the value you enter is within the supported range of your RAM modules. Going beyond the recommended range can lead to system instability or other issues. Refer to the specifications provided by the RAM manufacturer for guidance.
- If your BIOS supports the XMP (Extreme Memory Profile) feature, you can enable it to automatically apply preconfigured settings for optimized RAM performance. XMP profiles are typically designed and tested by the RAM manufacturer to ensure stability and compatibility.
- Make any other necessary adjustments related to timing or voltage settings, if applicable. Advanced users may fine-tune these settings for better performance, but it’s important to do proper research and proceed with caution to avoid causing any harm to your hardware.
It’s worth mentioning that changing the RAM speed in the BIOS can have a direct impact on system stability and compatibility. If you experience any issues after changing the RAM speed, such as system crashes, stability problems, or boot failures, it is advisable to revert to the previous settings or consult with a knowledgeable technician for assistance.
Once you have made the desired changes to the RAM speed and any related settings, continue to the next step to save your changes and exit the ASUS BIOS interface.
Step 5: Saving and Exiting the BIOS
After you have made the necessary changes to the RAM speed in the ASUS BIOS, it’s important to save the settings and exit the BIOS interface properly. Follow these steps:
- Look for an option to save the changes you have made. In most ASUS BIOS versions, you will find a “Save & Exit” or similar option in the main menu or at the bottom of the screen.
- Select the “Save & Exit” option using the arrow keys on your keyboard.
- A confirmation screen may appear, asking you to confirm the changes and save them. Press “Enter” to proceed.
- The BIOS will then save the changes and restart your computer to apply them. Allow the system to complete the rebooting process.
Once your computer has restarted, it will boot up with the new RAM speed settings you have selected. You can verify the changes by checking the RAM speed in the operating system or by using third-party software tools that monitor system information.
Remember that changing the RAM speed in the BIOS can have a direct impact on your system’s stability and compatibility. If you experience any issues or notice any signs of instability after adjusting the RAM speed, it is advisable to revert to the previous settings or consult with a knowledgeable technician for assistance.
With these steps, you have successfully changed the RAM speed in the ASUS BIOS. Enjoy the improved performance and efficiency of your computer with the optimized RAM speed settings!
Conclusion
Changing the RAM speed in the ASUS BIOS can be a powerful way to optimize the performance of your computer. By adjusting the RAM speed, you can enhance the speed and efficiency at which data is accessed and stored in your system, leading to improved overall performance.
In this article, we have provided a step-by-step guide on how to change the RAM speed in the ASUS BIOS. We covered the process of accessing the BIOS, navigating its interface, locating the RAM speed settings, changing the speed, and saving and exiting the BIOS properly.
It’s important to note that adjusting the RAM speed should be done with caution. Incorrect settings can result in system instability or damage to your hardware. Always refer to the specifications provided by the RAM manufacturer and seek guidance from experienced technicians if needed.
Remember to consider the capabilities of your RAM modules and ensure that any adjustments made to the RAM speed are within the supported range. Additionally, be aware of the impact that changing other related settings, such as timing or voltage, may have on the system’s stability and compatibility.
Lastly, it’s always a good practice to monitor your system’s performance and stability after making any changes to the RAM speed. If you encounter any issues or experience instability, consider reverting to the previous settings or consulting experts for further assistance.
By following the steps outlined in this guide, you are now equipped with the knowledge to change the RAM speed in the ASUS BIOS. Take advantage of this capability to optimize your computer’s performance and enjoy a smoother and more efficient computing experience.