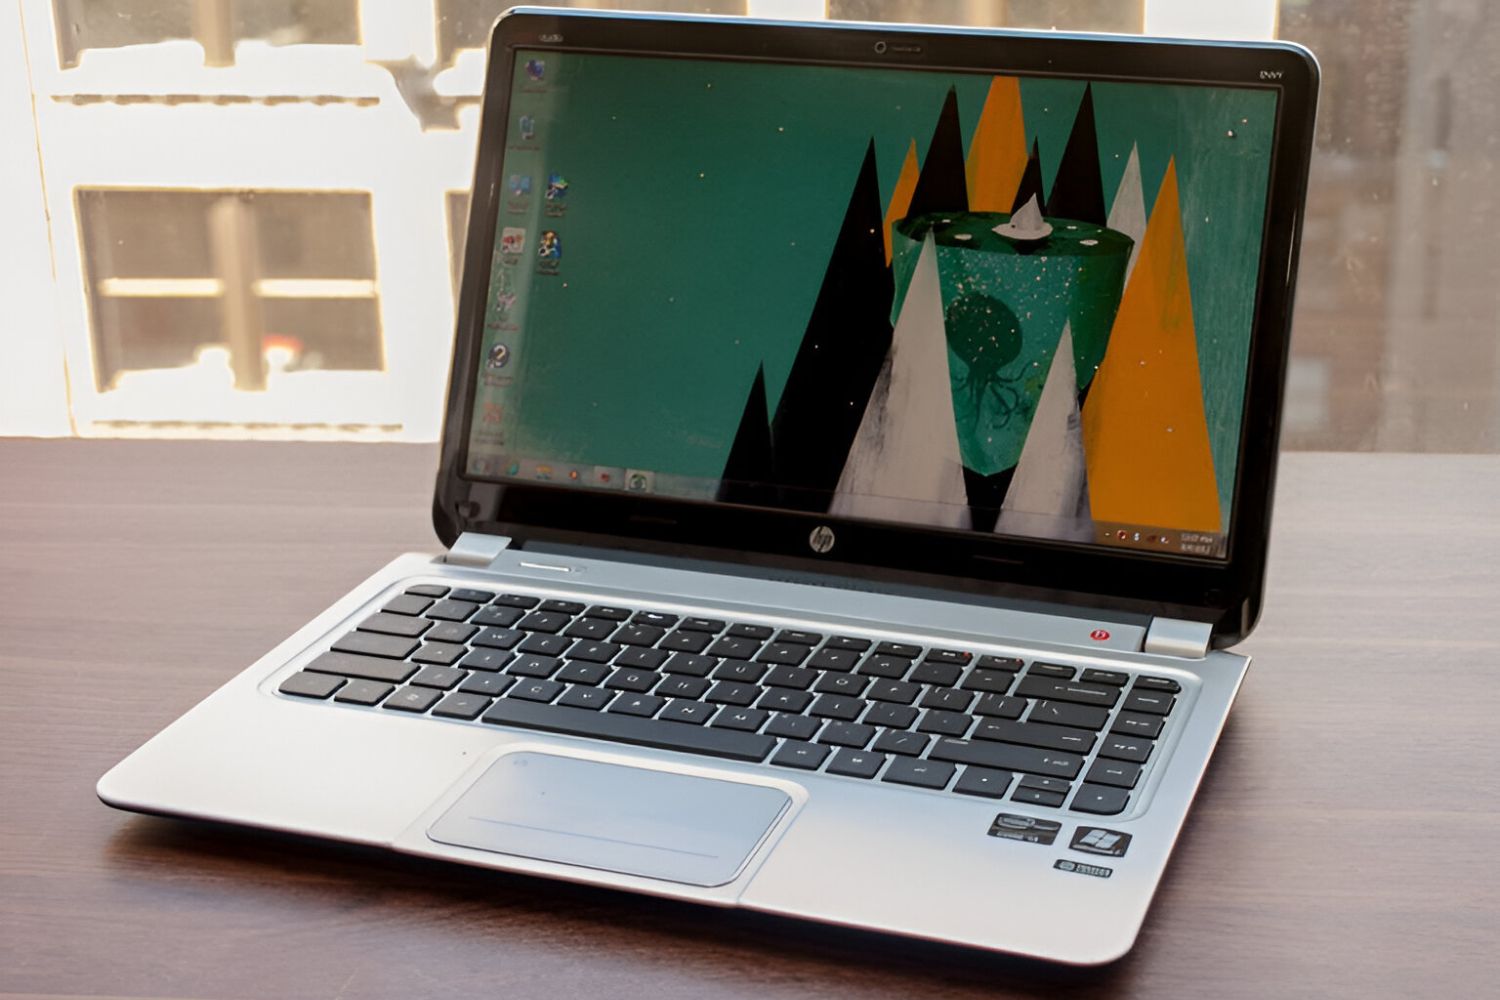
Troubleshooting the Touch Screen Issue
If you’re facing issues with the touch screen of your HP Envy Ultrabook laptop, there are a few troubleshooting steps you can take before considering a replacement. Understanding the potential causes and attempting these solutions can save you time and money.
1. Clean the Screen: Sometimes, the touch screen may not respond properly due to dirt, dust, or fingerprints. Gently wipe the screen using a soft, lint-free cloth to remove any debris or smudges. Avoid using harsh cleaning agents as they might damage the screen.
2. Restart the Laptop: Restarting the laptop can help resolve minor software glitches that could be affecting the touch screen’s functionality. Press the power button and choose “Restart” from the menu options. Once the laptop restarts, check if the touch screen is working properly.
3. Update Device Drivers: Outdated or incompatible device drivers can cause issues with the touch screen. Visit the official HP website and navigate to the support section. Download and install the latest drivers for your specific HP Envy Ultrabook model.
4. Perform a Calibration: Calibrating the touch screen can recalibrate its responsiveness. Open the Control Panel on your laptop, go to the “Hardware and Sound” section, and select “Calibrate the screen for pen or touch input.” Follow the on-screen instructions to complete the calibration process.
5. Disable Conflicting Software: Certain software applications or third-party tools may interfere with the touch screen’s operation. Try disabling any recently installed software temporarily to see if the touch screen starts working again. If the issue persists, you can re-enable the software.
6. Run Diagnostic Tests: HP laptops come with built-in diagnostic tools that can identify and fix hardware issues. Restart your laptop and press the appropriate key (usually F2 or F10) to access the diagnostics utility. Follow the on-screen instructions to run a comprehensive test and check if any issues are detected with the touch screen.
If none of these troubleshooting steps resolve the touch screen issue, it is possible that the touch screen itself may be faulty and require replacement. In such cases, following the appropriate steps to change the touch screen is necessary to restore full functionality to your HP Envy Ultrabook laptop.
Gathering the Necessary Tools
Before you begin the process of changing the touch screen on your HP Envy Ultrabook laptop, it is important to gather all the necessary tools. Having the right tools at hand will ensure a smooth and successful replacement process.
Here are the tools you will need:
- A small Phillips screwdriver: This screwdriver will be used to remove the screws that secure the bottom cover of your laptop. Make sure it is the appropriate size for the screws on your specific model.
- A plastic opening tool or a guitar pick: This tool is ideal for prying open the laptop’s bottom cover without causing any damage to the delicate components.
- A clean, lint-free cloth: Having a cloth on hand will allow you to clean the screen and ensure a clear view during the replacement process.
- A pair of tweezers: Tweezers can be handy for manipulating small parts or connectors during the touch screen replacement process.
- A container or tray: Use a container or tray to keep track of the screws and small components you remove from the laptop. This will prevent them from getting lost or mixed up.
- A replacement touch screen: Make sure to acquire a compatible touch screen for your specific HP Envy Ultrabook model. You can purchase the replacement touch screen from an authorized HP service center or a reliable online retailer.
- Protective gloves: Wearing gloves can help prevent fingerprints and smudges from being transferred onto the replacement touch screen during the installation process.
- Optional: ESD wrist strap or grounding mat: To protect the laptop components from electrostatic discharge, it is recommended to use an ESD wrist strap or work on a grounded mat while performing the touch screen replacement.
By ensuring you have all these tools ready before you start the touch screen replacement process, you will be well-prepared and minimize the risk of any damage to your laptop. Take the time to gather these tools and have them within reach as you proceed to the next steps of changing the touch screen on your HP Envy Ultrabook laptop.
Disconnecting the Power and Removing the Battery
Before you can begin the process of changing the touch screen on your HP Envy Ultrabook laptop, it is crucial to disconnect the power source and remove the battery. This step ensures your safety and prevents any potential damage to the laptop’s internal components.
Follow these steps to disconnect the power and remove the battery:
- Save your work and shut down the laptop: Make sure to save any unsaved work and close all open applications before proceeding. Click on the Start button, select “Shutdown,” and wait for the laptop to power off completely.
- Unplug the power cord: Disconnect the AC power adapter from the laptop and unplug it from the electrical outlet. This step ensures that there is no external power supply connected to the laptop.
- Flip the laptop and locate the battery: Carefully turn the laptop over, placing it on a soft and flat surface. Look for the battery compartment, generally located at the bottom of the laptop. It is usually secured by one or more screws or latches.
- Remove the battery: Using a small Phillips screwdriver, remove the screws that secure the battery in place. Keep track of the screws, placing them in a container or tray to avoid misplacing them. Once the screws are removed, gently lift the battery out of its compartment.
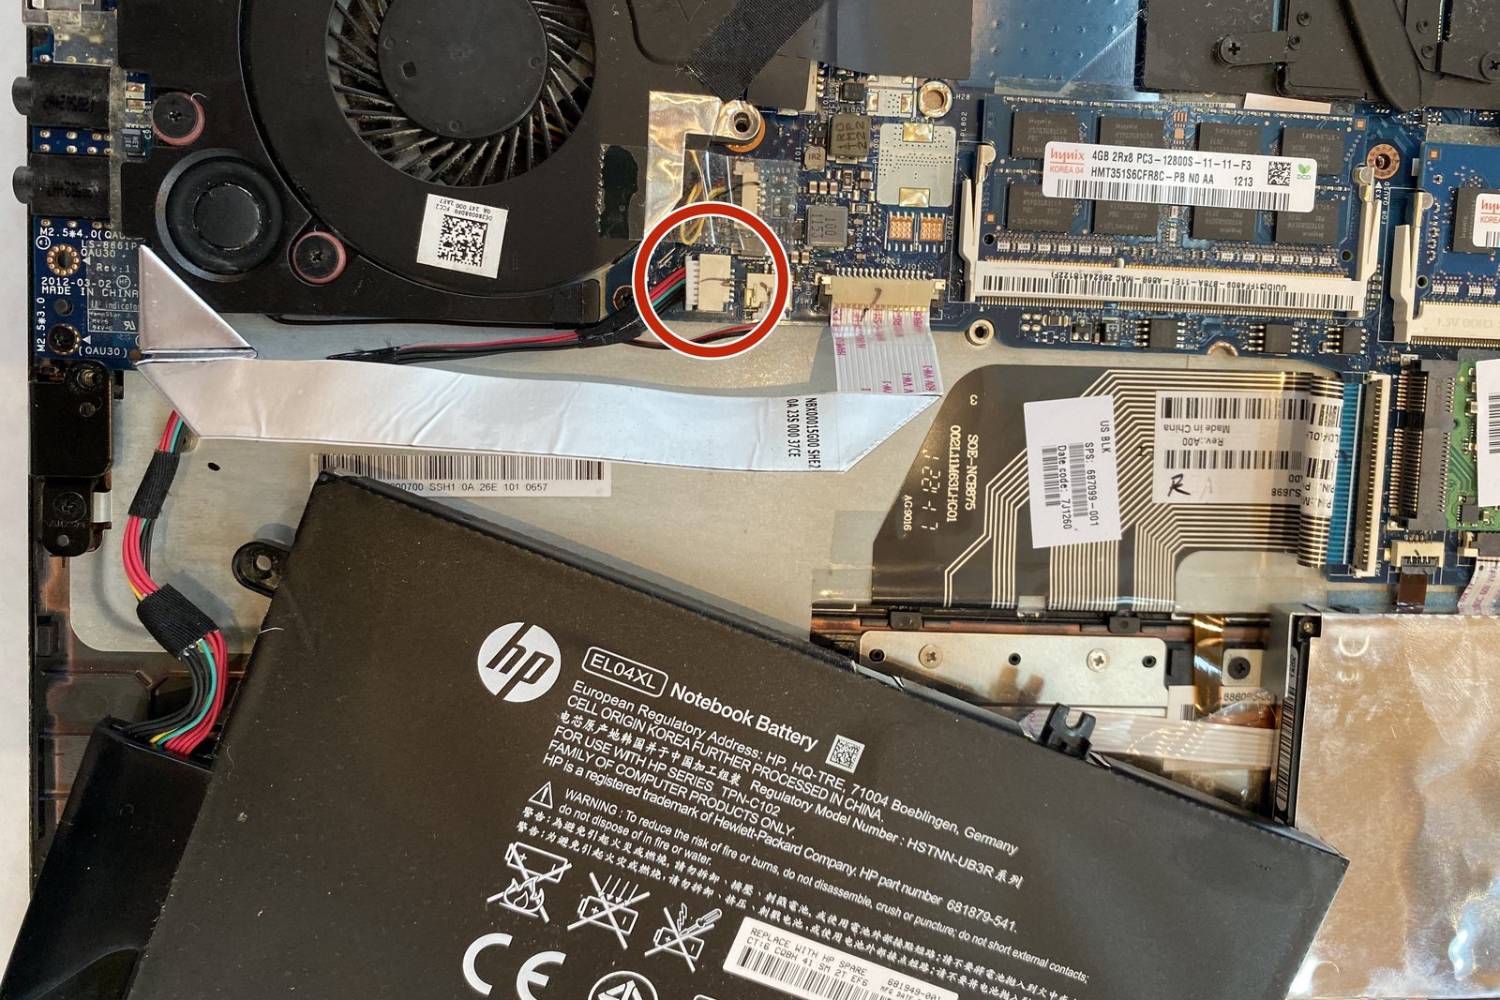
- Disconnect the battery cable: Locate the cable that connects the battery to the laptop’s internal components. Carefully lift the connector tab and gently pull the cable away from the connector to disconnect it. Take care not to pull on the cable itself, as it could get damaged.
Once you have successfully disconnected the power source and removed the battery, you have taken an essential step to ensure your safety during the touch screen replacement process. Keep the battery in a safe place as you proceed with the next steps, and remember to handle it with care to avoid damaging it. With the power source disconnected and the battery removed, you are now ready to move on to the next phase of changing the touch screen on your HP Envy Ultrabook laptop.
Removing the Bottom Cover of the Laptop
Now that you have disconnected the power and removed the battery, it’s time to remove the bottom cover of your HP Envy Ultrabook laptop. This step will grant you access to the internal components and allow for the replacement of the touch screen.
Follow these steps to remove the bottom cover:
- Locate the screws: Flip the laptop back over and identify the screws that secure the bottom cover. These screws are usually located on the back panel or around the edges of the laptop.
- Use the appropriate screwdriver: Select the appropriate size Phillips screwdriver and carefully remove the screws one by one. It’s important to keep track of the screws and place them in a container or tray to prevent losing them.
- Pry open the bottom cover: Once all the screws have been removed, gently insert a plastic opening tool or a guitar pick into the seam between the bottom cover and the laptop’s body. Gradually apply pressure and work your way around the edges, carefully prying the bottom cover open.
- Continue separating the cover: As you go along, you may encounter clips or latches holding the bottom cover in place. Use the opening tool to release these clips by gently prying them open. Take your time and be cautious to avoid damaging the plastic or other components.
- Remove the bottom cover: Once all the clips have been released, carefully lift and remove the bottom cover from the laptop’s body. Set it aside in a safe place, ensuring it doesn’t get scratched or damaged.
With the bottom cover successfully removed, you have gained access to the internal components of your HP Envy Ultrabook laptop. Ensure that you handle the bottom cover with care to avoid any accidental damage. Now you can proceed to the next steps to disconnect and remove the old touch screen and begin the installation of the new touch screen.
Disconnecting and Removing the Old Touch Screen
Now that you have successfully removed the bottom cover, it’s time to disconnect and remove the old touch screen from your HP Envy Ultrabook laptop. This step is essential to make way for the installation of the new touch screen.
Follow these steps to disconnect and remove the old touch screen:
- Locate the touch screen cables: Look for the cables that connect the touch screen to the laptop’s motherboard. These cables are generally located near the bottom of the screen and are secured with adhesive tape or small connectors.
- Remove the adhesive tape or connectors: If the cables are secured with adhesive tape, gently peel it off to expose the connectors. If the cables have small connectors, carefully lift the tabs securing them to the motherboard and gently pull the cables out.
- Separate the touch screen from the laptop: Once the cables are disconnected, you can remove the old touch screen from its housing. Use caution and gently lift it away, ensuring not to put excessive pressure on the display.
- Set aside the old touch screen: Place the old touch screen in a safe location, making sure it is protected from any potential damage. It’s a good idea to wrap it in a soft cloth or place it in an anti-static bag to prevent scratches or electrostatic discharge.
By following these steps, you have successfully disconnected and removed the old touch screen from your HP Envy Ultrabook laptop. Take extra care when handling the touch screen to prevent any damage. Now you’re ready to proceed to the next steps to install the new touch screen and restore full functionality to your laptop.
Installing the New Touch Screen
With the old touch screen removed, it’s time to install the new touch screen onto your HP Envy Ultrabook laptop. Follow these steps to ensure a smooth and successful installation:
- Remove the new touch screen from its packaging: Carefully unwrap the new touch screen, ensuring not to touch the screen itself to avoid leaving smudges or fingerprints.
- Position the new touch screen correctly: Align the new touch screen with the opening on the laptop’s housing, making sure it fits properly. Take note of any tabs or notches that need to line up with the corresponding slots on the laptop.
- Connect the touch screen cables: Gently connect the touch screen cables to their respective connectors on the laptop’s motherboard. If the cables have small connectors, ensure they are properly aligned and push them in until they snap into place. If there is adhesive tape, reattach it to secure the cables.
- Secure the touch screen in place: Once the cables are connected, gently press the edges of the touch screen to ensure it is seated properly. Take care not to apply excessive pressure to the screen itself to avoid any damage.
- Test the touch screen: Before reassembling the laptop, plug in the power cable and boot up the laptop. Test the functionality of the new touch screen by tapping and swiping on various parts of the display. Make sure it responds accurately and smoothly.
If the new touch screen is functioning correctly, you can proceed with reassembling the laptop. However, if you encounter any issues with the touch screen, double-check the cable connections and repeat the installation process if necessary. It’s essential to ensure the touch screen is properly installed and fully functional before moving forward.
By following these steps and taking care during the installation process, you can successfully install the new touch screen onto your HP Envy Ultrabook laptop. Once you’re satisfied with the functionality of the new touch screen, you can proceed to reassemble the laptop and enjoy the renewed touch screen experience.
Reconnecting and Securing the Touch Screen Cables
With the new touch screen properly installed, the next step is to reconnect and secure the touch screen cables on your HP Envy Ultrabook laptop. This ensures a stable and reliable connection for optimal touch screen functionality.
Follow these steps to reconnect and secure the touch screen cables:
- Locate the touch screen cables: Identify the cables that were previously disconnected from the old touch screen. They should be coming from the bottom of the display and connected to the laptop’s motherboard.
- Align the connectors: Carefully align the connectors on the touch screen cables with their corresponding slots on the motherboard. Take note of any orientation markers, tabs, or notches that need to match up for correct alignment.
- Connect the cables: Once the connectors are properly aligned, gently insert the touch screen cables into their respective slots on the motherboard. Ensure a snug fit, pushing the connectors in until they click into place or are fully seated.
- Secure the cables: Depending on the laptop model, there may be adhesive tape or small tabs provided to secure the touch screen cables and prevent them from accidentally coming loose. Follow the instructions or use the provided adhesive tape or clips to secure the cables in place.
- Double-check the connections: Once the cables are connected and secured, visually inspect the connections to make sure they are secure and aligned properly. Look for any signs of loose connections or misaligned cables.
Ensuring the touch screen cables are properly connected and secured is critical to the functioning of the touch screen on your HP Envy Ultrabook laptop. Take care to align the connectors correctly and verify their secure attachment to guarantee optimal touch screen performance.
Before proceeding to reassemble the laptop, it’s recommended to power on the laptop and test the touch screen functionality. Verify that the touch screen is responding accurately to your inputs and that there are no issues with the connection. If everything is functioning correctly, you can proceed with reassembling the laptop and completing the touch screen replacement process.
Reassembling the Laptop and Testing the New Touch Screen
Now that the touch screen cables are securely connected, it’s time to reassemble your HP Envy Ultrabook laptop and test the functionality of the new touch screen. Follow these steps to complete the touch screen replacement process:
- Retrieve the bottom cover: Take the bottom cover that you set aside earlier and carefully position it back onto the laptop’s body. Ensure that all the edges align properly with the laptop’s frame.
- Reattach the screws: Using the correct Phillips screwdriver, insert and tighten all the screws that secure the bottom cover. Start with one corner and work your way around, tightening the screws evenly to achieve a balanced fit.
- Power on the laptop: Once the bottom cover is securely in place, plug in the power cord and power on the laptop. Allow it to complete the startup process and reach the desktop screen.
- Test the new touch screen: Verify the functionality of the new touch screen by tapping and swiping on different areas of the display. Ensure that it responds accurately and smoothly to your touch inputs. Test various touch gestures to confirm all aspects of touch screen functionality.
- Check for any issues: Pay close attention to any anomalies or issues with the touch screen, such as unresponsiveness or inaccurate touch tracking. If any problems are detected, double-check the cable connections and repeat the installation steps if necessary.
- Ensure proper calibration: If the touch screen is functioning properly but seems slightly misaligned or imprecise, perform a calibration. Refer to the laptop’s settings or control panel to access the touch screen calibration tool and follow the on-screen instructions.
Once you’ve reassembled the laptop and confirmed the functionality of the new touch screen, congratulations! You have successfully completed the touch screen replacement process on your HP Envy Ultrabook laptop. Enjoy the renewed touch screen experience while using your laptop for all your needs.
Remember to keep the old touch screen and any unused replacement parts in a safe place for future reference or as backup components. Properly dispose of any packaging materials and ensure a clean and organized workspace.
In case you encounter any difficulties or if the touch screen issues persist, it may be necessary to seek professional assistance or contact the manufacturer’s support for further guidance and troubleshooting.
Conclusion
Changing the touch screen on your HP Envy Ultrabook laptop is a process that requires careful steps and attention to detail. By troubleshooting the touch screen issue, gathering the necessary tools, and following the proper procedures, you can successfully replace the touch screen and restore full functionality to your laptop.
Throughout the process, it’s crucial to take precautions and ensure your safety, such as disconnecting the power source and removing the battery. Utilize the appropriate tools and handle the components with care to prevent any damage during the touch screen replacement process.
Remember to reconnect and secure the touch screen cables accurately, as this ensures the proper functioning of the new touch screen. Once the installation is complete, reassemble the laptop and test the touch screen to verify its responsiveness and accuracy.
In the event of any difficulties during the touch screen replacement process, seek professional assistance or contact the manufacturer’s support for guidance and troubleshooting.
By following these steps and guidelines, you can successfully change the touch screen on your HP Envy Ultrabook laptop and enjoy a seamless touch screen experience once again.
Thank you for choosing this guide, and we hope it has been helpful in your touch screen replacement journey. Good luck!