Introduction
Changing your email address on your iPhone can be a necessary step, whether you’re switching email providers, updating your contact information, or simply looking for a fresh start. Thankfully, the process of changing your email address on an iPhone is relatively straightforward and can be done in just a few simple steps.
In this article, we will guide you through the process of changing your email address on your iPhone. We will cover everything from adding a new email account to removing your old email account, and updating your contact information. By following these steps, you’ll be able to seamlessly transition to your new email address while keeping all your important data intact.
Before we begin, it’s important to note that the specific steps may vary slightly depending on the version of iOS you are using. However, the overall process should remain similar, and we will do our best to provide instructions that are applicable to most iPhone users.
So, if you’re ready to update your email address and explore the world of possibilities that a new email account can bring, let’s dive into the step-by-step process of changing your email address on your iPhone.
Why Change Email Address on iPhone?
There are several reasons why you might want to change your email address on your iPhone. Let’s explore some of the most common motivations for making this change:
- Switching Email Providers: Perhaps you’ve decided to switch email providers due to better features, improved security, or a more user-friendly interface. In such cases, changing your email address on your iPhone allows you to seamlessly transition to your new email account and continue accessing your emails on your device.
- Updating Contact Information: If you’ve recently changed your name, got married, or moved to a new location, changing your email address can help ensure that your contacts have accurate information. By updating your email address on your iPhone, you’ll be able to send and receive emails with your updated contact details.
- Improving Privacy and Security: In today’s digital age, privacy and security are paramount. If you suspect that your current email address has been compromised or you simply want to enhance the security of your communications, changing your email address can provide you with a fresh start and added peace of mind.
- Creating a Professional Image: Your email address can often be a reflection of your personal or professional identity. If you’re using an outdated or unprofessional-sounding email address, changing it to a more appropriate one can help create a positive impression when corresponding with clients, employers, or colleagues.
- Managing Multiple Accounts: Some individuals find it more convenient to use separate email accounts for different purposes, such as personal and work-related communications. Changing your email address on your iPhone allows you to better organize your emails and improve your overall email management.
By considering these factors and determining your specific needs, you can make an informed decision about whether changing your email address on your iPhone is the right step for you. Now, let’s proceed to the step-by-step instructions to change your email address on your iPhone.
Step 1: Add New Email Account
The first step in changing your email address on your iPhone is to add your new email account. This process may vary slightly depending on the email provider you’re using, but the general steps remain the same. Here’s how to add a new email account:
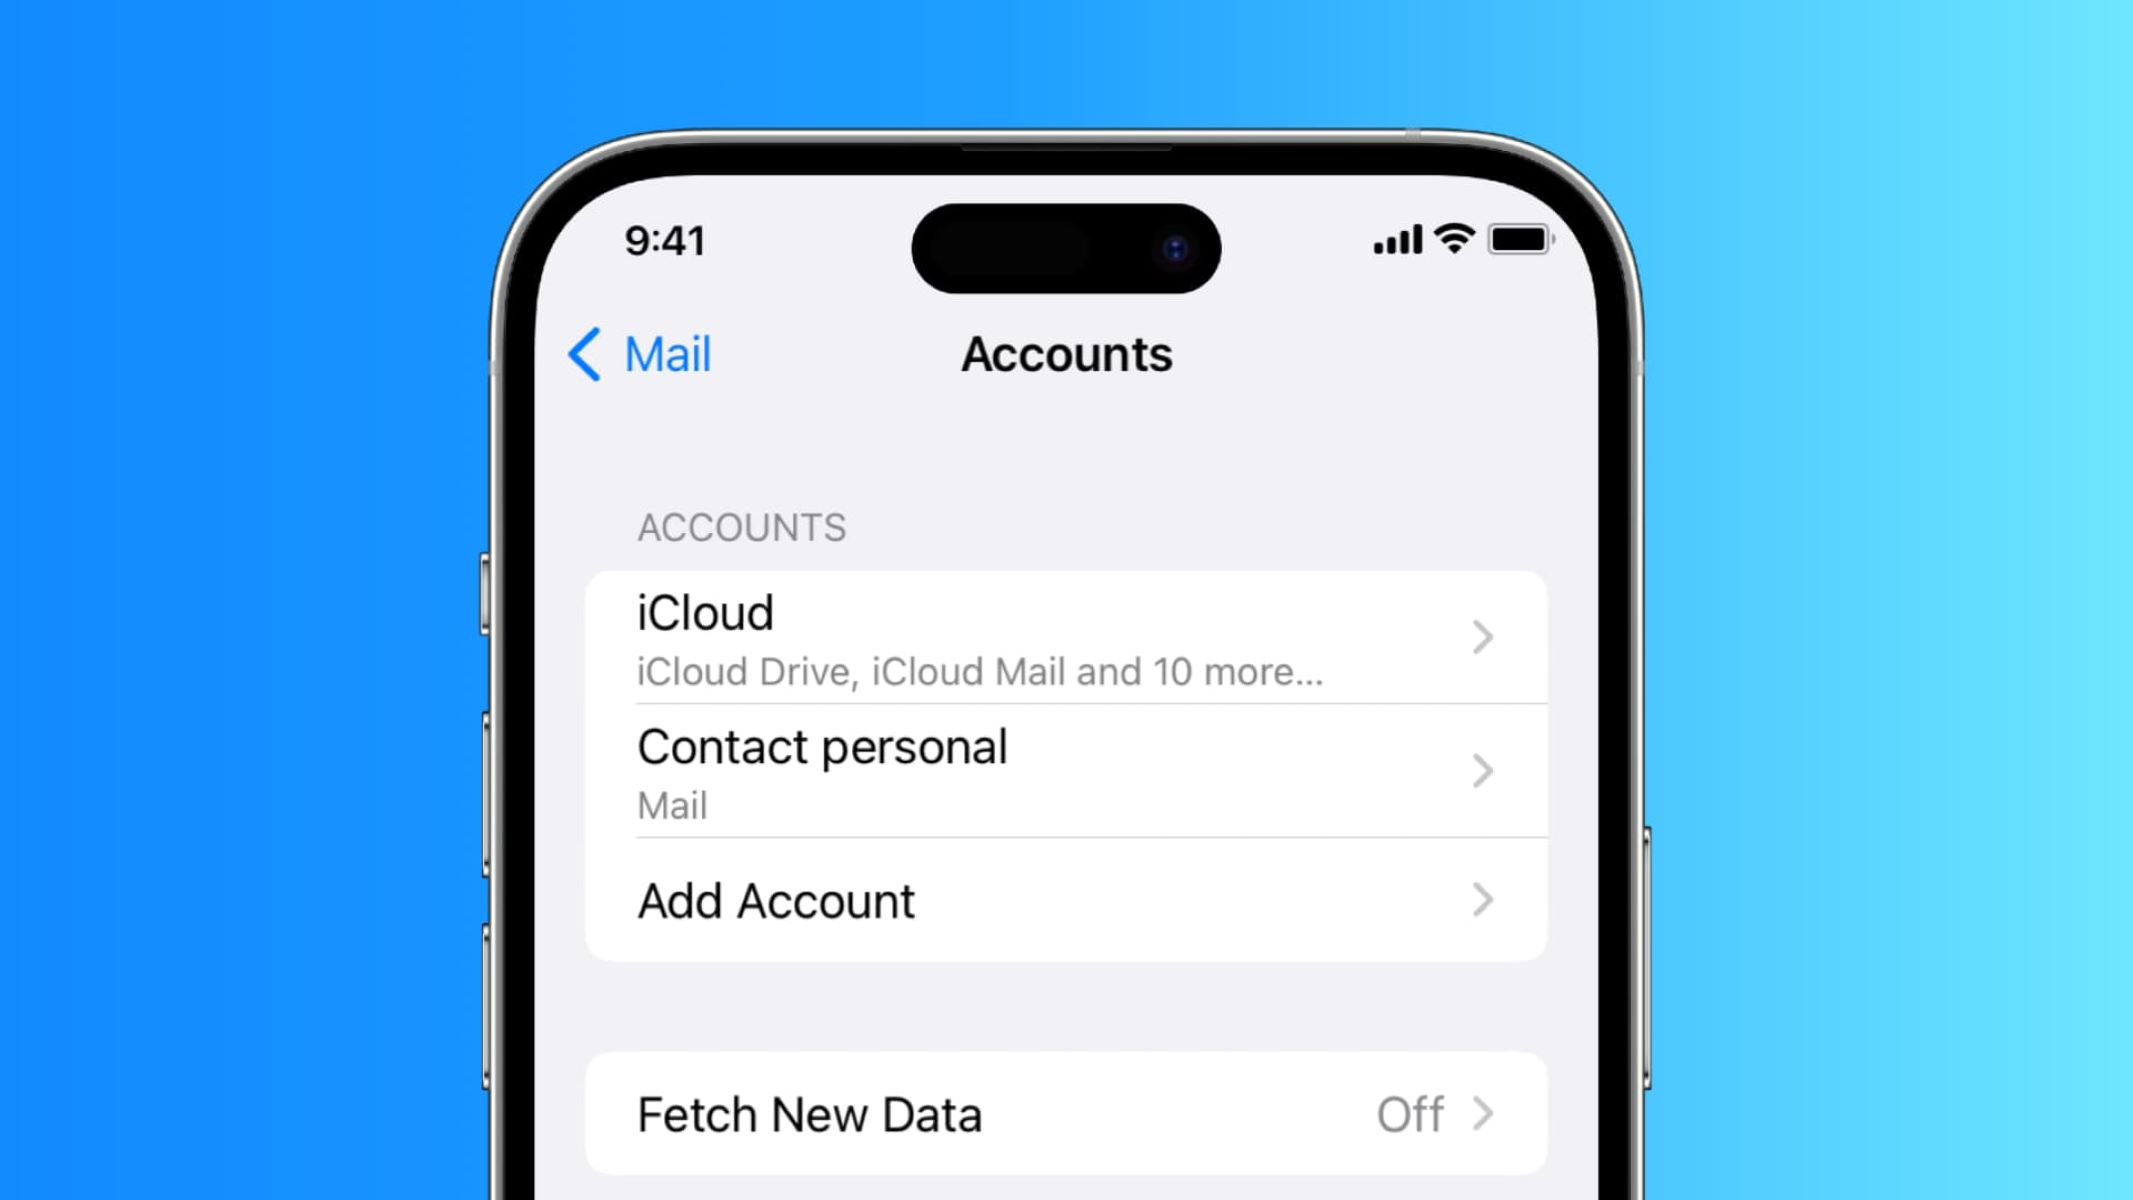
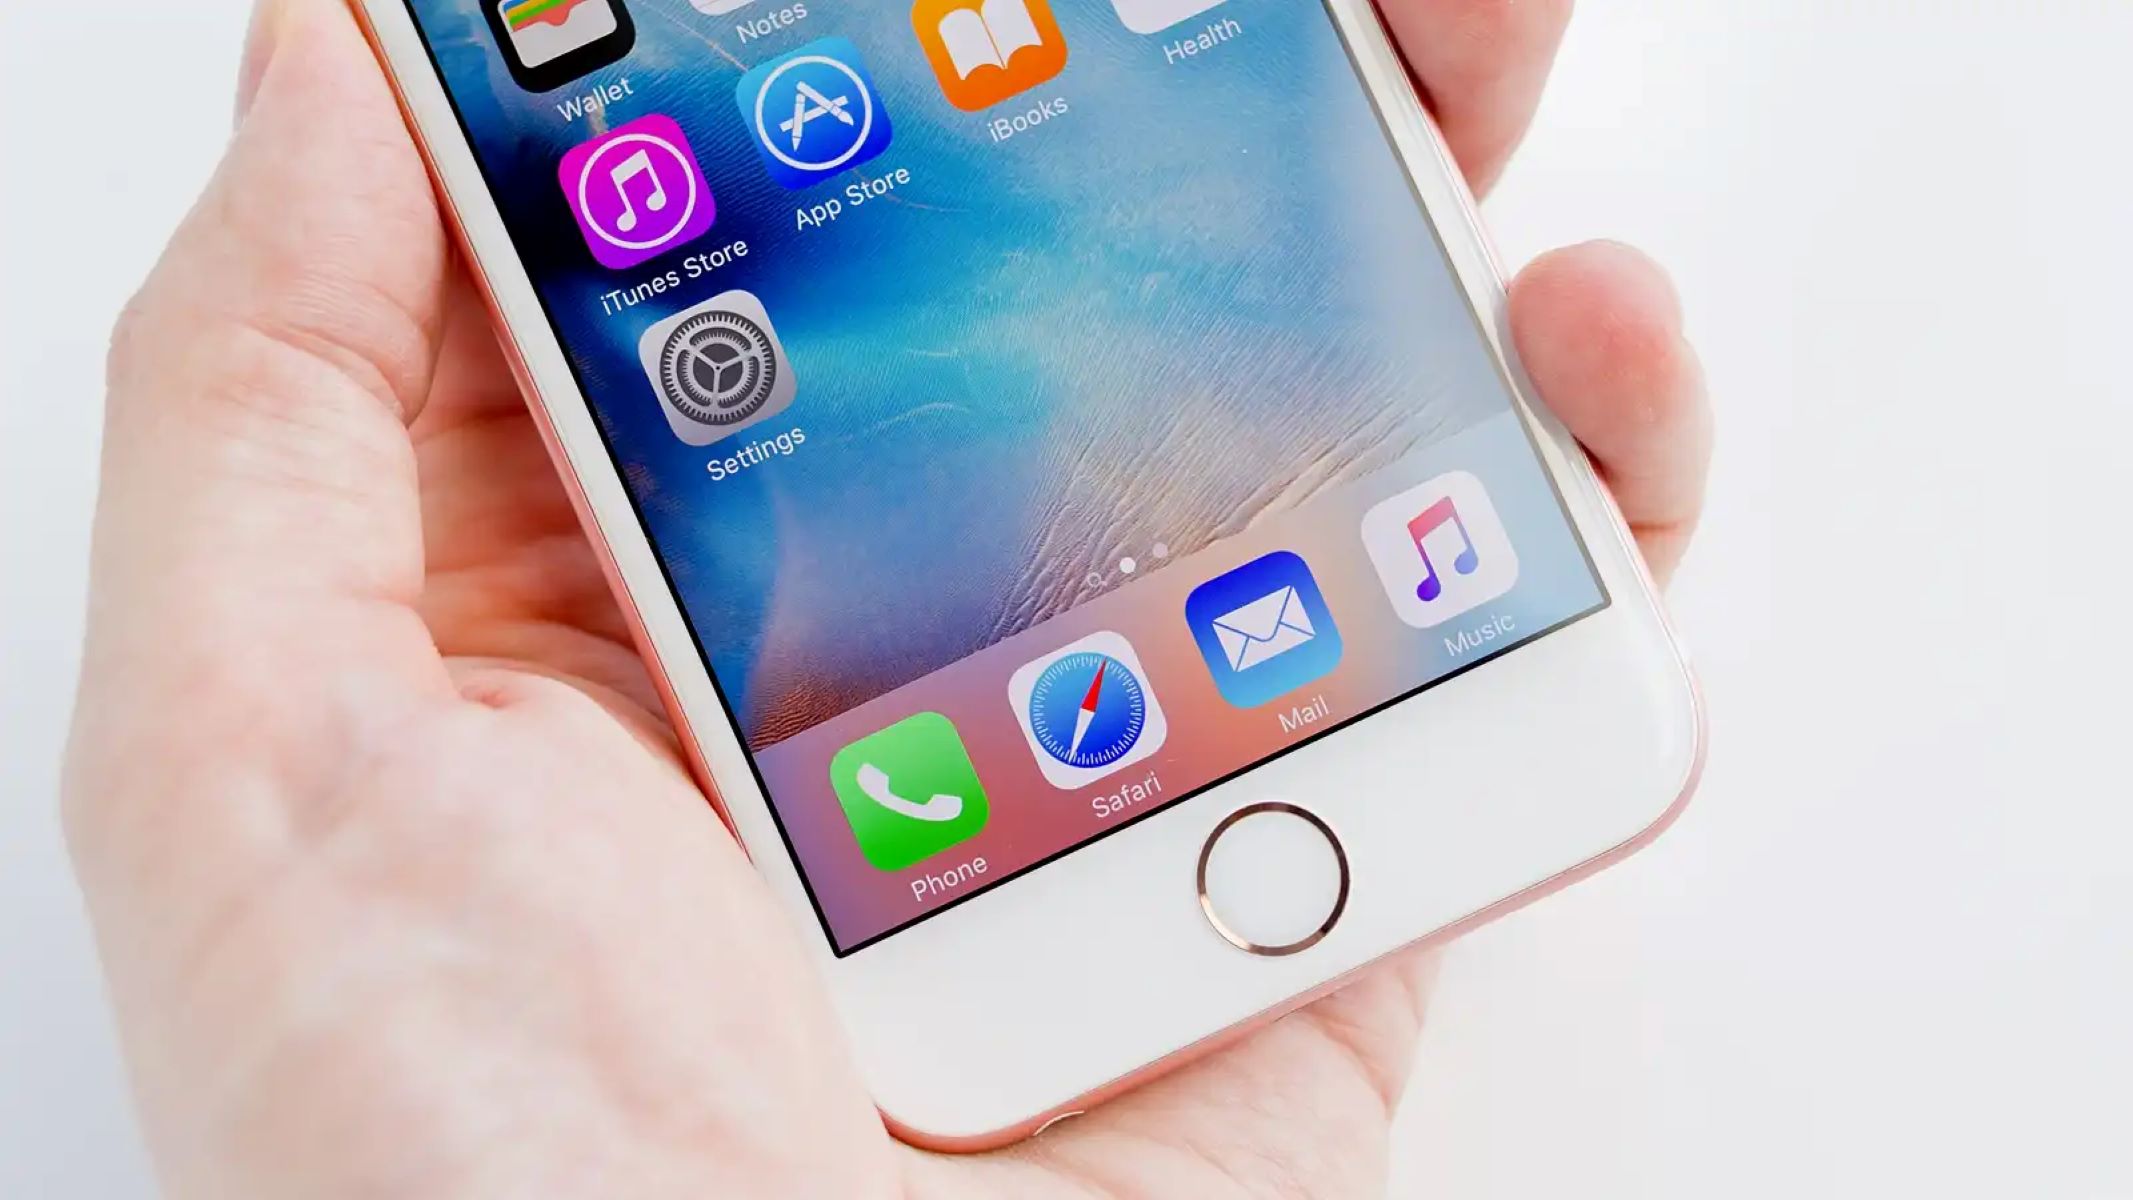
- Open the “Settings” app on your iPhone and scroll down until you find the “Passwords & Accounts” option. Tap on it.
- Under the “Accounts” section, tap on “Add Account”. A list of popular email providers will appear, but if your email provider is not listed, you can tap on “Other” and manually enter your email account settings.
- Select your email provider from the list or choose “Other” if your provider is not listed.
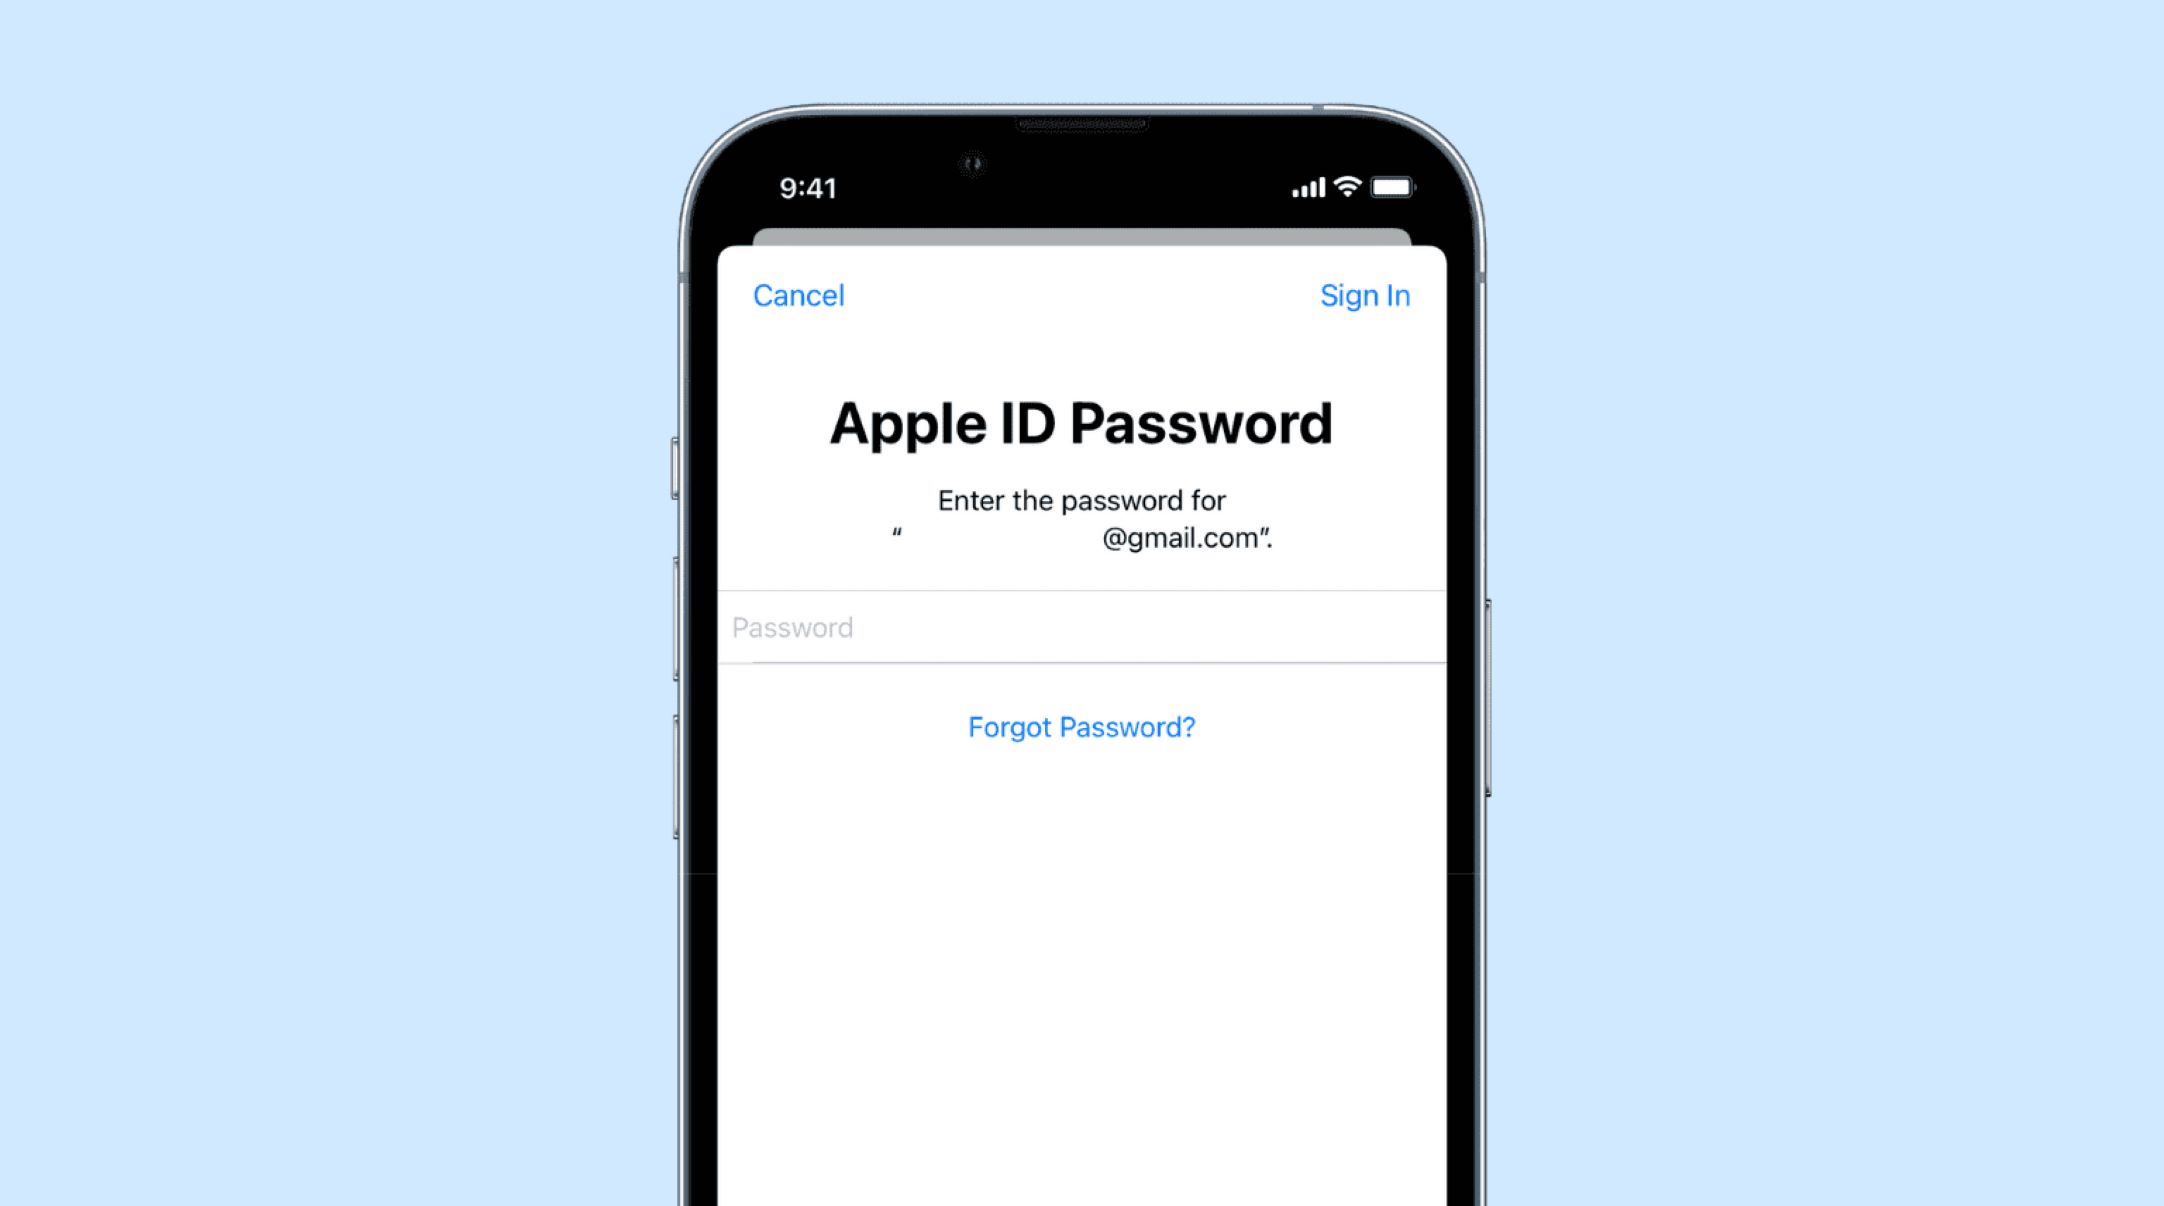
- Enter your email address and password for your new email account. If prompted, you may need to provide additional information such as the incoming and outgoing server settings for your email provider. These settings can usually be found on your email provider’s support website.
- Once you have entered all the necessary information, tap on “Next” or “Sign In”. Your iPhone will verify the account information and establish a connection to your new email account.
- After a successful verification, you’ll have the option to select which app features you want to enable for your new email account. This can include Mail, Contacts, Calendars, and Notes. Toggle the switches according to your preferences, and then tap on “Save” or “Done”.
That’s it! You have successfully added your new email account to your iPhone. You can now start sending and receiving emails using your new email address.
Keep in mind that if you’re using a popular email provider like Gmail, Yahoo, or Outlook, your iPhone may automatically configure the account settings for you. However, for other email providers, you may need to manually input the server settings. You can typically find this information on your email provider’s support website or by contacting their customer support.
Now that you’ve added your new email account, let’s move on to the next step, which is removing your old email account from your iPhone.
Step 2: Remove Old Email Account
Now that you’ve added your new email account to your iPhone, it’s time to remove the old email account that you no longer wish to use. Follow these steps to remove the old email account:
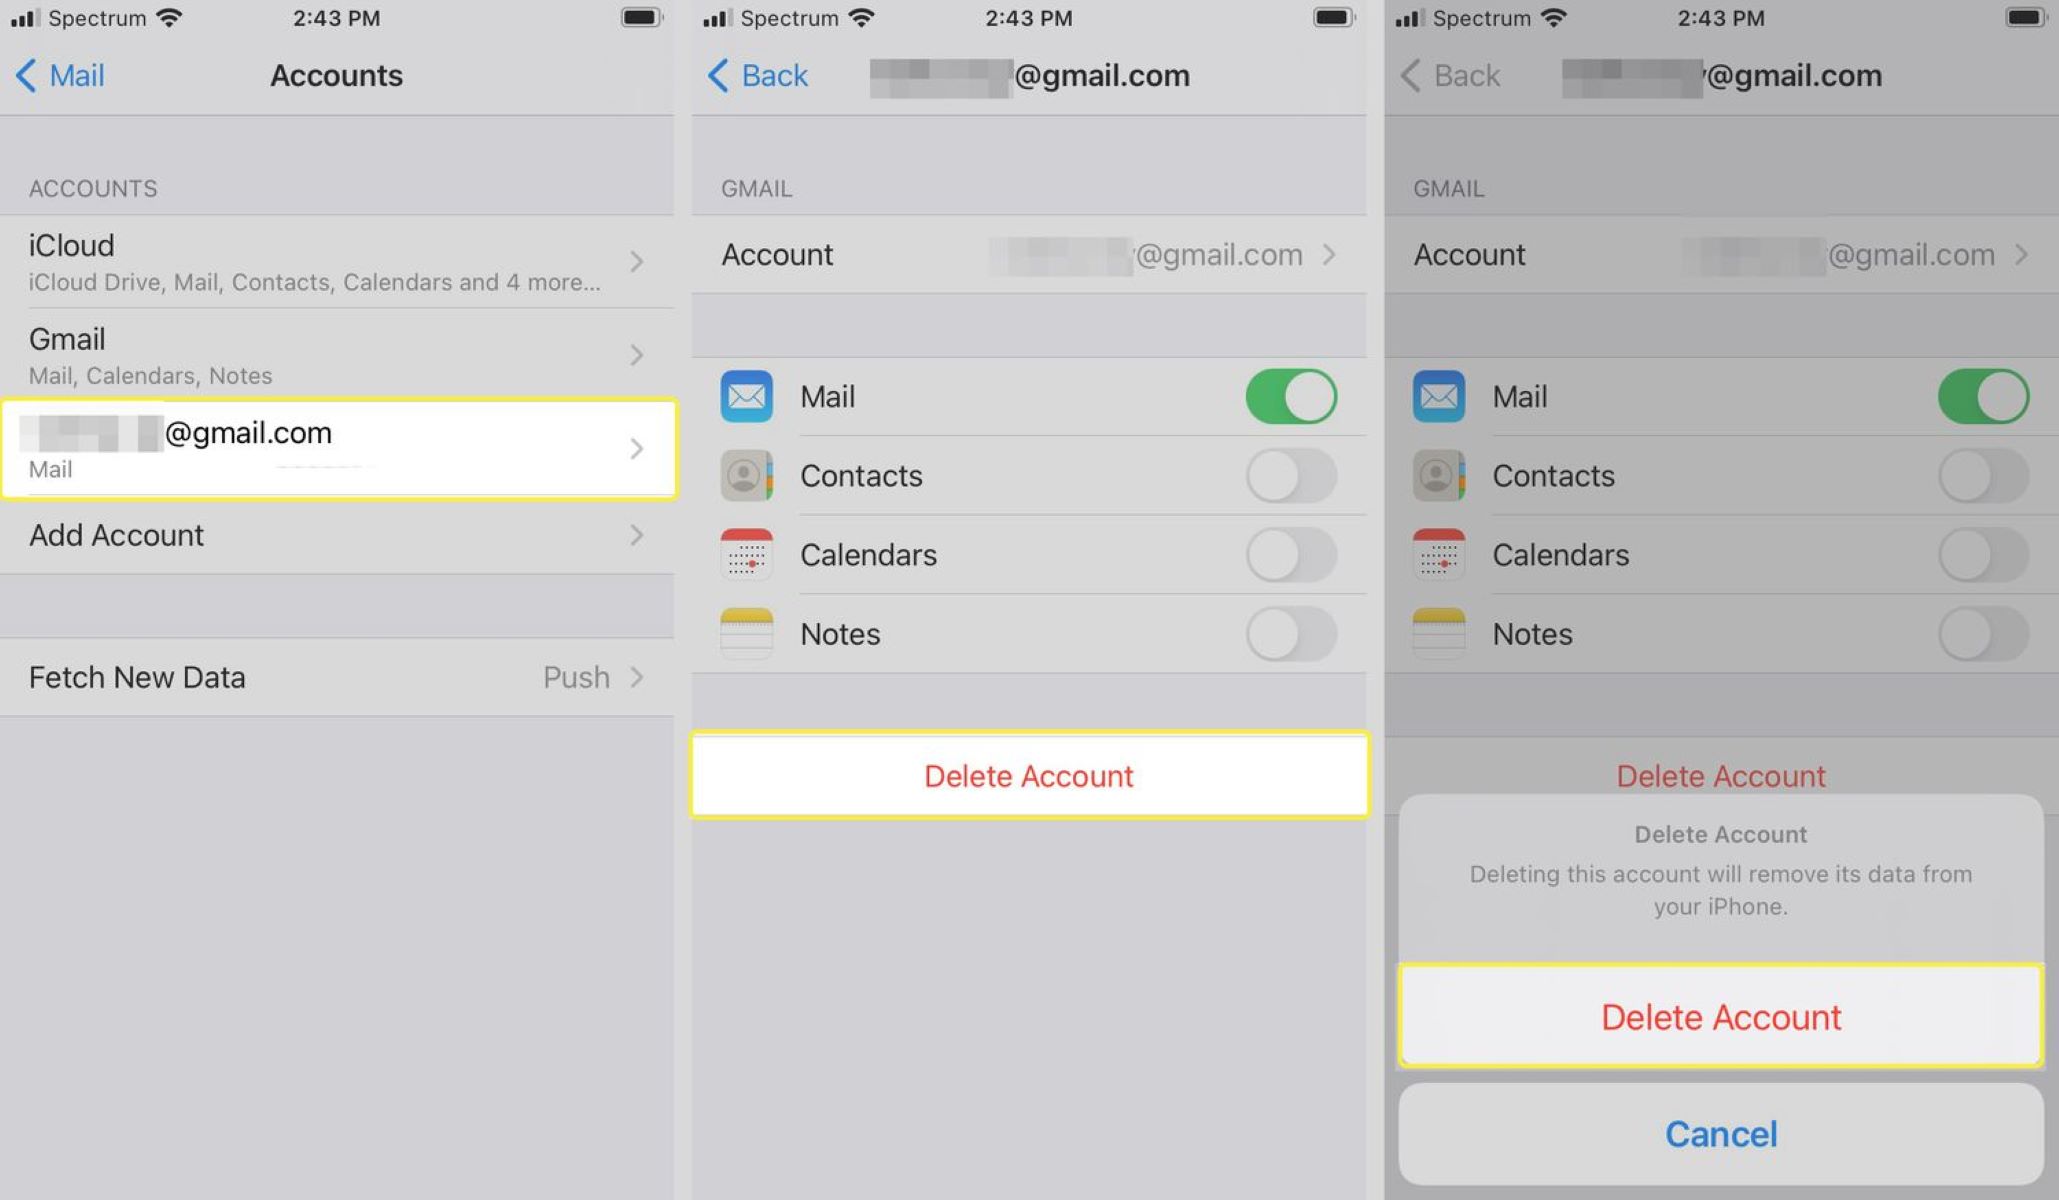
- Open the “Settings” app on your iPhone and scroll down to “Passwords & Accounts”. Tap on it.
- Under the “Accounts” section, you’ll see a list of all the email accounts that are currently set up on your iPhone. Locate the old email account that you want to remove and tap on it.
- On the next screen, you’ll see an option to “Delete Account” or “Remove Account”. Tap on it.
- A warning message will appear, informing you that deleting the account will remove all data associated with it from your iPhone. If you’re certain that you want to remove the account, tap on “Delete from My iPhone”.
- After confirming the deletion, your iPhone will remove the old email account and all associated data from your device. This includes emails, contacts, calendars, and any other information synced with that account.
Once the old email account has been successfully removed, you will no longer receive new emails or notifications for that account on your iPhone. However, all the existing emails and data will still be accessible through the email provider’s website or other devices where the account is linked.
It’s important to ensure that you have transferred any essential data, such as important emails or contacts, from the old email account to the new one before removing it. This will ensure that you don’t lose any important information during the transition. If you need assistance with transferring data, refer to the next step.
Now that your old email account has been removed, let’s move on to the next step, which involves updating your email preferences to ensure a smooth transition.
Step 3: Update Email Preferences
After adding your new email account and removing the old one, it’s important to update your email preferences on your iPhone to ensure that you can fully utilize your new email address. Follow these steps to update your email preferences:
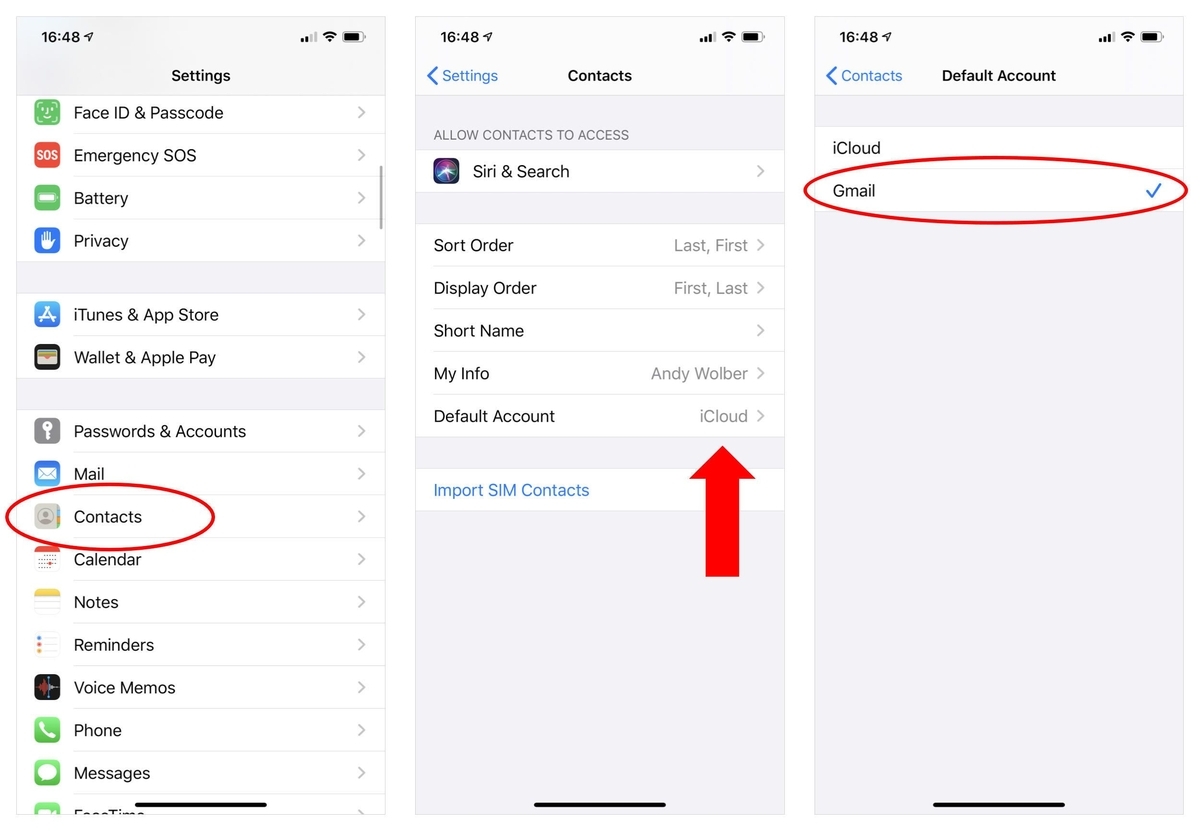
- Open the “Settings” app on your iPhone and scroll down to “Mail”. Tap on it.
- Under the “Mail” settings, you’ll find various options to customize how your emails are handled. Take a moment to review and adjust the following settings based on your preferences:
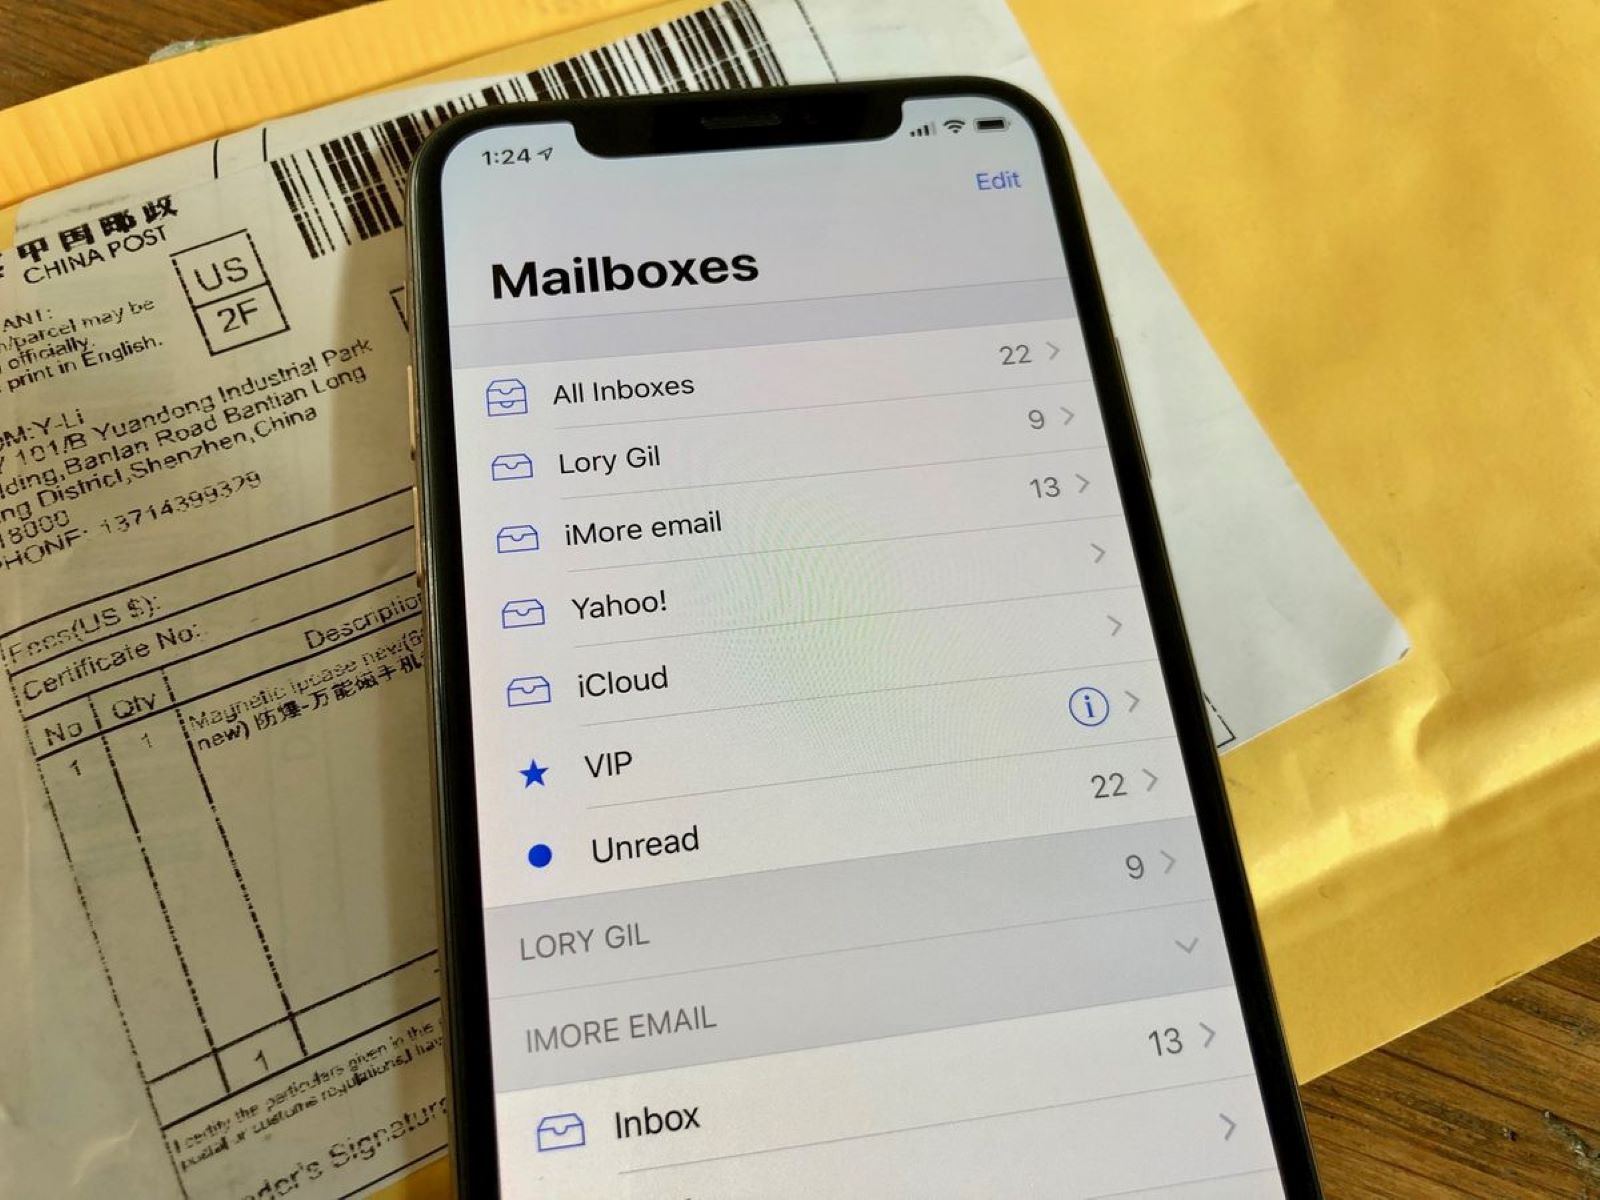
- Mailboxes: Here, you can manage and prioritize the different mailboxes and folders associated with your email accounts. You can choose to show or hide specific mailboxes, rearrange their order, and customize their behavior.
- Notifications: This section allows you to control how you receive notifications for new emails. You can choose to enable or disable notifications for each email account individually, adjust the alert style, and customize the sounds or vibrations associated with email notifications.
- Threads: If you prefer to view your emails in threaded conversations, you can toggle the “Organize by Thread” option. This groups related emails into a single conversation, making it easier to follow the flow of discussions.
- Swipe Options: Customize the swipe gestures on your iPhone to perform specific actions on your emails. You can set different actions for left and right swipes, such as deleting or archiving emails, flagging them, or marking them as read/unread.
- Signature: Update your email signature to reflect your new email address and any relevant contact information. You can create a professional signature that includes your name, job title, phone number, and website.
- Default Account: If you have multiple email accounts set up on your iPhone, you can choose which account should be used as the default for sending new emails.
Take some time to explore these settings and adjust them according to your preferences. This will help ensure that your new email address is fully integrated into your iPhone’s mail app and that you have control over how your emails are organized, received, and presented.
Now that you’ve updated your email preferences, let’s move on to the next step, which involves updating your contact information to reflect your new email address.
Step 4: Update Contact Information
Now that you’ve changed your email address on your iPhone, it’s essential to update your contact information to reflect your new email address. This step ensures that when you communicate with your contacts, they have the most up-to-date information. Follow these steps to update your contact information:
- Open the “Contacts” app on your iPhone. If you can’t find it on your home screen, swipe down and use the search bar to locate it.
- Select the contact that you want to update with your new email address. If the contact doesn’t exist yet, tap on the “+” icon to create a new contact.
- Tap on the “Edit” button located at the top-right corner of the contact’s profile.
- Scroll down to the “Email” section and tap on the existing email address associated with the contact.
- Replace the old email address with your new email address.
- Tap on “Done” or “Save” to save the changes and update the contact with your new email address.
- Repeat this process for each contact that you want to update with your new email address. If you have a large number of contacts to update, consider using the “Find & Replace” feature in the Contacts app to quickly make changes across multiple contacts.
By updating your contact information with your new email address, you ensure that when you send emails or receive emails from your contacts, the correct email address is used. This helps avoid any confusion or communication issues during the transition period.
It’s worth noting that changing your email address on your iPhone doesn’t automatically update your email address in your contacts’ devices or address books. It’s a good practice to inform your important contacts about the change or send out an email to let them know about your new email address. This ensures that they can update their records and continue to reach you without any disruptions.
Now that you’ve updated your contact information, let’s move on to the final step, which involves transferring any important data from your old email account to your new one.
Step 5: Transfer Data from Old Email Account
As you transition to your new email address on your iPhone, it’s important to transfer any important data from your old email account to your new one. This ensures that you don’t lose any valuable information during the switch. Follow these steps to transfer data from your old email account:
- Open the “Mail” app on your iPhone and navigate to your old email account.
- Select the emails, contacts, or any other data that you want to transfer to your new email account. You can do this by tapping on the “Edit” button and selecting the items you wish to transfer.
- Tap on the “Move” or “Transfer” button, usually represented by a folder icon with an arrow, and choose your new email account as the destination.
- If prompted, select the appropriate folder within your new email account where you want to transfer the data.
- Repeat this process for each batch of data that you want to transfer from your old email account to your new one.
- Once you have transferred all the important data, you can safely delete the data from your old email account to free up space, if desired. However, make sure to double-check that you have successfully transferred all the necessary data before deleting anything.
Transferring data from your old email account to your new one ensures that you have access to all the important emails and contacts during the transition. It helps you maintain a seamless email experience without losing any valuable information.
It’s worth mentioning that the process of transferring data may vary depending on your email provider and the specific settings and capabilities of your accounts. Some providers offer built-in tools or migration services to assist with this process. If you’re having difficulty transferring data, it’s recommended to consult the support resources provided by your email provider or contact their customer support for assistance.
Now that you’ve successfully transferred data from your old email account to your new one, you have completed the process of changing your email address on your iPhone! Congratulations!
Remember to regularly check both your old and new email accounts during the transition period to ensure that you don’t miss any important emails or notifications. Once you’re confident that all essential data has been transferred and you’re fully comfortable with using your new email address, you can safely remove your old email account from your iPhone.
We hope this step-by-step guide has been helpful in guiding you through the process of changing your email address on your iPhone. Enjoy the benefits of your new email account and stay connected with ease!
Conclusion
Changing your email address on your iPhone might seem like a daunting task, but with the right guidance, it can be a smooth and hassle-free process. By following the step-by-step instructions outlined in this article, you can successfully update your email address while keeping all your important data intact.
We discussed the reasons why you might want to change your email address, such as switching providers, updating contact information, improving privacy and security, and creating a professional image. These motivations highlight the importance of maintaining an up-to-date and secure email account.
We walked through each step of the process, from adding a new email account and removing the old one, to updating email preferences and contact information. These steps ensure that your new email address is fully integrated into your iPhone’s functionalities and that your contacts have your most current information.
Finally, we discussed the process of transferring data from your old email account to your new one. This ensures that you don’t lose any important emails or contacts during the transition, allowing for a seamless experience with your new email address.
Now that you’re equipped with the knowledge and steps to change your email address on your iPhone, you can confidently make the necessary adjustments to suit your needs. Take advantage of the benefits that come with a new email account, such as enhanced features, improved security, and a fresh start.
Remember to regularly check both your old and new email accounts during the transition period, and inform your important contacts about your new email address. This will ensure that you stay connected without any disruptions in communication.
We hope this comprehensive guide has helped you navigate the process of changing your email address on your iPhone. Enjoy the convenience and efficiency of your new email account, and stay connected with ease!