Introduction
Welcome to this helpful guide on how to cancel your Spotify Premium subscription directly from the app. Whether you’re looking to switch to a different streaming service or just taking a break from premium features, cancelling your Spotify Premium subscription is a straightforward process. By following a few simple steps, you can easily stop the recurring subscription and revert back to the free version of Spotify.
Spotify is a popular music streaming platform that offers a wide range of music, podcasts, and other audio content. With Spotify Premium, users can enjoy ad-free listening, higher audio quality, and other exclusive features. However, if you no longer wish to continue with the Premium subscription, this guide will show you how to cancel it directly from the Spotify app on your device.
By cancelling your Premium subscription, you will still have access to the free version of Spotify, which allows you to listen to music and podcasts with intermittent ads. You can always choose to upgrade back to Premium at a later time if you change your mind. Now, without further ado, let’s dive into the step-by-step process of cancelling Spotify Premium on the app.
Step 1: Open the Spotify app
To begin the process of cancelling your Spotify Premium subscription, make sure you have the Spotify app installed on your device. If you haven’t already downloaded it, you can find it in the App Store (for iOS) or Google Play Store (for Android). Once you have the app installed, open it by tapping on the Spotify icon.
Upon opening the app, you will be taken to the Spotify home screen, where you can browse through featured playlists, recommended music, and more. Take a moment to familiarize yourself with the app’s interface if you’re new to Spotify.
If you’re logged out of your Spotify account, you’ll need to sign in with your username and password. Simply enter the required information and tap the “Sign In” button to proceed. Once you’re logged in, you’re ready to move on to the next step.
It’s important to note that the process of cancelling your Spotify Premium subscription can only be done from within the Spotify app itself. You won’t be able to cancel your subscription by visiting the Spotify website or using any other third-party applications.
In the next step, we’ll guide you on how to navigate to your account page within the Spotify app, where you can access your subscription settings and initiate the cancellation process.
Step 2: Go to your account page
Once you have the Spotify app open and you’re logged in to your account, the next step is to navigate to your account settings. To do this, locate the “Home” tab at the bottom of the screen, usually represented by a house icon. Tap on it to access the home screen if you’re not already there.
Now, look for the gear icon or the three-dot menu icon, typically located in the top-right corner of the screen. Tap on this icon to open the settings menu.
In the settings menu, scroll down and look for an option labeled “Account” or “Account Settings.” This is where you’ll find the settings specific to your Spotify account. Tap on it to proceed.
Once you’re on the account page, you’ll have access to various account-related settings and options. Here, you can customize your profile, manage your playlists, adjust playback settings, and more.
It’s important to note that the exact location and appearance of the account settings may vary slightly depending on the version of the Spotify app you’re using and the type of device you have. However, you should be able to find the account page with relative ease by following the steps mentioned above.
In the next step, we’ll guide you on how to specifically navigate to the “Premium” section within your account settings, where you can initiate the cancellation process.
Step 3: Tap on “Premium”
Once you’re on the account page in the Spotify app, it’s time to locate and tap on the “Premium” section. This is where you’ll find all the relevant information about your current Premium subscription and the option to manage or cancel it.
Scroll through the account settings page until you come across a section titled “Premium” or “Subscription.” Tap on it to access the Premium settings.
Within the Premium section, you’ll see details about your current subscription plan, including the price, renewal date, and other relevant information. It’s worth taking a quick look at these details to confirm your subscription details before proceeding with the cancellation process.
Keep in mind that the Premium section may have a slightly different name or placement depending on the version of the Spotify app you’re using. However, it should be relatively easy to identify based on the context of the account page.
In the next step, we’ll guide you on how to specifically select the “Change or Cancel” option within the Premium section, which will further lead you to the cancellation process.
Step 4: Select “Change or Cancel”
Within the Premium section of your account settings, you’ll find various options related to your Spotify subscription. Look for an option that says “Change or Cancel” and tap on it to proceed with cancelling your Premium subscription.
This option is typically located near the bottom of the Premium section, and it may be accompanied by a description indicating that it allows you to manage your subscription settings.
By selecting “Change or Cancel,” you’re indicating that you want to make changes to your Premium subscription, which includes the option to cancel it altogether.
It’s important to note that selecting “Change or Cancel” doesn’t immediately cancel your Premium subscription. Instead, it takes you to a screen where you can choose to cancel the subscription and provide a reason for your decision.
In the next step, we’ll guide you on how to specifically choose the “Cancel Premium” option, initiating the cancellation process.
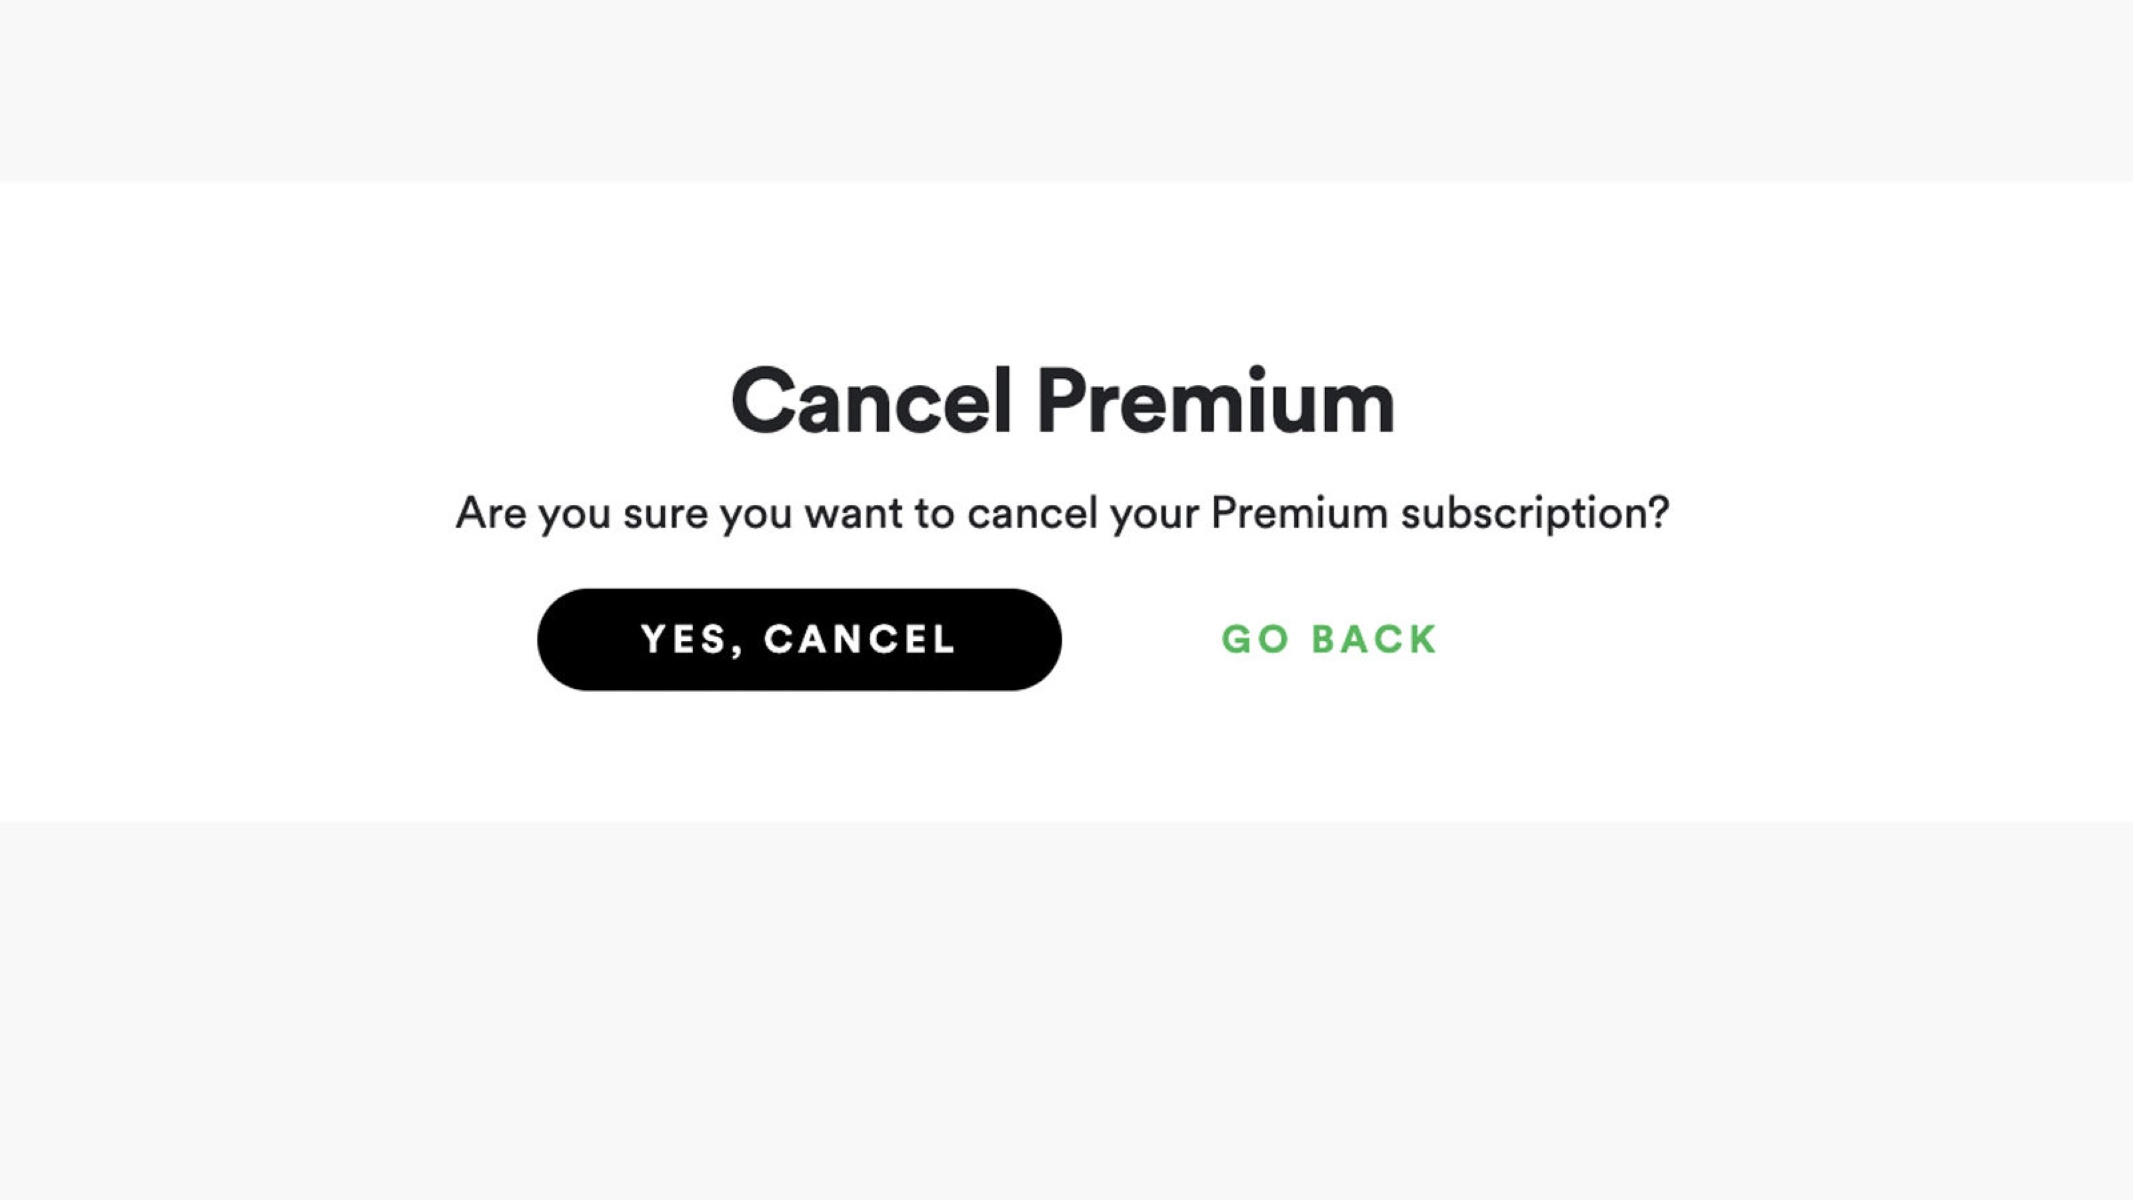
Step 5: Choose “Cancel Premium”
After selecting the “Change or Cancel” option within the Premium section of your Spotify account settings, you’ll be taken to a screen that presents you with different subscription options. Among these options, look for and tap on the one that says “Cancel Premium” to proceed with cancelling your subscription.
By choosing “Cancel Premium,” you’re confirming your decision to end your subscription and revert back to the free version of Spotify. It’s important to note that once you cancel your Premium subscription, you’ll lose access to the ad-free experience, higher audio quality, and other premium features of Spotify.
Before finalizing the cancellation, Spotify may offer you alternative subscription plans or discounts to encourage you to stay as a Premium user. If you’re unsure about cancelling, you can explore these options to see if there’s a plan that better suits your needs.
However, if you’re certain about cancelling your Premium subscription, proceed with choosing “Cancel Premium” to move forward with the cancellation process.
In the next step, we’ll guide you on how to provide a reason for cancelling your Premium subscription if prompted to do so.
Step 6: Provide a reason
After choosing “Cancel Premium” in the previous step, Spotify may ask you to provide a reason for cancelling your subscription. This feedback helps Spotify understand the needs and preferences of its users and can be valuable in their efforts to improve their service. Take a moment to reflect on your reason for cancelling and select the most appropriate option.
Spotify typically provides a list of common reasons for cancellation, such as financial reasons, switching to another streaming service, or not being satisfied with the premium features. However, they may also offer an option to provide your own customized reason if none of the provided options accurately describe your situation.
While providing a reason is optional, it can be helpful for Spotify to receive feedback from users. It’s an opportunity to voice your concerns and contribute to the development of the platform.
Once you’ve provided a reason, proceed to the next step to confirm your cancellation and complete the process.
In the next step, we’ll guide you on how to confirm the cancellation of your Premium subscription.
Step 7: Confirm cancellation
After providing a reason for cancelling your Spotify Premium subscription, you will be prompted to confirm the cancellation. This step ensures that you don’t accidentally cancel your subscription and allows you to double-check your decision.
On the confirmation screen, you’ll typically see a message informing you about the effects of cancelling your Premium subscription, such as losing access to ad-free listening and other premium features. Take a moment to review this information to ensure that you’re aware of the changes that will occur.
If you’re certain about cancelling your Premium subscription, look for a button or option that says “Confirm” or “Cancel Premium.” Tap on it to proceed with the cancellation process.
After confirming the cancellation, Spotify may display a brief message confirming that your Premium subscription has been successfully cancelled. You will also receive a confirmation email or notification from Spotify regarding the cancellation.
It’s worth noting that even after cancelling your Premium subscription, you can continue using the free version of Spotify and enjoy access to a vast library of music and podcasts. If you change your mind in the future, you can always upgrade back to Premium by following the appropriate steps within the app.
In the final step, we’ll discuss optional feedback and rating options that Spotify may provide after cancelling your Premium subscription.
Step 8: Feedback and rating
After confirming the cancellation of your Spotify Premium subscription, the app may provide you with an optional opportunity to provide feedback and rate your experience. This step allows you to share your thoughts, suggestions, or any issues you may have encountered during your time as a Premium user.
Spotify values user feedback and uses it to continuously improve their service. They may ask you to rate your experience on a scale or provide specific feedback through a text box. Feel free to share your thoughts honestly and constructively.
If you have encountered any technical issues or experienced challenges with certain features, it can be helpful to provide detailed feedback. This information can assist Spotify’s development team in identifying and resolving any issues.
Additionally, if you enjoyed your time as a Spotify Premium subscriber and had a positive experience, don’t hesitate to leave a positive rating or comment. This can provide useful feedback to the Spotify team as well as help other users in making their decision.
Remember that providing feedback and rating your experience is optional. If you’re not interested in sharing your thoughts at this time, you can simply skip this step and proceed with enjoying the free version of Spotify.
With that, you have successfully completed the process of cancelling your Spotify Premium subscription through the app. We hope this guide has been helpful in assisting you with the cancellation process.
Remember, should you choose to rejoin Spotify Premium in the future or have any further questions or issues, you can always revisit the Spotify app and explore the available options.
Conclusion
Canceling your Spotify Premium subscription directly from the app is a simple and straightforward process. By following the step-by-step guide outlined in this article, you can easily revert back to the free version of Spotify, allowing you to continue listening to your favorite music and podcasts with intermittent ads.
Remember, the process involves opening the Spotify app, navigating to your account page, selecting the “Premium” section, choosing “Change or Cancel,” tapping on “Cancel Premium,” providing a reason for cancellation if prompted, confirming the cancellation, and optionally leaving feedback and rating your experience.
Whether you’ve decided to switch to a different streaming platform, want to take a break from premium features, or simply want to explore other options, cancelling your Spotify Premium subscription is a matter of a few taps on your device.
It’s worth noting that even after cancelling your Premium subscription, you can still enjoy the vast library of music and podcasts on Spotify. If you change your mind in the future, you have the option to upgrade back to Premium and regain access to ad-free listening and other premium features.
We hope this guide has been helpful in assisting you with cancelling your Spotify Premium subscription directly from the app. Should you have any further questions or concerns, feel free to revisit this article or reach out to Spotify’s support team for assistance.
Thank you for choosing Spotify as your music streaming platform, and we wish you an enjoyable and personalized music listening experience.