Introduction
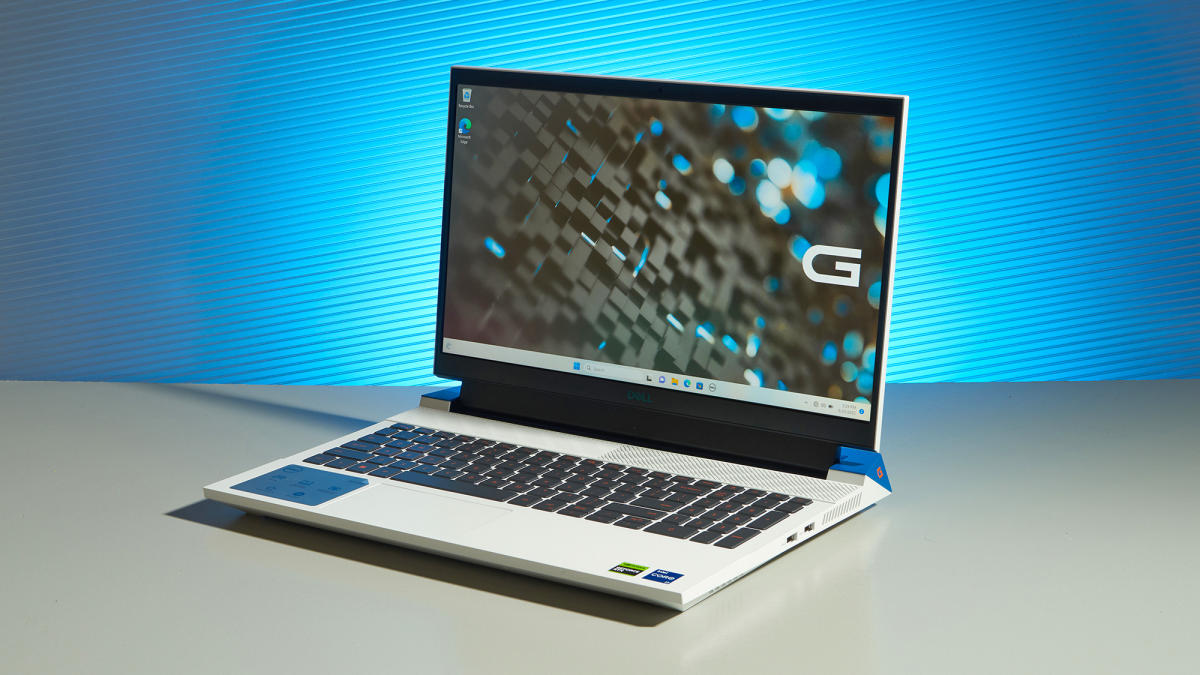
Building a gaming laptop is an exciting and rewarding project that allows you to customize your gaming experience and save some money in the process. With a budget of $2000, you can create a high-performance gaming machine that meets your specific gaming needs.
A gaming laptop offers the advantage of portability, allowing you to enjoy your favorite games wherever you go. By selecting the right components and assembling them correctly, you can create a powerful gaming laptop that rivals the performance of desktop systems.
In this guide, we will walk you through the process of building a gaming laptop with a budget of $2000. We will cover everything from choosing the right components to assembling the laptop. Whether you’re a seasoned gamer or a newcomer to the world of PC gaming, this guide will help you create a gaming laptop that delivers outstanding performance.
Before we dive into the details, it’s important to note that building a gaming laptop requires some basic technical knowledge. Familiarity with computer hardware and the ability to follow instructions are essential. If you’re new to building PCs, don’t worry! We’ll provide step-by-step instructions and troubleshoot common issues along the way.
Are you ready to embark on this adventure and build your dream gaming laptop? Let’s get started!
Choosing the Right Components
When building a gaming laptop, selecting the right components is crucial to achieving optimal performance. Here are some key components you need to consider:
Step 1: Selecting the Processor
The processor, or CPU, is the brain of your gaming laptop. It determines how quickly your laptop can process information and execute tasks. Look for a processor with a high clock speed and multiple cores to handle demanding gaming applications. Popular choices for gaming laptops include Intel Core i7 and AMD Ryzen processors.
Step 2: Picking the Right Graphics Card
The graphics card, or GPU, is responsible for rendering the visuals in your games. It’s one of the most important components for gaming performance. Look for a graphics card with a dedicated VRAM and ample processing power to handle the latest games. Options like NVIDIA GeForce RTX 3000 series or AMD Radeon RX 6000 series are excellent choices.
Step 3: Selecting the Right Amount of RAM
RAM, or memory, determines how many tasks your laptop can handle simultaneously. For gaming, it’s recommended to have at least 16GB of RAM. This ensures smooth gameplay and prevents lag. Opt for DDR4 RAM with a high frequency for better performance.
Step 4: Choosing the Right Storage Option
There are two primary storage options: solid-state drives (SSDs) and hard disk drives (HDDs). SSDs are faster and provide quicker game loading times, while HDDs offer more storage capacity at a lower cost. Consider a combination of both for optimal performance and storage capacity.
Step 5: Picking the Suitable Display
The display is where you’ll be experiencing your games. Look for a high-resolution display with a fast refresh rate (at least 144Hz) for smooth gameplay. Consider options like IPS or OLED panels for better color accuracy and contrast.
Step 6: Selecting the Right Gaming Accessories
In addition to the core components, consider investing in gaming accessories such as a mechanical keyboard, gaming mouse, and headphones. These accessories can enhance your gaming experience and provide better control and immersion while gaming.
Step 1: Selecting the Processor
When it comes to building a gaming laptop, choosing the right processor is crucial for achieving smooth and powerful performance. The processor, also known as the central processing unit (CPU), is the brain of your laptop that handles all calculations and tasks. Here are some key factors to consider when selecting a processor:
Performance:
Look for a processor with high clock speeds and multiple cores. Higher clock speeds mean faster processing, while multiple cores allow for better multitasking capabilities. This is especially important for modern games that require a lot of processing power.
Compatibility:
Ensure that the selected processor is compatible with the motherboard of your gaming laptop. Different processors use different socket types, so make sure to choose a processor that matches the motherboard’s socket to ensure a proper fit.
Brand and Model:
Both Intel and AMD offer a wide range of processors suitable for gaming laptops. Intel processors, such as the Core i7 or Core i9 series, are renowned for their single-threaded performance. On the other hand, AMD’s Ryzen processors, like the Ryzen 7 or Ryzen 9 series, provide excellent multi-threaded performance at a more budget-friendly price point.
Budget:
Consider your budget when selecting a processor. While high-end processors offer the best performance, they may come with a heftier price tag. Assess your gaming needs and budget to find a processor that provides a good balance between performance and affordability.
Overclocking:
If you’re interested in overclocking your processor to squeeze out additional performance, look for processors that have a “K” or “X” suffix (for Intel) or “Black Edition” (for AMD). These processors are designed to be easily overclocked, allowing you to push them beyond their default clock speeds for even better gaming performance.
By considering these factors, you can select a processor that meets your gaming requirements and provides a smooth and immersive gaming experience on your newly built gaming laptop.
Step 2: Picking the Right Graphics Card
When it comes to gaming, the graphics card (GPU) is one of the most critical components in your gaming laptop. It’s responsible for rendering and displaying the graphics of your games. Choosing the right graphics card is essential for achieving stunning visuals and smooth gameplay. Here are some factors to consider when picking a graphics card:
Performance:
Look for a graphics card that offers excellent performance and can handle the demands of modern and upcoming games. Consider the GPU’s core count, clock speeds, and memory bandwidth to determine its capability to handle high-resolution textures and complex visual effects.
VRAM Capacity:
Video RAM (VRAM) is the memory used specifically by the GPU. Look for a graphics card with ample VRAM capacity, as it directly impacts the texture quality and resolution that can be displayed. Opt for a graphics card with at least 6GB of VRAM, or higher if your budget allows, to ensure smooth gaming performance on high-resolution displays.
Brand and Model:
Both NVIDIA and AMD offer a wide range of graphics cards suitable for gaming laptops. NVIDIA’s GeForce RTX series, such as the RTX 3060 or RTX 3080, offers advanced features like real-time ray tracing and DLSS (Deep Learning Super Sampling) for improved graphics quality and performance. AMD’s Radeon RX series, like the RX 6700 XT or RX 6800, also provide excellent gaming performance at an attractive price point.
Power and Cooling:
Consider the power requirements and cooling capabilities of the graphics card. Ensure that your gaming laptop’s power supply can handle the power demands of the graphics card, and that your laptop’s cooling system can effectively dissipate the heat generated. This ensures stable and reliable performance during intense gaming sessions.
Connectivity and Outputs:
Check the connectivity options and available outputs of the graphics card. Make sure it supports the display connectors required for your gaming setup, whether that’s HDMI, DisplayPort, or others. Additionally, consider if the graphics card supports multi-monitor setups if you plan to use multiple displays for immersive gaming experiences.
By considering these factors, you can choose a graphics card that delivers exceptional gaming performance and brings your games to life with stunning visuals and smooth gameplay on your gaming laptop.
Step 3: Selecting the Right Amount of RAM
When it comes to gaming performance, having an adequate amount of RAM (Random Access Memory) is crucial. RAM plays a vital role in storing and quickly accessing game data while you’re playing, ensuring smooth and responsive gameplay. Here are some factors to consider when selecting the right amount of RAM for your gaming laptop:
Gaming Requirements:
Consider the gaming requirements of the titles you intend to play. Look at the recommended system requirements for the games you plan to run and use that as a guideline. While 8GB of RAM is often considered the minimum for gaming, opting for at least 16GB will provide a more future-proof setup and allow for seamless multitasking.
Game Settings and Resolution:
Higher game settings and resolutions generally require more RAM. If you plan to play games at higher resolutions, such as 1440p or 4K, or use advanced graphics settings like ultra textures, consider investing in 32GB of RAM. This will ensure smoother gameplay and prevent any possible slowdowns or frame rate drops.
Multitasking and Other Applications:
Consider your multitasking needs and other applications you’ll be using while gaming. If you tend to have multiple applications running simultaneously, such as a web browser, music player, or streaming software, having more RAM will help prevent any performance issues or slowdowns while accessing and switching between applications.
RAM Speed:
Higher RAM speeds offer faster data transfer rates, which can improve overall system performance. Look for DDR4 RAM with higher clock speeds. However, note that the performance gains from high-speed RAM are typically minimal and may not justify the additional cost. It’s generally more important to prioritize capacity over speed when it comes to gaming.
Upgradeability:
Consider the future upgradeability of your gaming laptop. If you plan to keep your laptop for several years or want the flexibility to upgrade your RAM later on, make sure your laptop supports additional RAM slots and has the necessary expansion capacity.
By considering these factors, you can select the right amount of RAM for your gaming laptop, ensuring smooth and responsive gameplay while also accommodating multitasking and future gaming needs.
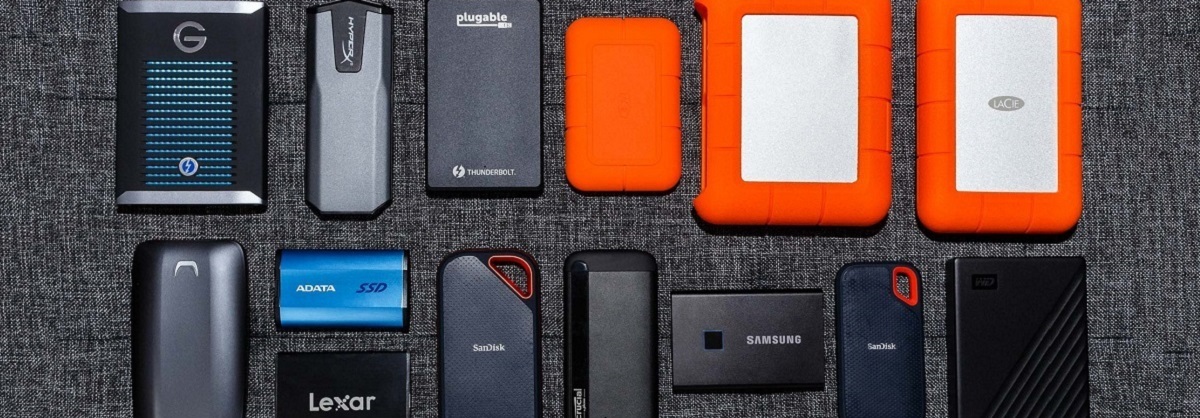
Step 4: Choosing the Right Storage Option
When building a gaming laptop, choosing the right storage option is crucial for ensuring fast game loading times and efficient data management. Here are some factors to consider when selecting the right storage option:
Solid-State Drive (SSD):
SSDs are highly recommended for gaming laptops due to their fast read and write speeds. They provide quicker game loading times and faster file transfers compared to traditional hard disk drives (HDDs). Opt for an SSD with sufficient capacity to store your operating system, games, and other important files. A 500GB to 1TB SSD is generally a good starting point.
Hard Disk Drive (HDD):
While HDDs are slower compared to SSDs, they offer larger storage capacities at a more affordable price. If you require more storage space for multimedia files or have a limited budget, consider pairing an SSD boot drive with a larger HDD storage drive. This way, you can install your operating system and frequently played games on the SSD for faster performance, while the HDD can handle bulk storage needs.
Hybrid Drives:
Hybrid drives combine the best of both worlds by combining an SSD and an HDD in a single drive. They have a small SSD portion for caching frequently accessed data, which provides faster access times compared to traditional HDDs. Hybrid drives are a good choice if you want a balance between speed and storage capacity at a more reasonable cost.
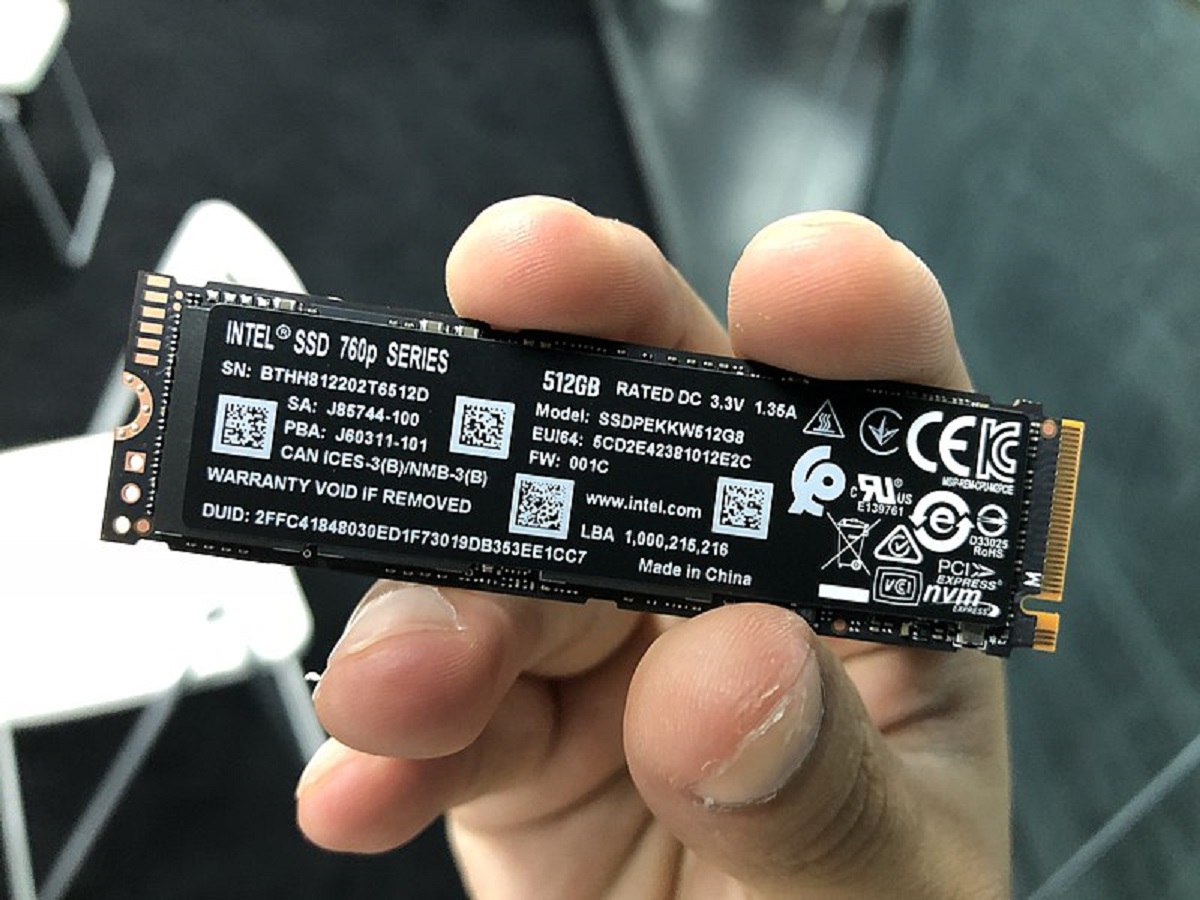
M.2 SSD:
M.2 SSDs are a newer form of storage that are even faster than traditional SATA SSDs. They connect directly to the motherboard, offering blazing-fast read and write speeds. If your gaming laptop supports an M.2 slot, consider investing in an M.2 SSD for maximum performance. Look for an NVMe M.2 SSD for the fastest speeds.
Storage Expansion:
Consider the storage expansion options available in your gaming laptop. Look for extra drive bays or additional M.2 slots that allow for easy future upgrades. This will give you the possibility to add more storage as your needs grow over time.
By considering these factors, you can choose the right storage option for your gaming laptop, optimizing game loading times and ensuring efficient data management for an enhanced gaming experience.
Step 5: Picking the Suitable Display
When it comes to gaming, the display plays a crucial role in your overall gaming experience. Selecting the right display for your gaming laptop ensures that you can fully immerse yourself in the stunning visuals of your favorite games. Here are some factors to consider when picking a suitable display:
Resolution:
Choose a display resolution that suits your gaming preferences. Higher resolutions, such as 1080p (Full HD), 1440p (Quad HD), or even 4K, offer sharper and more detailed visuals. However, keep in mind that higher resolutions demand more graphics power. Ensure that your gaming laptop’s graphics card can handle the chosen resolution without sacrificing performance.
Refresh Rate:
The refresh rate refers to how many times the display refreshes per second, and it is measured in Hertz (Hz). A higher refresh rate results in smoother and more fluid motion in games. Consider displays with refresh rates of at least 144Hz or higher for a seamless gaming experience.
Panel Type:
The panel type affects color accuracy, contrast, and viewing angles. The most common panel types for gaming laptops are IPS (In-Plane Switching) and TN (Twisted Nematic). IPS panels offer better color reproduction and wider viewing angles, while TN panels provide faster response times for reduced motion blur. Consider your priorities and gaming preferences when choosing between these panel types.
Screen Size:
Depending on your gaming preferences and portability needs, select an appropriate screen size for your gaming laptop. A larger screen can provide a more immersive experience, but it may also make the laptop less portable. Most gaming laptops offer screen sizes ranging from 15 to 17 inches.
Adaptive Sync Technology:
Consider displays that support adaptive sync technologies like NVIDIA G-Sync or AMD FreeSync. These technologies synchronize the display’s refresh rate with the graphics card’s output, reducing screen tearing and providing a smoother gaming experience. Ensure that your gaming laptop’s graphics card is compatible with the chosen adaptive sync technology.
Additional Features:
Take into account additional features that may enhance your gaming experience, such as HDR (High Dynamic Range) support for improved color and contrast, or anti-glare coatings to reduce reflections and eye strain during long gaming sessions.
By considering these factors, you can select a suitable display for your gaming laptop that enhances your gaming experience, immersing you in stunning visuals and providing smooth gameplay.
Step 6: Selecting the Right Gaming Accessories
When building a gaming laptop, it’s essential to select the right gaming accessories to enhance your gaming experience. These accessories can improve your control, comfort, and immersion while gaming. Here are some key gaming accessories to consider:
Gaming Keyboard:
A gaming keyboard offers features specifically designed for gaming, such as mechanical switches for tactile feedback and faster response times. Look for keyboards with customizable RGB lighting, macro keys, and anti-ghosting technology for seamless and accurate keystrokes.
Gaming Mouse:
A gaming mouse provides better precision and control during gameplay. Look for mice with adjustable DPI (dots per inch) settings, programmable buttons, and ergonomic designs for comfortable extended use. Optical or laser sensors are recommended for accurate tracking.
Gaming Headset:
A gaming headset enhances the immersion by providing clear and immersive audio. Look for headsets with noise-canceling features, good audio quality, and a comfortable fit for long gaming sessions. Consider whether you prefer wired or wireless options according to your needs.
Gaming Controller:
If you prefer console-style gaming or play games that are better suited for a controller, consider adding a gaming controller to your setup. Look for controllers compatible with your gaming laptop, whether it’s an Xbox, PlayStation, or a PC-specific controller.
Mouse Pad:
A mouse pad provides a smooth surface for your gaming mouse and helps improve mouse accuracy and control. Look for large, durable mouse pads with a non-slip base that can accommodate both your mouse and keyboard.
Gaming Monitor:
If you plan to connect your gaming laptop to an external monitor for an enhanced gaming experience, consider a gaming monitor with features like a high refresh rate, low response time, and adaptive sync technology. Choose a monitor with a size and resolution that suits your preferences.
Remember that the choice of gaming accessories is subjective and depends on your gaming preferences and budget. Consider trying out different models or brands to find the accessories that provide the best fit for your gaming style.
Building the Gaming Laptop
Now that you have chosen the right components, it’s time to put them together and build your gaming laptop. Building a laptop requires careful handling and attention to detail. Follow these steps to assemble your gaming laptop:
Step 1: Preparing the Work Area
Find a clean and well-lit workspace with ample space to spread out your components. Use an anti-static mat or wrist strap to prevent damage from static electricity. Gather all the necessary tools, such as screwdrivers and cable ties, to make the process easier.
Step 2: Installing the Processor on the Motherboard
Carefully align the notches on the processor with the corresponding socket on the motherboard. Gently lower the processor into the socket, ensuring it is seated correctly. Secure it in place by lowering the retention arm. Apply thermal paste to the top of the processor before attaching the CPU cooler.
Step 3: Installing the RAM Modules
Locate the RAM slots on the motherboard and push the RAM sticks into the slots firmly until they click into place. Ensure that the clips on the sides of the slots snap shut, securing the RAM modules. Follow the motherboard’s manual to determine the correct slots for dual-channel configurations, if applicable.
Step 4: Mounting the Graphics Card
Identify the PCIe slot on the motherboard where the graphics card will be installed. Remove the corresponding expansion slot cover on the back of the laptop casing. Insert the graphics card into the slot, applying gentle pressure until it is securely seated. Use screws to fasten the graphics card to the case for added stability.
Step 5: Installing the Storage Drive
Connect the storage drive, whether it’s an SSD, HDD, or M.2 drive, to the appropriate connector on the motherboard. Use screws or clips to secure the drive in place within the laptop casing. Ensure that the drive is properly connected and aligned with the SATA or M.2 slot.
Step 6: Assembling the Laptop Casing
Place the motherboard, with all its components, into the laptop casing carefully. Connect any necessary cables, such as power cables and data cables, to their respective ports on the motherboard. Secure the motherboard in place using screws provided with the casing. Install additional fans if needed for improved cooling.
Step 7: Connecting the Display and Accessories
Connect your gaming laptop to an external display, if desired, using the appropriate cables, such as HDMI or DisplayPort. Connect your gaming accessories such as the keyboard, mouse, and headset to the available USB ports or wireless connections on the laptop.
Step 8: Powering on the Gaming Laptop
Ensure that all the connections are secure and that no loose cables are obstructing the components. Connect the power supply to the laptop and the power outlet. Press the power button to turn on the laptop. If everything is correctly assembled, the laptop should boot up and initiate the operating system installation.
Remember to consult the manuals and guidelines provided with your components for specific instructions and to ensure a smooth assembly process. Take your time and double-check all connections to avoid any potential issues. Once your gaming laptop is built, you can enjoy an immersive gaming experience tailored to your needs and preferences.
Step 1: Preparing the Work Area
Before diving into the process of building your gaming laptop, it’s important to properly prepare your work area. Creating a suitable environment will help ensure a smooth and safe assembly process. Follow these steps to prepare your work area:
Clean and Organize:
Start by clearing out any clutter and creating a clean workspace. Remove any unnecessary items from the area to make room for your laptop components. Having a clean and organized work area will make it easier to find the tools and components you need during the assembly process.
Good Lighting:
Make sure your work area is well-lit. Sufficient lighting will help you clearly see the components and connectors during the assembly process, reducing the chances of errors or misplaced connections. Consider using a desk lamp or working in a naturally well-lit area.
Static Electricity Prevention:
Static electricity can damage sensitive electronic components. To prevent this, use an anti-static mat or work on a non-static surface. Additionally, wearing an anti-static wrist strap can help dissipate any built-up static electricity from your body to avoid damaging the components.
Necessary Tools:
Gather all the necessary tools that you’ll need during the assembly process. This typically includes screwdrivers, thermal paste for the processor, cable ties for cable management, and any specific tools mentioned in the component manuals. Having your tools ready in advance will save time and make the assembly process smoother.
Proper Ventilation:
Ensure that the area where you are building your gaming laptop has proper ventilation. Good airflow will prevent heat buildup and help keep the components cool during the assembly process. This is especially crucial when working with the laptop casing, as you’ll need ample space to maneuver and connect the components.
Workstation Stability:
Make sure your workstation is stable and won’t be easily disturbed during the assembly process. A shaky or unstable work surface could result in accidental spills or misalignment of components. Find a sturdy table or desk where you can comfortably work on your laptop without any unnecessary interruptions.
By preparing your work area before starting the assembly process, you can ensure a smooth and organized building experience. Taking the time to properly set up your work area will make the assembly process more enjoyable and help prevent any avoidable complications or errors.
Step 2: Installing the Processor on the Motherboard
Installing the processor, also known as the central processing unit (CPU), is a critical step in building your gaming laptop. The CPU is responsible for executing instructions and processing data, making it a crucial component for the overall performance of your laptop. Follow these steps to correctly install the processor on the motherboard:
Step 1: Preparing the CPU Socket
Start by identifying the CPU socket on your motherboard. The socket is usually protected by a plastic cover that needs to be gently lifted or opened. Carefully remove the cover and set it aside, making sure not to touch the pins or contacts inside the socket.
Step 2: Aligning the Processor
Take the processor out of its packaging, being mindful of handling it with care. Notice that one corner of the processor has a golden triangle or an arrow indicator. This corresponds to a marker on the CPU socket. Align the golden triangle or arrow on the processor with the matching marker on the socket.
Step 3: Placing the Processor
Once aligned, gently lower the processor into the socket, ensuring that all the pins on the processor make contact with their respective holes in the socket. Take your time and avoid applying excessive force. The processor should feel snug and fit naturally without requiring excessive pressure.
Step 4: Securing the Processor
Once the processor is properly placed in the socket, carefully close the retention arm or lever. The arm should lock the processor in place, applying even pressure across its surface. Double-check that the processor is securely fastened and the retention arm is fully closed.
Step 5: Applying Thermal Paste and Installing the CPU Cooler
Before installing the CPU cooler, apply a small amount of thermal paste to the top of the processor. The thermal paste helps to ensure proper heat transfer between the CPU and the cooler. Follow the manufacturer’s instructions or use an appropriate amount as recommended. Once the paste is applied, carefully mount the CPU cooler on top of the processor, aligning it with the mounting holes on the motherboard. Secure the cooler in place using the provided screws or clips.
Remember to consult the motherboard and CPU documentation for any specific instructions or recommendations regarding the installation process. Take your time and handle the processor and motherboard with care to avoid any accidental damage. With the processor correctly installed, you’re one step closer to completing your gaming laptop build.
Step 3: Installing the RAM Modules
Installing the RAM modules is an important step in building your gaming laptop. RAM, or Random Access Memory, is responsible for temporarily storing data that your laptop needs to access quickly. Follow these steps to correctly install the RAM modules on your motherboard:
Step 1: Locate the RAM Slots
Identify the RAM slots on your motherboard. These slots are usually located near the CPU socket and are labeled as DIMM slots. Check your motherboard’s manual to determine the number of RAM slots available and any specific configuration requirements for dual-channel setups.
Step 2: Open the RAM Slots
Most RAM slots have locking clips on either side to secure the RAM modules in place. Gently press down on the clips to open the slots. These clips may need to be pushed further away from the RAM slots until they click into the open position.
Step 3: Align the RAM Modules
Handle the RAM modules with care, avoiding touching the gold contacts on the bottom. Align the notches on the bottom of the RAM module with the corresponding slot on the motherboard. The RAM module has a notch in the middle that should match the tab inside the slot. Ensure the module is properly seated by aligning the notch and pressing it firmly into the slot.
Step 4: Insert the RAM Modules
Gently insert the RAM module into the slot, maintaining even pressure on both ends. Push the module down until you hear a click or feel the locking clips on the sides of the slot snap into place. The module should be firmly seated, and the clips should close automatically to secure it in position.
Step 5: Verify Installation
After installing all the RAM modules, visually inspect them to ensure they are securely locked in place. Check that the retention clips are fully closed, holding the modules in position. Give the modules a gentle, careful tug to confirm that they are snugly fitted and won’t accidentally come loose during use.
It’s essential to consult your motherboard’s manual for specific instructions and recommendations regarding RAM installation. Different motherboards may have slight variations in slot positioning or requirements. By correctly installing the RAM modules, you’ll ensure optimal performance and memory capacity for your gaming laptop.
Step 4: Mounting the Graphics Card
Mounting the graphics card, also known as the GPU (Graphics Processing Unit), is a crucial step in building your gaming laptop. The graphics card is responsible for rendering and displaying the visuals of your games. Follow these steps to correctly mount the graphics card on your motherboard:
Step 1: Locate the PCIe Slot
Identify the PCIe (Peripheral Component Interconnect Express) slot on your motherboard where the graphics card will be installed. This slot is specifically designed to accommodate the graphics card and provide it with the necessary power and data connectivity.
Step 2: Remove the Expansion Slot Cover
Before mounting the graphics card, you’ll need to remove the corresponding expansion slot cover on the back of the laptop casing. This allows the graphics card to be installed seamlessly into the PCIe slot.
Step 3: Align the Graphics Card
Hold the graphics card by its edges, being careful not to touch any sensitive components or connectors. Align the graphics card with the PCIe slot by matching the gold contacts on the bottom of the GPU with the contacts in the slot. Take note of any notches or guides that ensure the correct orientation.
Step 4: Install the Graphics Card
Gently but firmly insert the graphics card into the PCIe slot, applying equal pressure on both ends of the card. Push the card until it is fully seated in the slot and the gold contacts are no longer visible. Ensure that the graphics card is securely inserted into the slot and does not wiggle or move when lightly nudged.
Step 5: Secure the Graphics Card
Using screws provided with the gaming laptop casing, secure the graphics card to the case for added stability. Attach the screws through the holes on the rear bracket of the graphics card, aligning them with the corresponding holes on the back of the case. Tighten the screws gently, ensuring that the graphics card remains securely fastened in place.
Step 6: Connect Power and Data Cables
Depending on your graphics card, you may need to connect additional power cables to provide adequate power supply. Check the graphics card’s power requirements and connect the necessary power cables from the power supply unit to the connectors on the graphics card. Additionally, connect any data cables, such as HDMI or DisplayPort, to the graphics card for video output.
By correctly mounting the graphics card, you ensure proper functionality and optimal performance for your gaming laptop. Double-check all connections and secure the graphics card firmly to prevent any accidental dislodging during use.
Step 5: Installing the Storage Drive
Installing the storage drive is an essential step in building your gaming laptop. The storage drive is where you’ll store your operating system, games, and other files. Follow these steps to correctly install the storage drive in your laptop:
Step 1: Identify the Storage Connectors
Identify the appropriate storage connectors on your laptop’s motherboard. Depending on the type of storage drive you have, there may be SATA connectors or M.2 slots available.
Step 2: Choose the Right Storage Drive
Decide whether to use a solid-state drive (SSD) or a hard disk drive (HDD) as your storage drive. SSDs offer faster read and write speeds, while HDDs provide larger storage capacities at a lower cost. Alternatively, you can use a combination of both for optimal performance and storage capacity.
Step 3: Connect the SATA Drive
If you’re installing an SSD or HDD, connect one end of a SATA data cable to the storage drive and the other end to an available SATA connector on the motherboard. Connect the drive to the power supply using the appropriate SATA power cable. Ensure both connections are secure.
Step 4: Install the M.2 Drive
If you’re using an M.2 drive, locate the appropriate M.2 slot on the motherboard. Carefully insert the M.2 drive into the slot at a slight angle. Push it firmly until it is fully seated. Some M.2 slots may require a screw to secure the drive in place. Consult your motherboard’s manual for specific instructions.
Step 5: Configure the Storage Drive
After physically installing the storage drive, you’ll need to configure it in the BIOS/UEFI settings. Restart your laptop and access the BIOS/UEFI menu by pressing the appropriate key (usually F2 or Delete) during the boot process. Navigate to the storage settings and ensure the drive is recognized. If necessary, format the drive and set it as the primary boot option.
Step 6: Cable Management
Proper cable management is essential for an organized and efficient build. Use cable ties or Velcro straps to secure the storage drive cables and prevent them from obstructing other components or interfering with the airflow within the laptop casing.
By correctly installing the storage drive, you’ll have ample space to store your operating system, games, and other files. Remember to consult your laptop’s manual for specific instructions regarding storage installation and configuration.
Step 6: Assembling the Laptop Casing
Assembling the laptop casing is the next crucial step in building your gaming laptop. This involves carefully securing the motherboard, connecting cables, and ensuring proper airflow within the casing. Follow these steps to correctly assemble the laptop casing:
Step 1: Prepare the Laptop Casing
Ensure that the laptop casing is clean and free from any dust or unnecessary components. Remove any removable panels or covers from the casing to provide easy access to the internal components.
Step 2: Place the Motherboard
Carefully place the motherboard into the designated area in the laptop casing. Align the ports and connectors on the back of the motherboard with the corresponding holes or slots in the casing.
Step 3: Connect Cables and Wires
Connect all the necessary cables and wires, including power cables, data cables, and front panel connectors. Refer to your motherboard’s manual for specific instructions on the cable connections.
Step 4: Secure the Motherboard
Use the provided screws to securely fasten the motherboard to the laptop casing. Ensure that the motherboard is firmly in place to prevent any movement or shifting that could cause damage to the components.
Step 5: Install Additional Fans (if applicable)
If your laptop casing has additional fan slots, install the fans to ensure proper airflow and cooling. Connect the fan cables to the designated connectors on the motherboard or fan controller, ensuring they are securely attached.
Step 6: Organize Cables and Perform Cable Management
Neatly organize the cables within the laptop casing to maintain a clean and organized build. Use cable ties or Velcro straps to secure and bundle the cables together, preventing them from obstructing other components or interfering with the airflow.
Step 7: Close the Laptop Casing
Once all the components are in place and the cables are managed, carefully close the laptop casing. Ensure that all the panels or covers fit properly and are securely fastened.
Properly assembling the laptop casing ensures that the components are securely in place and allows for efficient airflow to maintain optimal performance and prevent overheating. Take your time to ensure everything is correctly installed and organized before closing the casing.
Step 7: Connecting the Display and Accessories
Connecting the display and accessories is the final step in building your gaming laptop. This step involves making the necessary connections to ensure proper video output, audio, and functionality of gaming peripherals. Follow these steps to correctly connect the display and accessories:
Step 1: Connect the Display
Connect your gaming laptop to an external display, if desired, using the appropriate cables. Common display connection options include HDMI, DisplayPort, or DVI. Ensure that the cable is securely connected to both the laptop and the display, and tighten any screws to prevent accidental disconnection.
Step 2: Connect the Keyboard, Mouse, and Headset
Connect your gaming keyboard, mouse, and headset to the available USB ports on your laptop. If your accessories use wireless connections, follow the manufacturer’s instructions to set up the wireless connection properly. Ensure that the connections are secure and the devices are recognized by your laptop.
Step 3: Check Audio Connectivity
If you’re using external speakers or headphones, ensure that they are properly connected to the audio output jack or the appropriate audio interface on your laptop. Check the audio settings on your laptop to ensure that the correct audio output device is selected and adjust the volume accordingly.
Step 4: Test the Connections
Before powering on your gaming laptop, double-check all the connections to ensure that they are secure and properly plugged in. This prevents any potential issues or loose connections that could affect video output or peripheral functionality.
Step 5: Power on the Laptop
After confirming that all the connections are secure, power on your gaming laptop. Press the power button and wait for the laptop to start up. If you have properly installed the operating system and drivers, the display should come to life, and your peripherals should be recognized and ready to use.
By correctly connecting the display and accessories, you ensure proper functionality and an immersive gaming experience with your gaming laptop. Double-check all connections and settings to ensure everything is properly set up before diving into your favorite games.
Step 8: Powering on the Gaming Laptop
Powering on the gaming laptop is the final step in the building process. After all the components have been installed and connected, it’s time to boot up your newly built gaming laptop and prepare for an immersive gaming experience. Follow these steps to correctly power on your gaming laptop:
Step 1: Double-Check Connections
Before powering on, quickly double-check all the connections, including power cables, monitor cables, and peripheral connections. Ensure that everything is securely plugged in and properly seated to prevent any potential issues or loose connections.
Step 2: Connect the Power Cable
Plug in the power cable into the power port of your gaming laptop. Connect the other end of the power cable into a reliable power outlet or surge protector. Ensure that the power outlet is functioning correctly and provides a stable power supply.
Step 3: Press the Power Button
Locate the power button, usually located near the keyboard or on the side of the laptop, and press it to turn on the laptop. Depending on the laptop model, you may need to press and hold the power button for a few seconds to initiate the booting process.
Step 4: Monitor the Startup Process
Once the power button is pressed, the laptop will begin its startup process. Monitor the screen to ensure that the bootup process proceeds as expected. You may see the manufacturer’s logo, a loading screen, or other indicators that the laptop is booting up. Be patient as this process may take a few seconds to complete.
Step 5: Enter the Operating System
If you have installed an operating system on your gaming laptop, it will now proceed to the login or setup screen. Follow the prompts on the screen to log in or set up your operating system for the first time. Ensure that you have the necessary credentials or installation media ready, depending on the operating system you have chosen.
Step 6: Configure and Update
Once you have entered the operating system, take the time to configure and update your gaming laptop. Install any necessary drivers, updates, or software to optimize the performance and security of your system. Configure settings according to your preferences and ensure that your gaming laptop is up to date.
By correctly powering on your gaming laptop, you’re ready to dive into your favorite games and enjoy the fruits of your labor. Remember to keep your gaming laptop well-maintained, perform regular updates, and monitor its performance to ensure optimal gaming experiences in the future.
Troubleshooting Common Issues
While building a gaming laptop can be an exciting process, it’s not uncommon to encounter some issues along the way. Here are some common problems that you may come across during the build, along with troubleshooting steps to help resolve them:
No Power:
If your laptop doesn’t power on at all, double-check the power connections, ensuring that the power cable is securely plugged into both the laptop and the power outlet. If you’re using a surge protector, make sure it’s functioning correctly. Try a different power outlet to rule out any issues with the current outlet.
No Display:
If your laptop powers on but doesn’t display anything on the screen, ensure that the monitor cable is securely connected to both the laptop and the monitor. Check the input source on the monitor to ensure it matches the cable connection. If using an external monitor, verify that the correct display mode is selected in your laptop’s settings.
RAM or Component Incompatibility:
If your laptop fails to boot or experiences frequent crashes, it could indicate RAM or component incompatibility. Check that the RAM modules are fully seated in their slots and properly aligned. Try removing and reseating the components, ensuring they are compatible with your motherboard specifications. Consult the component manuals and motherboard documentation for compatibility information.
Overheating:
If your laptop overheats and experiences performance issues or shutdowns, ensure that the cooling system is functioning properly. Clean any dust or debris from the cooling vents or fans. Consider using a laptop cooling pad to improve airflow. If the issue persists, check the CPU and GPU temperatures using monitoring software and consider reapplying thermal paste or upgrading the cooling system if needed.
Driver or Software Issues:
If you encounter issues with hardware recognition or performance, ensure that you have installed the necessary drivers and software for your components. Visit the manufacturer’s website to download the latest drivers and updates specific to your gaming laptop model. Consider updating your operating system and performing regular software updates to address any compatibility or performance issues.
Bios/UEFI Settings:
If your gaming laptop fails to boot or exhibits abnormal behavior, check the BIOS/UEFI settings. Ensure that the storage device with the operating system is set as the primary boot option. Check other settings related to power management, overclocking, or component configurations for any potential conflicts or incorrect settings.
If you encounter any issues that you are unable to resolve, consider reaching out to the manufacturer’s customer support or seeking assistance from a professional technician. Troubleshooting can sometimes require technical expertise, and seeking professional guidance can help resolve any persistent or complex problems.
Conclusion
Congratulations! You have successfully completed the process of building your gaming laptop. By carefully selecting the right components, assembling them correctly, and troubleshooting any issues along the way, you have created a personalized gaming machine tailored to your preferences and needs.
Building a gaming laptop offers numerous advantages, including the ability to customize your hardware, save money, and potentially achieve better performance compared to pre-built options. With your newly built gaming laptop, you can enjoy a wide range of games, whether you prefer immersive single-player experiences or competitive multiplayer adventures.
Remember to regularly update and maintain your gaming laptop by keeping your drivers and software up to date, monitoring temperatures, and cleaning the system to ensure optimal performance and longevity. Taking care of your gaming laptop will help preserve its performance capabilities and extend its lifespan.
Building a gaming laptop is a journey that requires patience, attention to detail, and a willingness to troubleshoot any unexpected issues. While challenges may arise, the knowledge and skills gained through the process can be rewarding and allow for future upgrades or modifications to further enhance your gaming experience.
Now, it’s time to enjoy the fruits of your labor and dive into your favorite games. Whether you’re exploring vast open worlds, battling fierce opponents, or experiencing immersive virtual realities, your gaming laptop will provide you with an exciting and immersive gaming adventure.
Remember to have fun, continue learning, and explore the world of gaming as you unlock new levels, achievements, and memories with your newly built gaming laptop. Happy gaming!