Introduction
Welcome to the world of Motorola smartphones! Whether you’re a first-time user or transitioning from a different phone brand, this guide will help you navigate and make the most of your Motorola device.
Motorola smartphones are known for their excellent performance, sleek design, and user-friendly interface. With a wide range of features and functions, these devices cater to different needs and preferences.
In this article, we will walk you through the essential steps to get started with your Motorola smartphone. From powering on to customizing settings, making calls to taking photos, we’ll cover everything you need to know to become a pro at using your device.
So, let’s dive in and discover the amazing capabilities of your Motorola smartphone!
Before we begin, it’s important to note that the exact steps and menus may vary slightly depending on the model and version of your Motorola smartphone. However, the core principles and functionalities remain the same across most devices.
Whether you’re using a Motorola Moto G, Moto E, Moto Z, or any other model, this guide will provide you with a solid foundation to navigate and master your smartphone.
Now that we’ve set the stage, let’s move on to the first step: powering on your Motorola smartphone.
Powering on your Motorola smartphone
The first step to using your Motorola smartphone is to power it on. To do this, locate the power button on your device. On most Motorola smartphones, the power button is located on the right side or the top of the device.
Once you’ve found the power button, press and hold it for a few seconds until the screen lights up. You may also see the Motorola logo appear on the screen as the device boots up.
After powering on your device, you will be greeted with the lock screen. This is the screen that appears when you first start or wake up your smartphone. Depending on your settings, you may need to swipe, enter a PIN, password, or use your fingerprint to unlock the device.
If this is your first time setting up your Motorola smartphone, you will be guided through the initial setup process. This includes connecting to a Wi-Fi network, signing in with your Google account, and configuring essential settings.
Once you’ve completed the setup process, your Motorola smartphone is ready for use. You can now access the home screen and start exploring the various features and apps available.
It’s worth mentioning that if your Motorola smartphone has a removable battery, you may need to insert or replace the battery before powering on the device. Refer to the user manual or manufacturer’s instructions for the specific steps to handle the battery of your device.
Now that you’ve successfully powered on your Motorola smartphone, let’s move on to the next section, where we’ll learn how to unlock your device and get started with the home screen.
Unlocking your Motorola smartphone
Once you’ve powered on your Motorola smartphone, the next step is to unlock it. The lock screen provides security and privacy by preventing unauthorized access to your device. There are several ways to unlock your Motorola smartphone:
- Swipe to unlock: The most basic method is to swipe up or swipe right on the lock screen. This will unlock your device and take you to the home screen. This method is often used when no additional security measures are enabled.
- Pattern or PIN: If you prefer a higher level of security, you can set up a pattern or PIN. To do this, go to the device settings, navigate to the “Security” section, and choose the “Screen lock” option. You can then select either a pattern or PIN, follow the on-screen instructions to set it up, and use it to unlock your device.
- Password: Similar to a pattern or PIN, you can also choose to set up a password as your lock screen option. This provides an extra layer of security by requiring you to enter a combination of letters, numbers, and symbols to unlock your device.
- Fingerprint: Many Motorola smartphones come with a fingerprint sensor, allowing you to unlock your device with just a touch of your finger. To set up fingerprint unlocking, go to the device settings, tap on “Security,” and select “Fingerprint.” Follow the on-screen instructions to register your fingerprint and use it to unlock your device.
- Face unlock: Some newer Motorola smartphones offer face unlock, which uses facial recognition technology to unlock your device. To set up face unlock, go to the device settings, navigate to the “Security” section, and choose the “Face unlock” option. Follow the prompts to register your face and use it to unlock your device.
- Smart Lock: Additionally, Motorola smartphones also support Smart Lock, which allows you to bypass the lock screen in certain trusted situations. This includes locations, devices, and even your voice. For example, you can set your home as a trusted location, and your device will remain unlocked when you’re at home.
By choosing the unlocking method that suits your preferences and needs, you can easily and securely access your Motorola smartphone. Now that you’ve unlocked your device, let’s move on to the next section, where we’ll explore the home screen and its functionalities.
Navigating the home screen
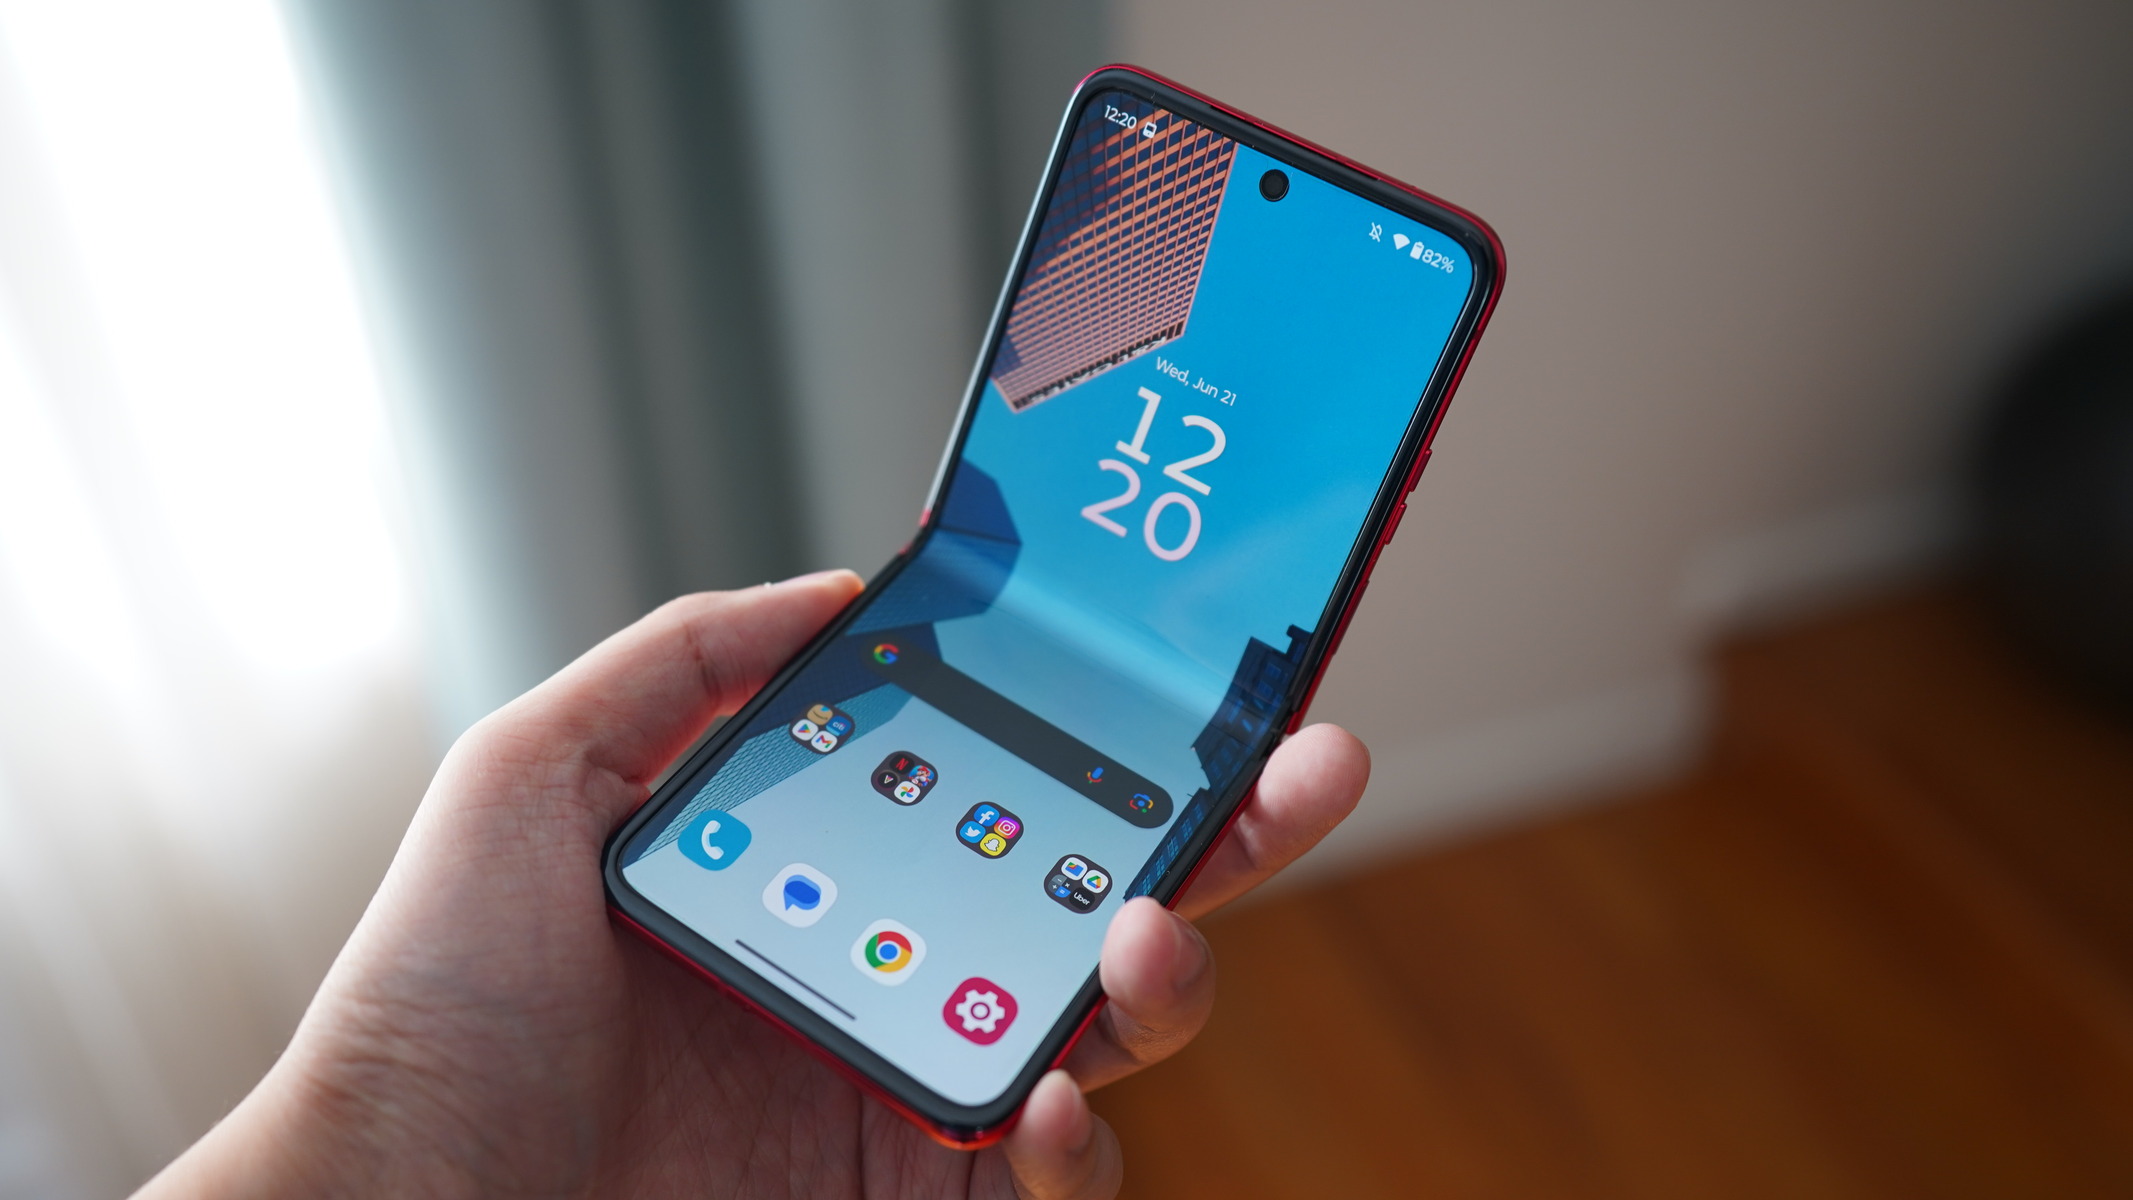
The home screen is the central hub of your Motorola smartphone. It’s where you can find and access your favorite apps, widgets, and shortcuts. Navigating the home screen is easy, and understanding its layout will help you make the most of your device.
When you unlock your Motorola smartphone, the home screen is the first thing you see. Here are some key elements and gestures to navigate the home screen:
- App icons: On the home screen, you’ll find various app icons representing installed applications. Tap on an app icon to open the corresponding app.
- Widgets: Widgets are dynamic and interactive components that provide quick access to information or perform specific functions. To add a widget to your home screen, long-press on an empty space, select “Widgets,” and choose the desired widget to add.
- App drawer: The app drawer is where you can find all the apps installed on your Motorola device. To open the app drawer, swipe up from the bottom of the screen or tap on the app drawer icon, usually located at the bottom center of the home screen.
- Home screen customization: You can customize your home screen by rearranging app icons, creating folders, and changing wallpapers. Long-press on an app icon to enter the edit mode, then drag and drop it to the desired location or onto another app icon to create a folder. To change the wallpaper, long-press on an empty space on the home screen, tap on “Wallpapers,” and choose from the available options.
- Gestures: Motorola smartphones often come with convenient gestures to navigate the home screen. For example, you can swipe down anywhere on the home screen to access the notification panel, swipe up with two fingers to quickly access the app drawer, or swipe left or right on the home screen to switch between different home screen panels.
- Search bar: At the top of the home screen, you’ll usually find a search bar. You can use this to quickly search for apps, contacts, settings, or even perform web searches directly from the home screen.
By familiarizing yourself with these elements and gestures, you can efficiently navigate through the home screen of your Motorola smartphone. Now that you know how to navigate the home screen, let’s move on to the next section, where we’ll explore the app drawer and learn how to access and manage your apps.
Using the app drawer
The app drawer is the central repository of all the apps installed on your Motorola smartphone. It provides a convenient way to access and manage your apps without cluttering your home screen. Let’s explore how to use the app drawer effectively:
To open the app drawer, either swipe up from the bottom of the home screen or tap on the app drawer icon, usually located at the bottom center of the screen. This will reveal a vertically scrolling list of all your installed apps.
Here are some key features and actions you can perform within the app drawer:
- App search: If you have a large number of apps installed, finding a specific app can be time-consuming. Luckily, the app drawer usually includes a search bar at the top. Simply type in the name of the app you’re looking for, and the list will automatically update to show relevant results.
- App organization: Most Motorola smartphones allow you to organize your app drawer by different categories or custom folders. To access these options, tap on the three-dot menu icon or the settings gear icon within the app drawer. From there, you can choose to sort apps alphabetically, by usage, or manually organize them into folders.
- App shortcuts: Some apps offer shortcuts directly from the app drawer. Long-press on an app icon to reveal additional options or quick actions specific to that app. For example, you might find direct actions like composing a new email or starting a new note for productivity apps.
- Uninstalling or disabling apps: If you have apps that you no longer use or want to free up storage space, you can uninstall or disable them directly from the app drawer. Long-press on an app icon and either choose the “Uninstall” option to remove the app completely or select “Disable” to prevent it from running without uninstalling it.
- App updates: Keeping your apps up to date is essential for optimal performance and security. Motorola smartphones usually have a dedicated section in the app drawer to manage app updates. Look for the “Updates” tab or the three-dot menu icon to access this section and update your apps as needed.
The app drawer is an efficient way to access and manage your apps on your Motorola smartphone. Whether you’re searching for a specific app, organizing your apps into folders, or uninstalling unnecessary ones, the app drawer provides all the tools you need. Now that you know how to use the app drawer effectively, let’s move on to the next section, where we’ll explore accessing and managing notifications on your Motorola smartphone.
Accessing and managing notifications
Notifications on your Motorola smartphone keep you updated with important information and alerts from various apps and services. From new messages to upcoming events, notifications provide a convenient way to stay informed. Here’s how you can access and manage notifications:
When you receive a new notification, it appears as a small icon or banner at the top of your screen. To view your notifications, swipe down from the top of the screen to pull down the notification shade. This will reveal a list of all your recent notifications.
Here are some key actions and options you can perform with notifications:
- Expand and collapse: If a notification has additional details or options, you can expand it by tapping on it. This will reveal more information or available actions. To collapse a notification, swipe it to the side or tap on the “x” button.
- Quick actions: Depending on the app and the type of notification, you may have quick actions available. For example, a missed call notification may offer options to call back or send a message directly from the notification shade. Simply tap on the available action to perform it without opening the app.
- Clearing notifications: To clear individual notifications, swipe them to the side or use the “Clear” button typically located at the top or bottom of the notification shade. If you want to clear all notifications at once, look for the “Clear all” or “Dismiss all” button.
- Priority and silent mode: Motorola smartphones offer different notification modes, including priority and silent. Priority mode allows only important notifications to come through, while silent mode mutes all notifications. You can access these modes by using the volume buttons or by going to the device settings and selecting “Sound & notification.”
- Notification settings: To customize how notifications behave for specific apps, you can access their individual notification settings. Open the device settings, go to “Apps & notifications,” and choose the desired app. From there, you can customize the notification sound, vibration, or even block notifications entirely.
- Notification dots: Some Motorola devices support notification dots, which are small indicators that appear on app icons to show unread notifications. Long-press on an app icon with a notification dot to reveal a preview of the notification or perform quick actions.
Managing your notifications effectively ensures that you stay informed without being overwhelmed. From expanding and collapsing notifications to customizing settings for specific apps, you have control over how notifications are displayed on your Motorola smartphone. Now that you know how to access and manage notifications, let’s move on to the next section, where we’ll explore making and receiving calls on your device.
Making and receiving calls
Making and receiving calls is a fundamental function of your Motorola smartphone. Whether you need to connect with friends, family, or colleagues, your device provides seamless communication capabilities. Here’s how you can make and receive calls:
Making Calls:
- Phone app: The most common method to make a call is by using the Phone app. Locate the Phone app icon on your home screen or in the app drawer and tap on it to open the app.
- Keypad: Once you’re in the Phone app, you’ll see a keypad. Enter the phone number you want to call using the keypad. If the number includes an international or country code, make sure to include it as well.
- Call button: After entering the desired phone number, tap on the call button, usually represented by a phone icon. Your Motorola smartphone will then initiate the call.
- Contacts app: An alternative way to make calls is by using the Contacts app. Open the Contacts app from your home screen or app drawer, locate the contact you want to call, and tap on their phone number. This will automatically initiate the call.
- Recent calls: Another convenient method is to use the Recent calls list. Open the Phone app and navigate to the “Recents” tab. You’ll see a list of your recently dialed, received, or missed calls. Tap on the desired contact or phone number to initiate a call.
- Favorite contacts: If you frequently call certain contacts, you can mark them as favorites. This way, they’ll appear in a separate tab or section within the Phone app for easy access. To add or manage favorite contacts, open the Phone app, go to the “Favorites” tab, and follow the instructions to add or remove contacts.
Receiving Calls:
When you receive an incoming call on your Motorola smartphone, several options and actions are available:
- Answer or decline: When a call comes in, swipe the incoming call notification to the side to accept or decline the call. Alternatively, you can tap the green phone icon to answer the call or the red phone icon to decline it.
- Quick reply messages: If you’re unable to answer a call but still want to respond, Motorola smartphones often provide quick reply messages. These are pre-defined text messages you can send to the caller as a response. You can find quick reply messages by swiping up on the incoming call screen.
- Reject with a message: If you need to decline a call but want to send a custom message to the caller, you can choose the “Reject with a message” option. This allows you to send a pre-set or personalized message explaining why you are unable to answer the call.
- Do not disturb: To avoid interruptions during specific periods, you can enable the “Do not disturb” mode on your Motorola smartphone. This mode silences notifications and calls and can be set to activate automatically during certain times or manually when needed.
By following these steps, you’ll be able to make and receive calls effortlessly on your Motorola smartphone. Whether it’s using the Phone app, Contacts app, or the Recent calls list, you have multiple options to connect with others. Now that you’re familiar with making and receiving calls, let’s move on to the next section, where we’ll explore sending and receiving text messages.
Sending and receiving text messages
Sending and receiving text messages is a common method of communication on your Motorola smartphone. Whether you need to send a quick message or have a conversation with someone, your device allows you to stay connected through text messaging. Here’s how you can send and receive text messages:
Sending Text Messages:
- Messaging app: Locate the Messaging app icon on your home screen or in the app drawer and tap on it to open the app.
- New message: Once you’re in the Messaging app, look for the “New Message” button or icon, often represented by a pencil or a plus sign. Tap on this button to start composing a new text message.
- Recipient: Enter the recipient’s phone number or select the contact from your Contacts list by tapping on the “Contacts” icon. You can also directly enter the contact’s name if it’s saved in your phonebook.
- Compose message: Once you’ve added the recipient, tap on the text box to start typing your message. You can enter your desired message using the on-screen keyboard.
- Sending options: Depending on the messaging app and your device settings, you may have additional options when composing messages. This can include attaching photos, videos, or files, inserting emoji or stickers, or even recording and sending voice messages.
- Send: When you’ve finished composing your message, tap on the send button, usually represented by an arrow or a paper plane icon. Your Motorola smartphone will then send the text message to the recipient.
Receiving Text Messages:
When you receive a text message on your Motorola smartphone, several options and actions are available:
- Notification: When a text message arrives, you’ll receive a notification on your device. The notification may appear as a small icon or banner at the top of the screen, depending on your settings. To view the message, simply tap on the notification to open the messaging app.
- Reply: Once you’ve opened the message, you can type your response in the text box provided. Similar to sending messages, you can also use additional features like attaching files, inserting emoji, or sending voice messages.
- Quick reply: If you’re unable to respond to a text message immediately, Motorola smartphones often offer quick reply options. These are pre-defined or customizable responses that you can send as a quick reply without fully opening the messaging app.
- Conversation view: All your text messages with a specific contact are grouped in a conversation view. This allows you to see the entire conversation history with that person, including sent and received messages, in a single thread.
- Managing messages: Within the messaging app, you can manage your text messages. This includes deleting messages, archiving conversations, blocking unwanted contacts, or adjusting message settings such as notifications and message display.
With these steps, you’ll be able to send and receive text messages effortlessly on your Motorola smartphone. Whether you’re using the messaging app, replying from notifications, or utilizing quick reply options, staying connected through text messaging is simple and convenient. Now that you’re familiar with sending and receiving text messages, let’s move on to the next section, where we’ll explore customizing your Motorola smartphone.
Customizing your Motorola smartphone
Your Motorola smartphone offers a range of customization options, allowing you to personalize your device and make it truly yours. From changing the wallpaper to customizing app icons, here are some ways to customize your Motorola smartphone:
Wallpaper and Theme:
- Changing wallpaper: Long-press on an empty space on the home screen and tap on “Wallpapers.” Choose from the available wallpapers or select your own image from the gallery. You can also set different wallpapers for the lock screen and home screen.
- Applying themes: Some Motorola smartphones offer pre-installed themes that change the look and feel of the entire device, including icons, colors, and fonts. Explore the device settings to find available themes and apply the one that suits your style.
App Icons and Widgets:
- Rearranging app icons: Long-press on an app icon to enter the edit mode. From there, you can drag and drop app icons to rearrange their positions on the home screen.
- Creating folders: Similar to rearranging app icons, long-press on an app icon and drag it onto another app icon to create a folder. This allows you to group related apps together for easy access.
- Adding widgets: Long-press on an empty space on the home screen, tap on “Widgets,” and select the desired widget to add it to the home screen. Widgets provide quick access to information or perform specific functions.
Settings and Notifications:
- Customizing sound and vibration: You can customize the device’s sound and vibration settings. Open the device settings, go to “Sound & notification,” and adjust the ringtone, notification sound, and vibration intensity to your preference.
- Notification LED: Some Motorola smartphones come with a notification LED that blinks to indicate missed calls, messages, or other notifications. To enable or customize this feature, go to the device settings, find the “Display” or “Notifications” section, and look for LED notification settings.
- Do not disturb: As mentioned earlier, you can enable the “Do not disturb” mode to avoid interruptions during specific times. Customize this mode by going to the device settings, selecting “Sound & notification,” and accessing the “Do not disturb” settings.
Launchers and Third-Party Apps:
- Using launchers: If you want to completely change the look and feel of your Motorola smartphone’s interface, you can install third-party launchers from the Google Play Store. Launchers provide extensive customization options, such as different layouts, icon packs, and gesture controls.
- Adding widgets and icon packs: Third-party apps available on the Google Play Store offer additional widgets and icon packs for further customization. Explore the Play Store and find widgets or icon packs that match your style and preferences.
By utilizing these customization options, you can personalize your Motorola smartphone to reflect your individual taste and style. Whether it’s changing the wallpaper, rearranging app icons, or installing third-party launchers, the possibilities for customization are endless. Now that you know how to customize your device, let’s move on to the next section, where we’ll explore managing your contacts on your Motorola smartphone.
Managing your contacts
Managing your contacts is crucial to stay organized and easily connect with your friends, family, and colleagues on your Motorola smartphone. Here’s how you can efficiently manage and organize your contacts:
Adding and Editing Contacts:
- Using the Contacts app: Open the Contacts app on your Motorola smartphone. Tap on the “+” or “Add” button to create a new contact. Enter the contact’s name, phone number, email address, and any additional details you want to include. Save the contact, and it will be added to your phonebook.
- Importing contacts: If you’re switching from another phone or device, you can import your existing contacts to your Motorola smartphone. Open the Contacts app, tap on the settings icon, and choose the “Import” option. Select the source from which you want to import your contacts, such as Google, SIM card, or other accounts.
- Linking contacts: Sometimes, you may have multiple entries for the same person in your contacts due to different sources or accounts. To keep your contacts organized, you can link them together. Open a contact, tap on the three-dot menu icon, and choose the “Link” or “Join” option. Select the other contact entries you want to link, and they will be merged into a single contact.
- Editing contacts: To edit an existing contact, open the Contacts app, locate the contact you want to edit, and tap on it. You can then make changes to the contact’s information, such as updating the phone number, email address, or adding a profile picture.
Organizing and Syncing Contacts:
- Creating contact groups: If you want to categorize your contacts for easier browsing, you can create contact groups. Open the Contacts app, go to the settings menu, and select “Manage Labels” or “Groups.” Create a new group and assign contacts to it.
- Syncing contacts with Google: To ensure that your contacts are securely backed up and synchronized across devices, you can sync them with your Google account. Open the device settings, select “Accounts,” and choose your Google account. Enable contact syncing to automatically backup, sync, and restore your contacts.
- Importing and exporting contacts: If you need to transfer contacts to another device or backup your contacts externally, you can import or export them. Open the Contacts app, go to the settings menu, and choose the “Import” or “Export” option. Select the desired method, such as exporting to a VCF file or sharing contacts via email or messaging apps.
Searching and Blocking Contacts:
- Searching contacts: If you have a large number of contacts, you can easily search for a specific contact by using the search bar within the Contacts app. Simply type the contact’s name, phone number, or any relevant information, and the list will update with the matching results.
- Blocking contacts: To block unwanted calls or messages from specific contacts, open the Contacts app, select the contact you want to block, and tap on the three-dot menu icon. Choose the “Block” or “Add to blocklist” option. Once blocked, you won’t receive calls or messages from that contact.
By effectively managing your contacts on your Motorola smartphone, you can easily find and connect with the people you need. Whether you’re adding and editing contacts, organizing them into groups, or syncing them with your Google account, the contact management features on your device make it easy to stay connected. Now that you’re familiar with managing contacts, let’s move on to the next section, where we’ll explore taking and viewing photos on your Motorola smartphone.
Taking and viewing photos
One of the standout features of your Motorola smartphone is its ability to capture and store precious moments through its camera. Whether you’re an amateur or a photography enthusiast, your device provides powerful tools to take and view stunning photos. Here’s how to make the most of your Motorola smartphone’s camera:
Taking Photos:
- Opening the camera app: Locate the camera app icon on your home screen or in the app drawer. Tap on it to open the camera interface.
- Focus and exposure: Before taking a photo, ensure that the camera is focused on the subject. Tap on the screen where you want to focus, and your device will automatically adjust the exposure and focus settings.
- Capturing photos: Once you’ve composed your shot, tap on the shutter button to take a photo. Your Motorola smartphone may offer additional options, such as HDR (High Dynamic Range) mode, which enhances the details in scenes with varying levels of brightness.
- Camera modes: Explore the camera app’s various modes to enhance your photography. Depending on your device’s model and software version, you may have modes like Panorama, Portrait, Night mode, or even a Pro mode for manual control over settings like ISO, shutter speed, and more.
- Burst mode: If you want to capture fast-moving subjects or a series of shots in quick succession, use Burst mode. Simply press and hold the shutter button, and your device will capture a series of photos. This is particularly useful for sports or action photography.
- Selfie camera: Most Motorola smartphones come with a dedicated front-facing camera for capturing selfies. Switch to the front camera by tapping on the icon with two arrows or by swiping left or right on the screen.
Viewing Photos:
- Gallery app: Open the Gallery app on your Motorola smartphone. You’ll see a grid view of your photos and albums.
- Browsing photos: Tap on any photo to view it in full screen. Swipe left or right to move between photos. Use pinch-to-zoom gestures to zoom in or out on a particular photo.
- Editing photos: Motorola smartphones often come with built-in photo editing tools. Open a photo in the Gallery app and look for the “Edit” option. From there, you can crop, adjust brightness and contrast, apply filters, and perform various edits to enhance your photos.
- Sharing photos: Tap on the sharing icon or the “Share” option in the Gallery app to quickly share your photos with others. You can send your photos via messaging apps, social media platforms, email, or even print them using compatible printers.
- Cloud backup: To ensure your photos are backed up and accessible across devices, consider using cloud storage services like Google Photos. Enable the automatic backup feature in the app settings, and your photos will be securely backed up to the cloud.
With these tips, you can capture stunning photos and easily browse and manage your photography collection on your Motorola smartphone. Whether you’re using the camera app’s various modes, editing your photos, or sharing them with friends and family, you have the tools to unleash your creativity. Now that you’re familiar with taking and viewing photos, let’s move on to the next section, where we’ll explore connecting to Wi-Fi and mobile data on your Motorola smartphone.
Connecting to Wi-Fi and mobile data
Connecting your Motorola smartphone to Wi-Fi and mobile data networks is essential for accessing the internet, streaming media, and staying connected wherever you go. Here’s how to connect and manage Wi-Fi and mobile data on your device:
Connecting to Wi-Fi:
- Wi-Fi settings: Open the device settings and navigate to the “Wi-Fi” section. Toggle the Wi-Fi switch to enable it.
- Scanning for networks: Your Motorola smartphone will automatically scan for available Wi-Fi networks. You’ll see a list of networks, along with their signal strength and security status.
- Selecting a network: Tap on the desired Wi-Fi network from the list. If the network is secured, you’ll need to enter the password to connect.
- Connecting to hidden networks: If you want to connect to a hidden Wi-Fi network, tap on the “Add network” option in the Wi-Fi settings. Enter the network name (SSID) and select the appropriate security type and password.
- Forgetting a network: To remove a saved Wi-Fi network from your device, go to the Wi-Fi settings, tap and hold on the network you want to forget, and select the “Forget network” option.
- Wi-Fi advanced settings: Explore the advanced settings in the Wi-Fi section for additional features. This includes options like Wi-Fi calling, Wi-Fi preferences, and even Wi-Fi sharing with nearby devices.
Connecting to Mobile Data:
- Mobile data settings: Open the device settings, go to the “Network & internet” or “Connections” section, and select “Mobile network” or “Data usage.”
- Enabling mobile data: Toggle the mobile data switch to enable it. Your Motorola smartphone will connect to the mobile data network provided by your carrier.
- Data usage monitoring: Monitor your mobile data usage by accessing the “Data usage” or “Network stats” section within the settings. This allows you to keep track of your data usage and set limits or warnings to prevent overage charges.
- Roaming settings: If you’re traveling internationally, you may need to enable roaming to use mobile data outside your home network. Open the mobile network settings and locate the roaming options. However, keep in mind that roaming charges may apply.
- Restricting background data: To conserve data and minimize usage, you can restrict background data for specific apps. Go to the “Data usage” or “Network stats” section, tap on the app you want to restrict, and enable the “Restrict app background data” option.
By connecting to Wi-Fi and mobile data networks on your Motorola smartphone, you can enjoy seamless internet access and stay connected wherever you are. Whether you’re accessing Wi-Fi networks, managing mobile data settings, or monitoring data usage, your device provides the tools for a reliable and efficient online experience. Now that you’re familiar with connecting to Wi-Fi and mobile data, let’s move on to the next section, where we’ll explore using Bluetooth on your Motorola smartphone.
Using Bluetooth on your Motorola smartphone
Bluetooth technology allows you to wirelessly connect your Motorola smartphone to other devices for sharing files, streaming audio, and more. Here’s how you can use and manage Bluetooth on your device:
Enabling Bluetooth:
- Bluetooth settings: Open the device settings and navigate to the “Bluetooth” section. Toggle the Bluetooth switch to enable it.
- Pairing devices: Tap on the “Pair new device” or “Scan” button to search for nearby Bluetooth devices. Make sure the other device is in “discoverable” mode. Tap on the device from the list of available devices to initiate the pairing process.
- Confirming pairing: On some devices, you may need to enter a passcode to establish a secure connection. The passcode is usually provided by the other device or mentioned in the device’s manual.
- Managing paired devices: Once a device is successfully paired, it will appear in the list of paired devices. From there, you can tap on a device to connect or disconnect. You can also rename or forget a paired device if needed.
- Bluetooth profiles: Explore the Bluetooth settings for additional options. This includes managing Bluetooth audio devices, enabling file transfers, and adjusting device visibility settings.
Using Bluetooth for File Transfer:
- Selecting files: Open the file manager app on your Motorola smartphone and locate the file you want to transfer.
- Sharing via Bluetooth: Tap and hold on the file to select it, then look for the sharing or send options. Choose the Bluetooth option, and a list of paired devices will appear.
- Selecting the receiver: Tap on the device you want to send the file to, and the transfer process will begin. The other device may prompt for acceptance of the incoming file.
Using Bluetooth for Audio:
- Pairing audio devices: Put your Bluetooth audio device (such as headphones or speakers) in pairing mode. Open the Bluetooth settings on your Motorola smartphone, and it should detect the audio device. Tap on the device to connect.
- Stream audio: Once connected, your device can stream audio wirelessly to the Bluetooth audio device. Play music or videos on your phone, and the audio will be transmitted to the connected device.
- Adjusting Bluetooth audio settings: Some Bluetooth audio devices may have additional controls or settings. Refer to the device’s manual to learn about adjusting volume, playback controls, and other audio settings.
By using Bluetooth on your Motorola smartphone, you can easily connect and transfer files, as well as stream audio to compatible devices. Whether you’re pairing devices, sharing files, or enjoying wireless audio, Bluetooth technology enhances the functionality and versatility of your device. Now that you’re familiar with using Bluetooth, let’s move on to the next section, where we’ll explore managing battery life on your Motorola smartphone.
Managing battery life
Battery life is a crucial aspect of any smartphone, and efficiently managing it ensures that your Motorola device lasts longer between charges. Here are some tips and tricks to help you prolong the battery life of your device:
- Optimize screen brightness: Lowering the screen brightness can significantly impact battery life. Adjust the brightness level manually or enable the adaptive brightness feature in the device settings to automatically adjust brightness based on ambient lighting conditions.
- Manage screen timeout: Set a shorter screen timeout duration to ensure that your device goes to sleep quickly when it’s not in use. This prevents unnecessary battery drain caused by the display staying active for extended periods.
- Use Wi-Fi instead of mobile data: When available, connect to Wi-Fi networks instead of relying on mobile data. Wi-Fi consumes less power for internet connectivity, leading to improved battery life.
- Turn off unnecessary radios: Disable features like Wi-Fi, Bluetooth, GPS, and NFC when you’re not using them. These radios consume power even when not in active use.
- Limit background app refresh: Restrict background app refresh for applications that don’t require constant updates. Go to the device settings and look for the “Battery” or “Apps & Notifications” section to manage app background activity.
- Enable battery-saving mode: Activate the battery-saving mode on your Motorola device. This mode adjusts various settings to extend battery life, such as reducing CPU performance, restricting background data, and disabling visual effects.
- Manage app notifications: Limit the number of apps that send push notifications, especially those that are not crucial. More notifications mean more active processes running in the background, which can drain your battery.
- Close unused apps: Close applications that you’re not actively using. Swipe away recent apps or use the task manager to force close background processes and free up system resources.
- Avoid extreme temperatures: Exposure to extremely hot or cold temperatures can negatively impact battery performance. Keep your device within optimal temperature ranges to ensure efficient battery operation.
- Monitor battery usage: Check the device settings to view battery usage statistics. This provides insights into which apps or processes consume the most battery power. Identify and address any power-hungry apps accordingly.
By following these battery-saving tips, you can optimize the battery life of your Motorola smartphone, ensuring that it lasts longer between charges. From adjusting screen brightness to managing background processes, these practices help conserve power and enhance your overall mobile experience. Now that you’re equipped with battery management know-how, let’s move on to the final section, where we’ll explore troubleshooting common issues you may encounter with your Motorola smartphone.
Troubleshooting common issues
While Motorola smartphones are known for their reliability, occasional issues may still arise. Here are some common problems you may encounter with your device and the steps you can take to troubleshoot them:
- App crashes or freezing: If an app crashes or freezes, try force closing it by swiping it away from the recent apps screen or using the task manager. If the problem persists, clear the app cache or uninstall and reinstall the app to resolve any potential software conflicts.
- Poor network reception: If you’re experiencing weak or inconsistent network reception, try manually switching to a different network band or resetting your network settings. You can also contact your mobile carrier to ensure there are no network outages in your area.
- Device overheating: If your Motorola smartphone becomes excessively hot, it’s usually a sign of excessive resource usage or an app running in the background. Close unnecessary apps, reduce screen brightness, and avoid using the device while charging to alleviate overheating issues.
- Bluetooth connectivity problems: If you’re having trouble connecting or pairing with a Bluetooth device, ensure that both devices are in pairing mode and within close proximity. Restart both devices if necessary, and make sure that there are no physical obstructions or interference nearby.
- Charging issues: If your device is not charging properly or the battery drains quickly, check the charging cable, adapter, and charging port for any damage or debris. Restart your device, and use a different charging cable or adapter if available. If the issue persists, contact Motorola support for further assistance.
- Screen unresponsiveness: If the touchscreen becomes unresponsive, try cleaning the screen with a microfiber cloth and ensure that your hands are clean and dry. If the problem persists, restart your device or perform a soft reset by holding down the power button for several seconds.
- Camera issues: If you’re experiencing problems with the camera app, such as blurry photos or crashes, ensure that the lens is clean and free from any smudges or debris. Clear the camera app cache, update the app or the device’s software, and restart your phone to resolve any software conflicts.
- Audio problems: If you’re encountering audio issues, check the volume settings, ensure that the device is not in silent mode, and verify that the speaker or headphone jack is not blocked. If using headphones, try a different pair to rule out any audio device problems.
- Software updates: Keeping your Motorola smartphone up to date with the latest software updates is crucial. Regularly check for system updates in the device settings and install them to ensure optimal performance, bug fixes, and security enhancements.
- Factory reset: If all else fails, performing a factory reset can resolve persistent software issues. Remember to backup your important data before proceeding, as a factory reset will erase all data and return your device to its original factory settings.
By following these troubleshooting steps, you can address common issues that may arise with your Motorola smartphone. If problems persist or become more severe, don’t hesitate to contact Motorola support or seek assistance from authorized service centers. Now that you’re equipped with troubleshooting knowledge, you’re ready to get the most out of your device.
Conclusion
Congratulations! You’ve successfully learned how to navigate and make the most of your Motorola smartphone. From powering on and unlocking the device to customizing settings, making calls, sending text messages, and taking photos, you now have the knowledge to utilize all the essential features of your device.
Throughout this guide, we explored various aspects of your Motorola smartphone, including connecting to Wi-Fi and managing mobile data, using Bluetooth for file transfers and audio streaming, and troubleshooting common issues that may arise. By following the tips and techniques provided, you can enhance your device’s performance, extend battery life, and overcome any challenges that you may encounter along the way.
Remember, your Motorola smartphone is a powerful tool that can assist you in both your personal and professional life. Take advantage of the features it offers, such as customizing your device, managing contacts, and utilizing various apps, to streamline your daily tasks and stay connected with others.
If you ever need further assistance or have any specific questions about your Motorola smartphone, don’t hesitate to refer to the device’s user manual, browse the Motorola support website, or reach out to customer support. They will be happy to assist you and provide further guidance.
Now, go forth and enjoy the full potential of your Motorola smartphone. Stay connected, capture precious moments, and make the most of the incredible technology at your fingertips. Happy exploring!


