Introduction
Welcome to this step-by-step guide on how to add someone on Google Calendar. Google Calendar is a powerful tool that allows you to manage your schedule, events, and appointments easily. By adding someone to your Google Calendar, you can share your schedule with them, making it convenient for both parties to stay organized and up-to-date.
Whether you want to add a colleague, a family member, or a friend, the process is simple and straightforward. In this guide, we will walk you through the steps to add someone on Google Calendar, helping you streamline your collaboration and stay connected.
With Google Calendar’s intuitive interface and seamless integration with other Google services, you can easily share events, set reminders, and collaborate in real-time. Adding someone to your calendar allows them to see your schedule, make event changes, and even add events on your behalf when necessary.
Now, let’s dive into the details of how you can add someone to your Google Calendar and start enjoying the benefits of efficient scheduling and communication.
Step 1: Open Google Calendar
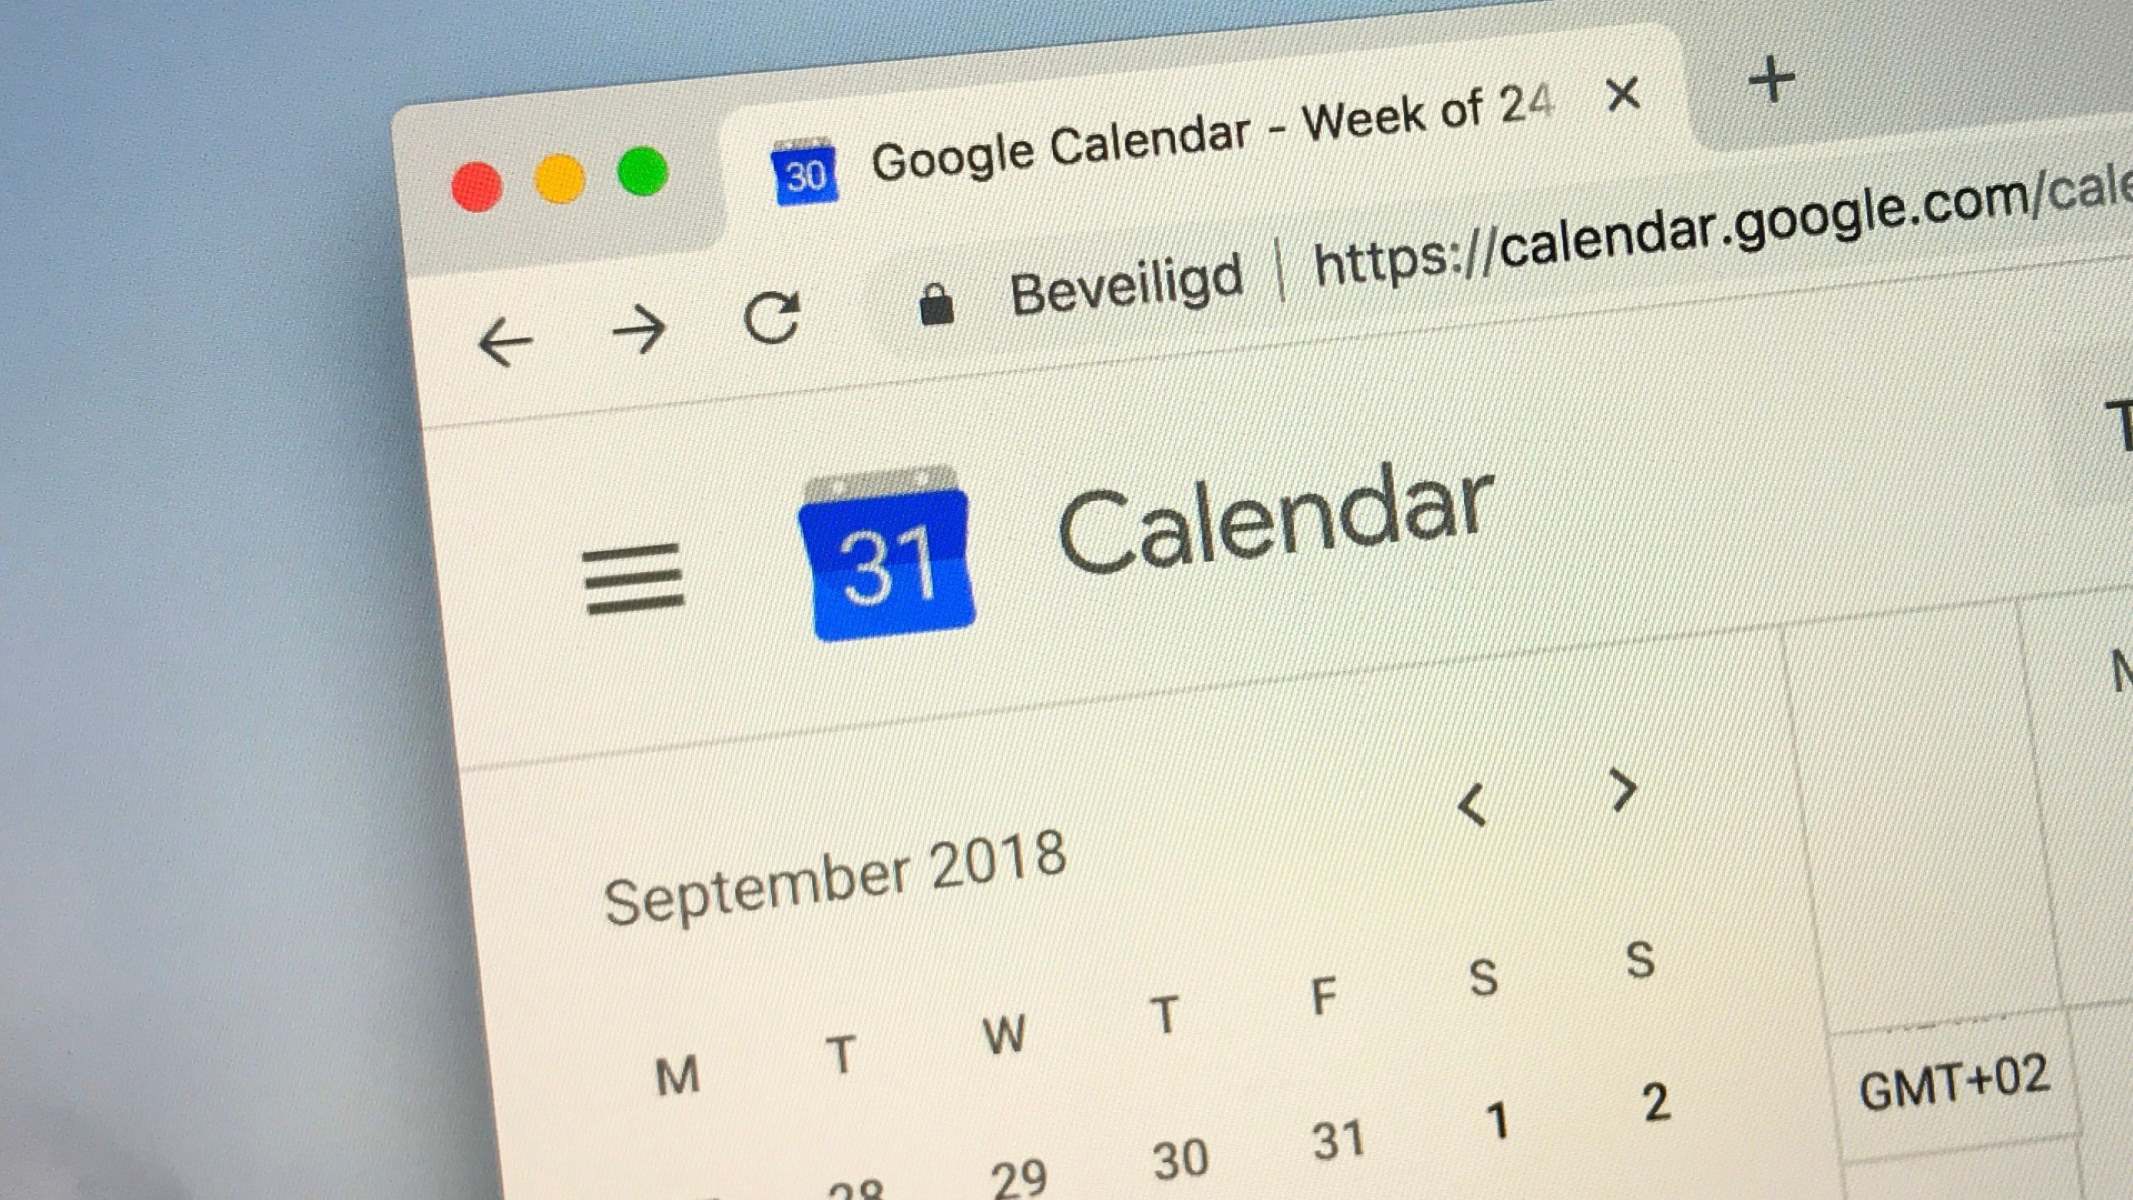
The first step to adding someone on Google Calendar is to open the Google Calendar application or website. If you are using a desktop computer, you can simply open a web browser and navigate to calendar.google.com. If you are using a mobile device, you can open the Google Calendar app.
Once you have opened Google Calendar, you will be directed to the main calendar interface, where you will see your own calendar with all your scheduled events and appointments.
If you haven’t already logged in to your Google account, you will need to do so before proceeding. Enter your email address and password, and click on the “Sign In” button. This will grant you access to your personal calendar and all the features Google Calendar has to offer.
Ensure that you have a stable internet connection to avoid any interruption during the process of adding someone to your Google Calendar.
Now that you have successfully opened Google Calendar and logged in to your account, you are ready to move on to the next step: accessing the settings menu.
Step 2: Go to the “Settings” menu
After opening Google Calendar and logging in to your account, the next step is to access the “Settings” menu. The settings menu is where you can customize various aspects of your Google Calendar, including adding new calendars, managing notifications, and, of course, adding people to your calendar.
To access the settings menu, look for the gear icon located in the top right corner of the Google Calendar interface. Click on the gear icon, and a dropdown menu will appear.
In the dropdown menu, scroll down until you find the “Settings” option and click on it. This will open the settings page where you can make modifications to your calendar’s configuration.
On the settings page, you will find a list of options and tabs on the left-hand side. These options allow you to customize different aspects of your Google Calendar experience. From here, you can control settings such as general preferences, event notifications, and calendar sharing.
Now that you have successfully located and accessed the settings menu, you are one step closer to adding someone to your calendar. In the next section, we will guide you through the process of adding a new calendar to your Google Calendar account.
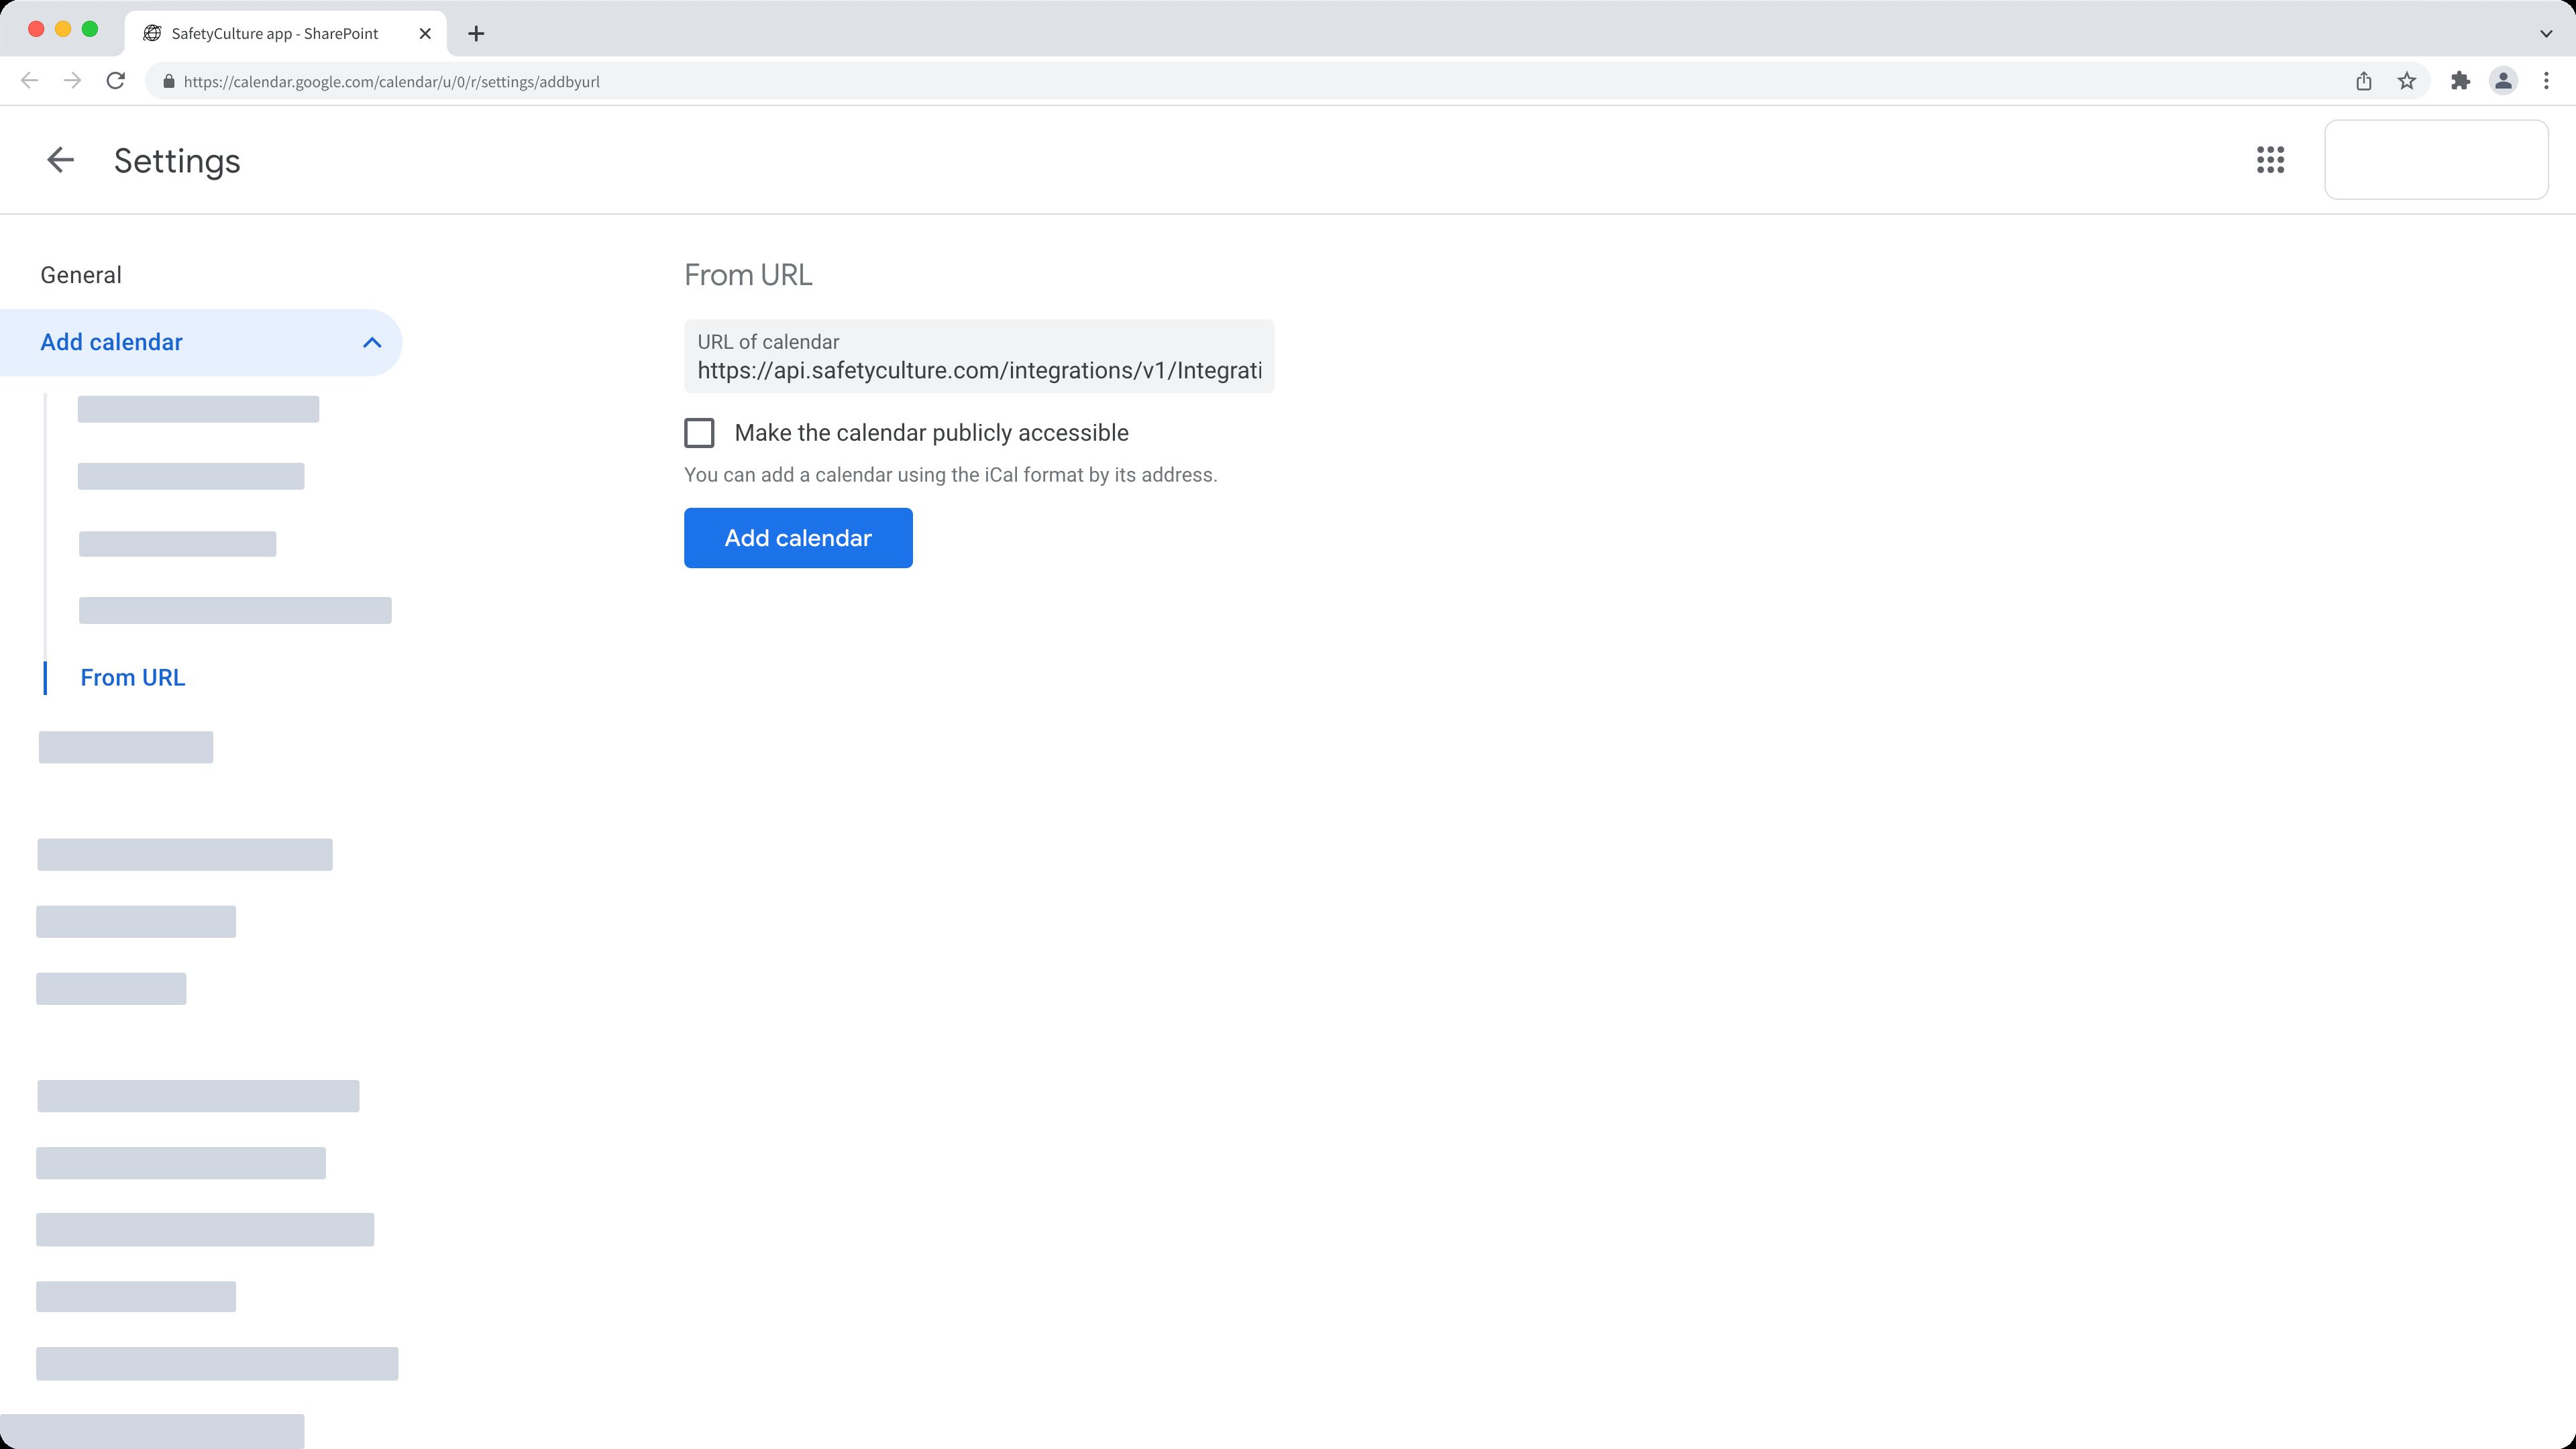
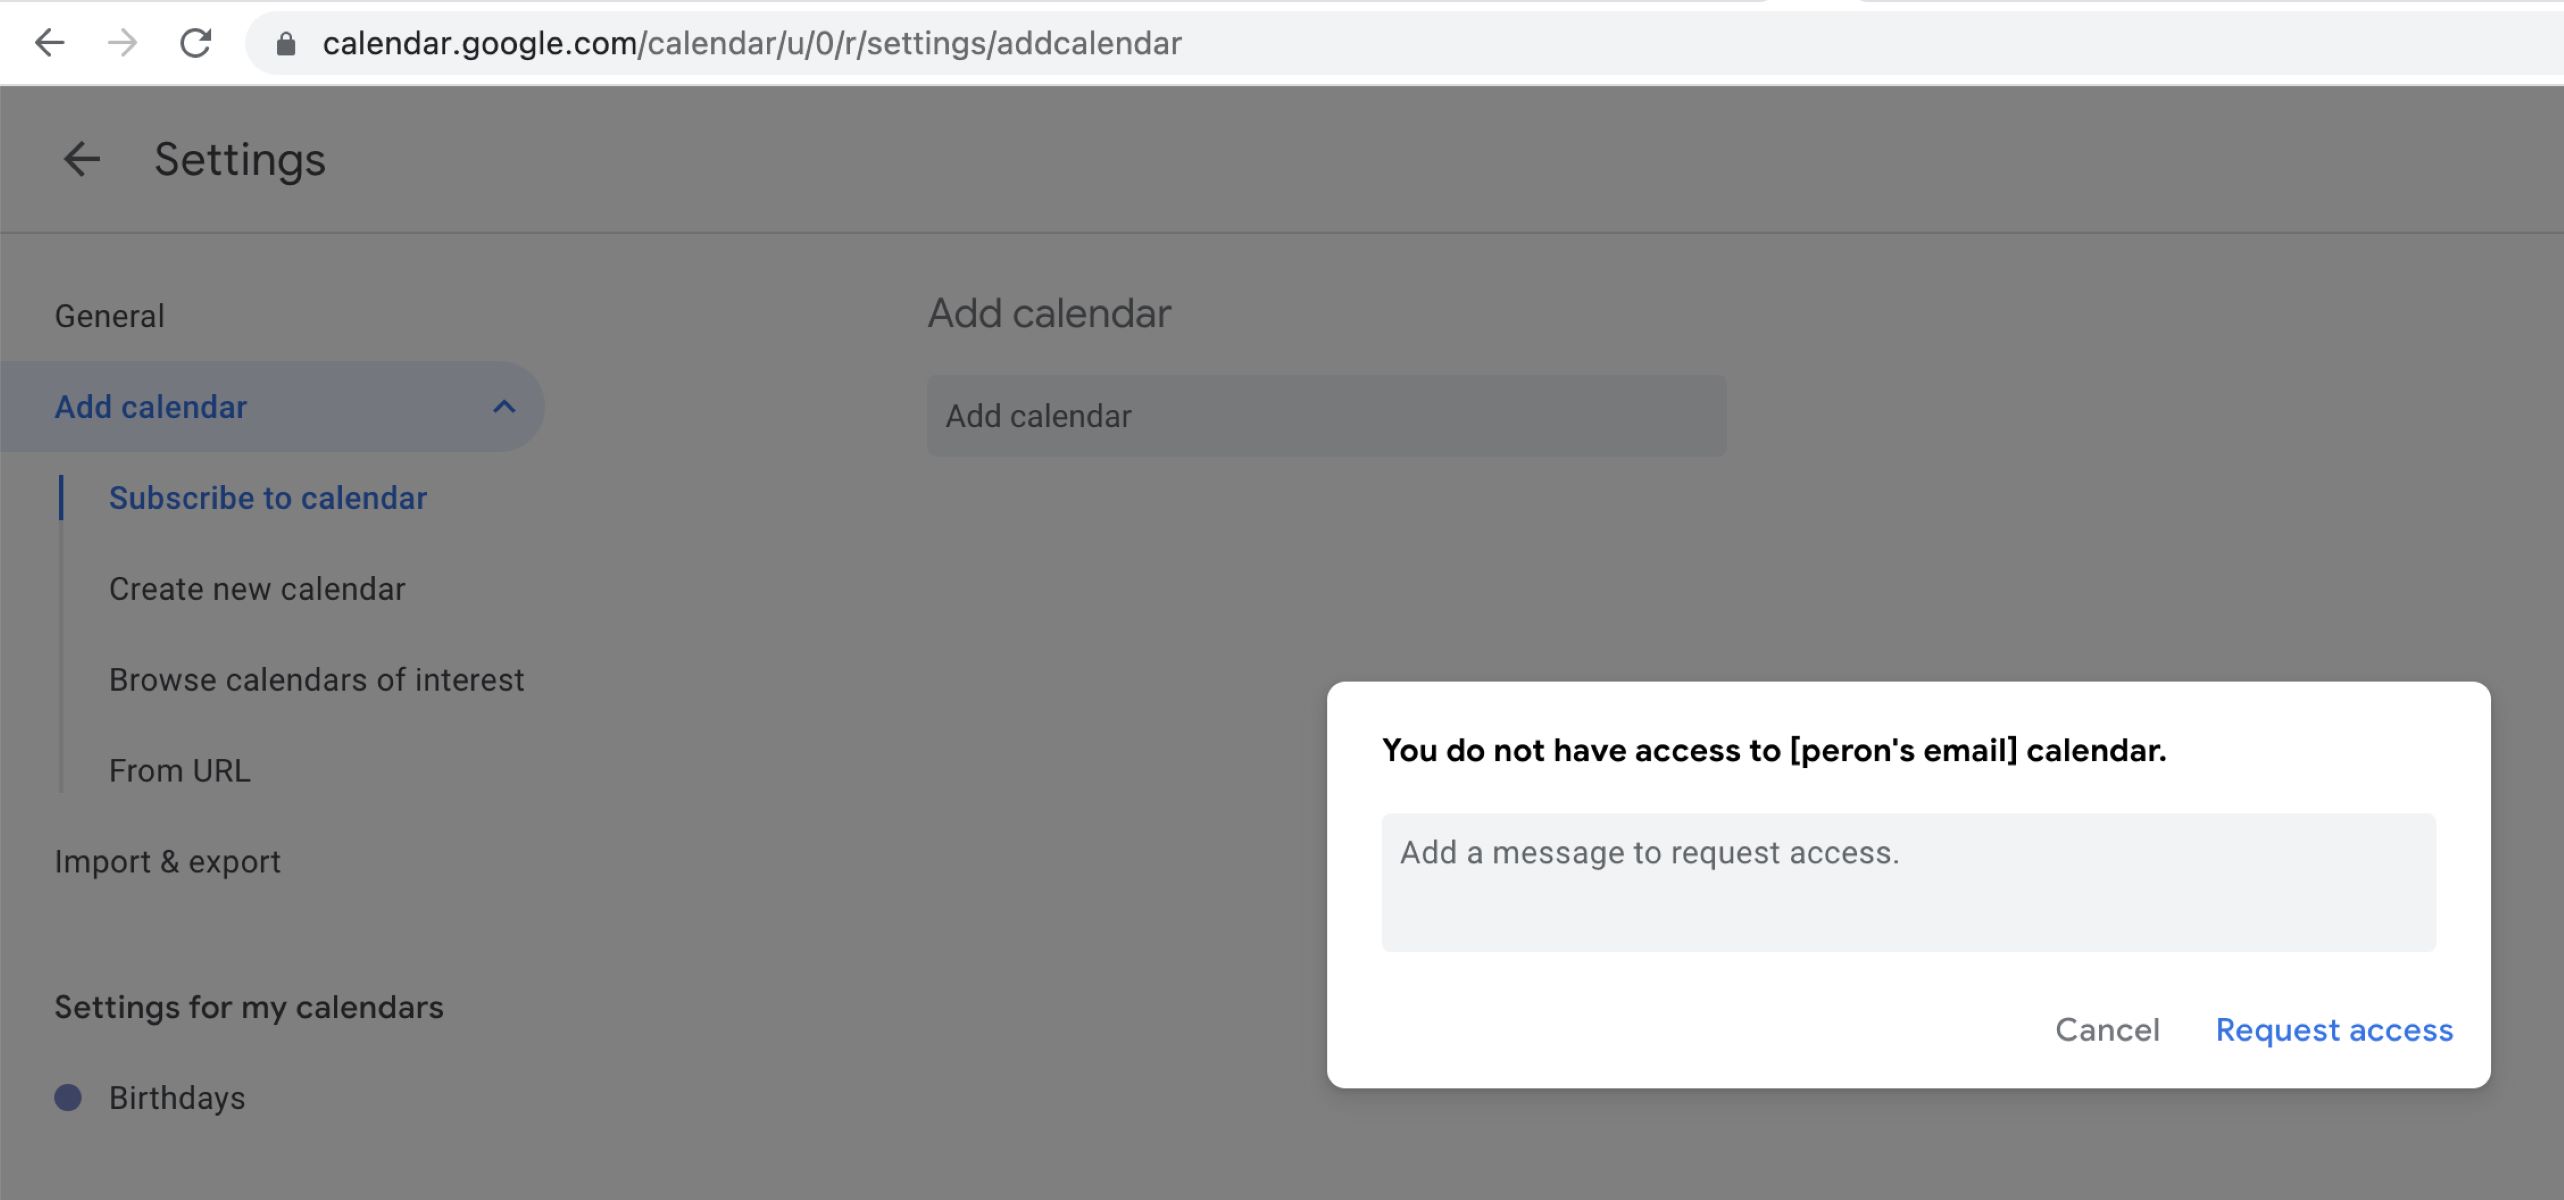
Step 3: Click on “Add Calendar” option
Once you have accessed the settings menu in Google Calendar, it’s time to proceed to the next step: clicking on the “Add Calendar” option. This option will allow you to create a new calendar or add an existing calendar to your account.
In the settings menu, you will see a list of tabs on the left-hand side. Look for the tab labeled “Add Calendar” or a similar option, as names may vary slightly depending on the version of Google Calendar you are using.
Clicking on the “Add Calendar” option will bring up a dialogue box or a new page with further instructions for adding a new calendar. The options may include creating a new calendar from scratch or adding a calendar shared with you by someone else.
If you want to add someone to your existing calendar, choose the appropriate option. This will allow you to share your calendar with the person you want to add and grant them permission to view, edit, or manage events on the calendar.
Before proceeding, make sure that you have the necessary information about the person you want to add. This can include their email address or, in some cases, their Google account name.
Now that you have clicked on the “Add Calendar” option, you are ready to move on to the next step: entering the person’s email address or name.
Step 4: Enter the person’s email address or name
After clicking on the “Add Calendar” option in Google Calendar’s settings menu, you will be prompted to enter the email address or name of the person you want to add to your calendar. This step is crucial as it allows Google Calendar to identify the correct individual and establish the connection between your calendars.
If you have the person’s email address, enter it in the designated field. Make sure to double-check the spelling and accuracy of the email address to ensure that the invitation is sent to the right person.
If you don’t have the person’s email address but know their Google account name, you can also enter that information instead. Google will try to match the name you entered with existing Google accounts and present you with a list of suggestions. Select the correct person from the suggestions to proceed.
In some cases, you may need to have the person’s email address associated with a Google account for the invitation to be successful. If they don’t have a Google account, they can create one for free, or you can consider sharing your calendar with them through other means, such as exporting events or sharing a read-only calendar link.
Once you have entered the person’s email address or name, double-check the information for accuracy. Ensuring that the correct person is added to your calendar is crucial for effective collaboration and communication.
Now that you have entered the person’s email address or name, you are ready to move on to the next step: verifying the person’s calendar.
Step 5: Verify the person’s calendar
After entering the email address or name of the person you want to add to your Google Calendar, the next step is to verify their calendar. Verifying the person’s calendar ensures that you are adding the correct individual and prevents any unauthorized access to your calendar.
Once you have entered the person’s email address or name, Google Calendar will prompt you to verify their calendar. This verification process typically involves sending an invitation or a request to the person to grant them access to your calendar.
Google Calendar will send an email invitation to the person you are adding, asking them to confirm their participation and accept the invitation. They will receive a notification that you have invited them to your calendar and will be asked to verify the invitation by accepting it.
It’s important to note that the person you are adding needs to have a Google account in order to receive and accept the invitation. If they don’t have a Google account, they will need to create one before they can proceed with verifying their calendar.
Once the person receives the invitation, they can click on the provided link or button to accept it. This will establish the connection between your calendars and grant the person access to view and, depending on the permissions you set, edit or manage events on your calendar.
It may take a few moments for the person’s calendar to be fully verified and added to your Google Calendar. If you encounter any issues or if the person is unable to verify their calendar, double-check the accuracy of the email address or name you entered and try resending the invitation.
Now that you have verified the person’s calendar, you are ready to proceed to the next step: choosing the permissions you want to grant them.
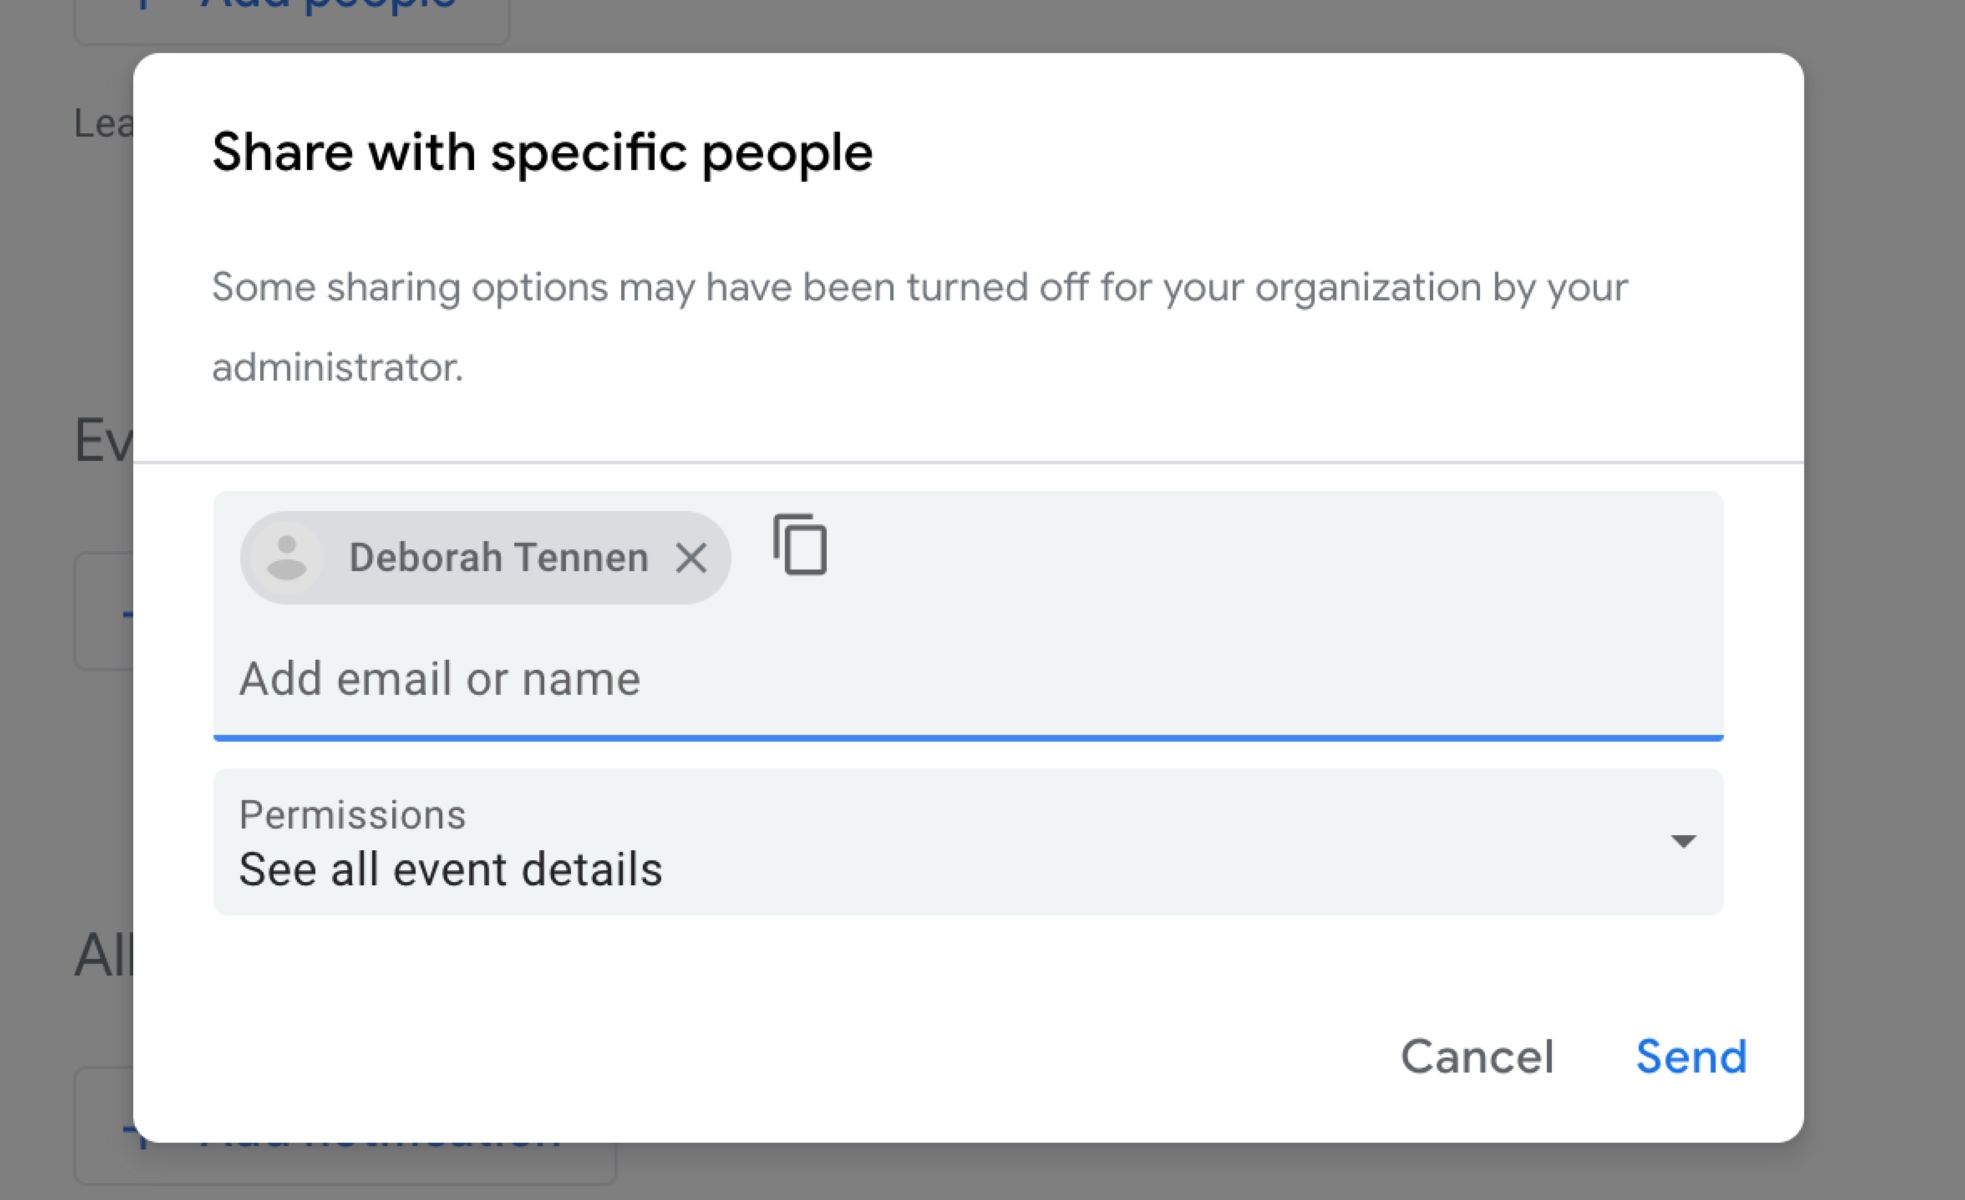
Step 6: Choose permissions for the person
Once the person’s calendar has been successfully verified, the next step is to choose the permissions you want to grant them. Google Calendar allows you to customize the level of access the person has to your calendar, ensuring that you maintain control over your schedule while still enabling collaboration and coordination.
When adding someone to your Google Calendar, you have several options for setting permissions:
- See only free/busy (hide details): This option allows the person to only see when you are available or busy without providing any specific details about your events. This is useful for sharing your availability with colleagues or team members, while still keeping event details private.
- See all event details: This option provides the person with full access to view all the details of your calendar events, including event titles, descriptions, locations, and attendee lists. This level of access is suitable when collaborating closely with a trusted individual or for sharing your calendar with family and close friends.
- Make changes to events: If you want to grant the person the ability to make changes to your events, such as adding or editing events, you can choose this option. It gives the person more control and responsibility in managing your calendar, such as scheduling meetings or updating event details.
- Make changes and manage sharing: This option provides the highest level of access and control. It allows the person to not only make changes to your events but also manage the sharing settings of your calendar, including adding or removing other individuals. Choose this option only if you fully trust the person and want to delegate administrative control.
Consider the nature of your relationship with the person you are adding and the level of collaboration required before choosing the appropriate permission level. It’s important to strike a balance between granting enough access for effective coordination while ensuring the privacy and security of your calendar.
Once you have chosen the desired permissions, click on the appropriate option to save the settings. Google Calendar will update the person’s access level accordingly, and they will be able to view and interact with your calendar based on the permissions you have set.
Congratulations! You have successfully chosen the permissions for the person you added to your Google Calendar. Now, let’s move on to the final step: sending the invitation.
Step 7: Send the invitation
After selecting the permissions and customizing the access level for the person you added to your Google Calendar, the final step is to send them the invitation. By sending the invitation, you ensure that they receive a notification and can access your calendar according to the permissions you have set.
To send the invitation, click on the “Send” or “Invite” button, which is usually located at the bottom of the settings page or the invitee’s settings section. When you click on this button, Google Calendar will generate an invitation email that includes all the necessary details and instructions for the person to accept the invitation.
The invitation email will typically include information such as your calendar name, the permissions they have been granted, and a link or button to accept the invitation. The person will receive this email in their inbox, provided they have a Google account associated with the email address you entered.
Once they receive the invitation, the person can click on the link or button to accept it and gain access to your calendar. They may be directed to a webpage or a confirmation page within the Google Calendar interface where they can verify their acceptance.
It’s important to communicate with the person you are adding and inform them that you have sent them an invitation to your calendar. This will ensure that they are aware of the invitation and can accept it promptly.
If the person encounters any issues while accepting the invitation or needs further assistance, you can provide them with instructions or troubleshoot together to ensure a smooth process.
Once the person accepts the invitation, they will be added to your Google Calendar, and you will both be able to view and interact with events and appointments based on the permissions you have set.
Congratulations! You have successfully sent the invitation to the person you added to your Google Calendar. Now, you can enjoy the benefits of streamlined scheduling and improved collaboration.
Conclusion
Adding someone to your Google Calendar is a simple and effective way to streamline scheduling and enhance collaboration. With just a few steps, you can grant individuals access to view, edit, or manage events on your calendar, ensuring everyone stays informed and organized.
In this step-by-step guide, we have walked you through the process of adding someone to your Google Calendar. From opening Google Calendar and accessing the settings menu to entering the person’s email address or name, verifying their calendar, choosing permissions, and finally sending the invitation, each step has been carefully explained to help you navigate the process with ease.
Remember to consider the level of access and permissions you grant to individuals based on the nature of your relationship and the requirements of collaboration. Striking a balance between sharing information and maintaining control over your calendar is essential for the success of your schedule management.
By adding someone to your Google Calendar, you can improve coordination, enhance communication, and foster better collaboration in both personal and professional settings. Whether you are working on a team project, coordinating family events, or managing shared appointments, Google Calendar offers a powerful platform to keep everyone on the same page.
Now that you are equipped with the knowledge of how to add someone to your Google Calendar, you can take full advantage of this feature to enhance your productivity, improve scheduling efficiency, and stay organized like never before.
So why wait? Start adding the important people in your life or work to your Google Calendar and enjoy the benefits of seamless collaboration and efficient scheduling!